Коагучек — типичные ошибки при использовании прибора для измерения МНО
08.04.2022
 Вы только что купили анализатор МНО и при первом же измерении Коагучек выдает сообщение об ошибке? Или вы измеряете МНО дома уже больше полугода и впервые столкнулись с такой проблемой? Давайте попробуем разобраться, какие ошибки могут возникнуть при эксплуатации прибора и что с ними делать.
Сообщения об ошибках часто возникают по вине невнимательных пользователей, забывших вставить чип от новой партии тест-полосок или использующих тест-полоски с истекшим сроком годности. Тем не менее, эта статья будет полезна каждому покупателю и пользователю Coaguchek.
Обращаем ваше внимание, что статья является кратким изложением инструкции к прибору Коагучек XS, стр. 75 глава «Сообщения об ошибках», полная инструкция доступна по ссылке.
|
Сообщение об ошибке (ему всегда предшествует слово error) |
Краткое описание |
|
Номер ошибки: 000 |
Превышено допустимое время нанесения пробы крови |
|
Номер ошибки: 3 |
Просрочен срок годности |
|
Номер ошибки: 4 |
Непригодная тест-полоска |
|
Номер ошибки: 5 |
Ошибка нанесения пробы крови |
|
Номер ошибки: 6 |
Погрешность измерения |
|
Номер ошибки: 7 |
Погрешность измерения |
|
Номер ошибки: 8 |
Ошибка диагностического тестирования |
|
Номер ошибки: 9 |
Ошибка диагностического тестирования |
Ошибка 000 свидетельствует о превышении допустимого времени нанесения пробы крови, которое составляет 180 секунд. При этой ошибке выключите Коагучек, выньте тест-полоску и выполните новое исследование, используя эту же тест-полоску.
Частой причиной появления ошибки 3 становится неправильно выставленные время и дата. Проверьте правильность установки времени и даты, а также их формат (рекомендуемый 31-12-00 День-Месяц-Год). Если же дата установлена правильно — выключите прибор, выньте кодовый чип и тест-полоску. Используйте тест-полоску из новой партии и кодовый чип также из новой партии.
При появлении ошибки 4 (непригодная тест-полоска) — выключите Coaguchek как минимум на 15 минут, выньте тест-полоску и снова вставьте ее. Если сообщение об ошибке появилось вновь, замените непригодную тест-полоску новой. Причиной этой ошибки может служить загрязнение направляющей тест-полосок.
В случае ошибки 5 (ошибка нанесения пробы крови) — выключите анализатор МНО и выньте тест-полоску. Нанесите кровь на полукруглую прозрачную зону на новой тест-полоске (кровь должна покрывать всю зону для нанесения пробы) и повторите исследование. Палец необходимо держать до окончания мигания символа крови на экране устройства. Кровь можно наносить как сверху, так и сбоку тест-полоски.
Наиболее частой причиной данной ошибки является недостаточный объем капли крови (необходимо минимум 8 мкл) Помните, что наносить каплю крови необходимо в течение 15 секунд после прокалывания пальца, потому что после процесс коагуляции уже начнется.
Ошибка 6 и Ошибка 7 (погрешность измерения) — выключите Коагучек и выньте тест-полоску, затем повторите исследование, используя новую тест-полоску. Не дотрагивайтесь до тест-полоски и не вынимайте ее в процессе исследования.
Убедитесь в том, что вы не сдавливаете палец и не касаетесь тест-полоски во время измерения – это две наиболее частые причины появления ошибки 6. Редкие причины данных ошибок подробно изложены в инструкции.
Ошибка 8 — Выключите прибор и выньте батареи. Подождите примерно одну минуту до повторной установки их в отсек для батарей. Установите правильную дату и время, затем повторите исследование. Если сообщение об ошибке по-прежнему выводится на экран, значит, прибор неисправен.
При ошибке 9 отключите Коагучек и подождите не менее двух минут. Удостоверьтесь в том, что во время проведения теста температура окружающей среды является стабильной и заново проведите исследование.
Если сообщение об ошибке не устраняется или повторно появляется в будущем, то прибор неисправен. Эта ошибка указывает на возможное повреждении контактов нагревающей пластины.
При ошибках 8 и 9 Вам следует обратиться в местный сервисный центр. Гарантийный срок на прибор Coaguchek XS в данный момент составляет 5 лет. В случае, если Вы считаете, что Ваш прибор неисправен, Вам необходимо обратиться на горячую линию Roche по телефону 8-800-100-19-68 (ежедневно с 9:00 до 21:00, звонок по России бесплатный). Купить коагулометр Коагучек XS и тест-полоски к нему вы можете у нас в интернет-магазине. По любым вопросам, связанным с анализатором Coaguchek, вы можете обратиться к нам в чат на сайте, написать нам на почту info@alpha-diagnostics.ru или просто позвонить +7 (905) 537-78-53.
Для Вашего удобства приводим видеоинструкцию по измерению уровня МНО на приборе Коагучек Икс Эс.
Возврат к списку
«Alpha-Diagnostics LLC» is the company located in Moscow and presented on the Russian market since 2002. Our main aim is to offer medical laboratory products with outstanding quality.
We cooperate with «Roche Diagnostics» (Germany), «Sysmex» (Japan), «STAGO» (France), «Abaxis Inc» (USA), «Sekisui Diagnostics» (USA), «Thermo Scientific» (USA).
Our core products in the field of POC testing: Cobas h 232 system, Troponin T tests, CoaguChek XS and CoaguChek XS Plus, Accutrend Plus, Piccolo Xpress, OSOM Influenza A&B Test and Strep A, procalcitonin Brahms PCT-Q.
We are open for any suggestions and mutually beneficial cooperation.
OOO «Alpha-Diagnostics»
Ulitsa Landyshevaya 12, building 1, office 2
Moscow, 125466, Russia
Phone: +7 495 580 29 02
Fax: +7 495 580 29 01
E-mail info@alpha-diagnostics.ru
This icon appears…
ERROR
8
Turn the monitor off and remove the batteries. Wait at least one minute before re-inserting the
batteries in the battery compartment, and then set the date and time as described starting on
page 34.
Repeat the test. If the error message persists, the monitor has a fault. Please call your local cus-
tomer support and service centre (see p. 122).
This icon appears…
ERROR
Patient
The monitor has a fault. Please call your local customer support and service centre (see p. 122).
This icon appears…
ERROR
QC
The monitor has a fault. Please call your local customer support and service centre (see p. 122).
Description of error
Error: Diagnostic test
Error during the internal diagnostic test which
the monitor performs.
Solution
Description of error
Error: Memory test (patient)
The memory contains faulty data.
Solution
Description of error
Error: Memory test (QC)
The memory contains faulty data.
Solution
Error messages
109
Coaguchek Xs is a digital home blood test device produced by Beckman Coulter. It is used to detect anemia, haemochromatosis and other disorders that can affect the body’s ability to produce red blood cells.
When you try to use your Coaguchek XS digital home blood test device, you might encounter an error code. It can cause an issue with the Coaguchek Xs’s performance, and you might encounter this error when you try to check your test results or if you try to use it to collect samples.
5
Error 5 means that there is an error while applying the blood. It happens when there is not really enough blood on the test strip, or you did not apply the blood very thoroughly, or you have used an inefficient technique for blood tests.
Tech Support 24/7
Ask a Tech Specialist Online
Connect with the Expert via email, text or phone. Include photos, documents, and more. Get step-by-step instructions from verified Tech Support Specialists.

To fix that, turn the INR meter off and clean the test strip. If the I-Net meter shows that there is not enough blood in the sample, it is wrong to apply the blood too heavily or the test strip was not properly cleaned. Re-run the procedure using another test strip and a blood sample that you have collected from a finger that you have previously used (or from another). This is not something that is unusual for testers who are just starting out, and it will require some time to get comfortable with the system. However, their customer care reps are ready to help.
6
Error 6 means that the test strip was touched or maybe removed during the blood test. This will happen if your attempts to interrupt the blood test include either applying more blood or moving the meter too quickly; if your efforts to do that are unsuccessful, the blood test will fail.
To fix that, retry the blood test by applying a new strip of blood from the new area of your finger. Do it as you would normally do it. Be very careful about touching or removing the test strip when a test is being performed. When your blood meter emits a beep when you put your finger on it, that means that it has collected some blood and is now analyzing it. If that happens, you should have a good read on your INR test results. You will receive your INR test results very soon.
4
Error 4 means that the test strip is no longer usable. It can happen if blood was injected before the countdown began. It is also important not to poke your finger to see if there is a blood clot on the finger before the countdown starts. It is possible that the strip is useless because someone has removed the cap from the bottle that contains test strips.
If there is no more blood in the kit, then power off the meter, re-insert the strip and repeat. If it happens again, just throw out the test strip and try it again, but this time power off the meter, plug in a new strip and start the testing process all over again. You should not sign any papers until the 180 seconds are up!
Tech Support 24/7
Ask a Tech Specialist Online
Connect with the Expert via email, text or phone. Include photos, documents, and more. Get step-by-step instructions from verified Tech Support Specialists.
(Visited 53 times, 1 visits today)
-
Contents
-
Table of Contents
-
Bookmarks
Quick Links
CoaguChek
System
XS
®
User Manual
for Self-Testing
Related Manuals for Roche CoaguChek XS System
Summary of Contents for Roche CoaguChek XS System
-
Page 1
CoaguChek ® System User Manual for Self-Testing… -
Page 3
P.O. Box 50457 Indianapolis, IN 46250-0457 Aspects of the CoaguChek XS System (meter and test strips) and its use are covered by one or more of the following U.S. patents: 6,662,439; 7,073,246; 7,386,937; 7,407,811; 6,881,378; 6,207,000; 7,429,865; 6,645,368; 7,049,131; 7,084,251; 5,625,036. Additional U.S. patents pending. -
Page 4
Revisions to this document are provided by Roche Diagnostics when necessary. No part of this document may be reproduced in any form or by any means without prior written consent. Manual version Revision date Changes Version 2.0 November 2009 New document… -
Page 5: Table Of Contents
Training DVD …………….2 Getting Started …………….2 User Manual ……………..2 Test Strip Package Inserts …………3 Lancet Device Package Inserts ……….3 The CoaguChek XS System ……….4 Anticoagulation Medication …………4 Blood-clotting Time …………..4 How the System Works …………5 The CoaguChek XS Meter …………6 Operating Conditions …………..7…
-
Page 6
Testing a Blood Sample …………17 Tips for a Good Fingerstick ……….17 Important Notes About Blood Testing ……18 Always ………………18 Never ………………18 Infection Control …………..19 Preparing for a Test …………..20 Performing a Test …………..22 Very Low or Very High Test Results ……… -
Page 7: About This Manual
About this Manual Symbols and Abbreviations The test strip insert, the label on the back of the meter, the User Manual, and other packaging material may contain the following symbols or abbreviations: Use by Batch code/Lot number In vitro diagnostic medical device This product fulfills the requirements of 0123 the European Directive 98/79/EC for in vitro…
-
Page 8: User Resources
Several resources are available to help you use and maintain the CoaguChek XS System. Training DVD The CoaguChek XS System DVD is for new users of the CoaguChek XS System. This program will help you get comfortable with the CoaguChek XS Meter and the testing procedure.
-
Page 9: Test Strip Package Inserts
Test Strip Package Inserts Be sure to read the test strip package insert for important updates and keep the insert from your current test strip package for future reference. Lancet Device Package Inserts Be sure to read the lancet device package insert to learn how to use the lancet device and for important updates.
-
Page 10: The Coaguchek Xs System
The CoaguChek XS System measures blood-clotting time (Prothrombin Time) for people who are taking anticoagulation medications such as Coumadin ® warfarin. The CoaguChek XS System measures blood- clotting time using blood from the fingertip. Anticoagulation Medication Anticoagulation medications, also known as blood thinners, are prescribed to avoid unwanted clots.
-
Page 11: How The System Works
How the System Works The CoaguChek XS System includes a meter and CoaguChek XS PT test strips. Each box of test strips has its own code chip that you insert into the meter. The code chip contains important information about the test strips such as their expiration date and lot number.
-
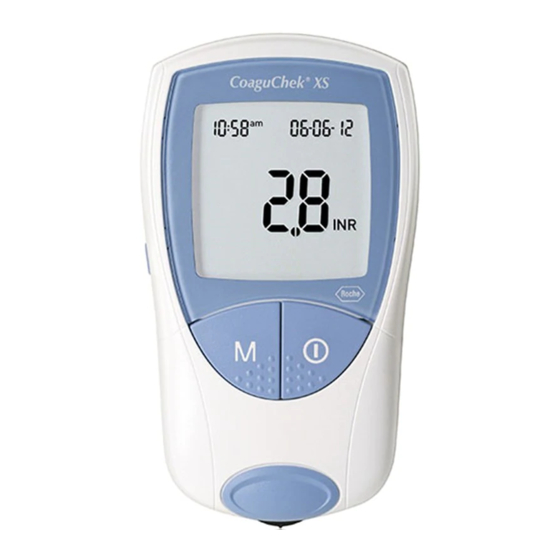
Page 12: The Coaguchek Xs Meter
The CoaguChek XS Meter A Display F Battery Compartment Cover B M (Memory) Button G Code Chip Slot C ON-OFF Button H SET Button D Test Strip Guide Cover I Data Port E Test Strip Guide…
-
Page 13: Operating Conditions
Operating Conditions To ensure that the CoaguChek XS Meter functions correctly, follow these guidelines: • Use the meter at room temperature, between 59°F and 90°F (15°C and 32°C). • Use the meter at a relative humidity of less than 85%, without condensation. •…
-
Page 14: Getting Started
Getting Started Refer to the Getting Started guide to learn how to set up the meter and prepare for and run your first blood- clotting time test. Batteries The CoaguChek XS Meter uses 4 AAA batteries. The recommended batteries, alkaline-manganese batteries, should last for approximately 60 tests.
-
Page 15: Installing (Or Replacing) Batteries
Installing (or Replacing) Batteries Have ready 4 AAA batteries. With the meter turned 1. Open Battery Compartment off, turn it over. Press the latch gently inward and lift the cover. Remove the old batteries, if necessary. 2. Insert New Batteries Position the batteries according to the diagram inside the battery…
-
Page 16: Meter Setup
Turn the meter off 3. Turn Off Meter Setup The CoaguChek XS Meter is preset with the U.S. date format (month-day-year) and U.S. time format (12-hour as opposed to 24-hour). Before you use the meter for the first time—or if there is no battery power for more than 1 minute—you’ll have to set the current date and time.
-
Page 17: Setting The Date And Time
Setting the Date and Time The date and time settings are important. Each time you run a test, the meter compares its date with the test strip’s expiration date. If the test strips are expired, the meter displays an error message and prevents you from running a test.
-
Page 18
If the meter is not already 1. Go to Setup Mode in Setup mode, press the SET button The date format flashes in the upper-right corner. Press the SET button 2. Set Today’s Date Press the M button to change the year. Press the SET button Press the M button change the month. -
Page 19
Press the SET button 3. Set Current Time Press the M button to change the hour. Press the SET button Press the M button to change the minutes. Press the SET button Turn the meter off 4. Turn Off If, in the future, you need to change the date and time, press the SET button to re-enter Setup… -
Page 20: The Meter’s Display
The Meter’s Display When you turn the meter on, it briefly shows all the display’s letters, numbers, and symbols. Regularly check that all segments of each letter, number, and symbol appear. Please compare your meter’s display to the meter display shown here on this page. You can display all the letters, numbers, and symbols for a longer time…
-
Page 21: Inserting A New Code Chip
Inserting a New Code Chip Have the correct code chip ready. With the meter turned off, 1. Remove Old Code Chip remove the old code chip and throw it away. Make sure that the 2. Match Code Numbers 3-digit code number on the new test strip container matches the 3-digit code number on…
-
Page 22: Integrated Quality Controls
Integrated Quality Controls The CoaguChek XS System has built-in quality control functions in the meter and test strips. The meter automatically runs its own quality control test as part of every blood test, so you never have to run quality control tests with liquid quality controls.
-
Page 23: Testing A Blood Sample
Testing a Blood Sample Tips for a Good Fingerstick For fingerstick blood testing, increasing the blood flow in your finger will help you get a good drop of blood. Before you stick your finger, try the following techniques until you see that your fingertip has good color: •…
-
Page 24: Important Notes About Blood Testing
Important Notes About Blood Testing Always • Operate the meter at temperatures between 59°F and 90°F (15°C and 32°C). • Refer to the test strip package insert for proper use and handling of test strips. • Keep the test strip guide and meter clean. See Cleaning the Meter section in this manual for more information.
-
Page 25: Infection Control
• Add more blood after the test has begun. • Touch any buttons while a test is in progress. • Perform a test with a drop of blood from a previous fingerstick. Infection Control The ACCU-CHEK Softclix lancet device is intended for ®…
-
Page 26: Preparing For A Test
Preparing for a Test Gather the following 1. Gather Items items: • CoaguChek XS Meter • Container of test strips • Test strip code chip • ACCU-CHEK Softclix lancet device and lancet Each box of test strips comes with a matching code chip.
-
Page 27
Make sure the meter is 3. Insert Code Chip turned off. With the code number facing up, insert the code chip into the code chip slot until it snaps into place. 4. Prepare Lancet Device Pull off the cap of the lancet device. -
Page 28: Performing A Test
Performing a Test Take a test strip out of 1. Get Ready the container. Close the container tightly. You have 10 minutes to use a test strip once you remove it from the container. 2. Insert Strip Slide the test strip into the test strip guide in the direction of the arrows until it stops.
-
Page 29
Confirm that the number 3. Match the Code Numbers displayed matches the number on the test strip container, then press the M button If the numbers are different, make sure you are using the code chip that came with the test strips you are using. An hourglass appears as the meter warms up, which takes about 30 seconds… -
Page 30
Massage your finger until 4. Collect the Blood you see increased color in your fingertip. Keeping your hand down, press the tip of the lancet firmly against the side of your fingertip. Press the release button. Gently squeeze from the base of your finger to develop a hanging drop of blood. -
Page 31
6. Apply the Blood Within 15 seconds of sticking your fingertip, apply the blood to the target area of the test strip—from the side of the test strip. Hold the blood drop to the test strip until you hear a beep. The flashing blood drop symbol disappears. -
Page 32
Record the result on the 7. Record Result CoaguChek XS System Prothrombin Time Self- Testing Log Book. Call your doctor with the test result. 8. Clean Up Remove the lancet from the lancet device. Place the used test strip and lancet in a puncture- proof container with a lid. -
Page 33: Very Low Or Very High Test Results
If, when you repeat the test, you get the same result (either < 0.8 or > 8.0), call the Roche Diagnostics Technical Service Center at 1-800-428-4674. If you see “error 7,” this means the meter was unable to detect a clot.
-
Page 34: Memory
Memory Storing Test Results in Memory The CoaguChek XS Meter automatically stores up to 100 test results and their dates and times in its memory. If the memory is full when you perform a test, the oldest result is automatically deleted. The most recent result is always saved.
-
Page 35
The most recent test 2. View Most Recent Result result appears. The letters mem indicate that you are viewing a result in memory. The time and date of the test also appear. If there are no results in memory, a 0 appears in the display’s top-right corner. -
Page 36: Erasing Stored Test Results
Erasing Stored Test Results You can erase all of the test results that are stored in the meter’s memory. You cannot, however, erase individual test results. To erase all stored results: 1. Go to Erase mode. With the meter turned off, press and hold down the M button .
-
Page 37
Press the M button 2. Confirm confirm that you want to erase the entire memory. The hourglass symbol flashes while the test results are being erased. Then, the counter is set to 0 and 3 dashes appear. Note: To exit Erase mode without erasing the results, press the ON-OFF button instead. -
Page 38: Cleaning/Disinfecting The Meter
Cleaning/Disinfecting the Meter Please follow the procedures below to clean the meter. Failure to follow these procedures may cause malfunction of the meter. • Clean the meter only when contaminated with blood. • Do not use sprays of any sort. •…
-
Page 39: Cleaning/Disinfecting The Exterior
Cleaning/Disinfecting the Exterior • Use 10% bleach solution (1 part bleach and 9 parts water) or 70% isopropyl alcohol (rubbing alcohol) to clean and disinfect the meter housing (the exterior of the meter). • Ensure that the blue test strip guide cover remains tightly closed while cleaning the housing.
-
Page 40: Cleaning/Disinfecting The Test Strip Guide
Cleaning/Disinfecting the Test Strip Guide • Use 10% bleach solution (1 part bleach and 9 parts water) or 70% isopropyl alcohol (rubbing alcohol) to clean the test strip guide. With the meter turned 1. Open the Cover off, use your thumbnail to open the cover of the test strip guide by pressing its front edge…
-
Page 41
2. Clean/Disinfect the Test • Hold the meter upright Strip Guide with the test strip guide facing down. • Clean the easily accessible areas with a cotton swab. • Be sure the swab is only damp, not soaking wet, to ensure excess fluid does not enter the meter. -
Page 42
With the cover off, allow 3. Allow to Dry the test strip guide to dry for at least 10 minutes before re-attaching the test strip guide cover and testing again. Close the cover, and 4. Close the Cover make sure it snaps into place. -
Page 43: Error Messages
You may see the following error messages while using the CoaguChek XS Meter. If you see an error message, first try to correct the problem using the solution described below. If the problem persists, call the Roche Diagnostics Technical Service Center at 1-800-428-4674. Error: Test Strip Solution: Possible causes: Remove the test strip.
-
Page 44
Error: Meter Solution: Temperature Turn the meter off and allow it to stand for about The meter is too cold or 30 minutes at room too warm to measure temperature between correctly. 59°F and 90°F (15°C and 32°C). Error: Battery Solution: The battery level is too Replace the batteries. -
Page 45
For more information, see the Code Chip section of this manual. If the code chip is damaged, call the Roche Diagnostics Technical Service Center at 1-800-428-4674. -
Page 46
Error: Test Strip Expired Solution: The test strip has expired. Check the meter’s date setting. If it is not correct, set the correct date. For more information, see the Meter Setup section of this manual. If the date is correct, turn the meter off and remove the code chip and the test strip. -
Page 47
Error: Time Exceeded Solution: You did not apply blood Turn the meter off and to the test strip within 180 remove the test strip. seconds after the blood Repeat the test using drop symbol appeared. a new test strip and blood taken from a new fingerstick from a different finger. -
Page 48
Error: Test Strip Solution: Interference Turn the meter off and The test strip was remove the test strip. touched or removed Repeat the test using during the test. a new test strip and blood taken from a new fingerstick from a different finger. -
Page 49
Error: Measurement Solution: Error If you see “error 7,” this Measurement error means the meter was caused by the blood unable to detect a clot. sample. Repeat the test. Be sure to carefully follow the steps on the previous pages. For example, make sure the fingertip is thoroughly dry, use the meter on a surface free… -
Page 50
Call the Roche Diagnostics Technical Service Center at 1-800-428- 4674. Error: Internal Error Solution: Because this error indicates possible damage to the heater plate contacts, call the Roche Diagnostics Technical Service Center at 1-800-428-4674 to have the meter replaced. -
Page 51: Other Information
Other Information Product Limitations Please read the information packaged with the test strips regarding up-to-date product specifications and limitations. Product Specifications Operating Conditions Temperature +59°F to +90°F (+15°C to +32°C) Relative humidity Less than 85% (without condensation) Maximum altitude 14,000 feet (4300 m) Placement Operate the meter on a level, vibration-free surface or hold it so it is roughly horizontal.
-
Page 52: Support/Services
10% to 85% (without condensation) Support/Services Questions Please call the Roche Diagnostics Technical Service Center at 1-800-428-4674 if you have questions regarding the handling of your meter, the reliability of your results, or if you suspect the meter is defective.
-
Page 53: Symbols
Symbols The following table lists all of the display screen icons and their meaning. Symbol Meaning Test strip (without sample application area) Test strip (with sample application area) Apply sample User must wait until the meter has completed an action. 24-hour time format 12-hour time format Time between midnight and noon…
-
Page 54
Symbol Meaning Beep tone is turned on Beep tone is turned off Result is above the chosen therapeutic range (only with INR as unit) Result is below the chosen therapeutic range (only with INR as unit) • Results in the chosen unit •… -
Page 55
Symbol Meaning Battery status: • When the batteries still have their full charge, all segments are lit. • Individual segments disappear one by one as the batteries become weaker. • When there is no segment remaining, you can no longer perform a test. You can, however, still access the meter’s memory. -
Page 56: Warranty
IMPLIED, INCLUDING WITHOUT LIMITATION THE IMPLIED WARRANTY OF MERCHANTABILITY OR FITNESS FOR A PARTICULAR PURPOSE. IN NO EVENT SHALL ROCHE DIAGNOSTICS BE LIABLE TO THE PURCHASER OR ANY OTHER PERSON FOR ANY INCIDENTAL, CONSEQUENTIAL, INDIRECT, SPECIAL OR PUNITIVE DAMAGES ARISING FROM OR IN ANY WAY CONNECTED WITH THE PURCHASE OR USE OF THE METER.
-
Page 57
Meters which show damage ® or misuse will be handled in accordance with the non-warranty service policy of Roche Diagnostics. The warranty of the repaired/replacement meter will expire on the date of the original warranty expiration or ninety (90) days after shipment of a replacement… -
Page 60
0123 ACCU-CHEK, COAGUCHEK and SOFTCLIX are trademarks of Roche. Manufactured for and distributed in the U.S.A. by: Roche Diagnostics 9115 Hague Road Indianapolis, IN 46256 Roche Diagnostics GmbH Sandhofer Strasse 116 68305 Mannheim Germany www.roche.com www.poc.roche.com…