Поиск и устранение повреждений данных
Уровень сложности
Средний
Время на прочтение
24 мин
Количество просмотров 2.8K

Это выдержка из восьмой главы книги Rodney Landrum: «SQL Server Tacklebox», в которой описывается, как DBA может устранить последствия повреждения данных. Будут продемонстрированы инструменты и сценарии, необходимые для своевременного поиска и устранения повреждений данных и предотвращения их попадания в резервные копии.
Чудовище Data Corruption может быть тихим и незаметным убийцей пользовательских данных. Оно может нанести удар сразу или ждать неделями, прежде чем проявится сущим кошмаром. Нет, я не говорю о разработчиках, речь пойдёт о повреждении базы данных.
Если Вы достаточно долго работаете администратором баз данных, то уже наверняка сталкивались с этим монстром по крайней мере в одной из его многочисленных форм. Часто такие повреждения происходят после сбоя электропитания, когда сервер вместо того, чтобы корректно завершить работу, просто умирает в процессе изменения данных. В результате этой, или какой‑либо другой неисправности оборудования, данные или индексы получают повреждения прямо на диске и SQL Server больше не может их использовать, пока целостность не будет восстановлена.
К счастью, есть несколько шагов, которые вы можете предпринять для защиты данных и, что не менее важно, своего места работы, в случае, если такое повреждение произойдёт. Само собой разумеется что прежде всего нужно позаботиться о хорошей стратегии резервного копирования, отсутствие которой равносильно игре в русскую рулетку в одиночку. Однако, тут будет продемонстрировано несколько других методов, основанных на разных командах DBCC. Кроме того, мы рассмотрим сценарий, который обеспечит обнаружение повреждений и сообщит о них по мере выявления, прежде чем они распространятся по вашей инфраструктуре. На основе этого можно рассчитывать что администратор базы данных сможет также ограничить ущерб, который причиняет ещё более свирепый «The Monster at the End of This Book».

PS: Если вам не повезло, и вы никогда не видели «The Monster at the End of This Book» (Jon Stone, иллюстратор Michael Smollin. «Golden Books») с очаровательным монстром Гровером с улицы Сезам в главной роли, то, во‑первых, я вам сочувствую, а во‑вторых, приношу свои извинения, потому что предыдущие ссылки мало что для вас значат. Я могу только порекомендовать вам немедленно ознакомиться с ним вместе с «The Zombie Survival Guide» (автор Max Brooks, Three Rivers Press) и добавить оба в обязательный список изучения для всех новых администраторов баз данных.
Причины Data Corruption
Есть много причин, из‑за которых база данных может повредиться. Чаще всего это происходит после сбоя оборудования. Обычно сбой происходит в дисковой подсистеме, которая отвечает за запись данных на диск. SQL Server ожидает что записываемые на диск данные останутся неизменными после передачи их интерфейсам операционной системы, а затем драйверу контроллера диска и непосредственно самому диску. Например, такого рода повреждение данных может быть вызвано отключением питания в середине транзакции.
Однако не только сбои дисковой подсистемы приводят к повреждению данных. Если вы обновите базу данных с SQL Server 2000 до SQL Server 2005 или выше, а затем проверите её с помощью скрипта, находящего повреждения, представленного в конце этой статьи, вы с удивлением обнаружите сообщения, которые можно истолковать как ошибки в файле базы данных. Однако, к счастью, это просто предупреждения об использовании пространства в фале, которое образовалось из‑за разницы версий базы, и решение проблемы будет в выполнении команды DBCC UPDATEUSAGE.
Какой бы ни была причина Data Corruption, администратор базы данных не должен долгое время находиться в неведении о целостности данных в базе. К сожалению, Чудовище Data Corruption часто умеет спрятаться и не высовывает свою страшную голову, пока сервер не обратится к поврежденными данными. К этому времени повреждение может попасть в файлы резервных копий, и, когда вы прибегнете к последнему из средств — восстановлению базы данных, восстановиться может уже имеющая повреждения база. Важность использования надежной стратегии регулярного резервного копирования невозможно переоценить. Кроме того, нужен скрипт или инструмент, который будет регулярно проверять базу данных и сообщать о любых проблемах и повреждениях, пока не стало слишком поздно. Именно такой сценарий будет представлен в этой статье.
Последствия Data Corruption
Как уже говорилось в этой статье, в большинстве случаев повреждения данных связаны с отказом оборудования. Это может быть контроллер жесткого диска или блок питания. Для выявления проблем, которые могут возникнуть из‑за подобных отказов, SQL Server использует функцию вычисления контрольной суммы страницы. Значение контрольной суммы вычисляется во время записи страниц на диск и проверяется при последующем чтении с диска. По существу, если значение контрольной суммы прочитанной страницы не соответствует тому, которое было рассчитано при записи, то SQL Server считает, что данные были изменены вне процесса ядра сервера баз данных. До SQL Server 2005, в качестве опции, можно было включить для базы данных обнаружение разорванных страниц (Torn Page Detection), которое выполняло аналогичные проверки.
Если SQL Server обнаружит повреждение, его реакция на проблему будет зависеть от масштаба ущерба. Если повреждение таково, что база данных недоступна для чтения, SQL Server не сможет инициализировать и загрузить эту базу. Почти во всех таких случаях потребуется полное восстановление базы данных из копии.
Если ущерб ограничен (затронуты только одна или две страницы данных), тогда SQL Server сможет открывать и читать базу данных. Это позволит использовать в качестве инструмента команду DBCC, для оценки и/или устранения ущерба. Имейте также в виду, что в рамках общей процедуры резервного копирования и восстановления у вас есть возможность выполнить восстановление на уровне страниц, если потребуется восстановить только одну или несколько страниц данных. Дополнительные сведения о восстановлении страниц из резервных копий базы данных можно найти по ссылке: Restore Pages (SQL Server)
Прежде чем двигаться дальше, стоит отметить, что несмотря на рекомендации оставлять режим проверки для всех экземпляров баз данных включенным (обнаружение разорванных страниц или контрольную сумму), это привносит накладные расходы, и возможно такую проверку отключить. Идея состоит в том, что, если вы доверяете своей дисковой подсистеме и системе электропитания, можно не включать проверку, если производительность является самой серьезной проблемой. Большинство дисковых подсистем сегодня имеют специальную батарейку, чтобы обеспечить успешное завершение операции записи.
Для SQL 2000 можно было использовать sp_dboption, которая позволяет включить или отключить обнаружение разорванных страниц. Для более поздних версий вы можете использовать команду ALTER DATABASE, чтобы включить torn page detection или checksum (невозможно включать оба режима одновременно), или можно указать none для отключения проверок.
Защита от Data Corruption
Помимо частого резервного копирования и проверки баз данных (что позволяет откатиться до того момента, когда баз ещё не была повреждена) хорошо подготовленный администратор базы данных будет иметь в своем распоряжении некоторые инструменты, которые позволяют определить место повреждения и восстановить любые поврежденные данные.
Однако, прежде чем ринуться с подобием мачете в заводь с чудовищами, я должен сообщить вам, что я ни в коем случае не являюсь экспертом в области повреждений баз данных. Я всего лишь обычный администратор базы данных, который с надеется что никогда не столкнется с повреждениями, но хочу быть настолько подготовленным, насколько это возможно, если это произойдет.
Таким образом, я собираюсь сосредоточиться на практических аспектах использования инструментов и скриптов, которые администратор базы данных может использовать для борьбы с Data Corruption, в основном оперируя семейством команд DBCC.
Я не буду слишком глубоко погружаться в недра механизма хранения SQL Server, где можно встретить всевозможные эзотерические термины, относящиеся к тому, как SQL Server физически распределяет или отображает данные в файле (GAM/ SGAM страницы, страницы PFS, цепочки IAM и многое другое). В качестве ссылки на подобный уровень детализации я не могу сделать ничего лучше, чем указать вам на работы Пола Рэндала, в его блоке в категории Corruption: https://www.sqlskills.com/blogs/paul/category/Corruption/
Он многое сделал для разработки команд DBCC, и является признанным экспертом в области повреждений данных и, безусловно, у него больше всего «кислорода в баллоне» для необходимого погружения.
DBCC CHECKDB
DBCC CHECKDB — это основная команда, которую администратор базы данных должен использовать для проверки и исправления ошибок согласованности в базах данных SQL Server. DBCC существует уже много лет и представлено в большинстве версий SQL Server. Можно встретить два варианта расшифровки этой аббревиатуры: Database Consistency Checks либо Database Console Commands, последняя из них более точна, поскольку DBCC включает команды, которые выходят за рамки простой проверки согласованности базы данных.
Однако для нас сейчас интересны только согласованность и целостность баз данных. DBCC CHECKDB на самом деле объединяет другие команды DBCC: DBCC CHECKCATALOG, DBCC CHECKALLOC и DBCC CHECKTABLE. Запуск DBCC CHECKDB включает в себя выполнение и этих команды, поэтому отпадает необходимость запускать их потом отдельно.
Чтобы продемонстрировать, как использовать эти инструменты для поиска и устранения повреждений данных, мне сначала нужно будет создать базу, а затем совершить «злодеяние» по повреждению в ней данных. Если мы начнем с нуля, это облегчит поиск и последующее повреждение страниц данных и/или индексов, поэтому давайте создадим совершенно новую, «незапятнанную» базу с метким названием «NEO». Как видно на рис. 1, в этой новой базе данных не создано ни одного объекта.

Чтобы убедиться, что файлы NEO ещё не повреждены, мы можем запустить команду DBCC CHECKDB, результат которой показан на рисунке 2.

Как и ожидалось, сообщений об ошибках согласованности или распределения не было, но все это очень скоро изменится… Я упомянул, что в конце этой книги появится монстр, и это не милый старый Гровер из «Улицы Сезам».
Пожалуйста, не идите на следующую страницу!
DBCC PAGE
Ага, вы все еще читаете, я вижу! Что ж, прежде чем мы выпустим монстра, я хочу показать вам еще одну очень важную команду DBCC, о которой вы, возможно, не знаете, а именно DBCC PAGE (sys.dm_db_page_info). Она «официально» не документирована, поскольку Microsoft её не поддерживает, но на самом деле я нашел кучу информации об этой команде из хорошо известных и уважаемых источников, таких как Пол Рэндал (Paul Randal), так что я больше не считаю ее недокументированной.
Синтаксис прост:
dbcc page ( {'dbname' | dbid}, filenum, pagenum [, printopt={0|1|2|3} ])
Однако выводимый командой результат может быть весьма пугающим для непосвященного администратора баз данных. Итак, прежде чем мы представим монстра, который портит базы данных, я хочу просмотреть с помощью DBCC PAGE на базу данных NEO. Команда выглядит следующим образом:
DBCC PAGE (NEO,1,1,3)
Первая цифра после имени базы «1» — это номер файла, вторая цифра «1» — это номер страницы, а последняя цифра «3» — это параметр подробности выводимой информации, принимает значения от 0 до 3. Значение «3» указывает, что мы хотим видеть не только заголовок страницы, но и детали. Не очень впечатляющий результат показаны на рисунке 3.

Причина того, что результаты оказались не очень информативными, заключается в том, что мы забыли включить важный флаг трассировки (3604). Если вы работаете с SQL Server и не знакомы с флагами трассировки, свяжитесь со мной, и мы поговорим об этом за кружкой пива. На самом деле, я не против, и буду рад новому товарищу и возможности проявить педантичность.
Однако сейчас я просто отмечу, что для просмотра вывода команды DBCC PAGE нам нужно запустить команду DBCC TRACEON. Конкретно:
DBCC TRACEON (3604)
На рис. 4 показаны результаты повторного выполнения DBCC PAGE с включенным флагом трассировки.

В нижней части листинга видно, что страницы 1:172 – 1:383 не распределены и все страницы имеют коэффициент заполнения 0%. Напомним, что эта база данных без таблиц или каких-либо других объектов, а потому и без вставленных куда-нибудь данных.
Итак, давайте теперь создадим простую таблицу и вставим в нее некоторый объём данных. Скрипт для этого показан в листинге 1. Он создает в базе данных NEO таблицу с именем ONE и вставляет в нее 1000 записей (на самом деле 999). Простые вещи, но важным моментом в контексте этого примера является то, что эта загрузка данных приведет к выделению дополнительных страниц в базе данных и заполнению их данными, и мы сможем полюбоваться на эти новые страницы.
USE [NEO]
GO
IF  EXISTS (SELECT * FROM sys.objects WHERE object_id = OBJECT_ID(N'[dbo].[ONE]')
            AND type in (N'U'))
DROP TABLE [dbo].[ONE]
GO
CREATE TABLE [dbo].[ONE](
   [NEOID] [int] NULL,
   [NEOTEXT] [nchar](50) NULL
) ON [PRIMARY]
GO

BEGIN Tran T_Time

DECLARE @SQL_Alphabet varchar(26)
SET @SQL_Alphabet = 'ABCDEFGHIJKLMNOPQRSTUVWXYZ'
DECLARE @rnd_seed int
 @rnd_seed = 26
DECLARE @counter int = 1
WHILE @counter < 1000
   BEGIN
     Insert  Into ONE
     Values (
               @counter,
               (select SUBSTRING (@SQl_alphabet,
                      Cast(RAND() * @rnd_seed as int) + 1,
                      CAST(RAND() * @rnd_seed as int) + 1)
               )
             )
     SET @counter = @counter + 1
   END
Commit Tran T_Time
Листинг 1. Создание и заполнение таблицы ONE.
На рис. 5 показан образец данных, которые были вставлены.

На рисунке 4 видно, что для пустой базы данных страницы 1:172 — 1:383 ещё не были распределены. Повторный запуск DBCC PAGE должен был показать, что для размещения данных были выделены дополнительные страницы, и они имеют разный процент заполнения. На рис. 6 показан новый результат.

Теперь мы видим, что страницы 1:184 – 1:189 распределены и заполнены на 100 процентов. Выбрав одну из новых страниц (1:184), содержащую только что загруженные данные, можно снова запустить DBCC PAGE для этой конкретной страницы и получить полную «корзину» информации, как показано на рис. 7.

На рисунке видно, например, что в результате возвращаются фактические значения для NEOID и NEOTEXT, 553 и UVWXYZ соответственно. Также там представлен шестнадцатеричный дамп, указывающий на конкретное место в файле данных, где хранится запись с NEOID = 533: 10006c00 29020000...
Если вы не эксперт в понимании шестнадцатеричных чисел, не бойтесь; я тоже такой. Однако, используя данную информацию, можно найти эту запись и изменить ее вне процесса SQL Server, что нанесет базе серьезный ущерб. Однако для этого «вредительства» мне понадобится мой верный шестнадцатеричный редактор, о котором я вскоре расскажу.
Повреждение страниц с данными
Мы знаем, что таблица ONE в базе данных NEO представляет собой кучу, поэтому любое внешнее повреждение будет непосредственно для страниц данных, а не в каком-либо из возможных некластерных индексов.
Случай с повреждением страниц индекса на самом деле не так драматичен, поскольку данные в индексе являются «дубликатами» данных с листового уровня, и поэтому восстановить ущерб относительно легко. Мы рассмотрим этот не смертельный вариант повреждений после того, как рассмотрим «вероломное вмешательство» и, надеюсь, успешное восстановление после повреждения данных в нашей являющейся кучей таблице.
Подлог шестнадцатеричного числа в данных
В мире существует множество редакторов в шестнадцатеричном формате, многие из них бесплатны или имеют бесплатный пробный период. Для этой статьи я загрузил пробную версию «Hex Editor Neo» разработанный HHD Software.
Шестнадцатеричный редактор позволяет администратору просто открывать и просматривать содержимое любого файла, в нашем случае файла данных базы. Хотя это интересное занятие, я бы рекомендовал его только для целей тестирования или обучения, так как это очень опасный инструмент в неопытных руках.
Здесь мы будем использовать шестнадцатеричный редактор для «обнуления» записи в файле данных базы, причём только на одной странице. Это приведет к повреждению, похожему на те, что возникают при аппаратных проблемах, из-за которой на диск записывается несогласованная информация, и при этом база данных не становится нечитаемой для SQL Server.
И хотя я не говорил об этом до сих пор…
Не делайте дальше ничего без предварительного резервного копирования базы данных!
Данные, которые я ухайдакаю (так говорят южане) путём обнуления, находятся на странице данных, показанной на рисунке 7, а именно на 1:184. Чтобы повредить данные на этой странице, сначала нужно остановить службу SQL Server, чтобы корневой файл данных не использовался. У меня это:
C:Program FilesMicrosoft SQL ServerMSSQL.1MSSQLDataNEO.mdf
Затем я просто открываю «Hex Editor Neo» и нахожу местоположение нужной записи с помощью NEOID=553 и NEOTEXT ="UVWXYZ", которую мы ранее увидели с помощью DBCC PAGE.
Большинство шестнадцатеричных редакторов, включая «Hex Editor Neo», имеют возможность поиска значений в файле. Вспомним результаты вывода команды DBCC PAGE с информацией, которая размещена на странице 1:184, мы просто возьмём значение 10006c00 29020000 и задав его для поиска найдём запись где NEOID равно 553. Как вы можете увидеть на рисунке 8, запись в шестнадцатеричном редакторе выглядит почти идентично выводу команды DBCC PAGE.

Далее я собираюсь внести в данные одно небольшое изменение, обнулив букву «U», подменив 55 на 00. Вот и все. На рис. 9 показан результат подмены.

Затем я сохраню файл и закрою шестнадцатеричный редактор. Вы тоже должны так сделать, иначе файл данных останется используемым, и будет невозможно инициализировать базу данных после запуска SQL Server. Теперь, наконец, настало время выпустить монстра…
Противостояние с монстром Data Corruption
На первый взгляд все выглядит нормально. База NEO данных запущена и доступна, и в журнале событий не было сообщений об ошибках. В Management Studio я могу без проблем детализировать объекты базы данных, включая таблицу ONE. Однако если я попытаюсь запросить таблицу с помощью SELECT * FROM ONE, произойдет нечто пугающее, как показано в листинге 2.
Msg 824, Level 24, State 2, Line 1
SQL Server detected a logical consistency-based I/O error: incorrect checksum (expected: 0x9a3e399c; actual: 0x9a14b99c).
It occurred during a read of page (1:184) in database ID 23 at offset 0x00000000170000 in file
'C:Program FilesMicrosoft SQL ServerMSSQL.1MSSQLDATANEO.mdf'.  Additional messages in the SQL Server error log or system event log may provide more detail. This is a severe error condition that threatens database integrity and must be corrected immediately.
Complete a full database consistency check (DBCC CHECKDB). This error can be caused by many factors; for more information, see SQL Server Books Online.
Листинг 2: Последствия Data Corruption в таблице ONE.
Это какое-то шоу ужасов, которое администраторы баз данных не хотели бы увидеть. Очевидно, это очень серьезная ошибка и опасное повреждение. Такая ошибка будет выдаваться каждый раз, когда запись 553 будет попадать в результаты запроса, поэтому любой просмотр таблицы будет приводить к проявлению проблемы.
Такие повреждения нужно уметь быстро исправлять. К счастью, перед повреждением файла данных мы сделали резервную копию. Поэтому, если ничего не поможет, я могу воспользоваться этим файлом резервной копии для восстановления данных. При решении проблем с подобными повреждениями критически важно, чтобы у вас были исправные резервные копии. К сожалению, в реальности это повреждение может оставаться незамеченным в течение нескольких дней, а это будет означать, что ваши резервные копии также будут содержать повреждённые данные.
Если это так, то в какой-то момент вы можете столкнуться с самым худшим из возможных сценариев, а именно с потерей данных. Однако, прежде чем смириться с этим фатальным исходом, я собираюсь победить монстра и посмотреть, смогу ли я решить проблему с помощью DBCC CHECKDB.
У DBCC CHECKDB много разных параметров, здесь я коснусь лишь некоторых из них. DBCC CHECKDB за время своего существования много раз улучшалась и подвергалась значительным переработкам в релизе SQL Server 2005 и более поздних версиях. Одним из самых полезных усовершенствований для администратора баз данных, работающего над устранением проблем с повреждением в базе, является большое количество подробных и полезных сообщений об ошибках.
Итак, погнали, давайте посмотрим, насколько всё плохо и что с этим можно поделать. Для начала я выполню ограниченную проверку согласованности данных на физическом уровне базы данных. Сделать это можно с помощью следующей команды:
DBCC CHECKDB ('neo') WITH PHYSICAL_ONLY;
GO
На рис. 10 показаны её результаты, которые, как и ожидалось, не вдохновляют.
Наихудшим из узнанного является предпоследняя строка, которая говорит, что REPAIR_ALLOW_DATA_LOSS это минимальный уровень исправления обнаруженных ошибок. Это означает, что мы можем исправить ущерб, запустив DBCC CHECKDB с опцией REPAIR_ALLOW_DATA_LOSS, но, как понятно из имени параметра, это приведет к потере данных.

Есть два других уровня восстановления, которые для нас были бы предпочтительнее: REPAIR_FAST или REPAIR_REBUILD. Первый имеется только для обратной совместимости и не выполняет восстановление базы данных с 2005 года. Если бы минимальный вариант восстановления был REPAIR_REBUILD, это указывало бы на то, что повреждение можно было бы легко восстановить, поскольку оно затронуло восстановимую структуру, например, некластерный индекс. Такое повреждение можно исправить перестроением индекса и без опасности потери данных.
Только в крайнем случае рекомендуется использовать варианты восстановления DBCC CHECKDB которые могут привести к потере данных. Причем восстановление из резервной копии очевидно является предпочтительным выбором, если это приведёт данные в неповрежденное состояние. Это, конечно, будет возможным только если сама резервная копия не содержит поврежденных данных.
Однако сейчас я собираюсь действовать в соответствии с тем, что рекомендовано в выводе команды DBCC CHECKDB и запускать её с параметром, который определяет вариант быстрого восстановления: REPAIR_ALLOW_DATA_LOSS. Для работы этой опции база данных должна быть в однопользовательском режиме, поэтому синтаксис будет следующим:
ALTER DATABASE NEO SET SINGLE_USER WITH ROLLBACK IMMEDIATE
GO
DBCC CHECKDB ('neo', REPAIR_ALLOW_DATA_LOSS)
GO
Результаты выполнения DBCC CHECKDB команды показаны в листинге 3.
DBCC results for 'ONE'.
Repair: The page (1:184) has been deallocated from object ID 2121058592, index ID 0, partition ID 72057594039042048, alloc unit ID 72057594043301888 (type In-row data).
Msg 8928, Level 16, State 1, Line 1
Object ID 2121058592, index ID 0, partition ID 72057594039042048, alloc unit ID 72057594043301888 (type In-row data): Page (1:184) could not be processed.  See other errors for details.
        The error has been repaired.
Msg 8939, Level 16, State 98, Line 1
Table error: Object ID 2121058592, index ID 0, partition ID 72057594039042048, alloc unit ID 72057594043301888 (type In-row data), page (1:184). Test (IS_OFF (BUF_IOERR, pBUF->bstat)) failed. Values are 29362185 and -4.
        The error has been repaired.
There are 930 rows in 14 pages for object "ONE".
Листинг 3: Ошибка устранена, но данные потеряны.
«Хорошей» новостью является то, что ошибки теперь исправлены. Плохая новость заключается в том, что монстр забрал с собой данные, повреждённая страница в файле данных теперь очищена. Попутно обратите внимание, что в выходных данных присутствует идентификатор объекта таблицы, в которой произошло повреждение, а также идентификатор индекса, который в данном случае равен 0, поскольку у таблицы нет индексов.

Итак, на данный ммент я знаю, что потерял данные, и это была только одна страница данных. Но неизвестно сколько именно данных было на этой странице. Простой SELECT показывает, что я потерял не только строку, которую я «подправил» (NEOID 553), но и еще 68 строк, вплоть до строки 621. Рисунок 11 демонстрирует факт потери этих строк.
Эти строки можно легко восстановлены, если есть актуальная резервная копия. У Вас же есть хорошая резервная копия, верно? Верно? Предполагая, что Вы её сделали, понадобится восстановить резервную копии в другую базу данных, например, пусть она называется NEO2. После этого можно синхронизировать две таблицы путем копирования отсутствующих строк. Синхронизация двух таблиц может быть выполнена с помощью простого оператора INSERT INTO, подобного показанному в листинге 4.
INSERT  INTO NEO..ONE ( NEOID, NEOTEXT )
        SELECT  NEOID,
                NEOTEXT
        FROM    NEO2..ONE
        WHERE   NEOID NOT IN ( SELECT   NEOID
                               FROM     NEO..ONE )
Листинг 4: Синхронизация двух таблиц для восстановления потерянных строк данных.
В этом «контролируемом примере» исправление довольно простое. В других сценариях с гораздо более высоким уровнем повреждения может потребоваться прибегнуть к другим мерам для восполнения утраченных данных после восстановления с потерей данных. Эти средства почти всегда будут включать восстановление базы данных из резервной копии, поэтому я еще раз подчеркиваю важность надежной, проверенной и хорошо документированной политики резервного копирования базы данных.
Повреждение некластерных индексов
Ранее я уже говорил, что с повреждением некластерного индекса справиться намного проще, чем с повреждением страницы данных на листовом уровне, поскольку эти индексы являются дополнительными, избыточными копиями реальных данных и могут быть легко перестроены. Однако было бы интересно доказать эти утверждения. Я воспользуюсь той же техникой подмены данных в шестнадцатеричном редакторе, чтобы повредить некластерный индекс, а не данные таблицы, и посмотрю, как с этим удастся потом справиться.
Мы уже знаем, что в результатах, выводимых командой DBCC индикатором того, относится ли повреждение к индексу или таблице, является значение IndexID. Для нашей таблицы ONE, которая является кучей, в листинге 3 значение IndexID = 0, поскольку для таблицы не были ещё созданы индексы. Значение IndexID = 1 означает кластерный индекс, а значение от 2 до 250 указывает на возможные некластерные индексы.
Предположим, что я выполнил необходимое восстановление базы из резервной копии и по столбцу NEOID таблицы ONE создал некластерный индекс с именем: NEOID.
Во-первых, нам нужно узнать на каких страницах разместился новый индекс, который создан для таблицы ONE. Затем мы посмотрим на страницу некластерного индекса средствами DBCC PAGE, чтобы определить какие данные нужно подменить, имитируя повреждение индекса, и при этом не повредить страницы данных в куче.
Чтобы узнать размещение страниц индекса, можно воспользоваться другой недокументированной командой DBCC, которая называется DBCC IND. Вот синтаксис этой команды:
DBCC IND (DBID, TABLEID,-1)
Итак, чтобы применить эту команду для недавно проиндексированной таблицы ONE, выполним следующее:
DBCC ind(23, 2121058592, -1)
Результаты показывают несколько строк, у которых значения IndexID в основном 0, а также несколько строк с IndexID = 2, что указывает на страницы некластерного индекса. Нам нужно запомнить продемонстрированное на рис. 11 значение указателя страницы для случая, когда IndexID = 2. Выберем там страницу 180.

Теперь можно снова запустить DBCC PAGE, и мы получим нужную нам информацию о странице:
DBCC TRACEON (3604);
GO
DBCC PAGE (NEO,1,180,3)
GO
Результаты выглядят совсем иначе, чем при просмотре страницы данных. Я вижу возвращенное шестнадцатеричное значение (HEAP RID), представляющее каждую строку индекса для запрошенной страницы, как это показано на рисунке 12.

Я снова использовал шестнадцатеричный редактор, чтобы обнулить HEAP RID, и снова это повредило базу данных. Однако есть одно существенное отличие: на этот раз, когда я запускаю DBCC CHECKDB('neo') WITH PHYSICAL_ONLY, значение IndexID поврежденного объект указывается как «2», то есть это код код некластерного индекса.
Приняв к сведению эту информацию, мы можем предложить иные способы устранения повреждений, кроме восстановления из резервной копии или запуска DBCC CHECKDB с REPAIR_ALLOW_DATA_LOSS, что потенциально приводит к потере данных.
Мы можем просто удалить и повторно создать некластерный индекс, используя код из листинга 5.
USE [NEO]
GO

IF  EXISTS (SELECT * FROM sys.indexes WHERE object_id = OBJECT_ID(N'[dbo].[ONE]')
 AND name = N'NEO_ID_NC')
DROP INDEX [NEO_ID_NC] ON [dbo].[ONE] WITH ( ONLINE = OFF )
GO

USE [NEO]
GO
CREATE NONCLUSTERED INDEX [NEO_ID_NC] ON [dbo].[ONE]
([NEOID] ASC)
WITH (SORT_IN_TEMPDB = ON, ONLINE = ON, ALLOW_PAGE_LOCKS = OFF)
GO
Листинг 5: Удаление и повторное создание поврежденного некластерного индекса.
Теперь, после того, как мы немного углубились в способы поиска и исправления некоторых проблем из-за повреждения данных, давайте обратимся к процессу обнаружения повреждений.
В поисках монстра Data Corruption
Нам нужен наилучший способ узнавать о повреждения в базах данных прежде чем они попадут в резервные копии и превратятся в более серьезную проблему. Как же этого добиться?
Один из вариантов — настроить регулярные проверки целостности с помощью планов обслуживания. Такое решение будет простым, поддерживаемым Майкрософт, прозрачным, полезным и, безусловно, лучше, чем отсутствие проверок целостности вообще. Тем не менее, мне нравится уровень контроля и гибкости, которые можно получить, создавая свои скрипты для выполнения тех же функций, что и планы обслуживания. Поэтому я поделюсь с вами сценарием, который я использую для перебора всех баз данных, включая системные базы данных, и получения отчета об ошибках, возвращаемых командой DBCC CHECKDB.
С помощью этого скрипта и тривиального способа извлечения во временную таблицу вывода результатов DBCC CHECKDB, вы не позволите монстру незаметно проникнуть в вашу инфраструктуру данных. И вы сможете действовать обдуманно, когда будете решать проблему сразу после обнаружения.
Скрипт в листинге 6 пробегает по всем базам данных экземпляра SQL Server, фиксирует ошибки и отправляет вам сообщение о числе обнаруженных ошибок, чтобы вы могли более подробно исследовать проблему при её обнаружении.
CREATE TABLE #CheckDBTemp (
     Error         INT
   , [Level]      INT
   , [State]      INT
   , MessageText   NVARCHAR(1000)
   , RepairLevel   NVARCHAR(1000)
   , [Status]      INT
   , [DBID]      INT
   , ObjectID      INT
   , IndexID      INT
   , PartitionID   BIGINT
   , AllocUnitID   BIGINT
   , [File]      INT
   , Page         INT
   , Slot         INT
   , RefFile      INT
   , RefPage      INT
   , RefSlot      INT
   , Allocation   INT
)

-- Needed variables

DECLARE @TSQL         NVARCHAR(1000)
DECLARE @dbName         NVARCHAR(100)
DECLARE @dbErrorList   NVARCHAR(1000)
DECLARE @dbID         INT
DECLARE @ErrorCount      INT
DECLARE @EmailSubject   NVARCHAR(255)
DECLARE @ProfileName   VARCHAR(100)
DECLARE @EmailRecipient   VARCHAR(255)

-- Init variables

SET @dbID = 0
SET @dbErrorList = ''
SET @EmailSubject = 'Integrity Check Failure on ' + CAST(COALESCE(@@SERVERNAME, 'Server Name Not Available') AS NVARCHAR)
SET @ProfileName = 'Notifications'
SET @EmailRecipient = 'rlandrum13@cox.net'

-- CYCLE THROUGH DATABASES

WHILE(@@ROWCOUNT > 0)
BEGIN
   IF( @dbID > 0 )
   BEGIN
      SET @TSQL = 'DBCC CHECKDB(''' +  @dbName  + ''') WITH TABLERESULTS, PHYSICAL_ONLY, NO_INFOMSGS'
      INSERT INTO #CheckDBTemp
      EXEC(@TSQL)
      SELECT @ErrorCount = COUNT(*) FROM #CheckDBTemp
      IF( @ErrorCount > 0 )
      BEGIN
         SET @dbErrorList = @dbErrorList + CHAR(10) + CHAR(13) + 'Issue found on database : ' + @dbName
         SET @dbErrorList = @dbErrorList + CHAR(10) + CHAR(13) + (Select Top 1 MessageText from  #CheckDBTemp)
      END
      TRUNCATE TABLE #CheckDBTemp
   END
   IF SUBSTRING(CONVERT(varchar(50), SERVERPROPERTY('ProductVersion')),1,1) = '8'
   BEGIN
      SELECT TOP 1 @dbName = name, @dbID = dbid
      FROM sysdatabases WHERE dbid > @dbID
          AND name NOT IN ('tempdb')
          AND DATABASEPROPERTYEX(name, 'Status') = 'Online'
      ORDER by dbid
   END
   ELSE
   BEGIN
      SELECT TOP 1 @dbName = name, @dbID = database_ID
      FROM sys.databases WHERE database_ID > @dbID
          AND name NOT IN ('tempdb')
          AND DATABASEPROPERTYEX(name, 'Status') = 'Online'
      ORDER by database_ID
   END
END
-- If errors were found
IF( @dbErrorList <> '' )
BEGIN
   IF SUBSTRING(CONVERT(varchar(50), SERVERPROPERTY('ProductVersion')),1,1) = '8'
   BEGIN
      EXEC master..xp_sendmail @recipients = @EmailRecipient, @subject = @EmailSubject, @message = @dbErrorList
   END
   ELSE
   BEGIN
      EXEC msdb..sp_send_dbmail @profile_name = @ProfileName, @recipients = @EmailRecipient, @subject = @EmailSubject, @body = @dbErrorList, @importance = 'High'
   END
END
DROP TABLE #CheckDBTemp
Листинг 6: Сценарий для поиска и сообщения о повреждении базы данных.
Вы могли заметить, что в коде используется параметр DBCC CHECKDB, который я ранее не упоминал, а именно WITH TABLERESULTS. Как следует из названия, результаты выполнения команды возвращаются в виде таблицы. Этот параметр не упоминается в электронной документации, но очень полезен для автоматизации проверки ошибок с помощью SQL Agent Jobs или ваших собственных скриптов.
Этот скрипт можно легко изменить, чтобы он отсылал сообщение электронной почты о том, что все базы данных, кроме базы данных NEO, не имеют ошибок. Это может несколько смягчить шок, если будет видно, например, что из 20 баз данных повреждена будет только одна. Я знаю, что это могло бы мне немного помочь… В любом случае, когда будет обнаружено повреждение, вы получите сообщение, похожее на то, что изображено на рисунке 14. И это сообщение действительно будет тем монстром, который разбудит вас посреди ночи в холодном поту.

В этом письме я показываю ObjectID, IndexID и другую информацию о поврежденной странице, а также вывожу имя базы данных. Этого должно быть достаточно, чтобы продолжить расследование с помощью «новых» инструментов: DBCC PAGE, DBCC INDID и DBCC CHECKDB в разных вариантах восстановления. Или это должно стать тревожным сигналом ктому факту, что вам, возможно, придется восстанавливать данные из резервной копии, не содержащей повреждения.
Резюме
В этой статье мы повредили данные в базе данных и бегло рассмотрели несколько недокументированных параметров DBCC, которые помогали восстановить поврежденные данные. Здесь мы затронули тему только поверхностно, упрощённо показав, как редактировать на странице шестнадцатеричные значения, а также немного научились понимать как сопоставлять результаты различных команд DBCC при устранении неполадок, связанных с повреждением данных.
Я не устану напоминать, что наличие продуманного плана резервного копирования является самой важной задачей для администратора баз данных. Хотя в этой статье я не описывал подробно резервное копирование и восстановление (только по этой теме можно написать целую книгу), но сама тема статьи представляет вескую причину иметь хорошие резервные копии как часть мер по обеспечению высокой доступности и защиты данных в рамках аварийного плана восстановления. Поврежденная база данных действительно угрожает катастрофой и может привести к длительному простою. Наверняка Вам не хочется когда‑нибудь прийти к своему начальнику, или начальнику вашего начальника, и сказать что вы потеряли данные безвозвратно. Если вам предстоит такое, лучше сразу актуализировать свое резюме, при условии, что диск, где оно хранилось, также не поврежден.
Часто у DBA возникает паника после обнаружения в базе данных Data Corruption любого уровня. Если нет проверенных резервных копий и проигнорированы основные рекомендации, которые помогают устранению неполадок, у администратора нет безопасного места, где он мог бы спрятаться, когда монстр впадает в ярость. Все, что вы сможете сделать, это починить базу с возможностью потери данных на сотнях страниц, а затем забиться в уголок своего рабочего места, которое скоро опустеет.
Если у вас есть проверенные резервные копии и вы умеете устранять повреждения без потери данных, то ваше рабочее место однажды может переместиться в офис руководителя с тонированными стёклами во всю стену, из которых открывается отличный вид на мир, где нет монстров.
Summary: Database Console Command (DBCC) CHECKDB is used to identify errors in the SQL Server database. The DBCC CHECKDB comes with three repair options to fix database-related errors. This article outlines how to use DBCC CHECKDB command to repair SQL database. Also, it will discuss about a specialized MS SQL repair software you can use when DBCC CHECKDB fails to repair the database.

Contents
- Steps to Use DBCC CHECKDB for Repairing SQL Database
- What To Do When DBCC CHECKDB Fails?
- Conclusion
DBCC CHECKDB is used to check the physical and logical integrity of database objects, index relationships, and other structural checks. The failure of any of these checks will report consistency errors as part of the database console command.
The best method to repair errors in the database, reported by DBCC CHECKDB, is to run the last known good backup as recommended by Microsoft. However, if the backup is not available or is corrupted, you can try accessing the database in Emergency state.
The Emergency state allows accessing a database marked as suspect. It also allows running DBCC CHECKDB repair options to resolve database corruption. Once the database becomes accessible, repair it using the minimum level of repair option.
Note: Repair operations exclude any constraints applied to or between tables. So, if any of the table has one or more constraints, you must run DBCC CHECKCONSTRAINTS following a repair operation.
How to Use DBCC CHECKDB Command?
Before using DBCC CHECKDB, let’s look at its syntax.
Syntax:
DBCC CHECKDB
[ ( db_name | db_id | 0
[ , NOINDEX
| , { REPAIR_ALLOW_DATA_LOSS | REPAIR_FAST | REPAIR_REBUILD } ]
) ]
[ WITH
{
[ ALL_ERRORMSGS ]
[ , EXTENDED_LOGICAL_CHECKS ]
[ , NO_INFOMSGS ]
[ , TABLOCK ]
[ , ESTIMATEONLY ]
[ , { PHYSICAL_ONLY | DATA_PURITY } ]
[ , MAXDOP = number_of_processors ]
}
]
]
There are a few options you can use to perform database consistency checks using DBCC CHECKDB. These options are as follows:
- database_name | database_id | 0: Specifies the name or ID of the database against which you need to run integrity checks. If the ‘database_name’ or ‘id’ is not specified and ‘0’ is specified, the current database will be used by default.
- NOINDEX: This argument performs only logical checks to reduce the total execution time. Also, it does not include non-clustered indexes in the checks.
- REPAIR_ALLOW_DATA_LOSS | REPAIR_FAST | REPAIR_REBUILD: To repair a database, you need to run the DBCC CHECKDB command with any of these repair options:
- REPAIR_ALLOW_DATA_LOSS: Use this repair option as a last resort to repair a SQL database, as it can lead to data loss.
- REPAIR_FAST: This repair option does not perform any repair actions. It helps maintain syntax for backward compatibility.
- REPAIR_REBUILD: The REPAIR_REBUILD option helps repair the database without any data loss. It can be used to repair missing rows in nonclustered indexes and for rebuilding an index.
- ALL_ERRORMSGS: This argument displays all the error messages for each object.
- EXTENDED_LOGICAL_CHECKS: Starting with SQL Server 2016, additional logical checks are not performed on filtered indexes and views. To perform the additional checks, you must use the EXTENDED_LOGICAL_CHECKS option.
- NO_INFOMSGS: DBCC output displays informational messages that are not related to the consistency errors. Running DBCC CHECKDB with NO_INFOMSGS can turn off the informational messages.
- TABLOCK: Uses locks rather than internal database snapshot to perform consistency checks on a database.
- ESTIMATEONLY: Specifies the estimated space required by the ‘tempdb’ database for executing the CHECKDB command.
- PHYSICAL_ONLY: It limits consistency checks on the physical structure of the database page, reducing run-time for DBCC CHECKDB on large databases.
- DATA_PURITY: It helps check a database for invalid or out-of-range column values.
Prerequisites to Run DBCC CHECKDB
You must ensure that your system meets the following prerequisites before you run DBCC CHECKDB to perform consistency checks on a database or repair it.
- SQL Server Management Studio (SSMS) must be installed on your machine.
- The user must have Administrator privileges.
Steps to Use DBCC CHECKDB for Repairing SQL Database
Open SSMS and follow these steps to repair SQL database by using DBCC CHECKDB:
Note: In below-mentioned steps, we will be using database_name as Dbtesting. Make sure to replace DBtesting with the name of your database.
Step 1: Set Database to Emergency Mode
Change the database status to EMERGENCY mode, which provides a read-only access to the administrator. To put the database in EMERGENCY mode, run the following query in SSMS:
ALTER DATABASE [Dbtesting] SET EMERGENCY

Step 2: Check for Corruption Errors
Once the administrator is able to access the database, execute the following DBCC CHECKDB command to analyze corruption errors in the database:
DBCC CHECKDB (Dbtesting)

If DBCC CHECKDB detects any errors in the database, it will recommend appropriate repair options to fix the issue.
Step 3: Set SQL Server Database to SINGLE_USER Mode
Before using the DBCC CHECKDB repair options, put the corrupt database in SINGLE_USER mode to prevent other users from modifying the data during the repair process. To set SQL database mode to SINGLE_USER, follow these methods:
Method 1: Using Graphical User Interface (GUI)
Open SSMS and perform these steps to set the database to SINGLE_USER mode:
- Right-click the database you want to repair, and then click Properties.

- In the Database Properties window, click Options.

- Click the Restrict Access dropdown box under the State tab, select SINGLE_USER option, and then click OK.

Method 2: Using Transact-SQL (T-SQL) Commands
You can also set the database to SINGLE_USER mode, by running the following T-SQL query in SSMS:
ALTER DATABASE Dbtesting SET SINGLE_USER

Step 4: Repair the Database
Once you have changed the database mode to SINGLE_USER, run DBCC CHECKDB with the REPAIR_ALLOW_DATA_LOSS repair option to repair SQL server database.
DBCC CHECKDB (N ’Dbtesting’, REPAIR_ALLOW_DATA_LOSS) WITH ALL_ERRORMSGS, NO_INFOMSGS;
GO

Note: While the REPAIR_ALLOW_DATA_LOSS repair option helps in repairing all reported errors in the SQL server database, it is not the best option for repairing database corruption. This repair option causes data loss. In fact, Microsoft recommends using the REPAIR_ALLOW_DATA_LOSS option as a last resort when you cannot restore a database from the backup. If you do not have a backup and cannot risk losing data, use a specialized MS SQL repair software to repair the database without any loss in database integrity.
Step 5: Set Database Back to MULTI_USER Mode
After successfully repairing the database, set the database to MULTI_USER mode by executing the following command:
ALTER DATABASE Dbtesting SET MULTI_USER

What To Do When DBCC CHECKDB Fails?
Running the DBCC CHECKDB REPAIR_ALLOW_DATA_LOSS command might require deleting some database pages, resulting in loss of data. Also, DBCC CHECKDB commands might fail and return an error when dealing with severely corrupt SQL database files.
In such a case, use a specialized MS SQL repair software, such as Stellar Repair for MS SQL. The software repairs severely corrupt MS SQL database and restores all its components, while maintaining database integrity. The SQL recovery software helps reinstate access to the database with minimal manual efforts and time.
Key Features:
- Repairs both MDF and NDF database files
- Recovers all database components, including tables, keys, indexes, stored procedures, etc.
- Allows recovery of deleted records
- Recovers SQL tables with PAGE and ROW compression
- Supports selective recovery of database objects
- Previews recoverable database objects
To know the complete working process of the software, watch the video
Conclusion
A corrupt database could lead to unnecessary downtime and data loss. To overcome database-related errors, restore the database from the most recent backup. If current database backup does not exist or if the backup itself is corrupt, you can use DBCC CHECKDB ‘REPAIR_ALLOW_DATA_LOSS’ repair option to fix the database. But, this repair option involves risk of data loss. Also, DBCC CHECKDB might fail to fix the issue.
Use Stellar Repair for SQL software to repair MS SQL database and recover all its components with precision, maintaining database structure and integrity of database objects.
About The Author
Priyanka Chauhan
Priyanka is a technology expert working for key technology domains that revolve around Data Recovery and related software’s. She got expertise on related subjects like SQL Database, Access Database, QuickBooks, and Microsoft Excel. Loves to write on different technology and data recovery subjects on regular basis. Technology freak who always found exploring neo-tech subjects, when not writing, research is something that keeps her going in life.
| title | description | author | ms.author | ms.date | ms.service | ms.subservice | ms.topic | f1_keywords | helpviewer_keywords | dev_langs | ||||||||||||||||||||
|---|---|---|---|---|---|---|---|---|---|---|---|---|---|---|---|---|---|---|---|---|---|---|---|---|---|---|---|---|---|---|
|
DBCC CHECKDB (Transact-SQL) |
DBCC CHECKDB checks the logical and physical integrity of all the objects in the specified database. |
rwestMSFT |
randolphwest |
12/05/2022 |
sql |
t-sql |
language-reference |
|
|
TSQL |
DBCC CHECKDB (Transact-SQL)
[!INCLUDE SQL Server SQL Database Azure SQL Managed Instance]
Checks the logical and physical integrity of all the objects in the specified database by performing the following operations:
- Runs DBCC CHECKALLOC on the database.
- Runs DBCC CHECKTABLE on every table and view in the database.
- Runs DBCC CHECKCATALOG on the database.
- Validates the contents of every indexed view in the database.
- Validates link-level consistency between table metadata and file system directories and files when storing varbinary(max) data in the file system using FILESTREAM.
- Validates the [!INCLUDEssSB] data in the database.
This means that the DBCC CHECKALLOC, DBCC CHECKTABLE, or DBCC CHECKCATALOG commands don’t have to be run separately from DBCC CHECKDB. For more detailed information about the checks that these commands perform, see the descriptions of these commands.
DBCC CHECKDB is supported on databases that contain memory-optimized tables but validation only occurs on disk-based tables. However, as part of database backup and recovery, a CHECKSUM validation is done for files in memory-optimized filegroups.
Since DBCC repair options aren’t available for memory-optimized tables, you must back up your databases regularly and test the backups. If data integrity issues occur in a memory-optimized table, you must restore from the last known good backup.
:::image type=»icon» source=»../../includes/media/topic-link-icon.svg» border=»false»::: Transact-SQL syntax conventions
Syntax
DBCC CHECKDB
    [ ( database_name | database_id | 0
        [ , NOINDEX
        | , { REPAIR_ALLOW_DATA_LOSS | REPAIR_FAST | REPAIR_REBUILD } ]
    ) ]
    [ WITH
        {
            [ ALL_ERRORMSGS ]
            [ , EXTENDED_LOGICAL_CHECKS ]
            [ , NO_INFOMSGS ]
            [ , TABLOCK ]
            [ , ESTIMATEONLY ]
            [ , { PHYSICAL_ONLY | DATA_PURITY } ]
            [ , MAXDOP = number_of_processors ]
        }
    ]
]
[!INCLUDEsql-server-tsql-previous-offline-documentation]
Arguments
database_name | database_id | 0
The name or ID of the database for which to run integrity checks. If not specified, or if 0 is specified, the current database is used. Database names must comply with the rules for identifiers.
NOINDEX
Specifies that intensive checks of nonclustered indexes for user tables won’t be performed. This choice decreases the overall execution time. NOINDEX doesn’t affect system tables because integrity checks are always performed on system table indexes.
REPAIR_ALLOW_DATA_LOSS | REPAIR_FAST | REPAIR_REBUILD
Specifies that DBCC CHECKDB repairs the errors found. Use the REPAIR options only as a last resort. The specified database must be in single-user mode to use one of the following repair options.
-
REPAIR_ALLOW_DATA_LOSS
Tries to repair all reported errors. These repairs can cause some data loss.
[!WARNING]
TheREPAIR_ALLOW_DATA_LOSSoption is a supported feature but it may not always be the best option for bringing a database to a physically consistent state. If successful, theREPAIR_ALLOW_DATA_LOSSoption may result in some data loss. In fact, it may result in more data lost than if a user were to restore the database from the last known good backup.[!INCLUDEmsCoName] always recommends a user restore from the last known good backup as the primary method to recover from errors reported by
DBCC CHECKDB. TheREPAIR_ALLOW_DATA_LOSSoption isn’t an alternative for restoring from a known good backup. It is an emergency last resort option recommended for use only if restoring from a backup isn’t possible.Certain errors, that can only be repaired using the
REPAIR_ALLOW_DATA_LOSSoption, may involve deallocating a row, page, or series of pages to clear the errors. Any deallocated data is no longer accessible or recoverable for the user, and the exact contents of the deallocated data cannot be determined. Therefore, referential integrity may not be accurate after any rows or pages are deallocated because foreign key constraints are not checked or maintained as part of this repair operation. The user must inspect the referential integrity of their database (usingDBCC CHECKCONSTRAINTS) after using theREPAIR_ALLOW_DATA_LOSSoption.Before performing the repair, you must create physical copies of the files that belong to this database. This includes the primary data file (
.mdf), any secondary data files (.ndf), all transaction log files (.ldf), and other containers that form the database including full text catalogs, file stream folders, memory optimized data, and so on.Before performing the repair, consider changing the state of the database to
EMERGENCYmode and trying to extract as much information possible from the critical tables and save that data. -
REPAIR_FAST
Maintains syntax for backward compatibility only. No repair actions are performed.
-
REPAIR_REBUILD
Performs repairs that have no possibility of data loss. This option may include quick repairs, such as repairing missing rows in nonclustered indexes, and more time-consuming repairs, such as rebuilding an index.
This argument doesn’t repair errors involving FILESTREAM data.
[!IMPORTANT]
SinceDBCC CHECKDBwith any of the REPAIR options are completely logged and recoverable, [!INCLUDEmsCoName] always recommends a user useDBCC CHECKDBwith any REPAIR options within a transaction (executeBEGIN TRANSACTIONbefore running the command) so that the user can confirm that they want to accept the results of the operation. Then the user can executeCOMMIT TRANSACTIONto commit all work done by the repair operation. If the user does not want to accept the results of the operation, they can execute aROLLBACK TRANSACTIONto undo the effects of the repair operations.To repair errors, we recommend restoring from a backup. Repair operations do not consider any of the constraints that may exist on or between tables. If the specified table is involved in one or more constraints, we recommend running
DBCC CHECKCONSTRAINTSafter a repair operation. If you must use REPAIR, runDBCC CHECKDBwithout a repair option to find the repair level to use. If you use theREPAIR_ALLOW_DATA_LOSSlevel, we recommend that you back up the database before you runDBCC CHECKDBwith this option.
ALL_ERRORMSGS
Displays all reported errors per object. All error messages are displayed by default. Specifying or omitting this option has no effect. Error messages are sorted by object ID, except for those messages generated from tempdb database.
EXTENDED_LOGICAL_CHECKS
If the compatibility level is 100, introduced in [!INCLUDEsql2008-md], this option performs logical consistency checks on an indexed view, XML indexes, and spatial indexes, where present.
For more information, see Perform logical consistency checks on indexes later in this article.
NO_INFOMSGS
Suppresses all informational messages.
TABLOCK
Causes DBCC CHECKDB to obtain locks instead of using an internal database snapshot. This includes a short-term exclusive (X) lock on the database. TABLOCK will cause DBCC CHECKDB to run faster on a database under heavy load, but will decrease the concurrency available on the database while DBCC CHECKDB is running.
[!IMPORTANT]
TABLOCKlimits the checks that are performed;DBCC CHECKCATALOGis not run on the database, and [!INCLUDEssSB] data is not validated.
ESTIMATEONLY
Displays the estimated amount of tempdb space that is required to run DBCC CHECKDB with all the other specified options. The actual database check isn’t performed.
PHYSICAL_ONLY
Limits the checking to the integrity of the physical structure of the page and record headers and the allocation consistency of the database. This check is designed to provide a small overhead check of the physical consistency of the database, but it can also detect torn pages, checksum failures, and common hardware failures that can compromise a user’s data.
A full run of DBCC CHECKDB may take considerably longer to complete than earlier versions. This behavior occurs because:
- The logical checks are more comprehensive.
- Some of the underlying structures to be checked are more complex.
- Many new checks have been introduced to include the new features.
Therefore, using the PHYSICAL_ONLY option may cause a much shorter run-time for DBCC CHECKDB on large databases and is recommended for frequent use on production systems. We still recommend that a full run of DBCC CHECKDB be performed periodically. The frequency of these runs depends on factors specific to individual businesses and production environments.
This argument always implies NO_INFOMSGS and isn’t allowed with any one of the repair options.
[!WARNING]
SpecifyingPHYSICAL_ONLYcausesDBCC CHECKDBto skip all checks of FILESTREAM data.
DATA_PURITY
Causes DBCC CHECKDB to check the database for column values that aren’t valid or out-of-range. For example, DBCC CHECKDB detects columns with date and time values that are larger than or less than the acceptable range for the datetime data type; or decimal or approximate-numeric data type columns with scale or precision values that aren’t valid.
Column-value integrity checks are enabled by default and don’t require the DATA_PURITY option. For databases upgraded from earlier versions of [!INCLUDEssNoVersion], column-value checks aren’t enabled by default until DBCC CHECKDB WITH DATA_PURITY has been run error free on the database. After this, DBCC CHECKDB checks column-value integrity by default. For more information about how CHECKDB might be affected by upgrading database from earlier versions of [!INCLUDEssNoVersion], see the Remarks section later in this article.
[!WARNING]
IfPHYSICAL_ONLYis specified, column-integrity checks are not performed.
Validation errors reported by this option can’t be fixed by using DBCC repair options. For information about manually correcting these errors, see Knowledge Base article 923247: Troubleshooting DBCC error 2570 in SQL Server 2005 and later versions.
MAXDOP
Applies to: [!INCLUDEssSQL14] Service Pack 2 and later versions
Overrides the max degree of parallelism configuration option of sp_configure for the statement. The MAXDOP can exceed the value configured with sp_configure. If MAXDOP exceeds the value configured with Resource Governor, the [!INCLUDEssDEnoversion] uses the Resource Governor MAXDOP value, described in ALTER WORKLOAD GROUP. All semantic rules used with the max degree of parallelism configuration option are applicable when you use the MAXDOP query hint. For more information, see Configure the max degree of parallelism Server Configuration Option.
[!WARNING]
IfMAXDOPis set to zero then [!INCLUDE ssnoversion-md] chooses the max degree of parallelism to use.
Remarks
DBCC CHECKDB doesn’t examine disabled indexes. For more information about disabled indexes, see Disable Indexes and Constraints.
If a user-defined type is marked as being byte ordered, there must only be one serialization of the user-defined type. Not having a consistent serialization of byte-ordered user-defined types causes error 2537 when DBCC CHECKDB is run. For more information, see User-Defined Type Requirements.
Because the Resource database is modifiable only in single-user mode, the DBCC CHECKDB command can’t be run on it directly. However, when DBCC CHECKDB is executed against the master database, a second CHECKDB is also run internally on the Resource database. This means that DBCC CHECKDB can return extra results. The command returns extra result sets when no options are set, or when either the PHYSICAL_ONLY or ESTIMATEONLY option is set.
Starting with [!INCLUDEssVersion2005] Service Pack 2, executing DBCC CHECKDB no longer clears the plan cache for the instance of [!INCLUDEssNoVersion]. Before [!INCLUDEssVersion2005] Service Pack 2, executing DBCC CHECKDB clears the plan cache. Clearing the plan cache causes recompilation of all later execution plans and may cause a sudden, temporary decrease in query performance.
Perform logical consistency checks on indexes
Logical consistency checking on indexes varies according to the compatibility level of the database, as follows:
- If the compatibility level is at least 100 (introduced in [!INCLUDEsql2008-md]):
- Unless
NOINDEXis specified,DBCC CHECKDBperforms both physical and logical consistency checks on a single table and on all its nonclustered indexes. However, on XML indexes, spatial indexes, and indexed views only physical consistency checks are performed by default. - If
WITH EXTENDED_LOGICAL_CHECKSis specified, logical checks are performed on an indexed view, XML indexes, and spatial indexes, where present. By default, physical consistency checks are performed before the logical consistency checks. IfNOINDEXis also specified, only the logical checks are performed.
These logical consistency checks cross check the internal index table of the index object with the user table that it is referencing. To find outlying rows, an internal query is constructed to perform a full intersection of the internal and user tables. Running this query can have a significant effect on performance, and its progress can’t be tracked. Therefore, we recommend that you specify WITH EXTENDED_LOGICAL_CHECKS only if you suspect index issues that are unrelated to physical corruption, or if page-level checksums have been turned off and you suspect column-level hardware corruption.
- If the index is a filtered index,
DBCC CHECKDBperforms consistency checks to verify that the index entries satisfy the filter predicate. - If the compatibility level is 90 or less, unless
NOINDEXis specified,DBCC CHECKDBperforms both physical and logical consistency checks on a single table or indexed view and on all its nonclustered and XML indexes. Spatial indexes aren’t supported. - Starting with [!INCLUDE sssql16-md], additional checks on persisted computed columns, UDT columns, and filtered indexes won’t run by default to avoid the expensive expression evaluations. This change greatly reduces the duration of
CHECKDBagainst databases containing these objects. However, the physical consistency check of these objects is always completed. Only whenEXTENDED_LOGICAL_CHECKSoption is specified, are the expression evaluations performed, in addition to the logical checks that are already present as part of theEXTENDED_LOGICAL_CHECKSoption (indexed view, XML indexes, and spatial indexes).
To learn the compatibility level of a database
- View or change the compatibility level of a database
Internal database snapshot
DBCC CHECKDB uses an internal database snapshot for the transactional consistency needed to perform these checks. This prevents blocking and concurrency problems when these commands are executed. For more information, see View the Size of the Sparse File of a Database Snapshot (Transact-SQL) and the DBCC Internal Database Snapshot Usage section in DBCC (Transact-SQL). If a snapshot can’t be created, or TABLOCK is specified, DBCC CHECKDB acquires locks to obtain the required consistency. In this case, an exclusive database lock is required to perform the allocation checks, and shared table locks are required to perform the table checks.
DBCC CHECKDB fails when run against the master database if an internal database snapshot can’t be created.
Running DBCC CHECKDB against tempdb doesn’t perform any allocation or catalog checks and must acquire shared table locks to perform table checks. This is because, for performance reasons, database snapshots aren’t available on tempdb. This means that the required transactional consistency can’t be obtained.
How DBCC CHECKDB creates an internal snapshot database beginning with SQL Server 2014
-
DBCC CHECKDBcreates an internal snapshot database. -
The internal snapshot database is created by using physical files. For example, for a database with
database_id = 10that has three filesE:Datamy_DB.mdf,E:Datamy_DB.ndf, andE:Datamy_DB.ldf, the internal snapshot database will be created usingE:Datamy_DB.mdf_MSSQL_DBCC11andE:Datamy_DB.ndf_MSSQL_DBCC11files. Thedatabase_idof the snapshot isdatabase_id + 1. Also note that the new files are created in the same folder using the naming convention<filename.extension>_MSSQL_DBCC<database_id_of_snapshot>. No sparse file is created for the transaction log. -
The new files are marked as sparse files at the file system level. The Size on Disk used by the new files will increase based on how much data is updated in the source database during the
DBCC CHECKDBcommand. The Size of the new files will be the same file as the.mdfor.ndffile. -
The new files are deleted at the end of
DBCC CHECKDBprocessing. These sparse files that are created byDBCC CHECKDBhave the «Delete on Close» attributes set.
[!WARNING]
If the operating system encounters an unexpected shutdown while theDBCC CHECKDBcommand is in progress, then these files will not be cleaned up. They will take up space, and can potentially cause failures on futureDBCC CHECKDBexecutions. In that case, you can delete these new files after you confirm that there is noDBCC CHECKDBcommand currently being executed.
The new files are visible by using ordinary file utilities such as Windows Explorer.
[!NOTE]
Prior to [!INCLUDE sssql14-md], named file streams were used instead to create the internal snapshot files. The named file streams used the format <filename.extension>:MSSQL_DBCC<database_id_of_snapshot>. Named file streams are not visible by using ordinary file utilities such as Windows Explorer. Therefore, in [!INCLUDE sssql11-md] and earlier versions, you may encounter error messages 7926 and 5030 when you run theDBCC CHECKDBcommand for database files located on an ReFS-formatted volume. This is because file streams cannot be created on Resilient File System (RefS).
Check and repair FILESTREAM data
When FILESTREAM is enabled for a database and table, you can optionally store varbinary(max) binary large objects (BLOBs) in the file system. When using DBCC CHECKDB on a database that stores BLOBs in the file system, DBCC checks link-level consistency between the file system and database.
For example, if a table contains a varbinary(max) column that uses the FILESTREAM attribute, DBCC CHECKDB will check that there is a one-to-one mapping between file system directories and files and table rows, columns, and column values. DBCC CHECKDB can repair corruption if you specify the REPAIR_ALLOW_DATA_LOSS option. To repair FILESTREAM corruption, DBCC will delete any table rows that are missing file system data.
Best practices
We recommend that you use the PHYSICAL_ONLY option for frequent use on production systems. Using PHYSICAL_ONLY can greatly shorten run-time for DBCC CHECKDB on large databases. We also recommend that you periodically run DBCC CHECKDB with no options. How frequently you should perform these runs depends on individual businesses and their production environments.
Check objects in parallel
By default, DBCC CHECKDB performs parallel checking of objects. The degree of parallelism is automatically determined by the query processor. The maximum degree of parallelism is configured just like parallel queries. To restrict the maximum number of processors available for DBCC checking, use sp_configure. For more information, see Configure the max degree of parallelism Server Configuration Option. Parallel checking can be disabled by using Trace Flag 2528. For more information, see Trace Flags (Transact-SQL).
[!NOTE]
This feature is not available in every edition of [!INCLUDEssNoVersion]. For more information, see parallel consistency check in the RDBMS manageability section of Editions and supported features of SQL Server 2022.
Understand DBCC error messages
After the DBCC CHECKDB command finishes, a message is written to the [!INCLUDEssNoVersion] error log. If the DBCC command successfully executes, the message indicates success and the amount of time that the command ran. If the DBCC command stops before completing the check because of an error, the message indicates that the command was terminated, a state value, and the amount of time the command ran. The following table lists and describes the state values that can be included in the message.
| State | Description |
|---|---|
| 0 | Error number 8930 was raised. This indicates a corruption in metadata that terminated the DBCC command. |
| 1 | Error number 8967 was raised. There was an internal DBCC error. |
| 2 | A failure occurred during emergency mode database repair. |
| 3 | This indicates a corruption in metadata that terminated the DBCC command. |
| 4 | An assert or access violation was detected. |
| 5 | An unknown error occurred that terminated the DBCC command. |
[!NOTE]
[!INCLUDEssNoVersion] records the date and time when a consistency check was run for a database with no errors (or «clean» consistency check). This is known as thelast known clean check. When a database is first started, this date is written to the EventLog (EventID-17573) and error log in the following format:
CHECKDB for database '<database>' finished without errors on 2022-05-05 18:08:22.803 (local time). This is an informational message only; no user action is required.
Error reporting
A dump file (SQLDUMP<nnnn>.txt) is created in the [!INCLUDEssNoVersion] LOG directory whenever DBCC CHECKDB detects a corruption error. When the Feature Usage data collection and Error Reporting features are enabled for the instance of [!INCLUDEssNoVersion], the file is automatically forwarded to [!INCLUDEmsCoName]. The collected data is used to improve [!INCLUDEssNoVersion] functionality.
The dump file contains the results of the DBCC CHECKDB command and additional diagnostic output. Access is limited to the [!INCLUDEssNoVersion] service account and members of the sysadmin role. By default, the sysadmin role contains all members of the Windows BUILTINAdministrators group and the local administrator’s group. The DBCC command doesn’t fail if the data collection process fails.
Resolve errors
If any errors are reported by DBCC CHECKDB, we recommend restoring the database from the database backup instead of running REPAIR with one of the REPAIR options. If no backup exists, running repair corrects the errors reported. The repair option to use is specified at the end of the list of reported errors. However, correcting the errors by using the REPAIR_ALLOW_DATA_LOSS option might require deleting some pages, and therefore some data.
Under some circumstances, values might be entered into the database that aren’t valid or out-of-range based on the data type of the column. DBCC CHECKDB can detect column values that aren’t valid for all column data types. Therefore, running DBCC CHECKDB with the DATA_PURITY option on databases that have been upgraded from earlier versions of [!INCLUDEssNoVersion] might reveal preexisting column-value errors. Because [!INCLUDEssNoVersion] can’t automatically repair these errors, the column value must be manually updated. If CHECKDB detects such an error, CHECKDB returns a warning, the error number 2570, and information to identify the affected row and manually correct the error.
The repair can be performed under a user transaction to let the user roll back the changes that were made. If repairs are rolled back, the database will still contain errors and must be restored from a backup. After repairs are completed, back up the database.
Resolve errors in database emergency mode
When a database has been set to emergency mode by using the ALTER DATABASE statement, DBCC CHECKDB can perform some special repairs on the database if the REPAIR_ALLOW_DATA_LOSS option is specified. These repairs may allow for ordinarily unrecoverable databases to be brought back online in a physically consistent state. These repairs should be used as a last resort and only when you can’t restore the database from a backup. When the database is set to emergency mode, the database is marked READ_ONLY, logging is disabled, and access is limited to members of the sysadmin fixed server role.
[!NOTE]
You cannot run theDBCC CHECKDBcommand in emergency mode inside a user transaction and roll back the transaction after execution.
When the database is in emergency mode and DBCC CHECKDB with the REPAIR_ALLOW_DATA_LOSS clause is run, the following actions are taken:
DBCC CHECKDBuses pages that have been marked inaccessible because of I/O or checksum errors, as if the errors haven’t occurred. Doing this increases the chances for data recovery from the database.DBCC CHECKDBattempts to recover the database using regular log-based recovery techniques.- If database recovery is unsuccessful because of transaction log corruption, the transaction log is rebuilt. Rebuilding the transaction log may result in the loss of transactional consistency.
[!WARNING]
TheREPAIR_ALLOW_DATA_LOSSoption is a supported feature of [!INCLUDEssNoVersion]. However, it may not always be the best option for bringing a database to a physically consistent state. If successful, theREPAIR_ALLOW_DATA_LOSSoption may result in some data loss.
In fact, it may result in more data lost than if a user were to restore the database from the last known good backup. [!INCLUDEmsCoName] always recommends a user restore from the last known good backup as the primary method to recover from errors reported byDBCC CHECKDB.
TheREPAIR_ALLOW_DATA_LOSSoption is not an alternative for restoring from a known good backup. It is an emergency last resort option recommended for use only if restoring from a backup is not possible.After rebuilding the log, there is no full ACID guarantee.
After rebuilding the log,
DBCC CHECKDBwill be automatically performed and will both report and correct physical consistency issues.Logical data consistency and business logic enforced constraints must be validated manually.
The transaction log size will be left to its default size and must be manually adjusted back to its recent size.
If the DBCC CHECKDB command succeeds, the database is in a physically consistent state, and the database status is set to ONLINE. However, the database may contain one or more transactional inconsistencies. We recommend that you run DBCC CHECKCONSTRAINTS to identify any business logic flaws and immediately back up the database.
If the DBCC CHECKDB command fails, the database can’t be repaired.
Run DBCC CHECKDB with REPAIR_ALLOW_DATA_LOSS in replicated databases
Running the DBCC CHECKDB command with the REPAIR_ALLOW_DATA_LOSS option can affect user databases (publication and subscription databases) and the distribution database used by replication. Publication and subscription databases include published tables and replication metadata tables. Be aware of the following potential issues in these databases:
- Published tables. Actions performed by the
CHECKDBprocess to repair corrupt user data might not be replicated: - Merge replication uses triggers to track changes to published tables. If rows are inserted, updated, or deleted by the
CHECKDBprocess, triggers don’t fire; therefore, the change isn’t replicated. - Transactional replication uses the transaction log to track changes to published tables. The Log Reader Agent then moves these changes to the distribution database. Some DBCC repairs, although logged, can’t be replicated by the Log Reader Agent. For example, if a data page is deallocated by the
CHECKDBprocess, the Log Reader Agent doesn’t translate this deallocation to a DELETE statement; therefore, the change isn’t replicated. - Replication metadata tables. Actions performed by the
CHECKDBprocess to repair corrupt replication metadata tables require removing and reconfiguring replication.
If you have to run the DBCC CHECKDB command with the REPAIR_ALLOW_DATA_LOSS option on a user database or distribution database:
- Quiesce the system: Stop activity on the database and at all other databases in the replication topology, and then try to synchronize all nodes. For more information, see Quiesce a Replication Topology (Replication Transact-SQL Programming).
- Execute
DBCC CHECKDB. - If the
DBCC CHECKDBreport includes repairs for any tables in the distribution database or any replication metadata tables in a user database, remove and reconfigure replication. For more information, see Disable Publishing and Distribution. - If the
DBCC CHECKDBreport includes repairs for any replicated tables, perform data validation to determine whether there are differences between the data in the publication and subscription databases.
Result sets
DBCC CHECKDB returns the following result set. The values might vary except when the ESTIMATEONLY, PHYSICAL_ONLY, or NO_INFOMSGS options are specified:
 DBCC results for 'model'.

 Service Broker Msg 9675, Level 10, State 1: Message Types analyzed: 13.

 Service Broker Msg 9676, Level 10, State 1: Service Contracts analyzed: 5.

 Service Broker Msg 9667, Level 10, State 1: Services analyzed: 3.

 Service Broker Msg 9668, Level 10, State 1: Service Queues analyzed: 3.

 Service Broker Msg 9669, Level 10, State 1: Conversation Endpoints analyzed: 0.

 Service Broker Msg 9674, Level 10, State 1: Conversation Groups analyzed: 0.

 Service Broker Msg 9670, Level 10, State 1: Remote Service Bindings analyzed: 0.

 DBCC results for 'sys.sysrowsetcolumns'.

 There are 630 rows in 7 pages for object 'sys.sysrowsetcolumns'.

 DBCC results for 'sys.sysrowsets'.

 There are 97 rows in 1 pages for object 'sys.sysrowsets'.

 DBCC results for 'sysallocunits'.

 There are 195 rows in 3 pages for object 'sysallocunits'.

 There are 0 rows in 0 pages for object "sys.sysasymkeys".

 DBCC results for 'sys.syssqlguides'.

 There are 0 rows in 0 pages for object "sys.syssqlguides".

 DBCC results for 'sys.queue_messages_1977058079'.

 There are 0 rows in 0 pages for object "sys.queue_messages_1977058079".

 DBCC results for 'sys.queue_messages_2009058193'.

 There are 0 rows in 0 pages for object "sys.queue_messages_2009058193".

 DBCC results for 'sys.queue_messages_2041058307'.

 There are 0 rows in 0 pages for object "sys.queue_messages_2041058307".

 CHECKDB found 0 allocation errors and 0 consistency errors in database 'model'.

 DBCC execution completed. If DBCC printed error messages, contact your system administrator.
DBCC CHECKDB returns the following result set (message) when NO_INFOMSGS is specified:
The command(s) completed successfully.
DBCC CHECKDB returns the following result set when PHYSICAL_ONLY is specified:
 DBCC results for 'model'.

 CHECKDB found 0 allocation errors and 0 consistency errors in database 'master'.

 DBCC execution completed. If DBCC printed error messages, contact your system administrator.
DBCC CHECKDB returns the following result set when ESTIMATEONLY is specified.
 Estimated TEMPDB space needed for CHECKALLOC (KB)

 -------------------------------------------------

 13

 (1 row(s) affected)

 Estimated TEMPDB space needed for CHECKTABLES (KB)

 --------------------------------------------------

 57

 (1 row(s) affected)

 DBCC execution completed. If DBCC printed error messages, contact your system administrator.
Permissions
Requires membership in the sysadmin fixed server role or the db_owner fixed database role.
Examples
A. Check both the current and another database
The following example executes DBCC CHECKDB for the current database and for the [!INCLUDEssSampleDBobject] database.
-- Check the current database.
DBCC CHECKDB;
GO
-- Check the AdventureWorks2019 database without nonclustered indexes.
DBCC CHECKDB (AdventureWorks2019, NOINDEX);
GO
B. Check the current database, suppressing informational messages
The following example checks the current database and suppresses all informational messages.
DBCC CHECKDB WITH NO_INFOMSGS;
GO
See also
- DBCC (Transact-SQL)
- View the Size of the Sparse File of a Database Snapshot (Transact-SQL)
- sp_helpdb (Transact-SQL)
- System Tables (Transact-SQL)
What Does DBCC CHECKDB Do
DBCC CHECKDB, also known as Database Console Command CHECKDB, is used to check both physical and logical integrity of objects (like tables, views, clusters, sequences, indexes, and synonyms) in a SQL Server database or Azure SQL Database. It is generally used to repair database corruption. When you run DBCC CHECKDB, you are actually executing the repair options below:
- Run DBCC CHECKALLOC: Check the consistency of disk space allocation structures on the selected database.
- Run DBCC CHECKTABLE: Check the integrity of all the table and view.
- Run DBCC CHECKCATALOG: Checks for catalog consistency within the selected database. The precondition for running this command is that the database must be online.
- Verify the contents of every indexed view in the specified database.
- Verify link-level consistency between table metadata, file system directories, and files when saving varbinary(max) data in the file system using FILESTREAM.
- Verify the Service Broker data in the database.
Thus, it is unnecessary to run DBCC CHECKALLOC, DBCC CHECKTABLE, or DBCC CHECKCATALOG separately from DBCC CHECKDB.
How to Use DBCC CHECKDB to Repair Database in SQL Server
When you want to fix a corruption issue in a SQL database, run the syntax below:
[ ( database_name | database_id | 0
[ , NOINDEX
| , { REPAIR_ALLOW_DATA_LOSS | REPAIR_FAST | REPAIR_REBUILD } ]
) ]
[ WITH
{
[ ALL_ERRORMSGS ]
[ , EXTENDED_LOGICAL_CHECKS ]
[ , NO_INFOMSGS ]
[ , TABLOCK ]
[ , ESTIMATEONLY ]
[ , { PHYSICAL_ONLY | DATA_PURITY } ]
[ , MAXDOP = number_of_processors ]
}
]
]
You may want to know:
database_name | database_id | 0
Is the name or ID of the database for which to run DBCC CHECKDB repair. If not specified, or if 0 is specified, the command will be applied to the current database by default.
NOINDEX
Means that intensive checks of nonclustered indexes for user tables should not be executed. This reduces the total execution time. NOINDEX won’t affect system tables because integrity checks are always performed on system table indexes.
REPAIR_ALLOW_DATA_LOSS | REPAIR_FAST | REPAIR_REBUILD
When you use one of the repair options above, you allow DBCC CHECKDB to repair the found errors. To understand the difference between these repair options:
- REPAIR_ALLOW_DATA_LOSS: If you use this repair option, DBCC CHECKDB will attempt to repair the errors found. It may CAUSE DATA LOSS if performed successfully.
- REPAIR_FAST: This repair will not perform any repair action. Instead, it only maintains syntax for backward compatibility only.
- REPAIR_BUILD: If you choose this repair option. Repair actions are performed but no data loss will occur. REPAIR_BUILD includes two kinds of repairs: quick repair and deep repair.
- Notice:
- For more information about other items in the syntax, you can refer to the related documents in Microsoft.com.
However, as Microsoft suggests, use the REPAIR options only as a last resort. Why? When there are errors reported by DBCC CHECKDB, the optimal option recommended is to restore the database from the last known good backup. As REPAIR_ALLOW_DATA_LOSS is not an alternative for restoring from a backup, it is only recommended when there is no backup available.
How to Repair Database Without CHECKDB REPAIR Option
Is REPAIR_ALLOW_DATA_LOSS the only choice when you cannot repair your database from a backup? Actually, it’s not. If DBCC CHECKDB reports errors on the selected database, you can repair your corrupted database using the SQL database recovery software — EaseUS MS SQL Recovery. You can apply this software to:
Repair SQL Server database: both primary (.mdf) and secondary (.ndf)
Repair database log files that may result in database errors
Repairs corrupted SQL server database objects — tables, triggers, indexes, keys, rules & stored procedures
Recover deleted/dropped SQL database records
To repair a database:
Step 1: Select the corrupted database for recovery
- Launch EaseUS MS SQL Recovery.
- Select the corrupted database file by clicking «Browse» (the two dots) or «Search».
- After selecting the file, click the «Repair» button to start the Analyzing process.
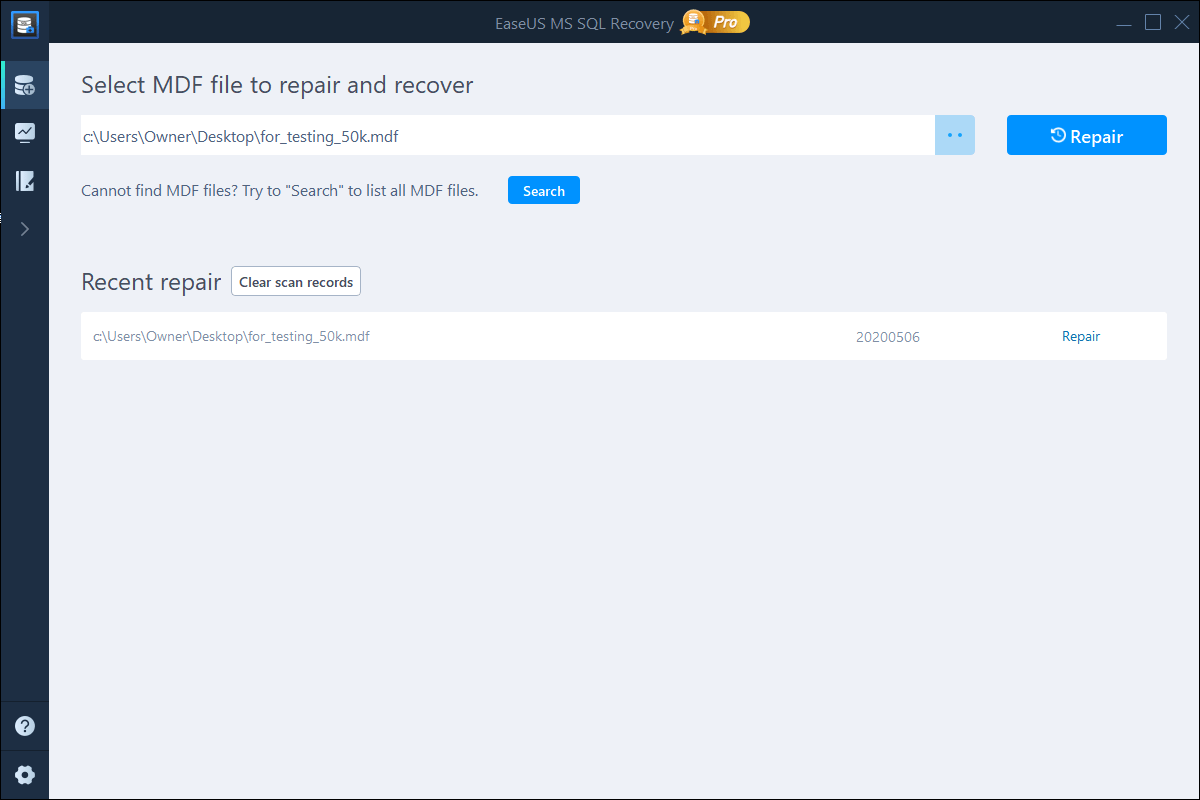
Note: To use this software, you need to stop the SQL Server service.
Step 2: Repair the corrupted database
- The software displays all the recoverable items in a tree-like structure. The items are shown in a left pane.
- Select the desired component to be recovered. From the window, click the «Export» button.
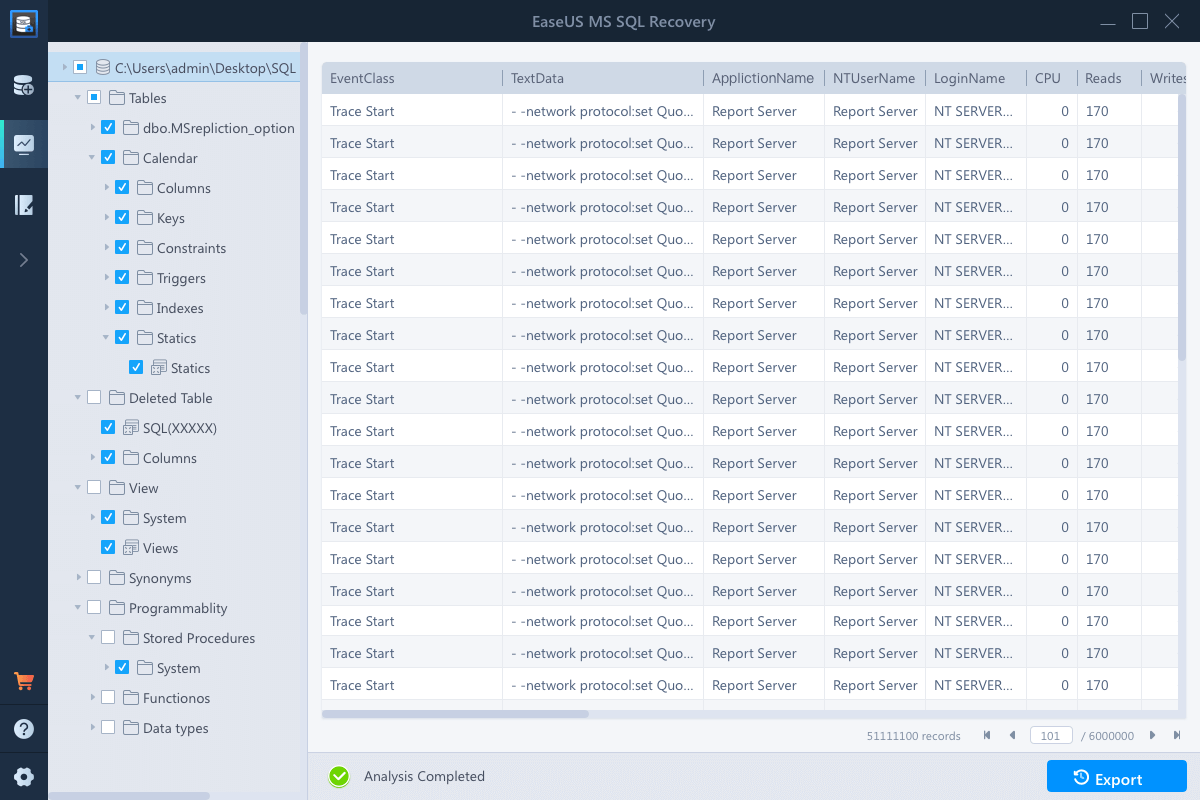
Step 3: Export to the database or as scripts
- Choose to export the database objects to database or export the items as scripts
- If you choose «Export to database», enter the information required and choose the target database.
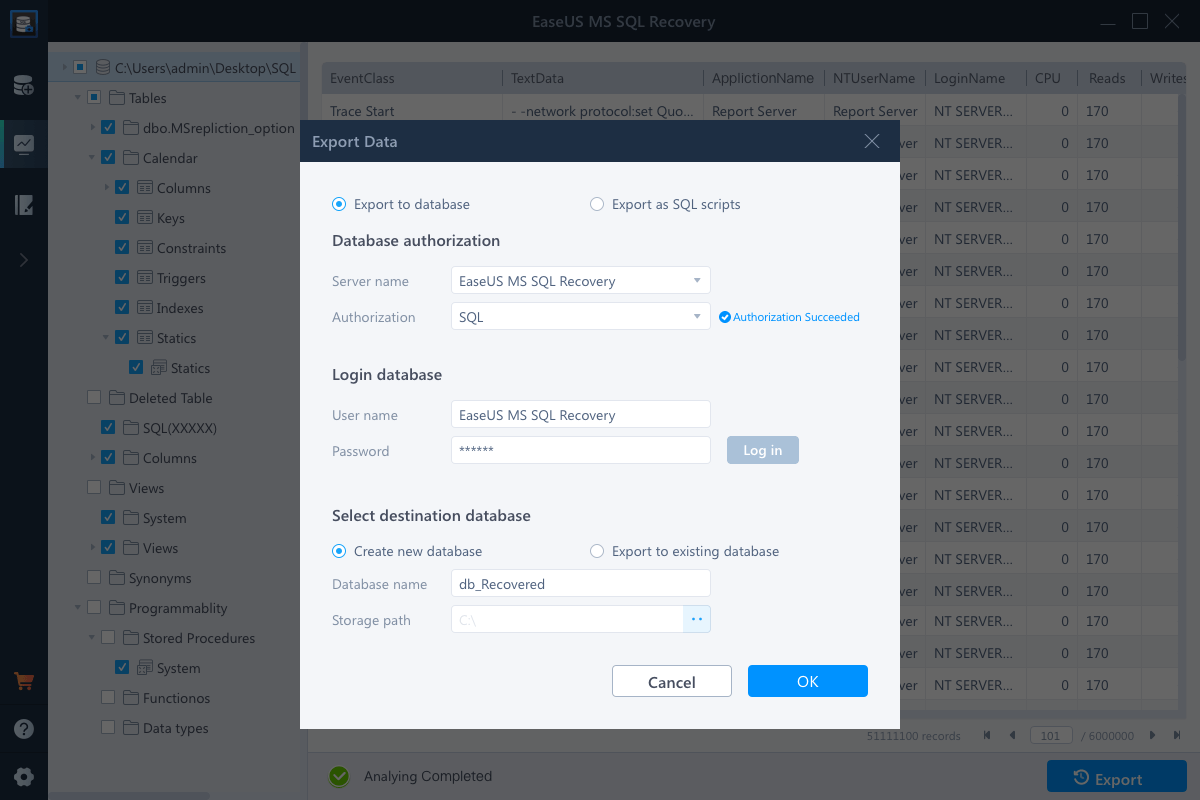
- A window appears up asking you to provide credentials to connect to the server and the destination to save the recovered items. In order to begin the repairing process, click «OK».
Note: Before clicking «OK», you need to restart the SQL Server service.
The Bottom Line
DBCC CHECKDB is the common choice for users to repair their database in SQL Server. However, it is not the only choice. If DBCC CHECKDB fails to work or you don’t want to use the repair option — REPAIR_ALLOW_DATA_LOSS, you can use EaseUS MS SQL Recovery to repair your database as alternative choice.
The T-SQL DBCC, acronym for “Database Console Command”, is a command that performs several types of tasks. These tasks are mainly of the validation and maintenance type.
Some of the DBCC commands, like the ones below, work on an internal read-only database snapshot. This means that the database engine creates a database snapshot and brings it to transactionally consistent state. The DBCC command then performs the checks against this snapshot. When the execution is completed, the snapshot is dropped.
- DBCC CHECKALLOC
- DBCC CHECKCATALOG
- DBCC CHECKDB
- DBCC CHECKFILEGROUP
- DBCC CHECKTABLE
The DBCC CHECKALLOC command checks the consistency of disk space allocation structures for a specified database.
The DBCC CHECKCATALOG checks the catalog consistency within the specified database.
The DBCC CHECKFILEGROUP checks the allocation and structural integrity of all tables and indexed views in the specified file group of the current database.
The DBCC CHECKTABLE command checks the integrity of all the pages and structures that make up the table or indexed view.
We have described the function of four commands and no, we have not missed the DBCC CHECKDB command. We will be discussing the DBCC CHECKDB below as this command is the «sum» of these four commands.
DBCC CHECKDB: What does this command do?
DBCC CHECKDB is an important command because it checks both the logical and physical integrity of all the objects in the specified database. This command performs the following:
· Executes DBCC CHECKALLOC on the database.
· Executes DBCC CHECKTABLE on each table and view.
· Executes DBCC CHECKCATALOG on the database.
· Validates the contents of every indexed view in the database.
· Validates link-level consistency between table metadata and file system directories and files when storing varbinary (max) data in the file system using FILESTREAM.
· Validates the Service Broker data in the database.
Usage of this command is simple. Just indicate the database name.

When the checks proceed, a log will be produced.
Let us now examine the log report. It shows the name of the database.
The first highlighted part of the log actually refers to the last checks carried out by the CHECKDB command and is used for the «validation of the Service Broker data in the database».
Service Broker is an asynchronous messaging framework with which you can implement scalable, distributed, highly available, reliable, and secure database applications based on SQL Server.

Then logical checks start by doing a primitive check on the data pages of critical system tables.

If any errors are found at this point, they cannot be fixed and CHECKDB terminates immediately.
This error message appears: System table pre-checks: Object ID O_ID. Loop in data chain detected at P_ID. Check statement terminated because of an irreparable error.
Then, logical checks will be performed on all the other tables, systems, and users.

Without entering too many details, logical checks that are performed include:
- Validate each table’s storage engine metadata
- Read and check all the data, indexes, and text pages, depending on the page type
- Check all inter-page relationships
- Check the page header counts in each page
- Perform any necessary repairs (if a repair level was specified)
If the command is executed to check if the database has problems, look at the end of the log. If it is all good, then we will see 0 allocation errors and 0 consistency errors. Otherwise, there is a problem.

We can check the log to find out on which object the corruption occurred. We can find tables and indexes, highlighted in red.

This command has options to repair the database, in case of errors.

By specifying one of the options in the DBCC command, we can try to fix the errors.
I suggest using the options REPAIR_FAST, REPAIR_REBUILD, and REPAIR_ALLOW_DATA_LOSS only as the last resort. It is to be noted that the REPAIR_ALLOW_DATA_LOSS can cause data loss.
Let us see how this option works.
DBCC CHECKDB with REPAIR_ALLOW_DATA_LOSS
The DBCC command checks both physical and logical integrity of the database. If there are any errors, we can try to fix them.
In particular, the «most aggressive» option is REPAIR_ALLOW_DATA_LOSS which attempts to repair data even at the cost of losing it.
Let us see how this command works when this option is specified.
I have a database “Recovered_corrupted_db_data” with a table “corrupted_usertable”

Often, we notice errors while making a SELECT on a table.
When we execute this query:

We get this error:

In this case, SQL Server is trying to read the table.
The data within this table is spread over multiple pages. When it reads the page 260, SQL Server encounters a logical consistency error.
SQL Server computes a checksum for each page when writes the data and verifies the correctness of this calculate value when it reads the data.
Note: We have a checksum value for each page and not for each row of data.
Since the database returned an error, we can execute the DBCC CHECKDB command.

The CHECKDB command has also detected that there is a problem on the page 260.

So, it is confirmed that we have a problem.
As said previously, use the REPAIR_ALLOW_DATA_LOSS command as the last option.
Note: If you have a backup, use it. You can also use a specialized software that can recover data from a corrupted .mdf file. For example, I use the easy-to-use Stellar Repair for MS SQL software.
If, however, we have no alternatives and the other options, like REPAIR_FAST and REPAIR_REBUILD, do not work, we can try this option.
Remember that we must switch to the single user mode before executing this command.

After executing the command, the log shows that all the errors have been repaired.

Now, if we run the CHECKDB command again, we can see that there are no errors.

Great! But what happened?
The table initially contained 100 rows with IDs starting from 1 to 100.
Now, we can see (in the image below) that rows with ID from 49 to 81 have been lost.

But this is not the only problem.
We also have a row with a completely wrong value for the column ID.

This means that the data is no longer reliable.
It is easy to understand that the DBCC CHECKDB with the option REPAIR_ALLOW_DATA_LOSS has omitted entirely the corrupt page (as we said before there is no table row level checksum).
Physically, the data is copied into new data pages, reconstructing a new link between the pages of the table.

To Conclude
In this article, we discussed the DBCC CHECKDB command that is able to check the database. It checks both logical and physical integrity of the database. This command is also able to repair the database. We have also discussed how the DBCC CHECKDB command with the REPAIR_ALLOW _DATA_LOSS option works.