
*In this article I will show you how you can fix “Gimbal IMU Data Error” however be a little complicated if you are not a techie person, but it can save you a lot of money and it is the only thing that will help you with this unless you send it to DJI, so stick on*
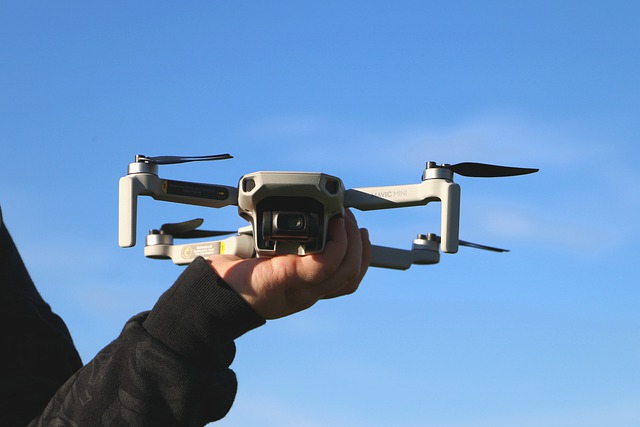
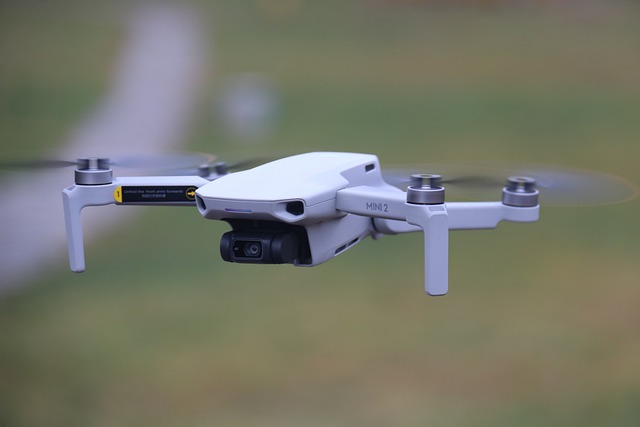
So, I crashed my Mavic mini a few weeks ago and the gimbal got damaged, then I bought a genuine replacement from Alibaba and replaced it.
Then when I was about to fly it I get this error “Gimbal IMU data error”.
After contacting DJI support, hours of frustration, and trying different things I finally fixed it and saved myself hundreds of bucks and so I thought I could do the same for others
First, if you don’t know what IMU is, it is a device that measures and reports the specific gravity and angular rate of an object to which it is attached.
Apparently, every gimbal has its own ID
And the id should match the rest of the drone’s components
So if the gimbal gets damaged you can’t change it without causing an issue.
The same happens if you replace the motherboard without the gimbal.
In other words, the IMU module data will have a hard time re-pairing with the new gimbal/camera you changed. That’s because DJI locks down their gimbals (and other components). so you can physically replace the gimbal, but it requires “activation” from the factory.
Apparently, DJI has special software called Repairtool that is used to pair the Camera ID with IMU, but it is not available to the public.
It took me ages to understand this, and when contacted DJI support team they said “contact our DJI Support Team to start up a ticket for us to diagnose the cause of the issue and a proper resolution will be provided“
And then they are going to charge me hundreds of dollars for a software problem, and so I said “no sir”
NOTE: in some cases, this error can be caused by an abstraction of the gimbal, in that case you need a professional.
First method
What I am about to show you is how you can calibrate your gimbal so you can get rid of the error and fly without any problem, however, it is impossible to pair the gimbal with the drone unless you send it to DJI.
- Download dji Assistant 2, python for windows, python pyserial and pyserial-3.5.tar
- Extract pyserial and DJI tools to a folder C:/DJI/
- Open “command prompt” as administrator then leave it open
- Connect your drone to your computer with the provided cable
- The SERIAL PORT COM will come for 15 seconds and will disappear from Device Manager
- So, as soon as it appears in Device Manager, Launch Assistant 2
- The Mavic mini will appear in Assistant 2
- It will automatically use the number of SERIAL PORT COM
- (you can change the firmware if you want)
- Close Assistant 2
- finnaly type your command
Commands are (you can copy in order not to mistake, just place your serial port number)
python comm_og_service_tool.py com(your number, for example com3) SPARK GimbalCalib JointCoarse.
Second method- roll back to previous firmware
Firmware rollback or downgrade refers to the process of uploading older versions of the software that operates your drone.
Now what I am basically about to show is how to roll back the firmware and reset the gimbal. it can seem a bit complicated but it is easier than the previous method” if you can watch the video below where I will show you how I did it step by step.
If this method is too complicated, you can also downgrade the firmware in the DJI assistant 2 or go 4 app and try to calibrate the gimbal, the success rate is low because DJI updates the older versions too.
1- Go to drone-hacks.com
Go to your browser and type drone hacks and go to the first website, this website is handy to manipulate drone’s software, it is commonly used to Remove No-Fly-Zones, Altitude limits, and such kinds of things but it can also help to fix software problems like this
2- Download the software
There are three options to choose from: for mac, windows, and Linux. choose the one that is compatible with your computer and download it
There is no installation and no sign-up required.
3- Connect your drone to your pc
Just connect your drone to your pc with the provided cable.
The software will be able to recognize the drone. If not restart the drone and connect it again.
4- Click hacks/flash firmware tab
click hack/flash firmware under that tab you will find “download firmware” click it and it will automatically lead you to the download page.
- Download firmware
The software will automatically choose the latest firmware for you, however, we don’t want that so change it to V01.00.0302 that is the version that we are going to use to fix “Error Code 40011” after choosing that version go ahead and download it.
6- Install the firmware to the drone
Go to the folder where you downloaded the firmware and choose it and wait for 5-10 minutes then you are done! you can now close the software.
7- open dji go 4 app
The error will still be there, don’t worry yet!
Go to settings, under control, click center gimbal and your drone will calibrate it will take a minute or two, and hopefully the problem will be fixed.
Note: make sure your drone has a full battery before this process
*Note: before firmware update make sure all your drone, controller, and phones battery are fully charged because it can take up to 30 minutes*
Final choice
If none of this seems to work contact DJI support.
they have special software they will run on the drone that will automatically connect the gimbal with the motherboard which will fix the problem
if the drone is within a year period from activation or if you have DJI care you can get it fixed without any cost. If not you might have to pay from $99 up to $350.
After you hand it to DJI it can take up to 15 days till they fix it and send it back to you, and it can take longer if you don’t live in the united states
If you are located in Armenia, you may contact the local dealer or DJI’s support via email to start a case and send the unit back.

If your DJI drone got a gimbal IMU data error (code 40021), you will not be able to fly it. In this guide, we will be discussing what this error code is and provide some methods that may help you out.
The Gimbal IMU Data Error (code 40021) is an error that appears after a crash, a gimbal camera replacement, or a mainboard change, or when nothing is wrong, it just comes out.
When you connect your drone to your remote controller, you will be asked to contact DJI Support, and your camera view may probably go black, some pilots also have internal memory and SD card issues like SD card N/A, unable to format. There are also problems like downward vision sensor errors coming together.

Because the IMU (Inertial Measurement Unit) is essential for keeping your drone stable and level in the air, when this error occurs, you can’t fly your drone until it’s fixed.
So how can we fix this Gimbal IMU error? Below are some methods you can try before you send your drone back for further diagnosis.
Troubleshooting DJI Gimbal IMU Data Error: Code 40021?
After doing a lot of research on forums and social media, it’s believed that this problem is most likely because you replaced one or more drone parts like the gimbal or camera, and the new parts may not pair with the main board.
That is to say, it’s not an issue that can be easily addressed by yourself, but we’ve still figured out a few methods you can try.
1. Calibrate the Drone IMU.
The first and easiest thing you can try is to calibrate your drone’s IMU. As mentioned above, drone IMU is very important for keeping the drone steady in the sky, and you need to make sure you do it correctly. It might be simply because of an IMU calibration problem. If you don’t know how to do it, just check this guide.
2. Contact a local DJI Authorized Dealer.
According to some pilots’ feedback, local DJI-authorised dealers have a way to fix the problem and erase error 40021, it seems DJI has a tool for the after-sales service team to repair this kind of issue, and it’s paid service, the fee varies from country to country. If the cost is not too high and you don’t want to spend too much time dealing with DJI, then it’s recommended.
3. Contact DJI Support.
If your drone is still under warranty and there is no local dealer who can work on this, you should just get in touch with DJI Support for a solution. Normally, you will need to send your aircraft back to DJI and wait for them to fix the drone and send it back to you. It may take a longer time depending on where you are.
4. Fix the error by yourself
If you are a tech guy, and your drone happened to be out of warranty, you can try to mend it by yourself, here is a video tutorial you can follow. It’s a long process and requires you to be knowledgeable of electronics.
Conclusion
After going through the guide, I guess you’ve known what to do next, just choose one or some of the methods according to your specific situation. Good luck and Fly Safe!
Поскольку красный цвет обычно ассоциируется с опасностью, см. DJI mini 2 мигает красным обязательно должен вас насторожить. Хотя к этому предупреждению следует относиться серьезно, проблема часто может быть быстро решена при правильной диагностике. Откройте для себя различные причины, которые могут оправдать это предупреждение, и решения, чтобы остановить мигание вашего дрона.
Первое, на что следует обратить внимание перед DJI mini 2 мигает красным является причиной сигнала. Мигание — это сообщение, которое вам нужно будет расшифровать с помощью цветовой код Светодиодные сигналы, установленные китайским производителем. Это избавит вас от необходимости столкнуться с объявленной опасностью. Для этого вам нужно будет следить за частотой мигания и другими цветами, которые могут чередоваться с красным.
Если у вас есть другие опасения по поводу вашего дрона и вам интересно как увеличить джи мини 2, не стесняйтесь обращаться к нашему руководству по этой теме.
Ваш DJI mini 2 медленно мигает красным
Медленно мигающий красный DJI mini 2 указывает на низкий уровень заряда батареи. На самом деле устройство оснащено интеллектуальная полетная батарея который обеспечивает энергию, необходимую для его работы в полете. Его мощность 2 250 мАч. Таким образом, он может позволить вам летать в течение периода до 31.
Ваш DJI mini 2 начинает быстро мигать красным
Когда уровень заряда батареи Intelligent Flight Battery DJi mini 2 очень низкий, индикатор состояния начнет быстро мигать. Это сигнал, которым нельзя пренебрегать. Вам нужно будет взглянуть на индикаторы уровня заряда батареи и подключить зарядное устройство до того, как оно полностью разрядится.
Ваш DJI mini 2 мигает красным
Мигает красным, ваше устройство указывает ошибка ИМУ. Эта аббревиатура на английском языке означает Инерциальный измерительный блок что значит » инерциальная единица измерения » На французском. Это измерительное устройство, которое использует данные, собранные гироскоп, un
акселерометр, un
барометр и термометр чтобы предоставить устройству полезную информацию, такую как угловая скорость, удельные силы и высота, чтобы помочь ему стабилизироваться. Для хорошего измерения прибор должен быть откалиброван. Эта ошибка обычно возникает при смене окружающей среды (значительные перепады температуры, длительные поездка более 50 км и другие) или после обновления.
Читайте также: Мой дрон не взлетает, что делать?
Ваш DJI mini попеременно мигает красным и желтым
Этот сигнал от дрона предлагает вам продолжить калибровка компаса. Как и калибровка IMU, компас или калибровка компаса должны быть выполнены после путешествия на расстояние 50 км от обычного места, где вы используете свой дрон. Это также необходимо сделать по истечении 30 дней, в течение которых вы не использовали устройство.
Как решить проблему, из-за которой DJI mini 2 мигает красным?
После того, как поставлен диагноз и у вас есть ответ на вопрос » почему мой дрон DJI mini 2 мигает красным? можно переходить к устранению неполадок.
Случай низкого или очень низкого уровня заряда
Когда интеллектуальная батарея вашего дрона разряжена, рекомендуется зарядить ее. Поэтому вы должны подключить зарядное устройство, когда увидите предупреждение в виде медленного или быстрого мигания красных светодиодов. Вот несколько инструкций по зарядке DJI mini 2:
- Бранчез ле USB-зарядное устройство мощностью 18 Вт который поставляется вместе с устройством DJI к розетке переменного тока (100-240 В, 50/60 Гц).
- Затем подключите DJI mini 2 к зарядному устройству.
- Начнется загрузка, и вы сможете следить за ее ходом благодаря индикаторы уровня заряда батареи. Он будет завершен, когда загорятся все светодиоды. Время, необходимое для полной зарядки аккумулятора Intelligent Flight Battery DJI mini 2, составляет примерно 1 час 22 минуты.
Случай ошибки DJI mini 2 IMU
Когда ваш дрон DJI mini 2 мигает красным ошибка ИДУ, вам нужно откалибровать его. Процесс прост и занимает всего около десяти минут:
- Дайте прибору остыть и положите его на плоская поверхность при этом следите за тем, чтобы у вас был запас заряда не менее 50% и его плечи закрыты;
- Включите право и подключите его к приложение DJI Fly ;
- Нажмите на три точки в правом верхнем углу, чтобы получить доступ к системным настройкам.
- Открыть » Безопасность затем прокрутите вниз до « Capteurs .
- Выберите » Калибровка IMU » затем выполните различные шаги, которые предложит вам приложение. Вам придется последовательно поворачивать дрон горизонтально и вертикально.
- Наконец, перезапустите дрон, как только операция будет завершена и успешно завершена. Если калибровка не удалась, все равно перезагрузитесь и повторите попытку.
Случай сбоя компаса или калибровки компаса
Этот случай относится к миганию красного и зеленого попеременно. За калибровка компаса DJI mini 2 следуйте приведенным ниже инструкциям:
- Выйдите на улицу, подальше от автомобилей, телекоммуникационных мачт и конструкций, которые могут создавать помехи.
- Включите дрон и подключитесь к приложению DJI Fly.
- Перейдите в настройки системы, нажав на три точки в правом верхнем углу.
- Затем нажмите » Безопасность » и перейдите в раздел « Capteurs .
- Перед компасом нажмите « Откалибровать «Тогда» Démarrer чтобы начать калибровку.
- Следуйте инструкциям в приложении для калибровки по горизонтали, а затем по вертикали.
- Вы должны сначала держать устройство вертикально, а затем вращать его в по часовой стрелке часов на 360 Degres. Затем свет изменится с желтого на сплошной зеленый.
- Для вертикальной калибровки нужно направить дрон вверх и повернуть его вокруг своей оси на 360 градусов. Индикатор также изменит цвет с желтого на зеленый, чтобы указать на успех операции.
- После успешного завершения всех калибровок светодиод начнет мигать зеленым цветом.
После предупреждений от дрона DJI mini 2 мигает красным, поэтому важно внимательно наблюдать за миганием, чтобы расшифровать предупреждение. Затем необходимо решить проблему, которая может быть связана с ошибкой калибровки компаса или IMU, а также с ошибкой зарядки аккумулятора.
Читать следующую
26.11.2022
Замена блока питания в PS4 Pro
26.11.2022
Прокачали Старый Asus X44 нашему подписчику!🔥 В 2 раза мощнее!
26.11.2022
Замена батареи на 11 (Офф, Колхоз или Просто установка)
25.11.2022
Самая ОГРОМНАЯ RTX4080 против RTX3090!🔥 DLSS 3.0
25.11.2022
iMac A1419 (27 дюймов) Замена блока питания
24.11.2022
Помогли Бабушке со старым ноутбуком, а она подарила урок Английского 🙏☺️
24.11.2022
Пятна на Камере — откуда?!
24.11.2022
Afox топ за свои деньги
23.11.2022
Наш мастер случайно РАЗБИЛ MacBook клиента на M1! 😱 ПОПАДОС НА 40.000 рублей! Страшный сон!
23.11.2022
Ремонт после рукож*пов: МОЩНАЯ GTX 1080 Ti JetStream 11ГБ | Большой SAMSUNG np300e7Z
DJI FPV is the DJI’s buddy for the FPV community, which is so beginner-friendly for new FPV beginners. However, I have seen many FPV users asking for solutions to DJI FPV error codes. Most of them are just common for DJI drones and easy to fix.
But some DJI FPV users are struggling with those DJI FPV errors. Therefore I thought it would be helpful if there would be an article about DJI FPV error codes and how to fix them. So in this article, we would talk about DJI FPV common error codes and solving those errors. Hope this would help with fixing your DJI FPV error.
- Error 1: DJI FPV remote controller control stick error.
- Error 2: DJI FPV ESC status error/ DJI FPV propulsion system auto check error.
- Error 3: DJI FPV IMU error.
- Error 4: DJI FPV battery error.
- Error 5: DJI FPV compass error.
- Error 6: DJI FPV fan error.
- Error 7: DJI FPV sensor system error.
- Error 8: DJI FPV fly safe database error.
- Error 9: DJI FPV GPS error.
- Error 10: DJI FPV battery communication error.
- Error 11: DJI FPV vision sensor calibration error.
- Error 12: DJI FPV sd card error.
- Error 13: DJI FPV gimbal error.
Error 1: DJI FPV remote controller control stick error.
In most cases, DJI FPV remote controller control stick error is caused by miscalibrated remote controller sticks and remote controller firmware glitches.
How to Fix DJI FPV remote controller stick error.
- Calibrate controller joysticks. Check out the below video to know how to calibrate the DJI FPV controller.
- Update Firmware of the remote controller.
- Reset the remote controller. Download and install DJI Assistant 2 and connect the remote controller to the PC and turn it on. Open DJI Assistant 2 application and log in to your DJI account. Once you logged choose DJI FPV and hit “Factory Restore Defaults”.
Error 2: DJI FPV ESC status error/ DJI FPV propulsion system auto check error.
Usually, ESC status errors are caused by drone crashes, firmware glitches, and faulty electronic speed controller (ESC).
How to Fix DJI FPV ESC error.
- Restart the aircraft.
- Update DJI FPV firmware.
- Replace ESC. If your DJI FPV’s ESC is damaged due to a crash, you need to repair it or replace it. Usually, you could buy DJI FPV ESC online, but it’s better to repair or replace it by contacting DJI Support.
Error 3: DJI FPV IMU error.
Usually, DJI FPV IMU error is caused by miscalibrated IMU. Besides that firmware glitches also could cause the issue.
How to Fix IMU Calibration Error.
- Calibrate DJI FPV IMU. Check out the below video to know how to calibrate DJI FPV IMU.
- Change the calibration location and try again IMU calibration.
- Update DJI FPV Firmware.
- Factory reset DJI FPV using DJI Assistant 2. Download and install the DJI Assistant 2 For FPV from DJI Downloads Center. Then connect the aircraft to the PC using the USB cable and power on the aircraft. Open the DJI Assistant 2 and log in to your DJI account and choose the FPV. Then hit “Factory Restore Defaults”.
Error 4: DJI FPV battery error.
Most of the time, DJI FPV battery error is caused by a faulty power management board and battery firmware glitches.
Fix DJI FPV Battery Error.
- Refresh or update battery firmware. Update DJI FPV firmware while keeping the glitched battery inside.
- Drain the battery to zero and recharge it fully.
- Change power management board. If you are getting this error after a crash, the FPV power management board might have been damaged and required to replace or repair the power management board. Advisable to contact DJI Support to do it for you.
- Replace the battery.
Error 5: DJI FPV compass error.
In most cases, DJI FPV compass error is caused by placing or flying the aircraft near magnetic fields which causes discrepancy with the natural magnetic field.
How to Fix DJI FPV Compass Error.
- Try rebooting the DJI FPV.
- Avoid Electromagnetic interference. Avoid flying the DJI FPV near powerlines, communication towers, huge buildings, etc.
- Calibrate the compass. Visit a different location you are currently in and try a compass calibration. Check out the below video for the DJI FPV compass calibration process.
- Contact DJI Support. If you still get the error, the compass might be faulty. It might need to be repaired or replaced. So it’s better to contact DJI Support for that.
Error 6: DJI FPV fan error.
DJI FPV fan error is caused by a damaged or blocked fan and connection cable issue. Check out the below video which talks about this error depth.
How to Fix DJI FPV fan error.
- Remove the shell and check the fan is blocked. If it is clean the fan and unblock it.
- Check the connection cable to the fan section.
- Replace the fan or contact DJI Support.
Error 7: DJI FPV sensor system error.
DJI FPV sensor error is caused by miscalibrated IMU and firmware issues. Also for a weird reason, I have seen in sometimes SD card causes this issue.
How to Fix DJI FPV sensor system error.
- Replace the SD card or format the SD card. As I said above, SD card also causes this issue for some reason. So it’s better to try this step. Check out this article as a source.
- Update DJI FPV firmware.
- Calibrate DJI FPV IMU.
Error 8: DJI FPV fly safe database error.
In most cases, DJI FPV fly safe database error is caused by a faulty DJI FPV fly safe database update.
How to Fix DJI FPV fly safe database error.
- Update or downgrade the FPV firmware. Since DJI FPV fly safe database error is caused by DJI FPV firmware issue, DJI have released the latest firmware that solves the issue. If you are getting this issue after updating the firmware try downgrading the firmware. Also check out the below video that addresses the error.
Error 9: DJI FPV GPS error.
In most cases, DJI FPV GPS error is caused by poor internet connection, firmware glitches, damaged GPS module, and environmental interferences.
How to Fix DJI FPV GPS Error.
- Connect to a strong internet connection.
- Update the DJI FPV unit firmware including goggles and controller.
- Contact DJI Support. Since damaged or faulty GPS module also could cause this error, it might need to repaired or replace with DJI Support.
Read the Detailed Article: Why Drone not connecting to GPS and how to fix it.
Error 10: DJI FPV battery communication error.
DJI FPV battery communication error is caused by improper battery seating. I found this solution in DJI forums.
How to Fix DJI FPV battery communication error.
- Make sure the batteries are well-seated. There are connection points for the drone battery not only at the rubber plug but also at the sides. Charge up the battery to full and put the drone battery in (without connecting the rubber plug), and make sure to seat the battery as snugly in the body of the drone as possible. Then, connect the rubber plug of the battery to the drone body.
Error 11: DJI FPV vision sensor calibration error.
Usually, DJI FPV vision sensor calibration error is caused by firmware glitches and improper vision sensor calibration.
How to Fix DJI FPV vision sensor calibration error.
- Clean sensors surface.
- Update the DJI FPV firmware before calibrating the vision sensor. Firmware glitches could cause faulty vision sensor calibration. Therefore first update or refresh the firmware then calibrate vision sensors. Check out the below video to know how to calibrate DJI FPV sensors.
Error 12: DJI FPV sd card error.
Usually, the DJI FPV SD card error is caused by inserting an unsupported SD card or a damaged SD card.
How to Fix DJI FPV SD card error.
- Use supported DJI FPV SD card. Visit the DJI FPV Product spec and check whether your SD card is listed as a supported SD card. If not, try using a supported SD card.
- Format the SD card.
- Update DJI FPV firmware.
- Repair the SD card using the Windows command prompt. Connect the SD card to the PC and open the command prompt. Then type “chkdsk” and leave a space and specify the SD card driver letter (Ex: chkdsk D). and hit enter. Once the process is done the sd card is repaired.
Error 13: DJI FPV gimbal error.
Most of the time, DJI FPV gimbal error is caused by restricted gimbal movement, faulty gimbal, or firmware issues.
How to Fix FPV Gimbal Error.
- Check whether something is blocking the gimbal.
- Update DJI FPV Firmware.
- Factory Reset the FPV. Connect the DJI FPV to the PC using the USB cable and power it on. Open the DJI Assistant 2 and choose the FPV and hit “Factory Restore Defaults”.
- Replace the faulty gimbal.