
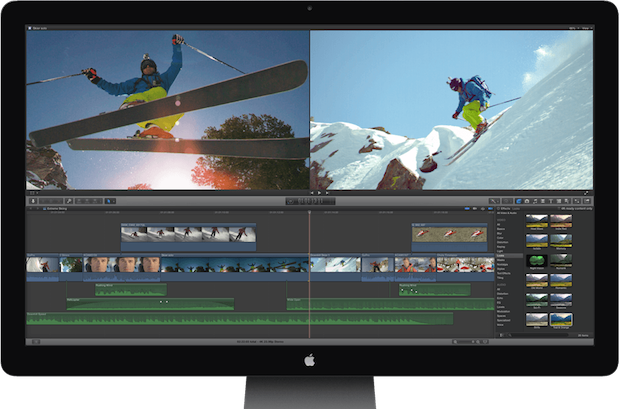
21 Июня 2016 Final Cut Pro X исполнится 5 лет. Появившись в 2011, он был встречен очень неоднозначно — полностью переработанный интерфейс, кардинально отличная логика работы, сам подход к процессу монтажа. Единственное, в чем сошлись мнения большинства – работа в X требовала существенно меньше времени, отличие доходило порой до двух раз, по сравнению с аналогичным объемом работ в 7 версии.
За эти 5 лет успели смениться три версии приложения, был сильно переработан интерфейс, структура хранения проекта, проведена огромная работа над ошибками.
Ниже представлена переработка трех англоязычных статей, опубликованных на разных интернет-ресурсах. Она содержит часто задаваемые вопросы по FCPХ и решение его наиболее распространенных проблем.
Общие рекомендации
- Используйте последнюю версию OS X (10.11) и соответствующую версию FCP X (10.2)! Она является актуальной, доработанной и обновляемой на сегодняшний день. Версии, соответствующие предыдущим OS X не развиваются и почти сняты с поддержки. Многие новые функции, рекомендации и приемы, упоминаемые на профильных ресурсах, неприменимы к ним.
- Отключите App Nap для приложения /Applications/Final Cut Pro.app. Для этого достаточно открыть его свойства (CMD+I) и поставить галочку напротив пункта Prevent App Nap.
- Как при запуске FCP X открыть диалог, позволяющий создать новый пустой проект вместо последнего, над которым работали или открыть один из имеющихся проектов? При запуске удерживать клавишу Alt (Option, ⌥). Может оказаться полезным при проблемах запуска текущего проекта.
Проблемы с производительностью
- Первым делом отключите создание waveforms и thumbnails на timeline, это сильно разгрузит систему.
- Если вы работаете с действительно большим количеством исходного материала или с исходниками работают одновременно несколько человек, рекомендуем вынести их хранение из проекта на отдельный раздел (external media). Для этого в свойстах проекта укажите новое расположение для элемента Media и сделайте File > Consolidate Library Files. Не забудьте выставить всем причастным разрешающие права на выбранный раздел. Механизм описан в статье Manage storage locations.
Проблемы со стабильностью
- Если программа работает нестабильно или аварийно завершает работу (“вылетает”), как и с предыдущей версией, причиной могут оказаться внешние устройства, подключенные по USB 2 или FireWire. Отключите их и подключайте по одному, чтобы найти виновника. По возможности, используйте для работы подключения USB 3 или Thunderbolt.
- При решении проблем FCP X может быть полезно запустить в безопасном режиме (при этом будет удален файл настроек). Для этого при запуске необходимо удерживать клавиши Alt (⌥) + CMD (⌘).
- На старых версиях бывает, что проект оказывается поврежден и FCP X просто не запускается (перестает отвечать (“зависает”) при попытке открыть последний проект, над которым вы работали). Чтобы решить эту проблему, вам необходимо открыть проект в Finder и выполнить Show Package Contents, затем удалить папки Thumbnail Media, Peaks Data и файл CurrentVersion.flexolibrary. При следующем открытии файл проекта будет восстановлен из резервной копии (“бэкапа”).
- Если при запуске FCP X перестает отвечать на стадии “Restoring the window layout”, необходимо удалить папку, расположенную по адресу ~/Application Support/Final Cut Pro/Layouts.
- Cпособ, позволяющий справиться с медленной работой (вращающийся курсор ожидания,
 ) FCP X — закройте проект (File > Close Library). Он должен остаться в списке Project Library, экспортируйте его в XML (File > Export XML). Создайте новый проект (File > New > Library), импортируйте в него сохраненный в предыдущем шаге XML. Перезапустите FCP X и убедитесь, что это помогло.
 - Проблемы с запуском может решить удаление папки com.apple.FinalCutPro.savedState, расположенной по адресу ~/Library/Saved Application State/com.apple.FinalCutPro.savedState.
Часто задаваемые вопросы
В: Как произносится название Final Cut Pro X?
О: Произносится “Final Cut Pro ten”.
В: Каковы возможности и системные требования Final Cut Pro X?
О: На официальной странице приложения доступны полные системные требования, обзор возможностей, а так же дополнительная информация на apple.com/finalcutpro.
В: А все же, заработает ли FCP X на моем Mac?
О: Для Final Cut Pro X, Motion 5 и Compressor 4 требуется OpenCL-совместимая видеокарта (не путать с OpenGL) и Mac App Store просто не позволит вам приобрести приложение, если ваша карта не входит в число совместимых. Apple опубликовала лист совместимости, в котором перечислены как подходящие модели, так и заведомо несовместимые с FCP X.
Однако, профильные ресурсы рапортуют об успешном запуске и функционировании с несомвестимыми картами, при условии, что приложение было куплено на совместимом Mac, а затем скопировано на рабочую станцию. Конечно, не рекомендуется использовать эту лазейку в продакшене (как минимум это чревато низкой производительностью).
В: Доступна ли пробная версия Final Cut Pro X?
О: Да, на странице Frequently asked questions about the Final Cut Pro X trial доступна ссылка на скачивание полностью функциональной 30-дневной версии Final Cut Pro X trial.
В: Где можно приобрести Final Cut Pro X?
О: Final Cut Pro X доступен исключительно в Mac App Store.
В: На скольких компьютерах я могу установить приобретенную копию Final Cut Pro X?
О: Короткий ответ — на 2 (двух): одну копию на рабочем и вторую копию на ноутбуке.
Развернутый ответ — для установки, в разделе Mac App Store, на вкладке Purchased щелкните по кнопке Install.
(Замечание: некоторые пользователи сообщают, что Mac App Store может “забыть”, что у вас приобретен FCP X)
Лицензионное соглашение Final Cut Pro X 10.2 гласит, что владелец, принявший лицензионное соглашение и купивший программу в Mac App Store имеет, в частности, следующие права:
(i) Скачать, установить, запускать и использовать в некоммерческих целях, одну (1) копию программы непосредственно на каждом компьютере Apple под управлением OS X (“Mac Computer”) которым вы владеете или используете…
(ii) В случае использования в коммерческих целях или в сфере обучения, скачать, установить, запускать и использовать одну (1) копию программы: (a) на компьютере Mac которым вы владеете или используете в одиночку, или (b) на общедоступном компьютере Mac которым вы владеете или используете совместно.
К примеру: один владелец имеет право использовать программу и на своем рабочем Mac и на своем портативном Mac. Также несколько студентов могут использовать программу на одном Mac находящемся в общем классе или лаборатирии.
Полный текст соглашения доступен на странице Final Cut Pro X 10.2 License Agreement.
В: Как приобрести Final Cut Pro X для бизнеса или сферы образования?
О: Для этого существуют специальные программы Apple Volume Purchase Program (VPP) для Business или Education (увы, эти программы недоступны в России).
В: Как вернуть купленный в App Store FCP X?
О: Использовать форму обратной связи, в которой выбрать “The app didn’t function as expected”. Даже несмотря на то, что в соглашении “terms and conditions” Apple возврат не допускается, большое количество людей смогло таким образом оформить возврат средств не только за FCP X, но и другие приобретенные в App Store программы.
В: Что делать, если установленная версия FCP X не обновляется через App Store?
О: Прежде всего, убедитесь, что ваша видеокарта есть в листе совместимости. Последовательность следующая: скопируйте ваше приложение из папки /Applications на внешний диск (флешку), после чего удалите его из папки /Applications (не забудьте очистить карзину). Перезапустите App Store и в разделе Purchases установите FCP X (установится последняя доступная для вашей системы версия программы). Подробнее метод описан в этой статье.
В: Что нового в версии Final Cut Pro X 10.2?
О: Нововведения описаны в документах Final Cut Pro X version 10.2 release notes, а так же What’s new in Final Cut Pro 10.2 в разделе Final Cut Pro X Help, и на странице What’s new in Final Cut Pro X.
В: Какие камеры и устройства поддерживает Final Cut Pro X?
О: Они перечислены в документе Cameras supported by Final Cut Pro X.
В: Какие ресурсы по обучению и поддержке доступны для Final Cut Pro X?
О: Final Cut Pro X support resources для самостоятельного решения проблем и Final Cut Pro X training resources для обучения.
В: Какая документация доступна для Final Cut Pro X?
О: Руководства пользователя доступны на странице User guides for Final Cut Pro X, Motion 5, and Compressor 4.
В: Какие доступны тренинги и сертификации по Final Cut Pro X?
О: Они описаны на странице Final Cut Pro X training resources.
В: Как перейти с Final Cut Pro 7 на Final Cut Pro X?
О: Это описано в Final Cut Pro X for Final Cut Pro 7 Editors.
В: Перезапишет ли FCP X при установке Final Cut Pro 7?
О: Нет. Все приложения пакета Final Cut Studio будут перемещены в соответствующую папку /Applications/Final Cut Studio/.
В: Где почерпнуть больше информации по эффективной работе с Final Cut Pro X Libraries?
О: На страницах:
Update and work with Final Cut Pro X libraries FAQ
Managing Media with Final Cut Pro X Libraries
Media management overview
В: Что насчет Motion и “audio content” по аналогии с Final Cut Studio?
О: Они есть. Но не устанавливаются по умолчанию (не входят в состав FCP X). Motion 5 устанавливается (покупается) отдельно из App Store. Дополнительный контент можно скачать бесплатно, выбрав в FCP X пункт меню Final Cut Pro > Download Additional Content.
ЗАМЕЧАНИЕ: Даже если сам дополнительный контент вам не нужен, все же рекомендуется его установить, так как в нем содержится, кроме прочего, расширенный набор кодеков.
В: Нужен ли мне Compressor 4?
О: Он необходим для срабатывания функции Export to QuickTime Movie и, в свою очередь, содержит множество кодеков и пресетов для конвертации. Если вам необходиа сквозная конвертация и экспорт из FCP X, вам определенно придется приобрести Compressor 4.
В: Что насчет остальных: Color, Cinema Tools и DVD Studio Pro?
О: Увы, Apple до сих пор не анонсировала их аналогов.
В: Откроются ли проекты Final Cut Pro 7 в FCP X?
О: Увы, нет. Есть возможность импортировать FCP 7 XML файл в 7toX, но учитывайте, что не все содержимое возможно перенести этим способом (мультикамеры и пр.).
В: Можно ли импортировать и экспортировать XML?
О: Можно, начиная с FCP X 10.0.1 или выше. Имейте ввиду, что в XML попадет не все содержимое проекта или эвента, так что это не является полноценной заменой механизму обмена проектами.
В: Поддерживается ли экспорт EDL или списков маркеров?
О: Увы, нет.
В: Можно ли импортировать содержащий слои файл Photoshop?
О: Да, в FCP X 10.0.3 или выше.
В: Поддерживается ли захват с кассет?
О: Да, но только по Firewire, что ограничивает нас DV, HDV или DVCPROHD. Процесс захвата описан в Import from tape-based cameras, максимально упрощен и для расширенных возможностей захвата рекомендуется использовать сторонние инструменты.
В: Возможен ли выгон на кассету?
О: Увы, нет.
В: Совместимы ли плагины Final Cut Pro 7 с Final Cut Pro X?
О: Увы, нет.
В: Возможен ли экспорт QuickTime movie с маркерами глав?
О: В новых версиях, да. Плюс, доступен обходной путь для старых.
В: Какие форматы поддерживает Final Cut Pro X?
О: Поддерживаемые форматы перечислены на странице Final Cut Pro X Help: Supported media formats.
В: Как изменить расположение проекта и сопутствующих файлов?
О: По умолчанию рендеры, кэши и исходные файлы хранится в папке проекта и вы можете просто переместить проект на другой диск. Так же, в свойствах проекта есть возможность указать отличное расположение для каждого из этих элементов.
ЗАМЕЧАНИЕ: Только локальные диски могут использоваться для хранения проекта – вы не можете сохранить его на AFP, SMB и ExFAT разделы. Зато можно использовать Xsan или NFS.
В: Возможен ли экспорт non-self-contained QuickTime movie?
О: Увы, нет.
В: Возможен ли вывод на просмотровый монитор?
О: Да, но есть некоторые вопросы, связанные с качеством отображения.
В: Как выгрузить OMFs / AAFs в Pro Tools?
О: Через сторонние приложения. Например, приобрести X2ProLE Audio Convert или ее полную версию X2Pro, которые поддерживают экспорт AAF из FCP X.
В: Что с автоматическими сохранениями?
О: FCP X сохраняет все изменения в проекте немедленно, функция ручного сохранения отсутствует. В результате и предыдущего сохранения, как такового, нет. Но есть одна резервная копия проекта, по умолчанию создаваемая каждые 15 минут (начиная с FCP X 10.0.3 и выше). Подробнее о работе с резервными копиями проекта – Restore a library from automatic backups.
ЗАМЕЧАНИЕ: Если действий Undo вам недостаточно и необходима разветвленная история сохранений, вам может помочь Pro Versioner.
В: Что с аудио микшером?
О: Увы, его нет. Возможность установки keyframe присутствует, но не в режиме реального времени, как ранее во время проигрывания timeline.
В: Возможен ли одновременный запуск Final Cut Pro X and Final Cut Pro 7?
О: Увы, нет, FCP X обнаруживает запущенный FCP 7 и просит его завершить.
В: Почему файлы DV, импортированные из iMovie, проигрываются без звука?
О: iMovie создает сырой (raw) DV файл без информации о треке или других метаданных. FCP X проверяет файлы на наличие информации о структуре трека. Что бы исправить ситуацию, вам необходимо пересохранить .dv файлы как QuickTime movies. Для этого откройте их в QuickTime Player 7, затем выполните File > Save As и сохраните в формате self-contained movie.
В: Что делать, если появляется сообщение об ошибке при запуске Final Cut Pro 7, которое сообщает, что он несовместим с Motion 5?
О: После установки Motion 5 вам необходимо запустить Motion 4 и закрыть его. Сообщение об ошибке должно пропасть.
В: Откроются ли мои старые проекты Motion в версии Motion 5?
О: Да. Появится запрос на обновление имеющегося проекта (не рекомендуется) или открыть как untitled project (рекомендуется), впоследствии сохранив его под другим именем.
В: Совместимы ли новые версии Motion и Compressor с Final Cut Pro 7?
О: Ни функция Send to Motion, ни Send to Compressor не будут работать с их новыми версиями, однако они полностью работоспособны и вы можете использовать их как отдельные приложения.
Вы не сможете добавить проект Motion 5 на timeline Final Cut Pro 7 (сообщает об ошибке с missing media), но вы можете сделать экспорт в формате QuickTime movie и добавить его в FCP7. Также, имейте в виду, что проекты Motion 5 не совместимы с Motion 4 и нет способа понизить их версию.
В: Новый Compressor на первый взгляд не изменился, в чем нововведения?
О: Одним из основных изменений состоит в том, что Qmaster теперь интегрирован непосредственно в Compressor.
В: Новая версия Compressor основана на x64 архитектуре?
О: Фоновые процессы конвертации — x64, но только для x64 кодеков. Пользовательский интерфейс Compressor – все еще x86.
В: Работает ли функция Send to Compressor в FCP X с Compressor 3?
О: Увы, нет, вам понадобится Compressor 4.
В: Как настроить Compressor 4 на использование всех ядер моего CPU?
О: В меню Apple Qmaster > Share This Computer. Отметить Share This Computer и выбрать Services Only. Затем, при запуске задания, отметить опцию This Computer Plus.
В: Есть ли нюансы несовместимости между Compressor 3.5 и Compressor 4?
О: Да, необходимо отключить Compressor 3.5 Quick Clusters перед использованием Compressor 4 Quick Clusters, иначе задания не запустятся.
В: Что насчет Final Cut Server и Final Cut Express?
О: Страницы Final Cut Server и Final Cut Express теперь перенаправляют нас на страницу Final Cut Pro X, означая, что они сняты с поддержки.
Источники
Apple: Frequently asked questions about Final Cut Pro X
Final Cut Pro X Frequently Asked Questions (by Jon Chappell)
Troubleshooting Final Cut Pro X 10.1 (by Richard Taylor)
Собственный многолетний опыт компании Shortcut по поддержке FCP X
Содержание статьи
- Метод 1: исправить FCP 10.6 в Монтерее, удалив настройки приложения
- Метод 2: исправить FCP 10.6 в Монтерее, создав новую библиотеку
- Как создать новую библиотеку для исправления Final Cut Pro 10.6 в Монтерее?
- Как создать новую библиотеку из существующих библиотек?
- Как закрыть библиотеку?
- Как открыть библиотеку?
- Вывод
После обновления до MacOS Monterey FCP 10.6 или Final Cut Pro не работают, что требует исправления. Более того, он вылетает, а вместо него на экране появляется вращающийся радужный шар. Это жалоба, с которой сталкиваются многие пользователи Mac, и она выглядит как ошибка операционной системы.

Если вы видеоредактор и в своей жизни сильно зависите от Final Cut Pro, у вас есть два варианта. Первый — вернуться к Big Sur и продолжить работу, пока Apple не исправит эту проблему в Монтерее. Или, во-вторых, вы можете использовать другой компьютер, пока происходит то же самое.
Однако, если это не вариант для вас, у меня есть несколько способов, которые сработали для некоторых пользователей. Читайте дальше, чтобы узнать эти способы, и, скорее всего, ваша проблема разрешится.
Метод 1: исправить FCP 10.6 в Монтерее, удалив настройки приложения
Шаг 1: Во-первых, одновременно удерживайте COMMAND + OPTION при запуске FCP X.
Шаг 2: Нажмите «Удалить настройки».
Шаг 3: Когда вы сделаете это, FCP 10.6 запустится в режиме по умолчанию. Кроме того, откройте Untitled Library.
Шаг 4: Затем снова откройте библиотеку, над которой вы уже работали, и установите нужные параметры.
Шаг 5: Кроме того, попробуйте снова отредактировать видео, запустив их.
Совет: Запустите Etrecheck и вставьте отчет в дополнительное текстовое поле.
Однако, если это не работает для вас, вы можете попробовать следующий метод.
Метод 2: исправить FCP 10.6 в Монтерее, создав новую библиотеку

Шаг 1: Когда вы увидите на экране вращающийся радужный пляжный мяч, закройте Final Cut Pro 10.6.
Шаг 2: Откройте консоль и нажмите «Начать трансляцию».
Шаг 3: Кроме того, откройте FCP еще раз и библиотеку, которая изначально создала для вас проблему.
Шаг 4: В консоли вы можете проверить следующий код ошибки. Некоторые из этих кодов будут повторяться много раз.
Шаг 5: Кроме того, создайте новую библиотеку и посмотрите, работает она или нет.
Как создать новую библиотеку для исправления Final Cut Pro 10.6 в Монтерее?
Шаг 1: В верхнем меню выберите «Файл».
Шаг 2: Затем нажмите «Создать» и «Библиотека».
Шаг 3: В центре экрана откроется окно. Здесь вы можете указать, где вы хотите сохранить свою библиотеку.
Шаг 4: По умолчанию Mac сохранит вашу библиотеку в папке с фильмами. Однако вы можете выбрать другое место хранения, если хотите.
Шаг 5: После того, как вы назовете свою библиотеку, нажмите «Сохранить».
Шаг 6: Ваша новая библиотека появится на боковой панели библиотеки с событием по умолчанию внизу.
Как создать новую библиотеку из существующих библиотек?
Шаг 1 : Выберите одно или несколько событий на боковой панели.
Шаг 2: Затем вверху выберите «Файл». Кроме того, скопируйте события в библиотеку, а затем в новую библиотеку.
Шаг 3: Появится такое же окно, позволяющее сохранить новое имя и местоположение библиотеки.
Шаг 4: После того, как вы закончите, нажмите «Сохранить».
Шаг 5: Поскольку вы копируете события с помощью мультимедиа, вас спросят, хотите ли вы включить какие-либо оптимизированные или прокси-файлы мультимедиа. Установите флажки, которые вы хотите включить, и нажмите «ОК».
Шаг 6: Ваша новая библиотека будет доступна на боковой панели вместе с копией выбранных вами событий.
Как закрыть библиотеку?
Шаг 1: Final Cut Pro автоматически сохраняет всю вашу работу. Таким образом, вам не нужно беспокоиться о сохранении каких-либо файлов перед закрытием.
Шаг 2: Удерживая CONTROL, щелкните библиотеку на боковой панели.
Шаг 3: В меню выберите «Закрыть библиотеку».
После того, как вы закроете ненужные библиотеки из бокового меню, ваш экран будет выглядеть чистым.

Как открыть библиотеку?
Шаг 1: Нажмите «Файл» и «Открыть библиотеку».
Шаг 2: Вы можете выбрать одну из последних библиотек или выбрать «Другое», чтобы найти библиотеку, которую хотите открыть.
Шаг 3: Откроется окно «Открытая библиотека». Нажмите «Найти».
Шаг 4: Выберите библиотеку, которую хотите открыть.
Шаг 5: Нажмите «Открыть».
Таким образом, теперь вы сможете увидеть библиотеку в своем сайдбаре.
Вывод
Если эти методы не работают, вы можете напрямую связаться со службой поддержки Apple. Однако те пользователи, которые связались с ними, узнали, что это проблема операционной системы. Таким образом, лучше подождать, пока Apple выпустит исправление для FCP 10.6.
Export errors in Final Cut Pro can be really frustrating, especially if you’re up against a deadline. Take a deep breath! You haven’t lost any of your work. There are a number of possible issues preventing your project from exporting successfully. If you systematically work through all the likely problems, there’s a good chance you’ll be able to fix any export errors in less than 10 minutes.
Below we’ve covered the reasons that export errors happen as well as troubleshooting steps to troubleshoot if you have any.
Part 1: Understanding Export Errors
Before jumping into the common fixes for export errors, let’s take a look at what causes them in the first place. Understanding what’s going on behind the scenes can help you diagnose what’s happening and maybe even prevent the problem from coming back in the future.
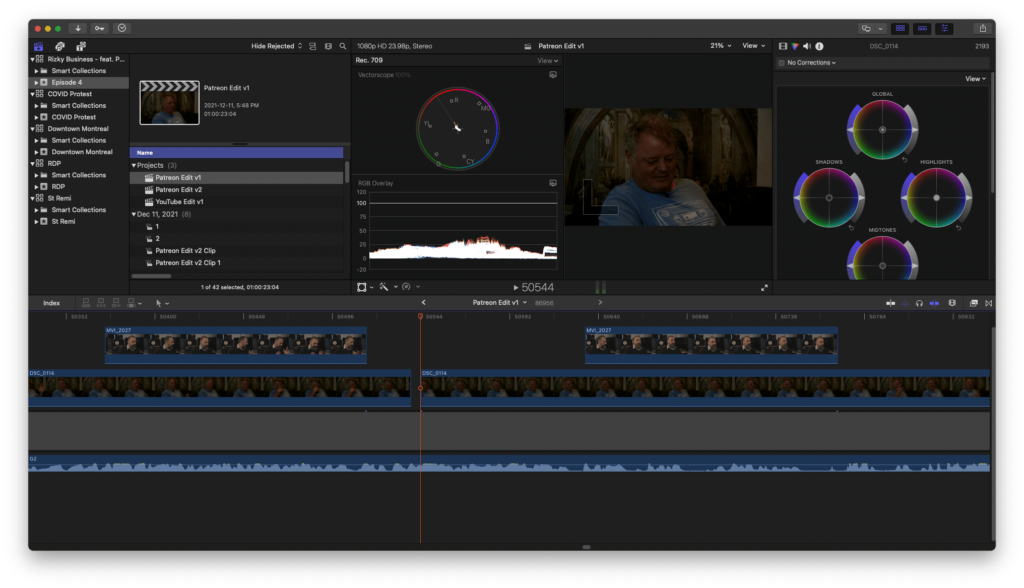
First of all, if you’re trying to export your project, make sure that you’ve got your timeline selected and not a clip in the browser. Otherwise, you may find that you’re not exporting the right thing or that Final Cut Pro has even disabled the export function. In order to do this, all you have to do is click anywhere in the timeline and then navigate up to File > Share.
Another common type of error can come from corrupted frames or media in your project. If you get an error that says Bad Frame, you’ll need to locate this frame in your project and try to reload it from the browser into the timeline. If that doesn’t work, you may even need to resort to removing that particular frame from your project entirely!
Render files are video clips that FCPX creates in the background to help preview your project at full speed while you’re editing. They’re handy and help your editing fly by smoothly, but sometimes they can also become corrupted. Deleting render files won’t make you lose anything except time and can sometimes fix your problem.
Corrupted video files can also cause problems when it’s time to export. If you identify one of the video clips you’ve included in your project is corrupted, you might need to consider swapping out with another clip or re-importing it from the source.
Part 2: How to Fix Final Cut Pro Export Errors
Below are a few quick fixes you can try once you’ve identified what’s causing your export error. If one of them doesn’t work, you can always try combining them and using multiple techniques to troubleshoot the issue.
Delete Your Render Files
If you’ve encountered Video Rendering Error: -50 or are just working through the troubleshooting steps, you can try the below method for deleting (and recreating) your render files.
- In the browser, select your project.
- Navigate on the top menu to File > Delete Generated Project Files.
- Tick the box that says Delete Render Files.
- Hit OK.
Once that’s done try to share your project again. It might take longer to export since Final Cut Pro will need to recreate the render files from scratch. This technique is also great for reducing the amount of disk space that Final Cut Pro takes up on your hard drive. You can go through all of your previous projects, events, or even libraries and delete the generated files to clear up space.
Replace Your Bad Frame
If you get an error message which specifies a specific frame, you’ll need to find that frame in your project and try to reload it. Make sure to note that frame number down so you can find it later.
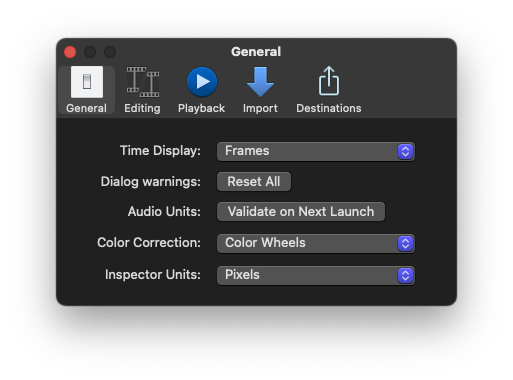
- On the top menu navigate to Final Cut Pro > Preferences > General > Time Display. Set it to Frames so that you can find the specific frame from your error message.
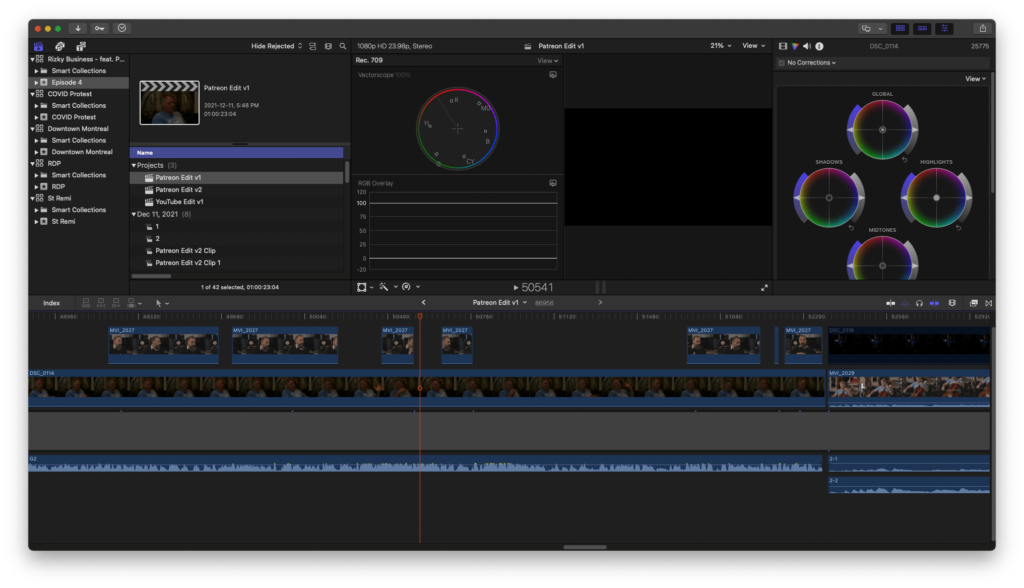
- In the timeline scroll forward and pay attention to the frame number below the viewer (where the timecode used to be). Keep scrolling until you find the exact frame from the error message.
- If there are any effects applied to this clip, select it and press Command+C to copy them.
- Select the clip at that location and press Shift+F to locate the original clip in the browser.
- Drag the clip down from the browser into the timeline where the current clip is. A popup should appear with several options; select Replace from Start.
- If you copied your clip’s effects earlier, select your newly replaced clip and then navigate to Edit > Paste Effects.
Did that work? If so, you might want to head back to the Preferences window and reset the Time Display back to the original time code. If you’re still unable to export, try going back to the previous section on delete render files and follow those steps before exporting again.
Create a New Library
If none of these troubleshooting techniques has resolved your issue so far, you can try creating an entirely new library and copying all of your content over into it.
- On the top menu navigate to File > New > Library.
- Select a location and name and then click Save.
- You should see your new Library appear in the browser next to the old one. Select the Project containing your project and drag it into the new Library.
- A popup should appear for copying your Event. Make sure to choose Media and select Original Media but deselect the other options.
Did your video finally export? One final trick, if you haven’t tried this already, is to export a Master File version of your project from the Share settings. You can take this Master File and then convert or compress it to whichever format you need.
Now you should understand everything you need to know about Final Cut Pro export errors, from render files and bad frames to recreating a new library to get around the issue. Make sure to bookmark this page in case you encounter these problems again because export errors always seem to crop up when you’re in a hurry and don’t have time to waste!
For your next project, you might also want to check out all of the Final Cut Pro resources available at Motion Array. There are tons of FCPX downloads to upgrade your editing toolkit, as well as stock video and royalty-free music to add to your next project as well!


You’re approaching the deadline, you’re finally ready to export your Final Cut Pro X project and then you get this message…
“Error: RenderFrameAt Returned: 4 Absolute Frame: 1234”.
The first time this happened to me, I was HOURS away from missing my deadline. The first thing I did was search the internet, but when I couldn’t find a straightforward solution…
I FLIPPED OUT!!
Luckily, I managed to use that head of mine to come up with a solution. That’s why I decided to write this article; to make YOUR life easier if this ever happens.
So, let’s get right into things because I’m assuming you’re in a rush…
- Why am I getting “Error: RenderFrameAt Returned” when exporting?
- How to locate corrupted frames in your FCPX timeline
- How to remove corrupted frames from your FCPX timeline
- Is there another way to fix RenderFrameAt errors?
- Summary: How To Fix RenderFrameAt Error in Final Cut Pro X
Why am I getting “Error: RenderFrameAt Returned” when exporting?
The reason you can’t share/export your Final Cut Pro X (and/or iMovie) project is that one of your clips on your timeline has a few corrupted frames.
When you get the error, make sure to take note of the number at the end.
FCPX/iMovie is telling you the exact frame where the corruption starts.
Most of the time, it’s only a few frames so it shouldn’t last more than a fraction of a second. Yup, all of that trouble for just a few frames!
Why can’t FCPX/iMovie simply share/export the video as is?
I wouldn’t waste my time on that, so let’s move on to locating these frames…
How to locate corrupted frames in your FCPX timeline
1 – Take note of the last number when you get the error message

2 – Change your timeline from hh:mm:ss to frames
3 – Navigate to the corresponding frame
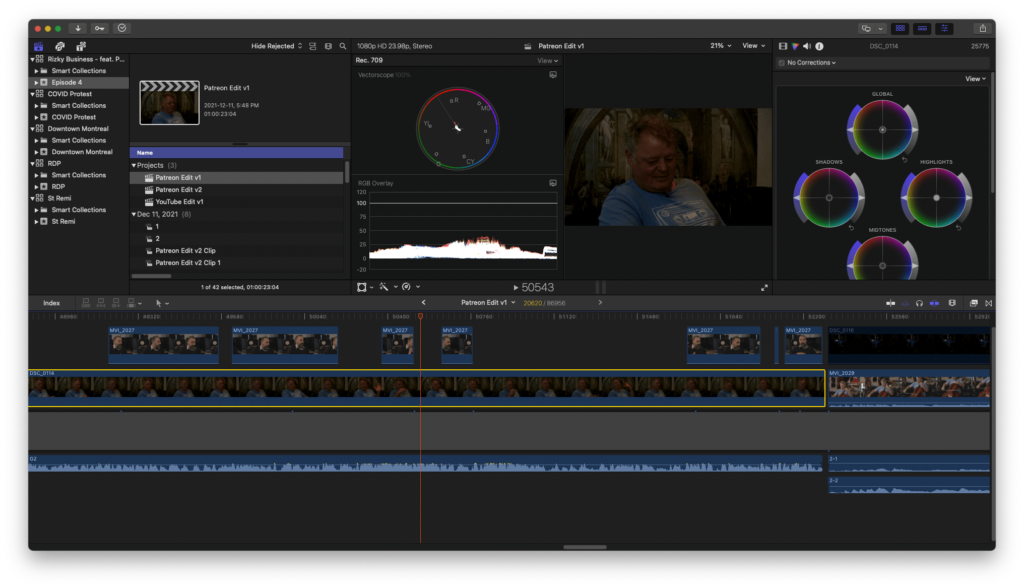
4 – Identify which clip has the corrupted frames (if multiple are in use)

5 – Identify where the corruption ends (take note of that number)
Now, we’re going to be moving on to the “quick fix”. We’ll be looking at other solutions you can try in another section because once again… I’m assuming you’re in a rush!
This is what I did to finally get my Final Cut Pro X project shared/exported…
How to remove corrupted frames from your FCPX timeline
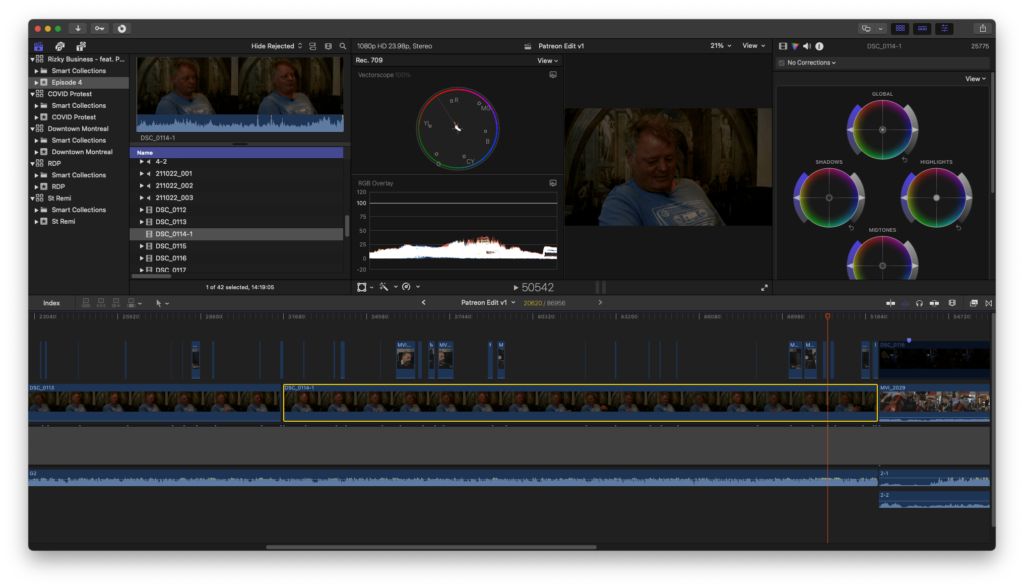
1 – Cut your clip 2-3 frames BEFORE the corrupted frames start
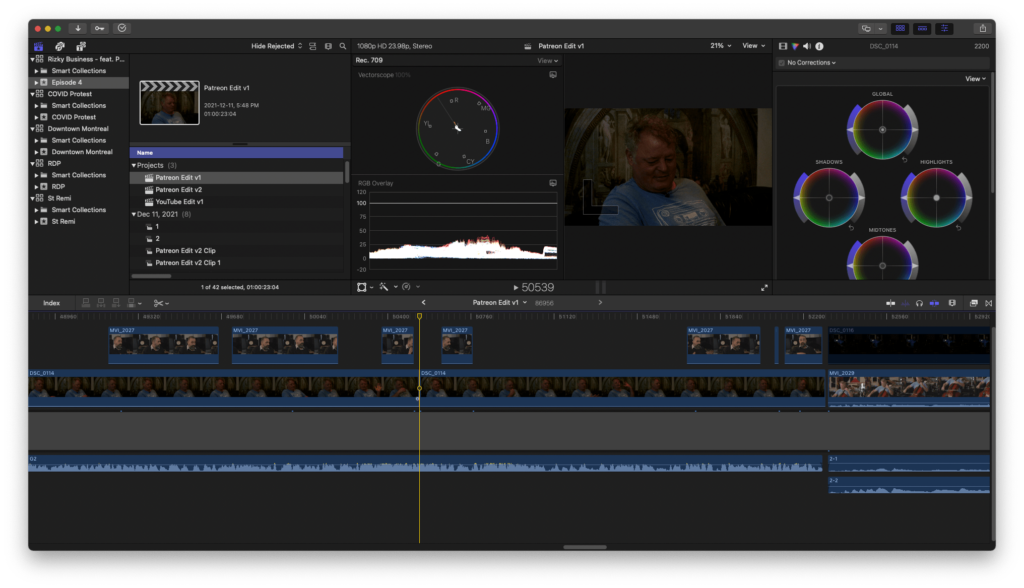
2 – Cut your clip 2-3 frames AFTER the corrupted frames end

3 – Select the corrupted section and delete it
4 – Try sharing/exporting your project (if another error with a different value appears, repeat the process)
If done correctly, this should finally allow you to get your Final Cut Pro X project rendered.
Of course, you’ll have a brief moment where the video cuts out. I’ll leave the rest up to you… Maybe you have another clip you can briefly insert to fill in the gap?
Alright, so now let’s see if we can work on a “better fix”. If you’ve got time, that is!
Is there another way to fix RenderFrameAt errors?
If the corruption doesn’t come from your source material (i.e the footage on your SD card), there might be a way of resetting your timeline.
That’s because the corruption could’ve happened during…
- Transfer
- Encoding
To verify if this IS the case, you need to go back to your source material and navigate to the same frame. Do you still get the same “glitch”?
If NOT, then there’s hope!
If you do, then the “quick fix” is the only fix for you (sorry).
To reset your clips, you’ll need to…
1 – Remove the corrupted clip(s) from your library AND timeline

2 – Delete render files, optimized media and proxy media

3 – Replace the original file(s) with the source file(s) (if the corruption occurred during the transfer) AND change the title(s)
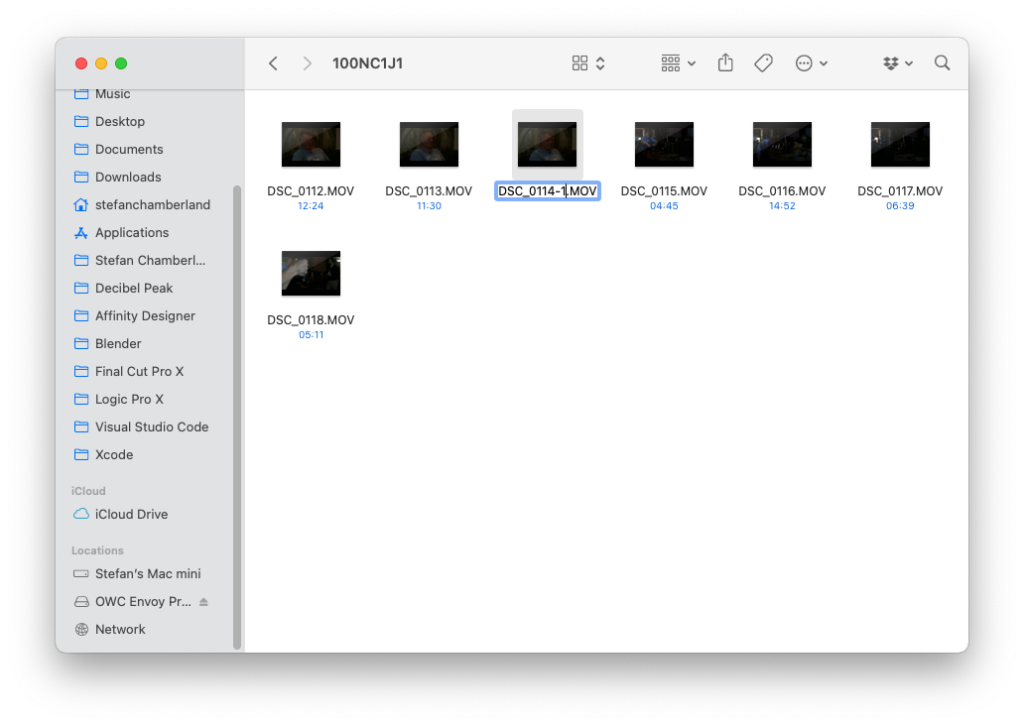
4 – Import the file(s) and replace any of the clips that were affected on your timeline
If that doesn’t work (because it didn’t for me), then you’re much better off sticking to the method laid out in the previous sections.
It’s just something you have to learn how to deal with…
So, there you go!
I hope that at least one of these methods helped. If it did, make sure to let us know which one in the comments (and if you’ve found any other solutions).
I’ll keep this post up to date if ever I come up with anything else.
If you think that this kind of error is exclusive to Final Cut Pro X/iMovie, then you’re mistaken. As it turns out, it happens with every major video editing software.
Corrupted frames are more common than you think and can be caused by a variety of factors.
However, that’s a topic for another article!
Thanks for reading, let me know if you have any questions!
Export errors in Final Cut Pro can be really frustrating, especially if you’re up against a deadline. Take a deep breath! You haven’t lost any of your work. There are a number of possible issues preventing your project from exporting successfully. If you systematically work through all the likely problems, there’s a good chance you’ll be able to fix any export errors in less than 10 minutes.
Below we’ve covered the reasons that export errors happen as well as troubleshooting steps to troubleshoot if you have any.
Part 1: Understanding Export Errors
Before jumping into the common fixes for export errors, let’s take a look at what causes them in the first place. Understanding what’s going on behind the scenes can help you diagnose what’s happening and maybe even prevent the problem from coming back in the future.
First of all, if you’re trying to export your project, make sure that you’ve got your timeline selected and not a clip in the browser. Otherwise, you may find that you’re not exporting the right thing or that Final Cut Pro has even disabled the export function. In order to do this, all you have to do is click anywhere in the timeline and then navigate up to File > Share.
Another common type of error can come from corrupted frames or media in your project. If you get an error that says Bad Frame, you’ll need to locate this frame in your project and try to reload it from the browser into the timeline. If that doesn’t work, you may even need to resort to removing that particular frame from your project entirely!
Render files are video clips that FCPX creates in the background to help preview your project at full speed while you’re editing. They’re handy and help your editing fly by smoothly, but sometimes they can also become corrupted. Deleting render files won’t make you lose anything except time and can sometimes fix your problem.
Corrupted video files can also cause problems when it’s time to export. If you identify one of the video clips you’ve included in your project is corrupted, you might need to consider swapping out with another clip or re-importing it from the source.
Part 2: How to Fix Final Cut Pro Export Errors
Below are a few quick fixes you can try once you’ve identified what’s causing your export error. If one of them doesn’t work, you can always try combining them and using multiple techniques to troubleshoot the issue.
Delete Your Render Files
If you’ve encountered Video Rendering Error: -50 or are just working through the troubleshooting steps, you can try the below method for deleting (and recreating) your render files.
- In the browser, select your project.
- Navigate on the top menu to File > Delete Generated Project Files.
- Tick the box that says Delete Render Files.
- Hit OK.
Once that’s done try to share your project again. It might take longer to export since Final Cut Pro will need to recreate the render files from scratch. This technique is also great for reducing the amount of disk space that Final Cut Pro takes up on your hard drive. You can go through all of your previous projects, events, or even libraries and delete the generated files to clear up space.
Replace Your Bad Frame
If you get an error message which specifies a specific frame, you’ll need to find that frame in your project and try to reload it. Make sure to note that frame number down so you can find it later.
- On the top menu navigate to Final Cut Pro > Preferences > General > Time Display. Set it to Frames so that you can find the specific frame from your error message.
- In the timeline scroll forward and pay attention to the frame number below the viewer (where the timecode used to be). Keep scrolling until you find the exact frame from the error message.
- If there are any effects applied to this clip, select it and press Command+C to copy them.
- Select the clip at that location and press Shift+F to locate the original clip in the browser.
- Drag the clip down from the browser into the timeline where the current clip is. A popup should appear with several options; select Replace from Start.
- If you copied your clip’s effects earlier, select your newly replaced clip and then navigate to Edit > Paste Effects.
Did that work? If so, you might want to head back to the Preferences window and reset the Time Display back to the original time code. If you’re still unable to export, try going back to the previous section on delete render files and follow those steps before exporting again.
Create a New Library
If none of these troubleshooting techniques has resolved your issue so far, you can try creating an entirely new library and copying all of your content over into it.
- On the top menu navigate to File > New > Library.
- Select a location and name and then click Save.
- You should see your new Library appear in the browser next to the old one. Select the Project containing your project and drag it into the new Library.
- A popup should appear for copying your Event. Make sure to choose Media and select Original Media but deselect the other options.
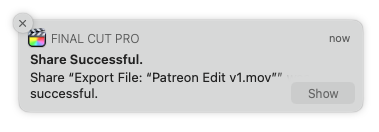
Did your video finally export? One final trick, if you haven’t tried this already, is to export a Master File version of your project from the Share settings. You can take this Master File and then convert or compress it to whichever format you need.
Now you should understand everything you need to know about Final Cut Pro export errors, from render files and bad frames to recreating a new library to get around the issue. Make sure to bookmark this page in case you encounter these problems again because export errors always seem to crop up when you’re in a hurry and don’t have time to waste!
For your next project, you might also want to check out all of the Final Cut Pro resources available at Motion Array. There are tons of FCPX downloads to upgrade your editing toolkit, as well as stock video and royalty-free music to add to your next project as well!
I keep getting these error codes when attempting to export to any destination since the latest update:
‘Video rendering error: 10004 (Final Cut Pro error 10004: renderVideoFrame failed)’
‘The operation could not be completed because an error occurred when creating frame 82 ((Error 10004f, 00:00:01;22 <<(Error 10110f, GGS Intro Logo.mp4 @ 00:00:00;00)>>)).’
iMac with Retina 5K display,
macOS High Sierra (10.13.2)
Posted on Dec 15, 2017 8:11 AM
There’s a problem with that frame. Switch FCP General prefs to show frame. Find frame 82 and figure out some way to replace it or cut around it.
Posted on Dec 15, 2017 9:04 AM