Rinse milk system
rinse milksystem
OK:P brwse.:care-bt
OK:P brwse.:care-bt
select the displayed program with the
The display reports the individual activities that must be
done before the rinse.
milk lever up
milk lever up
move spout up max.
move spout up max.
Check if the milk lever is up? if not, put it up now
Push the all-in-one spout to the uppermost position
Place an appropriate container under the
all-in-one spout
connect hose
connect hose
Start: care button
Start: care button
Wipe off the outside of the milk hose with a clean,
damp cloth
Place the milk hose with the milk nozzle on the hot
water spout and turn it clockwise to the stop
start the rinse with the care button
The coffee machine’s milk system is rinsed with
hot water. Hot rinse water is emptied through the
all-in-one spout.
After a successful rinse, the following display appears:
lower spout
lower spout
into beverage position
into beverage position
Turn the milk hose anticlockwise, disconnecting it
from the hot water spout
WMF 1000 user manual
P button
Care
Duration of milk system rinse
approx. 30 seconds
Place the milk hose on the
hot water spout and turn it
clockwise to the stop.
35
coffee wakes up the world User Manual Coffee machine English 04.07.001 Model Series 8400 33 2413 0010 10.2011 Introduction and General information Congratulations on the purchase of your WMF coffee machine The WMF bistro! coffee machine is a fully automatic single cup machine for espresso, café crème, cappuccino, milk coffee, latte macchiato, foamed milk and hot water. With its optionally available Choc hopper, the bistro! can also make hot chocolate with milk or milk foam. Each beverage is freshly brewed at the press of a button which guarantees a high quality beverage. User guidance is provided by a graphical touch-screen display on the coffee machine. Up to eight beverage buttons are available on the operating panel. The beverage buttons can be allocated on two levels and have a lettering space. Additional function keys may be allocated, depending on the machine configuration. Keep these instructions near the coffee machine so that you and your operating staff have the right information handy and can take the correct action in the event of any technical problems that may arise. 2 Please read the User Manual prior to using the coffee machine. Ensure that the staff has access to the User Manual. Important. Chapter 1 Introduction Follow the User Manual Signs and Symbols. Observe the Safety chapter. Observe the additional instructions: bistro! Cleaning instructions In the event of failure to comply with maintenance information (w Maintenance and descaling), no liability is accepted for any resultant damage. User Manual WMF bistro! Table of Contents Chapter 1 1.1 Introduction 6 Parts of the coffee machine 6 User Manual Signs and Symbols. . . . . . . . . . . . . . . . . . . . . . . . . . . . . . . . . . . . . . . . 8 Glossary . . . . . . . . . . . . . . . . . . . . . . . . . . . . . . . . . . . . . . . . . . . . . . . . . . . . . . . . . . 9 Chapter 2 Operation 10 2.1 2.2 2.3 2.4 Switch on coffee machine Dispensing beverages Multiple preselection Shift button (optional) Special buttons (optional). . . . . . . . . . . . . . . . . . . . . . . . . . . . . . . . . . . . . . . . . . . 2.5 Dispensing hot water 2.6 Dispense milk or milk foam 2.7 Connect up the milk Standard . . . . . . . . . . . . . . . . . . . . . . . . . . . . . . . . . . . . . . . . . . . . . . . . . . . . . . . . . . . 2.7.1 2.7.2 With WMF Cooler, WMF Cup&Cool (optional) . . . . . . . . . . . . . . . . . . . . . . . . . . . . . 2.8 Dispensing steam (optional) Warm beverages . . . . . . . . . . . . . . . . . . . . . . . . . . . . . . . . . . . . . . . . . . . . . . . . . . Foam milk . . . . . . . . . . . . . . . . . . . . . . . . . . . . . . . . . . . . . . . . . . . . . . . . . . . . . . . 2.9 Steam Milk (optional)/Dual Milk (optional) 2.10 Height adjustment of the combi spout 2.11 Bean hopper/product hopper 2.12 Manual insert 2.13 Grounds container 2.14 Grounds disposal through the counter (optional) 2.15 Drip tray 2.16 Switch off the coffee machine 10 10 10 11 11 11 11 12 12 12 13 13 13 14 15 15 15 16 16 17 17 Chapter 3 18 3.1 3.2 Software An overview Ready to operate 3.2.1 “Ready to operate” display. . . . . . . . . . . . . . . . . . . . . . . . . . . . . . . . . . . . . . . . . . . . . Standard display for normal operation . . . . . . . . . . . . . . . . . . . . . . . . . . . . . . . . . Standard display for SB mode (self-service) . . . . . . . . . . . . . . . . . . . . . . . . . . . . 3.2.2 “Warm rinse” pad . . . . . . . . . . . . . . . . . . . . . . . . . . . . . . . . . . . . . . . . . . . . . . . . . . . 3.2.3 Barista pad . . . . . . . . . . . . . . . . . . . . . . . . . . . . . . . . . . . . . . . . . . . . . . . . . . . . . . . . 3.2.4 Information . . . . . . . . . . . . . . . . . . . . . . . . . . . . . . . . . . . . . . . . . . . . . . . . . . . . . . . . Service . . . . . . . . . . . . . . . . . . . . . . . . . . . . . . . . . . . . . . . . . . . . . . . . . . . . . . . . . . Customer . . . . . . . . . . . . . . . . . . . . . . . . . . . . . . . . . . . . . . . . . . . . . . . . . . . . . . . . Brew time . . . . . . . . . . . . . . . . . . . . . . . . . . . . . . . . . . . . . . . . . . . . . . . . . . . . . . . Journal. . . . . . . . . . . . . . . . . . . . . . . . . . . . . . . . . . . . . . . . . . . . . . . . . . . . . . . . . . . Timer . . . . . . . . . . . . . . . . . . . . . . . . . . . . . . . . . . . . . . . . . . . . . . . . . . . . . . . . . . . 3.2.5 To the main menu . . . . . . . . . . . . . . . . . . . . . . . . . . . . . . . . . . . . . . . . . . . . . . . . . . . User Manual WMF bistro! 3 18 20 20 20 20 20 20 21 21 21 21 21 21 22 Table of Contents 3.3 Main menu Milk and foam . . . . . . . . . . . . . . . . . . . . . . . . . . . . . . . . . . . . . . . . . . . . . . . . . . . . . . Milk foam quality . . . . . . . . . . . . . . . . . . . . . . . . . . . . . . . . . . . . . . . . . . . . . . . . . Latte macchiato pause interval . . . . . . . . . . . . . . . . . . . . . . . . . . . . . . . . . . . . . . . 3.3.2 Timer program . . . . . . . . . . . . . . . . . . . . . . . . . . . . . . . . . . . . . . . . . . . . . . . . . . . . . . Timer state . . . . . . . . . . . . . . . . . . . . . . . . . . . . . . . . . . . . . . . . . . . . . . . . . . . . . . . Set timer . . . . . . . . . . . . . . . . . . . . . . . . . . . . . . . . . . . . . . . . . . . . . . . . . . . . . . . . Copy day . . . . . . . . . . . . . . . . . . . . . . . . . . . . . . . . . . . . . . . . . . . . . . . . . . . . . . . . Timer overview . . . . . . . . . . . . . . . . . . . . . . . . . . . . . . . . . . . . . . . . . . . . . . . . . . . Delete timer . . . . . . . . . . . . . . . . . . . . . . . . . . . . . . . . . . . . . . . . . . . . . . . . . . . . . . Timer information . . . . . . . . . . . . . . . . . . . . . . . . . . . . . . . . . . . . . . . . . . . . . . . . . 3.3.3 Care . . . . . . . . . . . . . . . . . . . . . . . . . . . . . . . . . . . . . . . . . . . . . . . . . . . . . . . . . . . . . . Cleaning program . . . . . . . . . . . . . . . . . . . . . . . . . . . . . . . . . . . . . . . . . . . . . . . . . Milk system . . . . . . . . . . . . . . . . . . . . . . . . . . . . . . . . . . . . . . . . . . . . . . . . . . . . . . Choc system (mixer rinsing) (optional) . . . . . . . . . . . . . . . . . . . . . . . . . . . . . . . . Filter change (optional) . . . . . . . . . . . . . . . . . . . . . . . . . . . . . . . . . . . . . . . . . . . . . Customer Check-up (optional) . . . . . . . . . . . . . . . . . . . . . . . . . . . . . . . . . . . . . . . 3.3.4 Settings . . . . . . . . . . . . . . . . . . . . . . . . . . . . . . . . . . . . . . . . . . . . . . . . . . . . . . . . . . . Recipe and buttons . . . . . . . . . . . . . . . . . . . . . . . . . . . . . . . . . . . . . . . . . . . . . . . . Selecting the beverage buttons when setting . . . . . . . . . . . . . . . . . . . . . . . . . . . Adjust values Start a preparation test with the current values Save setting. . . . . . . . . . . . . . . . . . . . . . . . . . . . . . . . . . . . . . . . . . . . . . . . . . . . . . . Cup volumes . . . . . . . . . . . . . . . . . . . . . . . . . . . . . . . . . . . . . . . . . . . . . . . . . . . . . Change recipes . . . . . . . . . . . . . . . . . . . . . . . . . . . . . . . . . . . . . . . . . . . . . . . . . . . Steam Milk settings (optional) Set decaf (optional) Sequence of ingredients additions . . . . . . . . . . . . . . . . . . . . . . . . . . . . . . . . . . . . Button allocation . . . . . . . . . . . . . . . . . . . . . . . . . . . . . . . . . . . . . . . . . . . . . . . . . Testing . . . . . . . . . . . . . . . . . . . . . . . . . . . . . . . . . . . . . . . . . . . . . . . . . . . . . . . . . . Weigh grounds Quality check Reset . . . . . . . . . . . . . . . . . . . . . . . . . . . . . . . . . . . . . . . . . . . . . . . . . . . . . . . . . . . Time and date . . . . . . . . . . . . . . . . . . . . . . . . . . . . . . . . . . . . . . . . . . . . . . . . . . . . Display language . . . . . . . . . . . . . . . . . . . . . . . . . . . . . . . . . . . . . . . . . . . . . . . . . . Display contrast . . . . . . . . . . . . . . . . . . . . . . . . . . . . . . . . . . . . . . . . . . . . . . . . . . . Water filter is fitted . . . . . . . . . . . . . . . . . . . . . . . . . . . . . . . . . . . . . . . . . . . . . . . Capacity . . . . . . . . . . . . . . . . . . . . . . . . . . . . . . . . . . . . . . . . . . . . . . . . . . . . . . . . . Warm-up rinsing . . . . . . . . . . . . . . . . . . . . . . . . . . . . . . . . . . . . . . . . . . . . . . . . . . SB mode (self-service) . . . . . . . . . . . . . . . . . . . . . . . . . . . . . . . . . . . . . . . . . . . . . Foamer rinsing . . . . . . . . . . . . . . . . . . . . . . . . . . . . . . . . . . . . . . . . . . . . . . . . . . . . Rinsing interval . . . . . . . . . . . . . . . . . . . . . . . . . . . . . . . . . . . . . . . . . . . . . . . . . . . Operating options . . . . . . . . . . . . . . . . . . . . . . . . . . . . . . . . . . . . . . . . . . . . . . . . . Illumination (optional) . . . . . . . . . . . . . . . . . . . . . . . . . . . . . . . . . . . . . . . . . . . . . . Milk (optional) . . . . . . . . . . . . . . . . . . . . . . . . . . . . . . . . . . . . . . . . . . . . . . . . . . . . 3.3.5 PIN-entry display . . . . . . . . . . . . . . . . . . . . . . . . . . . . . . . . . . . . . . . . . . . . . . . . . . . 3.3.6 PIN rights, access control . . . . . . . . . . . . . . . . . . . . . . . . . . . . . . . . . . . . . . . . . . . . . Cleaning level . . . . . . . . . . . . . . . . . . . . . . . . . . . . . . . . . . . . . . . . . . . . . . . . . . . . Setting level . . . . . . . . . . . . . . . . . . . . . . . . . . . . . . . . . . . . . . . . . . . . . . . . . . . . . Accounting level . . . . . . . . . . . . . . . . . . . . . . . . . . . . . . . . . . . . . . . . . . . . . . . . . . . Delete PIN . . . . . . . . . . . . . . . . . . . . . . . . . . . . . . . . . . . . . . . . . . . . . . . . . . . . . . . 3.3.7 Accounting numbers of beverages . . . . . . . . . . . . . . . . . . . . . . . . . . . . . . . . . . . . . . 3.3.8 Waiter accounting system (optional) . . . . . . . . . . . . . . . . . . . . . . . . . . . . . . . . . . . . 3.3.1 4 22 22 22 23 23 23 24 25 25 26 26 27 27 27 28 28 28 29 29 29 29 29 30 32 32 33 33 33 33 33 34 34 34 34 34 35 35 36 36 37 37 37 37 38 38 39 39 User Manual WMF bistro! Table of Contents Chapter 4 4.1 4.2 Other settings 40 Adjusting the pinch valve Labelling of beverage buttons 40 40 Chapter 5 5.1 5.2 5.3 5.4 5.5 5.6 5.7 5.8 Care 41 Cleaning program Milk system Foamer cleaning, standard . . . . . . . . . . . . . . . . . . . . . . . . . . . . . . . . . . . . . . . . . . . Foamer cleaning Plug&Clean . . . . . . . . . . . . . . . . . . . . . . . . . . . . . . . . . . . . . . . . Choc system rinsing General cleaning Choc mixer cleaning (optional) Steam outlet cleaning (standard und Steam Milk) Bean hopper cleaning Choc hopper cleaning (optional) 42 42 42 43 43 43 44 45 45 46 Chapter 6 HACCP schedule 47 Chapter 7 Maintenance and descaling 49 7.1 7.2 7.3 Customer Check-up Maintenance WMF Service Chapter 8 8.1 8.2 8.3 Messages and instructions 50 Messages for operation Error messages and malfunctions Errors without error message Chapter 9 9.1 9.2 9.3 9.4 9.5 9.6 49 49 49 50 51 54 Safety 55 Hazards to the operator Hazards to the coffee machine Intended use Directives Duties of the owner/operator Warranty claims No warranty is provided: . . . . . . . . . . . . . . . . . . . . . . . . . . . . . . . . . . . . . . . . . . . 55 56 57 58 59 60 60 Appendix: Cleaning instructions (standard) 61 Appendix: Technical data 62 Technical data for coffee machine Conditions for usage and installation 62 62 Appendix: 64 Accessories and spare parts Index User Manual WMF bistro! 66 5 Introduction and General information Chapter 1 1.1 Introduction Parts of the coffee machine 1 3 1 2 2 1 5 11 5 4 12 6 13 7 14 8 15 7 9 16 10 17 4 We 18 8 20 2 4 . 11 . 2 0 1 0 08:15 21 22 19 23 6 User Manual WMF bistro! Introduction and General information 1 Bean hopper (s) (optional 1 or 2, espresso on the left) 2 Choc hopper (optional) 3 Manual insert / tablet insert 4 Touch-screen display 5 Beverage buttons * 6 Steam button * or special preselection buttons (optional) 7 Pinch valve (When dispensing milk and milk foam through the combi spout) 8 Plug&Clean (optional) 9 Steam dispensing (optional), Steam Milk nozzle (optional) 10 Height-adjustable combi spout with integrated milk foamer 11 ON/OFF button 12 Decaf button ** 13 Shift button ** 14 Hot water button * 15 Hot water spout 16 Grounds container 17 Removable drip tray with drip plate (drip grid) 18 “Warm rinse” pad 19 Barista pad 20 Timer and clock display 21 Information pad 22 Messages / error messages 23 Menu pad (opens main menu) * ** Standard allocation Alternative button allocation User Manual WMF bistro! 7 Introduction and General information User Manual Signs and Symbols For a detailed description of the warnings, see the “Safety” chapter. Caution. Risk to the machine. Follow the manual. Caution. Risk to the user. Observe the Safety chapter. Caution. Hot liquid. Observe the Safety chapter. Caution. Hot surface. Observe the Safety chapter. Caution. Bruising or crushing hazard. Caution. Hot steam. Observe the Safety chapter. Observe the Safety chapter. Tip Instructions Cross reference Start position Main menu Very important. Must be strictly observed. If the menu symbol is shown in this User Manual, the description starts at the main menu start position. Call up the main menu pad Touch The main menu is displayed. Main menu. There are other display options w We 2 4 . 11 . 2 0 1 0 08:15 main menu Main menu 8 User Manual WMF bistro! Introduction and General information Glossary Term • Text in italics Explanation • Listings, selection options Individual steps Description of coffee machine state and / or explanations of automatic steps. Steam Milk Automatic steam dispensing through the steam milk spout for heating or foaming milk. 1-Step Beverages are dispensed and ready to drink with one push of a button. 2-Step In the first step, the Steam Milk outlet is used to make milk and milk foam. In the second step, coffee and chocolate beverages are dispensed with a push of a button, and the beverage components are mixed manually. Dual Milk In the optional Dual Milk version, 1-Step and 2-Step beverages can be made with just one coffee machine. Override function Milk can be heated or foamed without automatic shut-off, up to a maximum milk or foam temperature of 90 °C. Additions Components of a recipe for a beverage, in addition to coffee, such as milk, milk foam, Choc. Barista Professional coffee server Beverage dispensing Dispensing coffee, hot water or Choc beverages Carbonate hardness Quoted in gpg (°dKH). The water hardness is a measure of the calcium dissolved in the water. Capacity For example: the capacity of the water filter in litres of water it can filter Choc Hot chocolate Choc system Complete module, mixer with portion controller for Choc Decaf Decaffeinated coffee Dispensing options Start-Stop: dispensing runs up to the set amount and can be stopped by pressing the button again. Free-flow: dispensing runs for as long as the button is held. Metered: the set volume is dispensed. Grounds chute w Grounds disposal through counter, page 16 Main tap Water stop cock, angle valve Milk system Combi spout, milk nozzle and milk hose Preinfusion Prior to brewing, coffee is briefly infused in order to ensure a more intense release of its aromatic substances. Pressing Automatic pressing of ground coffee prior to brewing. Rinsing Intermediate cleaning SB mode Self-service User Manual WMF bistro! 9 Operation Chapter 2 2.1 Operation Switch on coffee machine Press ON/OFF button and hold for more than 2 seconds Coffee machine switches on and heats up. When the machine is ready to dispense beverages, the “Ready to operate” display appears. The machine can also be switched on using the timer. 2.2 PIN access control w Software w Settings w Operating options page 35 w T imer program w Software w T imer page 21 Dispensing beverages Pressing the beverage button triggers dispensing of the beverage selected. • Lit up button • Flashing button • Unlit button = ready to dispense = beverage dispensing = not ready to dispense / button disabled Place a suitably sized cup below the combi spout Press the desired beverage button Desired beverage and progress of dispensing are indicated on the display. 2.3 Multiple preselection After beginning brewing, the display will show a cup symbol during dispensing. Preselection for multiple dispensing Increase the preselection for a beverage: Touch pad Reduce the preselection for a beverage: Touch pad The display shows the current preselection and the number of beverages begun. Caution. Hot liquids in the dispensing area. Observe the Safety chapter. Button allocation w Software w Settings w Recipe and buttons page 29 We 2 4 . 11 . 2 0 1 0 08:15 Display multiple preselection: the example shows 6 café crème. Beverage 2 of 6 is currently being dispensed. Dispensing of a maximum of 12 times the single beverage is possible. The multiple preselection for dispensing larger quantities, for example for a pot of coffee. 10 User Manual WMF bistro! Operation 2.4 Shift button (optional) Each beverage button may be doubly assigned. Level 1 always active. Press the shift button 2x Level 2 activated. Press the desired beverage button Level 1 is active again after dispensing a beverage at Level 2. 2X Shift button (active/inactive) w Settings w Operating options page 35 Special buttons (optional) There are special buttons available on the control panel such as S, M, L or the Decaf button depending on the version. These are preselection buttons which establish the desired amount of the beverage or preparation from the Decaf grinder before selection of the beverage using the beverage buttons. 2.5 Dispensing hot water Press the hot water button Dispensing occurs according to the dispensing option. Multiple preselections are possible for the dispensing option “metered”. w Multiple preselection page 10 2.6 Dispense milk or milk foam Press the beverage button assigned to milk or milk foam Dispensing occurs according to the dispensing option. Dispensing options w Button allocation w Settings page 32 Free-flow, Start-Stop or metered User Manual WMF bistro! 11 Operation 2.7 Connect up the milk Insert the milk nozzle into the milk connection on the combi spout Use a suitable milk nozzle on the combi spout. Colour • green Milk temperature 4 - 8 °C; with a refrigerator • white 8 - 16 °C • brown 16 - 24 °C • red 4 - 8 °C; for the Milkpower option • blue 8 - 16 °C; for the Milkpower option • pink or purple for the Milkpower option if the other nozzles spatter at the spout Adjusting the pinch valve w Other settings page 40 2.7.1 Standard Open the milk packaging and place on the left next to the coffee machine Lead the milk hose through the side wall and through the pinch valve Insert the milk hose with the beige milk nozzle into the milk pack The hose must not be under tension or bent when adjusting the height of the combi spout. 2.7.2 Active Milk w Additional instructions Active Milk With WMF Cooler, WMF Cup&Cool (optional) Pull the milk container out of the cooler Push the lid of the milk container back Pour milk into the milk container Place the lid back on the container Insert the adapter on the milk hose into the connection in the milk container lid Push the milk container back in carefully The milk hose is inserted into the adapter. 12 User Manual WMF bistro! Operation 2.8 Dispensing steam (optional) Press the steam button Steam is dispensed for as long as the button is held. • Steam warms beverages • Steam manually foams milk Caution. Hot steam. Observe the Safety chapter. Warm beverages Use as tall and slim a Cromargan® jug as possible, with handle Fill jug to no more than half way Immerse steam nozzle deeply into jug Press and hold steam button until desired temperature is reached Release steam button Swing steam outlet over to the drip tray Briefly press on the steam button Residue in the steam outlet tube is rinsed out. Wipe steam outlet with a damp cloth A Cromargan® jug, such as WMF order code 06 3417 6040 Caution. Hot surfaces. Burn hazard. Foam milk Use as tall and slim a Cromargan® jug as possible, with handle Fill jug to no more than half way Immerse steam nozzle into jug to just under the surface Press and hold steam button whilst rotating jug in a clockwise direction A thick creamy milk foam results. Release steam button Swing steam outlet over to the drip tray Briefly press on the steam button Residue in the steam outlet tube is rinsed out. Wipe steam outlet with a damp cloth User Manual WMF bistro! Do not overheat milk when foaming, otherwise foam volume decreases. Caution. Hot surfaces. Burn hazard. 13 Operation 2.9 Steam Milk (optional)/ Dual Milk (optional) The milk is automatically heated or foamed. The Steam Milk buttons can be assigned to up to four milk foam quality levels, or to hot milk. The Steam Milk buttons are assigned at the factory to three foam quality levels (superfine, fine, standard) and hot milk. Heat milk or foam milk Fill a tall, narrow container with the desired milk quantity Do not fill the container above the halfway point, so that the milk will not run over when it foams. Insert the steam nozzle deep into the milk Briefly press the desired Steam Milk button Steam is discharged, depending on the Steam Milk button assignment. Steam dispensing ends after reaching the set temperature, or when the Steam Milk button is pressed again. Wipe steam outlet with a damp cloth Steam Milk buttons Button allocation w Software w Settings w Recipe and buttons page 29 w Change recipes page 30 Override function (optional) Function is adjusted upon request by WMF Service. Milk and foam can boil over if the temperature is set to 90 °C, or when the override function is used. Press and hold the desired Steam Milk button Steam is dispensed for as long as the button is held. Wipe steam outlet with a damp cloth Caution. Hot surfaces. Burn hazard. Scalding hazard. Observe the Safety chapter. The maximum temperature setting is 90 °C. Do not overheat milk when foaming, otherwise foam volume decreases. 14 User Manual WMF bistro! Operation 2.10 Height adjustment of the combi spout The combi spout height is adjustable. Take hold of the combi spout from the front and push to the desired height Height adjustment range of the combi spout 55 - 160 mm. 2.11 Bean hopper/product hopper If possible, replenish product hopper in advance. Fill the hoppers no more than the amount needed for one day, in order to maintain the freshness of the products. Espresso beans on the left 2.12 Manual insert The manual insert is located at the front in the centre of the coffee machine cover. Manual insert is used • for inserting cleaning tablets • when using an additional coffee variety, such as decaffeinated coffee • for a coffee trial Preparation of ground coffee using the manual insert Open manual insert lid Insert ground coffee (max. 16 g) Close manual insert lid Press the desired beverage button Add ground coffee or cleaning tablet only when display shows a message. Follow the manual. Observe the Safety chapter. User Manual WMF bistro! 15 Operation 2.13 Grounds container The coffee grounds container receives the used coffee grounds. It has enough capacity to store coffee grounds from approx. 70 brewing cycles. The display shows a message as soon as the coffee grounds container needs to be emptied. Beverage dispensing is blocked for as long as the grounds container is removed. Remove the coffee grounds container Empty and replace grounds container Confirm process on the display If coffee grounds container cannot be replaced, check chute for coffee residues and remove. Always empty grounds container before reinserting. Replacing without emptying results in the coffee grounds container being overfilled. The coffee machine will be soiled. This may cause subsequent damage to the machine. If this is not observed, the warranty is invalidated in the event of any resultant damage. Follow the manual. Observe the Safety chapter. 2.14 Grounds disposal through the counter (optional) The coffee machine can be fitted with through-counter coffee grounds disposal. In this case, both the coffee grounds container and the coffee machine base have an opening that passes through the counter on which the machine is placed. The spent coffee grounds are collected in a large container under the counter. 16 Clean coffee grounds chute daily w Care User Manual WMF bistro! Operation 2.15 Drip tray For coffee machines without a drain connection, the drip tray must be emptied regularly. Pull out the drip tray carefully and empty Replace drip tray Replace carefully so that no water accidentally drips down. Clean drip tray daily. w Care Caution. Hot liquids in the dispensing area. Observe the Safety chapter. 2.16 Switch off the coffee machine The coffee machine must be cleaned daily prior to switching it off. Press and hold ON/OFF button switches off Disconnect mains plug Turn off mains water supply until coffee machine If this is not observed, the warranty is invalidated in the event of any resultant damage. PIN access control w Software w Settings w Operating options page 35 Follow the manual. Observe the Safety chapter. User Manual WMF bistro! 17 Software Chapter 3 3.1 Software An overview Ready to operate We 2 4 . 11 . 2 0 1 0 08:15 Touch clear area on the “Ready to operate” display Additional pads are activated. We 2 4 . 11 . 2 0 1 0 08:15 There are various options for the “Ready to operate” display. We 2 4 . 11 . 2 0 1 0 08:15 If there are errors, the relevant pad is displayed. is required then a care message pad is displayed. If Cleaning Other display options w S ettings w Operating options. “Ready to operate” display pads Chapter 3.3 Warm rinsing Chapter 3.2.1 Barista (strength of the coffee) Chapter 3.2.3 Information Chapter 3.2.4 Main menu Chapter 3.2.5 Error message Touching the pad calls up the error message. Care message Touching the pad leads directly to the menu. 18 User Manual WMF bistro! Software Main menu functions Chapter 3.2 Milk and foam Chapter 3.3.1 Timer program Chapter 3.3.2 Care Chapter 3.3.3 Settings Chapter 3.3.4 PIN entry Chapter 3.3.5 PIN rights, access control Chapter 3.3.6 Accounting Chapter 3.3.7 Menu control pads Save settings start continue Start or confirm a step Back to the higher menu level Cancel / leave without saving (Exit) Clear or reset Start preparation test / coffee trial Increase or reduce setting values Forward or back one step in listings User Manual WMF bistro! 19 Software 3.2 3.2.1 Ready to operate “Ready to operate” display Standard display for normal operation • • • • We 2 4 . 11 . 2 0 1 0 08:15 We 2 4 . 11 . 2 0 1 0 08:15 “Warm rinse” pad Barista pad Menu Information Standard display for SB mode (self-service) All pads that allow changes to be made are not available. The “warm rinse” pad, Barista pad, menu pad and messages are inactive. Error messages are not shown, only the Caution symbol is shown. 3.2.2 “Warm rinse” pad Touch the “warm rinse” pad A rinse of the pipes with hot water begins. The water warms the brewing system and guarantees an optimum coffee temperature. 3.2.3 Recommended after a longer brewing pause, especially before dispensing a cup of espresso. “Warm rinse” pad (active/inactive) w Settings w Operating options page 35 Barista pad Touch the Barista pad The coffee strength will be altered for the next brew only. weaker (-15 %) normal, as per setting stronger (+15 %) Barista pad (active/inactive) w Settings w Operating options page 35 20 User Manual WMF bistro! Software 3.2.4 Information Touch the pad on the “Ready to operate” display The Information menu appears. The main “Information” menu contains the following selection options: Service information • • • • service Service location Next date for maintenance Start-up data Software versions customer care brewtime Customer • Journal Journal log of the last cleanings • Cleaning information Period since the last cleaning If no beverages were dispensed since the last cleaning, “OK” is displayed • Information about maintenance Information about the remaining period and brews until the next maintenance dates • Water filter information (optional) Information about the remaining capacity and period until filter change is needed Brew time • Brew time of last beverage dispensed Journal information • List of recorded errors and messages (for the telephone support team) journal timer Timer • Display the timer status (On/Off) • Display the next switching time User Manual WMF bistro! 21 Software 3.2.5 To the main menu We 2 4 . 11 . 2 0 1 0 08:15 Call up the main menu Press on the “Ready to operate” display on The main menu is displayed. “Ready to operate” display We 2 4 . 11 . 2 0 1 0 08:15 ... with additional pads Delayed fade-in w Settings w Operating options page 35 3.3 Main menu main menu Other illustrations of the main menu for protected levels. w PIN rights, access control page 37 3.3.1 Milk and foam Milk foam quality When dispensing milk and milk foam through the combi spout. The milk foam quality is set here. This setting will apply to all beverages with milk foam. -> finer foam and lower dispensing temperature Increase setting value -> coarser foam and higher dispensing temperature foam quality Reduce setting value Steam Milk settings w Software w Change recipes page 31 Set milk pump cycle (optional) w Additional instructions Active Milk 22 User Manual WMF bistro! Software Latte macchiato pause interval When dispensing milk and milk foam through the combi spout. Latte macchiato is more successful if the interval between milk and milk foam dispensing is lengthened. The standard setting is 3 seconds. macch.interrupt Reduce setting value -> shorter interval Increase setting value -> longer interval 3.3.2 Timer program The timer program sets the switch on and switch off times. The “Timer program” main menu contains the following selection options: • • • • • Timer state Set timer Timer overview Delete timer Timer information PIN rights, access control w Software w Settings w PIN rights, access control page 37 Timer state Touch timer state Activate / deactivate timer = On/Off. timer state When the timer is activated, the appears on the timer symbol display. User Manual WMF bistro! 23 Software Set timer Touch timer adjustment Program the switch on and switch off times. Touch operating time pad The operating time display appears. Here the day, time, and desired operation are set. timer adjustment Example: Set day (Day) • 1 = Monday • 2 = Tuesday, etc. up to 7 = Sunday • 1 - 5 = Monday to Friday (weekdays) • 1 - 7 = entire week (Monday to Sunday) operating time action prg day h min Set the time (hours, minutes) In day 1 - 5 or day 1 - 7, the switching times are copied to the indicated days. Set the desired switching time (action) Select desired settings with the and . pads • Switch on time = (on display) • Switch off time = (on display) Current selection is inversely displayed. Confirm with or Delete with Display programmed switching times Touch the and pads under Prg Programmed switching times are displayed here. Up to 16 switching times (events) per day can be programmed. Programmed times are listed chronologically. Any new switching time is sorted chronologically immediately upon input and confirmation with . Touching the 24 pad directly accesses the timer overview. User Manual WMF bistro! Software Copy day Any day may be copied to other days, complete with its switching times. Touch timer adjustment pad Program the switch on and switch off times. pad Touch operating time Touch the number pad under day The selection of the week days is displayed. Scroll through to page 4 Touch copy day The selection of the week days is displayed again. Select the day that you want to copy Touch insert day Select the day you want to copy the time settings to The day is copied. In day 1 - 5 or day 1 - 7, the switching times are copied to the indicated days. The individual days 1,2,3...7 are displayed. To check times w T imer overview Timer overview Checking the programmed switching times: Touch timer overview pad The switching times overview for the week is displayed graphically. Switch on times are indicated by bars. timer overview Example: timer overview operating time Switching times Monday to Friday (1 - 5). On time 7 a.m. (7:00) Off time 6 p.m. (18:00) User Manual WMF bistro! 25 Software Delete timer Touch delete timer on page 2 of the timer main program menu Scroll to desired day and touch to select A security dialogue now appears querying whether deletion is actually intended. Confirm with The day is deleted with all its switching times. Besides individual days, “all workdays” or the entire week can also be deleted. delete timer This process cannot be undone. Timer information Touching the timer info pad calls up a display with the next switching time and the timer state (On/Off). timer info timer info timer status next program operating time switch off 26 on 18:00 User Manual WMF bistro! Software 3.3.3 Care Cleaning programs are started from the Care main menu. The Care main menu contains the following selection options: • Cleaning program • Milk system (when dispensing milk and milk foam through the combi spout) • Choc system • Filter change (optional) • Customer check-up (optional) In the Software chapter w Care display-guided sequences are described in detail. Physical cleaning actions are described in the Care chapter. Cleaning program Touch cleaning prog. The daily cleaning program starts. The program automatically executes foamer cleaning if milk beverages have been dispensed.If there is a Choc system installed (mixer system) then Choc system rinsing occurs. The cleaning program sequence is described in the cleaning instructions. Prior to carrying out cleaning, please note the safety instructions in the safety chapter. Read the cleaning instructions and the Care chapter, starting on page 41. cleaning prog. w Cleaning instructions Caution. Follow the manual. Observe the Safety chapter. Milk system Milk system rinsing see Cleaning instructions. milk system During milk system cleaning the milk system is rinsed out using clear water. Using the option Plug&Clean the milk system cleaning is executed automatically. Milk system rinsing is performed automatically by the cleaning program. Caution. Follow the manual. Observe the Safety chapter. User Manual WMF bistro! 27 Software Choc system (mixer rinsing) (optional) See Cleaning instructions for Choc system rinsing. choc system During Choc system cleaning the mixer system is rinsed out using hot water. Choc system rinsing is performed automatically by the cleaning program when a Choc system is installed. Filter change (optional) Caution. Follow the manual. Observe the Safety chapter. This point can be selected by trained personnel if the WMF Service function has been enabled. Question: was the filter changed? yes/no Customer Check-up (optional) This point can be selected by trained personnel if the WMF Service function has been enabled. Question: has customer check-up been performed? yes/no 28 User Manual WMF bistro! Software 3.3.4 Settings Recipe and buttons Touch recipes/button recipes/button Menu recipes/button shows the options: • Cup volumes • Change recipes • Sequence of ingredients additions • Button allocation • Testing Selecting the beverage buttons when setting = more Press the desired beverage button = less Selecting the beverage button on the 2nd level Press the shift button 2x Press the desired beverage button = exit without change = save the values = start test Selecting the beverage button in conjunction with one of the preselection buttons S, M, L or decaf Press the desired preselection button Press the desired beverage button Adjust values Adjust values with the and pads Start a preparation test with the current values Touch pad The values are not saved yet. Save setting Save with Cup volumes Cup volumes are matched to the cups used. Individual beverage ingredients are matched to the new cup volumes with no effect on composition and quality. User Manual WMF bistro! cup volumes 29 Software Change recipes change recipes Chociatto All beverages Ground coffee quantity / Choc powder quantity Water volume Milk beverages Milk foam volume Change recipes display Chociatto ground coffee Milk volume Example: ground coffee quantity Coffee beverages Chociatto quality level Quality The quality levels influence the coffee brewing. The higher the quality level, the more intensive the release of the flavour and aromatic substances in the coffee. Quality 1 Quality 2 Quality 3 Quality 4 Quality 5 Quality 6 Quality 7 After pressing, space is provided for the ground coffee to swell. After pressing, the coffee is brewed immediately. After pressing, a pre-infusion occurs. After pressing and a pre-infusion, a second wet pressing occurs. Same as for Quality 4, but with stronger wet pressing. Same as for Quality 5, but with stronger wet pressing. Same as for Quality 6, but with longer wet pressing. Temperature The brewing temperature can be set to obtain an optimal coffee taste. For each beverage button separately, up to 2 stages higher and up to 2 stages lower. 1 stage represents about 2 °C. (Default value is 94 °C) 30 quality 4 Quality An excessively high quality level may lead to a brewing water error. (Error F161) chociatto temperature standard 0 User Manual WMF bistro! Software Steam Milk settings (optional) change recipes foam fine Milk and foam Milk temperature pad Touch change recipes Press the desired Steam Milk button Select milk or milk foam Adjust the milk foam quality Set the shut-off temperature Save with The maximum temperature setting is 90 °C. foam fine foam quality foam fine temperature Set decaf (optional) Decaf grinder is always the right grinder. pad Touch change recipes Press Decaf button Ground coffee quantity for decaf is set by percentage for the ground coffee quantity set in the recipe. This setting applies to all coffee beverages with preselected “Decaf”. Save with User Manual WMF bistro! decaf ground coffee 31 Software Sequence of ingredients additions Sequence examples The sequence of additions is only possible for beverages whose recipe contains at least two ingredients. The sequence in which the individual additions will be dispensed. Adjustable addition • Coffee • Milk • Milk foam • Choc Set the sequence a.) Upper line: set start position for dispensing milk, milk foam or Choc. b.) Lower line: set start position for coffee brewing. Touch the start position pad until the desired addition is shown The next addition will be shown each time it is touched. Sequence of dispensing from left to right. Button allocation The beverages are assigned to the beverage buttons. This button allocation is set here. Press the beverage button Select the desired recipe, for example espresso, from the list Alter dispensing option for milk *, foam *, steam or hot water Press the beverage button Select recipe, for example foam * Select dispensing option * When dispensing milk and milk foam through the combi spout. Select grinder for a coffee beverage Press the beverage button Select recipe, for example espresso Select grinder (on the right or left) 32 add-ons cappuccino a> b> First coffee and milk foam at the same time and then milk add-ons cappuccino First milk foam, then milk, then coffee add-ons cappuccino First milk, then milk foam, then coffee Load a new recipe: the previous settings will be overwritten by the works standard values for the new recipe. Only adjustable recipes are indicated. dispens.opt. ages metered free flow start/stop portioner ages grinder right grinder left User Manual WMF bistro! Software Testing Weigh grounds Empty and replace grounds container Touch weigh grounds The process dispenses ground coffee directly into the grounds container and the grounds may then be weighed. The grind quantity is dispensed three times. Quality check The components of a beverage are delivered individually (coffee, milk, milk foam, Choc). The volumes of the individual components can be determined exactly. Reset The coffee machine software is restarted here. reset Time and date Clock time and date are set here. time / date Display language Language used in the display is set here. language Display contrast Contrast of the display is set here. (Default value is 70) User Manual WMF bistro! contrast 33 Software Water filter is fitted Query regarding whether the WMF Service is enabled. Set here whether a scale filter / water filter is fitted or not. This affects the descaling intervals. softener/filter Capacity Scale filter / water filter: filter capacity is set here. (The water filter capacity can be found in the water filter documentation.) Filter capacity This point can be selected by trained personnel if the WMF Service function has been enabled. Warm-up rinsing Whether the coffee machine should rinse out the brewing unit with hot water after heating up is set here. Recommended setting: active. warm up rinsing SB mode (self-service) (active/inactive, default value: inactive) SB mode active • No manual insert (only cleaning tablets) • No beverage preselection possible • It is not possible to interrupt the beverage dispensing cycle • Menu pad delayed • Maintenance and error messages suppressed • Barista pad and “warm rinse” pad not displayed selfService mod Foamer rinsing Whether automatic foamer rinsing should occur after the last beverage with milk components is dispensed. yes/no It is not possible to interrupt the beverage dispensing cycle. 34 foamer rinsing User Manual WMF bistro! Software Rinsing interval The time elapsed between the last time a beverage with milk was dispensed and a foamer rinsing. Maximum value with Plug&Clean is 3 minutes. Recommended setting: 2 minutes. rinse interval Operating options The following operating options are available. • “Warm rinse” pad (active/inactive) • Barista pad (active/inactive) • Beverage preselection (active/inactive) • 2. Level, shift button (yes/no) • ON/OFF button (direct/via PIN) • Cancel beverage (yes/no) • Menu pad (immediate/delayed) • Error message (normal/symbol) “Warm rinse” pad Recommendation for self-service: inactive. Barista pad Recommendation for self-service: inactive. Beverage preselection Recommendation for self-service: inactive. 2nd level / shift button Recommendation for self-service: no. ON/OFF button Recommendation for self-service: via PIN. If “via PIN” is set, then the PIN for the cleaning level will be queried before switching on or off. Cancel beverage Recommendation for self-service: no. Menu pad Recommendation for self-service: delayed Standard: immediate Error number Normal: all messages are shown on the display. Symbol: messages that require immediate action are shown on the display. All other messages are displayed as symbol . Touch the symbol All messages are displayed. User Manual WMF bistro! options If customers serve themselves then some functions can be switched to inactive. The pads will not be shown on the “Ready to operate” display. w PIN rights, access control page 37 w To the main menu page 22 With illumination (optional): messages that require immediate action are accompanied by flashing side illumination. 35 Software Illumination (optional) Set the colour values here of the LEDs for the desired illumination colour Setting examples light sequence (sequence of colours) amber blue red 1 25 0 green blue 0 0 30 0 0 30 illumination setting illumination red green blue Milk (optional) The empty milk message can be activated here. Touch milk pad Beverage lockout yes/no Beverage lockout no: beverages can be dispensed until the milk container is actually empty. Beverage lockout yes: input is requested as to how many beverages can be dispensed after the message has appeared. After this number of beverages has been dispensed, beverages with milk are blocked from further dispensing. Beverage lockout is removed when the milk container is filled. milk setting illumination milk setting milk beverage lock setting milk beverage lock beverages left 36 no yes 3 User Manual WMF bistro! Software 3.3.5 PIN-entry display Individual authorisation levels can be protected using a PIN. For access to a PIN-protected level, the PIN must be entered via pad. Touch the pad in the main menu Numerical keyboard display appears. Enter required 4-figure PIN Confirm with Following entry of a valid PIN, the assigned functions are available. 3.3.6 2 4 . 11 . 2 0 1 0 PIN PIN-entry display PIN rights, access control If a PIN has been assigned for a particular level, no access will be granted without a PIN. Cleaning level main menu On entering the valid PIN, access to: = Care = PIN-protected ON/OFF button Cleaning level access Milk and foam settings for the Steam Milk button require PIN access at the Accounting level. Setting level main menu On entering the valid PIN, access to: = Set milk and foam quality (for all beverages) = Timer program = Care = PIN-protected ON/OFF button = Settings (beverage, general, others) Setting level access Milk and foam settings for the Steam Milk button require PIN access at the Accounting level. User Manual WMF bistro! 37 Software Accounting level main menu On entering the valid PIN, access to: = Set milk and foam quality (for all beverages) = Timer program = Care = PIN-protected ON/OFF button = Settings (beverage, general, others) = Assign PIN rights, access control = Accounting numbers of beverages Accounting level access A PIN can be assigned to any level. The levels are hierarchical. Example: the PIN for the cleaning and setting accounting level. setting Example: access-control accounting level is valid for levels, but not for the Touch the pad in the main menu Select desired level Example: cleaning Numerical keyboard display appears. Enter any desired 4-digit number Number entered is displayed. Confirm with This level is now PIN-protected. When a PIN is assigned to a subordinate level, that PIN is automatically copied to higher levels if the latter are not already PIN-protected. Delete PIN Entering 0000 will delete access control for the given level. Deletion of one level automatically deletes the subordinate levels. setting cleaning PIN entry for Cleaning level: 1234 This PIN is carried over to the higher levels. Example: access-control accounting setting cleaning PIN entry for Cleaning level: 1234 Setting level: 9876 Accounting level: 7777 = more = less = exit without change = save the values = delete 38 User Manual WMF bistro! Software 3.3.7 Accounting numbers of beverages Touch counter The counter menu displays the counter for each beverage. Read counter Touch desired beverage on the display Delete counter Touch the clear pad If no beverage is selected, on touching the clear pad a dialogue appears in the display querying whether the counter readings for all beverages should be zeroed. The “Accounting numbers of beverages” function should be protected with a PIN to prevent unauthorised access. Function over additional PIN (setting by service personnel): only possible to view the day counter, not to delete it. 3.3.8 Waiter accounting system (optional) See additional User Manual. User Manual WMF bistro! 39 Other settings Chapter 4 4.1 Other settings Adjusting the pinch valve When dispensing milk and milk foam through the combi spout. The milk dispensing temperature is determined by the milk nozzle and by the setting of the pinch valve. For dispensing of the milk foam, the dispensing temperature is only determined by the milk nozzle, not the pinch valve. Press in the pin with a ball pen or something similar Turn the pinch valve by one notch at a time Test at each step The milk should not spit during dispensing. Setting for colder milk = turning clockwise 4.2 Labelling of beverage buttons First switch off coffee machine in order not to trigger dispensing inadvertently. Pull out existing labelling behind front glass in a downward direction Write on label stickers as desired using the WMF template Stick on label mount and re-insert behind the front glass panel The template can be printed out on adhesive labels or paper. Stick paper to label mount using an adhesive sticker. Free download of WMF label template from www.servicecenter.wmf.com Matching adhesive labels: Zweckform-Avery No. 3659 40 User Manual WMF bistro! Care Chapter 5 Care Regular cleaning is essential in order to ensure problem-free operation of the coffee machine and to ensure optimum coffee quality. Prior to and after every instance that the machine is shut off for several days, perform all cleanings. Caution. Health hazard. Follow the HACCP schedule. Cleaning intervals overview Automatic Regularly Weekly Daily Care Cleaning program, x Foamer rinsing Cleaning program x x Milk system rinsing x Combi spout cleaning, standard x Combi spout cleaning, Plug&Clean * x Choc system rinsing * Combi spout cleaning, standard, Combi spout cleaning, Plug&Clean, Choc system rinsing, w Cleaning instructions. Grounds container cleaning x Drip tray cleaning x (x) Milk system rinsing, Mixer cleaning * x x Steam outlet cleaning x Steam Milk outlet cleaning * Daily Weekly Regularly Message (x) * x Bean hopper cleaning x Choc hopper cleaning * = Daily, at least once per day and as required = Weekly cleaning = Regularly as required = After the display shows a message = Daily as required = Optional (depending on the model) User Manual WMF bistro! 41 Care 5.1 Cleaning program The cleaning program is guided by software in the following sequence through the whole cleaning program: • Milk system cleaning • Choc system rinsing • Cleaning program for the machine with cleaning tablets: coffee carrying parts 5.2 Milk system Milk system cleaning see Cleaning instructions. The milk system consists of: • Combi spout • Milk nozzle • Milk hose The milk system must be thoroughly cleaned and sanitized at least once a day, after no more 24 hours. For machines with Plug&Clean, this must be done as part of the machine cleaning at the end of the service day. If this Plug&Clean cleaning is not done, then the combi spout must be disassembled and cleaned manually. Caution. Hot liquids in the dispensing area. Observe the Safety chapter. Cleaning Program w Cleaning instructions Caution. Hot liquids in the dispensing area. Observe the Safety chapter. Caution. Follow the hygiene instructions. See HACCP schedule. Milk hose should be changed at regular intervals. Foamer cleaning, standard Combi spout cleaning w Cleaning instructions Cleaning of the combi spout consists of three parts. • Automatic foamer rinsing after each beverage with milk or milk foam • Display-guided milk system rinsing • Once per day, place combi spout, milk hose and milk nozzles in a cleaning solution 42 User Manual WMF bistro! Care Foamer cleaning Plug&Clean Cleaning with Plug&Clean consists of three parts. • Automatic foamer rinsing for a maximum of 3 minutes after each beverage with milk or milk foam • Display-guided Plug&Clean cleaning • Once per week, lay combi spout, milk hose and milk nozzles in a cleaning solution 5.3 Plug&Clean cleaning program w Cleaning instructions Choc system rinsing Choc system rinsing is interim cleaning of the mixer. See Cleaning instructions for Choc system rinsing. 5.4 General cleaning Grounds container cleaning (grounds chute, optional) Empty the grounds container and rinse under running water Clean with a clean, damp cloth Drip tray, housing and front panel Clean the cold machine using a damp cloth Wipe dry using a fine woollen cloth or chamois leather The Choc system rinsing is an integral part of the cleaning program. Order numbers for the WMF care program w Appendix Accessories and spare parts page 64 Switch off the machine before cleaning the front panel to avoid a beverage being accidentally dispensed. Cleaning metal surfaces For cleaning metal housing parts (matte surface) we recommend WMF Purargan® cleaner. Do not clean with scouring powders or the like. There is a risk of causing scratches or scores. Do not use any sharp cleaning materials or implements. Use soft cloths for cleaning. User Manual WMF bistro! Risk to the machine. Follow the manual. 43 Care 5.5 Choc mixer cleaning (optional) Cleaning will be more frequent depending on powder consumption. Switch off coffee machine using the ON/OFF button Disconnect mains plug Remove the coffee grounds container Pull off mixer hose from mixer to combi spout Turn stud on bayonet fitting underneath the mixer bowl counter-clockwise Mixer bowl is released from the arrester lock. The propeller for the mixer is now visible. The propeller can be cleaned with a cloth Dismantle two-piece mixer bowl Clean both parts of mixer bowl and mixer hose under warm running water Allow all parts to dry completely closed open On re-assembly, all openings must face in the same direction. Ensure that the spiral guide is seated and the hose is not pinched. Replace mixer bowl Turn stud on bayonet connector back clockwise Push mixer hose onto mixer bowl fitting again, and plug in combi spout Replace the grounds container Ensure that mixer hose is replaced securely. This is important, as otherwise hot water or hot Choc beverage may escape. 44 Caution. Scalding hazard. Observe the Safety chapter. User Manual WMF bistro! Care 5.6 Steam outlet cleaning (standard und Steam Milk) Daily Mix 5 ml of cleaner in a tall jug with 0.5 l of lukewarm water Immerse the steam nozzle in the cleaning solution, and briefly press the steam button or a Steam Milk button Reaction time: 30 minutes Clean with a brush Rinse thoroughly with water Press the steam button The steam clears the holes of the steam nozzle of milk residue, and removes cleaner residue. Weekly Unscrew the steam nozzle Place the steam nozzle in the cleaning solution for at least 5 hours Clean with a brush Rinse thoroughly with clean water Screw the steam nozzle onto the Steam Milk spout Immerse the steam nozzle in a receptacle with clear water Briefly press a Steam Milk button Wipe steam outlet with a damp cloth 5.7 Caution. Health hazard. Irritation and scald hazard in the dispensing area. Caution. Hot steam. Observe the Safety chapter. Bean hopper cleaning Clean the inserted foils of the bean hopper as required and at regular intervals (at least once a month). Only perform cleaning on empty or almost empty bean hoppers. Never reach into the coffee grinders. Never clean the foils in a dishwasher. Switch off coffee machine using the ON/OFF button Disconnect mains plug Remove bean hopper lid Remove inserted foils upwards Clean thoroughly using a moist, non-woven cloth Allow the foils to dry completely Insert foil again User Manual WMF bistro! Caution. Bruising or crushing hazard. Observe the Safety chapter. Follow the manual. Observe the Safety chapter. 45 Care 5.8 Choc hopper cleaning (optional) Cleaning will be more frequent depending on powder consumption. Switch off coffee machine using the ON/OFF button Disconnect mains plug Unlock hopper lock on the machine cover Tip hopper backwards and remove upwards Empty hopper completely Unscrew union nut at front and rear Remove the dosing auger Thoroughly wipe out hopper with a damp cloth Thoroughly clean individual dosing auger components Allow product hopper and individual components to dry completely Re-assemble and insert the dosing auger and screw on union nuts Portion controller with individual parts, dosing auger Ensure correct orientation of discharge. Refill and replace product hopper Shut hopper lock on the machine cover 46 User Manual WMF bistro! HACCP schedule Chapter 6 HACCP schedule You are required by law to ensure that your customers are not subject to any health risks as a consequence of consumption of food items you serve. A HACCP schedule (Hazard Analysis Critical Control Points) for risk identification and assessment is required. You should carry out a risk analysis on your premises. The aim of the analysis is to recognize and pre-empt food hygiene hazard points. For this purpose, monitoring and, where necessary, test procedures must be established and implemented. With correct installation, care, maintenance, and cleaning, WMF coffee machines meet the requirements described above. If care of the coffee machines is not carried out properly, dispensing milk beverages will constitute a food hygiene hazard point. Please observe the following points in order to comply with the HACCP Schedule: “Food Hygiene Ordinance from 05.08.1997” Use our HACCP schedule for monitoring of regular cleaning. Sanitize the milk system daily • Follow the cleaning instructions for the milk system contained in the cleaning instructions. This will ensure that your system contains a minimum of bacteria at commencement of operation. You can call up the logs of the most recent cleaning operations via Information pad . Always commence operation with a freshly opened cooled milk pack • Original packaged UHT milk is usually free from harmful bacteria. Always open a new cooled pack at commencement of operation. • Ensure absolute cleanliness when opening the milk pack. Germs can be introduced from dirty hands or tools when opening. User Manual WMF bistro! Recommendation: only use UHT milk with a 1.5 % fat content. 47 HACCP schedule Keep milk cool • Always have a new cooled milk pack handy. • If a cooled freshly opened pack is used within a period not exceeding 3 hours, refrigeration during use is not necessary. • If little milk is being used, cooled milk must be placed in the refrigerator again during operation. At commencement of operation milk should be at approx. 6 - 8 °C. Depending on the setting, one litre of milk is sufficient for approx. 20 cappuccinos. WMF AG offers a range of refrigeration options (e.g., WMF countertop coolers or WMF milk coolers). HACCP schedule Month Year Use only cooled UHT milk, to prevent health risks due to bacteria. For Choc, use only products that have not exceeded their expiration date. 3a. Clean the foamer and change out the combi spout after 4 hours of operation (absolutely required for low number of dispense cycles, or if milk is not cooled.) 3b. Weekly mixer cleaning and regular product hopper cleaning (Care chapter) 4. General machine cleaning Cleaning steps Time of day 1 2 3 Signature 4 Date Date Cleaning steps: 1. Run the cleaning program w Cleaning instructions 2a. Foamer cleaning (combi spout) w Cleaning instructions 2b. Daily mixer cleaning w Cleaning instructions 1. 17. 2. 18. 3. 19. 4. 20. 5. 21. 6. 22. 7. 23. 8. 24. 9. 25. 10. 26. 11. 27. 12. 28. 13. 29. 14. 30. 15. 31. Cleaning steps Time of day 1 2 3 Signature 4 16. 48 User Manual WMF bistro! Maintenance Chapter 7 Maintenance and descaling Please observe that this is a professional industrial coffee machine which needs regular maintenance and descaling. The maintenance schedule is based on the degree of use of the machine and is shown on the display. If maintenance is undertaken by the WMF Service, then descaling of the brewing system is done at the same. The coffee machine may continue to be operated after the message, but Customer Care or contract maintenance should be carried out promptly to ensure correct functioning and so as to avoid any consequent damage. 7.1 Customer Check-up Customer Check-up after the display shows a message; may be undertaken by the user / operator. 7.2 Maintenance Maintenance after the display shows a message; may only be undertaken by trained personnel or by WMF Service, as in this instance components affecting safety must be replaced. 7.3 Customer Check-up after the display shows a message see Customer Check-up Instructions in Customer Check-up Kit. w Appendix:Accessories and spare parts Service maintenance message w Messages and instructions page 50 WMF Service You can reach the WMF Service Centre if the local WMF Service is not known. For other maintenance work and repairs, please contact your local WMF Service. The telephone number can be found on the address sticker on the coffee machine and on the delivery note. User Manual WMF bistro! 49 Messages and instructions Chapter 8 8.1 Messages and instructions Messages for operation Refill beans Top up bean hopper (refer to display) Check: • Is the product hopper lock open? Refill beans w Care • Beans do not feed through Stir with a large spoon and confirm with Open water supply valve Turn on water mains supply and confirm open water supply Empty coffee grounds container Empty grounds container Empty grounds cont.! Grounds container missing Replace the grounds container correctly Grounds container! Change water filter Please call the WMF Service Change filter Follow water filter instructions. Please consult the User Manual Error number is displayed w Error messages and malfunctions Please call the WMF Service Error number is displayed w Error messages and malfunctions Service Message Service maintenance after the display shows a message. Call WMF Service 50 C a u t i o n! Please consult the user manual! handleiding ! C a u t i o n! Call service! serviceMainten1 User Manual WMF bistro! Messages and instructions 8.2 Error messages and malfunctions Basic procedure on display of error messages or malfunctions. Switch coffee machine off and then on again after a few seconds Repeat the process which led to the error In many cases, this eliminates the malfunction and you can continue working. If this is not successful: find the error message or error number in the following list and follow the sequence of actions indicated. If this does not rectify the error or if the error indicated is not listed please call WMF Service. Some messages lead to blocking of individual functions. You will notice this by the fact that the beverage button illumination goes out. The beverage buttons that are still illuminated can continue to be used. Your WMF bistro! is provided with a diagnostics program. Any errors that occur are shown on the display. The error messages listed may also be caused by an interruption to the mains electricity supply. If there is a current error or a message to the operator, the pad is displayed. Touch pad Error number is displayed. User Manual WMF bistro! 51 Messages and instructions Error number Error description Action instructions Motor blocked All associated brews barred. Note hopper switchover. Grinders 24 Tap on beans hopper The beans may slide down and the light barrier is touched. 34 Motor blocked All associated brews barred. Note hopper switchover. Tap on beans hopper The beans may slide down and the light barrier is touched. Steam boiler 186 189 Steam boiler: filling time Steam dispensing barred, milk foam barred. Steam boiler: heat-up time error Heating off, steam dispensing barred. Machine Off-On; note heating display for information for the WMF Service Water tap open? Machine Off-On Check local fuses Sensor system (current) 130 General current error Machine Off-On Switch off lighting (w S ettings), all colours to zero Allow the machine to cool off and try again Call the WMF Service if the error occurs again 148 Current fault: steam boiler vent valve One can continue to use the machine; dosing fluctuations can occur for milk meterings. Confirm steam dispensing or milk dispensing from time to time Call WMF Service 131 Current error: hot water valve 132 Current error: cold water mixing valve, hot water valve Hot water dispensing is barred: one can continue to use the machine. Do not use hot water anymore. 137 Current error: mixer / valve Barr on beverage mixer: one can continue to use the machine. Do not use Choc anymore. 140 Current error: steam valve 1 Hot water dispensing is barred: one can continue to use the machine. Do not use hot water anymore. Call WMF Service Call WMF Service Call WMF Service Steam dispensing is barred: one can continue to use the machine. Do not use steam dispensing or Steam Milk. Call WMF Service 52 User Manual WMF bistro! Messages and instructions Error number Error description Action instructions 141 Current error: steam valve 2 Steam dispensing is barred: one can continue to use the machine. Do not use steam dispensing or Steam Milk. 142 Current error: cap. valve 1 143 Current error: cap. valve 2 134 Current error: cold water brewing valve 149 General current error 161 Flow error 165 Flow error: Choc dosing 170 Sensor damage: Steam Milk Call WMF Service Milk beverages are barred: the machine can be used except for milk beverages. If installed use steam dispensing for foaming. Call WMF Service Milk beverages are barred: the machine can be used except for milk beverages. If installed use steam dispensing for foaming. Call WMF Service One can continue to use the machine. Coffee beverages may be brewed too hot. Call WMF Service Machine Off-On Allow the machine to cool off and try again If the error occurs again: Call WMF Service Water tap opened? Machine Off-On Perform cleaning and try again Water tap opened? Machine Off-On Remove and clean mixer Perform mixer cleaning Machine Off-On Allow the machine to cool off and try again If the error occurs again: Call WMF Service Steam Milk is barred. One can continue to use the machine for coffee beverages. 171 Short circuit: Steam Milk sensor Machine Off-On Allow the machine to cool off and try again If the error occurs again: Call WMF Service Steam Milk is barred. One can continue to use the machine for coffee beverages. User Manual WMF bistro! 53 Messages and instructions 8.3 Errors without error message Error pattern • Coffee dispensing on the left / right differs • No milk foam / no milk dispensing, although there is milk in the container Action instructions Clean the combi spout ->Cleaning instructions Check whether the milk hose is kinked or squashed Lay milk hose correctly Clean the combi spout Check whether milk nozzle is blocked w Cleaning instructions Pinch valve turned to strongly? w Other settings • Milk foam not OK • Temperature too low Change milk nozzle: - green milk nozzle for use of cooled milk - white or brown milk nozzle for uncooled milk Clean the combi spout w Cleaning instructions Close pinch valve w Other settings • The milk foam dispensing spits strongly • Milk to hot Use white or brown milk nozzle Set foam quality lower Clean milk system w Cleaning instructions Open pinch valve w Other settings • Choc is blocked Is the hose kinked? Perform milk cleaning and rinsing oftener If necessary daily w Care and Cleaning instructions • No illumination • No display • No tone when pressing a button Dose less powder Dose more water Disconnect mains plug Pull out drip tray Check the fuse behind the drip tray Only fuse F4 A is permissible. Replace fuse Caution. Risk of electrocution. Risk to life if not observed. 54 User Manual WMF bistro! Safety Chapter 9 9.1 Safety Hazards to the operator At WMF, safety is one of the most essential product features. The effectiveness of safety devices can only be ensured if the following points are observed: • Read the User Manual carefully prior to use. • Do not touch hot machine components. • Do not use the machine if it is not working properly or if it is damaged. • Built-in safety devices must never be altered. • This device is not designed for persons (including children) with limited physical, sensory or mental capabilities or who lack the required experience and / or knowledge, unless they are supervised by a person responsible for their safety or have received instructions from them about how the device should be used. • Children should be supervised to ensure that they do not play with the device. Despite safety devices, every machine poses numerous hazards if incorrectly used. Please observe the following instructions when using the coffee machine so as to prevent injury and health hazards: Scalding hazard. When dispensing coffee, Choc, hot water and steam there is hazard of scalding. Ensure that there is always a receptacle under the spout when dispensing beverages. Caution. Failure to follow Safety warnings can result in death or serious injury. Follow the safety instructions. Caution. Hot liquids in the dispensing area. Scalding hazard. Caution. Hot steam. Burn hazard. User Manual WMF bistro! 55 Safety Bruising or crushing hazard. There is a hazard of bruising or crushing when handling all moving parts. Do not reach into the bean hopper or the brewing unit opening when the coffee machine is switched on. Health hazard. The product hoppers (coffee beans / Choc) and manual insert may only be filled with materials for the use intended. Health hazard. When handling special cleaners for the milk foamer, cleaning tablets, follow the protective measures on the packaging. The special cleaners for the milk foamer and cleaning tablets are irritants. Only put in cleaning tablets after the display shows a message. Irritation and scald hazard. Never reach under the spouts while cleaning. Cleaning fluid / descaling solution runs out of the combi spout when cleaning / descaling. 9.2 Caution. Bruising or crushing hazard. Risk of injury. Caution. Health hazard. Only use as intended. Caution. Health hazard. Follow the instructions of the label on the cleaning agents. Caution. Health hazard. Irritation and scald hazard in the dispensing area. Hazards to the coffee machine Please observe the following points so as to prevent problems with and damage to the coffee machine: • For water with carbonate hardness in excess of 5 °dKH, a WMF water filter must be fitted; otherwise, the coffee machine can be damaged due to build-up of scale. • For insurance reasons always ensure that, at the end of operation, the mains water supply for the water supply is turned off and the mains power is switched off or the machine is unplugged. 56 User Manual WMF bistro! Safety • We recommend damage prevention measures such as: - installation of a suitable water monitor in the mains water supply - installation of smoke alarms • After a company holiday we recommend running the cleaning program at least twice before reusing the machine. 9.3 w Cleaning instructions Intended use The WMF bistro! is designed to dispense coffee beverages, milk beverages and / or powdered beverages (Choc and topping) in various variations into cups or cans. In addition, the device can generate steam for heating milk and dispensing hot water. This device is also intended for industrial and commercial use and for use by professionals and trained users in shops in the consumer goods industry and agricultural holdings, or for the commercial use by non-professionals. The device can be used as a self-service device if it is supervised by trained personnel. The use of the device is also subject to the “General Terms and Conditions” of WMF AG and this user manual. Any other use or use that goes beyond the aforementioned is considered incorrect use. The manufacturer shall not be liable for any damage resulting from this. Under no circumstances may the WMF bistro! be used to dispense and heat liquids other than coffee, hot water (beverages, cleaning) or milk (cooled, pasteurised, homogenised, UHT). User Manual WMF bistro! 57 Safety 9.4 Directives The machine fulfils the requirements of the German Food and Feed Code (LFGB), the Regulation on Commodities (BedGgstV), the EC regulation No. 10 / 2011 as well as the EC regulation No. 1935 / 2004 in the currently valid editions. When used properly, the machine does not present a hazard to health or other unjustifiable hazard. The materials and raw materials used fulfil the requirements of the Regulation on Commodities as well as the EC regulations No. 10 / 2011. The machine fulfils the requirements of all applicable regulations in the directives MD (MR) 2006 / 42 / EC (EG), Directive 2004 / 108 / EC (EG), Directive 2002 / 95 / EC (ROHS), Directive 2002 / 96 / EC (WEEE). The EC declaration of conformity is included with the machine. The machine bears the CE mark. Any modifications that are not approved by WMF will cause this declaration to become invalid. Currently valid national rules apply in countries outside of the European Union. This device is subject to the directive on waste electrical and electronic equipment (WEEE / EU directive) and may not be disposed of as domestic waste. Requirements traceability pursuant to EC regulation No. 1935 / 2004 and Good Manufacturing Practice within the meaning of EC regulation No. 2023 / 2006 are ensured and guaranteed. 58 For disposal please contact the WMF Service. User Manual WMF bistro! Warranty 9.5 Duties of the owner/operator The operator of such equipment must ensure regular maintenance by WMF Service technicians, their agents or other authorised persons, and checking of safety devices. Access to the service area is permitted only for persons with knowledge and practical experience with the unit, especially regarding safety and hygiene. The coffee machine must be set up by the operator such that care and maintenance can be performed without hindrance. In office / floor supply or similar self-service applications, only staff instructed in operation of the machine should supervise the machine. Trained personnel should carry out maintenance and be available for questions regarding use. The operator shall ensure that electrical equipment and operating facilities are in a fit state (e.g. to BGV A3) [German Accident Prevention Association or equivalent]. In order to ensure the operating safety of your coffee machine, it is essential to perform regular checks of the safety valves and the pressure containers, among other checks. These measures are conducted by WMF Service or by WMF authorised service personnel as part of the maintenance work. Machine cleaning must be done only using the WMF special cleaning agent intended by WMF for the machine (tablets), and for the milk system (cleaning liquid). The manufacturer‘s specifications regarding maintenance cycles and frequency of maintenance (w Maintenance) are to be observed. User Manual WMF bistro! WMF special cleaning agent, w Appendix Accessories and spare parts page 64 59 Warranty 9.6 Warranty claims During the warranty period of 12 months from transfer of risk, the purchaser has statutory warranty entitlements. The vendor should always be afforded the opportunity to rectify errors within an appropriate period. Claims above and beyond the above, in particular damage claims as a result of consequential damage, are excluded, to the extent that this is legally permissible. Material defects shall be reported to the vendor immediately and in writing. Warranty period 12 months No warranty is provided: • On any parts subject to natural wear and tear. This includes seals, mixers, and brewing unit, among other items. • For malfunctions due to the effect of the weather, scale build-up, chemical, physical, electrochemical or electrical effects, unless attributable to a fault on the part of WMF. • If a water filter is not fitted even though the local water supply requires use of a water filter and malfunctions occur as a consequence. • With respect to faults which occur as a result of failure to follow handling instructions and regulations, maintenance and care of the unit (e.g. User Manual and servicing instructions). • With respect to faults which occur as the result of failure to use original WMF replacement parts or incorrect assembly by the purchaser or by third parties or by faulty or negligent treatment. • With respect to the consequences of improper modifications undertaken without our consent or by repair or reconditioning work on the part of the purchaser or by third parties. • With respect to faults caused by inappropriate or improper use. 60 Follow the manual. The customer is advised in the order confirmation whether or not use of a water filter is required. w Maintenance page 49 User Manual WMF bistro! 1 User Manual WMF bistro! 08:15 On submenu Care, touch milk system Touch start choc system milk system cleaning prog. customer care Milk system rinsing Machine cleaning starts. Duration approx. 8 minutes. In progress… cleaning prog. switchingOff 12 8.1 For water rinse, prepare 0.5 l of clear, cold water Insert milk hose Touch continue continue Prepared water for rinsing? cleaning prog. switchingOff 6 1 9 . 1 0 . 2 0 11 (Care) 3 4 continue Prepared water for rinsing? For water rinse, prepare 0.5 l of clear, cold water Insert milk hose Touch continue Milk system rinsing starts. Duration approx. 30 seconds. In progress… cleaning prog. milk system Step 6 and 10 Only if beverages containing milk have been previously prepared. 12.1 cleaning prog. milk system Milk system rinsing starts. Duration approx. 30 seconds. Close the manual insert lid Touch yes yes On submenu Care, touch choc system Touch start choc system milk system cleaning prog. customer care Choc system rinsing Step 11 Only if beverages containing Choc components have been previously prepared with the optional mixer. Mixer rinsing starts. Duration approx. 30 seconds. In progress… 11 In progress… cleaning prog. choc system Cleaning tablet inserted? 10 7.1 cleaning prog. milk system Empty grounds container Empty g r o u n d s c o n t a i n e r. cleaning prog. switchingOff 7 Touch cleaning prog. Touch switchingOff no switchingOff choc system switchingOff milk system cleaning prog. cleaning prog. customer care 9 6.1 2 cleaning prog. switchingOff Touch main menu 5 33 2413 0010 10.2011 Mixer rinsing starts. Duration approx. 30 seconds. In progress… cleaning prog. choc system 11.1 Open the manual insert lid Add a special WMF cleaning tablet Open tablet insert. Insert the cleaning tablet. cleaning prog. switchingOff 8 Touch start The cleaning program starts. start cleaning start now? cleaning prog. switchingOff 1 08:15 continue 10 Mixer rinsing starts. Duration approx. 30 seconds. 3 10.1 Empty grounds container Empty g r o u n d s c o n t a i n e r. cleaning prog. switchingOff 7 Touch cleaning prog. choc system milk system cleaning prog. customer care 4 If a mixer is fitted: Rinse mixer hose very thoroughly Reassemble combi spout Replace combi spout Insert milk hose If a mixer is fitted: Insert mixer hose Mix 5 ml of WMF Special cleaner with 0.5 l of lukewarm water start 11.1 Add a special WMF cleaning tablet Close the manual insert lid Confirm with OK Open tablet insert. Insert the cleaning tablet. cleaning prog. switchingOff 8.1 Touch start The cleaning program starts. Pull forwards with both hands Remove upwards from the pinch valve After Plug&Clean cleaning: the cleaned milk hose can be stored with the adapter in the closed cooler. Milk system rinsing: see the flip-side under “Milk system rinsing” for interim cleaning. Manual combi spout cleaning with Plug&Clean: perform at least once per week. Instructions Dismantle combi spout Immerse one end of the milk hose in the cleaning solution B Switch off using the ON/OFF button prior to cleaning. Unplug mains plug. Pull forward the lever behind the combi spout Remove combi spout Remove milk hose from milk container and release from combi spout If a mixer is fitted: Release the mixer hose Machines with pinch valve: Remove milk hose. Replace in reverse order. Rinse combi spout and milk hose very thoroughly with clear water C Caution. Carefully disconnect the milk hose. A Manual combi spout cleaning 5 cleaning start now? cleaning prog. switchingOff Immerse the length of the remaining milk hose in the cleaning solution This procedure prevents air bubbles from remaining in the milk hose. Place all parts of combi spout in the cleaning solution (3 parts) All parts must be completely immersed. After 5 hours clean all parts thoroughly with a brush Machine cleaning starts. Duration approx. 8 minutes. In progress… cleaning prog. switchingOff 11 Open the manual insert lid 8 Touch switchingOff no switchingOff switchingOff cleaning prog. Step 8 - 9 Only if beverages containing milk have been previously prepared. Step 10 Only if beverages containing Choc components have been previously prepared with the optional mixer. Plug&Clean cleaning starts. Duration approx. 2 minutes. In progress… cleaning prog. choc system 9 Plug&Clean In progress… (Care) 6.1 2 Do not pinch the milk hose. Touch Touch main menu cleaning prog. milk system Insert the milk hose with the Plug&Clean adapter into the Plug&Clean socket and lock continue Is the milk hose plugged into P&C socket and locked? cleaning prog. switchingOff 6 1 9 . 1 0 . 2 0 11 Touch We Plug&Clean cleaning program Appendix: Touch We Standard Cleaning Program Follow the overview of cleaning interval schedule in the Care chapter in the User Manual. Prior to the first cleaning, read the User Manual, Care chapter. Please refer to the User Manual. Cleaning instructions WMF bistro! Appendix: Additional instructions Cleaning instructions (standard) 61 Appendix: Technical data Appendix: Technical data Technical data for coffee machine Nominal power rating * Output per hour ** Overall hot water output Coffee bean hopper Choc hopper Mains power connection * Illumination External dimensions Weight empty Continuous sound pressure level (Lpa) ***** 3.5 kW 6.3 kW 300 espressos 300 espressos 200 cappuccinos 220 cappuccinos 200 café crèmes 220 café crèmes 120 coffees *** 120 coffees *** 120 chocs **** 120 chocs **** approx. 24 l / h approx. 48 l / h approx. 1,000 g per load 500 - 1,000 g per load, depending on the Choc powder 1 / N / PE 50 / 6 0 Hz 3 / N / PE 50 / 6 0 Hz 220 - 230 V 380 - 4 00 V LED class 1 width 453 mm height incl. bean hopper 745 mm depth 554 mm approx. 80 kg < 70 dB (A) We reserve the right to make technical modifications. * For special models see model label, values given above are for the basic model. ** The outputs per hour are STANDARD VALUES which can be dependent upon the following factors: ground coffee quantity, type of coffee, grinding degree, brewing temperature, brewing blend Ø, brewing pressure, water hardness and the general operating condition of the machine (i.e. scaling, connection conditions, electrical power, drinking water, drainage, wear, etc.) *** Only for model version ECF **** Only with the optional Choc ***** A-evaluated sound pressure level Lpa (slow) and Lpa (impulses) at operating personnel workplace is under 70 db (A) in any working mode. Conditions for usage and installation Necessary preparatory work for electricity, water and drainage connections at the customer‘s premises are to be arranged by the machine owner / operator. The work must be carried out by authorised installation technicians in compliance with general, country-specific and local regulations. The WMF service engineers may only connect the machine to existing prepared connection points. WMF Service is neither authorised nor responsible for carrying out any work on-site prior to connection. 62 User Manual WMF bistro! Appendix: Technical data Mains voltage tolerance range 230 V +6 % and -10 % / 4 00 V +6 % and -10 %. Mains voltage interruption < 50 ms: no interruption of function Water supply 3/8 inch hose connector with main valve, and filter with 0.2 to 0.25 mm mesh size, on site. Min. 0.2 MPa flow pressure at 2 l / min., max. 0.6 MPa. Water temperature max. 35 °C. The set of hoses provided with the new coffee machine and / or the new water filter must be used. Do not use old hoses. Water quality For drinking water with carbonate hardness above 5 °dKH, a WMF water filter should be installed upstream. Water drain pipe Hose a min. DN 19, minimum downward slope of 2 cm / m Ambient temperature +5 °C to max. +35 °C (empty the water line in case of frost). Maximum humidity 80 % relative humidity without condensation. Do not use unit outdoors. Degree of protection IP X0 Installing surface The unit must be placed on a level, flat, and sturdy surface. The unit is not intended to be located on a surface that is sprayed or cleaned with a water hose, steam jets, steam cleaner, or similar devices. Installation clearances For operating, service and safety reasons the machine should be installed with a clearance of not less than 50 mm at the back and sides from the building or non-WMF components. A clear height of 1,100 mm from the top of the supporting surface should be ensured. The height of the installation surface above the floor is at least 850 mm. If the machine connections are to be run downwards through the counter, please make space for the lines, which can reduce the usable space below the machine. Installation dimensions of the See the User Manual for the water filter. water filter These specifications for the electrical connection and the standards quoted apply for connecting the machine in EU countries. It may be necessary to also observe additional country-specific regulations. Outside the EU countries acceptance of the standards quoted is to be checked by the legal entity or natural person who wishes to use the machine. The local power supply must be constructed according to IEC 364. To improve safety, the coffee machine should be fitted with an FI 30 mA earth leakage current circuit breaker complying with EN 61008. Near the machine or about 30 cm below the counter top there should be a shockproof socket as a single-phase connection installed locally on the rear or side wall of the counter substructure or a country-specific single-phase socket and, in the case of a 3-phase connection, a 5-pin CEE / CEKON-socket according to EN 60309 or a country-specific multi-pin socket. The mains switch and plug top are part of the customer‘s on-site installation. The mains cable must not come into contact with hot surfaces. If the mains cable for this device is damaged then it must be replaced by our service personnel or a similarly qualified person, in order to prevent hazards. If the coffee machine is permanently connected to the mains then an all-pole disconnecting separator (mains switch) according to EN 60947 with a minimum 3 mm contact gap must be installed. A separator switch is recommended for a flexible connection. The machine may not be fitted with a fixed permanent mains connection if installed on a transporting trolley (a mobile station). In order to avoid possible faults from arising on our shielded data lines due to potential equalization currents between the devices, an additional potential equalization unit should be planned for devices connected to the vending system. (See EN 60309) User Manual WMF bistro! 63 Number Unit Designation 64 meter Pcs Pcs Pcs Pcs Pcs Pcs Pcs 1 1 1 1 1 1 1 1 Pcs Mixer bowl Mixer hose Milk nozzle with Milkpower, milk temperature 16 - 24 °C (violet) Milk nozzle with Milkpower, milk temperature 16 °C (pink) Milk nozzle with Milkpower, milk temperature 8 - 16 °C (blue) Milk nozzle with Milkpower, milk temperature 4 - 8 °C (red) Milk nozzle, milk temperature 16 - 24 °C (brown) Milk nozzle, milk temperature 8 - 16 °C (white) Milk nozzle, milk temperature 4 - 8 °C (green) Milk hose Combi spout Milkpower (complete) Combi spout standard (complete) Pcs 1 Pcs 1 33 2388 8000 Milk container lid 350 1 Pcs Set of documents: • User Manual bistro! • Cleaning instructions bistro! • Additional instructions bistro! Active Milk (optional) • Cleaning instructions bistro! Active Milk (optional) 33 2413 0010 33 2418 4000 Plug&Clean adapter Milk container 350 Documentation / Instructions Pcs Pcs 1 1 33 2427 5000 33 2388 7000 Milk container lid 33 2427 5000 33 2388 6000 Plug&Clean adapter 33 2318 0000 00 0048 0064 33 2410 3000 33 2410 2000 33 1384 3100 33 2410 1000 33 2031 5100 33 9516 9000 33 2317 8000 00 0048 4948 33 2867 5100 33 2867 5000 Milk container Cup&Cool width 36 cm Pcs Pcs 1 1 Cup&Cool width 27 cm 1 meter Pcs 1 Order No. 10 10 10 10 10 10 10 10 10 10 10 10 Position number all Fresh milk Fresh milk Fresh milk Fresh milk Fresh milk Fresh milk Choc Choc Fresh milk Fresh milk Fresh milk Fresh milk Fresh milk Fresh milk Fresh milk Fresh milk all all Model Appendix: 0.22 Pcs 1 Complete combi spout Choc Appendix: Accessories and spare parts Accessories and spare parts User Manual WMF bistro! Number Unit Spare key Pcs 1 User Manual WMF bistro! Pcs Pcs Pcs sheet 1 1 1 1 Labels for choc hopper Spare key Choc hopper lid, lockable Choc hopper lid Choc hopper Pcs 1 Pcs 1 Pcs 1 Fuse holder lid Fuse F4 Drip grid Drip tray Grounds disposal through the counter (with design sheet metal) Coffee grounds container (with design sheet metal) Pcs 1 Customer Check-up Kit 0.5 / 15.000 Milkpower Customer Check-up Kit 0.5 / 15.000 Pcs Pcs 1 1 tube box 1 1 bottle 1 Gasket grease 5 grams Cleaning brush Pipe cleaner Special cleaning tablets (100 pieces) WMF Special cleaner for milk foamer Order numbers for the WMF care program Pcs 1 Customer Check-up Kit 0.5 / 15.000 Pcs 1 Fuse Pcs 1 Drip tray / drip grid Pcs 1 Coffee grounds container Pcs 1 Choc hopper Bean hopper lid, lockable Pcs 1 Bean hopper lid Pcs Pcs 1 Bean hopper foil Designation 1 Bean hopper 33 2179 9000 33 1521 9000 33 0350 0000 33 0681 1000 33 0683 6000 33 2809 6100 33 2809 6000 33 1597 0000 33 0330 0000 33 2372 4000 33 2372 3000 33 2800 3100 33 2800 3000 33 2315 3000 33 2071 8100 33 2809 8000 33 9508 0100 33 2801 5099 33 2071 8100 33 2809 7000 33 9500 0200 33 2813 8000 Order No. 16 16 15 15 2 2 2 2 2 2 1 1 1 Position number all all all all Fresh milk Milkpower Standard all all all all Choc Choc Choc Choc Choc Choc all all Model Appendix: Accessories and spare parts 65 Index Index 1-Step 9 2-Step 9 A Access control 37 Accessories and spare parts 64 Accounting level 38 Accounting numbers of beverages 39 Additions 32 Adjustable addition 32 B Display switching times 24 Dosing auger 46 Drip tray 17 Drip tray, housing and front panel 43 Dual Milk 14 Duties of the owner/operator 59 E electrical connection 63 Empty grounds container 50 Error message 18, 51 Error messages 51 Error messages and malfunctions 54 Error number 50, 51 Barista pad 18, 20, 35 Bean hopper 7, 15 Bean hopper cleaning 45 beverage dispensing 10 Brewing unit error 50 Brew time 21 Button allocation 32 F C General cleaning 43 Glossary 8 Ground coffee quantity 30 Grounds container 16 Grounds container cleaning 43 Grounds container missing 50 Grounds disposal through the counter 16 Call up the main menu 8 Capacity 34 Care 21, 27, 41 Care message 18 Change recipes 30 Choc powder quantity 30 Choc system 28 Cleaning information 21 Cleaning instructions 61 Cleaning intervals overview 41 Cleaning level 37 Cleaning metal surfaces 43 Cleaning program 27, 42 Conditions for usage and installation 62 Connect up the milk 12 Cool milk 12, 48 Copy day 25 Cup&Cool 12 Cup volumes 29 Customer Check-up 49 Filter change 28 Foamer rinsing 34 Foam milk 13 G H HACCP schedule 47 Hazards to the coffee machine 56 Hazards to the operator 55 Height adjustment of the combi spout 15 I Information 18, 21 Instructions 50 Introduction 6 J D Journal 21 Daily cleaning 42 Damage prevention measures 57 day counter 39 Delete counter 39 Delete PIN 38 Delete timer 26 Diagnostics program 51 Dispense milk or milk foam 11 Dispensing hot water 11 Dispensing option 32 Dispensing steam 13 Display contrast 33 Display language 33 L 66 Labelling of beverage buttons 40 Latte macchiato 23 latte macchiato pause interval 23 M Main menu 18, 22 Main menu functions (pads) 19 Maintenance 49 Maintenance information 21 Malfunctions 51 User Manual WMF bistro! Index Manual insert 7, 15 Menu control pads 19 Messages and instructions 50 Messages for operation 50 Milk and foam 22 Milk foam dispensing 11 Milk foam quality 22 Milk foam volume 30 Milk nozzle 12 Milk system 27 Milk system rinsing Standard 43 Milk volume 30 Mixer cleaning 44 Mixer rinsing 43 Multiple dispensing 10 Multiple preselection 10 N No warranty is provided 60 O ON/OFF button 35 Open water supply valve 50 Operating options 35 Operation 10 Original WMF spare parts 60 Other settings 40 Override function 14 P Parts of the coffee machine 6 PIN entry 37 PIN rights 37 Preparation of coffee grounds using the manual insert 15 Preselection 10 Product hopper 15 Product hopper cleaning 46 Q Quality 30 Quality check 33 R Read counter 39 Ready to operate 18, 20 “Ready to operate” display pads 18 Recorded errors and messages 21 Refill beans 50 Reset 33 Rinsing interval 35 User Manual WMF bistro! S Safety devices 55 Sanitize milk system 47 SB mode 34 Second level 35 Select grinder 32 Self-service 20, 34, 35 Sequence of ingredients additions 32 Service 21 Set sequence 32 Set timer 24 Setting level 37 Settings 29 Shift button 11, 35 Software 18 Steam Milk 9, 14 Steam Milk buttons 14 Steam outlet cleaning 45 Switch off the coffee machine 17 Switch off time 24, 25 Switch on coffee machine 10 Switch on time 24, 25 T Tablet insert 7 Technical data 62 Testing 33 Time and date 33 Timer 21, 23 Timer information 26 Timer overview 25 Timer program 23 Timer state 23 To the main menu 22 Touch-screen display 7 U User Manual Signs and Symbols 8 User Manual Symbols 8 W Waiter accounting system 39 Warm beverages 13 “Warm rinse” pad 20, 35 Warm rinsing 18 Warm-up rinsing 34 Warranty claims 60 Water filter 60 Water filter is fitted 34 Weigh grounds 33 WMF Service 49 67 Your nearest WMF Service: © 2007 - 2011 WMF AG All rights reserved, in particular duplication, distribution and translation rights. No part of this manual may be reproduced in any form or processed, duplicated or distributed using electronic systems without written consent. Design and production / t ypesetting and print presentation: TecDoc GmbH; Geislingen, [email protected] Original User Manual. Printed in Germany. We reserve the right to make technical modifications. 28.10.2011
Содержание
- Принудительная промывка кофемашины ошибка 9055
- Почему ломается кофемашина
- Почему не включается кофемашина
- Кофемашина не реагирует на нажатия кнопок
- Из-под рожка машины вытекает вода
- Кофемашина сильно шумит
- Кофемашина не распознает кофе
- Почему устройство не хочет молоть кофе
- Почему аппарат не наливает кофе
- Код ошибки на дисплее
- Не происходит нагрев воды
- Не работает капучинатор
- Засорился фильтр в емкости с водой
- Не отображается уровень воды
- Вышел из строя манометр
- Кофемашина не прессует капсулы
- Заключение
- Как убрать воздушную пробку в кофемашине
- Когда нужна помощь специалиста
- Кофемашина не включается
- Повреждён шнур, неисправна розетка — проверить розетку тестером или подключит в неё другой исправный эл-прибор.
- Был скачок напряжения в эл.сети и сгорели элементы защиты в блоке электроники.
- Неисправен включатель или микропереключатели обрывающие подачу электропитания на плату управления.
- Сгорела первичная обмотка трансформатора низковольтного питания электроники — заменить трансформатор.
- Один или несколько элементов в блоке электроники: семисторы, стабилитроны, диодные мосты, резисторы вплоть до центрального контроллера / процессора — без знаний можно только усугубить поломку. Для ремонта обратиться к специалистам.
- Сработала термозащита на бойлере и обесточила всю кофемашину — нужно проверить все элементы защиты на бойлере / ТЭНе
- Кофе течёт из одного носика диспенсера / холдера
- Слабое давление / медленная подача кофе — проверить помпу, провести полное Тех обслуживание кофемашины
- Не ровно установлена кофемашина — выровнять горизонтально
- Диспенсер забит кофейным налётом — снять диспенсер и промыть водой. Если диспенсер не разборный — заменить на новый.
- При работе кофемашины подозрительный треск / скрип в заварочном устройстве
- Заварочное устройство если оно съёмное необходимо регулярно вынимать и промывать от молотого кофе и прочего налёта.
- Желательно, но не обязательно смазывать именно трущиеся детали тонким слоем силиконовой смазки. Что касается смазки это один из случаев когда кашу маслом можно испортить. Так как если будет участок где смазка в избытке, то на неё будет налипать молотое кофе и это будет уже что-то близкое к абразивным материалам, которые затрудняют движение механизма. По этой причине лучше когда ЗУ просто не смазан чем смазан не правильно.
- Исходя из пункта выше — осмотрите заварочное устройство, его внутренние направляющие, если в них есть старая смазка перемешанная с кофе, уберите этот налёт любым удобным способом: разберите и вычистите салфетками, не разбирая ватными палочками и другими удобными подручными средствами. Мыть водой бесполезно так как смазка силиконовая, густая и не боится ни холодной ни горячей воды.
- Ещё один источник треска, если он в заварочном устройстве – потеря эластичности, или формы уплотнения уплотнительных колец поршня. Кольцо просто необходимо заменить на аналогичное предназначенное для кофемашин
- Кофемолка кофемашины мало намалывает кофе / не крепкий напиток
- Почистить кофемолку от старого налипшего кофе
- Заменить тупые жернова на новые, заниматься их заточкой дело неблагодарное и просто потеря времени. Всё равно придёте к тому что вы их поменяете.
- Заменить шнек на более производительный, который увеличивает скорость прохождения кофе через жернова. Увеличение в среднем может быть +20%
- Заменить жернова на более производительные и правильно настроить что бы на максимальной закладке не пересыпалось из камеры ЗУ в поддон для отходов
- Отходы кофе не таблеткой, разваливается в кашу
- Недостаточное количество кофе, в зависимости от крепости кофе этот параметр 7-10 грамм сухого кофе на чашку. Если количество недостаточное то в заварочной камере нет возможности спрессовать такой маленький объём.
- Слишком крупный помол. При крупном помоле не то что отходы разваливаются, но и крепости кофе не будет. Расход может быть большим но эффективность минимальная. Установите помол приблизительно в размер манной крупы, это будет нулевая точка отсчета и от этой точки можно регулировать в небольших пределах чуть мельче или крупнее, при этом будет меняться не только насыщенность кофе, но и по разному раскрываться вкус. Ну и как бонус брикет отходов будет вываливаться ровной и красивой шайбой.
- Кофемашина требует чистки от кофейных отложений / Clean
- В кофемашинах со встроенной системой чистки кофейного тракта, при появлении индикации CLEAN – необходимо запустить программу очистки с применением специальных чистящих средств от кофейных жиров и отложений.
- В кофемашинах в которых отсутствует встроенная система очистки, но при этом снимается диспенсер (носик подачи кофе) – необходимо регулярно его снимать, разбирать и промывать от кофейного налёта. При регулярной эксплуатации 1-2 раза в месяц.
- Игнорировать сигнал нельзя! Иначе это в дальнейшем приведёт к засору диспенсера и для очистки придётся разбирать кофемашину, а возможно и менять диспенсер.
- Готовый кофе сливается в отсек для отработанного кофе
- Осмотреть уплотнение верхнего контрпоршня и при необходимости его заменить.
- Осмотреть корпус контрпоршня на наличие микротрещин, при обнаружении – заменить
- На верхнем контрпоршне обычно установлен крема клапан, необходимо осмотреть его корпус на наличие трещин и осмотреть уплотнения (обычно крема клапан это – пружинка с запирающим элементом в виде грибка, шарика или мембраны)
- Внимательно осмотреть кофевод, идущий к диспенсеру. Повреждённые элементы поменять.
- При приготовлении кофе / вода течёт не из диспенсера, а в поддон
- В автоматических кофемашинах Jura / Bosch / Siemens / Melitta / Nivona / Rotel / Saeco – необходимо осмотреть дренажный клапан. Эластичность манжет и трещина в пластиковых элементах может пропускать воду в поддон.
- В автоматических кофемашинах Saeco / Gaggia / Solis / Spidem /Philips – возможен износ уплотнений на штуцере бойлера или трещина во входном штуцере заварочного блока.
- В автоматических кофемашинах Delonghi – осмотреть уплотнения верхнего контрпоршня заварочного устройства, а так же непрозрачную часть контр поршня на наличие трещин.
- В автоматических кофемашинах Krups XP72… / EA8…. – осмотреть и заменить при необходимости уплотнения верхнего (белого) контр поршня ЗУ, убедиться в целостности манжеты нижнего поршня в бойлере, проверить на подтёки и отсутствие трещин в гидравлическом прессе. Если ничего не помогает, возможно неисправны уплотнения в мультиклапане или трещина в его корпусе.
- В капсульных кофеварках — изношено или потеряло эластичность уплотнение в капсулоприёмнике / не плотно прилегает капсула. А так же возможно в корпусе капсулоприёмника трещина.
- В рожковых кофеварках – возможно не правильно работает электромагнитный клапан, дренажный или аварийный клапан. В первую очередь можно провести декальцинацию, часто её в таких кофеварках не делают и накипь может мешать правильной работе клапанов. Удаление накипи может помочь решить проблему в половине случаев, если конечно накипь не повредила рабочие поверхности клапанов.
- При приготовлении кофе или промывке — вода течёт на стол
- Лопнула силиконовая или фторопластовая трубка высокого давления — необходимо её заменить.
- Появилась трещина на одном из соединительных переходников, клапане бойлера или в корпусе крана пар/вода. Заменить на новые и уплотнения на них.
- Если течёт одно из уплотнений в гидросистеме, то нужно поменять все уплотнения в гидросистеме а не только то что течёт, иначе каждый месяц будет течь в разных местах. Так не лучше ли поменять все уплотнения сразу и забыть о них на несколько лет. Для этого у нас есть ремкомплекты для разных кофемашин.
- Если течёт мультиклапан в кофемашине – аккуратно снимите его крышку, если не видно трещин и сломанных выходов то нужно обработать резиновые уплотнители керамического клапана, собрать проверить. Всё ещё продолжает течь – тогда в крышке есть микротрещина, её не склеить, только замена мультиклапана на новый. БУ мультиклапаны можно использовать на KRUPS, на все остальные кофемашины БУ мультиклапан желательно не ставить, возможно с ним в скором времени будет тоже самое.
- Нет подачи пара
- Проверить и прочистить форсунки капучинатора от накипи и засохшего молока.
- Если подача пара слабая – провести процесс декальцинации, удаление накипи может полностью восстановить нормальную работу парогенератора и всей системы.
- Проверить электромагнитные клапана — работающие на подачу пара, они могут не открываться или не закрываться из-за накипи и других отложений мешающим правильной работе плунжера. А так-же прозвонить электромагнитные катушки – нет ли обрыва.
- Если в данной системе стоит механический клапан подачи воды и пара – убедиться что в нём нет засора, при необходимости разобрать и почистить.
- Проверить исправность нагревательного элемента на бойлере пара – если сгоревший – заменить бойлер.
- Проверить исправность работы термопредохранителей, термостатов или датчика температуры. Само собой убедиться в надёжности всех контактов.
- Может отсутствовать подача напряжения с блока электроники на нагревательный элемент – тестер, паяльник в руки и вперёд на поиски неисправного элемента.
- Гудит помпа но вода не проходит через гидросистему
- Если в ёмкости для воды кофемашины установлен фильтр воды – снимите его, возможно дело в нём.
- Часто до помпы устанавливается ещё проточный фильтр грубой очистки, его корпус из прозрачного пластика, необходимо проверить чистый ли он. Если нет – прочистить или заменить.
- Если кофемашина долго стояла без работы то дело может быть в помпе. В ней залипает клапан на выходном штуцере. Часто достаточно его поддеть шилом или тонкой отверткой и помпа снова начинает работать.
- Если помпу долго включали без воды, пытаясь запустить подачу воды — возможно повреждение манжет на рабочем поршне помпы. Если помпа разборная можно подобрать новое кольцо и помпа заработает, если помпа не разборная – замена помпы.
- Возможен износ нескольких элементов помпы, сгорела эл.катушка помпы или она не выдаёт необходимого давления воды – заменить на новую.
- В зависимости от региона и жёсткости воды гидросистема может быть забита накипью, в частности бойлер. Если бойлер литой и выходы чистые а засор где-то глубоко то скорее всего ни химия ни другие прочистки уже не помогут – почистить или заменить бойлер.
- Возможно неисправен или забит накипью один из электромагнитных клапанов. Эл.катушки можно прозвонить тестером – неисправные заменить или поменять клапан. Если катушка работает, а клапан при подаче напряжения не срабатывает – разобрать клапан почистить и его элементы кроме эл.катушки промыть в растворе для декальцинации.
- Проверить все механические клапана в гидросистеме, датчик расхода воды (флоуметр), краны, промыть и прочисть трубки от всех загрязнений, провести декальцинацию сильным раствором для удаления накипи. Если через кофемашину вода очень медленно проходит и дело в накипи, то есть декальцинацию никогда не делали – БУДЬТЕ ВНИМАТЕЛЬНЫ И ОСТОРОЖНЫ. Лучше сделать первую декальцинацию вручную. Приготовить раствор для декальцинации полный контейнер для воды, желательно не сильно концентрированный, а как рекомендует производитель (1 шипучая таблетка или 1 столовая ложка если в виде порошка). Открыть кран подачи горячей воды пока не сольётся вся жидкость, нельзя допускать длительных остановок, максимум 1-5 сек. Иначе отслаивающаяся накипь может забить каналы в бойлере что может привести к тому что кромезамены бойлерабольше ничего не поможет. При сильных засорах, что бы избежать пробок кальция в бойлере, можно повторить такую экспресс декальцинацию 2-4 раза подряд через открытый кран подачи воды, после этого включить программную чистку в автоматическом режиме, которая в среднем длиться 30-50 минут. Таким образом можно очистить критические отложения накипи в гидросистеме кофемашины.

Кофе течёт из одного носика подачи кофе / диспенсера

Кофемашина не включается

Кофемашина требует чистки от кофейных отложений / Clean

Кофемашина требует чистки от накипи / Decalc

Маленькая закладка кофе на чашку

Отходы не таблеткой — разваливается в кашу

При приготовлении кофе / вода течёт не из диспенсера, а в поддон

При работе сильно скрипит заварочное устройство
13. Кофемолка в кофемашине не мелит кофе
- Если в кофемолку попала вода – требуется как можно скорее разобрать кофемашину, снять жернова и вручную прочистить каждую ламель жернова от налипшего влажного кофе. Других способов чистки без разборки и съёма жерновов не существует. Если не почистить сразу, то металлические жернова заржавеют и потеряют остроту заточки, в кофемолках с керамическими жерновами может заржаветь подшипник.
- При использовании жирного кофе (с характерным маслянистым блеском зерна) будет похожая ситуация. Жирный кофе залипает в ламели жерновов, и кофемолка будет вращаться в пустую. Разбираем кофемашину, снимаем жернов и чистим кофемолку, всё что налипло. После сборки жирный кофе не использовать – если нет желания повторить процедуру чистки кофемолки.
- Возможны варианты когда сильно зажаты жернова кофемолки, можно просто увеличить помол и нормальная работа восстановиться.
- Если двигатель кофемолки работает, а жернова не вращаются, то неисправность в редукторе кофемолки. В кофемолках SAECO / PHILIPS / GAGGIA с керамическими жерновами – может быть сломан вал крыльчатки нижнего жернова или сточены зубья шестерни. Причиной может послужить то что раскололись жернова в кофемолку попало что-то ещё кроме кофе – камень, ореховая скорлупа, пластик, шуруп и т.п. Может и от времени износиться шестерня. Шестерня, держатель жернова и керамические жернова можно заменить на новые, кофемолку в сборе менять не обязательно. В кофемолках с металлическими жерновами выход из строя редуктора, означает замену кофемолки в сборе, но, если это SAECO / GAGGIA / PHILIPS / SOLIS / SPIDEM можно заменить двигатель с редуктором в сборе, отдельно запчастей редуктора не продаётся, ну разве что защитная шайба редуктора, из-за которой часто и выходят из строя кофемолки в которых она есть. Шайба протирается до дыр и через неё кофе попадает в подшипник редуктора.
- Если кофемолка не вращается – проверить двигатель тестером. Возможно сточились щётки которые естественно можно поменять или неисправен ротор двигателя, в этом случае поменять двигатель или кофемолку в сборе, зависит от модели кофемашины.
- Если на кофемолку не подаётся напряжение, то неисправность придётся искать в блоке электроники. Но перед этим нужно проверить целы ли провода, которые идут от блока электроники к кофемолке и хорошие ли контакты в соединениях.
14. На дисплее кофемашины высвечивается ошибка
- Номер ошибки согласно задумке производителя указывает на неисправный блок. Но фактически это означает что полученный сигнал с датчика данного блока выдал результат который считается неисправностью. Хотя для того что бы найти неисправность достаточно и этой информации. Допустим в SAECO ошибка № 1 говорит о том что неисправна кофемолка, но возможно на кофемолку нет подачи напряжения и неисправность находиться в силовой части блока электроники.
- Если на кофемашине нет дисплея, то ошибка может подаваться определённой последовательностью мигания индикаторов или циклическим миганием одного через небольшую паузу.
- Номера ошибок кофемашин разных брендов как правило отличаются, по этому для перевода номера на понятный язык, необходимо найти таблицу ошибок данного бренда, а ещё лучше и по модели, но не всегда это осуществимо. Как правило такая информация не распространяется производителями для всех желающих.
- Часто проще провести диагностику, чем искать что означает номер ошибки. Достаточно лишь хорошо себе представлять в какой момент тот или иной блок вступает в работу. В своё время не заработал — ошибка. Обычно для определения неисправности уходит минут 5 если не считать разборку и сборку кофемашины. А искать таблицу можно день, два и без результата.
- Таблица кодов ошибок кофемашин — тут
15. Из холдера кофеварки или через диспенсер кофе подаётся по каплям
- Слишком мелкий помол кофе, в автоматической кофемашине часто достаточно увеличить регулятор помола кофемолки на 1-2 деления.
- В Рожковых кофеварках так же связанно с мелким помолом, или слишком большой закладке и темпированием. Можно попробовать — как проходит вода без кофе, если льётся нормально — то использовать кофе более крупного помола, закладку кофе на чашку сделать поменьше.
- Возможно забит фильтр группы — провести чистку кофейной группы или заварочного устройства от кофейных жиров.
- Возможно изношенна рабочая часть помпы и она не создаёт необходимого давления — заменить помпу.
16. При работе, редуктор заварочного блока скрипит, трещит или не приводит в действие ЗУ
Автоматические аппараты для приготовления кофе очень удобны в использовании: напиток готовится за считанные минуты, а вам нужно приложить лишь минимум усилий. Поэтому становится особенно обидно, когда полезный помощник на кухне выходит из строя. Ремонт кофемашины в сервисных центрах – долгое и затратное дело. А ведь иной раз проблему можно решить самостоятельно, не прибегая к помощи специалистов. Рассмотрим самые распространенные неисправности кофемашины и способы их устранения в домашних условиях.
Почему ломается кофемашина
Правильная эксплуатация и уход за кофемашиной обеспечивают долговременную службу и стабильную работу. К сожалению, в условиях офиса кофейные аппараты зачастую работают беспрерывно, почти на износ, а хорошо ухаживать и тщательно прочищать все элементы его конструкции не всегда удается: банально не хватает времени. Тем не менее, регулярная профилактика, чистка и общая проверка работоспособности кофемашины значительно снизят риск возникновения поломки. Вот моменты, на которые стоит обратить внимание заранее.
- Для приготовления кофе используется вода низкого качества. Если вы применяете обычную водопроводную воду, не фильтрованную, насыщенную хлоркой и другими вредными примесями, рано или поздно это приведет к образованию накипи и известкового налета на внутренних деталях кофемашины.
- Перебои в электросети. Периодические сбои в электричестве, частое включение/выключение прибора также способствует поломке.
- Износ деталей в процессе длительной эксплуатации. Если кофемашина служит вам верой и правдой уже не первый год, может произойти естественный износ конструкции. Здесь лучше проконсультироваться со специалистом: возможно, некоторые детали еще подлежат замене.
- Небрежная работа с аппаратом, отсутствие регулярной чистки. Чистка кофемашины – одна из важнейших составляющих ухода. Нередко в комплекте вместе с прибором идут специальные средства очиcтки, таблетки от накипи и др., но в определенных случаях необходима и тщательная чистка вручную.
- Попадание посторонних предметов внутрь конструкции, засор фильтров.
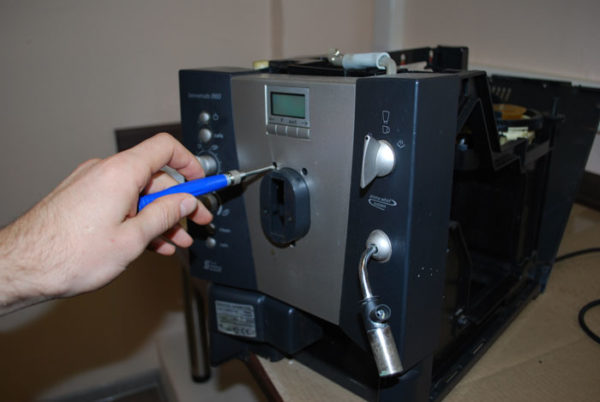
Это лишь общие причины, по которым может неожиданно сломаться ваша любимая кофемашина. Далее мы выделим типичные виды поломок, которые могут произойти с кофеприборами различных типов и функциональности.
Почему не включается кофемашина
Если кофеварка не включается, это может быть связано со многими проблемами. Среди них чаще всего выделяют наиболее распространенные.
- Изгиб или перелом электрического кабеля. Для устранения дефекта требуется его замена.
- При резких скачках напряжения в сети срабатывает предохранитель, и кофемашина перестает включаться. Для того чтобы она снова заработала, необходимо заменить данную деталь. Рекомендуется использовать стабилизатор, который предотвратит порчу бытовой техники.
- Если кофеварка работает без перерывов, то она может перегреться. В таком случае сработает термозащита и отключит устройство. В данной ситуации необходимо просто дать остыть кофемашине.
- При длительном пользовании в кофеварке образуется накипь, появляется кофейный налет. Все это может привести к размыканию контактов. Чтобы снова начать варить кофе, необходимо провести тщательную чистку устройства и восстановить контакты.
- Поломка модуля управления. Данный дефект является самым серьезным, и для его исправления придется обращаться к помощи профессионалов.

При этом не обязательно проблема заключается в кофеварке. Для начала необходимо проверить следующее.
- Убедиться, что в квартире есть электричество. Вполне возможно, что выбило пробки в электрощитке.
- Машинка может отключиться из-за забитых фильтров. Необходимо очистить или заменить их. После этого устройство будет работать в нормальном режиме.
Кофемашина не реагирует на нажатия кнопок
В такой ситуации следует сразу проверить, есть ли вода в бачке и кофе в контейнере. Кроме того, необходимо убедиться в правильном положении ручек и кнопок. Иногда может срабатывать защита, которая не отключится, пока все не вернется в исходное положение. Если это не сработало, то рекомендуется тщательно изучить инструкцию. Она может помочь определить причину поломки. Чаще всего она может быть указана на дисплее устройства.
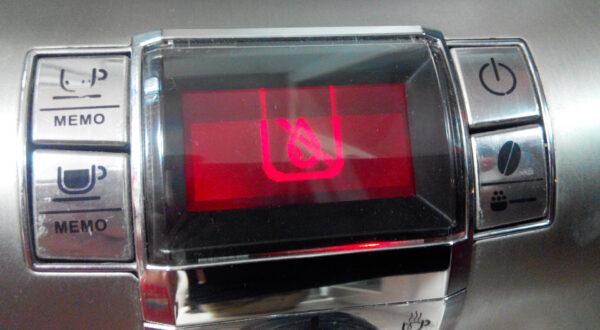
Иногда для устранения дефекта потребуется снять панель управления и проверить контакты тестером. Может быть, причиной неисправности является загрязнение кнопок, из-за чего они западают и не работают. В таком случае необходимо тщательно очистить контакты и кнопки панели управления.
Если и это не помогло, то, скорее всего, причиной неисправности является поломка электроники. В таком случае не стоит пытаться отремонтировать кофеварку своими руками. Необходимо сразу же отнести ее в сервисный центр.
Из-под рожка машины вытекает вода
Обратите внимание, что новое уплотнительное кольцо должно быть идентичным старому, обладать теми же характеристиками и размерами, иначе это чревато повреждениями и перегревом.
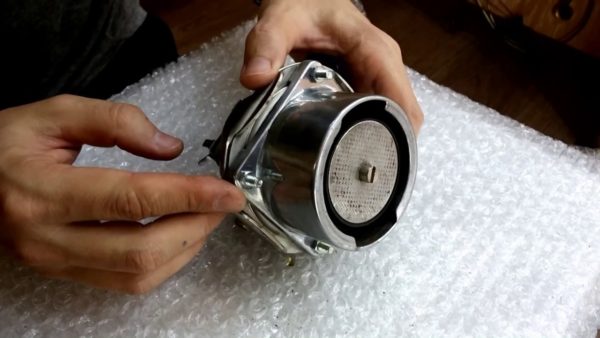
Протечка воды также может возникнуть из-за засорения фильтра рожка. Иногда на нем толстым слоем скапливаются жмых и отходы от кофе. Своевременно прочищайте фильтр и после чистки аккуратно устанавливайте его на место.
Кстати, подобные неисправности нередко возникают у кофемашины Delonghi: в процессе приготовления кофе или после завершения работы под агрегатом появляется вода. Производитель Делонги предупреждает об обязательном прочтении руководства по эксплуатации, а также призывает к бережному уходу и регулярному прочищению деталей.
Кофемашина сильно шумит
Если во время приготовления кофе вы заметили, что кофемашина издает посторонние шумы: треск, шипение или свист, то, скорее всего, произошел засор фильтра или сеточки в рожке. Что делать в этом случае? Аккуратно разобрать конструкцию и прочистить засорившиеся места. Удобнее всего это сделать с помощью специальных чистящих средств для кофемашин и кофеварок.
Чтобы удалить отложения с сеточки, воспользуйтесь обычной зубочисткой или маленькой щеточкой, только будьте осторожны: не порвите или не поцарапайте тонкий материал.
Возможно, вы используете кофе слишком крупного помола, и поры фильтра просто не справляются с частицами, а давление воды в свою очередь провоцирует образование трещин. Откройте резервуар, куда обычно засыпаете кофейные зерна, и проверьте, насколько крупный помол осуществляется. Для облегчения этой задачи многие кофемашины имеют функцию регулировки величины помола.
Еще одна версия того, почему возникает слишком громкий шум – естественный износ встроенной помпы. В данном случае вам просто придется заменить деталь.
Кофемашина не распознает кофе
Вы насыпали зерна или молотый кофе в резервуар, но кофемашина по-прежнему сигнализирует об его отсутствии и отказывается включаться? Скорее всего, поврежден блок управления, не работает внутренний двигатель или произошла поломка кофевода с воронкой. Осмотрите детали на предмет повреждения, проверьте, не оказались ли излишки кофейной пыли внутри воронки или в самом двигателе.
Замена двигателя – дорогостоящая процедура, поэтому в этом случае, возможно, придется задуматься о покупке новой кофемашины.
Еще одна частая неисправность: когда кофе плохо подается в резервуар, или же прибор не подает его вообще. Скорее всего, проблема в заварочном механизме: произошел засор, попали отходы, крупные частицы и проч.
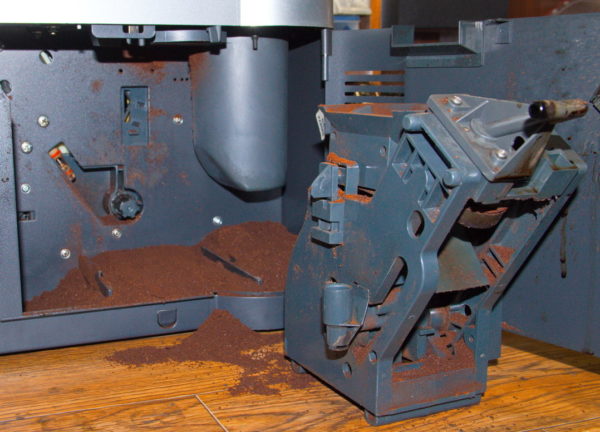
Почему устройство не хочет молоть кофе
Что нужно сделать в первую очередь – убедиться в наличии зерна в контейнере машины. Если оно есть, то необходимо высыпать его и удалить остатки с помощью пылесоса. После этого необходимо выставить настройки помола в максимальное положение и засыпать в бункер кофе другого сорта. После этого необходимо попробовать сварить пару чашек кофе. Если все нормально, то оно должно иметь матовый оттенок.
Иногда причина неисправности может быть в том, что предыдущие зерна были слишком жирными, и кофеварка просто не справлялась с ними.
Если это не помогло, то придется воспользоваться специальными средствами для чистки кофеварок. Их использование не гарантирует устранение неисправностей, но попробовать стоит. Если же и такой способ не помог, то придется разбирать устройство и тщательно прочищать все узлы. Чтобы не запутаться при сборке, рекомендуется помечать маркером все детали.
Почему аппарат не наливает кофе
Другой причиной того, что аппарат не наливает кофе, может быть загрязненный фильтр или металлический поршень. Поэтому, если машина начала медленно наливать кофе или плохо подавать воду, достаточно просто промыть блок. Если все сделано правильно, то кофеварка начнет работать в нормальном режиме и восстановит подачу воды.

Промывка кофемашины зачастую решает большинство проблем
Если и после этого кофе совсем не наливается или наливается плохо, то придется выполнить очистку тракта подачи воды. Иногда на нем может образовываться накипь, или появляться осадок из-за грязной водопроводной воды. Вообще, тракту необходимо регулярное техническое обслуживание, но мало кто из пользователей это делает. В результате устройство будет наливать кофе меньше, чем обычно. В таком случае необходимо снять заварочный блок. Именно за ним находится тракт подачи воды. Его необходимо тщательно прочистить и собрать кофеварку обратно. После этого кофе должно наливаться в нормальном режиме.
Код ошибки на дисплее
Довольно распространенная ситуация, когда сигнал об ошибке выводится непосредственно на дисплей кофемашины. Обратитесь к инструкции по эксплуатации прибора. Возможно, произошел засор, неисправен один из датчиков, по какой-либо причине заблокирован механизм. Например, у кофемашины Saeco ошибка Error 1 означает полную блокировку прибора, а Error 9 говорит о неисправности датчика водонагревателя. Надписи, аналогичные устройствам от Саеко, возникают и у моделей других производителей.
Не происходит нагрев воды
Если агрегат не греет воду, то причиной этой неисправности в кофемашине (Saeco, Delonghi, Bosch, Nespresso и др.) может быть повреждение нагревательного элемента или контроллера. Для обнаружения поломки прозвоните мультиметром оба элемента. Если же нагрев есть, но очень слабый, то возможно, этому виной жесткость воды.
Сейчас в продаже имеются специальные фильтры-картриджи для смягчения воды и защиты конструкции от образования накипи.
Стоит отметить, что для машин различных производителей имеются свои картриджи.
Не работает капучинатор
Если в машине имеется капучинатор, то вполне вероятны и поломки, связанные с его работой. Например, плохо взбивается молоко или не образуется молочная пенка. Обычно это связано с низким качеством молока или засором воздушных каналов, которые отвечают за создание пены. Молоко должно быть пастеризованным, жирностью от 2,5%. Воздушные каналы же могут забиться из-за некачественного и несвоевременного промывания. Не забывайте после приготовления кофе прочищать капучинатор чистой теплой водой в течение нескольких минут. Если же вы увидите, что вместо пенки течет горячее молоко, обратитесь в сервисный центр для ремонта данной детали.
Засорился фильтр в емкости с водой
- Засуньте руку в бачок для воды.
- Обхватите корпус фильтра руками и аккуратно его вытащите.
- В некоторых моделях кофемашин нужно отщелкнуть защелки, которые находятся над фильтром.
Не отображается уровень воды
Случаются ситуации, когда резервуар заполнен водой, но кофемашина никак не отображает ее уровень. Вероятно, все дело в датчике-поплавке: он просто не всплывает на поверхность. Не работающий поплавок может быть засорен, забит посторонним предметом или придавлен большим количеством воды. Лучше всего тщательно почистить поплавок, разобрать конструкцию датчика и просушить все элементы.
Вышел из строя манометр
Манометр, или контроллер давления кофейного аппарата, тоже может заклинить. Возможно, проблема заключается в трубке, которая соединяется непосредственно с манометром. Сам манометр стоит недорого, его легко можно заменить на новый.
Кофемашина не прессует капсулы
Механизм пробивания капсул или таблеток в капсульных аппаратах тоже может время от времени заедать. Чаще всего это происходит из-за неправильной установки капсулы. Ее желательно загружать в резервуар таким образом, чтобы она установилась на прокалывающей поверхности. После этого шага опустите рычажок.
Не забывайте, что кофемашина не может до конца прессовать таблетку, если она лежит неровно и не попадает в место прокалывания.
Заключение
Мы привели основные типы повреждений аппарата для приготовления кофе. Чтобы понять, почему ваша кофемашина больше не работает, нужно в первую очередь визуально осмотреть ее: возможно, сломалась кофемолка, один из датчиков, панель управления, а может, внутри конструкции образовался засор или заклинивший механизм. Засор, пожалуй, самая частая причина поломок. Если протекает кофемашина, кофе перестал подаваться в резервуар или сломался капучинатор, то, скорее всего, вам нужно просто качественно почистить все элементы и не допускать подобных неисправностей в будущем.

Добрый вечер. При включении и выключении кофемашины Philips EP1220/00 перестала срабатывать автоматическая функция промывки. Все остальные функции при этом работают. Подскажите, пожалуйста, в чём проблема? Машине всего неделя.
27.10.2021 21:25 Александр
Сегодня устранил точно такую же причину. На кофемашине перестала автоматически производится проливка, в начале и в конце работы. Нужно было заменить 1 большое колечко ( резиновое, оранжевое) на клапане ( сосочке), который находится, нужно вынуть варочный блок и смотреть внутри прямо, этот пластмассовый клапан видно, на нём два кошечка ( одно побольше, оно D _внеш. — 13мм, внутр. 9мм, толщина 2 мм) и поменьше. Так вот оно подстёрлось и давление падало и вода не шла на промывку. Заменил и всё стало, как раньше, промывка пошла. Посмотрите может и маленькое колечко нужно заменить. Но у меня только одно, большое. Могут быть может и какие то другие причины. Но мне это помогло. Может сумбурно написал, но как мог. Машине и года нет. Вот оно качество. По гарантии не стал отдавать, решил сам попробовать починить. Посмотрите ,может и у вас Наталья , что нибудь подобное. Рад буду ,если помог, хоть чем то.
Александр добрый день. У нас такая же беда с резинками. Подскажите где вы их
покупали?
Добрый день Михаил. Их можно купить у нас в России, а можно на Алиэкспресс. На Али продают дешевле, но отправка тоже из России. Вы наберите в инете для какой машины вам надо и смотрите у кого купить, где вам выгодней. Я купил на Али, там было дешевле, купил сразу несколько шт.. Большое колечко я написал размеры, а маленькое колечко там тоже можно купить, сами уточните какой размер нужен, мне просто нужно было одно большое. Или снимите старое и замерьте его. Возьмите несколько,потом пригодятся, это расходный материал. Потому, что когда варочный блок заходит на этот сосок, есть наверно какой то люфток и он стирает эти колечки или даже заминает и рвёт их, вот и приходится их менять. А если не в них дело, то это уже нужно разобрать машину и смотреть весь водяной тракт, может где то трубки лопнули или ,что то сорвалось. Это уже нужно разбирать и смотреть самому или в сервис. Удачи вам с ремонтом, а то сервис ( без гарантии) будет дороговато. Попробую вам потом сайт ,где покупал скинуть.
Магазин на Алиэкспресс — ,, zip67 Store». Там можно и маленькие резинки купить, только точно уточните какие вам нужны по размеру. Там правда для других моделей Филлипс, но они подходят и для наших 1220- 1224. Удачи в ремонте.
Прокладка кофеварки SAECO, Philips HD87. — RI98.. , O-RING M0090-20, на штуцер D=13mm, арт. NM01035

Как убрать воздушную пробку в кофемашине
- Выключить оборудование;
- Сбросить пар из бойлера, поскольку из-за давления в нем помпа не может автоматически добирать воду;
- Открыть паровой клапан; верхняя стрелка манометра, отвечающая за давление в бойлере, должна быть на нулевом показателе;
- Стравливаем давление и включаем кофемашину.
Из-за недостаточного давления и небольшого количества воды в бойлере начинается автоматическая подача воды, помпа начинает работать с большей силой, воздушная пробка устраняется. Как узнать, что после устранения воздушной пробки кофемашина готова к работе? Верхняя стрелка манометра должна находится между показателями в 1-1,5 атмосферы.
При завоздушивании кофемашины пробка может попасть в насос для технической воды, что также препятствует работе оборудования. Как убрать воздушную пробку в кофемашине в этом случае? В шланге для насоса есть клапан, при нажатии на который можно добрать воду. Для этого следует поднять шланг на уровень выше, чем кран, из которого вода поступает в кофемашину, зажать клапан, и вливать воду в насос до тех пор, пока из крана не потечет вода. После этого кран закрывается, клапан отпускается, шланг возвращается на место. Остается перезапустить насос, включив кофемашину.
- Извлечь емкость для воды и вылить имеющуюся в нем воду;
- Вытащить фильтр, руководствуясь инструкцией к конкретной модели кофемашины;
- Новый фильтр перед установкой важно замочить в воде, после появления пузырьков его можно устанавливать в резервуар для воды;
- После размещения фильтра резервуар для воды заполняется до максимальной отметки и устанавливается в кофемашину.
Заключительным этапом является подтверждение установки нового фильтра в меню кофемашины.
Когда нужна помощь специалиста
Если кофемашина завоздушилась, а устранить неисправность самостоятельно не удается, лучше обратиться к мастеру. Возможно, причиной поломки является выход из строя других элементов кофемашины, и безошибочно найти и устранить неисправность самостоятельно без специального оборудования может оказаться невозможно. В случае, если необходима замена фильтра, модель важно подбирать, учитывая конкретную марку и серию кофемашины. При любом затруднении лучше обратиться к специалисту: так можно избежать лишних затрат.
Источник
-
Page 1: User Manual
User Manual DI_00_00_00_00 Espresso Cappuccino Café Crème Latte Macchiato Milk Choc Milk coffee Coffee machine English 01.01.001 Series 1120 33 4097 3010 01.2017…
-
Page 2: Conditions For Use And Installation
With its optionally available powder hopper, the WMF 1100 S can also make hot chocolate with milk or milk foam. Follow the User Manual CaUtion >…
-
Page 3: Table Of Contents
Descaling . . . . . . . . . . . . . . . . . . . . . . . . . . . . . . . . . . . . . . . . . . . . . . . . . . . . . . . . . . . . . . . . . . . . . . . . User Manual WMF 1100 S…
- Page 4
Eco mode display . . . . . . . . . . . . . . . . . . . . . . . . . . . . . . . . . . . . . . . . . . . . . . . . . . . . . . . . . . . . . . . . . . 5.13 Language User Manual WMF 1100 S… - Page 5
10.3 Errors without error message 11 Safety and warranty 11.1 Hazards to the coffee machine 11.2 Directives 11.3 Duties of the owner / operator 11.4 Warranty claims appendix: technical data technical data for coffee machine appendix: accessories and spare parts index User Manual WMF 1100 S… -
Page 6: Safety
> Follow all the safety instructions. general safety instructions Hazards to the operator At WMF, safety is one of the most essential product features. The effectiveness of the safety devices can only be ensured if the following points are observed: >…
- Page 7
> Children must not play with the device. > Cleaning and user maintenance must not be performed by children. User Manual WMF 1100 S… - Page 8
> Avoid damage to the mains cable. Do not kink or crush it. > Never immerse the mains plug in water or other liquids, or pour water or other liquids over the mains plug. Always keeps the mains plug dry. User Manual WMF 1100 S… - Page 9
> Always place an appropriate cup under the spout before dispensing a beverage. risk of injury CaUtion • Long hair could become caught in the grinder head and drawn into the coffee machine. > Always protect hair with a hairnet. User Manual WMF 1100 S… -
Page 10: Risk Of Injury
> Only use products that are suitable for consumption and for use with the coffee machine. > The powder hopper, the bean hopper, and the manual insert may only be filled with materials for the use intended. User Manual WMF 1100 S…
- Page 11
• The drip tray may contain hot liquids. > Never reach under the spouts while cleaning. > Ensure that no one ever drinks the cleaning solution. > Move the drip tray carefully. User Manual WMF 1100 S… -
Page 12: Intended Use
> The coffee machine may be used only as intended. The WMF 1100 S is designed to dispense beverages made with coffee and/or milk and/or powder (such as Choc or topping) into suitable containers. This machine is intended for use in hotels, restaurants, and similar locations.
-
Page 13: Conditions For Use And Installation
The manufacturer shall not be liable for any damage resulting from this. Under no circumstances may the WMF 1100 S be used to dispense and heat liquids other than coffee, hot water (beverages, cleaning) or milk (chilled, pasteurised, homogenised, UHt).
-
Page 14: Introduction
DI_00_00_00_00 Espresso Cappuccino Café Crème Latte Macchiato Milk Choc Milk coffee Display DI_02_01_00_00 Espresso Espresso Cappuccino Cappuccino Café Crème Café Crème Latte Macchiato Latte Macchiato DI_02_01_00_01 Ristretto Ristretto Milk coffee Milk coffee Steam Steam Steam User Manual WMF 1100 S…
- Page 15
Touch display for beverage buttons and settings “ready to operate” display Menu pad (opens the main menu) Eco mode display Message pad Barista pad Cup volume “Warm rinse” pad SteamJet pad Steam button in beverage field User Manual WMF 1100 S… - Page 16
• for the installation location w s tarting on page 100 > Always follow the User Manual. Technical data w s tarting on page 101 note / tip notE • Instructions for safe use and tips for easier operation. User Manual WMF 1100 S… - Page 17
Prior to brewing cycle, coffee is briefly infused in order to ensure a more intense release of its aromatic substances. Pressing Automatic pressing of ground coffee prior to brewing cycle Rinsing Intermediate cleaning SB mode Customer self-service (self-service mode) User Manual WMF 1100 S… -
Page 18: Start-Up
• Never open the housing. • Never loosen the screws, and do not remove any housing parts. Conditions for use and installation iMportant Follow the User Manual. Technical data wstarting on page 101 User Manual WMF 1100 S…
-
Page 19: Installation Location
In case of doubt, do not start up the coffee machine, and inform the WMF Service. > Retain the original packaging in the event of any subsequent return. ™ Unpack the WMF 1100 S and place the coffee machine on a stable, horizontal surface ™ Observe the technical data Technical data w page 101 ™…
-
Page 20: Start-Up Program
The adjacent surfaces and w s tarting on page 6 spouts become hot. > When dispensing beverages, do not reach beneath the spouts. > Do not touch the spouts immediately after dispensing. User Manual WMF 1100 S…
- Page 21
This item is a step that is performed during the start-up program. For drinking water with carbonate hardness from 5 °dKH or higher, a WMF water filter must be fitted; otherwise, the coffee machine can be damaged due to build-up of scale. Determine the water hardness ™… -
Page 22: Operation
™ Press the ON/OFF switch A signal sounds. Coffee machine switches on and heats up. An automatic warm rinsing starts. When the coffee machine is ready to dispense beverages, the “Ready to operate” display appears. ON/OFF switch User Manual WMF 1100 S…
-
Page 23: Beverage Dispensing
M = size of the beverage set, no pre-selection S = approx. 25 % less than M L = approx. 25 % more than M User Manual WMF 1100 S…
-
Page 24: Connect Up The Milk
™ Push the milk container back in carefully The milk storage temperature must be adjusted to the milk temperature and suitable steam nozzle. Milk storage temperature w M ilk and foam page 56 User Manual WMF 1100 S…
-
Page 25: Milk Lance (Optional)
Dispensing option w S oftware spout w B everages ™ Touch the beverage button assigned to milk or milk page 41 foam The beverage is dispensed according to the recipe settings (dispensing option, milk foam quality, etc.) User Manual WMF 1100 S…
-
Page 26: Hot Water Dispensing
> Do not touch the spouts immediately after dispensing. > Do not touch the bottom of the steam outlet. > Always place an appropriate cup under the spout before dispensing a beverage. User Manual WMF 1100 S…
- Page 27
This blows out the condensate water. ™ Use as tall and slim a Cromargan® jug as possible, A Cromargan® jug, such as WMF order number 03 9090 0030 with handle or 03 9090 0050 ™ Fill jug to no more than half way ™… - Page 28
™ Touch the steam button and then touch it again after a short time Any residue in the steam outlet is flushed out by this brief jet of steam. ™ Wipe the steam outlet with a damp cloth User Manual WMF 1100 S… -
Page 29: Cup Table
Follow the Warranty chapter warranty. w s tarting on page 100 > Ensure that no foreign objects land in the coffee bean hopper. > Do not overfill the powder hopper. > Do not press down and compact the powder. User Manual WMF 1100 S…
-
Page 30: Manual Insert
™ Press the top of the manual insert lid in order to open the lid (push to open) ™ Insert ground coffee (maximum 15 g) ™ Close manual insert lid ™ Touch the desired beverage button Manual insert User Manual WMF 1100 S…
-
Page 31: Grounds Container
M anual cleaning container and the coffee machine base have an page 73 opening that passes through the on-site counter on which the machine is placed. The spent coffee grounds are collected in a separate container under the counter. User Manual WMF 1100 S…
-
Page 32: Drip Tray
With the constant water supply, the water tank iMportant may be removed only when the display shows Constant water supply retrofit kit an appropriate message, or when the machine w A ccessories and spare parts is switched off. page 104 User Manual WMF 1100 S…
-
Page 33: Switch Off The Coffee Machine
The ON/OFF switch is located on the right side of the operating panel. ™ Press the ON/OFF switch briefly (approx. 1 second) Coffee machine switches off. ™ Disconnect mains plug Coffee machines with a constant water supply ™ Turn off water mains tap ON/OFF switch User Manual WMF 1100 S…
-
Page 34: Software
Milk coffee Milk coffee “ready to operate” display pads page 36 Eco mode (active) Messages page 62 page 90 SteamJet cup warmer Warm rinsing page 37 page 36 S-M-L pad Barista (coffee strength) page 50 page 36 User Manual WMF 1100 S…
-
Page 35: Main Menu Functions
54 page 62 Menu control pads Main menu / Back Confirm value / setting DI_pin PIN entry Delete value / setting Next / Start Preparation test Load settings Back Save settings Show keyboard Messages on the display Milk temperature display Error message (optional) User Manual WMF 1100 S…
-
Page 36: Ready To Operate
15 % stronger than the setting * page 47 touch 2x 1 bean 15 % weaker than the setting * * Maximum quantity of ground coffee 15 g per brewing cycle The coffee strength will be altered for the next brewing cycle only. User Manual WMF 1100 S…
-
Page 37: Steamjet Cup Warmer
™ Touch the page 48 Hot steam slowly flows into the cup from below. The jet of steam stays on for the time set in the settings. ™ Touch the SteamJet pad again The steam jet stops immediately. User Manual WMF 1100 S…
-
Page 38: Care
Mixer rinsing w C are page 70 DS_03_04_01_08 Milk system rinsing The milk system rinsing rinses the milk hose, the milk Milk system rinsing nozzle, and the milk foamer. Milk system rinsing w C are page 70 User Manual WMF 1100 S…
-
Page 39: Cleanlock
Descaling chapter of litres remaining before descaling is required. This w s tarting on page 71 litres indication is calculated and displayed by the WMF 1100 S. User Manual WMF 1100 S…
-
Page 40: Beverages
A saved recipe is loaded to a beverage button here. ™ Touch a beverage button ™ Touch the “Load recipes” pad A submenu opens. ™ Mark the desired recipe ™ Touch the “Save recipes” pad The beverage button is assigned to the newly selected recipe. User Manual WMF 1100 S…
-
Page 41: Cup Volume, Multiple Brewing, And Dispensing Option
The beverage is brewed several times, as set. Up to 12 times the set quantity can be dispensed with one touch of a button. Available for beverages with coffee and with milk mixtures, as well as for hot water with the “metered” dispensing option. User Manual WMF 1100 S…
- Page 42
The beverage or steam is output for as long as the button is pressed and held. • Start-Stop-Freeflow A brief press of a button starts start-stop dispensing. A longer press of the button, for more than 1 second, starts freeflow dispensing. User Manual WMF 1100 S… -
Page 43: Change Recipes
The software indicates whether desired options are not technically possible. inventory of factory additions The additions that can be used for the recipe are shown here. ™ Touch the desired addition and slide it into the current recipe composition User Manual WMF 1100 S…
- Page 44
The setting options for the selected addition are displayed. The saved and current data are displayed. The current values The values saved by Service The factory values ground coffee quantity Enter in grams (g) Water quantity / milk quantity Enter in millilitres (ml) User Manual WMF 1100 S… -
Page 45: Coffee Quality
After pressing and a pre-infusion, wet pressing occurs. Same as for Quality 4, but with stronger wet pressing. Same as for Quality 5, but with stronger and longer wet pressing. Same as for Quality 6, but with stronger and longer wet pressing. User Manual WMF 1100 S…
-
Page 46: Text And Picture
35 Text + picture Cappuccino Note The beverage name and photo of a beverage button are adjusted here. Activate the keyboard by touching the keyboard pad. note A note about the beverage can be saved here. User Manual WMF 1100 S…
-
Page 47: Operating Options
• Cancel beverage: inactive • Menu pad: delayed • Error message: symbol • Cup size adjustment: inactive Barista pad Options: • active • inactive Default value: active active The pad is displayed when “Ready to operate”. User Manual WMF 1100 S…
- Page 48
The pad is displayed when “Ready to operate”. Error message The error is displayed in various colours in the header bar on the display. Options: • Text • Symbol Default value: Text Text The errors are shown on the display as a text message. User Manual WMF 1100 S… -
Page 49: Button Layout
49 pre-selection” can be activated here, or by selecting the “Self-service+Flags” button layout. Options: • active • inactive Default value: inactive DS_03_06_01_01 Button layout Various standard button layouts are saved here can be Button layout selected. User Manual WMF 1100 S…
-
Page 50: Postselection
Standard modification factor for beverage sizes for S-recipes that are newly activated. Default value: 75 % Large Standard modification factor for beverage sizes for L-recipes that are newly activated. Default value: 125 % Options: • active • inactive Default value: inactive User Manual WMF 1100 S…
-
Page 51: Beverage Pre-Selection
Decaf function. This setting applies to all coffee beverages with pre-selected “Decaf”. Options: • active • inactive Default value: inactive User Manual WMF 1100 S…
-
Page 52: Information
The weekly overview of the timer opens. All switch-on and switch-off times are displayed in this overview. DS_03_07_03_01 Service Service Contact data for WMF Service. Serial number of the coffee machine. DS_03_07_04_01 Care Care The last cleaning and care actions that run via coffee machine programs are displayed here.
-
Page 53: Accounting
408 4720 Default setting Counter 1 = day counter Counter 2 = week counter Counter 3 = month counter Counter 4 = year counter Each counter can be reset. Vending machines See vending machines User Manual. User Manual WMF 1100 S…
-
Page 54: Pin Rights
Operating options Language DI_usb DI_abr Accounting (without “delete”) DS_03_09_03_01 accounting pin Accounting On entering the valid PIN, access to: DI_pin DI_pfege Care DI_timer DI_getr Beverages Timer DI_bedien DI_system Operating options System DI_sprache DI_abr Accounting Language (with “delete”) DI_usb User Manual WMF 1100 S…
-
Page 55: Timer
21:00 00:.. 21:00 00:.. 21:00 00:.. 21:00 00:.. 21:00 00:.. 21:00 00:.. 21:00 22:00 23:00 The weekly overview of all switching times for the button layout is displayed. The settings can be modified directly in the overview. User Manual WMF 1100 S…
-
Page 56: 5.10 System
Progress indicator Options: Line, circle, off Default value: Line DS_03_11_00_02 Display and illumination Display and illumination The display and illumination are set here. illumination • Spout illumination Options: • active • inactive Default value: active User Manual WMF 1100 S…
- Page 57
Recalibrate the touch display. Display background The colour design for the touch display can be set here. • Colour of the main page • Colour of following pages User Manual WMF 1100 S… -
Page 58: Beverages: Large Font
Measured carbonate hardness Enter the measured water hardness in °dKH here. ™ Request drinking water hardness reading from water supplier, or determine using WMF carbonate hardness test (complete with instructions) in the accessories The carbonate hardness test is supplied with the accessories.
-
Page 59: Eco Mode
Beans empty message calibration Beans empty message The beans empty message is recalibrated here. calibration This must be performed as soon as the “Refill beans” message appears, even though there are still beans in the hopper. User Manual WMF 1100 S…
-
Page 60: Antifreeze / Transport Preparation
Load cup symbols Photos and beverage symbols stored on the USB stick are loaded to the coffee machine here. DS_03_13_00_03 Save recipes Save recipes Current recipes are exported from the coffee machine to the USB stick here. User Manual WMF 1100 S…
-
Page 61: Export Counters
(Can be protected by a PIN.) DS_03_13_00_08 Load language Load language If available, another display language can be loaded to the coffee machine from the USB stick here. DS_03_13_00_09 Firmware update Firmware update For Service only. User Manual WMF 1100 S…
-
Page 62: 5.12 Eco Mode
“Ready to operate” display. There are two states. Eco mode “active” The coffee machine is currently in the reduce phase. Eco mode “ready” Eco mode is based on idle time, 10 minutes after the latest beverage has been dispensed. User Manual WMF 1100 S…
-
Page 63: 5.13 Language
It can be set in increments of 30 minutes. Eco mode can be activated for a limited time using the timer. DI_sprache 5.13 Language The language used in the display is set here. The available languages are displayed in English. User Manual WMF 1100 S…
-
Page 64: Other Settings
The grinding degree can be set to a coarser level all at once, if desired. ™ Initiate coffee dispensing and wait until grinder starts up ™ With grinder running, alter grinding degree as desired using the multitool Grinding degree Grinding degree fine coarse Multitool User Manual WMF 1100 S…
-
Page 65: Care
• Germs can multiply in a coffee machine that Follow the Safety chapter is not in use. w s tarting on page 6 > Prior to and after every instance that the machine is shut off for several days, perform all cleanings. User Manual WMF 1100 S…
- Page 66
CaUtion • All cleaning agents are perfectly tuned to Follow the Safety chapter the cleaning programs. w s tarting on page 6 > Use only WMF cleaning and descaling agent. Health hazard / CaUtion irritation and scalding hazard Follow the Safety chapter w … -
Page 67: Cleaning Intervals Overview
= Daily, at least once per day and as needed Weekly = Weekly cleaning Regularly = Regularly as needed Automatic = Automatic processing Message = After the display shows a message = Daily for severe soiling = optional (depending on the model) User Manual WMF 1100 S…
-
Page 68: Dishwasher-Safe Parts
M ain menu with a WMF cleaning tablet. w C are w I nstructions A milk system rinsing and mixer rinsing are parts of the system cleaning. Total duration is approx. 10 minutes. User Manual WMF 1100 S…
- Page 69
• If confirmed with , the coffee machine is of rinse water may get into the restarted after cleaning. coffee grounds container. This is not an error. ™ Select desired option ™ Information will be shown on the display User Manual WMF 1100 S… -
Page 70: Mixer Rinsing
The milk system rinsing rinses the milk hose, the milk nozzles, and the milk foamer. w Clean milk system manually ™ Start the Care menu page 80 ™ Touch Cleaning programs ™ Touch Milk system rinsing ™ Information will be shown on the display User Manual WMF 1100 S…
-
Page 71: Descaling
6 surfaces and spouts become hot. > If the coffee machine is still hot, a cooling routine starts initially. Duration of the cooling routine is 5–10 minutes. > Wait until the cooling routine has finished. User Manual WMF 1100 S…
- Page 72
Care | Descaling • WMF care products are designed and tested iMportant for use with these materials. Any other descaling agent may cause damage to the Follow the Warranty chapter w s tarting on page 100 coffee machine. > Use only WMF descaling agent. -
Page 73: Manual Cleaning
Care | Manual cleaning Manual cleaning Order numbers for the WMF care program w A ccessories and spare parts page 104 7.6.1 Clean the operating panel (CleanLock) Touch “CleanLock” to start a 15-second countdown. The touch display can now be cleaned. The touch display is activated again 15 seconds after the last time…
-
Page 74: Clean The Catch Pan
™ Remove the catch pan and clean it thoroughly with clear drinking water ™ Dry and replace the catch pan ™ Replace the grounds container 7.6.4 Clean the water tank Thoroughly rinse water tank weekly with clear water. User Manual WMF 1100 S…
-
Page 75: Clean The Drip Tray
™ Clean the SteamJet spout and cover thoroughly with the included cleaning brush ™ Rinse the drip tray and the drip grid with clear drinking water ™ Dry the drip tray and the drip grid, reassemble and replace User Manual WMF 1100 S…
-
Page 76: Clean The Housing
Do not use any cleaners a damp cloth or implements. ™ Wipe dry using a fine woollen cloth 7.6.7 Clean the spout manually Regularly clean the outside of the spout with a damp cloth and clean the dispensing openings with the appropriate brushes. User Manual WMF 1100 S…
-
Page 77: Clean The Brewing Unit
> Allow the coffee machine to cool before cleaning. • The brewing unit can slip downwards. iMportant > Always hold the brewing unit securely. Follow the Warranty chapter > Never use force. Danger of breakage. w s tarting on page 100 User Manual WMF 1100 S…
- Page 78
™ Pull the springs outward and press them down This unlocks the insertion chute. ™ Swing the insertion chute [1] upwards ™ Clean the brewing sieve under running water or Illustration 3 with a cloth Illustration 4 User Manual WMF 1100 S… - Page 79
> Turn the thread on the brewing unit head w s tarting on page 100 slightly to the left or right with the multitool until the brewing unit slides into the guide. > Never use force. Danger of breakage. User Manual WMF 1100 S… -
Page 80: Clean The Milk System Manually
™ Clean the channels and connections with the included cleaning brush Health hazard CaUtion • In case of eye contact, the WMF milk system Follow the Safety chapter cleaner can cause severe eye injury. w s tarting on page 6 > Ensure that the milk system cleaner never makes contact with the eyes of a person or…
- Page 81
39 ™ Immerse the length of the remaining milk hose in the cleaning solution This procedure prevents air bubbles from remaining in the milk hose. All parts must be completely immersed in the cleaning solution. User Manual WMF 1100 S… -
Page 82: Clean The Mixer
• If the mixer hose is not firmly attached, Follow the Safety chapter hot water or hot powder beverage can be w s tarting on page 6 discharged inadvertently. > Place the mixer hose on the mixer bowl. User Manual WMF 1100 S…
-
Page 83: Clean The Bean Hopper
Coffee machine switches off. ™ Disconnect mains plug ™ Remove the cover from the bean hopper, empty it, and clean it with a damp cloth ™ Allow bean hoppers to dry completely ™ Refill bean hopper and close the covers User Manual WMF 1100 S…
-
Page 84: Clean The Powder Hopper
™ Remove the powder hopper, empty it out, and clean it with a damp cloth ™ Unscrew union nut at front and rear ™ Pull out the dosing auger and remove the discharge ™ Thoroughly wipe out hopper with a damp cloth User Manual WMF 1100 S…
- Page 85
(optional) ™ Unlatch the extension ™ Lift up the extension to remove it ™ Wipe out the extension thoroughly with a damp cloth and allow to dry ™ Replace the extension and latch it in place User Manual WMF 1100 S… -
Page 86: Haccp Cleaning Schedule
61 be established and implemented. With correct installation, care, maintenance, and cleaning, WMF coffee machines meet the requirements described above. If care and cleaning of the coffee machine is not carried out properly, dispensing milk beverages will constitute a food hygiene hazard point.
- Page 87
• If little milk is used, chilled milk must be placed in WMF offers a range of refrigeration options (e.g., WMF countertop the refrigerator again during operation. coolers or WMF milk coolers). HACCP cleaning schedule… -
Page 88: Maintenance And Descaling
Maintenance Maintenance after the display message; may only be Service maintenance message w M essages and instructions undertaken by trained personnel or by WMF Service, as page 90 in this instance components affecting safety must be replaced. The following care or maintenance stages are provided: • Descaling may be undertaken by the user / operator.
-
Page 89: Wmf Service
Maintenance and descaling | WMF Service WMF Service important. You can reach WMF Service if the local service point is For other maintenance work and not known. repairs, please contact your local WMF Service. The telephone number can be found on the address sticker WMF Group GmbH…
-
Page 90: Messages And Instructions
™ Change water filter For coffee machines with a constant water supply, we recommend using Follow water filter instructions. the bestmax V water filter. ™ Call WMF Service when needed Call WMF Service Error messages and malfunctions w p age 91 Error number is displayed Service messages are instructions.
-
Page 91: Error Messages And Malfunctions
If this does not rectify the error or if the error indicated is not listed please call WMF Service. Some messages lead to blocking of individual functions. You will notice this by the fact that the beverage button illumination goes out.
- Page 92
Boiler: ™ Switch the coffee machine off, allow to cool and over-temperature switch on again ™ If error not remedied call WMF Service Boiler: ™ Switch off the coffee machine and on again heat-up time error ™ If error not remedied call WMF Service… - Page 93
If error not remedied carry out the next step. warm rinsing ™ Clean the brewing unit w Care w Clean the brewing unit, page 77 ™ If error not remedied call WMF Service Steam boiler: Beverage dispensing temporarily blocked. level ™… -
Page 94: Errors Without Error Message
Error pattern Action instructions • No hot water dispensing ™ Clean the hot water spout but water in grounds ™ Call WMF Service (coffee dispensing possible) container • No Choc dispensing ™ Do not use Choc dispensing but water in grounds ™…
- Page 95
Care w C lean milk system manually, page 80 ™ Use lower powder dosage ™ Use higher water dosage • Pump runs continuously, ™ Switch the coffee machine off and on again water in grounds ™ If error not remedied call WMF Service container User Manual WMF 1100 S… -
Page 96: Safety And Warranty
Coffee grinder • Foreign objects can damage the grinders. This damage is not covered under the warranty. > Ensure that no foreign objects land in the coffee bean hopper. User Manual WMF 1100 S…
- Page 97
• For drinking water with carbonate hardness from 5 °dKH or higher, a WMF water filter must be fitted; otherwise, the coffee machine can be damaged due to build-up of scale. • For insurance reasons always ensure that, at the end of operation the mains switch is switched off or the mains plug is unplugged. -
Page 98: Directives
Safety and warranty 11.2 Directives Manufacturer: WMF Group GmbH, 73312 Geislingen (Germany) The device fulfils the requirements of all applicable regulations in the directives MD (MR) 2006/42/EC (EG), EMV directive (EMC) 2014/30/EC and RoHS 2011 / 65 / EG (EC). The manufacturer indicated above declares that this machine conforms to all applicable provisions of the directives listed.
-
Page 99: Duties Of The Owner / Operator
These measures are conducted by WMF Service or by WMF authorised service personnel as part of the maintenance work. WMF special cleaning agent System cleaning must be carried out using only the w …
-
Page 100: 11.4 Warranty Claims
Maintenance w p age 88 WMF, or by repair or reconditioning work on the part of the purchaser or by third parties. • With respect to faults caused by inappropriate or improper use.
-
Page 101: Appendix: Technical Data
Do not use old hoses. Water quality For drinking water with carbonate hardness from 5 °dKH or higher, a WMF water filter must be fitted. Water drain tube (optional) Hose a minimum of DN 19, minimum downward slope of 2 cm/m Water tank volumes approx.
- Page 102
Installation clearances For operating, service, and safety reasons the machine should be installed with a clearance from the building or non-WMF components of not less than 50 mm at the sides and 50 mm at the back. A minimum working space of 800 mm in front of the coffee machine is recommended. - Page 103
In order to avoid possible faults from arising in our shielded data lines due to potential equalisation currents between the devices, an additional potential equalisation unit should be planned for devices connected to the vending system. (See EN 60309) User Manual WMF 1100 S… -
Page 104: Appendix: Accessories And Spare Parts
O-ring (friction piston) 33 7006 5190 all Multitool 33 7007 1261 all Bean hopper / product hopper Bean hopper lid 33 4051 0000 all Powder hopper lid 33 4051 0000 Choc Powder hopper, no cover 33 2916 5000 all User Manual WMF 1100 S…
- Page 105
(4 pcs in package) Documentation / Instructions Set of documents: 33 4097 3010 all User Manual WMF 1100 S Order numbers for the WMF care program Bottle WMF Special cleaner for milk foamer 33 0683 6000 all Pack Special cleaning tablets (100 pieces) 33 2332 4000 all… -
Page 106: Index
Preparation of ground coffee using the Installation location 19 Conditions for use and installation 13 manual insert 30 Installation surface 102 Connect up the milk 24 Instructions 39 Constant water supply 32 Intended use 12 Counter 53 Introduction 14 Cup size 49 Quality level 45 Inventory of factory additions 43 Cup table 29 User Manual WMF 1100 S…
- Page 107
Technical data for coffee machine 101 Settings (basic settings) 20 Water quality 101 Temperature 59 Settings PIN 54 Water quantity 44 Text and picture 46 S-M-L buttons 23 Water supply 101 Time/date 55 S-M-L Cup volumes 41 WMF Service 89 Timer 52, 55 S-M-L Function 41, 50 Touch calibration 57 Software 34 Transport preparation 60 Spout 15 User Manual WMF 1100 S… - Page 108
Your nearest WMF Service: © 2017 WMF Group GmbH All rights reserved, in particular duplication, distribution, and translation rights. No part of this manual may be reproduced in any form or processed, duplicated, or distributed using electronic systems without written consent. Design and production / typesetting and print presentation: TecDoc GmbH;…
инструкцияWMF 1000

35
WMF 1000 user manual
Care
Rinse milk system
Select the displayed program with the
P button
The display reports the individual activities that must be
done before the rinse.
Check if the milk lever is up? If not, put it up now
Push the all—in—one spout to the uppermost position
Place an appropriate container under the
all—in—one spout
Wipe off the outside of the milk hose with a clean,
damp cloth
Place the milk hose with the milk nozzle on the hot
water spout and turn it clockwise to the stop
Start the rinse with the care button
The coffee machine‘s milk system is rinsed with
hot water. Hot rinse water is emptied through the
all—in—one spout.
After a successful rinse, the following display appears:
Turn the milk hose anticlockwise, disconnecting it
from the hot water spout
rinse milksystem
OK:P brwse.:care-bt
rinse milksystem
OK:P brwse.:care-bt
milk lever up
move spout up max.
milk lever up
move spout up max.
connect hose
Start: care button
connect hose
Start: care button
lower spout
into beverage position
lower spout
into beverage position
Place the milk hose on the
hot water spout and turn it
clockwise to the stop.
Duration of milk system rinse
approx. 30 seconds
-
Page 1: User Manual
User Manual DI_00_00_00_00 Espresso Cappuccino Café Crème Latte Macchiato Milk Choc Milk coffee Coffee machine English 01.01.001 Series 1120 33 4097 3010 01.2017…
-
Page 2: Conditions For Use And Installation
With its optionally available powder hopper, the WMF 1100 S can also make hot chocolate with milk or milk foam. Follow the User Manual CaUtion >…
-
Page 3: Table Of Contents
Descaling . . . . . . . . . . . . . . . . . . . . . . . . . . . . . . . . . . . . . . . . . . . . . . . . . . . . . . . . . . . . . . . . . . . . . . . . User Manual WMF 1100 S…
-
Page 4
Eco mode display . . . . . . . . . . . . . . . . . . . . . . . . . . . . . . . . . . . . . . . . . . . . . . . . . . . . . . . . . . . . . . . . . . 5.13 Language User Manual WMF 1100 S… -
Page 5
10.3 Errors without error message 11 Safety and warranty 11.1 Hazards to the coffee machine 11.2 Directives 11.3 Duties of the owner / operator 11.4 Warranty claims appendix: technical data technical data for coffee machine appendix: accessories and spare parts index User Manual WMF 1100 S… -
Page 6: Safety
> Follow all the safety instructions. general safety instructions Hazards to the operator At WMF, safety is one of the most essential product features. The effectiveness of the safety devices can only be ensured if the following points are observed: >…
-
Page 7
> Children must not play with the device. > Cleaning and user maintenance must not be performed by children. User Manual WMF 1100 S… -
Page 8
> Avoid damage to the mains cable. Do not kink or crush it. > Never immerse the mains plug in water or other liquids, or pour water or other liquids over the mains plug. Always keeps the mains plug dry. User Manual WMF 1100 S… -
Page 9
> Always place an appropriate cup under the spout before dispensing a beverage. risk of injury CaUtion • Long hair could become caught in the grinder head and drawn into the coffee machine. > Always protect hair with a hairnet. User Manual WMF 1100 S… -
Page 10: Risk Of Injury
> Only use products that are suitable for consumption and for use with the coffee machine. > The powder hopper, the bean hopper, and the manual insert may only be filled with materials for the use intended. User Manual WMF 1100 S…
-
Page 11
• The drip tray may contain hot liquids. > Never reach under the spouts while cleaning. > Ensure that no one ever drinks the cleaning solution. > Move the drip tray carefully. User Manual WMF 1100 S… -
Page 12: Intended Use
> The coffee machine may be used only as intended. The WMF 1100 S is designed to dispense beverages made with coffee and/or milk and/or powder (such as Choc or topping) into suitable containers. This machine is intended for use in hotels, restaurants, and similar locations.
-
Page 13: Conditions For Use And Installation
The manufacturer shall not be liable for any damage resulting from this. Under no circumstances may the WMF 1100 S be used to dispense and heat liquids other than coffee, hot water (beverages, cleaning) or milk (chilled, pasteurised, homogenised, UHt).
-
Page 14: Introduction
DI_00_00_00_00 Espresso Cappuccino Café Crème Latte Macchiato Milk Choc Milk coffee Display DI_02_01_00_00 Espresso Espresso Cappuccino Cappuccino Café Crème Café Crème Latte Macchiato Latte Macchiato DI_02_01_00_01 Ristretto Ristretto Milk coffee Milk coffee Steam Steam Steam User Manual WMF 1100 S…
-
Page 15
Touch display for beverage buttons and settings “ready to operate” display Menu pad (opens the main menu) Eco mode display Message pad Barista pad Cup volume “Warm rinse” pad SteamJet pad Steam button in beverage field User Manual WMF 1100 S… -
Page 16
• for the installation location w s tarting on page 100 > Always follow the User Manual. Technical data w s tarting on page 101 note / tip notE • Instructions for safe use and tips for easier operation. User Manual WMF 1100 S… -
Page 17
Prior to brewing cycle, coffee is briefly infused in order to ensure a more intense release of its aromatic substances. Pressing Automatic pressing of ground coffee prior to brewing cycle Rinsing Intermediate cleaning SB mode Customer self-service (self-service mode) User Manual WMF 1100 S… -
Page 18: Start-Up
• Never open the housing. • Never loosen the screws, and do not remove any housing parts. Conditions for use and installation iMportant Follow the User Manual. Technical data wstarting on page 101 User Manual WMF 1100 S…
-
Page 19: Installation Location
In case of doubt, do not start up the coffee machine, and inform the WMF Service. > Retain the original packaging in the event of any subsequent return. ™ Unpack the WMF 1100 S and place the coffee machine on a stable, horizontal surface ™ Observe the technical data Technical data w page 101 ™…
-
Page 20: Start-Up Program
The adjacent surfaces and w s tarting on page 6 spouts become hot. > When dispensing beverages, do not reach beneath the spouts. > Do not touch the spouts immediately after dispensing. User Manual WMF 1100 S…
-
Page 21
This item is a step that is performed during the start-up program. For drinking water with carbonate hardness from 5 °dKH or higher, a WMF water filter must be fitted; otherwise, the coffee machine can be damaged due to build-up of scale. Determine the water hardness ™… -
Page 22: Operation
™ Press the ON/OFF switch A signal sounds. Coffee machine switches on and heats up. An automatic warm rinsing starts. When the coffee machine is ready to dispense beverages, the “Ready to operate” display appears. ON/OFF switch User Manual WMF 1100 S…
-
Page 23: Beverage Dispensing
M = size of the beverage set, no pre-selection S = approx. 25 % less than M L = approx. 25 % more than M User Manual WMF 1100 S…
-
Page 24: Connect Up The Milk
™ Push the milk container back in carefully The milk storage temperature must be adjusted to the milk temperature and suitable steam nozzle. Milk storage temperature w M ilk and foam page 56 User Manual WMF 1100 S…
-
Page 25: Milk Lance (Optional)
Dispensing option w S oftware spout w B everages ™ Touch the beverage button assigned to milk or milk page 41 foam The beverage is dispensed according to the recipe settings (dispensing option, milk foam quality, etc.) User Manual WMF 1100 S…
-
Page 26: Hot Water Dispensing
> Do not touch the spouts immediately after dispensing. > Do not touch the bottom of the steam outlet. > Always place an appropriate cup under the spout before dispensing a beverage. User Manual WMF 1100 S…
-
Page 27
This blows out the condensate water. ™ Use as tall and slim a Cromargan® jug as possible, A Cromargan® jug, such as WMF order number 03 9090 0030 with handle or 03 9090 0050 ™ Fill jug to no more than half way ™… -
Page 28
™ Touch the steam button and then touch it again after a short time Any residue in the steam outlet is flushed out by this brief jet of steam. ™ Wipe the steam outlet with a damp cloth User Manual WMF 1100 S… -
Page 29: Cup Table
Follow the Warranty chapter warranty. w s tarting on page 100 > Ensure that no foreign objects land in the coffee bean hopper. > Do not overfill the powder hopper. > Do not press down and compact the powder. User Manual WMF 1100 S…
-
Page 30: Manual Insert
™ Press the top of the manual insert lid in order to open the lid (push to open) ™ Insert ground coffee (maximum 15 g) ™ Close manual insert lid ™ Touch the desired beverage button Manual insert User Manual WMF 1100 S…
-
Page 31: Grounds Container
M anual cleaning container and the coffee machine base have an page 73 opening that passes through the on-site counter on which the machine is placed. The spent coffee grounds are collected in a separate container under the counter. User Manual WMF 1100 S…
-
Page 32: Drip Tray
With the constant water supply, the water tank iMportant may be removed only when the display shows Constant water supply retrofit kit an appropriate message, or when the machine w A ccessories and spare parts is switched off. page 104 User Manual WMF 1100 S…
-
Page 33: Switch Off The Coffee Machine
The ON/OFF switch is located on the right side of the operating panel. ™ Press the ON/OFF switch briefly (approx. 1 second) Coffee machine switches off. ™ Disconnect mains plug Coffee machines with a constant water supply ™ Turn off water mains tap ON/OFF switch User Manual WMF 1100 S…
-
Page 34: Software
Milk coffee Milk coffee “ready to operate” display pads page 36 Eco mode (active) Messages page 62 page 90 SteamJet cup warmer Warm rinsing page 37 page 36 S-M-L pad Barista (coffee strength) page 50 page 36 User Manual WMF 1100 S…
-
Page 35: Main Menu Functions
54 page 62 Menu control pads Main menu / Back Confirm value / setting DI_pin PIN entry Delete value / setting Next / Start Preparation test Load settings Back Save settings Show keyboard Messages on the display Milk temperature display Error message (optional) User Manual WMF 1100 S…
-
Page 36: Ready To Operate
15 % stronger than the setting * page 47 touch 2x 1 bean 15 % weaker than the setting * * Maximum quantity of ground coffee 15 g per brewing cycle The coffee strength will be altered for the next brewing cycle only. User Manual WMF 1100 S…
-
Page 37: Steamjet Cup Warmer
™ Touch the page 48 Hot steam slowly flows into the cup from below. The jet of steam stays on for the time set in the settings. ™ Touch the SteamJet pad again The steam jet stops immediately. User Manual WMF 1100 S…
-
Page 38: Care
Mixer rinsing w C are page 70 DS_03_04_01_08 Milk system rinsing The milk system rinsing rinses the milk hose, the milk Milk system rinsing nozzle, and the milk foamer. Milk system rinsing w C are page 70 User Manual WMF 1100 S…
-
Page 39: Cleanlock
Descaling chapter of litres remaining before descaling is required. This w s tarting on page 71 litres indication is calculated and displayed by the WMF 1100 S. User Manual WMF 1100 S…
-
Page 40: Beverages
A saved recipe is loaded to a beverage button here. ™ Touch a beverage button ™ Touch the “Load recipes” pad A submenu opens. ™ Mark the desired recipe ™ Touch the “Save recipes” pad The beverage button is assigned to the newly selected recipe. User Manual WMF 1100 S…
-
Page 41: Cup Volume, Multiple Brewing, And Dispensing Option
The beverage is brewed several times, as set. Up to 12 times the set quantity can be dispensed with one touch of a button. Available for beverages with coffee and with milk mixtures, as well as for hot water with the “metered” dispensing option. User Manual WMF 1100 S…
-
Page 42
The beverage or steam is output for as long as the button is pressed and held. • Start-Stop-Freeflow A brief press of a button starts start-stop dispensing. A longer press of the button, for more than 1 second, starts freeflow dispensing. User Manual WMF 1100 S… -
Page 43: Change Recipes
The software indicates whether desired options are not technically possible. inventory of factory additions The additions that can be used for the recipe are shown here. ™ Touch the desired addition and slide it into the current recipe composition User Manual WMF 1100 S…
-
Page 44
The setting options for the selected addition are displayed. The saved and current data are displayed. The current values The values saved by Service The factory values ground coffee quantity Enter in grams (g) Water quantity / milk quantity Enter in millilitres (ml) User Manual WMF 1100 S… -
Page 45: Coffee Quality
After pressing and a pre-infusion, wet pressing occurs. Same as for Quality 4, but with stronger wet pressing. Same as for Quality 5, but with stronger and longer wet pressing. Same as for Quality 6, but with stronger and longer wet pressing. User Manual WMF 1100 S…
-
Page 46: Text And Picture
35 Text + picture Cappuccino Note The beverage name and photo of a beverage button are adjusted here. Activate the keyboard by touching the keyboard pad. note A note about the beverage can be saved here. User Manual WMF 1100 S…
-
Page 47: Operating Options
• Cancel beverage: inactive • Menu pad: delayed • Error message: symbol • Cup size adjustment: inactive Barista pad Options: • active • inactive Default value: active active The pad is displayed when “Ready to operate”. User Manual WMF 1100 S…
-
Page 48
The pad is displayed when “Ready to operate”. Error message The error is displayed in various colours in the header bar on the display. Options: • Text • Symbol Default value: Text Text The errors are shown on the display as a text message. User Manual WMF 1100 S… -
Page 49: Button Layout
49 pre-selection” can be activated here, or by selecting the “Self-service+Flags” button layout. Options: • active • inactive Default value: inactive DS_03_06_01_01 Button layout Various standard button layouts are saved here can be Button layout selected. User Manual WMF 1100 S…
-
Page 50: Postselection
Standard modification factor for beverage sizes for S-recipes that are newly activated. Default value: 75 % Large Standard modification factor for beverage sizes for L-recipes that are newly activated. Default value: 125 % Options: • active • inactive Default value: inactive User Manual WMF 1100 S…
-
Page 51: Beverage Pre-Selection
Decaf function. This setting applies to all coffee beverages with pre-selected “Decaf”. Options: • active • inactive Default value: inactive User Manual WMF 1100 S…
-
Page 52: Information
The weekly overview of the timer opens. All switch-on and switch-off times are displayed in this overview. DS_03_07_03_01 Service Service Contact data for WMF Service. Serial number of the coffee machine. DS_03_07_04_01 Care Care The last cleaning and care actions that run via coffee machine programs are displayed here.
-
Page 53: Accounting
408 4720 Default setting Counter 1 = day counter Counter 2 = week counter Counter 3 = month counter Counter 4 = year counter Each counter can be reset. Vending machines See vending machines User Manual. User Manual WMF 1100 S…
-
Page 54: Pin Rights
Operating options Language DI_usb DI_abr Accounting (without “delete”) DS_03_09_03_01 accounting pin Accounting On entering the valid PIN, access to: DI_pin DI_pfege Care DI_timer DI_getr Beverages Timer DI_bedien DI_system Operating options System DI_sprache DI_abr Accounting Language (with “delete”) DI_usb User Manual WMF 1100 S…
-
Page 55: Timer
21:00 00:.. 21:00 00:.. 21:00 00:.. 21:00 00:.. 21:00 00:.. 21:00 00:.. 21:00 22:00 23:00 The weekly overview of all switching times for the button layout is displayed. The settings can be modified directly in the overview. User Manual WMF 1100 S…
-
Page 56: 5.10 System
Progress indicator Options: Line, circle, off Default value: Line DS_03_11_00_02 Display and illumination Display and illumination The display and illumination are set here. illumination • Spout illumination Options: • active • inactive Default value: active User Manual WMF 1100 S…
-
Page 57
Recalibrate the touch display. Display background The colour design for the touch display can be set here. • Colour of the main page • Colour of following pages User Manual WMF 1100 S… -
Page 58: Beverages: Large Font
Measured carbonate hardness Enter the measured water hardness in °dKH here. ™ Request drinking water hardness reading from water supplier, or determine using WMF carbonate hardness test (complete with instructions) in the accessories The carbonate hardness test is supplied with the accessories.
-
Page 59: Eco Mode
Beans empty message calibration Beans empty message The beans empty message is recalibrated here. calibration This must be performed as soon as the “Refill beans” message appears, even though there are still beans in the hopper. User Manual WMF 1100 S…
-
Page 60: Antifreeze / Transport Preparation
Load cup symbols Photos and beverage symbols stored on the USB stick are loaded to the coffee machine here. DS_03_13_00_03 Save recipes Save recipes Current recipes are exported from the coffee machine to the USB stick here. User Manual WMF 1100 S…
-
Page 61: Export Counters
(Can be protected by a PIN.) DS_03_13_00_08 Load language Load language If available, another display language can be loaded to the coffee machine from the USB stick here. DS_03_13_00_09 Firmware update Firmware update For Service only. User Manual WMF 1100 S…
-
Page 62: 5.12 Eco Mode
“Ready to operate” display. There are two states. Eco mode “active” The coffee machine is currently in the reduce phase. Eco mode “ready” Eco mode is based on idle time, 10 minutes after the latest beverage has been dispensed. User Manual WMF 1100 S…
-
Page 63: 5.13 Language
It can be set in increments of 30 minutes. Eco mode can be activated for a limited time using the timer. DI_sprache 5.13 Language The language used in the display is set here. The available languages are displayed in English. User Manual WMF 1100 S…
-
Page 64: Other Settings
The grinding degree can be set to a coarser level all at once, if desired. ™ Initiate coffee dispensing and wait until grinder starts up ™ With grinder running, alter grinding degree as desired using the multitool Grinding degree Grinding degree fine coarse Multitool User Manual WMF 1100 S…
-
Page 65: Care
• Germs can multiply in a coffee machine that Follow the Safety chapter is not in use. w s tarting on page 6 > Prior to and after every instance that the machine is shut off for several days, perform all cleanings. User Manual WMF 1100 S…
-
Page 66
CaUtion • All cleaning agents are perfectly tuned to Follow the Safety chapter the cleaning programs. w s tarting on page 6 > Use only WMF cleaning and descaling agent. Health hazard / CaUtion irritation and scalding hazard Follow the Safety chapter w … -
Page 67: Cleaning Intervals Overview
= Daily, at least once per day and as needed Weekly = Weekly cleaning Regularly = Regularly as needed Automatic = Automatic processing Message = After the display shows a message = Daily for severe soiling = optional (depending on the model) User Manual WMF 1100 S…
-
Page 68: Dishwasher-Safe Parts
M ain menu with a WMF cleaning tablet. w C are w I nstructions A milk system rinsing and mixer rinsing are parts of the system cleaning. Total duration is approx. 10 minutes. User Manual WMF 1100 S…
-
Page 69
• If confirmed with , the coffee machine is of rinse water may get into the restarted after cleaning. coffee grounds container. This is not an error. ™ Select desired option ™ Information will be shown on the display User Manual WMF 1100 S… -
Page 70: Mixer Rinsing
The milk system rinsing rinses the milk hose, the milk nozzles, and the milk foamer. w Clean milk system manually ™ Start the Care menu page 80 ™ Touch Cleaning programs ™ Touch Milk system rinsing ™ Information will be shown on the display User Manual WMF 1100 S…
-
Page 71: Descaling
6 surfaces and spouts become hot. > If the coffee machine is still hot, a cooling routine starts initially. Duration of the cooling routine is 5–10 minutes. > Wait until the cooling routine has finished. User Manual WMF 1100 S…
-
Page 72
Care | Descaling • WMF care products are designed and tested iMportant for use with these materials. Any other descaling agent may cause damage to the Follow the Warranty chapter w s tarting on page 100 coffee machine. > Use only WMF descaling agent. -
Page 73: Manual Cleaning
Care | Manual cleaning Manual cleaning Order numbers for the WMF care program w A ccessories and spare parts page 104 7.6.1 Clean the operating panel (CleanLock) Touch “CleanLock” to start a 15-second countdown. The touch display can now be cleaned. The touch display is activated again 15 seconds after the last time…
-
Page 74: Clean The Catch Pan
™ Remove the catch pan and clean it thoroughly with clear drinking water ™ Dry and replace the catch pan ™ Replace the grounds container 7.6.4 Clean the water tank Thoroughly rinse water tank weekly with clear water. User Manual WMF 1100 S…
-
Page 75: Clean The Drip Tray
™ Clean the SteamJet spout and cover thoroughly with the included cleaning brush ™ Rinse the drip tray and the drip grid with clear drinking water ™ Dry the drip tray and the drip grid, reassemble and replace User Manual WMF 1100 S…
-
Page 76: Clean The Housing
Do not use any cleaners a damp cloth or implements. ™ Wipe dry using a fine woollen cloth 7.6.7 Clean the spout manually Regularly clean the outside of the spout with a damp cloth and clean the dispensing openings with the appropriate brushes. User Manual WMF 1100 S…
-
Page 77: Clean The Brewing Unit
> Allow the coffee machine to cool before cleaning. • The brewing unit can slip downwards. iMportant > Always hold the brewing unit securely. Follow the Warranty chapter > Never use force. Danger of breakage. w s tarting on page 100 User Manual WMF 1100 S…
-
Page 78
™ Pull the springs outward and press them down This unlocks the insertion chute. ™ Swing the insertion chute [1] upwards ™ Clean the brewing sieve under running water or Illustration 3 with a cloth Illustration 4 User Manual WMF 1100 S… -
Page 79
> Turn the thread on the brewing unit head w s tarting on page 100 slightly to the left or right with the multitool until the brewing unit slides into the guide. > Never use force. Danger of breakage. User Manual WMF 1100 S… -
Page 80: Clean The Milk System Manually
™ Clean the channels and connections with the included cleaning brush Health hazard CaUtion • In case of eye contact, the WMF milk system Follow the Safety chapter cleaner can cause severe eye injury. w s tarting on page 6 > Ensure that the milk system cleaner never makes contact with the eyes of a person or…
-
Page 81
39 ™ Immerse the length of the remaining milk hose in the cleaning solution This procedure prevents air bubbles from remaining in the milk hose. All parts must be completely immersed in the cleaning solution. User Manual WMF 1100 S… -
Page 82: Clean The Mixer
• If the mixer hose is not firmly attached, Follow the Safety chapter hot water or hot powder beverage can be w s tarting on page 6 discharged inadvertently. > Place the mixer hose on the mixer bowl. User Manual WMF 1100 S…
-
Page 83: Clean The Bean Hopper
Coffee machine switches off. ™ Disconnect mains plug ™ Remove the cover from the bean hopper, empty it, and clean it with a damp cloth ™ Allow bean hoppers to dry completely ™ Refill bean hopper and close the covers User Manual WMF 1100 S…
-
Page 84: Clean The Powder Hopper
™ Remove the powder hopper, empty it out, and clean it with a damp cloth ™ Unscrew union nut at front and rear ™ Pull out the dosing auger and remove the discharge ™ Thoroughly wipe out hopper with a damp cloth User Manual WMF 1100 S…
-
Page 85
(optional) ™ Unlatch the extension ™ Lift up the extension to remove it ™ Wipe out the extension thoroughly with a damp cloth and allow to dry ™ Replace the extension and latch it in place User Manual WMF 1100 S… -
Page 86: Haccp Cleaning Schedule
61 be established and implemented. With correct installation, care, maintenance, and cleaning, WMF coffee machines meet the requirements described above. If care and cleaning of the coffee machine is not carried out properly, dispensing milk beverages will constitute a food hygiene hazard point.
-
Page 87
• If little milk is used, chilled milk must be placed in WMF offers a range of refrigeration options (e.g., WMF countertop the refrigerator again during operation. coolers or WMF milk coolers). HACCP cleaning schedule… -
Page 88: Maintenance And Descaling
Maintenance Maintenance after the display message; may only be Service maintenance message w M essages and instructions undertaken by trained personnel or by WMF Service, as page 90 in this instance components affecting safety must be replaced. The following care or maintenance stages are provided: • Descaling may be undertaken by the user / operator.
-
Page 89: Wmf Service
Maintenance and descaling | WMF Service WMF Service important. You can reach WMF Service if the local service point is For other maintenance work and not known. repairs, please contact your local WMF Service. The telephone number can be found on the address sticker WMF Group GmbH…
-
Page 90: Messages And Instructions
™ Change water filter For coffee machines with a constant water supply, we recommend using Follow water filter instructions. the bestmax V water filter. ™ Call WMF Service when needed Call WMF Service Error messages and malfunctions w p age 91 Error number is displayed Service messages are instructions.
-
Page 91: Error Messages And Malfunctions
If this does not rectify the error or if the error indicated is not listed please call WMF Service. Some messages lead to blocking of individual functions. You will notice this by the fact that the beverage button illumination goes out.
-
Page 92
Boiler: ™ Switch the coffee machine off, allow to cool and over-temperature switch on again ™ If error not remedied call WMF Service Boiler: ™ Switch off the coffee machine and on again heat-up time error ™ If error not remedied call WMF Service… -
Page 93
If error not remedied carry out the next step. warm rinsing ™ Clean the brewing unit w Care w Clean the brewing unit, page 77 ™ If error not remedied call WMF Service Steam boiler: Beverage dispensing temporarily blocked. level ™… -
Page 94: Errors Without Error Message
Error pattern Action instructions • No hot water dispensing ™ Clean the hot water spout but water in grounds ™ Call WMF Service (coffee dispensing possible) container • No Choc dispensing ™ Do not use Choc dispensing but water in grounds ™…
-
Page 95
Care w C lean milk system manually, page 80 ™ Use lower powder dosage ™ Use higher water dosage • Pump runs continuously, ™ Switch the coffee machine off and on again water in grounds ™ If error not remedied call WMF Service container User Manual WMF 1100 S… -
Page 96: Safety And Warranty
Coffee grinder • Foreign objects can damage the grinders. This damage is not covered under the warranty. > Ensure that no foreign objects land in the coffee bean hopper. User Manual WMF 1100 S…
-
Page 97
• For drinking water with carbonate hardness from 5 °dKH or higher, a WMF water filter must be fitted; otherwise, the coffee machine can be damaged due to build-up of scale. • For insurance reasons always ensure that, at the end of operation the mains switch is switched off or the mains plug is unplugged. -
Page 98: Directives
Safety and warranty 11.2 Directives Manufacturer: WMF Group GmbH, 73312 Geislingen (Germany) The device fulfils the requirements of all applicable regulations in the directives MD (MR) 2006/42/EC (EG), EMV directive (EMC) 2014/30/EC and RoHS 2011 / 65 / EG (EC). The manufacturer indicated above declares that this machine conforms to all applicable provisions of the directives listed.
-
Page 99: Duties Of The Owner / Operator
These measures are conducted by WMF Service or by WMF authorised service personnel as part of the maintenance work. WMF special cleaning agent System cleaning must be carried out using only the w …
-
Page 100: 11.4 Warranty Claims
Maintenance w p age 88 WMF, or by repair or reconditioning work on the part of the purchaser or by third parties. • With respect to faults caused by inappropriate or improper use.
-
Page 101: Appendix: Technical Data
Do not use old hoses. Water quality For drinking water with carbonate hardness from 5 °dKH or higher, a WMF water filter must be fitted. Water drain tube (optional) Hose a minimum of DN 19, minimum downward slope of 2 cm/m Water tank volumes approx.
-
Page 102
Installation clearances For operating, service, and safety reasons the machine should be installed with a clearance from the building or non-WMF components of not less than 50 mm at the sides and 50 mm at the back. A minimum working space of 800 mm in front of the coffee machine is recommended. -
Page 103
In order to avoid possible faults from arising in our shielded data lines due to potential equalisation currents between the devices, an additional potential equalisation unit should be planned for devices connected to the vending system. (See EN 60309) User Manual WMF 1100 S… -
Page 104: Appendix: Accessories And Spare Parts
O-ring (friction piston) 33 7006 5190 all Multitool 33 7007 1261 all Bean hopper / product hopper Bean hopper lid 33 4051 0000 all Powder hopper lid 33 4051 0000 Choc Powder hopper, no cover 33 2916 5000 all User Manual WMF 1100 S…
-
Page 105
(4 pcs in package) Documentation / Instructions Set of documents: 33 4097 3010 all User Manual WMF 1100 S Order numbers for the WMF care program Bottle WMF Special cleaner for milk foamer 33 0683 6000 all Pack Special cleaning tablets (100 pieces) 33 2332 4000 all… -
Page 106: Index
Preparation of ground coffee using the Installation location 19 Conditions for use and installation 13 manual insert 30 Installation surface 102 Connect up the milk 24 Instructions 39 Constant water supply 32 Intended use 12 Counter 53 Introduction 14 Cup size 49 Quality level 45 Inventory of factory additions 43 Cup table 29 User Manual WMF 1100 S…
-
Page 107
Technical data for coffee machine 101 Settings (basic settings) 20 Water quality 101 Temperature 59 Settings PIN 54 Water quantity 44 Text and picture 46 S-M-L buttons 23 Water supply 101 Time/date 55 S-M-L Cup volumes 41 WMF Service 89 Timer 52, 55 S-M-L Function 41, 50 Touch calibration 57 Software 34 Transport preparation 60 Spout 15 User Manual WMF 1100 S… -
Page 108
Your nearest WMF Service: © 2017 WMF Group GmbH All rights reserved, in particular duplication, distribution, and translation rights. No part of this manual may be reproduced in any form or processed, duplicated, or distributed using electronic systems without written consent. Design and production / typesetting and print presentation: TecDoc GmbH;…