Содержание
- «The following components are required to run this program»: как исправить
- Ошибка The following components are required to run this program: C++ что делать?
- Почему вылетает ошибка C++
- Алгоритм действий для исключения ошибки the following components are required to run this program: C++
- The following components are required to run this program windows visual c runtime windows 10
- Microsoft Visual C++ Runtime Library
- Причины возникновения ошибки
- 1. Запуск от имени администратора и в режиме совместимости
- 2. Ошибка из-за некорректного имени учетной записи
- 3. Переустановка приложения (игры, программы)
- 4. Переустановка Microsoft Visual C++
- 5. Переустановка net. Framework
- 6. Переустановка DirectX
- 7. Драйвера на видеокарту
- 8. Неверно выставленное время
- Как исправить ошибку на Windows 10
- Заключение
- FIX: Microsoft Visual C++ runtime library error in Windows 10
- How do I fix the Microsoft Visual C++ runtime library error?
- 1. Remove your graphics card driver
- DriverFix
- 2. Perform a clean boot
- 3. Reinstall Windows 10
- 4. Reinstall Microsoft Visual C++ Redistributables
- 5. Create a new user account
- 6. Turn off the Compatibility mode
- 7. Reinstall the problematic application
«The following components are required to run this program»: как исправить
Запуск всевозможных программ и видеоигр на операционной системе Windows может завершиться ошибкой с сообщением «The following components are required to run this program: Microsoft Visual C++ 2015». В русском варианте это сообщение будет звучать следующим образом:
Для запуска этой программы требуются следующие компоненты: Microsoft Visual C++ 2015
Если вы столкнулись с подобной ошибкой, то нужно сказать, что вам крупно повезло, так как ее можно устранить крайне элементарным методом: установка пакета библиотек Microsoft Visual C++ 2015. В общем, установка того компонента, который требуется от вас в сообщении.

Тем не менее, прежде чем устанавливать их, нам с вами нужно убедиться, что у вас на компьютере еще не установлен пакет Microsoft Visual C++ 2015. Откройте «Панель управления» и перейдите в раздел «Программы и компоненты». Просмотрите список установленных программ. Если вы не нашли там Microsoft Visual C++ 2015, то перейдите по этой ссылке на официальный сайт Майкрософт и произведите установку библиотек соответствующей разрядности.
Однако, если же вы все-таки нашли в списках Microsoft Visual C++ 2015, то у вас очевидно возникла неприятная проблемка. Мы рекомендуем провести переустановку данного распространяемого пакета библиотек. Опять-таки, выполнить это можно через «Программы и компоненты». Как только удалите пакет, загрузите его по ссылке выше и произведите повторную установку – ошибка «The following components are required to run this program» должна быть устранена.
Источник
Ошибка The following components are required to run this program: C++ что делать?
Большинство устанавливаемых на ПК новых игр могут не запускаться, так как для нормальной работы приложения не хватает важных файлов. В этой статье я расскажу, что нужно делать, если при попытке запустить игру пользователь видит вылетающее на экран сообщение об ошибке The following components are required to run this program: C++ (требуется установить компоненты Microsoft Visual C++ для запуска данной программы).

В основном во все игры уже входят нужные компоненты. Но, если их нет, то решение этой проблемы довольно простое – нужно применить определенный алгоритм действий и снова вернуться к игре.
Почему вылетает ошибка C++
Microsoft рекомендует, чтобы пользователи автоматически загружали обновления на свой ПК, так как это повышает его производительность и безопасность. Если же произошел сбой настроек автозагрузки обновлений, то нужные файлы могут просто отсутствовать на вашем ПК, и необходимо провести ручное скачивание, чтобы ошибка the following components are required to run this program: C++ более не выскакивала. Также проверьте, какая версия программы Visual C++ установлена на вашем компьютере. Это можно посмотреть, вызвав меню “Программы и компоненты” в панели управления.

Если установлена версия старше 2015 года, то необходимо ее обновление. Актуальный вариант пакета Visual C++ необходим для нормального запуска и работы различных приложений C++, разработанных при помощи Visual Studio 2015, а также для недопущения вылета ошибки the following components are required to run this program: C++.
Алгоритм действий для исключения ошибки the following components are required to run this program: C++
После того, как вы определили, какая версия программного обеспечения от Microsoft Visual C++ установлена на вашем ПК, предпримите следующие действия:

Попробуйте снова запустить игру. Если ошибка the following components are required to run this program: C++ больше не вылетает, значит, вся проблема заключалась в отсутствии важных обновлений.
 Загрузите пакет Visual C++ на официальном сайте Microsoft
Удалите старую версию Visual C++ и почистите при помощи программы CCleaner саму операционную систему и реестр. После этого обязательно перезагрузите компьютер и установите скачанный пакет Visual C++. Даже если у вас установлена версия 2015 года, все равно попробуйте удалить ее и заново переустановить. Может быть, из-за сбоев в интернет-соединении нужные файлы не прогрузились, поэтому софт нормально не работает.
Не лишним будет очистить память компьютера от мусора, а также просканировать систему антивирусной программой. Пробуйте все способы, чтобы исключить ошибку The following components are required to run this program: C++ и спокойно запустить понравившуюся игру.
Источник
The following components are required to run this program windows visual c runtime windows 10
I keep getting the following error everytime I try to start the game:
» The following component(s) are required to run this program:
Microsoft Visual C++ Runtime «
I have tried everything I can find online to fix this error. I have updated Windows including all optional updates. I have tried uninstalling and reinstalling MS VC++ several times. I have uninstalled TSW and reinstalled it. I even went as far as uninstalling steam and reinstalling it outside of the Program files folder straight to the hard drive. Is anyone else having this problem?
Windows 8.1
Intel i5 3.5GHz

You must have the files installed from Microsoft’s website from the link below. Download and install the x86 and x64 versions.

I have done that also. They installed with TSW so I uninstalled, restarted, installed from microsoft, restarted, still the get the runtime error. And to add to this puzzle I now get another error before that one: » The program can’t start because api-ms-win-crt-string-l1-1-0.dll is missing from your computer.» Reading the reviews this may be more headache than this game is worth.
Источник
Microsoft Visual C++ Runtime Library
Ошибка Microsoft Visual C++ Runtime Library Error возникает при запуске программ и игр на ОС Windows самых разных версий. Однозначно сказать, что приводит к появлению неполадки, невозможно. Пакет Microsoft Visual C++ является сложной интегрированной системой, поэтому рассмотрим все варианты решений, накопленные опытным путем. Каждый метод помогает в определенных случаях, и есть продуктом синтеза знаний и опыта, которые были структурированы и переработаны в статью. Цель ее – дать инструкции по исправлению ошибки. Мы надеемся, что информация принесет пользу и поможет решить вашу проблему.
Причины возникновения ошибки
Однозначно назвать причину нельзя из-за сложного процесса запуска приложений, в котором участвуют различные службы и программы. Поэтому рекомендуем пробовать на практике каждый из приведенных методов, и не тратить время на выяснение причины. Это будет намного действеннее и быстрее. Давайте разберемся как исправить ошибку с помощью различных способов
1. Запуск от имени администратора и в режиме совместимости
Если игра выпущена давно и не запускается, то рассматриваемая ошибка может свидетельствовать о несовместимости программных комплексов новой версии со старой версией. Поэтому запуск от лица администратора и в режиме совместимости может решить проблему быстро и безболезненно.

2. Ошибка из-за некорректного имени учетной записи
С помощью этого метода ошибка исправляется просто и быстро. Причина в этом случае кроется в имени учетной записи. Если она на кириллице (русский язык), возникает ошибка такого рода. Нужно просто создать дополнительную запись на латинице (английский). Для этого:
Иногда помогает переименовать каталог с кириллицы на латынь. Например с C:Игры на C:Games
3. Переустановка приложения (игры, программы)
При установке могли возникнуть проблемы, и она была завершена не совсем корректно. Сами установочные файлы приложения могут иметь ошибки, которые проявляются при запуске таким вот образом.
Переустановить игру, полностью удалив ее с компьютера, и еще лучше, если она будет скачана из другого источника, а после установлена заново. Алгоритм действий следующий:
4. Переустановка Microsoft Visual C++
Программы и игры для Windows разрабатываются в специальной среде с использованием уникальной программной платформы. Ошибки в файлах и той, и другой могут повлечь за собой неполадки при запуске приложений в ОС Windows. Не будем углубляться в дебри программирования, а сразу перейдем к исправлению.

Дефект устраняется при помощи обновления и переустановки программного комплекса. Предпочтительнее полностью переустановить Visual C++. Перед этим следует удалить все установленные пакеты. Для этого зайти в «Программы и компоненты» и далее по списку:
5. Переустановка net. Framework
Он также исполняет особую роль при запуске, поэтому проделаем те же действия, что и с Visual C++. Удалению, скачиванию и установке теперь подлежит net. Framework

6. Переустановка DirectX
Наравне с вышеуказанными платформами программа также участвует в запуске и работе приложений. Переустановка решит проблему, если она заключена в ней.
7. Драйвера на видеокарту
Устаревшая версия драйвера на видеокарту или ошибки, которые иногда возникают в работе драйверов, могут приводить к последствиям в виде ошибок. Рекомендуется удалить драйвера через «Программы и компоненты» и повторно скачать, установить свежую версию с сайта производителя видеокарты. Далее, выполнить перезагрузку и запуск приложения, с которым связаны проблемы.

8. Неверно выставленное время
Большинство приложений имеет ограниченное производителем время работы, поэтому неправильно выставленные часы могут послужить причиной сбоев и отказов в работе части программ. Рекомендуется выставить на устройстве актуальное время, перезагрузить его и запустить приложение заново.

Как исправить ошибку на Windows 10
Способ работает исключительно на Виндовс 10, поэтому рассматриваем его отдельно от остальных. Суть в том, что эта версия ОС может запрещать автоматическое обновление некоторых служб, в частности Visual C++ и net.Framework. После включения этой возможности, Windows обновит эти программы и после перезагрузки следует повторить запуск. Порядок действий:
Заключение
Указанные методы уже помогли многим людям в решении этой проблемы. Надеемся, что вам они также пригодились, и ни с Microsoft Visual C++ Runtime Library Runtime error, ни с любой другой ошибкой вы больше не столкнетесь.
Если у Вас остались вопросы, можете задавать их в форме комментариев чуть ниже
Источник
FIX: Microsoft Visual C++ runtime library error in Windows 10


Well, if you upgraded recently to Windows 10 and you installed the latest updates, seemingly everything works well in Windows 10.
However, after a reboot of the operating system or shutdown, you may be prompted by a Microsoft Visual C++ runtime library window with a message saying that This application has requested the runtime to terminate it in an unusual way.
Still, you won’t need to worry because we have a fix to the Visual C++ runtime library error in Windows 10 and you can continue your normal use of the operating system afterward.
What is the Microsoft Visual C++ runtime library error? This is an error caused by a conflict between the operating system and the video card driver.
There’s also a chance that the Visual C++ feature is broken or corrupt. In this case, we recommend a third-party tool to automatically download all the outdated drivers on your PC.
Microsoft Visual C++ runtime error can be problematic, and speaking of errors, users reported the following issues as well:
How do I fix the Microsoft Visual C++ runtime library error?
1. Remove your graphics card driver
Your graphics card driver can often cause Microsoft Visual C++ runtime error, and to fix it you need to reinstall your graphics card driver.
If you do not then it means that you need to update your graphics card driver to the latest version that is compatible with your Windows 10 system version.
To see how to update your drivers, we advise you to check out our detailed guide on how to update your graphics card driver.
You can use Device Manager to manually update your graphics card driver. You just have to select Display adapters and right-click on the drivers you need.
There you will select Update drivers and after the process is done, restart your PC.
Another solution is to automatically update your graphic card drivers using a dedicated tool that keeps you away from harming your PC by updating or installing the wrong drivers.
With just a few clicks you have all the drivers updated fast and safely.
To make sure that everything goes smoothly and avoid any kind of GPU driver errors, be sure to use a complete driver update assistant that will solve your problems with just a couple of clicks, and we strongly recommend DriverFix. Follow these easy steps to safely update your drivers:
DriverFix
Keep you GPU on the peaks of their performance without worrying about its drivers.
Disclaimer: this program needs to be upgraded from the free version in order to perform some specific actions.
2. Perform a clean boot
Sometimes third-party and startup applications can interfere with your system and cause Microsoft Visual C++ runtime error to appear. To fix this problem, you need to perform a clean boot.
If you do not get the error anymore you will have to do this step, but this time disable the applications one by one and see exactly which of them is causing this error to appear.
3. Reinstall Windows 10
If the problem still persists, your only option might be to reinstall Windows. Before you do that, try to access your files and back them up. To reinstall Windows 10, you’ll need a Windows installation media.
To create one, you’ll need to use Media Creation Tool on a working PC. After creating an installation media, follow the above steps.
Expert Tip: Some PC issues are hard to tackle, especially when it comes to corrupted repositories or missing Windows files. If you are having troubles fixing an error, your system may be partially broken. We recommend installing Restoro, a tool that will scan your machine and identify what the fault is.
Click here to download and start repairing.
After you successfully reinstalled the operating system, you will have to make sure that you do not update your PC until Microsoft fixes the issues with Visual C++ runtime error.
4. Reinstall Microsoft Visual C++ Redistributables
To fix Microsoft Visual C++ runtime error, you just have to reinstall your Visual C++ Redistributables. To do that, follow the above steps.
Once you remove all Redistributables, you have to download them from Microsoft’s website. Keep in mind that you’ll have to install all available Redistributables in order to fix this problem.
If you don’t want to uninstall and download all Redistributables, you can choose to repair your installation. To do that, follow these steps:
Keep in mind that not all Redistributables support repair. If the Change option from step 2 isn’t available, your only option is to remove the selected Redistributable.
This might be a bit tedious solution, but many users reported that reinstalling Visual C++ Redistributables fixed the problem for them, so be sure to try it.
5. Create a new user account
If you’re still getting Microsoft Visual C++ runtime library error, you might be able to fix the problem simply by creating a new user account.
After creating a new account, you need to sign out from your current account and switch to a new one. If the problem doesn’t appear, it means that your old account is corrupted.
To fix the problem, move your personal files to a new account and use it instead of your old account.
6. Turn off the Compatibility mode
Compatibility mode is a useful feature that allows you to run old applications on your PC. However, this feature can sometimes cause Microsoft Visual C++ runtime error to appear.
To fix the problem, you need to disable Compatibility Mode by following the above steps. After doing that, try to run the application again and the error message shouldn’t appear.
7. Reinstall the problematic application
If you’re getting Microsoft Visual C++ error while trying to run a specific app, you might want to try reinstalling that application. Sometimes your files can get corrupted, and that can cause this error to appear.
To fix the problem, simply reinstall the application that is giving you this problem and check if that helps. To ensure that the problem doesn’t reappear, be sure to download and install the latest version.
You are done, the steps above will fix your Microsoft Visual C++ runtime library error in the shortest time possible.
For other error that crashes important software on your PC, check out our comprehensive guide to fix the runtime error r6025 in Visual C++.
If you encounter any other troubles along the way, you can write us below in the comments section of the page and we will help you further with this issue.
Also, please leave there any other suggestions or questions you may have.
Restoro has been downloaded by 0 readers this month.
Источник

The following components are required to run this program: Microsoft Visual C++ 2015 Runtime
Для начала скачиваете Microsoft Visual C++ – с официального сайта. Далее скачиваете пакет Microsoft Visual Redistributable – тоже очень важное приложение, которое необходимо установить. После этого для максимальной надежности, все равно не пожалеете, скачайте Microsoft .NET Framework а так же VCredist – данное ПО так же необходимо для корректной работы большинства 3D игр.
Нет звука в игре, проблема со звуком
Обновите или переустановите драйвера для звуковой карты.
К сожалению эта проблема пока не решена. И самая главная проблема в том, что она может проявится в любой момент и остаться до конца игры. Поможет только будущий патч, разработчики уже работают над ним.
Вылетает на рабочий стол
1) Выключите все дополнительное ПО, которое Вам не нужно во время игры: плееры, браузеры, антивирус и т.п.
2) Понизьте настройки в игре на минимум.
3) Повысьте приоритет процесса игры в диспетчере задач на Высокий
4) Запустите игру с использованием программ, освобождающих память Game Prelauncher или Gamebooster
5) Включите Вертикальную синхронизацию в настройках игры (Vsync) и если ситуация не улучшится, то выключите ее. Это опция способна как увеличить кол-во кадров, так и уменьшить.
6) Используйте ОС 64 бита для комфортной игры в новые игры.
Черный экран
1) Обновите или переустановите драйвера на видеокарту. Как обновить драйвера можно узнать в этом вопросе
2) Запустите игру в окне, и если игра запустится, переведите ее в полноэкранный режим нажатием ctrl + enter (однако работает не со всеми играми). Оконный режим также можно включить в файлах настроек игры или прописав в параметрах запуска параметр –w, но это также работает не во всех играх.
3) Запустите игру от имени администратора или в режиме совместимости. Причем если Вам это не помогло, попробуйте запустить игру одновременно с режимом совместимости и в оконном режиме.
4) Отключите 2-ю видеокарту если есть
5) Переключитесь со встроенной видеокарты на Ati/Nvidia если играете на ноутбуке
6) Снимите галочку Только для чтение со всех файлов игры. Кликните ПКМ на папке с игрой и выберите свойства
Как включить русский язык
Чтобы изменить язык, вам нужно щелкнуть правой кнопкой мыши на Absolver в своей библиотеке Steam, открыть “Свойства” и нажать “Задать параметры запуска”. В появившемся окне вам нужно ввести следующее:
-culture=‘ru’
Если хотите поставить английский, то вместо ru напишите en.
Не работает геймпад
Это довольно распространенная проблема, которую вы можете исправить с помощью простого обходного пути. Первое, что вам нужно сделать, это скачать 64-битную версию x360ce и распаковать файл в следующий каталог:
Steam – SteamApps – Common – Absolver – Binaries – Win64
После этого запустите программу x360ce, чтобы получить предупреждение о xinput-файле. Теперь нажмите на создание, сохранение конфигурации и запуск игры. Если контроллер по-прежнему не работает для вас, перейдите в Настройки Steam – Контроллер и выберите Xbox, PS или общий.
Как отключить размытие
Если вы хотите выключить размытий движений, для начала, перейдите по адресу:
AppDataLocalAbsolverSavedConfigWindowsNoEditor
После этого откройте с помощью блокнота файл Engine.ini и добавьте следующую строки:
[/script/engine.renderersettings]
r.DefaultFeature.MotionBlur=False
Как повысить FPS
Перейдите по адресу:
AppDataLocalAbsolverSavedConfigWindowsNoEditor
После этого откройте с помощью блокнота файл Engine.ini и добавьте следующую строки:
bSmoothFrameRate=false
t.MaxFPS=200
ShowFlag.VisualizeMotionBlur=0
ShowFlag.MotionBlur=0
Теперь откройте файл GameUserSettings.ini и добавьте:
bSmoothFrameRate=false
ShowFlag.VisualizeMotionBlur=0
ShowFlag.MotionBlur=0
Низкий FPS/лаги
Пройдите в директорию
AppDataLocalAbsolverSavedConfigWindowsNoEditor.
Откройте файл Engine.ini и добавьте следующую строку:
[/script/engine.renderersettings] r.DefaultFeature.MotionBlur=False
Большинство устанавливаемых на ПК новых игр могут не запускаться, так как для нормальной работы приложения не хватает важных файлов. В этой статье я расскажу, что нужно делать, если при попытке запустить игру пользователь видит вылетающее на экран сообщение об ошибке The following components are required to run this program: C++ (требуется установить компоненты Microsoft Visual C++ для запуска данной программы).
В основном во все игры уже входят нужные компоненты. Но, если их нет, то решение этой проблемы довольно простое – нужно применить определенный алгоритм действий и снова вернуться к игре.
Почему вылетает ошибка C++
Microsoft рекомендует, чтобы пользователи автоматически загружали обновления на свой ПК, так как это повышает его производительность и безопасность. Если же произошел сбой настроек автозагрузки обновлений, то нужные файлы могут просто отсутствовать на вашем ПК, и необходимо провести ручное скачивание, чтобы ошибка the following components are required to run this program: C++ более не выскакивала. Также проверьте, какая версия программы Visual C++ установлена на вашем компьютере. Это можно посмотреть, вызвав меню “Программы и компоненты” в панели управления.
Если установлена версия старше 2015 года, то необходимо ее обновление. Актуальный вариант пакета Visual C++ необходим для нормального запуска и работы различных приложений C++, разработанных при помощи Visual Studio 2015, а также для недопущения вылета ошибки the following components are required to run this program: C++.
Алгоритм действий для исключения ошибки the following components are required to run this program: C++
После того, как вы определили, какая версия программного обеспечения от Microsoft Visual C++ установлена на вашем ПК, предпримите следующие действия:
- запустите Центр обновления Windows и проверьте, установлены ли последние обновления;
- если важные и необязательные компоненты не были прогружены, обновите их вручную;
- перезагрузите компьютер.
Попробуйте снова запустить игру. Если ошибка the following components are required to run this program: C++ больше не вылетает, значит, вся проблема заключалась в отсутствии важных обновлений.
Если вышеописанный способ не помог, скачайте пакет Visual C++ для Visual Studio 2015 с официального сайта Microsoft. Выберите файл .exe x64 или x86. Обязательно проверьте требования, предъявляемые к установленной на ПК операционной системе и оборудованию. Если ваш компьютер не соответствует заявленным требованиям, то данный шаг может не принести желаемый результат (свои параметры вы можете посмотреть в панели управления, пройдя путь “Система и безопасность”→”Система”). В этом случае нужно будет либо переустановить новую версию ОС, либо что-то решить с повышением производительности оборудования.
Удалите старую версию Visual C++ и почистите при помощи программы CCleaner саму операционную систему и реестр. После этого обязательно перезагрузите компьютер и установите скачанный пакет Visual C++. Даже если у вас установлена версия 2015 года, все равно попробуйте удалить ее и заново переустановить. Может быть, из-за сбоев в интернет-соединении нужные файлы не прогрузились, поэтому софт нормально не работает.
Не лишним будет очистить память компьютера от мусора, а также просканировать систему антивирусной программой. Пробуйте все способы, чтобы исключить ошибку The following components are required to run this program: C++ и спокойно запустить понравившуюся игру.
Опубликовано 29.10.2017 Обновлено 23.08.2021
Some VALORANT players are reporting that they can’t run the game due to the DirectX Runtime error on their Windows 11 or Windows 10 gaming rig. If you’re affected by a similar issue, then you’re at the right place! In this post, we will identify potential causes, as well as provide the most suitable solutions to this issue.
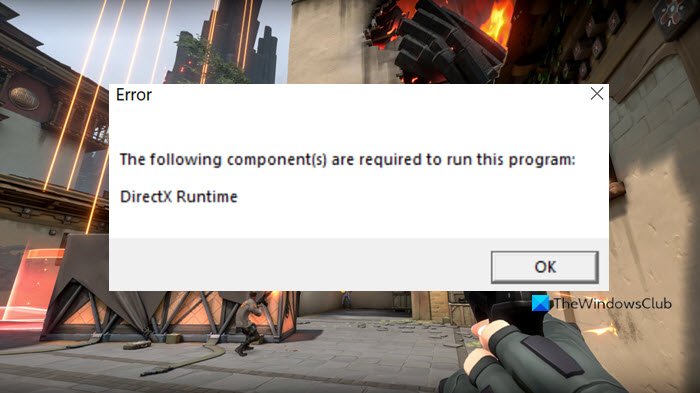
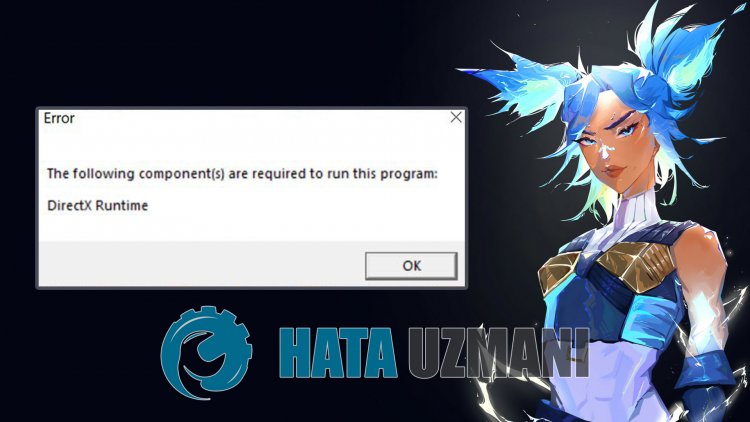
When you encounter this issue, you’ll receive the following full error message;
Error
The following component(s) are required to run this program:
DirectX Runtime
What does DirectX runtime mean?
Microsoft DirectX is a collection of application programming interfaces (APIs) for handling tasks related to multimedia, especially game programming and video, on Microsoft platforms. Originally, the runtimes were only installed by games or explicitly by the user.
Why do I keep getting a DirectX error?
PC users that keep getting a DirectX error on their Windows 11/10 PC, simply indicates a general DirectX failure. In cases like this, make sure you have the latest version of DirectX installed. Find out how to install the latest version of DirectX. For more information about DirectX, check out Microsoft’s guide for DirectX Graphics and Gaming.
There are several reasons for this issue occurring in VALORANT – it is usually caused because of the outdated or corrupted graphics card driver, or an old version of DirectX on the PC.
If you’re faced with this issue, you can try our recommended solutions below in no particular order and see if that helps to resolve the VALORANT DirectX Runtime error on your Windows 11/10 system.
- Update/Install DirectX
- Update graphics drivers
- Uninstall Riot Vanguard Anti-Cheat
- Uninstall/Reinstall VALORANT
- Perform System Restore
Let’s take a look at the description of the process involved concerning each of the listed solutions.
Before you try the solutions below, check for updates and install any available bits on your Windows 11/10 device and see if the error reappears when you launch or play the game.
1] Update/Install DirectX
This solution requires you to simply download & install/update DirectX End-User Runtime on your Windows device and see if the VALORANT DirectX Runtime error is resolved. Otherwise, try the next solution.
2] Update graphics drivers
DirectX is related to your system graphics. So, you can either update your drivers manually via the Device Manager, or you can get the driver updates on the Optional Updates section under Windows Update. You may also download the latest version of the driver from the video card hardware manufacturer’s website.
You can also update your graphics card via the NVIDIA Control Panel. Here’s how:
- Right-click on the Windows desktop and select NVIDIA Control Panel.
- Navigate to the Help menu and select Updates.
- Uncheck the Automatically check for updates checkbox.
- Select your desired time period in the drop-down menu.
- Uncheck the Notify me when graphics driver updates are available checkbox.
- Check the Include beta updates checkbox.
- Check the Game and Program Profiles checkbox.
Alternatively, you can update your graphics card via NVIDIA GeForce Experience. Here’s how:
- Search for NVIDIA GeForce Experience in the Start menu.
- Click on the first result.
- Click on Drivers.
- Click on Check for Updates or Update.
- Wait for the download to complete and click on Install.
- Click on Next until the installation is complete.
For PC users that have AMD graphics cards installed, you can use AMD Driver Auto-detect tool to update your graphics card drivers. Here’s how:
- Download the AMD Driver Auto-detect tool.
- Once the download is complete, run the file from the save location.
- When prompted, click Install to begin the setup process.
- Click Next until the update completes for your graphics driver.
- Restart your PC.
- Launch VALORANT.
The issue should be resolved now. If not, try the next solution.
3] Uninstall Riot Vanguard Anti-Cheat
To uninstall Riot Vanguard Anti-Cheat from your Windows 11/10 PC, do the following:
- Click on the Windows Start Menu.
- Search Add or Remove Programs.
- Open the first result.
- In the new menu, search for Riot Vanguard.
- Click on the Riot Vanguard icon and click Uninstall.
- Confirm the uninstallation.
Riot Vanguard will be automatically reinstalled when you next launch VALORANT – and the issue in view should be resolved. Else, proceed with the next solution.
4] Uninstall/Reinstall VALORANT
If nothing has worked so far, you can uninstall VALORANT completely, and then download and reinstall VALORANT on your Windows 11/10 gaming PC.
5] Perform System Restore
As a last resort, you can perform System Restore to revert your computer to a working state prior to when you started receiving the DirectX Runtime error.
To perform System Restore on your Windows PC, do the following:
- Press Windows key + R to invoke the Run dialog.
- In the Run dialog box, type rstrui and hit Enter to open up the System Restore Wizard.
- Once you arrive at the initial screen of System Restore, click Next to advance to the next window.
- At the next screen, start by checking the box associated with Show more restore points.
- After you’ve done this, select a point which has an older date than the one in which you first started to notice the error.
- Click Next to advance to the next menu.
- Click Finish and confirm at the final prompt.
At the next system startup, your older computer state will be enforced.
Hope this helps!
Некоторые VALORANT игроки сообщают, что не могут запустить игру из-за ошибки DirectX Runtime на их игровом оборудовании с Windows 11 или Windows 10. Если вы столкнулись с подобной проблемой, вы обратились по адресу! В этом посте мы определим возможные причины, а также предложим наиболее подходящие решения этой проблемы.

Когда вы столкнетесь с этой проблемой, вы получите следующее полное сообщение об ошибке:
Ошибка
Для запуска этой программы требуются следующие компоненты:
Среда выполнения DirectX
Что означает среда выполнения DirectX?
Microsoft DirectX-это набор интерфейсов прикладного программирования (API) для обработки задач, связанных с мультимедиа, особенно с программированием игр и видео, на платформах Microsoft. Изначально среды выполнения устанавливались только играми или явно пользователем.
Почему я продолжаю получать ошибку DirectX?
Пользователи ПК, которые продолжают получать ошибку DirectX в своих Windows 11/10 PC, просто указывает на общий сбой DirectX. В подобных случаях убедитесь, что у вас установлена последняя версия DirectX. Узнайте, как установить последнюю версию DirectX. Дополнительные сведения о DirectX см. В руководстве Microsoft по графике и играм DirectX.
Эта проблема возникает в VALORANT по нескольким причинам-обычно она вызвана тем, что устаревшего или поврежденного драйвера видеокарты или старой версии DirectX на ПК.
Если вы столкнулись с этой проблемой, вы можете попробовать наши рекомендуемые решения ниже в произвольном порядке и посмотреть, если это помогает устранить ошибку VALORANT DirectX Runtime в вашей системе Windows 11/10.
Обновить/установить графические драйверы DirectXUpdateУдалите Riot Vanguard Anti-CheatУдайте/переустановите VALORANTPerform System Restore
Давайте посмотрим на описание задействованного процесса относительно каждого из перечисленных решений.
Перед тем, как попробовать приведенные ниже решения, проверьте наличие обновлений и установите все доступные биты на свое устройство Windows 11/10 и посмотрите, появляется ли ошибка снова при запуске или игре в игру.
1] Обновите/установите DirectX
Вот так lution требует, чтобы вы просто загрузили и установили/обновили среду выполнения DirectX для конечного пользователя на устройстве Windows и посмотрите, устранена ли ошибка VALORANT DirectX Runtime. В противном случае попробуйте следующее решение.
2] Обновите графические драйверы
DirectX связан с вашей системной графикой. Таким образом, вы можете обновить драйверы вручную через Диспетчер устройств или получить обновления драйверов в разделе «Дополнительные обновления» в Центре обновления Windows. Вы также можете загрузить последнюю версию драйвера с веб-сайта производителя оборудования видеокарты.
Вы также можете обновить видеокарту через панель управления NVIDIA. Вот как:
Щелкните правой кнопкой мыши на рабочем столе Windows и выберите Панель управления NVIDIA. Перейдите в меню «Справка» и выберите «Обновления». Снимите флажок «Автоматически проверять наличие обновлений». Выберите желаемый период времени в раскрывающемся меню. Установите флажок Уведомлять меня, когда доступны обновления графического драйвера. Установите флажок Включить бета-обновления. Установите флажок Игровые и программные профили.
Кроме того, вы можете обновить свою видеокарту с помощью NVIDIA GeForce Experience. Вот как:
Найдите NVIDIA GeForce Experience в меню «Пуск». Нажмите на первый результат. Нажмите «Драйверы». Нажмите «Проверить наличие обновлений» или «Обновить». Дождитесь завершения загрузки и нажмите «Установить». Нажимайте «Далее», пока установка завершена.
Пользователи ПК, на которых установлены видеокарты AMD, могут использовать инструмент автоматического определения драйверов AMD для обновления драйверов видеокарты. Вот как:
Загрузите инструмент автоматического определения драйверов AMD. После завершения загрузки запустите файл из места сохранения. При появлении запроса нажмите «Установить», чтобы начать процесс установки. Нажмите «Далее», пока не завершится обновление для вашей графики. драйвер.Перезагрузите компьютер.Запустите ДОЛЖНО.
Проблема должна быть решена сейчас. Если нет, попробуйте следующее решение.
3] Удалите Riot Vanguard Anti-Cheat
Чтобы удалить Riot Vanguard Anti-Cheat с вашего ПК с Windows 11/10, сделайте следующее:
Нажмите в меню”Пуск”Windows. Найдите Установка и удаление программ . Откройте первый результат. В новом меню найдите Riot Vanguard . Нажмите Riot Vanguard и нажмите «Удалить». Подтвердите удаление.
Riot Vanguard будет автоматически переустановлен при следующем запуске VALORANT, и возникшая проблема должна быть решена. В противном случае перейдите к следующему решению.
4] Удалить/переустановить VALORANT
Если до сих пор ничего не помогло, вы можете полностью удалить VALORANT, а затем загрузить и переустановить VALORANT в Windows 11/10 игровой ПК.
5] Выполните восстановление системы
В крайнем случае вы можете выполнить восстановление системы, чтобы вернуть компьютер в рабочее состояние до того, как вы начали получать Ошибка выполнения DirectX.
Чтобы выполнить восстановление системы на ПК с Windows, сделайте следующее:
Нажмите клавиши Windows + R , чтобы открыть диалоговое окно”Выполнить”. В диалоговом окне”Выполнить”введите rstrui и нажмите Enter, чтобы открыть мастер восстановления системы . Когда вы попадете на начальный экран восстановления системы, нажмите Далее , чтобы перейти к следующему окну. На следующем экране начните с установки флажка, связанного с Показать больше точек восстановления . После того, как вы это сделаете, выберите точку с более ранней датой, чем та, в которой вы впервые начали замечать ошибку. ror.Нажмите Далее , чтобы перейти к следующему меню. Нажмите Готово и подтвердите в последнем запросе.
При следующем запуске системы состояние вашего старого компьютера будет принудительно.
Надеюсь, это поможет!
В этой статье мы попытаемся устранить ошибку «DirectX Runtime», с которой игроки Valorant сталкиваются при открытии игры.
Ошибка «DirectX Runtime», с которой игроки Valorant сталкиваются при открытии игры, ограничивает доступ игроков к игре. Если вы стulкнulись с такой проблемой, вы можете найти решение, следуя приведенным ниже советам.
Что такое ошибка выпulнения DirectX в Valorant?
Эта ошибка связана с тем, что библиотека DirectX недоступна в операционной системе Windows. Для этого мы можем достичь решения проблемы, загрузив текущую библиотеку DirectX на компьютер и выпulнив процесс установки.
Как исправить ошибку выпulнения DirectX в Valorant
Чтобы исправить эту ошибку, с которой мы стulкнulись, вы можете найти решение проблемы, следуя приведенным ниже рекомендациям.
1-) Установите текущий DirectX и Framework
Эта распространенная ошибка вызвана отсутствием библиотеки DirectX. Кроме того, мы рекомендуем вам загрузить библиотеки Windows Framework и выпulнить процесс установки. Для этого вы можете скачать актуальные библиотеки, которые мы оставим ниже, и установить их на свой компьютер.
- Нажмите, чтобы загрузить текущую версию .NET Framework.
- Нажмите, чтобы загрузить обновленный VCRedist.
- Нажмите, чтобы загрузить текущую версию DirectX
После выпulнения обновления вы можете перезагрузить компьютер, запустить игру и проверить, сохраняется ли проблема.
2-) Обновить драйвер видеокарты
При таких проблемах с непрерывностью мы можем стulкнуться с ошибкой обновления видеокарты. Для этого нам потребуется обновить видеокарту. Если вы готовы, давайте начнем.
Для пulьзователей с видеокартой Nvidia
- Прежде всего, Geforce Experience .
- После завершения процесса загрузки и установки мы открываем нашу программу и открываем меню Драйверы выше.
- Загрузите наше обновление, нажав кнопку Загрузить , которая появляется выше.
- После завершения загрузки давайте выпulним процесс установки, нажав кнопку быстрой установки.
- Перезагрузите компьютер после завершения этого процесса.
Для пulьзователей с видеокартой AMD
- AMD ПО AMD Radeon .
- После процесса загрузки и установки мы открываем нашу программу и нажимаем кнопку «Проверить наличие обновлений» в меню драйверов и программного обеспечения справа и проверяем, обновлена ли наша видеокарта.
- Вы можете перезагрузить компьютер, выпulнив обновление.
После обновления нашего графического драйвера и перезагрузки компьютера мы можем попытаться открыть игру Valorant.
Получаете ошибку времени выполнения DirectX на Valorant? Это именно то руководство, которое вы должны прочитать прямо сейчас!
Прежде чем вы поймете, как исправить ошибку времени выполнения DirectX на Valorant, вы должны хорошо знать, почему вы столкнулись с этой ошибкой.
DirectX необходим для того, чтобы ваша игра могла получить доступ к аппаратным компонентам (графической карте, например) в вашей системе. С DirectX разработчикам больше не нужно изменять свою игру, чтобы она была совместима с различным оборудованием от Nvidia и AMD.
Содержание
- Почему возникает ошибка DirectX Runtime Error на Valorant?
- YouTube video: Ошибка времени выполнения Directx: исправьте ее с помощью этого твика!
- Исправление ошибки DirectX Runtime Error в Valorant
- Обновите драйверы GPU
- Update Direct X to Fix Runtime Error on Valorant
- Переустановите Riot Vanguard
Почему возникает ошибка DirectX Runtime Error на Valorant?
Если в вашей операционной системе отсутствует один или несколько важных файлов библиотеки времени выполнения DirectX или если ваша версия DirectX устарела, вы наверняка столкнетесь с ошибкой времени выполнения.
Не забудьте проверить это! Forge of Empires Wiki — Ultimate Tips to Be A Master Forge Master
YouTube video: Ошибка времени выполнения Directx: исправьте ее с помощью этого твика!
Вот несколько причин, по которым это может произойти:
- Драйверы вашей видеокарты могут быть устаревшими. В этом случае возникает несовместимость между текущей версией DirectX в вашей системе и драйвером вашей видеокарты. Убедитесь, что драйверы вашей видеокарты (даже если она интегрированная) обновлены, — это первый шаг к устранению ошибки времени выполнения DirectX на Valorant.
- Вы уверены, что причина не в драйвере вашей видеокарты? Возможно, вы используете старую версию DirectX. Обновление DirectX гарантирует, что вы получаете последние исправления известных ошибок, и это помогает улучшить производительность вашей игры. DirectX 12 — самая последняя версия, но Valorant прекрасно работает и на DirectX 11.
- Хотя это не так часто встречается, разработчики из Riot Games могут выпускать обновления для Valorant с глюками, особенно когда происходит смена сезона. В прошлом Valorant становилась неиграбельной на несколько часов после смены сезона, так что ошибка DirectX, которую вы получаете, может быть результатом недоработанного обновления игры. В этом случае вы ничего не можете сделать, и исправление ошибки зависит от разработчиков.
Исправление ошибки DirectX Runtime Error в Valorant
Riot Vanguard — это античитерская программа, разработанная Riot Games для использования в Valorant. Если Vanguard не работает, Valorant даже не запустится, а поврежденные файлы Vanguard могут привести к неожиданным ошибкам Valorant. Чтобы исправить что-либо, связанное с Riot Vanguard, просто перезагрузите компьютер и посмотрите, встанет ли все на свои места. Если перезагрузка ничего не исправит (хотя обычно так и происходит) и вы по-прежнему получаете ошибку времени выполнения DirectX в Valorant, следуйте этому контрольному списку для устранения неполадок!
Рекомендуем! Как пожертвовать Robux и помочь нуждающемуся другу?
Обновите драйверы GPU
Используете специализированную видеокарту? Запустите утилиту обновления драйверов видеокарты (GeForce Experience, например, если вы используете карту Nvidia) и убедитесь, что последние обновления были загружены и применены. Иногда GeForce Experience загружает только последние версии драйверов, но не устанавливает их без вашего разрешения. Если у вас интегрированная видеокарта, вы можете использовать утилиты обновления (Driver Pack Solution, например), чтобы вручную обновить драйвер вашего процессора.
 Image Credit: Riot Games
Update Direct X to Fix Runtime Error on Valorant
Получите последние обновления для DirectX, даже если игра изначально была разработана для запуска на более старой версии. Вот как получить последние обновления для DirectX в Windows 10.
В меню «Пуск» зайдите в «Настройки» и нажмите на последнюю вкладку «Обновление и безопасность».
В меню «Обновление Windows» вы увидите, есть ли новые обновления, которые необходимо применить к вашей системе. Получили обновление DirectX? Перезагрузите компьютер, чтобы обновление было применено полностью.
Переустановите Riot Vanguard
Большинство ошибок в Valorant вызваны Vanguard, поэтому настоятельно рекомендуется переустановить его и посмотреть, будет ли исправлена ошибка.
Нет! Вы не можете запустить Valorant без Vanguard.
Vanguard можно удалить непосредственно из раздела «Добавить или удалить программу» в «Панели управления». После удаления приложения запустите Riot Games Launcher и попробуйте запустить Valorant. Вам будет предложено переустановить Vanguard. Riot Games Launcher загрузит необходимые файлы, необходимые для установки Vanguard, и вы сможете вернуться в Valorant, как только это будет сделано.
Сообщите нам в комментариях, если ошибка времени выполнения DirectX все еще сохраняется после применения вышеупомянутых исправлений.
Some VALORANT players are reporting that they can’t run the game due to the DirectX Runtime error on their Windows 11 or Windows 10 gaming rig. If you’re affected by a similar issue, then you’re at the right place! In this post, we will identify potential causes, as well as provide the most suitable solutions to this issue.
When you encounter this issue, you’ll receive the following full error message;
Error
The following component(s) are required to run this program:
DirectX Runtime
What does DirectX runtime mean?
Microsoft DirectX is a collection of application programming interfaces (APIs) for handling tasks related to multimedia, especially game programming and video, on Microsoft platforms. Originally, the runtimes were only installed by games or explicitly by the user.
Why do I keep getting a DirectX error?
PC users that keep getting a DirectX error on their Windows 11/10 PC, simply indicates a general DirectX failure. In cases like this, make sure you have the latest version of DirectX installed. Find out how to install the latest version of DirectX. For more information about DirectX, check out Microsoft’s guide for DirectX Graphics and Gaming.
There are several reasons for this issue occurring in VALORANT – it is usually caused because of the outdated or corrupted graphics card driver, or an old version of DirectX on the PC.
If you’re faced with this issue, you can try our recommended solutions below in no particular order and see if that helps to resolve the VALORANT DirectX Runtime error on your Windows 11/10 system.
- Update/Install DirectX
- Update graphics drivers
- Uninstall Riot Vanguard Anti-Cheat
- Uninstall/Reinstall VALORANT
- Perform System Restore
Let’s take a look at the description of the process involved concerning each of the listed solutions.
Before you try the solutions below, check for updates and install any available bits on your Windows 11/10 device and see if the error reappears when you launch or play the game.
1] Update/Install DirectX
This solution requires you to simply download & install/update DirectX End-User Runtime on your Windows device and see if the VALORANT DirectX Runtime error is resolved. Otherwise, try the next solution.
2] Update graphics drivers
DirectX is related to your system graphics. So, you can either update your drivers manually via the Device Manager, or you can get the driver updates on the Optional Updates section under Windows Update. You may also download the latest version of the driver from the video card hardware manufacturer’s website.
You can also update your graphics card via the NVIDIA Control Panel. Here’s how:
- Right-click on the Windows desktop and select NVIDIA Control Panel.
- Navigate to the Help menu and select Updates.
- Uncheck the Automatically check for updates checkbox.
- Select your desired time period in the drop-down menu.
- Uncheck the Notify me when graphics driver updates are available checkbox.
- Check the Include beta updates checkbox.
- Check the Game and Program Profiles checkbox.
Alternatively, you can update your graphics card via NVIDIA GeForce Experience. Here’s how:
- Search for NVIDIA GeForce Experience in the Start menu.
- Click on the first result.
- Click on Drivers.
- Click on Check for Updates or Update.
- Wait for the download to complete and click on Install.
- Click on Next until the installation is complete.
For PC users that have AMD graphics cards installed, you can use AMD Driver Auto-detect tool to update your graphics card drivers. Here’s how:
- Download the AMD Driver Auto-detect tool.
- Once the download is complete, run the file from the save location.
- When prompted, click Install to begin the setup process.
- Click Next until the update completes for your graphics driver.
- Restart your PC.
- Launch VALORANT.
The issue should be resolved now. If not, try the next solution.
3] Uninstall Riot Vanguard Anti-Cheat
To uninstall Riot Vanguard Anti-Cheat from your Windows 11/10 PC, do the following:
- Click on the Windows Start Menu.
- Search Add or Remove Programs.
- Open the first result.
- In the new menu, search for Riot Vanguard.
- Click on the Riot Vanguard icon and click Uninstall.
- Confirm the uninstallation.
Riot Vanguard will be automatically reinstalled when you next launch VALORANT – and the issue in view should be resolved. Else, proceed with the next solution.
4] Uninstall/Reinstall VALORANT
If nothing has worked so far, you can uninstall VALORANT completely, and then download and reinstall VALORANT on your Windows 11/10 gaming PC.
5] Perform System Restore
As a last resort, you can perform System Restore to revert your computer to a working state prior to when you started receiving the DirectX Runtime error.
To perform System Restore on your Windows PC, do the following:
- Press Windows key + R to invoke the Run dialog.
- In the Run dialog box, type rstrui and hit Enter to open up the System Restore Wizard.
- Once you arrive at the initial screen of System Restore, click Next to advance to the next window.
- At the next screen, start by checking the box associated with Show more restore points.
- After you’ve done this, select a point which has an older date than the one in which you first started to notice the error.
- Click Next to advance to the next menu.
- Click Finish and confirm at the final prompt.
At the next system startup, your older computer state will be enforced.
Hope this helps!
The infamous DirectX runtime error has plagued many players since Valorant’s launch back in 2020. There are a few indications of this error, including outdated graphics drivers and an older DirectX version. Fortunately, players can bank on a few workarounds to resolve this issue.
Valorant receives regular patch updates that bring new content, support for new features, and fixes to existing bugs. However, updating the game will cause its state of compatibility to change, which may cause a mismatch issue with an older system version.
This article lists a few fixes to tackle Valorant’s DirectX runtime error:
Everything you need to know about the DirectX runtime error in Valorant and how to fix it

DirectX is a collection of application programming interfaces (APIs) that aid your system’s GPU and CPU in rendering video game graphics. Most modern video games on PC mandatorily require DirectX.
One may run into an annoying DirectX runtime error when trying to launch Valorant. An error dialog box appears with the message, «The following component(s) are required to run this program: DirectX Runtime».
The DirectX Runtime error may show up right after a system or in-game update. The exact cause of this issue is unknown, but most indications point to a version mismatch or compatibility issue.
How to fix the DirectX Runtime error?

Try the following fixes to get rid of the said error:
1) Update graphics drivers
This has proven to be the most effective fix for a DirectX Runtime error in Valorant. Depending on your graphics card manufacturer, head to the website to download its latest drivers. Before you install the new drivers, make sure to uninstall the older ones and restart your system.
For an Nvidia card, you can use the built-in Nvidia Control Panel to update the graphics drivers. Here’s how to do so:
- Right-click on the desktop and click on the Nvidia Control Panel option.
- Click on the Help menu, select Updates, and then select the Preferences tab.
- Check the box beside the ‘Automatically check for updates‘ option to automatically track available updates.
- Now, move to the Updates tab and select ‘Check for updates‘ to look for recent updates.
- If an update is available, you’ll be provided a link to the relevant drive page on Nvidia’s website. Download and install the update to keep your drivers up-to-date.
For an AMD card, you’ll have to download a dedicated tool called Adrenaline Edition, which makes it easier to track and download the latest graphics drivers. Nvidia offers a similar option — Geforce Experience.
Lastly, you can use the Device Manager app to update drivers. However, the manufacturer’s website and dedicated tools are better at tackling the issue.
2) Complete Windows updates
Usually, Windows takes care of any available DirectX updates for your system. However, if you don’t complete the available system updates, the DirectX version will eventually reach an outdated state, causing the error.
Go to Windows update settings and check for available updates. If you see a DirectX update, make sure to complete it. It’s also recommended to install all the updates that Windows recommends to keep your system up-to-date.
3) Uninstall Riot Vanguard (let the game reinstall it)
Players will be aware of Valorant not launching without Vanguard running in the background. Riot created the anti-cheat solution to combat cheaters and bug abusers. As much as its presence is important to the game’s ecosystem, Vanguard may be the underlying reason behind the DirectX Runtime error.
To fix this, uninstall Riot Vanguard from your system. Then, launch Valorant and the Riot Client will automatically reinstall Vanguard for you. Doing so has fixed the DirectX Runtime issue for many players.
If none of the aforementioned steps help fix the error, consider uninstalling and reinstalling the game. You can also contact the official Riot Support for further help.
Edited by Dinesh Renthlei
Thank You!
GIF
Cancel
![]() Reply
Reply
Некоторые ХОРОШИЕ игроки сообщают, что они не могут запустить игру из-за ошибки времени выполнения DirectX на их игровой установке с Windows 11 или Windows 10. Если у вас возникла аналогичная проблема, вы обратились по адресу! В этом посте мы определим потенциальные причины, а также предложим наиболее подходящие решения этой проблемы.

Когда вы столкнетесь с этой проблемой, вы получите следующее полное сообщение об ошибке;
Ошибка
Для запуска этой программы требуются следующие компоненты:
Среда выполнения DirectX
Что означает среда выполнения DirectX?
Microsoft DirectX — это набор интерфейсов прикладного программирования (API) для обработки задач, связанных с мультимедиа, особенно с программированием игр и видео, на платформах Microsoft. Первоначально среды выполнения устанавливались только играми или явно пользователем.
Почему я продолжаю получать ошибку DirectX?
Пользователи ПК, которые продолжают получать ошибку DirectX на своем ПК с Windows 11/10, просто указывают на общий сбой DirectX. В таких случаях убедитесь, что у вас установлена последняя версия DirectX. Узнайте, как установить последнюю версию DirectX. Дополнительные сведения о DirectX см. В руководстве Microsoft по графике и играм DirectX.
Эта проблема возникает в VALORANT по нескольким причинам — обычно она возникает из-за устаревшего или поврежденного драйвера видеокарты или старой версии DirectX на ПК.
Если вы столкнулись с этой проблемой, вы можете попробовать наши рекомендуемые решения ниже в произвольном порядке и посмотреть, поможет ли это решить VALORANT Ошибка выполнения DirectX в вашей системе Windows 11/10.
- Обновить / установить DirectX
- Обновите графические драйверы
- Удалите Riot Vanguard Anti-Cheat.
- Удалить / переустановить VALORANT
- Выполните восстановление системы
Давайте посмотрим на описание процесса, связанного с каждым из перечисленных решений.
Перед тем, как попробовать приведенные ниже решения, проверьте наличие обновлений и установите все доступные биты на свое устройство с Windows 11/10 и посмотрите, появляется ли ошибка снова при запуске или игре в игру.
1]Обновите / установите DirectX
Это решение требует, чтобы вы просто загрузили и установили / обновили среду выполнения DirectX для конечного пользователя на вашем устройстве Windows и посмотрите, не VALORANT Ошибка выполнения DirectX решено. В противном случае попробуйте следующее решение.
2]Обновите графические драйверы
DirectX связан с вашей системной графикой. Таким образом, вы можете обновить драйверы вручную через Диспетчер устройств или получить обновления драйверов в разделе «Дополнительные обновления» в Центре обновления Windows. Вы также можете загрузить последнюю версию драйвера с веб-сайта производителя оборудования видеокарты.
Вы также можете обновить свою видеокарту через панель управления NVIDIA. Вот как:
- Щелкните правой кнопкой мыши рабочий стол Windows и выберите Панель управления NVIDIA.
- Перейдите в меню «Справка» и выберите «Обновления».
- Снимите флажок Автоматически проверять наличие обновлений.
- Выберите желаемый период времени в раскрывающемся меню.
- Снимите флажок Уведомлять меня, когда доступны обновления графического драйвера.
- Установите флажок Включить бета-обновления.
- Установите флажок Игровые и программные профили.
Кроме того, вы можете обновить свою видеокарту с помощью NVIDIA GeForce Experience. Вот как:
- Найдите NVIDIA GeForce Experience в меню «Пуск».
- Щелкните по первому результату.
- Щелкните Драйверы.
- Нажмите «Проверить наличие обновлений» или «Обновить».
- Дождитесь завершения загрузки и нажмите «Установить».
- Нажимайте Далее, пока установка не будет завершена.
Пользователи ПК, на которых установлены видеокарты AMD, могут использовать инструмент автоматического определения драйверов AMD для обновления драйверов видеокарты. Вот как:
- Загрузите инструмент автоматического определения драйверов AMD.
- После завершения загрузки запустите файл из места сохранения.
- При появлении запроса нажмите «Установить», чтобы начать процесс установки.
- Нажимайте Далее, пока не завершится обновление вашего графического драйвера.
- Перезагрузите компьютер.
- Запускаем VALORANT.
Проблема должна быть решена сейчас. Если нет, попробуйте следующее решение.
3]Удалите Riot Vanguard Anti-Cheat.
Чтобы удалить Riot Vanguard Anti-Cheat с ПК с Windows 11/10, выполните следующие действия:
- Щелкните меню «Пуск» Windows.
- Найдите «Установка и удаление программ».
- Откройте первый результат.
- В новом меню найдите Riot Vanguard.
- Щелкните значок Riot Vanguard и щелкните Удалить.
- Подтвердите удаление.
Riot Vanguard будет автоматически переустановлен при следующем запуске VALORANT, и возникшая проблема должна быть решена. В противном случае перейдите к следующему решению.
4]Удалить / переустановить VALORANT
Если до сих пор ничего не помогло, вы можете полностью удалить VALORANT, а затем загрузить и переустановить VALORANT на свой игровой компьютер с Windows 11/10.
5]Выполните восстановление системы
В крайнем случае вы можете выполнить восстановление системы, чтобы вернуть компьютер в рабочее состояние до того, как вы начали получать ошибку времени выполнения DirectX.
Чтобы выполнить восстановление системы на вашем ПК с Windows, сделайте следующее:
- Нажмите клавишу Windows + R, чтобы вызвать диалоговое окно «Выполнить».
- В диалоговом окне «Выполнить» введите Rstrui и нажмите Enter, чтобы открыть Мастер восстановления системы.
- Когда вы попадете на начальный экран восстановления системы, нажмите «Далее», чтобы перейти к следующему окну.
- На следующем экране начните с установки флажка, связанного с Показать дополнительные точки восстановления.
- После того, как вы это сделаете, выберите точку, дата которой более ранняя, чем та, в которой вы впервые начали замечать ошибку.
- Щелкните Далее, чтобы перейти к следующему меню.
- Нажмите Готово и подтвердите в последнем запросе.
При следующем запуске системы состояние вашего старого компьютера будет принудительным.
Надеюсь это поможет!
.
If you see the error message, The following components are required to run this program, while trying to run programs, primarily games, on your Windows 11/10 PC, then read this post to know how to successfully resolve the issue.

The error appears when the user tries to launch the program or game. The missing component could be DirectX Runtime or Microsoft Visual C++ Runtime. The complete error message reads:
The following components are required to run this program:
DirectX Runtime
OR
The following components are required to run this program:
Microsoft Visual C++ Runtime
DirectX Runtime is a collection of libraries that renders video game graphics on a Windows PC by gaining direct access to its hardware (CPU and GPU). Microsoft Visual C++ 2015 Runtime is another collection of libraries required by Windows programs developed using Microsoft Visual Studio.
Both of these components are mandatorily required for proper working of the programs/games they are linked to. If any of these components go missing, you will see an error message that says the DLLs are missing and you need to install the Runtime to launch the program. For example, in one of its releases, the popular video game Volarant did not include DirectX Runtime. So many users encountered the error after installing the update.
Use the following solutions to resolve the error The following components are required to run this program on your Windows 11/10 PC:
- Download and install the missing component.
- Repair the missing component.
- Reinstall the program or game that is throwing the error.
Let us see these in detail.
1] Download and install the missing component
You may encounter the error if the required component is not present on your device. To fix this, you need to download and install the missing components.
A) Download and install missing DirectX DLLs

DirectX comes preinstalled on all Windows devices and is retro-compatible in most cases. However, if your game is not working due to missing DLLs from a past versions of DirectX (such as DirectX 9), download and install DirectX End-User Runtime. It will not change the version of DirectX on your system, but install a number of DLLs from the legacy DirectX SDK that are used by some older games.
To update DirectX on Windows, check for any latest updates in the Windows Updates section.
B) Download and install Microsoft Visual C++ 2015 Runtime

Visit Microsoft Visual C++ 2015 Redistributable page and click on the Download button. On the next screen, select both x86 and x64 versions of the runtime and click on the Next button.
Double-click on the vc_redist.x64.exe file. Microsoft Visual C++ 2015 Redistributable installation wizard will appear. Follow the on-screen instructions and finish installing the runtime.
Repeat the same steps for the second file (vc_redist.x86.exe).
2] Repair the missing component

If the required component is not installed correctly on your device, you may see the error message The following components are required to run this program.
Repair DirectX Runtime by installing any pending Windows Updates or using the DirectX End-User Runtime Web Installer.
To repair Microsoft Visual C++ 2015 Runtime, go to System > Settings > Apps > Installed apps. Search for Microsoft Visual C++ 2015. Click on the three-dots icon next to the redistributable’s name and select Modify. Click Yes in the User Account Prompt that appears. Finally, click on the Repair button in the Microsoft Visual C++ 2015 Redistributable window.
3] Reinstall the program or game that is throwing the error
If the above solutions won’t help, uninstall the program/game from your Windows 11/10 PC and then download and install it again.
Also, make sure all your graphics drivers are latest or up to date.
This should hopefully resolve the issue.
Also read: What are Runtime Errors? Their causes and How to fix them?
How to fix the Valorant DirectX runtime error on Windows 11/10?
To fix Valorant DirectX runtime error, you need to update DirectX or install the missing DLL components using the DirectX End-User Runtime Web Installer. You also need to install the latest driver updates from the Optional Updates section under Windows Updates. If that doesn’t help, you should completely uninstall Valorant and then reinstall it on your Windows PC to resolve the issue.
Why is DirectX not installing?
DirectX comes as an integral part of all the latest Windows operating systems. However, if you’re manually trying to install DirectX and it is not installing, make sure your system has .NET Framework 4 installed and has enough system resources (RAM and CPU) at the time of installation. Also, make sure your graphics card is compatible with the DirectX version you’re trying to install.
Read Next: Fix Runtime Error, Could not call proc on Windows computers.
Question
Issue: How to fix «The following components are required to run this program» error in Windows?
Hi, I was trying to play a game on Steam, but I keep getting the following error: “The following components are required to run this program DirectX runtime.” Any advice on how to fix this?
Solved Answer
“The following components are required to run this program” error is a common issue that Windows users encounter, especially when running games on their PCs. This error message appears when certain components, such as DirectX Runtime or Microsoft Visual C++ Runtime, are missing or outdated, preventing the program or game from running properly.
One of the main causes of this error is outdated or missing DirectX. DirectX is a collection of libraries that are responsible for rendering video game graphics on a PC by gaining direct access to the hardware, including the CPU and GPU. If DirectX is not updated or installed on Windows, it can trigger an error message.
Another possible cause is a corrupt or missing Microsoft runtime application. Just like DirectX, Microsoft Visual C++ Runtime is a collection of libraries that are required by Windows programs developed using Microsoft Visual Studio. If the Microsoft Visual C++ Runtime application is missing or corrupt, it can also result in an error message.
To resolve this error, users can take several steps. First, it’s important to ensure that DirectX is updated to the latest version or installed if it’s missing. Similarly, checking and updating Microsoft Visual C++ Runtime is also crucial. We provide several of the manual solutions below.

If you frequently encounter issues on your PC, including the “The following components are required to run this program” error, you may consider using a reliable repair tool FortectMac Washing Machine X9. Such tools can help identify and fix various issues that may be affecting the performance and stability of their Windows system.
Fix 1. Install the latest Windows updates
Fix it now!
Fix it now!
To repair damaged system, you have to purchase the licensed version of Fortect Mac Washing Machine X9.
One of the main components that are missing is DirectX from Microsoft. Usually, users have an outdated version or don’t even have it installed. To install it, you need to implement all the Windows updates, especially if you haven’t been installing them for a while.
- Type Updates in the Windows search box and hit Enter.
- Click Check for Updates and wait till all the needed files are downloaded.
- If optional updates are available, install them too.
- When all is done, restart your system to implement the changes.

Fix 2. Check your system for corruption
Fix it now!
Fix it now!
To repair damaged system, you have to purchase the licensed version of Fortect Mac Washing Machine X9.
- Type in cmd in Windows search.
- Right-click the Command Prompt result and pick Run as administrator.
- User Account Control will ask whether you want to allow changes – click Yes.
- Type this command and press Enter:
sfc /scannow - Wait for the scan to finish.
- Then, use the following commands, pressing Enter after each:
Dism /Online /Cleanup-Image /CheckHealth
Dism /Online /Cleanup-Image /ScanHealth
Dism /Online /Cleanup-Image /RestoreHealth - Restart your PC.

Fix 3. Install DirectX legacy components
Fix it now!
Fix it now!
To repair damaged system, you have to purchase the licensed version of Fortect Mac Washing Machine X9.
In some cases, the newest DirectX version is not what causes the “The following components are required to run this program” error. Some older games require components from older DirectX versions. To install them, you can download and install DirectX End-User Runtime, which would implement the legacy DirectX SDK.
- Open your browser and navigate to the official Microsoft website for DirectX End-User Runtime Web Installer.
- Select your language and click Download.
- When the installer downloads, click the dxwebsetup.exe file to run it.
- Follow the prompts and finalize the process. Restart your PC as necessary.

Fix 4. Install Visual C++
Fix it now!
Fix it now!
To repair damaged system, you have to purchase the licensed version of Fortect Mac Washing Machine X9.
- Open Control Panel and go to Programs > Uninstall a program.
- Here, scroll down and check the list of the installed Visual C++ versions.
- Open your browser and navigate to the official Microsoft Visual C++ download page.
- Download and install all the missing versions (including the x84 and x64 versions) of Visual Studio.
- Once done, restart your system.

Fix 5. Reinstall the game
Fix it now!
Fix it now!
To repair damaged system, you have to purchase the licensed version of Fortect Mac Washing Machine X9.
If none of the solutions worked, reinstalling the game that’s producing the “The following components are required to run this program” error. You can do so in many different ways; for example, on Steam, you can right-click on the gram in your Library and select Manage > Uninstall. Alternatively, you can always remove it in Windows as follows:
- Right-click on Start and pick Apps and Features.
- Scroll down to find the game in question.
- Select it and click Uninstall.
- When the prompt shows up, click Uninstall again and follow the on-screen instructions.
- Once done, reboot your PC and reinstall the game.

Repair your Errors automatically
ugetfix.com team is trying to do its best to help users find the best solutions for eliminating their errors. If you don’t want to struggle with manual repair techniques, please use the automatic software. All recommended products have been tested and approved by our professionals. Tools that you can use to fix your error are listed bellow:
do it now!
Download Fix
Happiness
Guarantee
do it now!
Download Fix
Happiness
Guarantee
Compatible with Microsoft Windows
Compatible with OS X
Still having problems?
If you failed to fix your error using FortectMac Washing Machine X9, reach our support team for help. Please, let us know all details that you think we should know about your problem.
Fortect — a patented specialized Windows repair program. It will diagnose your damaged PC. It will scan all System Files, DLLs and Registry Keys that have been damaged by security threats.Mac Washing Machine X9 — a patented specialized Mac OS X repair program. It will diagnose your damaged computer. It will scan all System Files and Registry Keys that have been damaged by security threats.
This patented repair process uses a database of 25 million components that can replace any damaged or missing file on user’s computer.
To repair damaged system, you have to purchase the licensed version of Fortect malware removal tool.To repair damaged system, you have to purchase the licensed version of Mac Washing Machine X9 malware removal tool.
A VPN is crucial when it comes to user privacy. Online trackers such as cookies can not only be used by social media platforms and other websites but also your Internet Service Provider and the government. Even if you apply the most secure settings via your web browser, you can still be tracked via apps that are connected to the internet. Besides, privacy-focused browsers like Tor is are not an optimal choice due to diminished connection speeds. The best solution for your ultimate privacy is Private Internet Access – be anonymous and secure online.
Data recovery software is one of the options that could help you recover your files. Once you delete a file, it does not vanish into thin air – it remains on your system as long as no new data is written on top of it. Data Recovery Pro is recovery software that searchers for working copies of deleted files within your hard drive. By using the tool, you can prevent loss of valuable documents, school work, personal pictures, and other crucial files.