|
Дентальный рентгеновский аппарат Kodak 2200 |
||||||
|
||||||
|
||||||
|
||||||
|
||||||
|
||||||
|
||||||
|
||||||
|
||||||
|
||||||
|
||||||
|
||||||
|
||||||
|
||||||
|
||||||
|
||||||
|
||||||
|
||||||
|
||||||
|
||||||
|
||||||
|
||||||
|
||||||
|
||||||
|
||||||
|
||||||
|
||||||
|
||||||
|
||||||
|
||||||
|
||||||
|
||||||
|
||||||
|
||||||
|
||||||
|
||||||
|
||||||
|
||||||
|
||||||
|
||||||
|


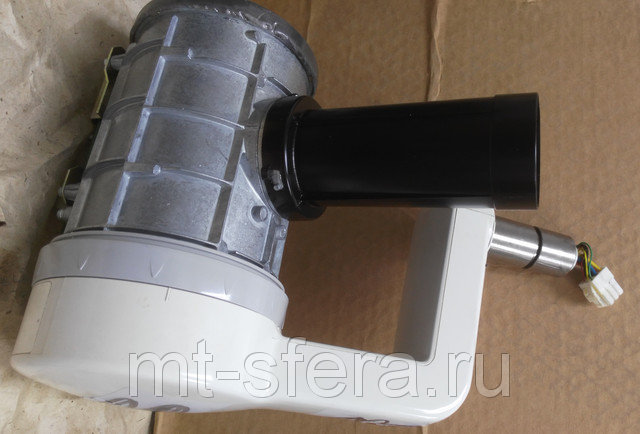
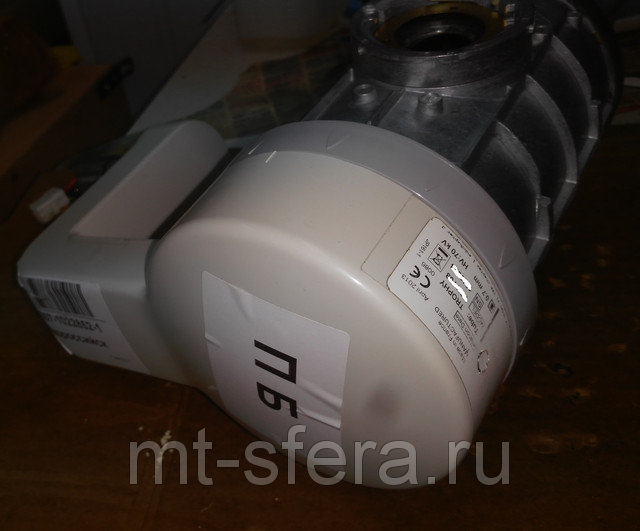
 я не пойму. Напряжения все есть. Земля есть. Соединения проверил все протянул. Звонил на кодак сказали присылай трубу отремонтируем. Поделитесь опытом или дельными советами. Буду признателен.


Disinfecting
Error Messages
Error message
COOLING
CAUTION
:
If you turn off power to the system, the microprocessor does not calculate the cooling time, and for
safety reasons considers that the system has not gone into the cooling cycle.
OP. ERROR
plus audible alarm
KV ERROR
POWER ERROR
4-2
Clean the outside of the system with a damp paper towel or soft cloth using
an alcohol-based, non-corrosive cleaner.
If necessary, wipe off surfaces with disinfectant.
CAUTION
:
• Do not allow liquids to drip into the system.
• Do not spray cleaner or disinfectant directly onto the machine.
• Protect the system from contamination using barriers available
from dental distributors.
• Follow the manufacturer’s safety recommendations when using the
cleaner or disinfectant.
Table 10. Error messages
Cause
Cooling cycle; this message can appear
during a period of intensive use.
Release of the radiography control
button before the end of the exposure.
The display shows the remaining
exposure time. (Based on this time,
decide whether to develop the film or
make another exposure.)
The generator’s high voltage value is
different from the required value.
Over- or under-tension of the main
power.
Power supply problem on the filament.
Cut filament.
SM701_K2200_2_en
How to cancel
Do not turn off the system. The error
message will disappear when the system
returns to a satisfactory temperature.
Press any key on the arch to stop the
alarm.
Turn off the system and restart. If the
problem persists, call a qualified service
technician and discontinue using the
equipment.
Turn off the system and restart. If the
problem persists, call a qualified service
technician and discontinue using the
equipment.
1 August 2006
- Главная —
- Наши услуги —
- Ремонт рентгеновских аппаратов —
- Ремонт Kodak 2100, 2200 ошибка E13, kV Err и др.
Ремонт стоматологических (дентальных) рентгеновских аппаратов Kodak
Ремонт рентгеновских аппаратов Kodak 2100, Kodak 2200 (ошибки E10, E11, E12, E13, E14, E15; KV Error и др.)

Как мы работаем: Вы отправляете нам неисправный блок транспортной компанией, мы ремонтируем, проверяем, настраиваем технические параметры после ремонта, отправляем вам. Срок ремонта обычно составляет 1-3 дня
Гарантия на выполненые работы 6 месяцев
Инструкция по монтажу Kodak2100
Ниже приведены сообщения об ошибках для аппарата Кодак 2100, которые помогут Вам в определении неисправности:
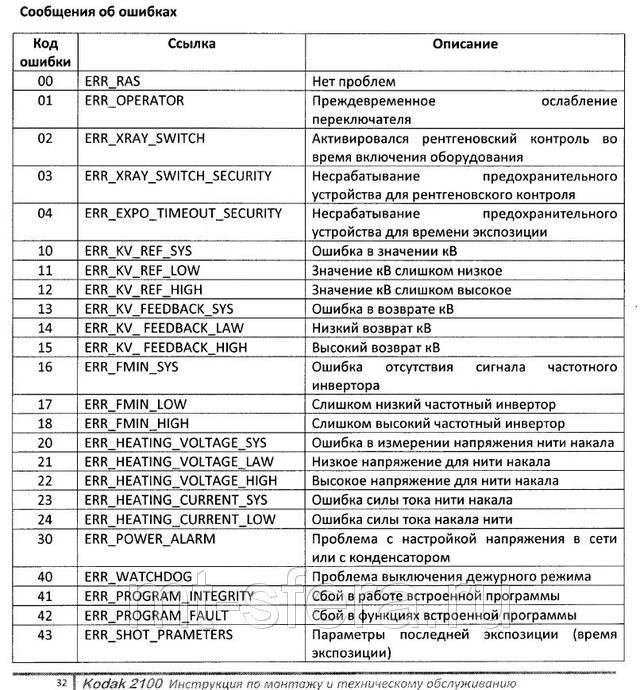
Монтаж, техническое обслуживание, демонтаж, списание, утилизация рентгеновских аппаратов.
Лицензия № ФС-99-04-005505 от 15.03.2018 Федеральной Службы по надзору в сфере здравоохранения на осуществление деятельности по техническому обслуживанию медицинской техники, в том числе монтаж, наладка, ремонт, контроль технических параметров.
Лицензия № 77.99.15.002.Л.000109.11.16 от 07.11.2016 Федеральной Службы по надзору в сфере защиты прав потребителей и благополучия человека на осуществление деятельности по размещению, техническому обслуживанию источников ионизирующего излучения для медицинских целей, проектирование средств радиационной защиты источников ионизирующего излучения.
Используемые радиационные источники: аппараты рентгеновские медицинские.
- Срок выполнения: 3 дня
- Особенности услуги: послеремонтная гарантия
 Loading…
![]()
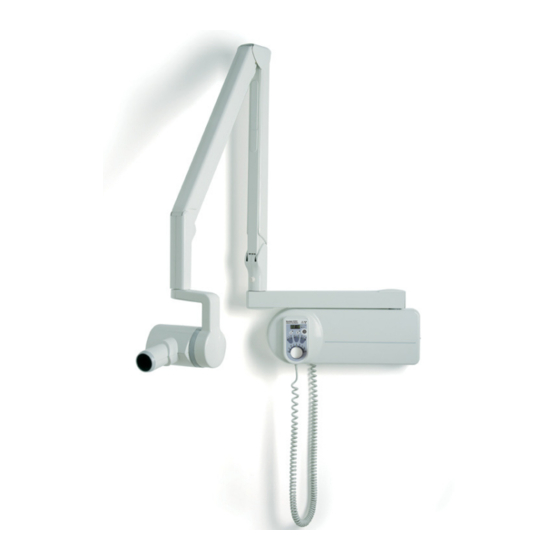
KODAK 2200 Intraoral
X-ray System
User’s Manual

This document is originally written in English.
Manual Name: KODAK 2200 Intraoral X-ray System, User Guide
Document code: SM731 Revision Number: Rev 01 Printed Date: 6/2009
The brand names and logos reproduced in this guide are copyright.
KODAK is a trademark of KODAK used under License.
RVG, Trophy, are registered trademarks of Carestream Health, Inc. All other names or products referred to in this document are used only for the purpose of identification and maybe the trademarks or the registered trademarks of their respective owners.
The RVG technology is the subject of and international patent registered by Carestream Health, Inc.

Table of Contents
|
1. Safety and Regulatory Information ……………………………………………………………………….. |
1-1 |
|
Conventions Used in This Manual ……………………………………………………………………………………. |
1-1 |
|
General Safety Guidelines………………………………………………………………………………………………. |
1-1 |
|
Warnings and Safety Instructions …………………………………………………………………………………….. |
1-2 |
|
Marking and Labelling Symbols……………………………………………………………………………………….. |
1-4 |
|
EEC Regulations …………………………………………………………………………………………………………… |
1-5 |
|
U.S. Regulations……………………………………………………………………………………………………………. |
1-5 |
|
2. System Overview …………………………………………………………………………………………………. |
2-1 |
|
Components …………………………………………………………………………………………………………………. |
2-1 |
|
Wall-Mounted Unit for Irix Replacement ……………………………………………………………………………. |
2-3 |
|
Label Locations……………………………………………………………………………………………………………… |
2-4 |
|
Ceiling-mounted Unit ……………………………………………………………………………………………………… |
2-5 |
|
Mounted on Mobile Stand (Optional) ………………………………………………………………………………… |
2-6 |
|
Floor-mounted Unit (Optional) …………………………………………………………………………………………. |
2-7 |
|
Control Timer Unit………………………………………………………………………………………………………….. |
2-8 |
|
3. Using the System …………………………………………………………………………………………………. |
3-1 |
|
Positioning ……………………………………………………………………………………………………………………. |
3-1 |
|
Positioning the patient………………………………………………………………………………………………………….. |
3-1 |
|
Positioning the x-ray generator ……………………………………………………………………………………………… |
3-1 |
|
Positioning the imaging receptor ……………………………………………………………………………………………. |
3-2 |
|
Exposure………………………………………………………………………………………………………………………. |
3-3 |
|
Exposure Parameters ………………………………………………………………………………………………………….. |
3-3 |
|
Procedure ………………………………………………………………………………………………………………………….. |
3-3 |
|
Processing ……………………………………………………………………………………………………………………. |
3-4 |
|
Setting Modes……………………………………………………………………………………………………………….. |
3-4 |
|
Additional Features………………………………………………………………………………………………………… |
3-5 |
|
4. User Mode……………………………………………………………………………………………………………. |
4-1 |
|
Entering the User Mode………………………………………………………………………………………………….. |
4-1 |
|
Changing the Parameters……………………………………………………………………………………………….. |
4-1 |
|
Exiting the User Mode ……………………………………………………………………………………………………. |
4-1 |
|
Parameters …………………………………………………………………………………………………………………… |
4-1 |
|
5. Care and Maintenance ………………………………………………………………………………………….. |
5-1 |
|
General Maintenance …………………………………………………………………………………………………….. |
5-1 |
|
Cleaning…………………………………………………………………………………………………………………………….. |
5-2 |
|
Disinfecting ………………………………………………………………………………………………………………………… |
5-2 |
|
Error Messages …………………………………………………………………………………………………………….. |
5-2 |
|
Troubleshooting …………………………………………………………………………………………………………….. |
5-3 |
|
6. Technical Specifications ………………………………………………………………………………………. |
6-1 |
|
Compliance with International Standards ………………………………………………………………………….. |
6-1 |
|
X-ray Generator …………………………………………………………………………………………………………….. |
6-4 |
|
Equipped X-ray Generator………………………………………………………………………………………………. |
6-5 |
|
Tables of Exposure Times ………………………………………………………………………………………………. |
6-7 |
|
Emitted Doses ………………………………………………………………………………………………………………. |
6-9 |
iii

List of Figures
|
Figure 1: KODAK 2200 Intraoral X-ray System………………………………………………………………………………………. |
2-1 |
|
|
Figure 2: Side view of KODAK 2200 Intraoral X-ray System …………………………………………………………………… |
2-2 |
|
|
Figure 3: KODAK 2200 Intraoral X-ray System:……………………………………………………………………………………… |
2-3 |
|
|
Figure 4: Identification labels on standard mount …………………………………………………………………………………. |
2-4 |
|
|
Figure 5: Identification labels on Irix replacement mount………………………………………………………………………. |
2-4 |
|
|
Figure 6: KODAK 2200 |
Intraoral X-ray System ceiling-mounted unit………………………………………………………. |
2-5 |
|
Figure 7: KODAK 2200 |
Intraoral X-ray System mounted on mobile stand……………………………………………….. |
2-6 |
|
Figure 8: KODAK 2200 |
Intraoral X-ray System floor-mounted unit …………………………………………………………. |
2-7 |
|
Figure 9: KODAK 2200 |
Intraoral X-ray System control timer unit……………………………………………………………. |
2-8 |
|
Figure 10: Patient positioning ……………………………………………………………………………………………………………… |
3-1 |
|
|
Figure 11: Paralleling technique (left) and Bisecting technique (right)……………………………………………………. |
3-2 |
|
|
Figure 12: Heating and cooling curves for TROPHY TRX 708 tube …………………………………………………………. |
6-4 |
|
|
Figure 13: Heating and cooling curves for CEI OCX/65-G tube ………………………………………………………………. |
6-4 |
|
|
Figure 14: X-ray generator …………………………………………………………………………………………………………………… |
6-5 |
|
|
Figure 15: Heating and cooling curves …………………………………………………………………………………………………. |
6-6 |
List of Tables
|
Table 1: Type of Scissors Arms …………………………………………………………………………………………………………… |
2-2 |
|
Table 2: Parameters for User Mode………………………………………………………………………………………………………. |
4-1 |
|
Table 3: Error Messages ……………………………………………………………………………………………………………………… |
5-2 |
|
Table 4: Troubleshooting…………………………………………………………………………………………………………………….. |
5-3 |
|
Table 5: Main characteristics of the x-ray generator ……………………………………………………………………………… |
6-4 |
|
Table 6: Equipped x-ray generator……………………………………………………………………………………………………….. |
6-5 |
|
Table 7: Exposure times in seconds for class D-Speed films…………………………………………………………………. |
6-7 |
|
Table 8: Exposure time corrections depending on selected setting ……………………………………………………….. |
6-7 |
|
Table 9: Choice of film type …………………………………………………………………………………………………………………. |
6-8 |
|
Table 10: Choice of sensor type…………………………………………………………………………………………………………… |
6-8 |
|
Table 11: Choice of storage phosphor plates ……………………………………………………………………………………….. |
6-8 |
|
Table 12: Dose measured at extremity of 20 cm (8 in.) cone…………………………………………………………………… |
6-9 |
|
Table 13: Exposure surface versus type of collimator used…………………………………………………………………. |
6-10 |
iv

1. Safety and Regulatory Information
The information contained in this manual is based on the experience and knowledge relating to the subject matter gained by Carestream Health, Inc. prior to publication. No patent license is granted by this information.
Carestream Health, Inc. reserves the right to change this information without notice, and makes no warranty, express or implied, with respect to this information. Carestream Health, Inc. shall not be liable for any loss or damage, including consequential or special damages, resulting from any use of this information, even if loss or damage is caused by Carestream Health, Inc. negligence or other fault.
Conventions Used in This Manual
Note
Notes provide additional information, such as expanded explanations, hints, or reminders.
Important
Important highlights critical policy information that affects how you use this manual and this product.
 CAUTION:
Caution points out procedures that you must follow precisely to avoid damage to the system or any of its components, yourself or others, loss of data, or corruption of files in software applications.
General Safety Guidelines
•This product is designed and manufactured to ensure maximum safety of operation. Operate and maintain it in strict compliance with the safety precautions and operating instructions contained in this manual.
•This product meets all the safety requirements applicable to medical equipment. However, anyone attempting to operate the system must be fully aware of potential safety hazards.
•There are no user serviceable parts in this system. The product must be installed, maintained, and serviced by qualified service personnel according to procedures and preventive maintenance schedules in the product service manual. If your product does not operate as expected, contact your Service Representative.
•Do not modify this product in whole or in part without prior written approval from Carestream Health, Inc.
•The assembly, extensions, adjustments, modifications, and repairs must be performed by an authorized Service Representative. Your radiology system must be installed in premises that comply with applicable standards.
•Personnel operating and maintaining this system should receive training and be familiar with all aspects of operation and maintenance.
•KODAK 2200 Intraoral x-ray system is intended to be used at the direction of dentists, oral surgeons and orthodontists for x-ray imaging of the dento-maxillo-facial area.
|
06/2009 |
SM731_K2200_01_en |
1-1 |

•To ensure safety, read all user manuals carefully before using the system and observe all Caution, Important, and Note callouts located throughout the manual.
•Keep this manual with the equipment.
•Reading this manual does not qualify you to operate, test, or calibrate this system.
•Unauthorized personnel are not allowed access to the system.
•If the product does not operate properly or fails to respond to the controls as described in this manual:
•Follow the safety precautions as specified in this manual.
•Stop using the equipment and do not make or authorize any changes to it.
•Immediately contact your Service Representative, report the problem, and await further instructions.
•X-ray systems manufactured by Carestream Health, Inc. comply with safety standards throughout the world for optimum protection against radiation risks.
•Be aware of the product specifications and of system accuracy and stability limitations. Consider these limitations before making any decision based on quantitative values. If you have any doubts, consult your Sales Representative.
 CAUTION:
X-rays can be dangerous if used incorrectly. Take precautions even when following the instructions in this manual.
Use conventional commercially available equipment to protect yourself and your patients against scattered radiation risks.
• If you fail to comply with these instructions, Carestream Health, Inc. will not be responsible for the safety reliability, and characteristics of the equipment.
Warnings and Safety Instructions
 CAUTION:
Do not operate the equipment in the presence of explosive liquids, vapors, or gases. Do not plug in or turn on the system if hazardous substances are detected in the environment. If these substances are detected after the system has been turned on, do not attempt to turn off the unit or unplug it. Evacuate and ventilate the area before turning off the system.
DANGER: THIS IS AN ELECTRICAL UNIT. DO NOT EXPOSE IT TO WATER SPRAY. SUCH ACTION MAY CAUSE AN ELECTRICAL SHOCK OR A MALFUNCTION OF THE UNIT.
|
1-2 |
SM731_K2200_01_en |
06/2009 |

WARNING
The user is responsible for the operation and maintenance of this unit. This unit must only be operated by legally qualified persons.
The cover of the unit must not be opened by the user.
Inspection and maintenance operations should only be carried out by an approved technician.
WARNING
This unit must be installed in an x-ray room that complies with current installation standards. From this location, visual or audio communication must be maintained with the patient, together with access to the control interface during exposure.
WARNING
Do not operate the unit if there is the threat of an earthquake.
Following an earthquake, ensure that the unit is operating properly before using it again.
Failure to observe this precaution may expose patients to hazards.
WARNING
X-ray equipment can be hazardous to patients and the operator if the exposure safety factors and operating instructions are not observed.
WARNING
Do not place objects within the field of operation of the unit.
WARNING
We recommend that the patient and the operator wear protective lead-lined aprons, unless other Radiation Protection Protocols apply locally.
Ensure that any parts of the unit that may come into contact with the patient and the operator have been disinfected after each patient has been exposed to x-rays.
If the unit develops a fault, turn it off (O) and display a sign that states “Out of Service.”
WARNING
The operator must ask the patient to refrain from moving during the entire period of exposure.
In the European Union, this symbol indicates that when the last user wishes to discard this product, it must be sent to appropriate facilities for recovery and recycling.
Contact your local sales representative for additional information on the collection and recovery programs available for this product.
|
06/2009 |
SM731_K2200_01_en |
1-3 |

Marking and Labelling Symbols
ATTENTION:
CONSULT ACCOMPANYING DOCUMENTS
WARNING & IONIZING RADIATION:
IONIZING RADIATION
CHASSIS GROUND STUD.
PROTECTIVE EARTH
POWER ON
POWER OFF
|
1-4 |
SM731_K2200_01_en |
06/2009 |

EEC Regulations
The Kodak intraoral x-ray system is a Class II b medical device, which bears the following mark of conformity:
U.S. Regulations
 CAUTION:
U.S. federal law restricts this device to sale by or on the order of a dentist.
|
06/2009 |
SM731_K2200_01_en |
1-5 |

|
1-6 |
SM731_K2200_01_en |
06/2009 |

2. System Overview
Components
Figure 1: KODAK 2200 Intraoral X-ray System
1.High-frequency x-ray generator
•Transformer and associated electronics, and an oil-bathed x-ray tube
•Beam-limiting device
•Radiation diameter – 6 cm (2 3/8 in.)
•Distance from x-ray tube focal spot to skin – 20 cm (7 7/8 in.)
•Angle scale and handle to facilitate positioning
2.Wall framework
•Contains the high-frequency generator’s control electronics
3.Control timer unit
•Anatomical selection and display of parameters (exposure time, emitted dose)
•Self-test of the microprocessor each time the unit is activated
•Alarm during incorrect operation
•2 pre-set modes or manual exposure settings
|
06/2009 |
SM731_K2200_01_en |
2-1 |

4.Scissor arm
•Wall-mounted with a choice of extensions
Figure 2: Side view of KODAK 2200 Intraoral X-ray System
|
Extension |
R |
Span A |
||
|
CG 645 |
47,0 cm |
170.0 cm |
||
|
(18.5 in.) |
(66 15/16 in.) |
|||
|
CG 646 |
64.8 cm |
188.0 cm |
||
|
(25.5 in.) |
(74 in.) |
|||
|
CG 648 |
82.5 cm |
205.0 cm |
||
|
(32.5 in.) |
(80 11/16 in.) |
|||
Table 1: Type of Scissors Arms
5.On/off switch
•Contains built-in light
6.Rectangular collimator (optional)
•Different sizes adapted to films and RVG sensors
Additional options
•Separate control timer
•Separate exposure switch (if the control panel is attached to the wall framework)
•Wall-mounted unit for Irix replacement
•Ceiling-mounted unit
•Floor-mounted unit
•Unit mounted on mobile stand
|
2-2 |
SM731_K2200_01_en |
06/2009 |

Wall-Mounted Unit for Irix Replacement
Figure 3: KODAK 2200 Intraoral X-ray System:
Replacement of Irix System
1.High-frequency x-ray generator
2.Wall framework
3.Control timer unit
4.Separate exposure switch
5.Scissor arm
6.Rectangular collimator
7.On/off switch with built-in light
|
06/2009 |
SM731_K2200_01_en |
2-3 |

SM731_K2200_01_en 06/2009
5-2
Cleaning
Clean the outside of the system with a damp paper towel or soft cloth using
an alcohol-based, non-corrosive cleaner.
Disinfecting
If necessary, wipe off surfaces with disinfectant.
CAUTION:
• Do not allow liquids to drip into the system.
• Do not spray cleaner or disinfectant directly onto the machine.
• Protect the system from contamination using barriers available
from dental distributors.
• Follow the manufacturer’s safety recommendations when using
the cleaner or disinfectant.
Error Messages
Error Message Cause How to cancel
I 01 and a red LED
lights up on the
control unit
Cooling cycle: this message can appear
during a period of intensive use.
Do not turn off the system. The error
message will disappear when the
system returns to a satisfactory
temperature.
CAUTION:
If you turn off power to the system, the microprocessor does not calculate the cooling time, and for
safety reasons considers that the system has not gone into the cooling cycle.
I 02 Request for a x-ray tube seasoning Refer to Installation Manual
E 01
plus audible alarm
Release of the radiography control button
before the end of the exposure. The display
shows the remaining exposure time (Based
on this time, decide whether to develop the
film or make another exposure).
Press the selector knob to stop the
alarm.
E 02 The radiography control was activated while
the unit was being powered on.
E 03-E 04 Problems with the exposure time control.
E 10 to E 18 kV voltage error.
E 20 to E 24 Filament voltage error.
E30 Problem with voltage to main power supply
or to chemical capacitor.
E 40 to E 46 System error (problems with the
microprocessor on the power board).
E 50 to E 54 Problems with the I2C bus (the connection
between the control panel and the power
board).
Turn off the system and restart. If the
problem persists, call a qualified service
technician and discontinue using the
equipment.
Table 3: Error Messages
- Главная —
- Наши услуги —
- Ремонт рентгеновских аппаратов —
- Ремонт Kodak 2100, 2200 ошибка E13, kV Err и др.
Ремонт стоматологических (дентальных) рентгеновских аппаратов Kodak
Ремонт рентгеновских аппаратов Kodak 2100, Kodak 2200 (ошибки E10, E11, E12, E13, E14, E15; KV Error и др.)
Как мы работаем: Вы отправляете нам неисправный блок транспортной компанией, мы ремонтируем, проверяем, настраиваем технические параметры после ремонта, отправляем вам. Срок ремонта обычно составляет 1-3 дня
Гарантия на выполненые работы 6 месяцев
Инструкция по монтажу Kodak2100
Ниже приведены сообщения об ошибках для аппарата Кодак 2100, которые помогут Вам в определении неисправности:
Монтаж, техническое обслуживание, демонтаж, списание, утилизация рентгеновских аппаратов.
Лицензия № ФС-99-04-005505 от 15.03.2018 Федеральной Службы по надзору в сфере здравоохранения на осуществление деятельности по техническому обслуживанию медицинской техники, в том числе монтаж, наладка, ремонт, контроль технических параметров.
Лицензия № 77.99.15.002.Л.000109.11.16 от 07.11.2016 Федеральной Службы по надзору в сфере защиты прав потребителей и благополучия человека на осуществление деятельности по размещению, техническому обслуживанию источников ионизирующего излучения для медицинских целей, проектирование средств радиационной защиты источников ионизирующего излучения.
Используемые радиационные источники: аппараты рентгеновские медицинские.
- Срок выполнения: 3 дня
- Особенности услуги: послеремонтная гарантия
-
Contents
-
Table of Contents
-
Troubleshooting
-
Bookmarks
Quick Links
KODAK 2200 Intraoral
X-ray System
User’s Manual
Related Manuals for Kodak 2200
Summary of Contents for Kodak 2200
-
Page 1
KODAK 2200 Intraoral X-ray System User’s Manual… -
Page 2
This document is originally written in English. Manual Name: KODAK 2200 Intraoral X-ray System, User Guide Document code: SM731 Revision Number: Rev 01 Printed Date: 6/2009 The brand names and logos reproduced in this guide are copyright. KODAK is a trademark of KODAK used under License. -
Page 3: Table Of Contents
Table of Contents 1. Safety and Regulatory Information ……………….1-1 Conventions Used in This Manual ………………..1-1 General Safety Guidelines………………….1-1 Warnings and Safety Instructions ………………..1-2 Marking and Labelling Symbols…………………1-4 EEC Regulations ………………………1-5 U.S. Regulations……………………..1-5 2. System Overview ……………………2-1 Components ……………………..2-1 Wall-Mounted Unit for Irix Replacement ………………2-3 Label Locations……………………..2-4 Ceiling-mounted Unit ……………………2-5 Mounted on Mobile Stand (Optional) …………………2-6…
-
Page 4
List of Figures Figure 1: KODAK 2200 Intraoral X-ray System………………..2-1 Figure 2: Side view of KODAK 2200 Intraoral X-ray System …………….2-2 Figure 3: KODAK 2200 Intraoral X-ray System:………………..2-3 Figure 4: Identification labels on standard mount ………………..2-4 Figure 5: Identification labels on Irix replacement mount……………… -
Page 5: Safety And Regulatory Information
Personnel operating and maintaining this system should receive training and be familiar with all aspects of operation and maintenance. • KODAK 2200 Intraoral x-ray system is intended to be used at the direction of dentists, oral surgeons and orthodontists for x-ray imaging of the dento-maxillo-facial area.
-
Page 6: Warnings And Safety Instructions
• To ensure safety, read all user manuals carefully before using the system and observe all Caution, Important, and Note callouts located throughout the manual. • Keep this manual with the equipment. • Reading this manual does not qualify you to operate, test, or calibrate this system.
-
Page 7
WARNING The user is responsible for the operation and maintenance of this unit. This unit must only be operated by legally qualified persons. The cover of the unit must not be opened by the user. Inspection and maintenance operations should only be carried out by an approved technician. -
Page 8: Marking And Labelling Symbols
Marking and Labelling Symbols ATTENTION: CONSULT ACCOMPANYING DOCUMENTS WARNING & IONIZING RADIATION: IONIZING RADIATION CHASSIS GROUND STUD. PROTECTIVE EARTH POWER ON POWER OFF SM731_K2200_01_en 06/2009…
-
Page 9: Eec Regulations
EEC Regulations The Kodak intraoral x-ray system is a Class II b medical device, which bears the following mark of conformity: U.S. Regulations CAUTION: U.S. federal law restricts this device to sale by or on the order of a dentist.
-
Page 10
SM731_K2200_01_en 06/2009… -
Page 11: System Overview
2. System Overview Components Figure 1: KODAK 2200 Intraoral X-ray System 1. High-frequency x-ray generator • Transformer and associated electronics, and an oil-bathed x-ray tube • Beam-limiting device • Radiation diameter – 6 cm (2 3/8 in.) • Distance from x-ray tube focal spot to skin – 20 cm (7 7/8 in.) •…
-
Page 12: Figure 2: Side View Of Kodak 2200 Intraoral X-Ray System
4. Scissor arm • Wall-mounted with a choice of extensions Figure 2: Side view of KODAK 2200 Intraoral X-ray System Extension Span A CG 645 47,0 cm 170.0 cm (18.5 in.) (66 15/16 in.) CG 646 64.8 cm 188.0 cm (25.5 in.)
-
Page 13: Wall-Mounted Unit For Irix Replacement
Wall-Mounted Unit for Irix Replacement Figure 3: KODAK 2200 Intraoral X-ray System: Replacement of Irix System 1. High-frequency x-ray generator 2. Wall framework 3. Control timer unit 4. Separate exposure switch 5. Scissor arm 6. Rectangular collimator 7. On/off switch with built-in light…
-
Page 14: Label Locations
Label Locations Figure 4: Identification labels on standard mount Figure 5: Identification labels on Irix replacement mount SM731_K2200_01_en 06/2009…
-
Page 15: Ceiling-Mounted Unit
Ceiling-mounted Unit Figure 6: KODAK 2200 Intraoral X-ray System ceiling-mounted unit 1. High-frequency x-ray generator 2. Ceiling-mounted unit containing the high-frequency x-ray generator’s control electronics 3. Separate timer/control unit for the x-ray generator 4. Scissor arm 5. On/off switch with built-in light 6.
-
Page 16: Mounted On Mobile Stand (Optional)
Mounted on Mobile Stand (Optional) Figure 7: KODAK 2200 Intraoral X-ray System mounted on mobile stand 1. High-frequency x-ray generator 2. Mobile stand containing the high-frequency x-ray generator’s control electronics 3. Timer/control unit for the x-ray generator 4. Scissor arm 5.
-
Page 17: Floor-Mounted Unit (Optional)
Floor-mounted Unit (Optional) Figure 8: KODAK 2200 Intraoral X-ray System floor-mounted unit 1. High-frequency x-ray generator 2. Floor column containing the high-frequency x-ray generator’s control electronics 3. Timer/control unit for the x-ray generator 4. Scissor arm 5. On/off switch with built-in light 6.
-
Page 18: Control Timer Unit
Control Timer Unit Figure 9: KODAK 2200 Intraoral X-ray System control timer unit 1. Display 2. Exposure time — emitted dose selection 3. X-ray exposure button 4. X-ray emission control light 5. Cooling indicator 6. Child/Adult/Large selector 7. kV selector 8.
-
Page 19: Using The System
3. Using the System Every dental specialist would like to produce high-quality intraoral radiographs that reveal maximum detail with the minimum dose to the patient, show teeth and anatomic structures accurately with a minimum of distortion or magnification, and have optimal density and contrast to maximize their use for the detection of dental diseases.
-
Page 20: Positioning The Imaging Receptor
Figure 11: Paralleling technique (left) and Bisecting technique (right) Positioning the imaging receptor Using the KODAK 2200 Intraoral X-ray System, you may create an x-ray image on one of three different types of imaging receptors: • Conventional silver halide films, such as KODAK INSIGHT or KODAK ULTRA-SPEED dental films.
-
Page 21: Exposure
Like film, different digital sensors have varying sensitivities, so you need to adjust exposure for sensors as well. This KODAK 2200 system allows you to use 2 different modes with pre-set exposure times. These modes are programmed when installing the equipment based on your local imaging systems, as indicated in Tables 9 to 11.
-
Page 22: Processing
6. Acquire the image. • Press the x-ray exposure button on the control timer unit (or on the remote exposure switch). The x-ray emission indicator lights up and an audible signal is emitted. • Keep pressing until the x-ray emission light goes out and the audible signal stops.
-
Page 23: Additional Features
Shorter exposure times, reducing the risk of blur due to movement of the patient or film during exposure. • Reduction in x-ray dose to patients because the KODAK 2200 System emits fewer soft rays absorbed by patients that do not contribute to the radiological picture.
-
Page 24
SM731_K2200_01_en 06/2009… -
Page 25: User Mode
4. User Mode The User Mode allows you to select the settings to be used for the different pre-set modes. It also allows you to validate specific local requirements for some countries. Entering the User Mode 1. Turn on the system. The self-test is activated.
-
Page 26
SM731_K2200_01_en 06/2009… -
Page 27: Care And Maintenance
5. Care and Maintenance General Maintenance To make sure that the system functions correctly, you must have it serviced annually by an authorized technician. In addition, every three months inspect the equipment and make sure of the following: Generator • The certification label is legible.
-
Page 28: Cleaning
Cleaning Clean the outside of the system with a damp paper towel or soft cloth using an alcohol-based, non-corrosive cleaner. Disinfecting If necessary, wipe off surfaces with disinfectant. CAUTION: • Do not allow liquids to drip into the system. • Do not spray cleaner or disinfectant directly onto the machine.
-
Page 29: Troubleshooting
Troubleshooting Problem Cause Solution Nothing lights up Unit is disconnected. Connect the unit. Fuse F1 is burned out or defective. Replace the fuse. Circuit breaker is off. Turn on the circuit breaker. Control unit doesn’t light Control unit is disconnected. Connect the control unit.
-
Page 31: Technical Specifications
Carestrem Health, Inc. 150 Veronal Street Rochester, New York – USA 14608 Models KODAK 2200 Compliance with International Regulations • Medical Device directives 93/42/European Economic Community (EEC), Class II b • ElectroMagnetic Compatibility (EMC) directive 89/336/EEC • FDA Center for Devices & Radiological Health (CDRH-21-CFr title 21 sub- chapter J) (USA) •…
-
Page 32
Rated high voltage and maximum corresponding current • 70 kV, 7 mA Current/voltage combinations for a maximum output power of: • 490 W, 70 kV / 7 mA Rated power for exposure time of 0.1 sec. • 490 W Rate of use •… -
Page 33
Classification in Accordance with EN/IEC 60601-1-2 Group I, class B Ambient Operating Conditions • Temperatures: 5 to 35° C • Relative humidity: 30 to 85% • Atmospheric pressure: 700 to 1060 hpa Storage Conditions • Temperatures: -10 to 60° C •… -
Page 34: X-Ray Generator
X-ray Generator TROPHY type TRX 708 CEI type OCX/65-G Rated high voltage 70 kV 70 kV Rated anodic power 490 W 490 W Maximum heat 8,700 J 10.000 J accumulated in the anode Rated value of focal spot 0,7 mm (0.027 in.) 0.7 mm (0.027 in.) (IEC 60336/1993) Target materials…
-
Page 35: Equipped X-Ray Generator
Equipped X-ray Generator Parameters Features IEC standard 60601-2-28 (1993) Conform Type of protection against electric shocks Class 1 Degree of protection against electric shocks Type B Rated value of inherent filtration 1.5 mm (0.059 in.) eq. Al Rated value of additional filtration 1.0 mm (0.039 in.) eq.
-
Page 36: Figure 15: Heating And Cooling Curves
Figure 15: Heating and cooling curves of the KODAK 2200 system tube head SM731_K2200_01_en 06/2009…
-
Page 37: Tables Of Exposure Times
Tables of Exposure Times The following exposure timetables were established with a unit equipped with a standard cone with a focus-to-skin distance of 20 cm (8 inches). 70kV – 7mA Cone 20 cm (8 in.) 60kV – 7mA Cone 20 cm (8 in.) Maxillary Child Adult…
-
Page 38: Table 9: Choice Of Film Type
Kodak Kodak 5100 S 08 Kodak RVG 5000 S 08 Trophy RVG Access S 08 Kodak Kodak 6100 size 1 & 2 S 07 Kodak RVG 6000 S 07 Trophy RVG Ultimate S 07 Trophy RVG Reference Hi Resol mode…
-
Page 39: Emitted Doses
Emitted Doses To obtain the dose in mGy.cm , multiply values in the tables by the exposed surface. The exposed surface depends on the collimator that is used and is indicated in Table 13. 70kV – 7mA 60kV – 7mA t(s) t(s) t(s)
-
Page 40: Table 13: Exposure Surface Versus Type Of Collimator Used
Used with Exposure Used Collimator Format digital surface type (mm) with film sensor 19 x 24 Size 0 23 x 35 Size 1 Size 0 22 x 35 Size 1 24 x 40 31 x 39 Size 2 12.1 Size 2 31 x 41 Size 3 27 x 54 Standard 60 mm…
-
Page 41
6-11 06/2009 SM731_K2200_01_en… -
Page 42
© Carestream Health, Inc., 2009 The Kodak trade mark and trade dress are used under license from Eastman Kodak Company SM731-1 06/09 Trophy A subsidiary of Carestream Health, Inc. 4 rue F. Pelloutier Croissy-Beaubourg 77435 Marne la Vallée Cedex 2 (France)