| title | description | ms.custom | ms.date | ms.prod | ms.reviewer | ms.suite | ms.tgt_pltfrm | ms.topic | ms.assetid | caps.latest.revision | author | ms.author | manager |
|---|---|---|---|---|---|---|---|---|---|---|---|---|---|
|
SWIFT error codes in BizTalk Server | Microsoft Docs |
View the class and validation types for the SWIFT Accelerator in BizTalk Server |
08/16/2017 |
biztalk-server |
article |
03699986-965b-4a28-ab2e-09f110fb4db6 |
4 |
MandiOhlinger |
mandia |
anneta |
SWIFT defines many network-imposed validations against the set of financial (FIN) messages. Each validation relates to a type of check against the contents of the message, and is associated with a three-character error code. The first character of the error code implies the class of the problem detected, and is a letter. The remaining two characters denote the detail of the error (when combined with the class) and always appear as a two-digit code.
Class of errors
The following table lists the letter designations, validation type, rule change associated with each class of error, and whether or not the class of error is supported.
| Class | Validation type and rule change | Supported? |
|---|---|---|
| C, D, E | Semantic validation rules 0-299 | Supported |
| Knn | Invalid code word in field nn | Supported |
| M50 | Message length exceeded | Unsupported |
| M60 | Non-SWIFT character encountered | Supported |
| T | Text validation error codes | Supported |
| G | Specific error codes for message user group (MUG) Textval rules | Unsupported |
| B | Special error codes for value-added services | Unsupported |
All SWIFT errors should be referenced in the SWIFT User Handbook. For more information and for a complete list of SWIFT error codes, refer to the Message Format Validation Rules volume of the SWIFT User Handbook. [!INCLUDEbtaA4SWIFT2.3abbrevnonumber] implements the rules in the September 2003 edition of this publication. You can access the SWIFT Web site at https://go.microsoft.com/fwlink/?LinkId=27885.
Validation errors
There are some codes which are defined by A4SWIFT. These error codes are used in the validation/network rules created and implemented by A4SWIFT, so there is no corresponding error code defined by SWIFT for such rules. Below table shows the error code and corresponding case in which the error is thrown. is the particular field which throws the error.
| Error Code | Description |
|---|---|
| A4SWIFT001 | The first character of multiline field cannot be ‘:’ or ‘-‘ character for second and subsequent lines. |
| A4SWIFT002 | Field contains invalid value. |
[!NOTE]
[!INCLUDEA4SWIFT_CurrentVersion_FirstRef] includes support for some legacy messages, because internal applications might use these messages. Therefore, A4SWIFT maintains the associated SWIFT rules and error codes.
More good info
Troubleshooting: Issues and Resolutions
Known Issues
Common terms and definitions
Обработка ошибок
Обработка ошибок — это процесс реагирования на возникновение ошибок и восстановление после появления ошибок в программе. Swift предоставляет первоклассную поддержку при генерации, вылавливании и переносе ошибок, устранении ошибок во время выполнения программы.
Некоторые операции не всегда гарантируют полное выполнение или конечный результат. Опционалы используются для обозначения отсутствия значения, но когда случается сбой, важно понять, что вызвало сбой, для того, чтобы соответствующим образом изменить код.
В качестве примера, рассмотрим задачу считывания и обработки данных из файла на диске. Задача может провалиться по нескольким причинам, в том числе: файл не существует по указанному пути, или файл не имеет разрешение на чтение, или файл не закодирован в необходимом формате. Отличительные особенности этих различных ситуаций позволяют программе решать некоторые ошибки самостоятельно и сообщать пользователю какие ошибки она не может решить сама.
Отображение и генерация ошибок
В Swift ошибки отображаются значениями типов, которые соответствуют протоколу Error. Этот пустой протокол является индикатором того, что это перечисление может быть использовано для обработки ошибок.
Перечисления в Swift особенно хорошо подходят для группировки схожих между собой условий возникновения ошибок и соответствующих им значений, что позволяет получить дополнительную информацию о природе самой ошибки. Например, вот как отображаются условия ошибки работы торгового автомата внутри игры:
enum VendingMachineError: Error {
    case invalidSelection
    case insufficientFunds(coinsNeeded: Int)
    case outOfStock
}
Генерация ошибки позволяет указать, что произошло что-то неожиданное и обычное выполнение программы не может продолжаться. Для того чтобы «сгенерировать» ошибку, вы используете инструкцию throw. Например, следующий код генерирует ошибку, указывая, что пять дополнительных монет нужны торговому автомату:
throw VendingMachineError.insufficientFunds(coinsNeeded: 5)Обработка ошибок
Когда генерируется ошибка, то фрагмент кода, окружающий ошибку, должен быть ответственным за ее обработку: например, он должен исправить ее, или испробовать альтернативный подход, или просто информировать пользователя о неудачном исполнении кода.
В Swift существует четыре способа обработки ошибок. Вы можете передать (propagate) ошибку из функции в код, который вызывает саму эту функцию, обработать ошибку, используя инструкцию do-catch, обработать ошибку, как значение опционала, или можно поставить утверждение, что ошибка в данном случае исключена. Каждый вариант будет рассмотрен далее.
Когда функция генерирует ошибку, последовательность выполнения вашей программы меняется, поэтому важно сразу обнаружить место в коде, которое может генерировать ошибки. Для того, чтобы выяснить где именно это происходит, напишите ключевое слово try — или варианты try? или try!— до куска кода, вызывающего функцию, метод или инициализатор, который может генерировать ошибку. Эти ключевые слова описываются в следующем параграфе.
Заметка
Обработка ошибок в Swift напоминает обработку исключений (exceptions) в других языках, с использованием ключевых слов try, catch и throw. В отличие от обработки исключений во многих языках, в том числе и в Objective-C- обработка ошибок в Swift не включает разворачивание стека вызовов, то есть процесса, который может быть дорогим в вычислительном отношении. Таким образом, производительные характеристики инструкции throw сопоставимы с характеристиками оператора return.
Передача ошибки с помощью генерирующей функции
Чтобы указать, что функция, метод или инициализатор могут генерировать ошибку, вам нужно написать ключевое слово throws в реализации функции после ее параметров. Функция, отмеченная throws называется генерирующей функцией. Если у функции установлен возвращаемый тип, то вы пишете ключевое слово throws перед стрелкой возврата (->).
func canThrowErrors() throws -> String

func cannotThrowErrors() -> String
Генерирующая функция передает ошибки, которые возникают внутри нее в область вызова этой функции.
Заметка
Только генерирующая ошибку функция может передавать ошибки. Любые ошибки, сгенерированные внутри non-throwing функции, должны быть обработаны внутри самой функции.
В приведенном ниже примере VendingMachine класс имеет vend(itemNamed: ) метод, который генерирует соответствующую VendingMachineError, если запрошенный элемент недоступен, его нет в наличии, или имеет стоимость, превышающую текущий депозит:
struct Item {
    var price: Int
    var count: Int
}

class VendingMachine {
    var inventory = [
        "Candy Bar": Item(price: 12, count: 7),
        "Chips": Item(price: 10, count: 4),
        "Pretzels": Item(price: 7, count: 11)
    ]
    var coinsDeposited = 0

    func vend(itemNamed name: String) throws {
        guard let item = inventory[name] else {
            throw VendingMachineError.invalidSelection
        }

        guard item.count > 0 else {
            throw VendingMachineError.outOfStock
        }

        guard item.price <= coinsDeposited else {
            throw VendingMachineError.insufficientFunds(coinsNeeded: item.price - coinsDeposited)
        }

        coinsDeposited -= item.price

        var newItem = item
        newItem.count -= 1
        inventory[name] = newItem

        print("Dispensing (name)")
    }
}
Реализация vend(itemNamed: ) метода использует оператор guard для раннего выхода из метода и генерации соответствующих ошибок, если какое-либо требование для приобретения закуски не будет выполнено. Потому что инструкция throw мгновенно изменяет управление программой, и выбранная позиция будет куплена, только если все эти требования будут выполнены.
Поскольку vend(itemNamed: ) метод передает все ошибки, которые он генерирует, вызывающему его коду, то они должны быть обработаны напрямую, используя оператор do-catch, try? или try!, или должны быть переданы дальше. Например, buyFavoriteSnack(person:vendingMachine: ) в примере ниже — это тоже генерирующая функция, и любые ошибки, которые генерирует метод vend(itemNamed: ), будут переноситься до точки, где будет вызываться функция buyFavoriteSnack(person:vendingMachine: ).
let favoriteSnacks = [
    "Alice": "Chips",
    "Bob": "Licorice",
    "Eve": "Pretzels"
]
func buyFavoriteSnack(person: String, vendingMachine: VendingMachine) throws {
    let snackName = favoriteSnacks[person] ?? "Candy Bar"
    try vendingMachine.vend(itemNamed: snackName)
}
В этом примере, функция buyFavoriteSnack(person:vendingMachine: ) подбирает любимые закуски данного человека и пытается их купить, вызывая vend(itemNamed: ) метод. Поскольку метод vend(itemNamed: ) может сгенерировать ошибку, он вызывается с ключевым словом try перед ним.
Генерирующие ошибку инициализаторы могут распространять ошибки таким же образом, как генерирующие ошибку функции. Например, инициализатор структуры PurchasedSnack в списке ниже вызывает генерирующую ошибку функции как часть процесса инициализации, и он обрабатывает любые ошибки, с которыми сталкивается, путем распространения их до вызывающего его объекта.
struct PurchasedSnack {
    let name: String
    init(name: String, vendingMachine: VendingMachine) throws {
        try vendingMachine.vend(itemNamed: name)
        self.name = name
    }
}
Обработка ошибок с использованием do-catch
Используйте инструкцию do-catch для обработки ошибок, запуская блок кода. Если выдается ошибка в коде условия do, она соотносится с условием catch для определения того, кто именно сможет обработать ошибку.
Вот общий вид условия do-catch:
do {
    try выражение
    выражение
} catch шаблон 1 {
    выражение
} catch шаблон 2  where условие {
    выражение
} catch шаблон 3, шаблон 4 where условие {
    выражение
} catch {
    выражение
}
Вы пишете шаблон после ключевого слова catch, чтобы указать какие ошибки могут обрабатываться данным пунктом этого обработчика. Если условие catch не имеет своего шаблона, то оно подходит под любые ошибки и связывает ошибки к локальной константе error. Более подробно о соответствии шаблону см. Шаблоны.
Например, следующий код обрабатывает все три случая в перечислении VendingMachineError, но все другие ошибки должны быть обработаны окружающей областью:
var vendingMachine = VendingMachine()
vendingMachine.coinsDeposited = 8
do {
    try buyFavoriteSnack(person: "Alice", vendingMachine: vendingMachine)
} catch VendingMachineError.invalidSelection {
    print("Ошибка выбора.")
} catch VendingMachineError.outOfStock {
    print("Нет в наличии.")
} catch VendingMachineError.insufficientFunds(let coinsNeeded) {
    print("Недостаточно средств. Пожалуйста вставьте еще (coinsNeeded) монетки.")
} catch {
    print("Неожиданная ошибка: (error).")
}
// Выведет "Недостаточно средств. Пожалуйста вставьте еще 2 монетки.
В приведенном выше примере, buyFavoriteSnack(person:vendingMachine: ) функция вызывается в выражении try, потому что она может сгенерировать ошибку. Если генерируется ошибка, выполнение немедленно переносится в условия catch, которые принимают решение о продолжении передачи ошибки. Если ошибка не генерируется, остальные операторы do выполняются.
В условии catch не нужно обрабатывать все возможные ошибки, которые может вызвать код в условии do. Если ни одно из условий catch не обрабатывает ошибку, ошибка распространяется на окружающую область. Однако распространяемая ошибка должна обрабатываться некоторой внешней областью. В функции nonthrowing условие включения do-catch должно обрабатывать ошибку. В функции throwing либо включающая условие do-catch, либо вызывающая сторона должна обрабатывать ошибку. Если ошибка распространяется на область верхнего уровня без обработки, вы получите ошибку исполнения.
Например, приведенный ниже пример можно записать так, чтобы любая ошибка, которая не является VendingMachineError, вместо этого захватывалась вызывающей функцией:
func nourish(with item: String) throws {
    do {
        try vendingMachine.vend(itemNamed: item)
    } catch is VendingMachineError {
        print("Некорректный вывод, нет в наличии или недостаточно денег.")
    }
}

do {
    try nourish(with: "Beet-Flavored Chips")
} catch {
    print("Unexpected non-vending-machine-related error: (error)")
}
// Выведет "Некорректный вывод, нет в наличии или недостаточно денег."
В nourish(with: ), если vend(itemNamed : ) выдает ошибку, которая является одним из кейсов перечисления VendingMachineError, nourish(with: ) обрабатывает ошибку, печатая сообщение. В противном случае, nourish(with: ) распространяет ошибку на свое место вызова. Ошибка затем попадает в общее условие catch.
Преобразование ошибок в опциональные значения
Вы можете использовать try? для обработки ошибки, преобразовав ее в опциональное значение. Если ошибка генерируется при условии try?, то значение выражения вычисляется как nil. Например, в следующем коде x и y имеют одинаковые значения и поведение:
func someThrowingFunction() throws -> Int {
    // ...
}

let x = try? someThrowingFunction()

let y: Int?
do {
    y = try someThrowingFunction()
} catch {
    y = nil
}
Если someThrowingFunction() генерирует ошибку, значение x и y равно nil. В противном случае значение x и y — это возвращаемое значение функции. Обратите внимание, что x и y являются опциональными, независимо от того какой тип возвращает функция someThrowingFunction().
Использование try? позволяет написать краткий код обработки ошибок, если вы хотите обрабатывать все ошибки таким же образом. Например, следующий код использует несколько попыток для извлечения данных или возвращает nil, если попытки неудачные.
func fetchData() -> Data? {
    if let data = try? fetchDataFromDisk() { return data }
    if let data = try? fetchDataFromServer() { return data }
    return nil
}
Запрет на передачу ошибок
Иногда вы знаете, что функции throw или методы не сгенерируют ошибку во время исполнения. В этих случаях, вы можете написать try! перед выражением для запрета передачи ошибки и завернуть вызов в утверждение того, что ошибка точно не будет сгенерирована. Если ошибка на самом деле сгенерирована, вы получите сообщение об ошибке исполнения.
Например, следующий код использует loadImage(atPath: ) функцию, которая загружает ресурс изображения по заданному пути или генерирует ошибку, если изображение не может быть загружено. В этом случае, поскольку изображение идет вместе с приложением, сообщение об ошибке не будет сгенерировано во время выполнения, поэтому целесообразно отключить передачу ошибки.
let photo = try! loadImage(atPath: "./Resources/John Appleseed.jpg")Установка действий по очистке (Cleanup)
Вы используете оператор defer для выполнения набора инструкций перед тем как исполнение кода оставит текущий блок. Это позволяет сделать любую необходимую очистку, которая должна быть выполнена, независимо от того, как именно это произойдет — либо он покинет из-за сгенерированной ошибки или из-за оператора, такого как break или return. Например, вы можете использовать defer, чтобы удостовериться, что файл дескрипторов закрыт и выделенная память вручную освобождена.
Оператор defer откладывает выполнение, пока не происходит выход из текущей области. Этот оператор состоит из ключевого слова defer и выражений, которые должны быть выполнены позже. Отложенные выражения могут не содержать кода, изменяющего контроль исполнения изнутри наружу, при помощи таких операторов как break или return, или просто генерирующего ошибку. Отложенные действия выполняются в обратном порядке, как они указаны, то есть, код в первом операторе defer выполняется после кода второго, и так далее.
func processFile(filename: String) throws {
    if exists(filename) {
        let file = open(filename)
        defer {
            close(file)
        }
        while let line = try file.readline() {
            // работаем с файлом.
        }
        // close(file) вызывается здесь, в конце зоны видимости.
    }
}
Приведенный выше пример использует оператор defer, чтобы удостовериться, что функция open(_: ) имеет соответствующий вызов и для close(_: ).
Заметка
Вы можете использовать оператор defer, даже если не используете кода обработки ошибок.
Если вы нашли ошибку, пожалуйста, выделите фрагмент текста и нажмите Ctrl+Enter.
Обработка ошибок — это процесс реагирования и исправления ошибок в вашей программе. Swift обеспечивает первоклассную поддержку для генерации, перехвата, распространения и обработки исправляемых ошибок во время выполнения.
Некоторые операции не всегда гарантируют завершение выполнения или получение полезного результата. Необязательные параметры используются для представления отсутствия значения, но когда происходит сбой операции, часто полезно понять, что вызвало сбой, чтобы ваш код мог реагировать соответствующим образом.
В качестве примера рассмотрим задачу чтения и обработки данных из файла на диске. Эта задача может быть выполнена несколькими способами, включая файл, не существующий по указанному пути, файл, не имеющий разрешений на чтение, или файл, не закодированный в совместимом формате. Различение между этими различными ситуациями позволяет программе устранять некоторые ошибки и сообщать пользователю о любых ошибках, которые она не может устранить.
ЗАМЕТКА
Обработка ошибок в Swift взаимодействует с шаблонами обработки ошибок, которые используют
NSErrorкласс в Какао и Objective-C.
Представление и бросание ошибок
В Swift ошибки представлены значениями типов, которые соответствуют Errorпротоколу. Этот пустой протокол указывает, что тип может использоваться для обработки ошибок.
Перечисления Swift особенно хорошо подходят для моделирования группы связанных состояний ошибок с соответствующими значениями, позволяющими передавать дополнительную информацию о природе ошибки. Например, вот как вы можете представить условия ошибки работы торгового автомата в игре:
enum VendingMachineError: Error {
    case invalidSelection
    case insufficientFunds(coinsNeeded: Int)
    case outOfStock
}
Выдача ошибки позволяет вам указать, что произошло что-то неожиданное, и нормальный поток выполнения не может продолжаться. Вы используете throwзаявление, чтобы выбросить ошибку. Например, следующий код выдает ошибку, чтобы указать, что торговому автомату необходимо пять дополнительных монет:
throw VendingMachineError.insufficientFunds(coinsNeeded: 5)Обработка ошибок
Когда выдается ошибка, некоторый окружающий фрагмент кода должен отвечать за обработку ошибки — например, путем исправления проблемы, попытки альтернативного подхода или информирования пользователя о сбое.
Существует четыре способа обработки ошибок в Swift. Вы можете распространять ошибку из функции в код, который вызывает эту функцию, обрабатывать ошибку с помощью оператора do— catch, обрабатывать ошибку как необязательное значение или утверждать, что ошибка не произойдет. Каждый подход описан в разделе ниже.
Когда функция выдает ошибку, она меняет поток вашей программы, поэтому важно, чтобы вы могли быстро определить места в вашем коде, которые могут выдавать ошибки. Чтобы определить эти места в вашем коде, напишите tryключевое слово ( try?или try!вариант или) перед фрагментом кода, который вызывает функцию, метод или инициализатор, который может вызвать ошибку. Эти ключевые слова описаны в разделах ниже.
ЗАМЕТКА
Обработка ошибок в Swift напоминает обработку исключений в других языках, с использованием
try,catchиthrowключевых слов. В отличие от обработки исключений во многих языках, включая Objective-C, обработка ошибок в Swift не включает в себя разматывание стека вызовов, процесс, который может быть вычислительно дорогим. Таким образом, рабочие характеристикиthrowоператора сопоставимы с характеристикамиreturnоператора.
Распространение ошибок с использованием бросающих функций
Чтобы указать, что функция, метод или инициализатор могут выдать ошибку, вы пишете throwsключевое слово в объявлении функции после ее параметров. Функция с пометкой throwsназывается функцией броска . Если функция указывает тип возвращаемого значения, вы пишете throwsключевое слово перед стрелкой возврата ( ->).
func canThrowErrors() throws -> String

func cannotThrowErrors() -> String
Функция выброса распространяет ошибки, которые выбрасываются внутри нее, в область, из которой она вызывается.
ЗАМЕТКА
Только бросающие функции могут распространять ошибки. Любые ошибки, возникающие в неработающей функции, должны обрабатываться внутри функции.
В приведенном ниже примере VendingMachineкласс имеет vend(itemNamed:)метод, который выбрасывает соответствующее значение, VendingMachineErrorесли запрошенный элемент недоступен, отсутствует на складе или имеет стоимость, превышающую текущую сумму депозита:
struct Item {
    var price: Int
    var count: Int
}

class VendingMachine {
    var inventory = [
        "Candy Bar": Item(price: 12, count: 7),
        "Chips": Item(price: 10, count: 4),
        "Pretzels": Item(price: 7, count: 11)
    ]
    var coinsDeposited = 0

    func vend(itemNamed name: String) throws {
        guard let item = inventory[name] else {
            throw VendingMachineError.invalidSelection
        }

        guard item.count > 0 else {
            throw VendingMachineError.outOfStock
        }

        guard item.price <= coinsDeposited else {
            throw VendingMachineError.insufficientFunds(coinsNeeded: item.price - coinsDeposited)
        }

        coinsDeposited -= item.price

        var newItem = item
        newItem.count -= 1
        inventory[name] = newItem

        print("Dispensing (name)")
    }
}
Реализация vend(itemNamed:)метода использует guardоператоры для раннего выхода из метода и выдачи соответствующих ошибок, если какое-либо из требований для покупки закуски не выполнено. Поскольку throwоператор немедленно передает управление программой, элемент будет продаваться, только если все эти требования будут выполнены.
Поскольку vend(itemNamed:)метод распространяется любые ошибки , он бросает, любой код , который вызывает этот метод должен либо обрабатывать ошибки, используя do— catchзаявление, try?или try!-или продолжают их распространять. Например, buyFavoriteSnack(person:vendingMachine:)в приведенном ниже примере также есть функция throwing, и любые ошибки, которые vend(itemNamed:)генерирует метод, будут распространяться вплоть до точки, где buyFavoriteSnack(person:vendingMachine:)вызывается функция.
let favoriteSnacks = [

"Alice": "Chips",

"Bob": "Licorice",

"Eve": "Pretzels",

]

func buyFavoriteSnack(person: String, vendingMachine: VendingMachine) throws {

let snackName = favoriteSnacks[person] ?? "Candy Bar"

try vendingMachine.vend(itemNamed: snackName)

}
В этом примере функция ищет любимую закуску данного человека и пытается купить ее, вызвав метод. Поскольку метод может выдать ошибку, он вызывается с ключевым словом перед ним.buyFavoriteSnack(person: vendingMachine:)vend(itemNamed:)vend(itemNamed:)try
Бросающие инициализаторы могут распространять ошибки так же, как и бросающие функции. Например, инициализатор для PurchasedSnackструктуры в приведенном ниже листинге вызывает функцию выброса как часть процесса инициализации и обрабатывает любые возникающие ошибки, передавая их вызывающей стороне.
struct PurchasedSnack {

let name: String

init(name: String, vendingMachine: VendingMachine) throws {

try vendingMachine.vend(itemNamed: name)

self.name = name

}

}
Обработка ошибок с помощью Do-Catch
Вы используете оператор do— catchдля обработки ошибок, выполняя блок кода. Если код в doпредложении выдает ошибку , он сопоставляется с catchпредложениями, чтобы определить, какой из них может обработать ошибку.
Вот общая форма do— catchзаявление:
do {

try expression

statements

} catch pattern 1 {

statements

} catch pattern 2 where condition {

statements

} catch {

statements

}
Вы пишете шаблон после, catchчтобы указать, какие ошибки может обработать это предложение. Если catchпредложение не имеет шаблона, оно сопоставляется с любой ошибкой и связывает ошибку с локальной константой с именем error.
Например, следующий код соответствует всем трем случаям VendingMachineErrorперечисления.
var vendingMachine = VendingMachine()

vendingMachine.coinsDeposited = 8

do {

try buyFavoriteSnack(person: "Alice", vendingMachine: vendingMachine)

print("Success! Yum.")

} catch VendingMachineError.invalidSelection {

print("Invalid Selection.")

} catch VendingMachineError.outOfStock {

print("Out of Stock.")

} catch VendingMachineError.insufficientFunds(let coinsNeeded) {

print("Insufficient funds. Please insert an additional (coinsNeeded) coins.")

} catch {

print("Unexpected error: (error).")

}

// Prints "Insufficient funds. Please insert an additional 2 coins."
В приведенном выше примере buyFavoriteSnack(person:vendingMachine:)функция вызывается в tryвыражении, поскольку она может выдать ошибку. Если выдается ошибка, выполнение немедленно переходит к catchпредложениям, которые решают, следует ли продолжить распространение. Если ни один шаблон не сопоставлен, ошибка попадает в заключительное catchпредложение и связывается с локальной errorконстантой. Если ошибка не выдана, остальные операторы в doоператоре выполняются.
Предложения catchне должны обрабатывать каждую возможную ошибку, которую doможет выдать код в предложении. Если ни одно из catchпредложений не обрабатывает ошибку, ошибка распространяется на окружающую область. Однако распространяемая ошибка должна быть обработана некоторой окружающей областью. В функции nonthrowing, объемлющий do— catchпункт должен обработать ошибку. В функции метательного, либо вшита do— catchпункт или вызывающий должен обработать ошибку. Если ошибка распространяется на область верхнего уровня без обработки, вы получите ошибку во время выполнения.
Например, приведенный выше пример может быть написан так, что любая ошибка, которая не VendingMachineErrorявляется, вместо этого перехватывается вызывающей функцией:
func nourish(with item: String) throws {

do {

try vendingMachine.vend(itemNamed: item)

} catch is VendingMachineError {

print("Invalid selection, out of stock, or not enough money.")

}

}


do {

try nourish(with: "Beet-Flavored Chips")

} catch {

print("Unexpected non-vending-machine-related error: (error)")

}

// Prints "Invalid selection, out of stock, or not enough money."
В nourish(with:)функции, если vend(itemNamed:)выдает ошибку, которая является одним из случаев VendingMachineErrorперечисления, nourish(with:)обрабатывает ошибку, печатая сообщение. В противном случае nourish(with:)распространяет ошибку на свой сайт вызова. Ошибка тогда поймана общим catchпредложением.
Преобразование ошибок в необязательные значения
Вы используете try?для обработки ошибки путем преобразования ее в необязательное значение. Если при вычислении try?выражения выдается ошибка , значением выражения является nil. Например, в следующем коде xи yимеют то же значение и поведение:
func someThrowingFunction() throws -> Int {
    // ...
}

let x = try? someThrowingFunction()

let y: Int?
do {
    y = try someThrowingFunction()
} catch {
    y = nil
}
Если someThrowingFunction()выдает ошибку, значение xи yесть nil. В противном случае значение xи yявляется значением, которое вернула функция. Обратите внимание, что xи yявляются необязательными для любого типа someThrowingFunction()возврата. Здесь функция возвращает целое число, поэтому xи yявляются необязательными целыми числами.
Использование try?позволяет вам написать краткий код обработки ошибок, когда вы хотите обрабатывать все ошибки одинаково. Например, следующий код использует несколько подходов для извлечения данных или возвращает, nilесли все подходы дают сбой.
func fetchData() -> Data? {

if let data = try? fetchDataFromDisk() { return data }

if let data = try? fetchDataFromServer() { return data }

return nil

}
Отключение распространения ошибок
Иногда вы знаете, что бросающая функция или метод на самом деле не будут выдавать ошибку во время выполнения. В таких случаях вы можете написать try!перед выражением, чтобы отключить распространение ошибок, и обернуть вызов в утверждение времени выполнения, что не будет выдано никакой ошибки. Если на самом деле выдается ошибка, вы получите ошибку во время выполнения.
Например, в следующем коде используется loadImage(atPath:)функция, которая загружает ресурс изображения по заданному пути или выдает ошибку, если изображение не может быть загружено. В этом случае, поскольку образ поставляется с приложением, во время выполнения не будет выдано никаких ошибок, поэтому целесообразно отключить распространение ошибок.
let photo = try! loadImage(atPath: "./Resources/John Appleseed.jpg")Указание действий по очистке
Вы используете deferоператор для выполнения набора операторов непосредственно перед тем, как выполнение кода покидает текущий блок кода. Этот оператор позволяет выполнять любую необходимую очистку, которая должна выполняться независимо от того, как выполнение покидает текущий блок кода — независимо от того, была ли вызвана ошибка или из-за оператора, такого как returnили break. Например, вы можете использовать deferинструкцию, чтобы гарантировать, что файловые дескрипторы закрыты, а выделенная вручную память освобождена.
deferЗаявление отсрочивает выполнение , пока текущая область не закрывается. Этот оператор состоит из deferключевого слова и операторов, которые будут выполнены позже. Отложенные операторы могут не содержать какой-либо код, который передавал бы управление из операторов, таких как оператор a breakили return, или путем выдачи ошибки. Отложенные действия выполняются в порядке, обратном порядку их написания в исходном коде. То есть код в первом deferоператоре выполняется последним, код во втором deferоператоре выполняется со второго до последнего и так далее. Последний deferоператор в порядке исходного кода выполняется первым.
func processFile(filename: String) throws {

if exists(filename) {

let file = open(filename)

defer {

close(file)

}

while let line = try file.readline() {

// Work with the file.

}

// close(file) is called here, at the end of the scope.

}

}
В приведенном выше примере используется deferоператор, чтобы гарантировать, что open(_:)функция имеет соответствующий вызов close(_:).
ЗАМЕТКА
Вы можете использовать
deferоператор, даже если код обработки ошибок не используется.
Error handling is the process of responding to and recovering from error conditions in your program. Swift provides first-class support for throwing, catching, propagating, and manipulating recoverable errors at runtime.
Some operations aren’t guaranteed to always complete execution or produce a useful output. Optionals are used to represent the absence of a value, but when an operation fails, it’s often useful to understand what caused the failure, so that your code can respond accordingly.
As an example, consider the task of reading and processing data from a file on disk. There are a number of ways this task can fail, including the file not existing at the specified path, the file not having read permissions, or the file not being encoded in a compatible format. Distinguishing among these different situations allows a program to resolve some errors and to communicate to the user any errors it can’t resolve.
Representing and Throwing Errors
In Swift, errors are represented by values of types that conform to the Error protocol. This empty protocol indicates that a type can be used for error handling.
Swift enumerations are particularly well suited to modeling a group of related error conditions, with associated values allowing for additional information about the nature of an error to be communicated. For example, here’s how you might represent the error conditions of operating a vending machine inside a game:
- enum VendingMachineError: Error {
- case invalidSelection
- case insufficientFunds(coinsNeeded: Int)
- case outOfStock
- }
Throwing an error lets you indicate that something unexpected happened and the normal flow of execution can’t continue. You use a throw statement to throw an error. For example, the following code throws an error to indicate that five additional coins are needed by the vending machine:
- throw VendingMachineError.insufficientFunds(coinsNeeded: 5)
Handling Errors
When an error is thrown, some surrounding piece of code must be responsible for handling the error—for example, by correcting the problem, trying an alternative approach, or informing the user of the failure.
There are four ways to handle errors in Swift. You can propagate the error from a function to the code that calls that function, handle the error using a do—catch statement, handle the error as an optional value, or assert that the error will not occur. Each approach is described in a section below.
When a function throws an error, it changes the flow of your program, so it’s important that you can quickly identify places in your code that can throw errors. To identify these places in your code, write the try keyword—or the try? or try! variation—before a piece of code that calls a function, method, or initializer that can throw an error. These keywords are described in the sections below.
Note
Error handling in Swift resembles exception handling in other languages, with the use of the try, catch and throw keywords. Unlike exception handling in many languages—including Objective-C—error handling in Swift doesn’t involve unwinding the call stack, a process that can be computationally expensive. As such, the performance characteristics of a throw statement are comparable to those of a return statement.
Propagating Errors Using Throwing Functions
To indicate that a function, method, or initializer can throw an error, you write the throws keyword in the function’s declaration after its parameters. A function marked with throws is called a throwing function. If the function specifies a return type, you write the throws keyword before the return arrow (->).
- func canThrowErrors() throws -> String
- func cannotThrowErrors() -> String
A throwing function propagates errors that are thrown inside of it to the scope from which it’s called.
Note
Only throwing functions can propagate errors. Any errors thrown inside a nonthrowing function must be handled inside the function.
In the example below, the VendingMachine class has a vend(itemNamed:) method that throws an appropriate VendingMachineError if the requested item isn’t available, is out of stock, or has a cost that exceeds the current deposited amount:
- struct Item {
- var price: Int
- var count: Int
- }
- class VendingMachine {
- var inventory = [
- «Candy Bar»: Item(price: 12, count: 7),
- «Chips»: Item(price: 10, count: 4),
- «Pretzels»: Item(price: 7, count: 11)
- ]
- var coinsDeposited = 0
- func vend(itemNamed name: String) throws {
- guard let item = inventory[name] else {
- throw VendingMachineError.invalidSelection
- }
- guard item.count > 0 else {
- throw VendingMachineError.outOfStock
- }
- guard item.price <= coinsDeposited else {
- throw VendingMachineError.insufficientFunds(coinsNeeded: item.price — coinsDeposited)
- }
- coinsDeposited -= item.price
- var newItem = item
- newItem.count -= 1
- inventory[name] = newItem
- print(«Dispensing (name)«)
- }
- }
The implementation of the vend(itemNamed:) method uses guard statements to exit the method early and throw appropriate errors if any of the requirements for purchasing a snack aren’t met. Because a throw statement immediately transfers program control, an item will be vended only if all of these requirements are met.
Because the vend(itemNamed:) method propagates any errors it throws, any code that calls this method must either handle the errors—using a do—catch statement, try?, or try!—or continue to propagate them. For example, the buyFavoriteSnack(person:vendingMachine:) in the example below is also a throwing function, and any errors that the vend(itemNamed:) method throws will propagate up to the point where the buyFavoriteSnack(person:vendingMachine:) function is called.
- let favoriteSnacks = [
- «Alice»: «Chips»,
- «Bob»: «Licorice»,
- «Eve»: «Pretzels»,
- ]
- func buyFavoriteSnack(person: String, vendingMachine: VendingMachine) throws {
- let snackName = favoriteSnacks[person] ?? «Candy Bar»
- try vendingMachine.vend(itemNamed: snackName)
- }
In this example, the buyFavoriteSnack(person: vendingMachine:) function looks up a given person’s favorite snack and tries to buy it for them by calling the vend(itemNamed:) method. Because the vend(itemNamed:) method can throw an error, it’s called with the try keyword in front of it.
Throwing initializers can propagate errors in the same way as throwing functions. For example, the initializer for the PurchasedSnack structure in the listing below calls a throwing function as part of the initialization process, and it handles any errors that it encounters by propagating them to its caller.
- struct PurchasedSnack {
- let name: String
- init(name: String, vendingMachine: VendingMachine) throws {
- try vendingMachine.vend(itemNamed: name)
- self.name = name
- }
- }
Handling Errors Using Do-Catch
You use a do—catch statement to handle errors by running a block of code. If an error is thrown by the code in the do clause, it’s matched against the catch clauses to determine which one of them can handle the error.
Here is the general form of a do—catch statement:
- do {
- try expression
- statements
- } catch pattern 1 {
- statements
- } catch pattern 2 where condition {
- statements
- } catch pattern 3, pattern 4 where condition {
- statements
- } catch {
- statements
- }
You write a pattern after catch to indicate what errors that clause can handle. If a catch clause doesn’t have a pattern, the clause matches any error and binds the error to a local constant named error. For more information about pattern matching, see Patterns.
For example, the following code matches against all three cases of the VendingMachineError enumeration.
- var vendingMachine = VendingMachine()
- vendingMachine.coinsDeposited = 8
- do {
- try buyFavoriteSnack(person: «Alice», vendingMachine: vendingMachine)
- print(«Success! Yum.»)
- } catch VendingMachineError.invalidSelection {
- print(«Invalid Selection.»)
- } catch VendingMachineError.outOfStock {
- print(«Out of Stock.»)
- } catch VendingMachineError.insufficientFunds(let coinsNeeded) {
- print(«Insufficient funds. Please insert an additional (coinsNeeded) coins.»)
- } catch {
- print(«Unexpected error: (error).»)
- }
- // Prints «Insufficient funds. Please insert an additional 2 coins.»
In the above example, the buyFavoriteSnack(person:vendingMachine:) function is called in a try expression, because it can throw an error. If an error is thrown, execution immediately transfers to the catch clauses, which decide whether to allow propagation to continue. If no pattern is matched, the error gets caught by the final catch clause and is bound to a local error constant. If no error is thrown, the remaining statements in the do statement are executed.
The catch clauses don’t have to handle every possible error that the code in the do clause can throw. If none of the catch clauses handle the error, the error propagates to the surrounding scope. However, the propagated error must be handled by some surrounding scope. In a nonthrowing function, an enclosing do—catch statement must handle the error. In a throwing function, either an enclosing do—catch statement or the caller must handle the error. If the error propagates to the top-level scope without being handled, you’ll get a runtime error.
For example, the above example can be written so any error that isn’t a VendingMachineError is instead caught by the calling function:
- func nourish(with item: String) throws {
- do {
- try vendingMachine.vend(itemNamed: item)
- } catch is VendingMachineError {
- print(«Couldn’t buy that from the vending machine.»)
- }
- }
- do {
- try nourish(with: «Beet-Flavored Chips»)
- } catch {
- print(«Unexpected non-vending-machine-related error: (error)«)
- }
- // Prints «Couldn’t buy that from the vending machine.»
In the nourish(with:) function, if vend(itemNamed:) throws an error that’s one of the cases of the VendingMachineError enumeration, nourish(with:) handles the error by printing a message. Otherwise, nourish(with:) propagates the error to its call site. The error is then caught by the general catch clause.
Another way to catch several related errors is to list them after catch, separated by commas. For example:
- func eat(item: String) throws {
- do {
- try vendingMachine.vend(itemNamed: item)
- } catch VendingMachineError.invalidSelection, VendingMachineError.insufficientFunds, VendingMachineError.outOfStock {
- print(«Invalid selection, out of stock, or not enough money.»)
- }
- }
The eat(item:) function lists the vending machine errors to catch, and its error text corresponds to the items in that list. If any of the three listed errors are thrown, this catch clause handles them by printing a message. Any other errors are propagated to the surrounding scope, including any vending-machine errors that might be added later.
Converting Errors to Optional Values
You use try? to handle an error by converting it to an optional value. If an error is thrown while evaluating the try? expression, the value of the expression is nil. For example, in the following code x and y have the same value and behavior:
- func someThrowingFunction() throws -> Int {
- // …
- }
- let x = try? someThrowingFunction()
- let y: Int?
- do {
- y = try someThrowingFunction()
- } catch {
- y = nil
- }
If someThrowingFunction() throws an error, the value of x and y is nil. Otherwise, the value of x and y is the value that the function returned. Note that x and y are an optional of whatever type someThrowingFunction() returns. Here the function returns an integer, so x and y are optional integers.
Using try? lets you write concise error handling code when you want to handle all errors in the same way. For example, the following code uses several approaches to fetch data, or returns nil if all of the approaches fail.
- func fetchData() -> Data? {
- if let data = try? fetchDataFromDisk() { return data }
- if let data = try? fetchDataFromServer() { return data }
- return nil
- }
Disabling Error Propagation
Sometimes you know a throwing function or method won’t, in fact, throw an error at runtime. On those occasions, you can write try! before the expression to disable error propagation and wrap the call in a runtime assertion that no error will be thrown. If an error actually is thrown, you’ll get a runtime error.
For example, the following code uses a loadImage(atPath:) function, which loads the image resource at a given path or throws an error if the image can’t be loaded. In this case, because the image is shipped with the application, no error will be thrown at runtime, so it’s appropriate to disable error propagation.
- let photo = try! loadImage(atPath: «./Resources/John Appleseed.jpg»)
Specifying Cleanup Actions
You use a defer statement to execute a set of statements just before code execution leaves the current block of code. This statement lets you do any necessary cleanup that should be performed regardless of how execution leaves the current block of code—whether it leaves because an error was thrown or because of a statement such as return or break. For example, you can use a defer statement to ensure that file descriptors are closed and manually allocated memory is freed.
A defer statement defers execution until the current scope is exited. This statement consists of the defer keyword and the statements to be executed later. The deferred statements may not contain any code that would transfer control out of the statements, such as a break or a return statement, or by throwing an error. Deferred actions are executed in the reverse of the order that they’re written in your source code. That is, the code in the first defer statement executes last, the code in the second defer statement executes second to last, and so on. The last defer statement in source code order executes first.
- func processFile(filename: String) throws {
- if exists(filename) {
- let file = open(filename)
- defer {
- close(file)
- }
- while let line = try file.readline() {
- // Work with the file.
- }
- // close(file) is called here, at the end of the scope.
- }
- }
The above example uses a defer statement to ensure that the open(_:) function has a corresponding call to close(_:).
Note
You can use a defer statement even when no error handling code is involved.
Мы используем обработку ошибок с помощью do-try-catch для реагирования на исправимые ошибки. Это дает нам больший контроль над различными ошибочными сценариями, которые могут возникнуть в нашем коде, например, при вводе неправильного имени пользователя или пароля.
Зачем нужно отслеживать ошибки?
В приложении некоторые ошибки могут быть результатом ошибок программиста. Когда ваше приложение вылетает с сообщением «Index out of bounds», вы, вероятно, где-то допустили ошибку. И точно так же, когда вы принудительно извлекаете опциональное значение, которое имеет значение nil, ваше приложение падает.
В практической разработке iOS некоторые ошибки являются частью работы приложения, например, сообщение «Недостаточно средств» при попытке оплаты с помощью карты.
Ошибки такого рода исправимы. Их можно обработать и отреагировать соответствующим образом. К примеру:
- При попытке снять деньги в банкомате отображается «Неверный PIN-код».
- Ваш автомобиль показывает индикатор низкого уровня топлива при попытке запустить двигатель.
- Попытка аутентификации для API возвращает «Неверное имя пользователя / пароль».
Вы можете работать с этими ошибками, отобразив сообщение с предупреждением или сделав что-то еще. Например, ваша карта блокируется после 3 неудачных попыток. Ваш автомобиль может указать вам ближайшую заправку, когда у вас кончается бензин. Вы можете попробовать ввести другое имя пользователя и пароль.
Swift поддерживает обработку ошибок с помощью блока кода do-try-catch.
Выбрасывание ошибок
Когда в вашем коде возникает сценарий, который может привести к ошибке, вы можете выбросить ошибку:
if fuel < 1000 {
    throw RocketError.insufficientFuel
}
В приведенном выше коде ключевое слово throw используется для выдачи ошибки типа RocketError.insufficientFuel, когда переменная fuel меньше, чем 1000.
Представьте, что мы пытаемся запустить ракету:
func igniteRockets(fuel: Int, astronauts: Int) throws {
    if fuel < 1000 {
        throw RocketError.insufficientFuel
    }
    else if astronauts < 3 {
        throw RocketError.insufficientAstronauts(needed: 3)
    }

    // Запуск ракеты
    print("3... 2... 1... Старт!")
}
Функция igniteRockets(fuel:astronauts:) будет запускать ракеты, только если значение fuel больше или равно 1000 и если на борту есть как минимум 3 астронавта.
Функция igniteRockets(…) также помечается ключевым словом throws. Это ключевое слово указывает, что ошибки должны быть обработаны.
В приведенном выше коде мы используем тип ошибки RocketError:
enum RocketError: Error {
    case insufficientFuel
    case insufficientAstronauts(needed: Int)
    case unknownError
}
Данное перечисление определяет три типа ошибок: .insufficientFuel, insufficientAstronauts(needed) и .unknownError. Определение ваших собственных типов ошибок полезно, потому что это поможет четко понять, что эти ошибки означают в вашем коде.
Возьмем, например, ошибку insufficientAstronauts(needed:). Когда выдается эта ошибка, вы можете использовать аргумент needed:, который указывает, сколько астронавтов необходимо для успешного запуска ракеты.
Ключевое слово throw имеет тот же эффект, что и ключевое слово return. Когда выполняется throw, выполнение функции останавливается, и выброшенная ошибка передается вызывающей функции.
Теперь мы можем использовать обработку ошибок, чтобы соответствующим образом реагировать на сценарии ошибок. Обработка ошибок в Swift осуществляется с помощью блока кода do-try-catch:
do {
    try igniteRockets(fuel: 5000, astronauts: 1)
} catch {
    print(error)
}
Обработка ошибок имеет три аспекта:
- К функции, которая может вызвать ошибку, добавляется ключевое слово try.
- Блок кода, который включает ключевое слово try, обернут в do { … }.
- Один или несколько блоков catch { … } могут быть присоединены к do { … } для обработки отдельных случаев ошибок.
Если функция выдает ошибку, вызывается блок catch. В данном случае это выводит ошибку на консоль.
Вы также можете реагировать на ошибки в индивидуальном порядке:
do {
    try igniteRockets(fuel: 5000, astronauts: 1)
} catch RocketError.insufficientFuel {
    print("Ракете нужно больше топлива!")
} catch RocketError.insufficientAstronauts(let needed) {
    print("Нужно как минимум (needed) астронавта...")
}
Вышеуказанные блоки catch вызываются на основании отдельных перечислений RocketError. Вы можете напрямую получить доступ к связанным значениям перечислений, таких как needed. Также вы можете использовать выражения с шаблоном where чтобы получить больший контроль над ошибочным сценарием.
enum RocketError: Error {
    case insufficientFuel
    case insufficientAstronauts(needed: Int)
    case unknownError
}

func igniteRockets(fuel: Int, astronauts: Int) throws {
    if fuel < 1000 {
        throw RocketError.insufficientFuel
    }
    else if astronauts < 3 {
        throw RocketError.insufficientAstronauts(needed: 3)
    }

    // Ignite rockets
    print("3... 2... 1... Полет!")
}

do {
    try igniteRockets(fuel: 5000, astronauts: 1)
} catch {
    print(error)
}
Преобразование ошибок в опционалы с помощью try?
Целью обработки ошибок является явное определение того, что происходит при возникновении ошибки. Это позволяет нам реагировать определенным образом на ошибки.
В некоторых случаях нас не волнует сама ошибка. Нам просто нужно получить значение из функции. И если возникает ошибка, мы можем возвратить nil. Эта возможность доступна с помощью ключевого слова try? Когда вы используете try?, вам не нужно использовать полный блок кода do-try-catch.
let result = try? calculateValue(for: 42)
Представьте, что функция может выбрасывать ошибки, если ее параметр недействителен. Вместо обработки ошибки мы конвертируем возвращаемое значение в опциональное.
Возможны два сценария:
- Функция не выдает ошибку и возвращает значение, которое присваивается константе result.
- Функция выдает ошибку и не возвращает значение. Это означает, что константе result присваивается nil.
Обработка ошибок с помощью try? означает, что вы можете воспользоваться синтаксисом, специфичным для опционалов, таких как объединение по nil и опциональное связывание:
if let result = try? calculateValue(for: 99) {
    //
}

let result = try? calculateValue(for: 123) ?? 101
Отключение обработки ошибок с помощью try!
Вы можете полностью отключить обработку ошибок с помощью try!. Ключевое слово try! используется для принудиального извлечения опционального значения.
В отличие от того try?, который возвращает опциональное значение, синтаксис try! приведет к сбою вашего кода в случае возникновения ошибки. Есть два различных сценария, в которых использование try! может быть полезно:
- Используйте try!, когда вы на 100% уверенны, что ошибка не возникнет.
- Используйте, try!, когда невозможно продолжить выполнение кода.
Представьте, что вы пишите приложение, в которое встроен файл базы данных. Функция загрузки базы данных выдает ошибку, когда база данных повреждена. Вы можете использовать try! для загрузки базы данных в память, потому что, если база данных повреждена, приложение все равно не сможет быть использовано.
| title | description | ms.custom | ms.date | ms.prod | ms.reviewer | ms.suite | ms.tgt_pltfrm | ms.topic | ms.assetid | caps.latest.revision | author | ms.author | manager |
|---|---|---|---|---|---|---|---|---|---|---|---|---|---|
|
SWIFT error codes in BizTalk Server | Microsoft Docs |
View the class and validation types for the SWIFT Accelerator in BizTalk Server |
08/16/2017 |
biztalk-server |
article |
03699986-965b-4a28-ab2e-09f110fb4db6 |
4 |
MandiOhlinger |
mandia |
anneta |
SWIFT Error Codes
SWIFT defines many network-imposed validations against the set of financial (FIN) messages. Each validation relates to a type of check against the contents of the message, and is associated with a three-character error code. The first character of the error code implies the class of the problem detected, and is a letter. The remaining two characters denote the detail of the error (when combined with the class) and always appear as a two-digit code.
Class of errors
The following table lists the letter designations, validation type, rule change associated with each class of error, and whether or not the class of error is supported.
| Class | Validation type and rule change | Supported? |
|---|---|---|
| C, D, E | Semantic validation rules 0-299 | Supported |
| Knn | Invalid code word in field nn | Supported |
| M50 | Message length exceeded | Unsupported |
| M60 | Non-SWIFT character encountered | Supported |
| T | Text validation error codes | Supported |
| G | Specific error codes for message user group (MUG) Textval rules | Unsupported |
| B | Special error codes for value-added services | Unsupported |
All SWIFT errors should be referenced in the SWIFT User Handbook. For more information and for a complete list of SWIFT error codes, refer to the Message Format Validation Rules volume of the SWIFT User Handbook. [!INCLUDEbtaA4SWIFT2.3abbrevnonumber] implements the rules in the September 2003 edition of this publication. You can access the SWIFT Web site at https://go.microsoft.com/fwlink/?LinkId=27885.
Validation errors
There are some codes which are defined by A4SWIFT. These error codes are used in the validation/network rules created and implemented by A4SWIFT, so there is no corresponding error code defined by SWIFT for such rules. Below table shows the error code and corresponding case in which the error is thrown. is the particular field which throws the error.
| Error Code | Description |
|---|---|
| A4SWIFT001 | The first character of multiline field cannot be ‘:’ or ‘-‘ character for second and subsequent lines. |
| A4SWIFT002 | Field contains invalid value. |
[!NOTE]
[!INCLUDEA4SWIFT_CurrentVersion_FirstRef] includes support for some legacy messages, because internal applications might use these messages. Therefore, A4SWIFT maintains the associated SWIFT rules and error codes.
More good info
Troubleshooting: Issues and Resolutions
Known Issues
Common terms and definitions
Error Handling in Swift 2.0
As a tentpole feature for Swift 2.0, we are introducing a new
first-class error handling model. This feature provides standardized
syntax and language affordances for throwing, propagating, catching, and
manipulating recoverable error conditions.
Error handling is a well-trod path, with many different approaches in
other languages, many of them problematic in various ways. We believe
that our approach provides an elegant solution, drawing on the lessons
we’ve learned from other languages and fixing or avoiding some of the
pitfalls. The result is expressive and concise while still feeling
explicit, safe, and familiar; and we believe it will work beautifully
with the Cocoa APIs.
We’re intentionally not using the term «exception handling», which
carries a lot of connotations from its use in other languages. Our
proposal has some similarities to the exceptions systems in those
languages, but it also has a lot of important differences.
Kinds of Error
What exactly is an «error»? There are many possible error conditions,
and they don’t all make sense to handle in exactly the same way,
because they arise in different circumstances and programmers have to
react to them differently.
We can break errors down into four categories, in increasing order of
severity:
A simple domain error arises from an operation that can fail in some
obvious way and which is often invoked speculatively. Parsing an integer
from a string is a really good example. The client doesn’t need a
detailed description of the error and will usually want to handle the
error immediately. These errors are already well-modeled by returning an
optional value; we don’t need a more complex language solution for
them.
A recoverable error arises from an operation which can fail in
complex ways, but whose errors can be reasonably anticipated in advance.
Examples including opening a file or reading from a network connection.
These are the kinds of errors that Apple’s APIs use NSError for today,
but there are close analogues in many other APIs, such as errno in
POSIX.
Ignoring this kind of error is usually a bad idea, and it can even be
dangerous (e.g. by introducing a security hole). Developers should be
strongly encouraged to write code that handles the error. It’s common
for developers to want to handle errors from different operations in the
same basic way, either by reporting the error to the user or passing the
error back to their own clients.
These errors will be the focus of this proposal.
The final two classes of error are outside the scope of this proposal. A
universal error is theoretically recoverable, but by its nature the
language can’t help the programmer anticipate where it will come from.
A logic failure arises from a programmer mistake and should not be
recoverable at all. In our system, these kinds of errors are reported
either with Objective-C/C++ exceptions or simply by logging a message
and calling abort(). Both kinds of error are discussed extensively in
the rationale. Having considered them carefully, we believe that we can
address them in a later release without significant harm.
Aspects of the Design
This approach proposed here is very similar to the error handling model
manually implemented in Objective-C with the NSError convention.
Notably, the approach preserves these advantages of this convention:
- Whether a method produces an error (or not) is an explicit part of
its API contract. - Methods default to not producing errors unless they are explicitly
marked. - The control flow within a function is still mostly explicit: a
maintainer can tell exactly which statements can produce an error,
and a simple inspection reveals how the function reacts to the
error. - Throwing an error provides similar performance to allocating an
error and returning it — it isn’t an expensive, table-based stack
unwinding process. - Cocoa APIs using standard
NSErrorpatterns can be imported into
this world automatically. Other common patterns (e.g.CFError,
errno) can be added to the model in future versions of Swift.
In addition, we feel that this design improves on Objective-C’s error
handling approach in a number of ways:
- It eliminates a lot of boilerplate control-flow code for propagating
errors. - The syntax for error handling will feel familiar to people used to
exception handling in other languages. - Defining custom error types is simple and ties in elegantly with
Swift enums.
As to basic syntax, we decided to stick with the familiar language of
exception handling. We considered intentionally using different terms
(like raise / handle) to try to distinguish our approach from other
languages. However, by and large, error propagation in this proposal
works like it does in exception handling, and people are inevitably
going to make the connection. Given that, we couldn’t find a compelling
reason to deviate from the throw / catch legacy.
This document just contains the basic proposal and will be very light on
rationale. We considered many different languages and programming
environments as part of making this proposal, and there’s an extensive
discussion of them in the separate rationale document. For example, that
document explains why we don’t simply allow all functions to throw, why
we don’t propagate errors using simply an ErrorOr<T> return type, and
why we don’t just make error propagation part of a general monad
feature. We encourage you to read that rationale if you’re interested
in understanding why we made the decisions we did.
With that out of the way, let’s get to the details of the proposal.
Typed propagation
Whether a function can throw is part of its type. This applies to all
functions, whether they’re global functions, methods, or closures.
By default, a function cannot throw. The compiler statically enforces
this: anything the function does which can throw must appear in a
context which handles all errors.
A function can be declared to throw by writing throws on the function
declaration or type:
func foo() -> Int {          // This function is not permitted to throw.
func bar() throws -> Int {   // This function is permitted to throw.
throws is written before the arrow to give a sensible and consistent
grammar for function types and implicit () result types, e.g.:
func baz() throws {

// Takes a 'callback' function that can throw.
// 'fred' itself can also throw.
func fred(_ callback: (UInt8) throws -> ()) throws {

// These are distinct types.
let a : () -> () -> ()
let b : () throws -> () -> ()
let c : () -> () throws -> ()
let d : () throws -> () throws -> ()
For curried functions, throws only applies to the innermost function.
This function has type (Int) -> (Int) throws -> Int:
func jerry(_ i: Int)(j: Int) throws -> Int {
throws is tracked as part of the type system: a function value must
also declare whether it can throw. Functions that cannot throw are a
subtype of functions that can, so you can use a function that can’t
throw anywhere you could use a function that can:
func rachel() -> Int { return 12 }
func donna(_ generator: () throws -> Int) -> Int { ... }

donna(rachel)
The reverse is not true, since the caller would not be prepared to
handle the error.
A call to a function which can throw within a context that is not
allowed to throw is rejected by the compiler.
It isn’t possible to overload functions solely based on whether the
functions throw. That is, this is not legal:
func foo() {
func foo() throws {
A throwing method cannot override a non-throwing method or satisfy a
non-throwing protocol requirement. However, a non-throwing method can
override a throwing method or satisfy a throwing protocol requirement.
It is valuable to be able to overload higher-order functions based on
whether an argument function throws, so this is allowed:
func foo(_ callback: () throws -> Bool) {
func foo(_ callback: () -> Bool) {
rethrows
Functions which take a throwing function argument (including as an
autoclosure) can be marked as rethrows:
extension Array {
    func map<U>(_ fn: ElementType throws -> U) rethrows -> [U]
}
It is an error if a function declared rethrows does not include a
throwing function in at least one of its parameter clauses.
rethrows is identical to throws, except that the function promises
to only throw if one of its argument functions throws.
More formally, a function is rethrowing-only for a function f if:
- it is a throwing function parameter of f,
- it is a non-throwing function, or
- it is implemented within f (i.e. it is either f or a function or
closure defined therein) and it does not throw except by either:- calling a function that is rethrowing-only for f or
- calling a function that is
rethrows, passing only functions
that are rethrowing-only for f.
It is an error if a rethrows function is not rethrowing-only for
itself.
A rethrows function is considered to be a throwing function. However,
a direct call to a rethrows function is considered to not throw if it
is fully applied and none of the function arguments can throw. For
example:
// This call to map is considered not to throw because its
// argument function does not throw.
let absolutePaths = paths.map { "/" + $0 }

// This call to map is considered to throw because its
// argument function does throw.
let streams = try absolutePaths.map { try InputStream(filename: $0) }
For now, rethrows is a property of declared functions, not of function
values. Binding a variable (even a constant) to a function loses the
information that the function was rethrows, and calls to it will use
the normal rules, meaning that they will be considered to throw
regardless of whether a non-throwing function is passed.
For the purposes of override and conformance checking, rethrows lies
between throws and non-throws. That is, an ordinary throwing method
cannot override a rethrows method, which cannot override a
non-throwing method; but an ordinary throwing method can be overridden
by a rethrows method, which can be overridden by a non-throwing
method. Equivalent rules apply for protocol conformance.
Throwing an error
The throw statement begins the propagation of an error. It always
takes an argument, which can be any value that conforms to the Error
protocol (described below).
if timeElapsed > timeThreshold {
    throw HomeworkError.Overworked
}

throw NSError(domain: "whatever", code: 42, userInfo: nil)
As mentioned above, attempting to throw an error out of a function not
marked throws is a static compiler error.
Catching errors
A catch clause includes an optional pattern that matches the error.
This pattern can use any of the standard pattern-matching tools provided
by switch statements in Swift, including boolean where conditions.
The pattern can be omitted; if so, a where condition is still
permitted. If the pattern is omitted, or if it does not bind a different
name to the error, the name error is automatically bound to the error
as if with a let pattern.
The try keyword is used for other purposes which it seems to fit far
better (see below), so catch clauses are instead attached to a
generalized do statement:
// Simple do statement (without a trailing while condition),
// just provides a scope for variables defined inside of it.
do {
    let x = foo()
}

// do statement with two catch clauses.
do {
    ...

} catch HomeworkError.Overworked {
    // a conditionally-executed catch clause

} catch _ {
    // a catch-all clause.
}
As with switch statements, Swift makes an effort to understand whether
catch clauses are exhaustive. If it can determine it is, then the
compiler considers the error to be handled. If not, the error
automatically propagates out of scope, either to a lexically enclosing
catch clause or out of the containing function (which must be marked
throws).
We expect to refine the catch syntax with usage experience.
Error
The Swift standard library will provide Error, a protocol with a very
small interface (which is not described in this proposal). The standard
pattern should be to define the conformance of an enum to the type:
enum HomeworkError : Error {
    case Overworked
    case Impossible
    case EatenByCat(Cat)
    case StopStressingMeWithYourRules
}
The enum provides a namespace of errors, a list of possible errors
within that namespace, and optional values to attach to each option.
Note that this corresponds very cleanly to the NSError model of an
error domain, an error code, and optional user data. We expect to import
system error domains as enums that follow this approach and implement
Error. NSError and CFError themselves will also conform to
Error.
The physical representation (still being nailed down) will make it
efficient to embed an NSError as an Error and vice-versa. It should
be possible to turn an arbitrary Swift enum that conforms to Error
into an NSError by using the qualified type name as the domain key,
the enumerator as the error code, and turning the payload into user
data.
Automatic, marked, propagation of errors
Once an error is thrown, Swift will automatically propagate it out of
scopes (that permit it), rather than relying on the programmer to
manually check for errors and do their own control flow. This is just a
lot less boilerplate for common error handling tasks. However, doing
this naively would introduce a lot of implicit control flow, which makes
it difficult to reason about the function’s behavior. This is a serious
maintenance problem and has traditionally been a considerable source of
bugs in languages that heavily use exceptions.
Therefore, while Swift automatically propagates errors, it requires that
statements and expressions that can implicitly throw be marked with the
try keyword. For example:
func readStuff() throws {
    // loadFile can throw an error.  If so, it propagates out of readStuff.
    try loadFile("mystuff.txt")

    // This is a semantic error; the 'try' keyword is required
    // to indicate that it can throw.
    var y = stream.readFloat()

    // This is okay; the try covers the entire statement.
    try y += stream.readFloat()

    // This try applies to readBool().
    if try stream.readBool() {
    // This try applies to both of these calls.
    let x = try stream.readInt() + stream.readInt()
    }

    if let err = stream.getOutOfBandError() {
    // Of course, the programmer doesn't have to mark explicit throws.
    throw err
    }
}
Developers can choose to «scope» the try very tightly by writing it
within parentheses or on a specific argument or list element:
// Ok.
let x = (try stream.readInt()) + (try stream.readInt())

// Semantic error: the try only covers the parenthesized expression.
let x2 = (try stream.readInt()) + stream.readInt()

// The try applies to the first array element.  Of course, the
// developer could cover the entire array by writing the try outside.
let array = [ try foo(), bar(), baz() ]
Some developers may wish to do this to make the specific throwing calls
very clear. Other developers may be content with knowing that something
within a statement can throw. The compiler’s fixit hints will guide
developers towards inserting a single try that covers the entire
statement. This could potentially be controlled someday by a coding
style flag passed to the compiler.
try!
To concisely indicate that a call is known to not actually throw at
runtime, try can be decorated with !, turning the error check into a
runtime assertion that the call does not throw.
For the purposes of checking that all errors are handled, a try!
expression is considered to handle any error originating from within its
operand.
try! is otherwise exactly like try: it can appear in exactly the
same positions and doesn’t affect the type of an expression.
Manual propagation and manipulation of errors
Taking control over the propagation of errors is important for some
advanced use cases (e.g. transporting an error result across threads
when synchronizing a future) and can be more convenient or natural for
specific use cases (e.g. handling a specific call differently within a
context that otherwise allows propagation).
As such, the Swift standard library should provide a standard Rust-like
Result<T> enum, along with API for working with it, e.g.:
- A function to evaluate an error-producing closure and capture the
result as aResult<T>. - A function to unpack a
Result<T>by either returning its value or
propagating the error in the current context.
This is something that composes on top of the basic model, but that has
not been designed yet and details aren’t included in this proposal.
The name Result<T> is a stand-in and needs to be designed and
reviewed, as well as the basic operations on the type.
defer
Swift should provide a defer statement that sets up an ad hoc
clean-up action to be run when the current scope is exited. This
replicates the functionality of a Java-style finally, but more cleanly
and with less nesting.
This is an important tool for ensuring that explicitly-managed resources
are released on all paths. Examples include closing a network connection
and freeing memory that was manually allocated. It is convenient for all
kinds of error-handling, even manual propagation and simple domain
errors, but is especially nice with automatic propagation. It is also a
crucial part of our long-term vision for universal errors.
defer may be followed by an arbitrary statement. The compiler should
reject a defer action that might terminate early, whether by throwing
or with return, break, or continue.
Example:
if exists(filename) {
    let file = open(filename, O_READ)
    defer close(file)

    while let line = try file.readline() {
    ...
    }

    // close occurs here, at the end of the formal scope.
}
If there are multiple defer statements in a scope, they are guaranteed
to be executed in reverse order of appearance. That is:
let file1 = open("hello.txt")
defer close(file1)
let file2 = open("world.txt")
defer close(file2)
...
// file2 will be closed first.
A potential extension is to provide a convenient way to mark that a
defer action should only be taken if an error is thrown. This is a
convenient shorthand for controlling the action with a flag. We will
evaluate whether adding complexity to handle this case is justified
based on real-world usage experience.
Importing Cocoa
If possible, Swift’s error-handling model should transparently work
with the SDK with a minimal amount of effort from framework owners.
We believe that we can cover the vast majority of Objective-C APIs with
NSError** out-parameters by importing them as throws and removing
the error clause from their signature. That is, a method like this one
from NSAttributedString:
- (NSData *)dataFromRange:(NSRange)range
       documentAttributes:(NSDictionary *)dict
                    error:(NSError **)error;
would be imported as:
func dataFromRange(
    _ range: NSRange,
    documentAttributes dict: NSDictionary
) throws -> NSData
There are a number of cases to consider, but we expect that most can be
automatically imported without extra annotation in the SDK, by using a
couple of simple heuristics:
-
The most common pattern is a
BOOLresult, where a false value
means an error occurred. This seems unambiguous. -
Also common is a pointer result, where a
nilresult usually means
an error occurred. This appears to be universal in Objective-C; APIs
that can returnnilresults seem to do so via out-parameters. So
it seems to be safe to make a policy decision that it’s okay to
assume that anilresult is an error by default.If the pattern for a method is that a
nilresult means it produced
an error, then the result can be imported as a non-optional type. -
A few APIs return
void. As far as I can tell, for all of these,
the caller is expected to check for a non-nilerror.
For other sentinel cases, we can consider adding a new clang attribute
to indicate to the compiler what the sentinel is:
- There are several APIs returning
NSIntegerorNSUInteger. At
least some of these return 0 on error, but that doesn’t seem like a
reasonable general assumption. AVFoundationprovides a couple methods returning
AVKeyValueStatus. These produce an error if the API returned
AVKeyValueStatusFailed, which, interestingly enough, is not the
zero value.
The clang attribute would specify how to test the return value for an
error. For example:
+ (NSInteger)writePropertyList:(id)plist
                      toStream:(NSOutputStream *)stream
                        format:(NSPropertyListFormat)format
                       options:(NSPropertyListWriteOptions)opt
                         error:(out NSError **)error
    NS_ERROR_RESULT(0);

- (AVKeyValueStatus)statusOfValueForKey:(NSString *)key
                                  error:(NSError **)
    NS_ERROR_RESULT(AVKeyValueStatusFailed);
We should also provide a Clang attribute which specifies that the
correct way to test for an error is to check the out-parameter. Both of
these attributes could potentially be used by the static analyzer, not
just Swift. (For example, they could try to detect an invalid error
check.)
Cases that do not match the automatically imported patterns and that
lack an attribute would be left unmodified (i.e., they’d keep their
NSErrorPointer argument) and considered «not awesome» in the SDK
auditing tool. These will still be usable in Swift: callers will get the
NSError back like they do today, and have to throw the result manually.
For initializers, importing an initializer as throwing takes precedence
over importing it as failable. That is, an imported initializer with a
nullable result and an error parameter would be imported as throwing.
Throwing initializers have very similar constraints to failable
initializers; in a way, it’s just a new axis of failability.
One limitation of this approach is that we need to be able to
reconstruct the selector to use when an overload of a method is
introduced. For this reason, the import is likely to be limited to
methods where the error parameter is the last one and the corresponding
selector chunk is either error: or the first chunk (see below).
Empirically, this seems to do the right thing for all but two sets of
APIs in the public API:
-
The
ISyncSessionDriverDelegatecategory onNSObjectdeclares
half-a-dozen methods like this:- (BOOL)sessionDriver:(ISyncSessionDriver *)sender didRegisterClientAndReturnError:(NSError **)outError;
Fortunately, these delegate methods were all deprecated in Lion, and
are thus unavailable in Swift. -
NSFileCoordinatorhas half a dozen methods where theerror:
clause is second-to-last, followed by a block argument. These
methods are not deprecated as far as I know.
The above translation rule would import methods like this one from
NSDocument:
- (NSDocument *)duplicateAndReturnError:(NSError **)outError;
like so:
func duplicateAndReturnError() throws -> NSDocument
The AndReturnError bit is common but far from universal; consider this
method from NSManagedObject:
- (BOOL)validateForDelete:(NSError **)error;
This would be imported as:
func validateForDelete() throws
This is a really nice import, and it’s somewhat unfortunate that we
can’t import duplicateAndReturnError: as duplicate().
Potential future extensions to this model
We believe that the proposal above is sufficient to provide a huge step
forward in error handling in Swift programs, but there is always more to
consider in the future. Some specific things we’ve discussed (and may
come back to in the future) but don’t consider to be core to the Swift
2.0 model are:
Higher-order polymorphism
We should make it easy to write higher-order functions that behave
polymorphically with respect to whether their arguments throw. This can
be done in a fairly simple way: a function can declare that it throws if
any of a set of named arguments do. As an example (using strawman
syntax):
func map<T, U>(_ array: [T], fn: T -> U) throwsIf(fn) -> [U] {
    ...
}
There’s no need for a more complex logical operator than disjunction
for normal higher-order stuff.
This feature is highly desired (e.g. it would allow many otherwise
redundant overloads to be collapsed into a single definition), but it
may or may not make it into Swift 2.0 based on schedule limitations.
Generic polymorphism
For similar reasons to higher-order polymorphism, we should consider
making it easier to parameterize protocols on whether their operations
can throw. This would allow the writing of generic algorithms, e.g. over
Sequence, that handle both conformances that cannot throw (like
Array) and those that can (like a hypothetical cloud-backed
implementation).
However, this would be a very complex feature, yet to be designed, and
it is far out-of-scope for Swift 2.0. In the meantime, most standard
protocols will be written to not allow throwing conformances, so as to
not burden the use of common generic algorithms with spurious
error-handling code.
Statement-like functions
Some functions are designed to take trailing closures that feel like
sub-statements. For example, autoreleasepool can be used this way:
autoreleasepool {
    foo()
}
The error-handling model doesn’t cause major problems for this. The
compiler can infer that the closure throws, and autoreleasepool can be
overloaded on whether its argument closure throws; the overload that
takes a throwing closures would itself throw.
There is one minor usability problem here, though. If the closure
contains throwing expressions, those expressions must be explicitly
marked within the closure with try. However, from the compiler’s
perspective, the call to autoreleasepool is also a call that can
throw, and so it must also be marked with try:
try autoreleasepool {              // 'try' is required here...
    let string = try parseString() // ...and here.
    ...
}
This marking feels redundant. We want functions like autoreleasepool
to feel like statements, but marks inside built-in statements like if
don’t require the outer statement to be marked. It would be better if
the compiler didn’t require the outer try.
On the other hand, the «statement-like» story already has a number of
other holes: for example, break, continue, and return behave
differently in the argument closure than in statements. In the future,
we may consider fixing that; that fix will also need to address the
error-propagation problem.
using
A using statement would acquire a resource, holds it for a fixed
period of time, optionally binds it to a name, and then releases it
whenever the controlled statement exits. using has many similarities
to defer. It does not subsume defer, which is useful for many ad-hoc
and tokenless clean-ups. But it could be convenient for the common
pattern of a type-directed clean-up.
Automatically importing CoreFoundation and C functions
CF APIs use CFErrorRef pretty reliably, but there are several problems
here: 1) the memory management rules for CFErrors are unclear and
potentially inconsistent. 2) we need to know when an error is raised.
In principle, we could import POSIX functions into Swift as throwing
functions, filling in the error from errno. It’s nearly impossible to
imagine doing this with an automatic import rule, however; much more
likely, we’d need to wrap them all in an overlay.
In both cases, it is possible to pull these into the Swift error
handling model, but because this is likely to require massive SDK
annotations it is considered out of scope for iOS 9/OS X 10.11 & Swift
2.0.
Unexpected and universal errors
As discussed above, we believe that we can extend our current model to
support untyped propagation for universal errors. Doing this well, and
in particular doing it without completely sacrificing code size and
performance, will take a significant amount of planning and insight. For
this reason, it is considered well out of scope for Swift 2.0.
Мы используем обработку ошибок с помощью do-try-catch для реагирования на исправимые ошибки. Это дает нам больший контроль над различными ошибочными сценариями, которые могут возникнуть в нашем коде, например, при вводе неправильного имени пользователя или пароля.
Зачем нужно отслеживать ошибки?
В приложении некоторые ошибки могут быть результатом ошибок программиста. Когда ваше приложение вылетает с сообщением «Index out of bounds», вы, вероятно, где-то допустили ошибку. И точно так же, когда вы принудительно извлекаете опциональное значение, которое имеет значение nil, ваше приложение падает.
В практической разработке iOS некоторые ошибки являются частью работы приложения, например, сообщение «Недостаточно средств» при попытке оплаты с помощью карты.
Ошибки такого рода исправимы. Их можно обработать и отреагировать соответствующим образом. К примеру:
- При попытке снять деньги в банкомате отображается «Неверный PIN-код».
- Ваш автомобиль показывает индикатор низкого уровня топлива при попытке запустить двигатель.
- Попытка аутентификации для API возвращает «Неверное имя пользователя / пароль».
Вы можете работать с этими ошибками, отобразив сообщение с предупреждением или сделав что-то еще. Например, ваша карта блокируется после 3 неудачных попыток. Ваш автомобиль может указать вам ближайшую заправку, когда у вас кончается бензин. Вы можете попробовать ввести другое имя пользователя и пароль.
Swift поддерживает обработку ошибок с помощью блока кода do-try-catch.
Выбрасывание ошибок
Когда в вашем коде возникает сценарий, который может привести к ошибке, вы можете выбросить ошибку:
if fuel < 1000 {
    throw RocketError.insufficientFuel
}
В приведенном выше коде ключевое слово throw используется для выдачи ошибки типа RocketError.insufficientFuel, когда переменная fuel меньше, чем 1000.
Представьте, что мы пытаемся запустить ракету:
func igniteRockets(fuel: Int, astronauts: Int) throws {
    if fuel < 1000 {
        throw RocketError.insufficientFuel
    }
    else if astronauts < 3 {
        throw RocketError.insufficientAstronauts(needed: 3)
    }

    // Запуск ракеты
    print("3... 2... 1... Старт!")
}
Функция igniteRockets(fuel:astronauts:) будет запускать ракеты, только если значение fuel больше или равно 1000 и если на борту есть как минимум 3 астронавта.
Функция igniteRockets(…) также помечается ключевым словом throws. Это ключевое слово указывает, что ошибки должны быть обработаны.
В приведенном выше коде мы используем тип ошибки RocketError:
enum RocketError: Error {
    case insufficientFuel
    case insufficientAstronauts(needed: Int)
    case unknownError
}
Данное перечисление определяет три типа ошибок: .insufficientFuel, insufficientAstronauts(needed) и .unknownError. Определение ваших собственных типов ошибок полезно, потому что это поможет четко понять, что эти ошибки означают в вашем коде.
Возьмем, например, ошибку insufficientAstronauts(needed:). Когда выдается эта ошибка, вы можете использовать аргумент needed:, который указывает, сколько астронавтов необходимо для успешного запуска ракеты.
Ключевое слово throw имеет тот же эффект, что и ключевое слово return. Когда выполняется throw, выполнение функции останавливается, и выброшенная ошибка передается вызывающей функции.
Теперь мы можем использовать обработку ошибок, чтобы соответствующим образом реагировать на сценарии ошибок. Обработка ошибок в Swift осуществляется с помощью блока кода do-try-catch:
do {
    try igniteRockets(fuel: 5000, astronauts: 1)
} catch {
    print(error)
}
Обработка ошибок имеет три аспекта:
- К функции, которая может вызвать ошибку, добавляется ключевое слово try.
- Блок кода, который включает ключевое слово try, обернут в do { … }.
- Один или несколько блоков catch { … } могут быть присоединены к do { … } для обработки отдельных случаев ошибок.
Если функция выдает ошибку, вызывается блок catch. В данном случае это выводит ошибку на консоль.
Вы также можете реагировать на ошибки в индивидуальном порядке:
do {
    try igniteRockets(fuel: 5000, astronauts: 1)
} catch RocketError.insufficientFuel {
    print("Ракете нужно больше топлива!")
} catch RocketError.insufficientAstronauts(let needed) {
    print("Нужно как минимум (needed) астронавта...")
}
Вышеуказанные блоки catch вызываются на основании отдельных перечислений RocketError. Вы можете напрямую получить доступ к связанным значениям перечислений, таких как needed. Также вы можете использовать выражения с шаблоном where чтобы получить больший контроль над ошибочным сценарием.
enum RocketError: Error {
    case insufficientFuel
    case insufficientAstronauts(needed: Int)
    case unknownError
}

func igniteRockets(fuel: Int, astronauts: Int) throws {
    if fuel < 1000 {
        throw RocketError.insufficientFuel
    }
    else if astronauts < 3 {
        throw RocketError.insufficientAstronauts(needed: 3)
    }

    // Ignite rockets
    print("3... 2... 1... Полет!")
}

do {
    try igniteRockets(fuel: 5000, astronauts: 1)
} catch {
    print(error)
}
Преобразование ошибок в опционалы с помощью try?
Целью обработки ошибок является явное определение того, что происходит при возникновении ошибки. Это позволяет нам реагировать определенным образом на ошибки.
В некоторых случаях нас не волнует сама ошибка. Нам просто нужно получить значение из функции. И если возникает ошибка, мы можем возвратить nil. Эта возможность доступна с помощью ключевого слова try? Когда вы используете try?, вам не нужно использовать полный блок кода do-try-catch.
let result = try? calculateValue(for: 42)
Представьте, что функция может выбрасывать ошибки, если ее параметр недействителен. Вместо обработки ошибки мы конвертируем возвращаемое значение в опциональное.
Возможны два сценария:
- Функция не выдает ошибку и возвращает значение, которое присваивается константе result.
- Функция выдает ошибку и не возвращает значение. Это означает, что константе result присваивается nil.
Обработка ошибок с помощью try? означает, что вы можете воспользоваться синтаксисом, специфичным для опционалов, таких как объединение по nil и опциональное связывание:
if let result = try? calculateValue(for: 99) {
    //
}

let result = try? calculateValue(for: 123) ?? 101
Отключение обработки ошибок с помощью try!
Вы можете полностью отключить обработку ошибок с помощью try!. Ключевое слово try! используется для принудиального извлечения опционального значения.
В отличие от того try?, который возвращает опциональное значение, синтаксис try! приведет к сбою вашего кода в случае возникновения ошибки. Есть два различных сценария, в которых использование try! может быть полезно:
- Используйте try!, когда вы на 100% уверенны, что ошибка не возникнет.
- Используйте, try!, когда невозможно продолжить выполнение кода.
Представьте, что вы пишите приложение, в которое встроен файл базы данных. Функция загрузки базы данных выдает ошибку, когда база данных повреждена. Вы можете использовать try! для загрузки базы данных в память, потому что, если база данных повреждена, приложение все равно не сможет быть использовано.
Время на прочтение
5 мин
Количество просмотров 10K
Сегодня мы приготовили перевод для тех, кто так же, как автор статьи, при изучении Документации языка программирования Swift избегает главы «Error Handling».
Из статьи вы узнаете:
- что такое оператор if-else и что с ним не так;
- как подружиться с Error Handling;
- когда стоит использовать Try! и Try?

Моя история
Когда я был младше, я начинал изучать документацию языка Swift. Я по несколько раз прочёл все главы, кроме одной: «Error Handling». Отчего-то мне казалось, что нужно быть профессиональным программистом, чтобы понять эту главу.
Я боялся обработки ошибок. Такие слова, как catch, try, throw и throws, казались бессмысленными. Они просто пугали. Неужели они не выглядят устрашающими для человека, который видит их в первый раз? Но не волнуйтесь, друзья мои. Я здесь, чтобы помочь вам.
Как я объяснил своей тринадцатилетней сестре, обработка ошибок – это всего лишь ещё один способ написать блок if-else для отправки сообщения об ошибке.
Сообщение об ошибке от Tesla Motors
Как вы наверняка знаете, у автомобилей Tesla есть функция автопилота. Но, если в работе машины по какой-либо причине происходит сбой, она просит вас взять руль в руки и сообщает об ошибке. В этом уроке мы узнаем, как выводить такое сообщение с помощью Error Handling.
Мы создадим программу, которая будет распознавать такие объекты, как светофоры на улицах. Для этого нужно знать как минимум машинное обучение, векторное исчисление, линейную алгебру, теорию вероятности и дискретную математику. Шутка.
Знакомство с оператором if-else
Чтобы максимально оценить Error Handling в Swift, давайте оглянемся в прошлое. Вот что многие, если не все, начинающие разработчики сделали бы, столкнувшись с сообщением об ошибке:
var isInControl = true

func selfDrive() {
 if isInControl {
  print("You good, let me ride this car for ya")
 } else {
  print("Hold the handlebar RIGHT NOW, or you gone die")
 }
}

selfDrive() // "You good..."
Проблема
Самая большая проблема заключается в удобочитаемости кода, когда блок else становится слишком громоздким. Во-первых, вы не поймёте, содержит ли сама функция сообщение об ошибке, до тех пор, пока не прочитаете функцию от начала до конца или если не назовёте ее, например, selfDriveCanCauseError, что тоже сработает.
Смотрите, функция может убить водителя. Необходимо в недвусмысленных выражениях предупредить свою команду о том, что эта функция опасна и даже может быть смертельной, если невнимательно с ней обращаться.
С другой проблемой можно столкнуться при выполнении некоторых сложных функций или действий внутри блока else. Например:
else {
 print("Hold the handle bar Right now...")

 // If handle not held within 5 seconds, car will shut down
 // Slow down the car
 // More code ...
 // More code ...

}
Блок else раздувается, и работать с ним – все равно что пытаться играть в баскетбол в зимней одежде (по правде говоря, я так и делаю, так как в Корее достаточно холодно). Вы понимаете, о чём я? Это некрасиво и нечитабельно.
Поэтому вы просто могли бы добавить функцию в блок else вместо прямых вызовов.
else {
 slowDownTheCar()
 shutDownTheEngine()
}
Однако при этом сохраняется первая из выделенных мной проблем, плюс нет какого-то определённого способа обозначить, что функция selfDrive() опасна и что с ней нужно обращаться с осторожностью. Поэтому предлагаю погрузиться в Error Handling, чтобы писать модульные и точные сообщения об ошибках.
Знакомство с Error Handling
К настоящему времени вы уже знаете о проблеме If-else с сообщениями об ошибках. Пример выше был слишком простым. Давайте предположим, что есть два сообщения об ошибке:
- вы заблудились
- аккумулятор автомобиля разряжается.
Я собираюсь создать enum, который соответствует протоколу Error.
enum TeslaError: Error {
 case lostGPS
 case lowBattery
}
Честно говоря, я точно не знаю, что делает Error протокол, но при обработке ошибок без этого не обойдешься. Это как: «Почему ноутбук включается, когда нажимаешь на кнопку? Почему экран телефона можно разблокировать, проведя по нему пальцем?»
Разработчики Swift так решили, и я не хочу задаваться вопросом об их мотивах. Я просто использую то, что они для нас сделали. Конечно, если вы хотите разобраться подробнее, вы можете загрузить программный код Swift и проанализировать его самостоятельно – то есть, по нашей аналогии, разобрать ноутбук или iPhone. Я же просто пропущу этот шаг.
Если вы запутались, потерпите еще несколько абзацев. Вы увидите, как все станет ясно, когда TeslaError превратится в функцию.
Давайте сперва отправим сообщение об ошибке без использования Error Handling.
var lostGPS: Bool = true
var lowBattery: Bool = false

func autoDriveTesla() {
 if lostGPS {
  print("I'm lost, bruh. Hold me tight")
  // A lot more code

 }
 if lowBattery {
  print("HURRY! ")
  // Loads of code
 }
}
Итак, если бы я запустил это:
autoDriveTesla() // "HURRY! " Но давайте используем Error Handling. В первую очередь вы должны явно указать, что функция опасна и может выдавать ошибки. Мы добавим к функции ключевое слово throws.
func autoDriveTesla() throws { ... }Теперь функция автоматически говорит вашим товарищам по команде, что autoDriveTesla – особый случай, и им не нужно читать весь блок.
Звучит неплохо? Отлично, теперь пришло время выдавать эти ошибки, когда водитель сталкивается с lostGPA или lowBattery внутри блока Else-If. Помните про enum TeslaError?
func autoDriveTesla() throws {
 if lostGPS {
  throw TeslaError.lostGPS

}
 if lowBattery {
  throw TeslaError.lowBattery
}
Я вас всех поймаю
Если lostGPS равно true, то функция отправит TeslaError.lostGPS. Но что делать потом? Куда мы будем вставлять это сообщение об ошибке и добавлять код для блока else?
print("Bruh, I'm lost. Hold me tight")Окей, я не хочу заваливать вас информацией, поэтому давайте начнём с того, как выполнить функцию, когда в ней есть ключевое слово throws.
Так как это особый случай, вам необходимо добавлять try внутрь блока do при работе с этой функцией. Вы такие: «Что?». Просто последите за ходом моих мыслей ещё чуть-чуть.
do {
 try autoDriveTesla()
}
Я знаю, что вы сейчас думаете: «Я очень хочу вывести на экран моё сообщение об ошибке, иначе водитель умрёт».
Итак, куда мы вставим это сообщение об ошибке? Мы знаем, что функция способна отправлять 2 возможных сообщения об ошибке:
- TeslaError.lowBattery
- TeslaError.lostGPS.
Когда функция выдаёт ошибку, вам необходимо её “поймать” и, как только вы это сделаете, вывести на экран соответствующее сообщение. Звучит немного запутанно, поэтому давайте посмотрим.
var lostGPS: Bool = false
var lowBattery: Bool = true

do {
 try autoDriveTesla()
 } catch TeslaError.lostGPS {
  print("Bruh, I'm lost. Hold me tight")
 } catch TeslaError.lowBattery {
  print("HURRY! ")
 }
}

// Results: "HURRY! "
Теперь всё должно стать понятно. Если понятно не всё, вы всегда можете посмотреть моё видео на YouTube.
Обработка ошибок с Init
Обработка ошибок может применяться не только к функциям, но и тогда, когда вам нужно инициализировать объект. Допустим, если вы не задали имя курса, то нужно выдавать ошибку.
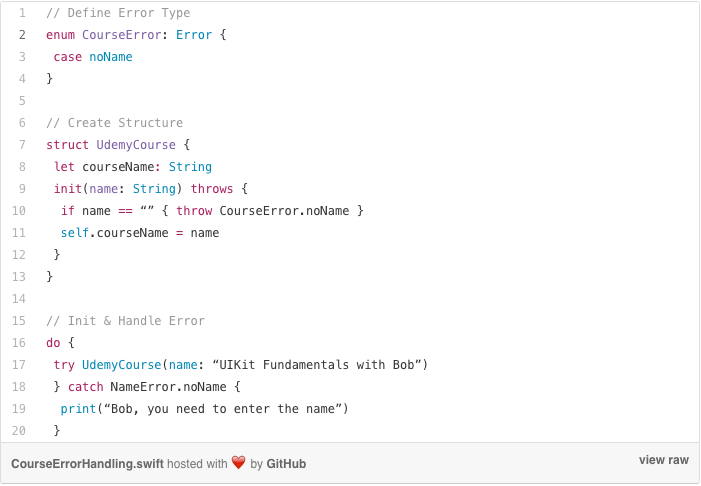
Если вы введёте tryUdemyCourse(name: «»), появится сообщение об ошибке.
Когда использовать Try! и Try?
Хорошо. Try используется только тогда, когда вы выполняете функцию/инициализацию внутри блока do-catch. Однако если у вас нет цели предупредить пользователя о том, что происходит, выводя сообщение об ошибке на экран, или как-то исправить ее, вам не нужен блок catch.
try?– что это?
Давайте начнём с try? Хотя это не рекомендуется,
let newCourse = try? UdemyCourse("Functional Programming")try? всегда возвращает опциональный объект, поэтому необходимо извлечь newCourse
if let newCourse = newCourse { ... }Если метод init выбрасывает ошибку, как, например
let myCourse = try? UdemyCourse("") // throw NameError.noNameто myCourse будет равен nil.
try! – что это?
В отличие от try? оно возвращает не опциональное значение, а обычное. Например,
let bobCourse = try! UdemyCourse("Practical POP")bobCourse не опционально. Однако, если при методе инициализации выдается ошибка вроде,
let noCourseName = try! UdemyCourse("") // throw NameError.noNameто приложение упадёт. Так же как и в случае с принудительным извлечением с помощью !, никогда не используйте его, если вы не уверены на 101% в том, что происходит.
Ну вот и всё. Теперь вы вместе со мной поняли концепцию Error Handling. Легко и просто! И не нужно становиться профессиональным программистом.