Если ваш Macintosh HD (disk0s2) не может быть смонтирован с помощью Дисковой утилиты, это означает, что где-то что-то не так и ваш Mac не включается. Несколько пользователей Mac, которые обновились до macOS Big Sur, жаловались на получение ошибки com.apple.DiskManagement.disenter -119930868 при установке своих жестких дисков. Невозможность смонтировать свои диски означает невозможность доступа к этому диску. Это создает огромную проблему, особенно для тех, кто решил установить macOS на этот диск.
com.apple.DiskManagement.disenter error -119930868 не является новой ошибкой, потому что пользователи Mac также сталкивались с ней в более ранних версиях macOS. Однако появление этой ошибки на этот раз означает, что она связана с недавним обновлением до macOS Big Sur.
Что вызывает ошибку com.apple.DiskManagement.disenter -119930868 и как успешно смонтировать ехать без этой ошибки? Если вас интересуют эти вопросы, читайте дальше, чтобы узнать больше.
Что такое Com.apple.DiskManagement.disenter Ошибка -119930868?
Когда вы подключаете внешний жесткий диск к Mac, он обычно отображается на рабочем столе, в Finder и в Дисковой утилите. Но бывают случаи, когда внешний диск не отображается ни в одном из этих мест, и данные на немонтируемом внешнем жестком диске становятся недоступными. Когда пользователи сталкиваются с этой проблемой, самый простой способ решить эту проблему — установить диск вручную. К сожалению, несколько пользователей сообщали об ошибке com.apple.DiskManagement.disenter -119930868 всякий раз, когда они пытались подключить внешний диск с помощью Дисковой утилиты или Терминала.
В некоторых случаях диск уже смонтирован, но невидимый. В других случаях ошибка диска появляется независимо от того, какое действие пользователь пытается выполнить с диском — будь то форматирование, монтирование или стирание.
Полное сообщение об ошибке гласит:
Не удалось смонтировать «имя диска».
(ошибка com.apple.DiskManagement.disenter -119930868)
Что вызывает ошибку Com.apple.DiskManagement.disenter -119930868?
Если не удается смонтировать жесткий диск и появляется ошибка com.apple.DiskManagement.disenter -119930868, это может быть вызвано одной из следующих причин:
- Повреждение файловой системы. Файловая система отвечает за организацию и хранение данных на диске. Если файловая система Macintosh HD повреждена, основная файловая таблица будет затронута напрямую, поэтому Mac не сможет подключить диск.
- Вирусные атаки. Возможно, ваша система Mac или Macintosh HD подверглась атаке вируса или вредоносного ПО, что привело к повреждению данных. Тогда ваш Mac также не сможет смонтировать Macintosh HD.
- Файл каталога поврежден. Файлы каталога содержат файлы записей разделенных томов. Таким образом, если какой-либо файл каталога окажется поврежденным, Mac не сможет получить местоположение размера тома, описание содержимого тома и другую информацию о томе, не говоря уже о монтировании диска.
- Сбои Дисковой утилиты. Проблема с подключением Macintosh HD также может быть вызвана сбоями Дисковой утилиты.
- Неисправности системы. К системным сбоям относятся сбои в работе машины и ошибки операционной системы. В случае сбоя операционной системы Mac она не может подключить ни один диск.
Как решить ошибку com.apple.DiskManagement.disenter -119930868
Прежде чем приступить к исправлению этой ошибки, вот контрольный список, который вы При подключении жесткого диска необходимо учитывать следующее:
- Повторно подключите разъем USB или адаптер, чтобы он плотно прилегал к жесткому диску.
- Подключите жесткий диск к другому USB-порту или другой Mac.
- Замените USB-кабель или адаптер, если вы подозреваете, что он поврежден.
- Подключите img к внешнему источнику питания, если он требуется для жесткого диска.
- Проверьте светодиод, чтобы убедиться, что устройство хранения включено и работает.
- Замените жесткий диск другим корпусом, если вы считаете, что он неисправен.
Также рекомендуется запустить сканирование вашего компьютера с помощью надежной антивирусной программы, чтобы убедиться, что ошибка не вызвана заражением вредоносным ПО.
После того, как вы выполнили контрольный список и ошибка по-прежнему появляется, затем выполните следующие действия.
Исправление №1: измените настройки macOS.
Убедитесь, что Finder предпочитает показывать внешние диски на рабочем столе или в Finder. Для этого:
Вам также необходимо убедиться, что в меню View Disk Utility выбран параметр «Показать все устройства».
Исправление №2: сброс настроек прошивки Mac.
Чтобы сбросить NVRAM (энергонезависимую RAM) & amp; PRAM (ОЗУ параметров):
- Для iMac, Mac Pro / mini или ноутбука со съемным аккумулятором: отсоедините кабель питания или выньте аккумулятор, затем нажмите и удерживайте кнопку питания в течение 5 секунд.
- Для MacBook Air, MacBook Pro или MacBook с несъемным аккумулятором: нажмите и удерживайте кнопку Shift + Control + Option + Power . в течение 10 секунд.
Исправление №3: Восстановите диск с помощью Дисковой утилиты.
Если ваш компьютер Mac не загружается, вы можете загрузить Mac в режиме восстановления macOS, а затем восстановить размонтированный Macintosh HD (disk0s2).
Выполните следующие действия, чтобы восстановить размонтированный Macintosh с помощью Дисковой утилиты:
Если в сообщении говорится, что дисковая утилита не может восстановить диск, перейдите к следующему решению.
Исправление №4: исправить Macintosh HD через терминал.
Если Дисковая утилита перестала восстанавливать Macintosh HD в macOS, вы можете попытаться исправить это с помощью терминала.
Исправление №5: Восстановление из резервной копии Time Machine.
Если у вас есть резервная копия Time Machine, вы можете восстановить резервную копию и исправить отключенный Macintosh HD ( disk0s2).
Если все остальное не поможет , сотрите диск и переустановите macOS.
Если нет важных данных или вы успешно восстановили потерянные данные, вы можете стереть диск и переустановить macOS, используя режим восстановления. Выберите Дисковую утилиту, выберите свой диск и сотрите его. Вернитесь в главное окно и нажмите «Переустановить macOS». Имейте в виду, что это должен быть ваш последний вариант. Надеюсь, это должно устранить ошибку com.apple.DiskManagement.disenter -119930868 и решить проблему с диском.
YouTube видео: Как исправить ошибку com.apple.DiskManagement.disenter -119930868
06, 2023
В этом руководстве мы покажем вам различные способы исправления ошибки Diskmanagement.disenter с кодами ошибок 119930868, 119930872, 49218, 49223, 0 и т. д. Многие пользователи выразили обеспокоенность тем, что не могут подключить внешние жесткие диски к своему Mac. . Эта проблема не зависит от ОС, о ней сообщалось в Big Sur, Monterey и даже Ventura.

Всякий раз, когда они пытаются смонтировать диск с помощью Дисковой утилиты, они приветствовал с ошибкой Diskmanagement.disenter вместе с одним из следующих кодов ошибок 119930868, 119930872, 49218, 49223, 0 и т. д. Невозможность доступа пользователей к данным на отключенном внешнем жестком диске доставляет им массу неудобств. Если вы тоже находитесь в одной лодке, то это руководство поможет вам. Следите за исправлениями.
Рекомендуется попробовать каждый из нижеперечисленных обходных путей, а затем посмотреть, какой из них приводит к успеху. Итак, имея это в виду, давайте начнем. Droidwin и его участники не будут нести ответственность в случае термоядерной войны, если ваш будильник не разбудит вас, или если что-то случится с вашим Mac и данными, выполнив следующие шаги.
ИСПРАВЛЕНИЕ 1. Завершение процесса fsck
Одна из наиболее распространенных причин этой ошибки может быть связана с тем, что «fsck» может держать ее в заложниках. Поэтому вам придется убить этот процесс и повторить попытку монтирования диска. Вот как это можно сделать:
- Для начала запустите Терминал и Дисковую утилиту.
- Затем попробуйте смонтировать диск и сразу переключитесь на Терминал.
- Теперь выполните следующую команду в окне терминала: sudo pkill -f fsck
- Диск смонтируется в режиме только для чтения. Теперь вы можете восстановить его с помощью программы «Первая помощь» в Дисковой утилите.
- Ремонт займет время. После этого это должно исправить ошибку Diskmanagement.disenter.
ИСПРАВЛЕНИЕ 2: использование терминала
- Для начала загрузите Mac в режим восстановления, как указано ниже: Apple Silicon: нажмите и удерживайте кнопку питания, пока не появится «Загрузка параметров запуска». Затем выберите Функции > Продолжить. Intel: перезагрузите Mac и одновременно нажмите и удерживайте сочетание клавиш Command+R.
- Затем нажмите «Утилиты» и выберите «Терминал». Теперь введите следующую команду: diskutil list
- Появится список всех дисков. Запишите идентификатор тома вашего диска [such as disk3s1].
- Наконец, выполните приведенную ниже команду [replace diskX with your volume identifier].diskutil repairVolume/diskX
- Проверьте, исправляет ли он ошибку Diskmanagement.disenter 119930868, 119930872, 49218, 49223, 0.
ИСПРАВЛЕНИЕ 3. Изменение размера выделяемого диска
Некоторые старые Mac не смогут смонтировать диск, если размер выделения больше 1024. Поэтому, чтобы решить эту проблему, перейдите на компьютер с Windows или Linux (или используйте виртуальную машину) и переформатируйте диск в ExFAT и выберите 1024 как размер выделения. Теперь попробуйте установить его на свой Mac, и на этот раз вы не получите никаких кодов ошибок.
Вот и все. Это были три метода, которые должны помочь вам исправить ошибку Diskmanagement.disenter с кодами ошибок 119930868, 119930872, 49218, 49223, 0 и т. д. Если у вас есть какие-либо вопросы относительно вышеупомянутых шагов, сообщите нам об этом в комментариях. Мы вернемся к вам с решением в ближайшее время.
О главном редакторе
Reading time: 5 Minutes
If you’re unable to mount your Mac’s hard drive, it may prevent your computer from turning on. Some users who have upgraded to macOS Big Sur have reported experiencing the com.apple.DiskManagement.disenter error -119930868 when attempting to mount their drives, rendering them inaccessible. While this isn’t a new error, it’s connected to the recent macOS Big Sur upgrade. Keep reading to find out what causes this error and how to fix it.
What is Com.apple.DiskManagement.disenter Error -119930868?
Typically, when an external hard drive is connected to a Mac, it appears on the Desktop, in Finder, and in Disk Utility. However, there may be times when the external drive doesn’t appear in any of these locations, causing the data within the unmounted external hard drive to become inaccessible. When users encounter this issue, the easiest way to resolve this is by mounting the drive manually. Unfortunately, several users have reported getting the com.apple.DiskManagement.disenter error -119930868 whenever they try to mount the external drive using Disk Utility or the Terminal.
In some cases, the drive is already mounted but not visible. In other instances, the disk error appears no matter what action the user is trying to perform on the drive — whether it’s formatting, mounting, or erasing.
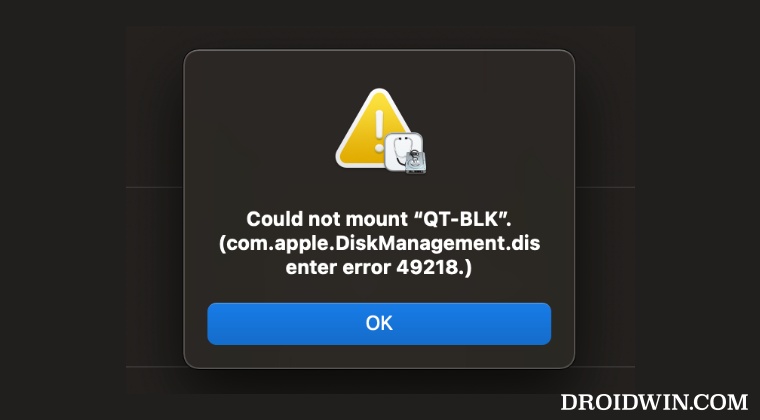
The complete error message reads:
Could not mount “disk name”.
(com.apple.DiskManagement.disenter error -119930868)
What Causes Com.apple.DiskManagement.disenter Error -119930868?
If you can’t mount your hard drive and the com.apple.DiskManagement.disenter error -119930868 appears, it could be due to any of the following reasons:
- File system damage. The file system, which organizes and stores data on a drive, could be damaged. If the file system of the Macintosh HD is corrupted, the master file table will be impacted in a direct manner so the Mac won’t mount the drive.
- Virus attacks. Perhaps, your Mac system or the Macintosh HD is attacked by virus or malware, resulting in data corruption. Then your Mac won’t mount the Macintosh HD, either.
- Catalog file corruption. Catalog files contain the record files of partitioned volumes. So if any catalog file becomes corrupt, the Mac won’t be able to get volume size location, description of volume content and other volume information, let alone mount the drive.
- Disk Utility failures The Macintosh HD not mounted issue may be caused by Disk Utility faults, too.
- System malfunctions. These could include hardware malfunctions or operating system errors. If the Mac operating system crashes, it cannot mount any drive.
Steps to Resolve the com.apple.DiskManagement.disenter Error -119930868
Before you proceed with fixing this error, here is a checklist you need to consider when connecting your hard drive:
- Reconnect the USB connector or adapter to fit the hard drive snugly.
- Connect the hard drive to a different USB port or a different Mac.
- Replace the USB cable or adapter in case you suspect it to be damaged.
- Connect to an external power source if the hard drive requires one.
- Check the LED light to ensure the storage device is powered on and working.
- Swap the hard drive with a different case if you presume it to be faulty.
It’s also recommended to run a security scan on your computer using a reliable antivirus program to ensure that the error is not due to a malware infection.
Once you’ve gone through the checklist and the error still appears, then proceed with the steps below.
Fix #1: Change macOS Settings.
Ensure Finder’s preference to show external disks on Desktop or Finder is enabled. To do this:
- Open Finder from Dock. From the top Menu Bar, go to Finder > Preferences.
- On the Finder Preferences window, click the General tab.
- Under the Show these items on the Desktop section, select the External disks checkbox. Your Desktop will now show the external hard drive icon.
- Click the Sidebar tab. Under the Locations section, select the External disks checkbox. Your Finder sidebar will now show the external hard drive.
You also need to ensure Disk Utility’s View menu has the “Show All Devices” option selected.
- Press Command + Space Bar keys to open Spotlight.
- Type disk utility and hit Return to open Disk Utility.
- Click the View menu located at the top left corner of Disk Utility and select Show All Devices. Your Disk Utility’s sidebar should now show the external hard drive.
Fix #2: Reset Mac Firmware Settings.
To reset NVRAM (Non-volatile RAM) & PRAM (Parameter RAM):
- Restart Mac then immediately press and hold Option + Command + P + R keys until you hear a second chime.
- Reset SMC (System Management Controller) on your Mac by using the instructions below:
- For iMac, Mac Pro/mini, or laptop with a removable battery—detach the power cable or take out the battery then press and hold the Power button for 5 seconds.
- For MacBook Air, MacBook Pro, or MacBook with non-removable battery—press and hold Shift + Control + Option + Power Button for 10 seconds.
Fix #3: Repair Disk with Disk Utility.
If your Mac computer won’t boot, you can boot your Mac into macOS Recovery mode and then repair unmounted Macintosh HD (disk0s2).
Follow these steps to repair unmounted Macintosh with Disk Utility:
- Turn on your Mac by pressing the Power button.
- Press and hold down Command+R keys immediately upon hearing the startup chime. Hold down the keys until you see the Apple logo, a spinning globe or other startup screen. Startup is complete when you see the macOS Utilities window.
- Select Disk Utility and click Continue.
- Select the unmounted Macintosh HD (disk0s2) from the left sidebar of Disk Utility window.
- Click First Aid in the toolbar of the Disk Utility window.
- Click Run to check and repair file system errors.
- Wait until the procedure is completed. If you get a message saying success, restart your Mac and see if your Mac can be booted.
If a message says that the disk utility cannot repair the disk, go to the next solution.
Fix #4: Fix Macintosh HD via Terminal.
If Disk Utility stopped repairing Macintosh HD in macOS, you can then try to fix it with Terminal.
- Boot your Mac into Recovery Mode.
- Click Utilities from the menu bar and select Terminal from the drop-down list.
- Enter diskutil list. This will list out the available volumes.
- Check the volume identifier from the table that appears. (For example disk 2s1)
- Enter diskutil repairVolume/disk 2s1. (Replace disk 2s1 with the volume identifier of your Macintosh HD)
Fix #5: Restore from a Time Machine Backup.
If you have a Time Machine backup, you can restore the backup and fix unmounted Macintosh HD (disk0s2).
- Boot your Mac into macOS Recovery mode.
- Select Disk Utility and click Continue.
- Select Macintosh HD (disk0s2) and click Erase.
- Before erasing, make sure you don’t lose any data.
- Return to macOS Utilities window.
- Select Restore from Time Machine Backup and click Continue.
- Select your Time Machine backup disk as the restore source and then click Continue.
- Select a backup and then click Continue.
- Select the hard disk as the restore destination and then click Restore to continue.
- Restart your Mac computer when the restore is done.
If all else fails, erase the drive and reinstall macOS.
If there is no important data or you have recovered lost data successfully, you can erase the drive and reinstall macOS instead using Recovery mode. Choose Disk Utility, select your drive and erase it. Go back to the main window and click Reinstall macOS. Keep in mind that this should be your last option. Hopefully this should resolve the com.apple.DiskManagement.disenter error -119930868 and fix your disk problem.
Give us some love and rate our post!

Vicrey Makapagal
Vic is a tech enthusiast who loves to be up-to-date with the latest and greatest technology in the world. He creates content that educates and helps users with their tech-related questions. Vic manages our website to ensure that our readers have a seamless experience while browsing. He excels in troubleshooting errors and resolving Windows issues for gaming and work purposes.
Many users have been voicing their concern that they aren’t able to mount their external hard drives to their Mac. This issue comes independent of the OS and has been reported across Monterey, Big Sur, and even Ventura. When the user are trying the mount the disk using the Disk Utility, they’re getting the Mac Diskmanagement.Disenter Error with one of these error codes – 119930868, 49218, 119930872, 49223, 0, etc.
Follow us on Telegram
The inability to access data on the unmounted external hard drive has been causing a great deal of inconvenience to the users. If you’re in the same boat, then this guide will be of great help to you. In this guide, you will get to know how to fix Diskmanagement.Disenter Enter 119930868, 49218, 49223, 0, etc.
Mac users have reported encountering the com.apple.DiskManagement.disenter error -119930868 when attempting to mount their Macintosh HD (disk0s2) in Disk Utility after upgrading to macOS Big Sur. This error prevents access to the drive, causing significant issues for those who have installed macOS on that drive. This error is not new, but its recent occurrence suggests a connection to the Big Sur upgrade. The causes and solutions for this error are not specified in the given text.
Method 1: Kill the fsck process

- To start off, launch Terminal and Disc Utility
- After that, try to mount the disk and straightaway switch to Terminal
- Then, execute the following command in the terminal window –
sudo pkill –f fsck
- The disk will now mount in read-only mode
- You can now repair it by using First Aid in Disk Utility
- Wait patiently as repairing could take time
- Once it is done, it will fix the errors
Method 2: By using Terminal
- To start off, boot your Mac to Recovery Mode
- Press and hold the power button until the Loading Startup Options appear -> Select Options -> Continue
- After that, click Utilities and choose Terminal
- Type in the following command –
diskutil list
- It’ll bring a list of all disks
- Note down the disk’s volume identifier
- Lastly, execute the following command (replace diskX with the volume identifier that you noted above)
diskutil repairVolume/diskX
Method 3: Make changes to the Disk Allocation Size
Some older Macs will struggle to mount the drive if the allocation size is larger than 1024. For resolving this, you should head over to a Windows or Linux machine and reformat the drive in ExFAT. Then, choose “1024” as the allocation size. Now, you should try to mount it on your Mac and this time, you won’t be getting any error codes.
Conclusion
In short, the com.apple.DiskManagement.disenter error can be a frustrating problem for Mac users who have upgraded to MacOS Big Sur. Although the causes of the error are not specified, there are possible solutions that can be tried before resorting to wiping the drive and reinstalling MacOS. If all other options have been exhausted and there is no important data on the drive, or it has been successfully recovered, wiping and reinstalling MacOS in recovery mode may be the most effective solution. Remember to always back up your data before attempting any troubleshooting steps. Thank you for reading this guide, and please feel free to share your thoughts and experiences in the comment section down below the article.

Aviral Sharma is a talented and passionate writer who has been using words to express his thoughts ever since he learnt how to hold a pen. He is passionate about outer space, history, sports and most importantly technology. Aviral is a regular writer for rootmygalaxy.net and has been getting better by the day.
In this guide, we will show you various methods to fix Diskmanagement.disenter error with error codes 119930868, 119930872, 49218, 49223, 0, etc. Many users have voiced their concern that they are unable to mount their external hard drives to their Mac. This issue is independent of the OS and has been reported across Big Sur, Monterey, and even Ventura.
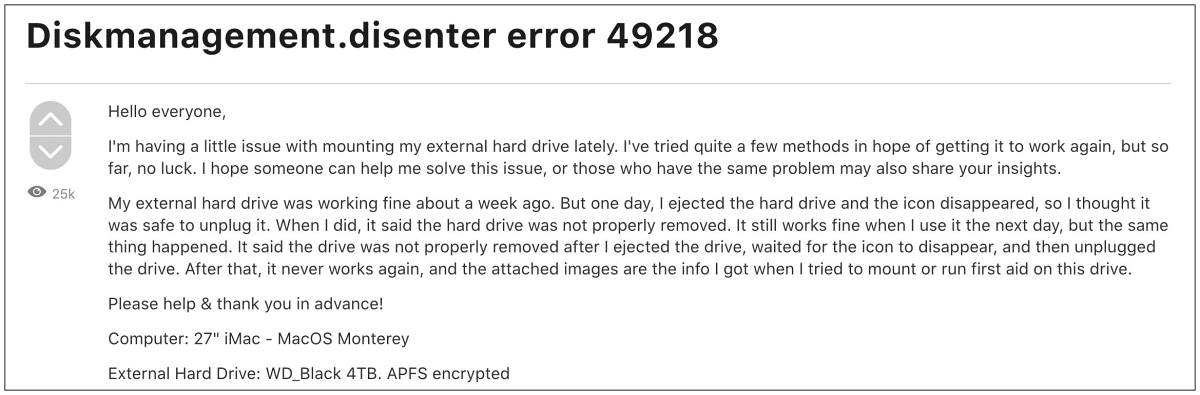
Whenever they are trying to mount the disk using the Disk Utility, they are greeted with the Diskmanagement.disenter error along with one of the following error codes 119930868, 119930872, 49218, 49223, 0, etc. The inability of the users to access data on the unmounted external hard drive is causing them a great deal of inconvenience. If you are also in the same boat, then this guide will help you out. Follow along for the fixes.
It is recommended that you try out each of the below-mentioned workarounds and then see which one spells out success. So with that in mind, let’s get started. Droidwin and its members wouldn’t be held responsible in case of a thermonuclear war, your alarm doesn’t wake you up, or if anything happens to your Mac and data by performing the below steps.
FIX 1: Kill the fsck Process
One of the most common reasons for this error could be due to the fact that “fsck” might be holding it hostage. So you will have to kill this process and retry mounting the disk. Here’s how it could be done:
- To begin with, launch both Terminal and Disk Utility.
- Then try to mount the disk and straightaway switch to Terminal.
- Now execute the below command in the terminal window:
sudo pkill -f fsck
- The disk will mount in read-only mode. You could now repair it via First Aid in Disk Utility.
- The repairing will take time. Once done, it should fix the Diskmanagement.disenter error.
FIX 2: Using Terminal
- To begin with, boot your mac to Recovery Mode as instructed below:
Apple Silicon: Press and hold the power button until “Loading startup options” appear. Then select Options > Continue.
Intel: Restart your Mac and while doing so press and hold the Command+R shortcut keys.
- Then click Utilities and select Terminal. Now type in the below command:
diskutil list
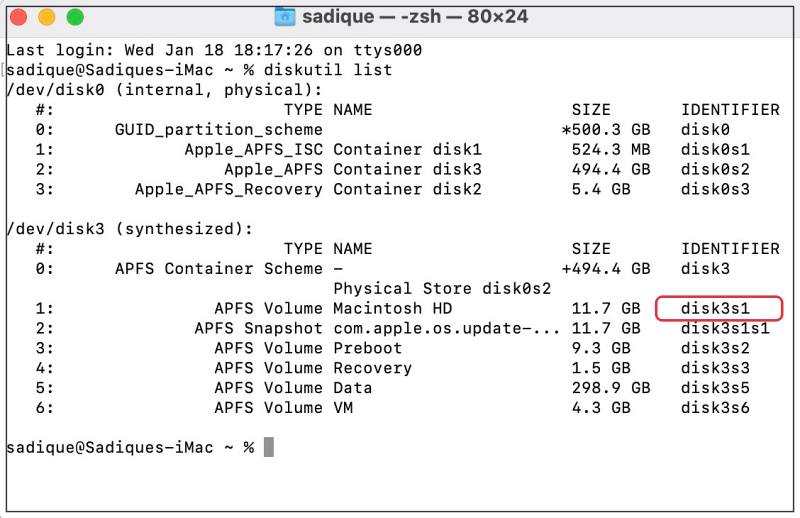
- It will bring up a list of all disks. Note down your disk’s volume identifier [such as disk3s1].
- Finally, execute the below command [replace diskX with your volume identifier].
diskutil repairVolume/diskX
- Check if it fixes Diskmanagement.disenter error 119930868, 119930872, 49218, 49223, 0.
FIX 3: Change the Disk Allocation Size
Some older Macs wouldn’t be able to mount the drive if the allocation size is larger than 1024. So to resolve this, go to a Windows or Linux machine (or use a Virtual machine) and reformat the drive in ExFAT and select 1024 as the allocation size. Now try mounting it on your Mac and this time you wouldn’t get any error codes.
That’s it. These were the three methods that should help you fix the Diskmanagement.disenter error with error codes 119930868, 119930872, 49218, 49223, 0, etc. If you have any queries concerning the aforementioned steps, do let us know in the comments. We will get back to you with a solution at the earliest.
- No Disk to Install macOS: How to Fix
- Western Digital Hard Disk Drive disconnecting randomly on Mac [Fixed]
- Cannot Format Drive using Disk Utility in Mac: How to Fix
- Disk Not Ejected Properly message after waking Mac from Sleep [Fixed]
About Chief Editor

Sadique Hassan
administrator
A technical geek by birth, he always has a keen interest in the Android platform right since the birth of the HTC Dream. The open-source environment always seems to intrigue him with the plethora of options available at his fingertips. “MBA by profession, blogger by choice!”