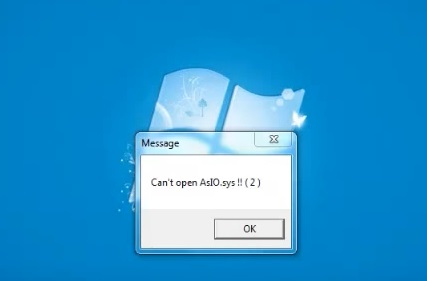
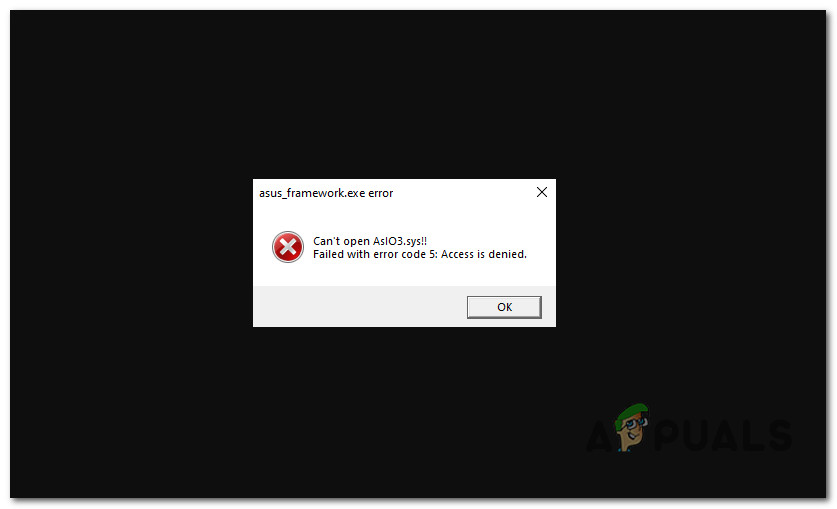
While installing or opening the ASUS utility or startup of Asus AI Suite and AURA the error comes with a popup notification saying Can’t open AsIO.sys !! ( 2 ).
This is a very common issue faced by a lot of Asus users. If you’re one of them and already get annoyed with this mess, then don’t worry.
In this article, we’re going to suggest to you all the relevant information about how to solve this error. So, stick with the article till the end.

Why Can’t Open AsIO sys 2 Error Occurs?
AsIO.sys is basically an Asus driver file that comes with the Asus motherboard preinstalled.
When the AsIO.dll file gets missing or corrupted or defective, the system can’t open or execute the AsIO.sys file, and then this error occurs.
To solve this error, you’ve to apply some effective methods. Jump to the next section to check them all.
How to Solve Can’t Open AsIO.sys !! ( 2 ) Error?
Here’re the possible solutions to this error. Check and apply them one by one until they get fixed.
Method 1: Unblock the Asus AI Suite
When you try to install the AI Suite and fail because of this error, then this method will get rid of it.
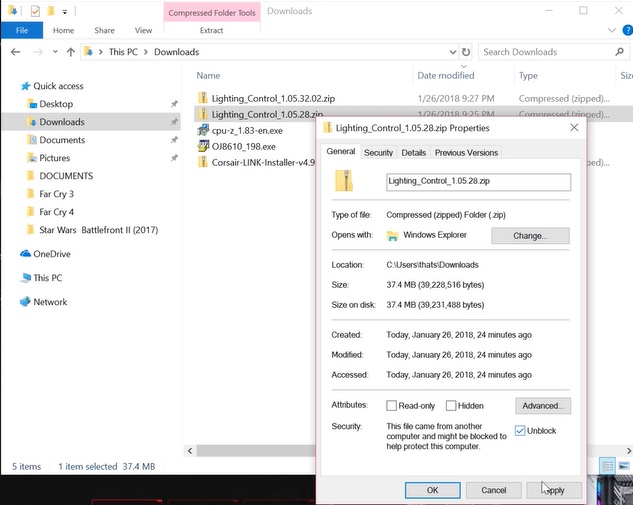
Step 1: Right-click on the downloaded AI Suite ZIP file.
Step 2: Select Properties.
Step 3: Mark the Unblock box at the bottom and click OK.
Step 4: Now, open the ZIP file and extract the folder.
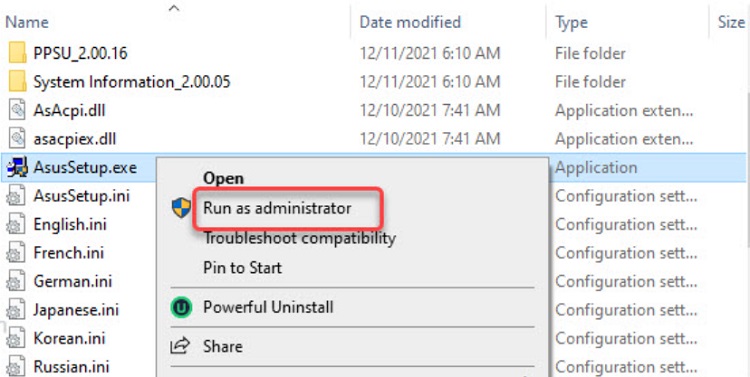
Step 5: Inside the folder, right-click on the AsusSetup.exe file and choose to Run as administrator.
In this way, you can successfully install the software.
Method 2: Replace AsIO.dll and AsIO.sys File
Another best solution to this error is replacing the AsIO.dll files and the AsIO.sys file according to the following ways –
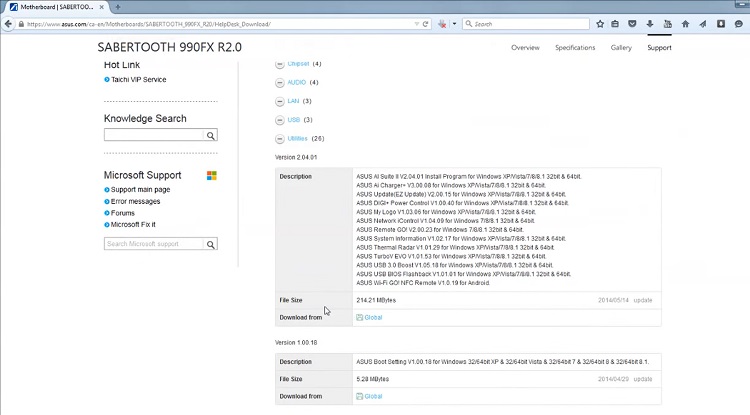
Step 1: Download the latest AI Suite package according to your motherboard from Asus’ official site.
Step 2: Open the ZIP file and extract the contained folder.
Step 3: After extracting, find the DrvResource folder inside this folder.
Step 4: Locate the folder named Io. It contains the AsIO.dll file.
Step 5: Now, navigate to the AI Suite Installation folder.
Step 6: Go to the search bar at the top-right corner and search for AsIO.dll.
Step 7: Then, replace all the AsIO.dll files with the one from DrvResource/Io.
Step 8: Ensure to replace all the AsIO.dll in the AI Suite installation folder.
Step 9: Now, navigate to local drive (C:) > Windows > SysWOW64 > drivers.
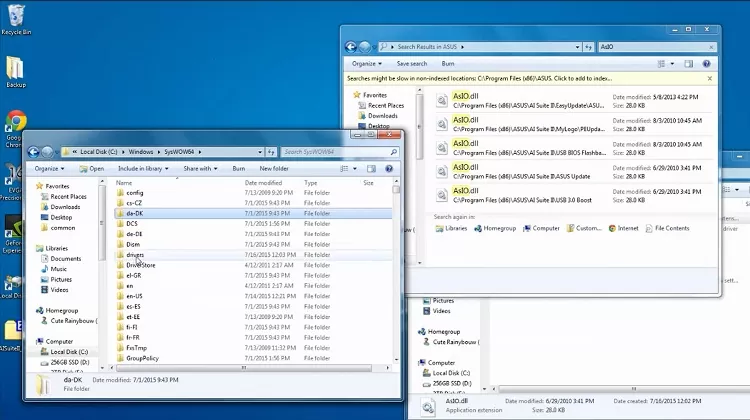
Step 10: Replace the AsIO.sys file with the one from DrvResource/Io according to your Windows version. Such as for 64-bit you should use AsIO64.sys file to replace. To do so –
- Delete the AsIO.sys file in drivers.
- Now copy the AsIO64.sys file from DrvResource/Io and paste it in drivers.
- Rename it as AsIO.sys.
Step 11: Close the windows and check if the error appears.
Method 3: Reinstall AI Suite
When the previous methods fail to solve the problem for you, it’s time to go for a fresh install of the program. But before doing so, you must do some initial things. Here’s the whole method –
Step 1: Uninstall the Asus AI Suite.
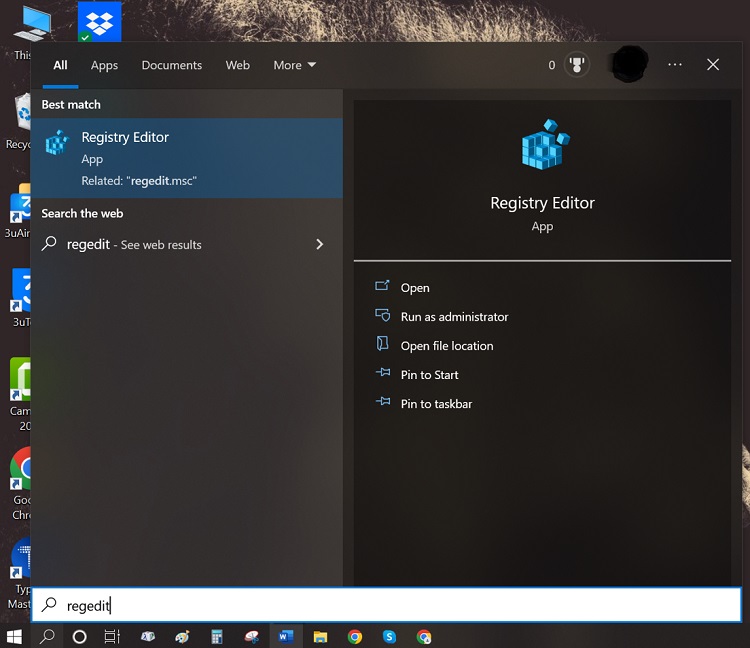
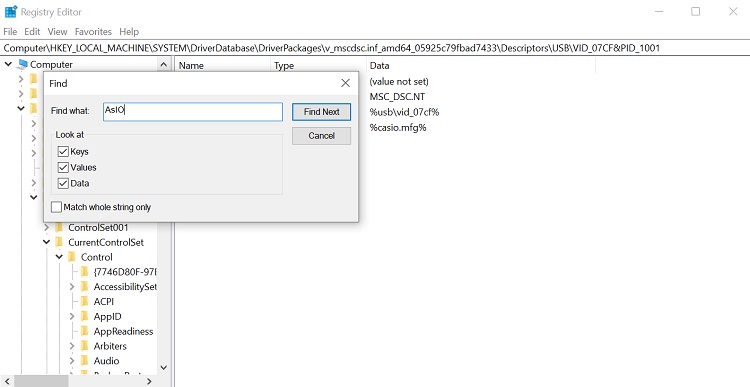
Step 2: Search for regedit in the search bar and select Registry Editor.
Step 3: Here, locate all entries related to AsIO.sys and delete them.
Step 4: Now, reinstall the Asus AI Suite.
There’s another method to solve this issue, but it’s a little bit more complex than the others. It’s not recommended to apply it first. Any of the first 3 methods should do the job for you. But if anyhow they all fail, you can try the following one.
Method 4: Grant Permission for AsIO.sys (Optional)
Step 1: First, log in with the administrative account.
Step 2: Navigate to the local drive (C:) > Windows > SysWOW64.
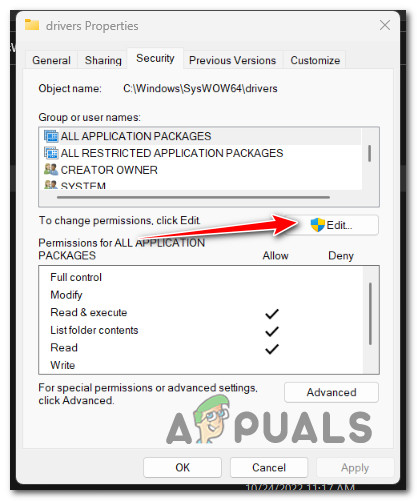
Step 3: Right-click on the drivers folder and select Properties.
Step 4: Open the Security tab and go to Edit.
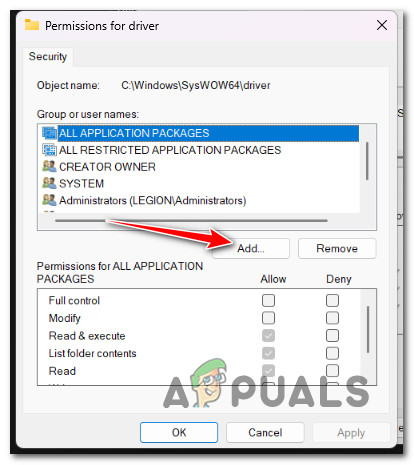
Step 5: Now, select Add.
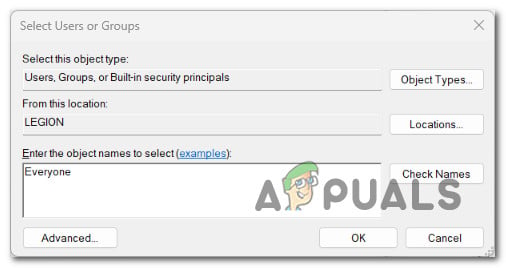
Step 6: Type Everyone in the box at the bottom and click OK.
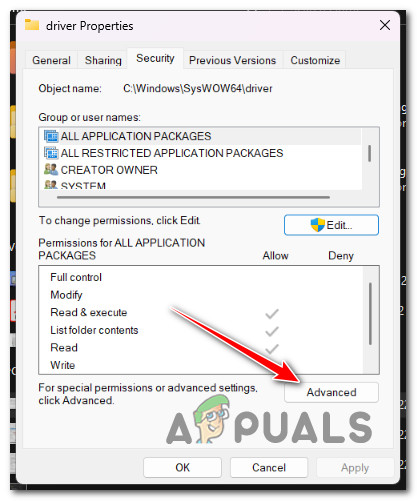
Step 7: Return to the Security tab and select Advanced.
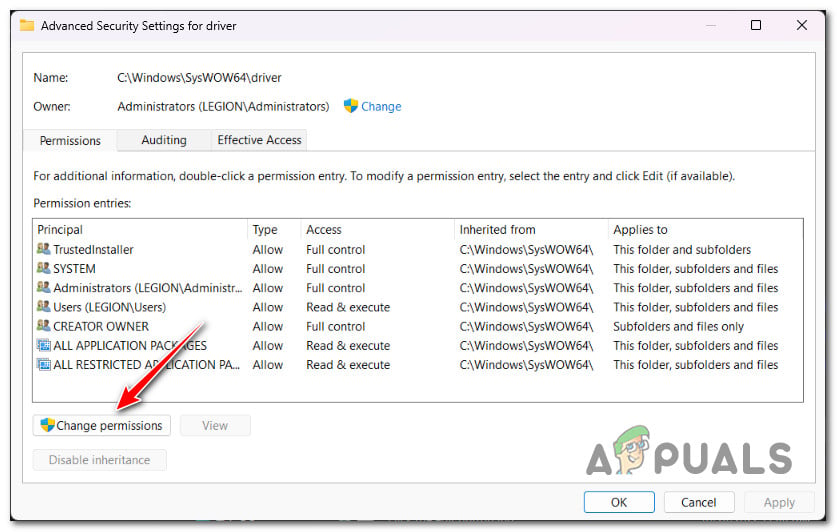
Step 8: Navigate Advanced Security Settings > Permissions. Select Change Permissions.
Step 9: Again, type Everyone in the box. Ensure the Replace owner on subcontainers and objects is marked.
Step 10: Open Auditing tab and select the owner as Add with Everyone.
Step 11: Set Everyone as the priciple and then locate Basic Authorization. Mark the Full control box.
Step 12: Finish the process and restart the computer.
Frequently Asked Questions (FAQs)
Can I delete the AsIO.sys file?
AsIO.sys is an important driver file of Asus Utility software. Without it, the software won’t function perfectly. So, you can surely delete it from the installation folder, but you shouldn’t if the utility program is essential for you. But you may delete it when it seems to cause a threat to your computer system.
How to launch ASIO panel?
The procedure is quite simple. First of all, press F10 and click on the speaker icon to access Audio Settings. Or you can access the Audio Settings from the Options menu. Then at the bottom-left, you can see the Show ASIO panel option. Click it to open the panel.
How to activate ASIO4ALL?
To do so, you should start by opening the Start menu and locating ASIO4ALL offline settings. After that, click the next button to choose your interface. Then open playback/input settings. Finally, choose ASIO4ALL as the playback/input device.
What is the cause behind Can’t open AsIO3.sys error?
It occurs when somehow your computer hard drives get corrupted or have bad sectors and affect the utility installation folder. That means if the AsIO3.sys file is being defective by the hard drive corruption then this error shows up.
Conclusion
That’s all about the error. If you’re able to apply these methods successfully, then you may overcome this problem with ease. If you think you get any help from this post then don’t forget to share your valuable feedback with us.
Пользователи Windows 10 могут иногда сталкиваться с ошибками asio.sys на своих компьютерах. Было бы хорошо узнать, что такое asio.sys, прежде чем перейти к решению.
Asio.sys — это драйвер, специфичный для компьютеров ASUS. Поврежденные файлы и неисправное оборудование часто вызывают эту ошибку. Это часто приводит к ошибкам Blue Screen of Death.
Стоит отметить, что ошибка Asio.sys также может быть вызвана заражением вредоносным ПО, повреждением жесткого диска и повреждением памяти.
Вот подробный список процесса устранения неполадок для решения проблем asio.sys. Имейте в виду, что эти шаги довольно сложны. Итак, выполняйте каждый шаг.
Решение 1. Обновите драйверы системного устройства.
Ошибка типа «синий экран» asio.sys, влияющая на вашу систему, может быть вызвана устаревшими драйверами устройств .
По многим причинам драйверы, которые работают нормально, могут просто перестать работать в следующую минуту. Но вы можете обновить драйвер устройства, чтобы исправить проблему BSOD.
Независимо от того, являетесь ли вы экспертом в поиске, загрузке и обновлении драйверов, процедура все равно может быть очень напряженной и расстраивающей. Ухудшение проблем при загрузке не того драйвера или несовместимой версии драйвера.
Таким образом, из-за сложности и нехватки времени рекомендуется использовать инструмент обновления драйверов для ускорения процесса.
Средство обновления драйверов автоматически обновит все драйверы устройств на вашем компьютере, а не только драйверы, связанные с ошибкой asio.sys.
Одно из самых надежных обновлений драйверов, которое мы тестировали в Tweakbit.
TweakBit Driver Updater — это комплексное решение для автоматического обновления. Обновление драйверов оптимизирует ваш компьютер, обеспечивая правильную работу устройств в соответствии с последними функциями.
- Скачать сейчас TweakBit’s Driver Updater
Решение 2. Исправьте записи реестра
Иногда ошибки Asio.sys Blue Screen могут быть связаны с проблемами в реестре Windows. Таким образом, вам нужно будет исправить любые проблемы реестра, прежде чем вы сможете исправить эту системную ошибку.
Если вы не являетесь экспертом в этом, не пытайтесь редактировать реестр Windows вручную, чтобы избавиться от недействительных ошибок asio.sys. Если вы неправильно отредактируете свой реестр, ваш компьютер может перестать функционировать, и это может привести к необратимому повреждению вашей ОС.
Поэтому по этой причине мы рекомендуем вам использовать надежное средство очистки реестра для сканирования и исправления проблем реестра asio.sys. Когда вы используете очиститель реестра, процедура поиска отсутствующих файлов, неработающей ссылки в реестре или недействительных записей реестра может стать проще.
Если вы не знаете, какой Registry Cleaner установить на свой компьютер, ознакомьтесь с этим руководством.
Решение 3: Запустите полное сканирование вредоносных программ на вашем компьютере
Ошибка остановки файла asio.sys может быть вызвана заражением вашего компьютера вредоносным ПО.
Запустите полное сканирование системы с использованием антивирусных и вредоносных программ . Затем перезагрузите компьютер и проверьте, сохраняется ли проблема.
Не знаете, какой антивирус установить на свой компьютер? Это руководство поможет вам.
Решение 4. Удалите недавно установленные программы
Удаление сторонних приложений может быть правильным решением, если ошибка BSOD asio.sys связана с определенной программой.
Просто зайдите в Панель управления, перейдите в раздел «Программы и компоненты», выберите программу, которую вы недавно установили, и удалите ее с вашего ПК. 
Перезагрузите компьютер.
Решение 5: Запустите SFC
Средство проверки файлов Windows — это доступный инструмент Windows, который может сканировать и восстанавливать системные файлы Windows.
Чтобы запустить SFC, откройте командную строку как администратор и введите sfc / scannow . Нажмите Enter. 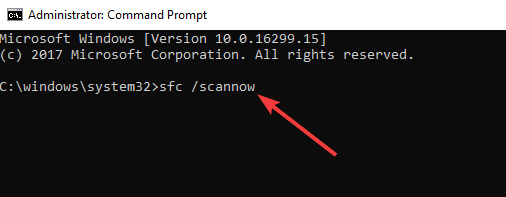
На этом этапе средство проверки системных файлов начинает сканирование системных файлов. Это должно занять несколько минут, так что наберитесь терпения.
Решение 6. Установите все доступные обновления Windows
Время от времени Microsoft обновляет и улучшает системные файлы Windows, которые могут быть связаны с asio.sys. Время от времени найти подходящее решение проблемы asio.sys может быть легко, как обновить Windows с помощью текущего пакета обновления или любого другого патча, выпущенного Microsoft.
Итак, зайдите в Настройки и проверьте наличие обновлений. 
Решение 7. Проверьте наличие повреждений жесткого диска
Как упоминалось ранее, проблемы asio.sys могут быть вызваны проблемами с повреждением жесткого диска.
К счастью, в Microsoft встроен простой сервис, известный как Check Disk, который может исправить проблемы с повреждением жесткого диска.
Чтобы использовать его, запустите командную строку как администратор рекламы и введите chkdsk / f . 
CheckDisk начнет сканирование на наличие повреждений жесткого диска.
Решение 9. Проверьте RAM на наличие повреждений
Повреждение памяти может привести к ошибкам BSOD asio.sys. Если вы сталкиваетесь со случайной перезагрузкой компьютера, сбоем компьютера, получением «звуковых» кодов при запуске, а также проблемами BSOD asio.sys, это может указывать на повреждение памяти компьютера.
Для получения дополнительной информации о том, как исправить проблемы с ОЗУ, ознакомьтесь с руководствами ниже:
- Как исправить поврежденный дамп памяти эффективно и результативно
- Решите: у вашего компьютера недостаточно памяти в Windows 10, 8.1 или 7
Мы надеемся, что эти решения помогут вам решить проблемы с asio.sys. Обратная связь от вас будет оценена.
AsIO.sys — файл программы Asus PC Probe, которая устанавливает драйвер для материнской платы ASUS и служит для мониторинга компонентов ПК. Если вы меняли компоненты компьютера и не удалили программу Asus PC Probe, то столкнетесь с кодом ошибки SYSTEM SERVICE EXCEPTION и указанием на файл AsIO.sys в Windows 10/8.1/7.
Как исправить ошибку AsIO.sys в Windows 10
Нужно удалить программу Asus PC Probe, чтобы избавиться от синего экрана, но как это сделать, если все новые компоненты установлены и нет возможности загрузиться на рабочий стол. Если вы опытный пользователь и вы можете загрузиться на рабочий стол, то удалите программу Asus PC Probe через инсталлятор, но я покажу, что делать, когда нет возможности попасть на рабочий стол.
1. Включите и выключите компьютер 4-5 раза, доходя до ошибки или загрузки логотипа Windows. Далее вас перебросит в дополнительные параметры загрузки, где вы должны выбрать «Параметры загрузки» > «Перезагрузить» > и нажать F4 «Безопасный режим«. Это даст вам возможность загрузиться на рабочий стол и вы сможете удалить Asus PC Probe.
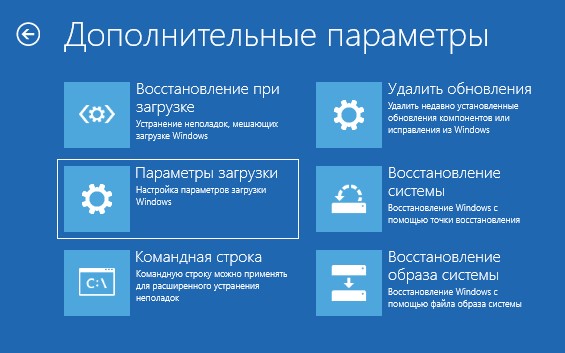
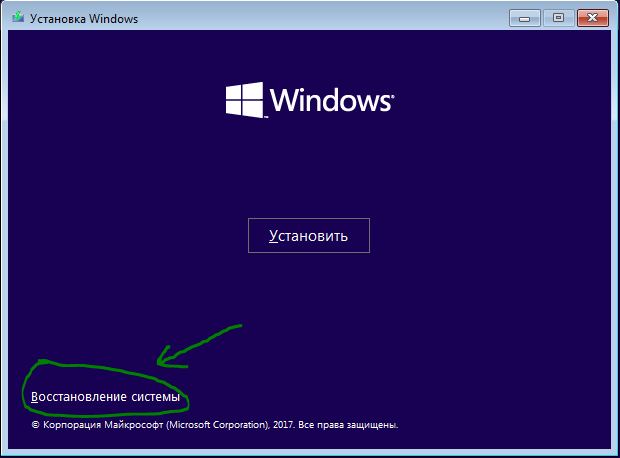
2. Если вы не можете попасть в дополнительные параметры, то нужно создать установочную флешку и на пункте установки нажать снизу на «Восстановление системы». Далее вас перекинет в дополнительные параметры, где вы можете запустить безопасный режим, как в пункте 1.
Смотрите еще:
- Исправить ошибку nvlddmkm.sys синего экрана Windows 10
- Исправить ошибку Dxgkrnl.sys на синем экране Windows 10
- Исправить ошибку fltMgr.sys на синем экране Windows 10
- Ошибка win32kfull.sys на синем экране в Windows 10
- Ошибка dxgmms2.sys на синем экране Windows 10
[ Telegram | Поддержать ]
Некоторые пользователи Asus столкнулись с ошибкой: не удается открыть AsIO3.sys при работе на компьютере с Windows 11/10. Это ошибка, которая может помешать вам использовать компьютер, так как система не сможет получить доступ к этому файлу. Когда возникает ошибка такого типа, что-то не так с записями реестра или системными файлами, связанными с операционной системой. В этой статье мы объясним причины, по которым файл AsIO3.sys может быть недоступен, и способы решения этой проблемы.
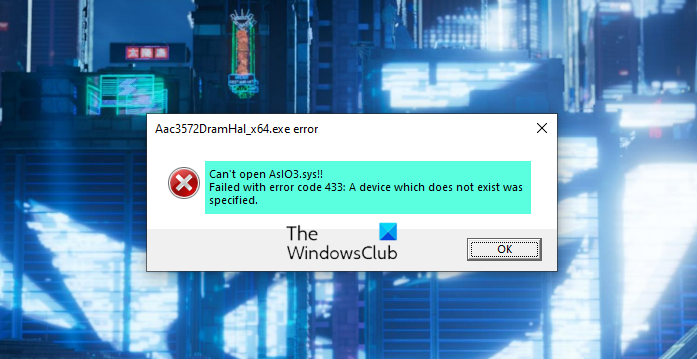
Не удается открыть AsIO3.sys! Ошибка с кодом ошибки 433, Указано несуществующее устройство
Полная проверка системы, обновление драйверов и удаление недавно установленных программ могут помочь решить эту проблему. Читайте дальше, чтобы узнать все, что вам нужно знать об ошибке AsIO3.sys на компьютерах ASUS и о том, как ее исправить.
Что такое AsIO3.sys и почему он не открывается?
AsIO3.sys — это драйвер, разработанный специально для компьютеров ASUS. AsIO расшифровывается как ввод-вывод Asus. Как часть предустановленного программного обеспечения на вашем компьютере ASUS, это приложение отслеживает температуру оперативной памяти и скорость графического процессора. Он также управляет другим оборудованием, например скоростью внутренних вентиляторов. Этот инструмент упрощает мониторинг и управление компьютером ASUS, поскольку он уведомляет вас о возникновении проблем, связанных с оборудованием.
Были сообщения о том, что пользователи сталкивались с сообщением об ошибке «Не удается открыть AsIO3.sys» при попытке запустить свой компьютер. К этой ошибке могут привести несколько факторов, в том числе заражение вредоносным программным обеспечением, неисправность жестких дисков и повреждение памяти. Ознакомьтесь с этой статьей, если вы столкнулись с этой ошибкой на своем компьютере ASUS.
Если вы не можете открыть ошибку AsIO3.sys на компьютерах ASUS, следуйте приведенным ниже советам. Прежде чем применять эти методы, обязательно сделайте резервную копию своих данных на случай, если с ними что-то пойдет не так и ваши данные будут потеряны.
- Переустановите драйвер или программное обеспечение ASUS.
- Отключить или удалить Asus TUF Armoury Crate
- Обновите драйверы вашего устройства
- Запустите средство проверки системных файлов
- Выполнить восстановление системы
Рассмотрим подробнее каждый метод:
1]Переустановите драйвер или программное обеспечение ASUS.
Этот метод требует переустановки драйвера или программного обеспечения Asus, которое включает или устанавливает этот файл AsIO3.sys.
2]Отключить или удалить Asus TUF Armoury Crate
Решение этой проблемы — отключить или удалить Asus TUF Armoury Crate & Aura Creator. Ниже приведены шаги, которые вы можете предпринять, чтобы удалить все приложения и службы Armoury Crate:
- Откройте веб-браузер и перейдите к оружейному ящику. веб-сайт поддержки.
- На Драйвер и утилита нажмите на раскрывающееся меню.
- Здесь вы найдете два варианта, Windows 11 64-разрядная или же Windows 10 64-разрядная версиявыберите тот вариант, который соответствует вашим потребностям, чтобы загрузить инструмент удаления Armoury Crate.
- Нажми на Скачать кнопку, чтобы получить файл.
- Как только вы загрузите его, откройте проводник (Windows+Е ключи) и перейдите к Загрузки папка.
- Распаковать “Armoury_Crate_Uninstall_Tool.zip» и дважды щелкните «Armoury Crate Uninstall Tool.exe», чтобы начать процесс удаления.
- После завершения удаления перезагрузите систему.
Примечание. Официальный инструмент для очистки AC — лучший способ удалить ящик Armory.
3]Обновите драйверы вашего устройства
Неисправный или устаревший драйвер также может быть причиной этой ошибки синего экрана. В таком случае у вас есть два варианта на выбор:
4]Запустите средство проверки системных файлов
Если приведенные выше решения не работают, похоже, ваша система повреждена. Чтобы устранить повреждение системных файлов, вы можете использовать утилиту проверки системных файлов, выполнив следующие действия:
Для начала запустите командную строку от имени администратора.
В командной строке скопируйте и вставьте следующую команду:
sfc/scannow
Теперь нажмите клавишу Enter, и он просканирует систему на наличие поврежденных файлов. Когда сканирование будет завершено, перезагрузите компьютер и посмотрите, решена ли проблема.
5]Выполните восстановление системы
Это решение очень эффективно для устранения многих проблем на ПК с Windows, включая такие ошибки BSOD. Так что, если ничего не помогает, просто восстановите свою систему до прежнего состояния. Таким образом, вы сможете восстановить свою систему в прежнее состояние, которое в то время функционировало должным образом.
Как скачать аудиодрайверы Asus?
Следующие шаги помогут вам выполнить загрузку аудиодрайверов Asus для Windows 11/10:
- Прежде всего, посетите asus.com.
- Затем найдите свой продукт по серийному номеру.
- На следующей странице нажмите Драйверы и утилиты.
- Выберите операционную систему, а затем загрузите аудиодрайвер.
Сообщение по теме: Как исправить ошибку «синий экран» Tcpip.sys на компьютере с Windows
The error “can’t open AsIO.sys” can occur at startup, installing or opening an ASUS utility. If you’re experiencing this error, don’t worry. The tips below may help you fix the error.
What’s AsIO.sys?
AsIO.sys is a driver file that belongs to ASUS. Usually it’s preinstalled on your ASUS computer and installed along with the ASUS motherboard. The error “can’t open AsIO.sys” is one of the common errors that ASUS users have reported. It usually occurs to AURA & AI Suite.
You may encounter this error whenever you start your computer, or when you install AURA or AI Suite. Select one of the links below for the fix depending on your situation.
Fix: If you run into this error when you open AURA or AI Suite
Fix: If you run into this error when you install AURA or AI Suite
Fix: If you run into this error When you start your computer
Fix: If you run into this error when you open AURA or AI Suite
The message “can’t open AsIO.sys” can pop up at opening AURA or AI Suite. To fix the error, you just need to run the utility as administrator.
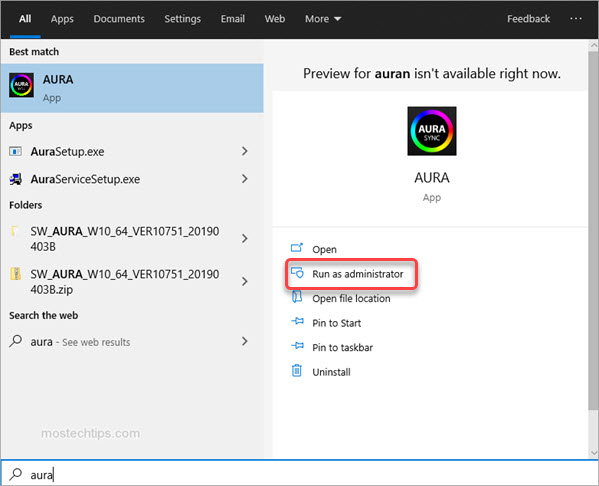
1) On your keyboard, press the Windows logo key.
2) Type the utility you have the problem with (AURA or AI Suite), and then click on Run as administrator. Then you should be able to open the program.
Fix: If you run into this error when you install AURA or AI Suite
Many users have reported that this error occurs when they install AURA or AI Suite (I, II or III). If you also can’t install AURA or AI Suite due to this error, you can follow these steps to fix it.
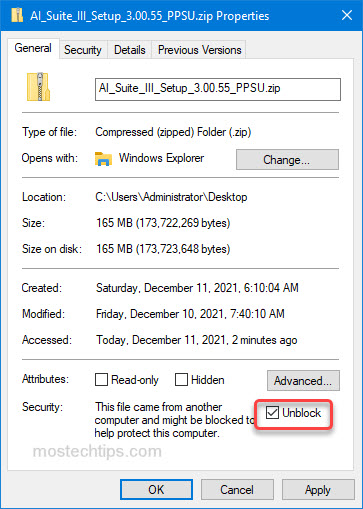
1) Right-click on the downloaded file of the utility (the zip file) and select Properties.
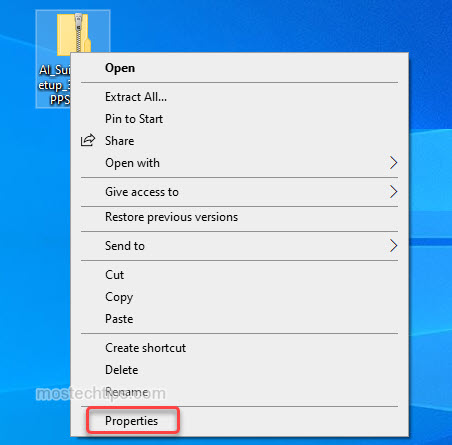
2) At the bottom, tick the “Unblock” checkbox, and then click OK to save the changes.

3) Extract the zip file.
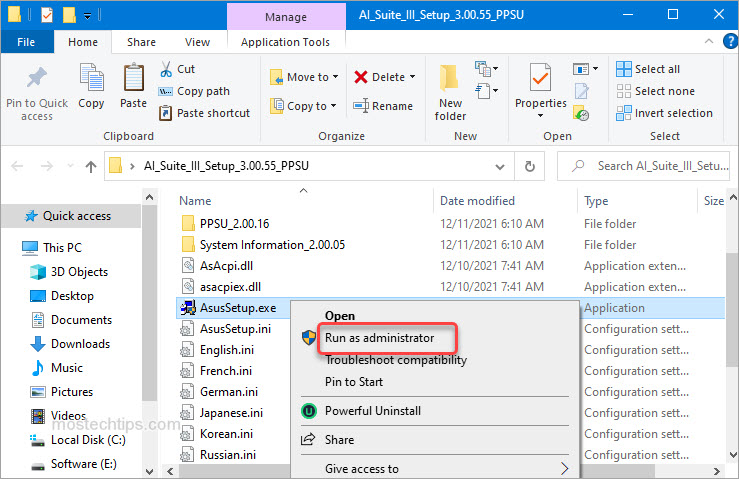
4) Open the extracted folder and then locate the file called “AsusSetup.exe”.
5) Right-click on “AsusSetup.exe” and select Run as administrator. Then you should install the utility successfully.

Fix: If you run into this error When you start your computer
If this error message pops up at startup, the ASUS utilities (usually, AURA or AI Suite) could be the culprit.
If you have multiple ASUS utilities installed, to figure out which utility is causing the problem, you can uninstall them one by one then you can determine which one is causing the problem. If you only have one ASUS utility installed, just uninstall it and reinstall it as administrator.
Here’s how to do it:
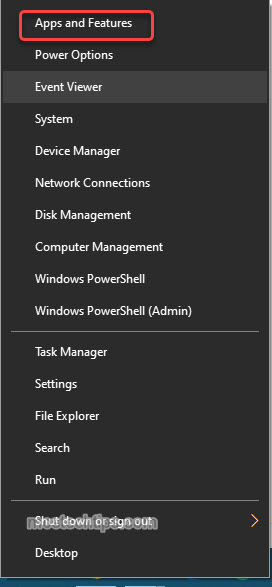
1) Right-click on the Start menu button and select Apps and Features.
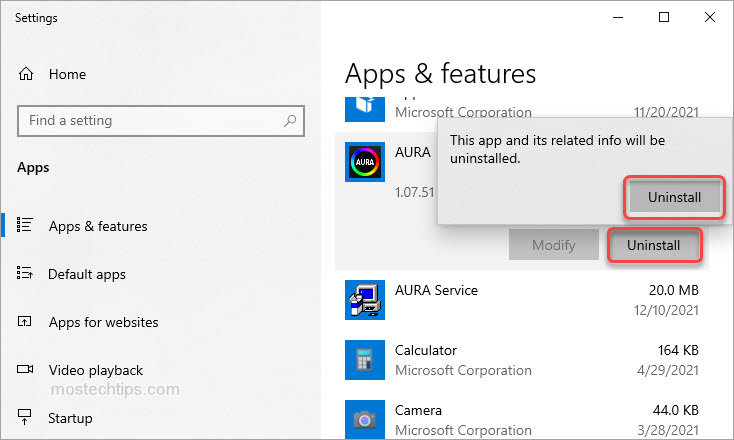
2) Scroll down and select one of the ASUS utilities.
3) Click Uninstall, then the confirmation dialog will pop up, then click Uninstall again.
4) Once the uninstallation is done, restart your computer and check to see if the error still occurs.
If the error still occurs, it means that utility is not the cause. If you have multiple ASUS utilities installed, repeat the steps above until you figure out the one that’s causing the problem.
Once you figure out and uninstall the utility that’s causing the problem, you can reinstall it by following these steps:
a) Right-click on the downloaded file of the utility (.zip file) and select Properties.

b) At the bottom, tick the “Unblock” check box, and then click OK to save the changes.
c) Extract the zip file.
d) Open the extracted folder and locate the file called “AsusSetup.exe”.
e) Right-click on “AsusSetup.exe” and select Run as administrator.
Hopefully you can fix the “Can’t open AsIO.sys” with the above tips. If you have any questions, feel free to drop a comment below. I’ll get back to you ASAP.
If you’re getting the ‘Can’t open AsIO3.sys – Failed with error code 5: Access is denied‘ error when attempting to install AURA Sync or another ASUS-related software on your PC; this article will help you fix it. We will dive into all the variations of this issue (on Windows 10 and Windows 11) and feature every confirmed fix that other users have used successfully.
As you’ll see below, this error has a huge variety of potential culprits, as there are a lot of potential conflicts that might cause the “Can’t open asio3.sys” error.
1. Unblock the zip file
One of the most popular reasons this issue occurs is because the .zip file that you download (containing software that uses the AsIO3.sys) is blocked.
This issue is known to occur with older software builds – Until recently, every .zip file downloaded from the official ASUS support website was blocked.
To fix this issue and get around the ‘Can’t open AsIO3.sys‘, you’ll need to access the Properties screen of the .zip file and unblock it before carrying on the installation.
For specific instructions on how to do this, follow the steps below:
- Open File Explorer and navigate to the location of the .zip file.
- Right-click on it and choose Properties from the context menu that just appeared.
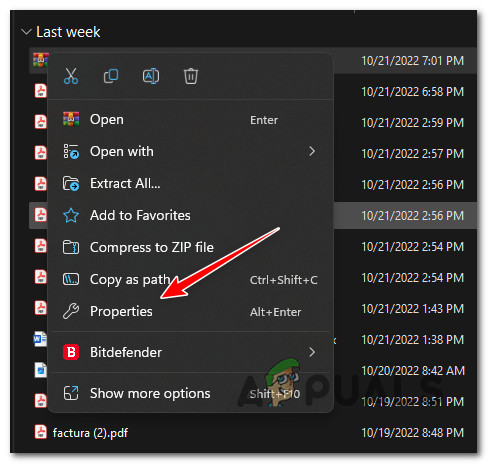
Access the Properties screen - Once you’re inside the Properties screen of the .zip file, access the General tab.
- Scroll down to the bottom of the page and see if you have a Security entry.
- Check the Unblock button before clicking on Apply if you spot a Security layer.
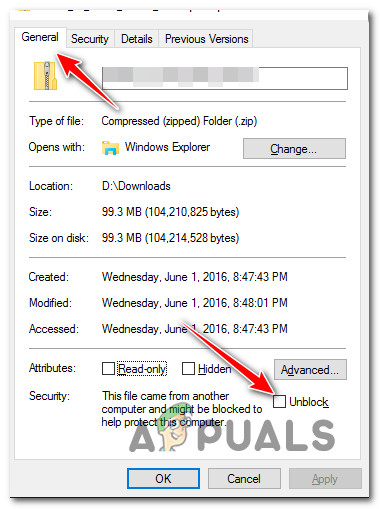
Unblock the .zip file - At the confirmation prompt, click Yes, then wait until the file is unblocked.
- Double-click on the recently unblocked .zip file and extract the files before carrying on the installation normally.
- Double-click on the executable and see if it produces the same ‘Can’t open AsIO3.sys’ error.
If the problem is still not fixed, move to the next method below.
2. Grant yourself full permission for AsIO.sys (if applicable)
If the method above didn’t work for you and you already have installed ASUS drivers, the problematic AsIO.sys file is already installed on your PC.
You might be experiencing this issue because the file doesn’t have full permission to jump into action when called by Windows Installer (during the installation of another ASUS software).
Note This is typically confirmed to occur on systems with aggressive UAC (User Account Control) settings.
To address this issue, go to C:WindowsSysWOW64driversAsIO.sys and give yourself permission through the security tab. This fix was confirmed to work by most users dealing with the ‘Can’t open AsIO3.sys‘ error.
Important: This method is only applicable if you previously installed another ASUS software and the AsIO.sys supporting file is already installed on your PC.
Here’s what you need to do:
- Start by ensuring that you are logged in with an administrative account.
- Open File Explorer (Windows key + E) and navigate to the following location:
C:WindowsSysWOW64
Note: If you can’t spot the AsIO.sys file inside this directory, this method does not apply to you. In this case, skip to the next method below.
- Right-click the drivers folder and choose Properties from the menu that appears.

Access the Properties screen of drivers - On the Properties screen of the drivers folder, go to the Security tab and click the Edit button (near Change Permissions, click Edit).
Click on the Edit button - On the Security tab, click the Add button next to Group or user names.
Adding new security for user - In the Select Users or Groups window, type Everyone in the box next to Enter the object names to select (examples), and click OK to save the changes.
Apply security rule for everyone - Click “Apply” to keep your changes.
- Go back to the volume’s Properties and click on the Security tab. This time, click on the Advanced button (associated with Special permissions or advanced settings)
Access the Advanced Permissions settings - Go to the Permissions tab in the Advanced Security Settings box and click on Change Permissions.
Changing Permissions - In the “Enter the object name to select” field of the “Select User or Group” window, type “Everyone.”
- Make sure the Replace owner on subcontainers and objects option is checked.
- Click the Auditing tab and click Add with Everyone as the owner.
- Choose Everyone as the Principal under the Auditing Entry, then go to the Basic Authorization section and check the box next to Full control.
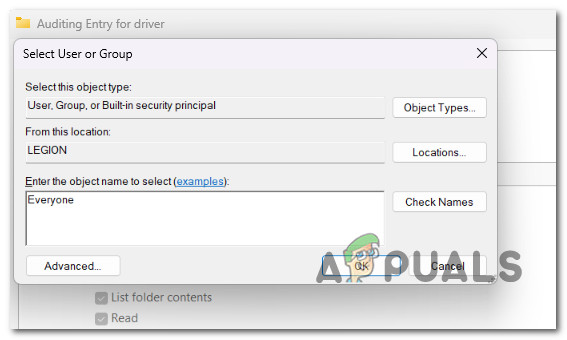
Setting up the ‘Everyone’ value as Principal for every group - Finally, click Ok and then Apply to save the changes.
- Restart your computer and attempt to install the ASUS software once again.
If you’re still seeing the ‘Can’t open AsIO3.sys’ error, try the next method below.
3. Perform SFC & DISM scans
If you’ve reached this point without a workable solution, you should check to see if a corrupted system file prevents you from installing ASUS software (and triggering the ‘Can’t open AsIO3.sys’ error).
If you don’t want to use third-party tools, it would be smart to use a few of your operating system’s tools. (SFC and DISM).
System File Checker and Deployment Image Servicing and Management are two built-in tools that can be used to fix corrupt system files that may stop your OS from utilizing Windows Install dependencies.
System File Checker is the best place to start because it can be run without an internet connection. Follow these steps to deploy an SFC scan.
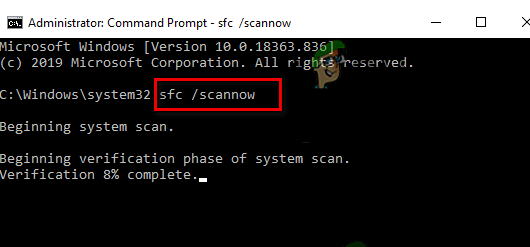
Important: If the System File Checker scan window stops responding while running, DO NOT CLOSE THE WINDOW until the procedure is done.
Note: System File Checker swaps out broken parts of system files with working ones by using a cache that is stored locally. This process shouldn’t be stopped until it’s done to avoid making more logical mistakes. Using an old HDD instead of a modern SSD could take an hour or more (depending on how fast your storage device can read and write).
When the SFC scan is done, restart your computer to see if the ‘Can’t open AsIO3.sys’ error is fixed.
If the problem is still there, deploy a DISM scan.
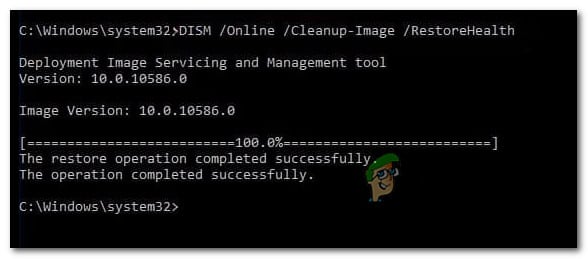
Before you start this process, you should know that DISM uses a part of Windows Update to replace corrupted files with ones that aren’t corrupted. This means that your Internet connection needs to be stable.
After the SFC and DISM checks, you should restart your computer to see if you’re still experiencing the ‘Can’t open AsIO3.sys’ error.
If the problem keeps happening, move on to the next method below.
4. Install ASUS Armory Crate (if applicable)
Even if you’re not a fan of bloatware (we aren’t either), you should still consider installing the ASUS Armory Crate utility – it will most likely fix the issue automatically.
Note: Armoury Crate is an integration app for gaming laptops and desktops in the ROG and TUF series. It combines different functions, such as the ROG Gaming Center from Gaming NB, the AEGIS III from Gaming DT, Lighting, and AURA Sync from AURA. Installing it serves our purpose of installing all the required dependencies (including the asio3.sys dependency).
The only bad thing about this integration app is that it also installs some bloatware from ASUS. But for the most part, these are non-intrusive and won’t slow down your system.
Follow the instructions below to download and install ASUS Armory Crate:
Important: Only follow the instructions below if you are experiencing this issue on a ROG or TUF gaming laptop.
- Open your browser and navigate to the official download page of ASUS Armory Crate.
- From the Please select OS drop-down menu, select your operating system.
- Next, click on the Download button associated with the recommended version of Armory Crate.
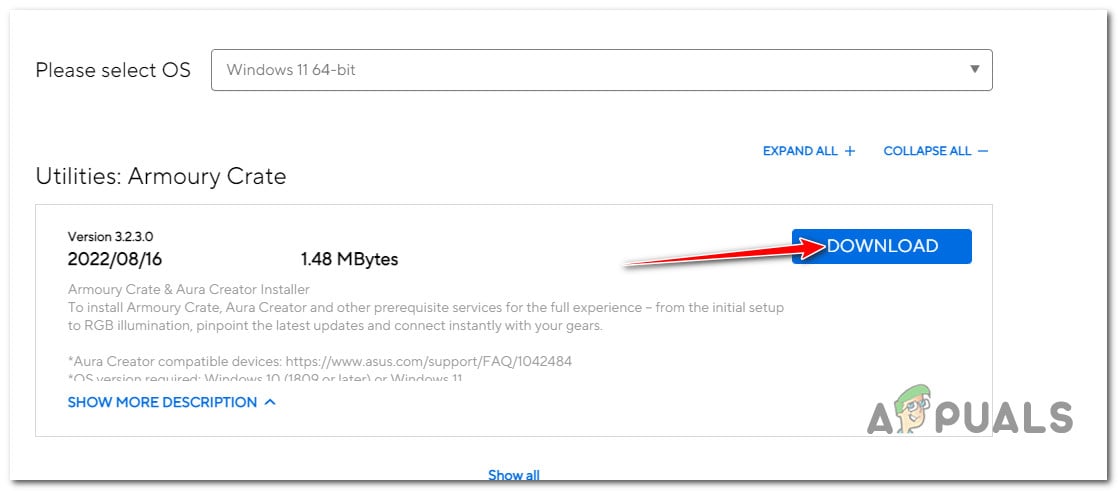
Downloading the ASUS Armory Crate installation executable - Once the executable has been downloaded, extract it using the built-in utility or a 3rd party suite like WinZip or WinRar.
- Next, right-click on the ArmouryCrateInstaller.exe and click on Run as Administrator from the context menu.
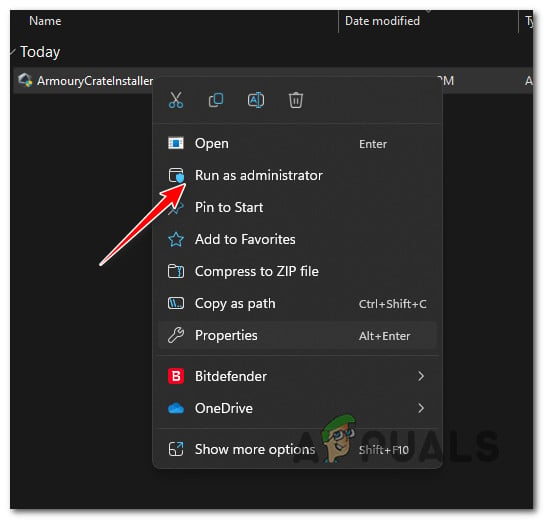
Run the executable as administrator - Follow the remaining instructions to complete the installation, then reboot your PC.
- Once the next startup is complete, repeat the previous action causing the ‘Can’t open AsIO3.sys – Failed with error code 5: Access is denied’ error and see if the problem is now fixed.
If the problem is still not fixed, move down to the next method below where we explore a potential issue caused by Windows Update.
5. Uninstall the latest Windows Security Update
This problem is also caused by a bad Windows security update that Microsoft released for Insider Previews and retail versions on some ASUS laptop models.
If the “Can’t open AsIO3.sys” error started showing up after your operating system installed a security update, uninstalling it should fix the problem for you.
Follow the steps below to get rid of the latest Windows update:
Important: You can hide the update and stop it from being installed again by following the extra instructions.
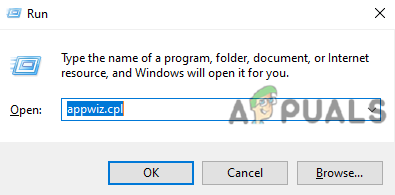
- Use the Windows key + R to get to the Run box and the Programs and Features page.
- Then type “appwiz.cpl” into the text box where you just typed it.
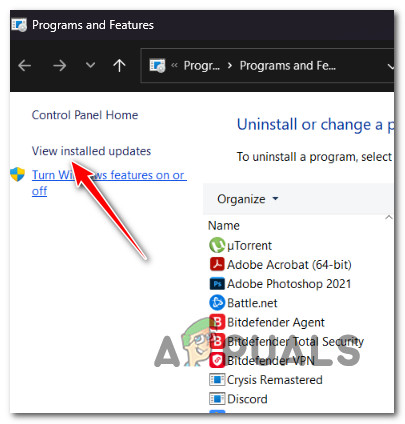
Open the Programs and Features menu - Go to Programs and Features, and then choose View installed updates from the left-hand menu.
View the recently installed Windows Updates - On the Installed Updates page, look for the most recent update and right-click on it. From the menu that pops up, click Uninstall.
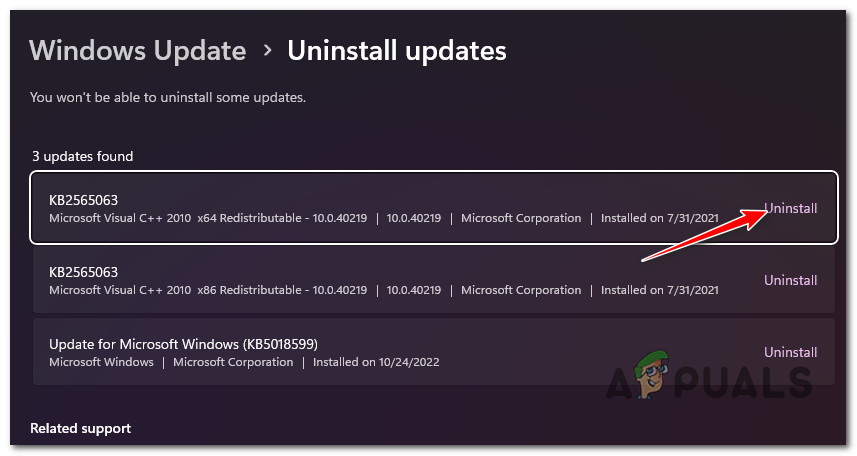
Uninstall the Windows Update that was installed recently - When asked if you want to get rid of the update, choose “Yes.” Let the uninstalling process finish by saying “Yes” when asked to do so.
- It would be best if you didn’t restart your computer after removing the update. Instead, go to the official site where you can download the Microsoft Show or Hide troubleshooter.
- We should start downloading the tool we’ll be using right away.
- After the process, open the .diagcab file and click on Advanced.
- Select the box next to Apply Repairs Automatically and then click Next.
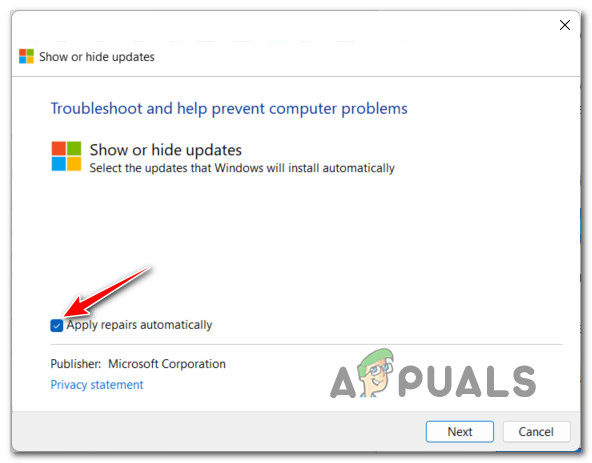
Applying the repairs automatically when using Windows Show / Hide Troubleshooter Note: The program will look through your computer for updates that haven’t been downloaded yet. Choose Hide Updates from the list of options on the next screen to hide updates.
- On the next page, click Next and check the box next to the most recent Windows update. If you do this, the system won’t try to install the same update again.
- Restart your computer once to see if the problem has been fixed.
If the problem is still not fixed, move to the next method below.
6. Install ASUS AI Suite addon (if applicable)
If you followed the method above to troubleshoot an issue caused by a bad windows update, let’s troubleshoot against a potential issue caused by ASUS AI Suite.
If you have this tool installed on your PC, you might want to check if the tool has an available add-on waiting to be installed.
Note: ASUS has released an add-on to tackle this issue for certain laptop models. This will be applied to your existing installation using the manual updating solution from ASUS.
Remember that ASUS AI Suite doesn’t have a dynamic self-updating feature. If you want to ensure that they’re updated to the latest version, you’ll need to run the AsusSetup executable (which can be found inside the download folder) and follow the instructions to install every pending addon.
Here’s what you need to do to install pending add-ons for your ASUS AI suite:
- First, close any currently running 3rd party applications (including ASUS AI Suite).
- Open your browser and download the latest compatible version of ASUS AI Suite (according to your motherboard or laptop model) from the official ASUS download website.
- Next, navigate to the location where you downloaded the latest version of AI Suite and extract the .zip archive.
- Access the extracted folder, right-click on AsusSetup, and click on Run as Administrator from the context menu that just appeared.
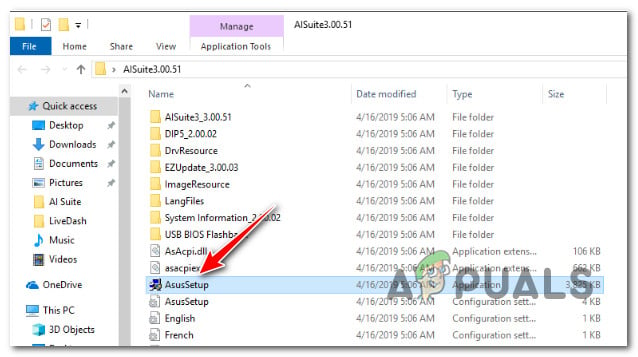
Run the AsusSetup executable with administrative access - Click Yes to grant admin access at the User Account Control (UAC).
- Once you get to the next screen, check every ASUS application box and click on Install to update every underlying application to the latest version.
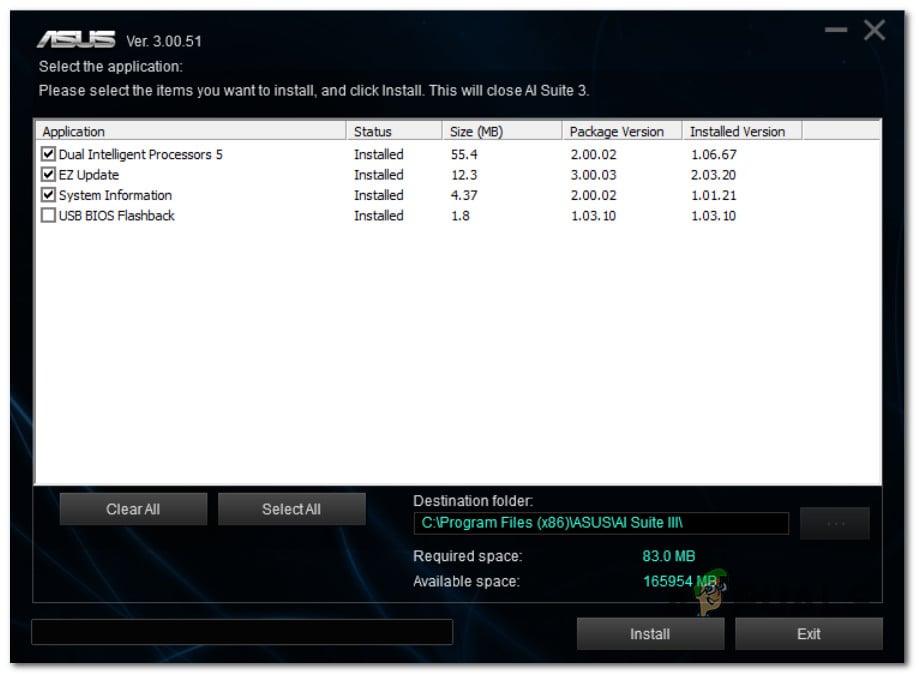
Update the ASUS suite to the latest version - At the end of this process, the installer will confirm that the AI Suite has been updated to the latest version. Click Ok to finish the process.
- Next, you will be prompted to reboot your PC. Do so by clicking Yes.
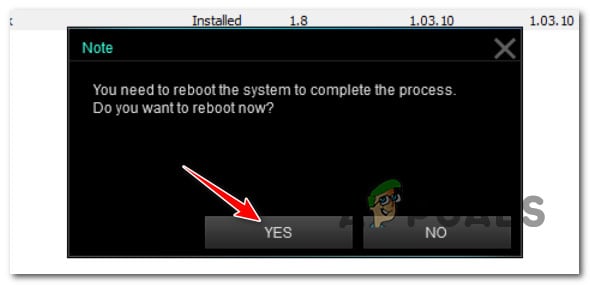
Confirm the reboot operation - Once the next startup is complete, repeat the action causing the asio3.sys error and see if the problem is now fixed.
If the problem is still not fixed or this method is not applicable, move down to the next method below.
7. Use System Restore to revert the installation of ASUS AI Suite
If this issue started after you updated your ASUS AI Suite version to the latest version, you might be able to revert to a version that doesn’t produce this behavior.
Unfortunately, ASUS only has the latest build of ASUS AI Suite available on their official download website. Your only solution (unless you want to use a 3rd party service like Oldversion.com) is to use System Restore.
Note: System Restore will allow you to revert your system to a previous state in time. By default, this utility is configured to automatically create new restore snapshots at important system events (such as installing a new update for an existing app).
If you didn’t modify the default behavior of System Restore, you should have a restore snapshot created just before the installation of the ASUS AI Suite update.
Follow the instructions below to use System Restore to revert ASUS AI Suite to a previous version:
- Open the Run dialog box, type “rstrui,” and press Enter to launch the System Restore wizard.
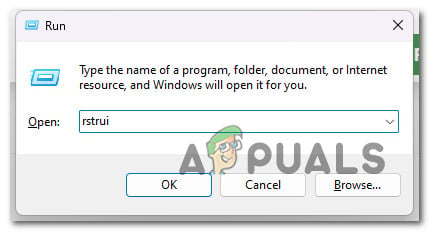
Open Restore point - Click Yes if the User Account Control asks you to provide admin access.
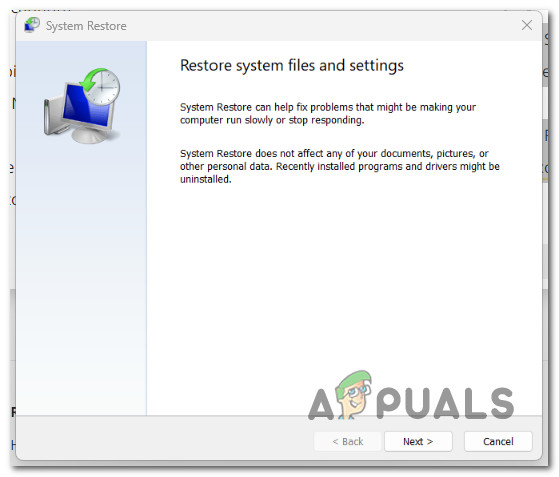
- To proceed, click Next on the System Restore window’s first screen.
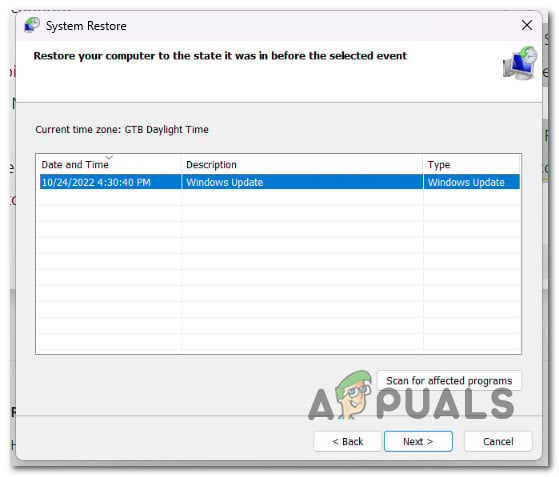
Get past the initial System Restore screen - Before clicking Next, pick a reliable restore point. If you don’t see the restore point created just before the update of the ASUS AI suite, check the box next to Show more restore points.
- Select a restore point produced before you first ran into the ‘Can’t Open asio3.sys’ error, then click Next to begin the restoration process.
Selecting a viable Restore Point - Restart your computer and repeat the action that was previously causing the issue with asio.sys.
If the problem is still not fixed, move to the next method below.
8. Uninstall Armory Crate using a dedicated uninstaller
If you started experiencing this issue after installing or updating the Armory Crate utility from ASUS, you are not the only one affected by this issue.
We’ve identified dozens of user reports experiencing the same Can’t open AsIO3.sys error due to a bad version of Armory Crate.
To fix it, you’ll have to uninstall the utility.
Important: If you install this suite conventionally (via Programs and Features), chances are you will still experience this issue. Our advice is to use the dedicated Armoury Crate uninstaller.
Here’s how to uninstall Armory Crate using the dedicated uninstaller:
- First, close every 3rd party application (including any utility from ASUS).
- Open any browser and access the official Armory Crate download site.
- On the official download website, start by selecting your OS to get the correct download version.
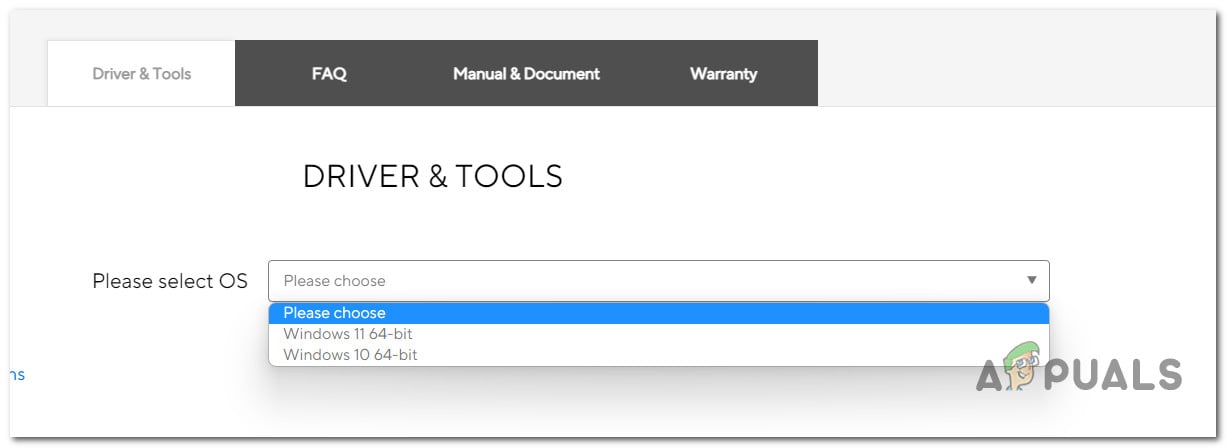
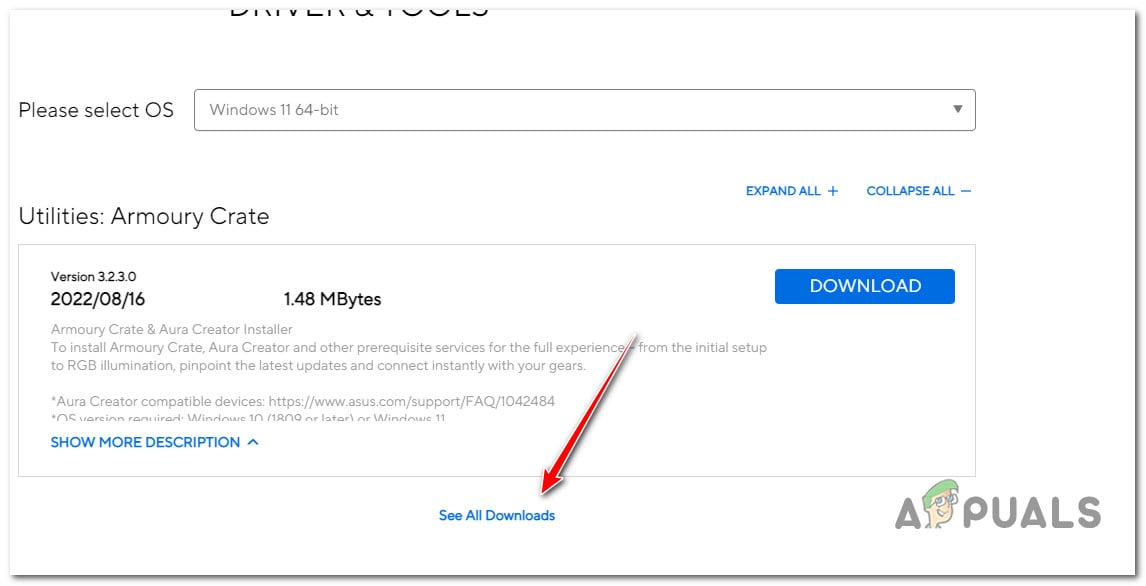
Selecting the correct OS version - After selecting your OS, you will only see the latest version of Armory Crate. When this happens, click on See All Downloads.
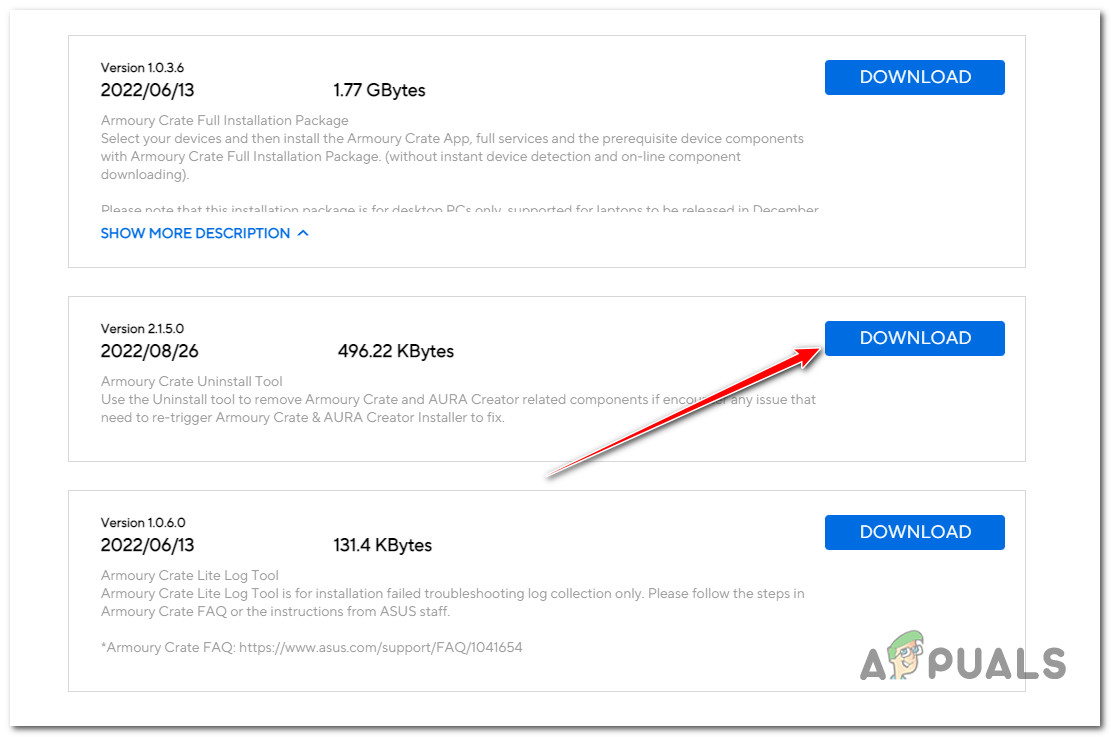
Viewing all available updates - Scroll down to the bottom and locate the Download button associated with the Armoury Crate Uninstall Tool. Click on it.
Downloading the correct uninstaller - Once the download is complete, extract the archive.
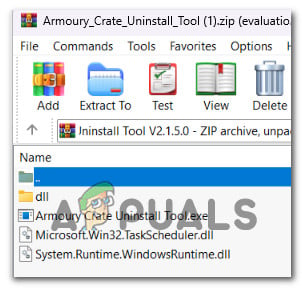
Extracting the uninstaller Note: You can use the built-in extraction tool (if applicable) or go for a third party solution (like WinZip or WinRar)
- Once the extraction is complete, right-click on Armoury Crate Uninstall Tool.exe and choose Run As Administrator from the context menu.
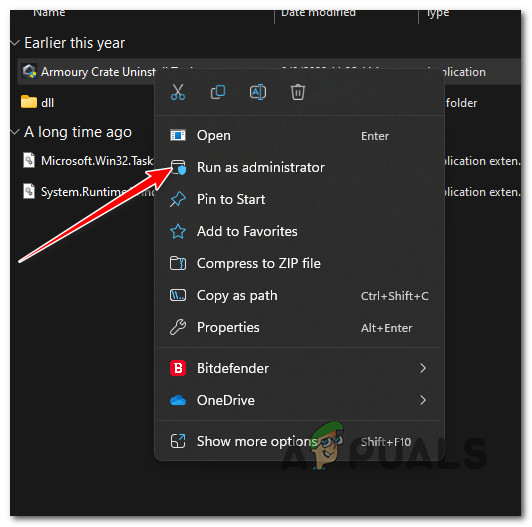
Running as administrator - At the User Account Control, click Yes to grant admin access.
- Next, click Uninstall to begin the operation and confirm at the next prompt.
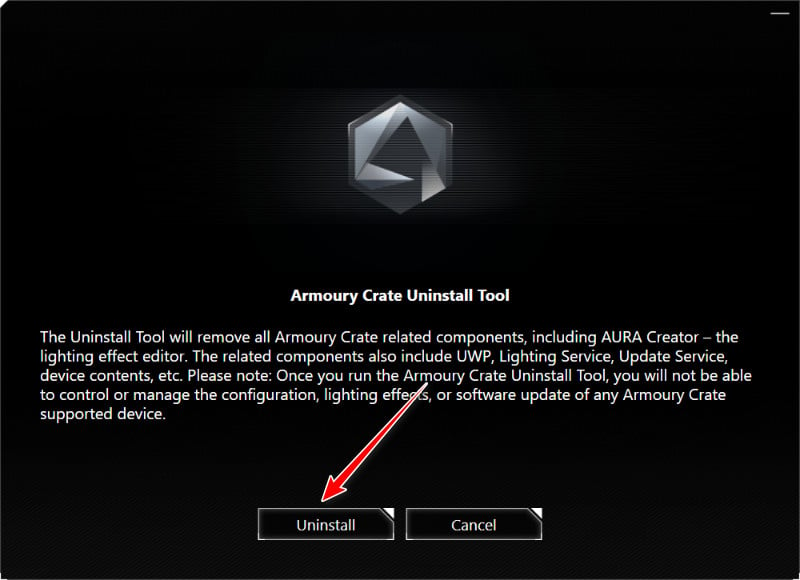
Uninstalling the Armoury Crate - Once the uninstallation is complete, click on Restart Now and wait until your PC boots back up.
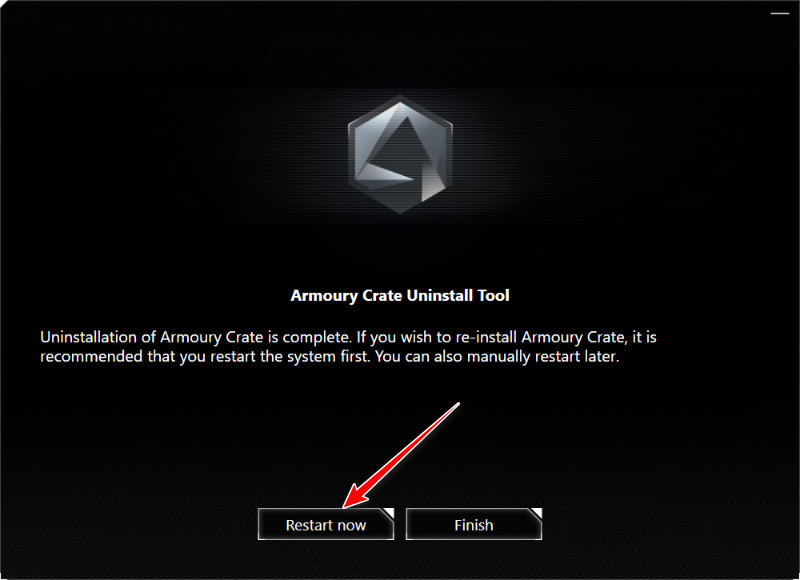
Restarting the PC after uninstallation - Repeat the action causing the error and see if it’s fixed.
If you’re still experiencing the ‘Can’t open AsIO3.sys error, move down to the next method below.
9. Enable AsusCertService
If you’re using an aggressive system optimizer suite, there’s a big chance that it ends up blocking the AsusCertService to improve the RAM usage of your PC.
This might be the cause of why you are seeing the ‘Can’t open AsIO3.sys error when opening ASUS applications (because this important dependency is inaccessible).
Fortunately, the fix for this particular issue is simple. You need to access your Service settings and ensure that AsusCertService service is enabled and configured to start at every system start.
Here’s how to do this:
- Press Windows key + R to open up a Run dialog box.
- Next, type ‘services.msc’ inside the text box and press Ctrl + Shift + Enter to open the Services screen with admin access.
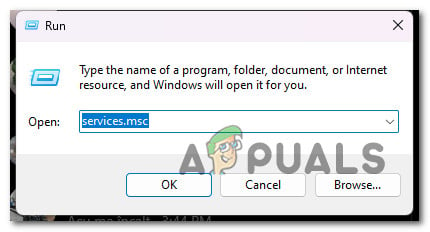
Accessing the Services screen - At the User Account Control (UAC), click Yes to grant admin access.
- Once inside the Services screen, use the right-hand pane to locate the Asus Certificate Service.
- Right-click on it and choose Properties from the context menu.
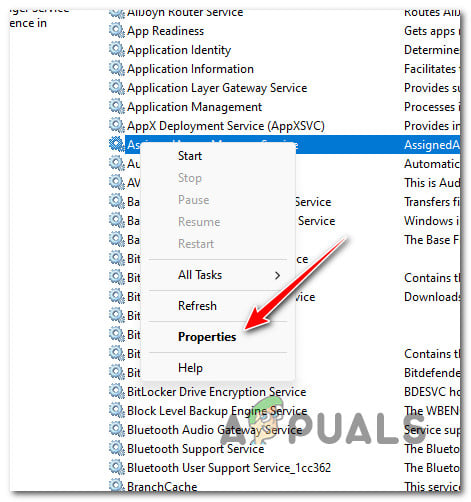
Accessing the Properties screen of AsusCertService - From the next screen, set the Startup Type to Automatic, then click on Start to start the service.
- Click Apply to save the changes.
- Repeat the action that was causing the ‘Can’t open AsIO3.sys’ error and see if the problem is now fixed.
If the problem is still not fixed, move down below.
10. Install the latest Lightning updates via Aura
Another potential cause that might cause this issue is a scenario in which one of your ASUS suites is missing the lightning updates.
Note: This is a more recent dependency required nowadays by every proprietary software released by ASUS.
The quickest way to ensure you have all the required lightning updates is to use Aura Sync to install them automatically.
Remember that Aura Sync is now a part of Armoury Crate, but you can still install it individually.
Follow the instructions below to carry out this procedure:
- Start by closing every 3rd party application, including ASUS software.
- Visit the official download page for Aura Sync.
- The standalone version of Aura Sync Utility can be downloaded by clicking on the hyperlink at the bottom of the page.
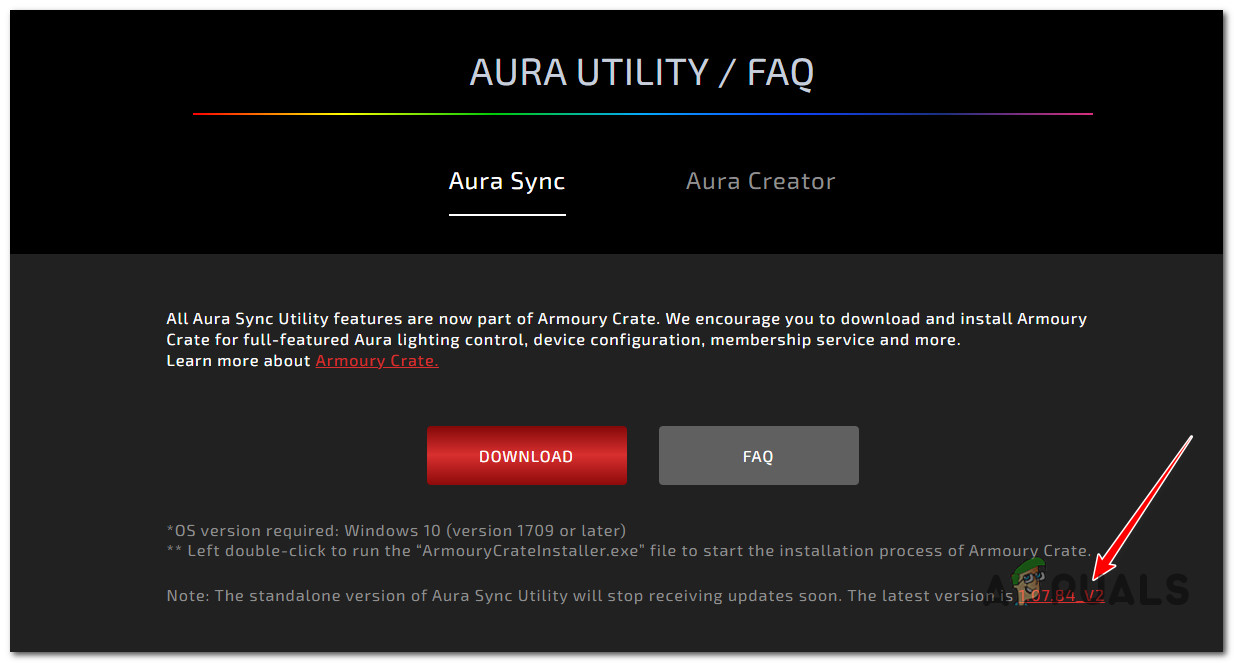
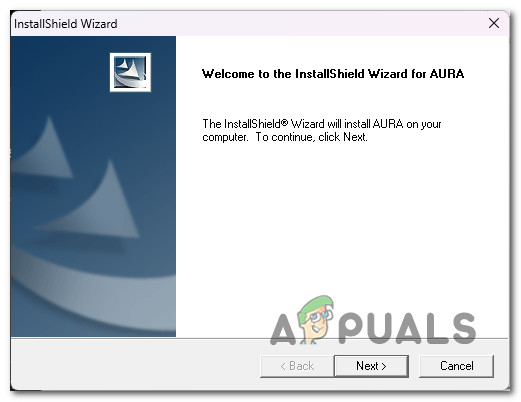
Download the standalone version of Aura Sync - Extract the recently downloaded archive, right-click on Setup.exe and click on Run as Administrator.
- Click Yes to grant admin access from the context menu that just appeared.
- Go through the installation instructions, then reboot your computer once Aura Sync is installed on your PC.
Go through the installation instructions - Run Aura Sync, and you should get a popup asking if you want to install the pending updates. Click Yes and wait until all the lightning dependencies are installed, then restart your PC.
If the problem is still not fixed, move to the next method below.
11. Disable Plugins in iCUE Settings (if applicable)
If you’re using the iCUE software to synchronize the RGB lighting on all your compatible devices, you should know that this software is known to conflict with the ASUS AI Suite and produce the ‘Can’t open AsIO3.sys’.
Fortunately, you can fix this conflict easily by accessing your iCUE settings and unchecking the box associated with Enable plugins.
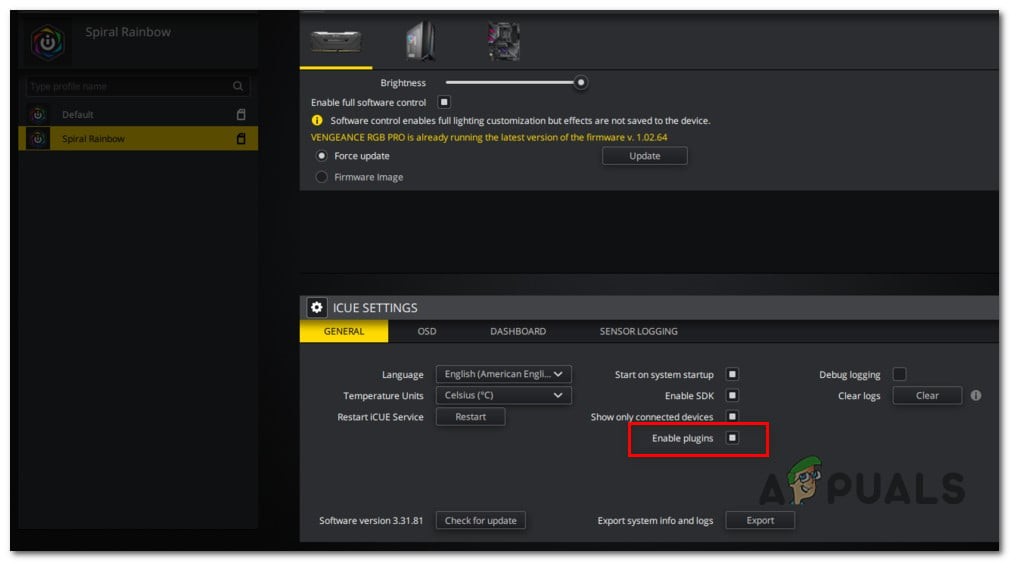
After you do this, reboot your PC, and the issue should be fixed.
If this scenario is not applicable, move to the next method below
12. Uninstall Asus Probe (if applicable)
ASUS Probe is the final 3rd party conflict known to produce this error. This is legacy software that ASUS no longer supports. Furthermore, it’s known to cause compatibility issues with many of the newer proprietary software from ASUS (ASUS AI Suite, Aura Sync, EZ Flash, etc.)
Note that ASUS Probe doesn’t have any functionality that is not available on the flagship ASUS AI Suite, so you have no reason not to uninstall it if you still have it on your system.
Follow the steps below to complete the installation:
- Press the Windows key + R to open up a Run dialog box.
- Next, type ‘appwiz.cpl’ inside the text box, then press Ctrl + Shift + Enter to open the Programs and Features utility with admin access.
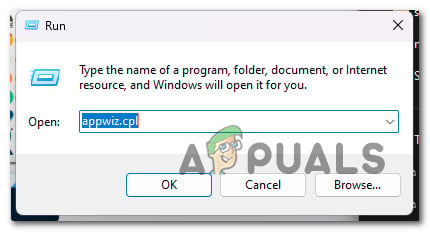
Open up the Programs and Features screen - Click Yes to grant admin access at the User Account Control (UAC).
- Once inside the Programs and Features screen, right-click on Asus Probe and click on Uninstall from the context menu.
Uninstalling ASUS probe - Follow the remaining prompts to complete the uninstallation, reboot your PC and see if the conflict is resolved.
If the same problem is still occurring, move to the final fix below.
13. Perform a clean install or repair install
If none of the above fixes worked and you’re still getting the error “Can’t open AsIO3.sys – Failed with error code 5: Access is denied” after trying all of them, the only thing left to do is to refresh the kernel data along with every Windows file.
Many users who said they had the same problem said it was fixed after they did a full system refresh. You can choose either a clean install or a repair install (in-place repair).
The biggest problem with a clean installation is that you can’t save any of your data unless you first make a copy of everything (apps, games, personal media, etc.). This could take some time to do.
But if you choose the repair install (in-place repair) method, you might be able to save your personal information (including applications, games, personal material, and even specific user preferences). But the process will take a little longer.
-
08-21-2019 09:04 PM
#11

ROG Guru: Yellow Belt
Array
Rewerend PC SpecsRewerend PC Specs Motherboard Asus Crosshair V Formula — Z Processor AMD FX-9370 Memory (part number) 2 x KHX23C11T3K2/8X Graphics Card #1 R9 Fury X 4gb Sapphire Sound Card Asus Xonar Phoebus Monitor SAMSUNG U28E590D 28″ uHD + freeSync Storage #1 Samsung SSD EVO 540 250Gb Storage #2 Seagate 7200.14 2TB CPU Cooler Corsair Hydro H105 Case Cooler Master Cosmos II Power Supply ENERMAX ERV1000EWT-G Revolution87+ 1000W Gold Keyboard Microsoft SideWinder X6 Mouse Saitek MAD CATZ R.A.T. 7 Headset Asus ROG Orion Mouse Pad Steel Series PAD Headset/Speakers Genius Home Theather SW 5.1 OS MS Windows 8.1 Pro Network Router Asus RT-N18U Accessory #1 Zalman ZM-MFC3 FAN/TEMP CONTROLLER
Hey I just fixed that ASio.sys creepy window….fresh install didn�t helped but uninstall all software from AiSuite except DIP5 make it work again without that annoying box…
I hope that could help others, rest of the SW are not so usefull anyway. But I need AiSuite for my Ryujin 360.Cheers.
-
01-15-2020 04:11 PM
#12
New ROGer
Array
Riverdog64 PC SpecsRiverdog64 PC Specs Motherboard ASUS ROG Crosshair VII Hero (Wi-Fi) X470 Processor AMD Ryzen 7 2700X Memory (part number) CORSAIR VENGEANCEL 16GB (2X 8GB) DDR4 3600 Graphics Card #1 GIGABYTE Radeon VII 16GB PCI Express Sound Card on-board Monitor ASUS ROG Swift PG278QR 27� Gaming Monitor 1440p 1ms 165Hz DP HDMI G-SYNC Storage #1 Samsung SSD 970 PRO 512GB — NVMe M.2 Storage #2 Seagate BarraCuda 2TB HDD � 3.5 Inch SATA 6Gb/s CPU Cooler Fractal Design Cooler FD-WCU-CELSIUS-S24 Case CORSAIR Carbide 270R Mid-Tower Case, Window Side Panel Power Supply CORSAIR RM750x, 750 Watt, 80+ Gold Keyboard Redragon K582-BA Wired Mechanical Gaming Keyboard Mouse Redragon Cobra Gaming Mouse Combo, 10,000DPI Mouse Pad who cares?
 I found a solution the «Can’t open asio.sys (5) error.
I chalk this up to poor instructions on the ASUS downloads site…
This error is related to installation of ASUS AI Suite 3 versions before .52 and Windows 10 (as far as I know only Windows 10). I make no guarantees that this will work for you or that there is not another way, but this is what I did to fix the problem.
When downloading AI Suite, you have to first identify your motherboard. I am not positive if there are different versions of the program for each motherboard, but just in case there are, go through that process to find the Utilities download section for your motherboard.
There is an updated files that call itself ASUS AI Suite 3 vers. xx.52 but it is only an updater as far as AI Suite is concerned and if you run it on its own, without an earlier version of AI Suite installed already, it only installs two other programs in the suite and not the one used for overclocking.
In the same Utilities software list, you will find the xx.51 version of AI Suite as well. This has ALL the software. I installed that one first. (be careful… there are several «setup.exe» «AsusSetup.exe» files. I used the «AsusSetup.exe» after I uncompressed the files each time). Afterwards I rebooted and though AI Suite’s overclocking program was not installed (finally), I go the all too familiar ASio.sys (5) can’t be opened or found error.
THEN I installed the xx.52 version that appears to not be the entire AI Suite 3. After a reboot, this error was gone.
-
01-25-2020 04:24 AM
#13
ROG Guru: Orange Belt
Array
Braegnok PC SpecsBraegnok PC Specs Motherboard Asus Crosshair X670E Gene Processor AMD Ryzen 9 7950X Memory (part number) CMT32GX5M2B6000Z30K Graphics Card #1 EVGA RTX 3090 Ti FTW3 Ultra Monitor Alienware AW3423DW Storage #1 Samsung 990 Pro CPU Cooler Optimus AM5 Foundation Case Asus Prime AP201 Power Supply SeaSonic Prime TX-1600 Keyboard Das Keyboard 4 Ultimate Mouse G502 Lightspeed Headset SteelSeries Arctis Pro OS Windows 11 Pro 
I was able to fix the can’t open asio.sys (5),.. I’m running Windows 10 64-Bit.
I used System Restore, and went back to before installing Asus A1 Suite, then installed Ver. 3.00.36 and checked all box’s, after rebooting I had the can’t open asio.sys (5) box,.. then went bask to Asus site and installed the ver 52 update.
With the first install ( ver .36 ) the EZ Update, and USB BIOS Flashback does not work!,.. that is why I was getting the error at startup, after installing update ver 52 you only have two options to check which is the EZ Update and USB BIOS Flashback, I checked both box’s, installed update,.. and all is good now.
Hope this helps
Last edited by Braegnok; 01-25-2020 at 05:43 AM.
-
01-26-2020 12:13 AM
#14
ROG Member
Array
areserhat PC Specsareserhat PC Specs Motherboard Rog Strix X570 E Processor AMD Ryzen 3700x Memory (part number) Kingston 2933MHZ Graphics Card #1 Rog StrixRx580 Monitor AOC C24G1 Storage #1 Samsung M2 970 250gb Storage #2 Samsung M2 970 Plus 500gb CPU Cooler Rog Ryujin 240 Case Corsair Crystal 680x Power Supply Rog Strix 750W PSU Keyboard Corsair K95 RGB Platinium Mouse Rog Gladius Origin Headset Steelseries Arctis 7 Mouse Pad Steelseries QCK Prism Headset/Speakers Logitech Z533 White OS Windows 10 Pro Accessory #1 Rog Terminal Accessory #2 Rog Led Strips

I had this problem before 2 times. Thanks to Asus we are expert on finding a way. Anyway below is my solution which works well.
Download the latest aura and just install the lightning updates. Probably there is a crash between Ai Suite and Aura drivers.
Ps. I am now travelling maybe I gave wrong file info when I return back I will update this answer.
-
05-23-2020 01:11 PM
#15
New ROGer
Array
Great this worked for me!!
 Originally Posted by Riverdog64

I chalk this up to poor instructions on the ASUS downloads site…
This error is related to installation of ASUS AI Suite 3 versions before .52 and Windows 10 (as far as I know only Windows 10). I make no guarantees that this will work for you or that there is not another way, but this is what I did to fix the problem.
When downloading AI Suite, you have to first identify your motherboard. I am not positive if there are different versions of the program for each motherboard, but just in case there are, go through that process to find the Utilities download section for your motherboard.
There is an updated files that call itself ASUS AI Suite 3 vers. xx.52 but it is only an updater as far as AI Suite is concerned and if you run it on its own, without an earlier version of AI Suite installed already, it only installs two other programs in the suite and not the one used for overclocking.
In the same Utilities software list, you will find the xx.51 version of AI Suite as well. This has ALL the software. I installed that one first. (be careful… there are several «setup.exe» «AsusSetup.exe» files. I used the «AsusSetup.exe» after I uncompressed the files each time). Afterwards I rebooted and though AI Suite’s overclocking program was not installed (finally), I go the all too familiar ASio.sys (5) can’t be opened or found error.
THEN I installed the xx.52 version that appears to not be the entire AI Suite 3. After a reboot, this error was gone.
Hi thanks for the post, this worked perfectly for me.
-
07-15-2020 07:16 PM
#16
ROG Junior Member
Array
Originally Posted by Riverdog64
I chalk this up to poor instructions on the ASUS downloads site…
This error is related to installation of ASUS AI Suite 3 versions before .52 and Windows 10 (as far as I know only Windows 10). I make no guarantees that this will work for you or that there is not another way, but this is what I did to fix the problem.
When downloading AI Suite, you have to first identify your motherboard. I am not positive if there are different versions of the program for each motherboard, but just in case there are, go through that process to find the Utilities download section for your motherboard.
There is an updated files that call itself ASUS AI Suite 3 vers. xx.52 but it is only an updater as far as AI Suite is concerned and if you run it on its own, without an earlier version of AI Suite installed already, it only installs two other programs in the suite and not the one used for overclocking.
In the same Utilities software list, you will find the xx.51 version of AI Suite as well. This has ALL the software. I installed that one first. (be careful… there are several «setup.exe» «AsusSetup.exe» files. I used the «AsusSetup.exe» after I uncompressed the files each time). Afterwards I rebooted and though AI Suite’s overclocking program was not installed (finally), I go the all too familiar ASio.sys (5) can’t be opened or found error.
THEN I installed the xx.52 version that appears to not be the entire AI Suite 3. After a reboot, this error was gone.
This also worked for me.
-
09-07-2020 09:37 AM
#17
New ROGer
Array
mguizz PC Specsmguizz PC Specs Motherboard ROG STRIX Z390 F GAMING Memory (part number) Corsair Vengeance Pro Graphics Card #1 GeForce RTX 2070 SUPER Monitor Dell U2719D
I had this issue & fixed it the following way.
Go to the specific motherboard ‘Driver & Tools’ page & download from ‘Software and Utility’ the latest AI Suite & latest Ez Update (AIS V3.00.51 & EZU v3.00.11 at time of writing) installers.
Install AI Suite & reboot
Install Ez UpateHope it works for you, cheers.
Last edited by mguizz; 09-07-2020 at 09:55 AM.
Have you encountered the “can’t open AsIO3.sys” error when the computer is turned on? If so, you can read this post, in which MiniTool briefly describes what the error is and offers you 9 methods to solve this error.
Here is what the user says:
After installing the utility, I get this error message on Windows startup every time «Aac3572DramHal_x64.exe error Can’t open AsIO3.sys!! Failed with error code 5: Access is denied.» The error appears only when Synapse is already open in the system tray. If I close Synapse, the error goes away, and then when I start Synapse manually again, the lighting controls all work as expected.https://github.com/ChromaControl/ChromaControl/issues/19
What Is AsIO3.sys and Why Can’t Open AsIO3.sys?
AsIO3.sys is a driver file belonging to ASUS. Usually, it is preinstalled on your ASUS computer and installed with the ASUS motherboard. The error «can’t open AsIO3.sys» is one of the common errors reported by ASUS users and the error may completely show as “can’t open AsIO3.sys error code 433”. And this error always occurs when the computer is turned on.
The causes for the “can’t open AsIO3.sys” error are various, including malware infections, hard drive corruption issues and memory corruption issues, etc. Then, how to solve this error in your PC? Please read the following content.
Back up Data Before Fixing the Can’t Open AsIO3.sys Error
If you are facing the “can’t open AsIO3.sys” error in your PC, you can take the following methods to solve it. However, before you perform these methods, you’d better rescue data first, in case that important data suffered damage during repair.
You can refer to this article to know the detailed steps: How to Backup Files on Windows 10? Try These Top 4 Ways
How to Fix AsIO3.sys Error on Your PC?
There are 5 methods for the “can’t open AsIO3.sys” error, please try them one by one until the error is solved. The following methods are applicable for
Method 1: Fix Registry Items
Sometimes, “can’t open AsIO3.sys error code 433” can be related to problems in the Windows registry. Therefore, you need to fix any registry issues using the Automatic Repair of Windows built-in tool before you can fix this system error. The following steps show you the details.
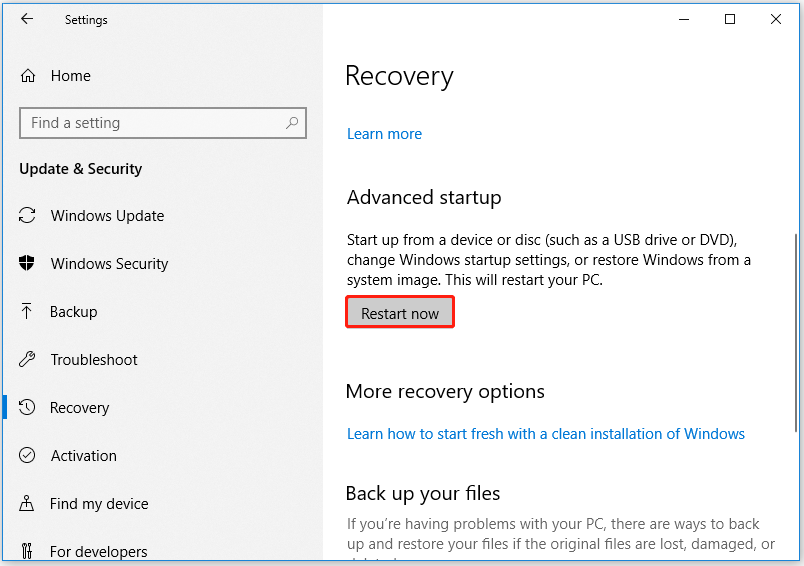
Step 1: Press the Win + I key to open the Settings panel.
Step 2: Navigate to the Update & Security > Recovery option.
Step 3: Under Recovery, click on the Restart now button on the Advanced startup section.
Step 4: Wait a moment and then you will see several options in a blue window. And you should click on the Troubleshoot option.
Step 5: Click on the Advanced options > Automatic Repair/ Startup Repair option.
Step 6: After you enter into the automatic mode, you will be asked to enter the recovery key to get going again and then click on Continue.
After completing all the above steps, Automatic Repair will begin diagnosing your computer and may restart in the process. In this way, damaged registry keys can be repaired.
Method 2: Update System Device Drivers
Outdated device drivers are one cause of can’t open AsIO3.sys error code 433. So, you need to update them in Device Manager. Steps are as below:
Step 1: Press the Win + R key to open the Run dialog. Then type devmgmt.msc in the search box and then press Enter.
Step 2: In the Device Manager window, check on drivers with a yellow exclamation mark.
Step 3: Right click on the driver with a yellow exclamation mark and select the Update Driver option.
Step 4: In the pop-up window, select Search automatically for updated driver software.
Step 5: After updating all the system device drives, restart the computer and then see if the “can’t open AsIO3.sys” error is cleared.
Method 3: Perform a Full Scan to Remove Malware
The “can’t open AsIO3.sys” error can be caused by a malware infection on your computer. So, you can check for malware by scanning the entire system. The steps are as follows:
Step 1: Press the Win + I key to open Settings, and navigate to the Update & Security > Windows Security > Virus & threat protection option.
Step 2: In the Windows Defender Security Center, click on the Scan now button.
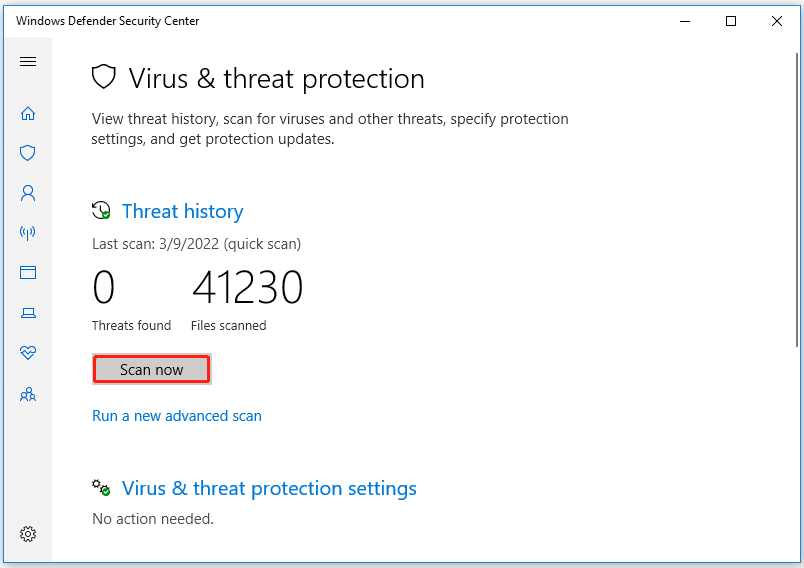
The Windows Defender Security Center will now start to detect if there are any threats on the system. After the scan is over, you will notice the results. If the scan finds any threats, click on the Clean threats button to remove them from the system.
Method 4: Uninstall Recently Installed Software
Conflicts between two or more programs may also cause the “can’t open AsIO3.sys” error in your computer. Therefore, uninstalling your recently installed software may be one of the important fixes. Here is the guide:
Step 1: Press Windows + R key to open Run and type appwiz.cpl. Then press the Enter key.
Step 2: When Program and Features window shows up, find out the program that causes this error.
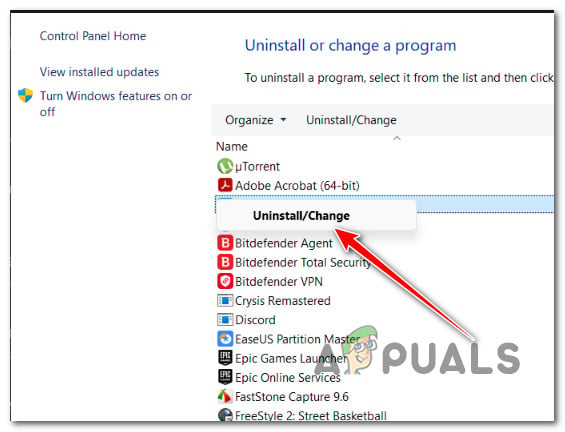
Step 3: Right click on the entry that is causing the “can’t open AsIO3.sys” error and select Uninstall.
Method 5: Check Hard Drive for Bad Sectors
The error on the hard drive like bad sectors may lead to the “can’t open AsIO3.sys” error and the hard disk can be damaged. So, you can take some measures to find the issues with your hard drive.
For instance, you can check if there are bad sectors on the hard drive with MiniTool Partition Wizard. Its Surface Test feature can help you check for bad sectors. Besides, this tool can be used to manage partitions, recover partitions, convert FAT to NTFS, and more.
Free Download
Step 1: Launch MiniTool Partition Wizard to enter its main interface.
Step 2: Select the hard drive that causes the error and then click the Surface Test option on the left operation panel.

Step 3: In the pop-up window, click the Start Now button to immediately check the bad sectors for the hard drive.
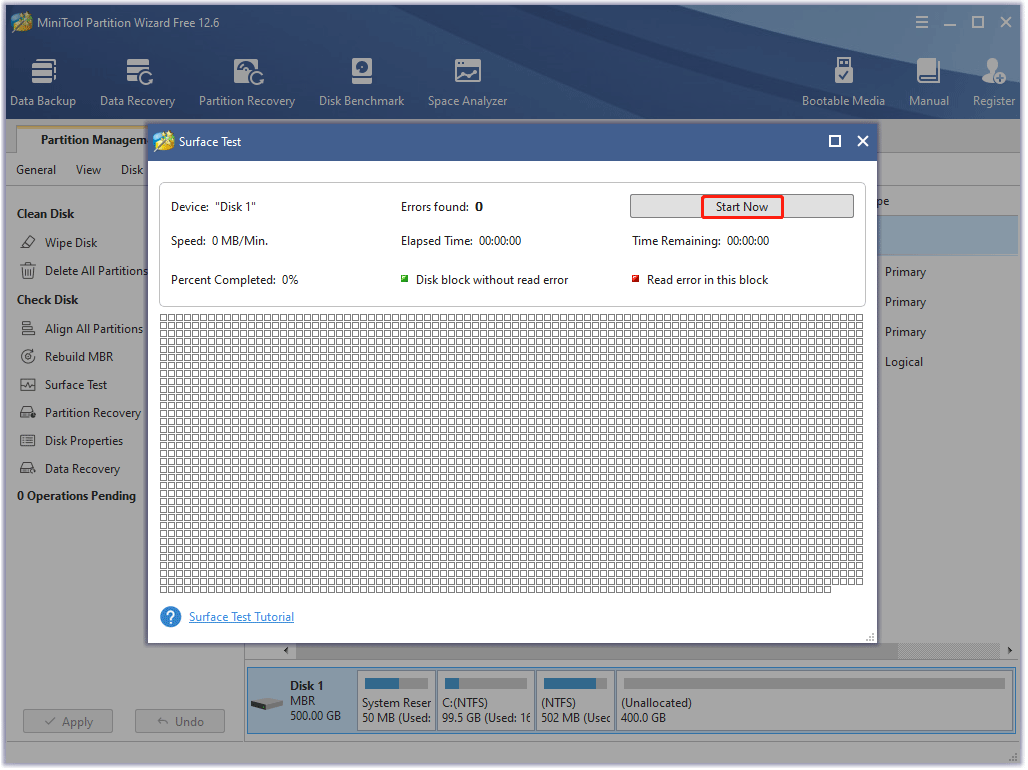
Step 4: When the hard drive error test process is completed, the disk blocks that have no read errors will be marked in green. However, if MiniTool Partition Wizard finds some hard disk errors, the blocks will be marked as red.
Method 6: Fix Damaged Hard Drive
The “can’t open AsIO3.sys” issue can be triggered by hard drive corruption issues. You can use the CHKDSK utility to investigate and repair bad sectors in the disk drive to fix this error.
Step 1: Press Windows + S key and type cmd.exe in the search of the box. Then right click on it and select Run as administrator.
Step 2: Type chkdsk c: /f /r /x command and press Enter key to execute.

Step 3: After execution, restart the computer and check if the error is solved.
Method 7: Fix Corrupted System Files – SFC & DISM
The corrupted system files or Windows images can trigger the “can’t open AsIO3.sys” error. To fix this problem, Windows provides two utilities.
The first tool is SFC (System File Checker), which detects and restores missing components. The other is the DISM (Deployment Image Servicing and Management) tool, which fixes more complex system errors. It uses different algorithms to find problems and fix corrupt data that SFC might miss.
Here’s how to perform these scans:
Step 1: Open the Command Prompts as administrator.
Step 2: In the Command Prompt window, type the following command: sfc /scannow and press Enter.

Step 3: After the scanning process is complete, if it describes that the corruption is resolved, close Command Prompt and restart Windows 10.
If the SFC tool fails to repair corrupted files, you can use the DISM tool.
Step 1: Open the Command Prompt as administrator. Then type DISM.exe /Online /Cleanup-image /Restorehealth. Then press Enter.

Step 2: After the scanning process is complete, restart your computer to check if the error has been solved.
The process will find and correct corrupt files, registry entries, and other system errors that can cause errors related to can’t open AsIO3.sys.
Method 8: Check RAM for Corruption Issues
Memory corruption can cause the “can’t open AsIO3.sys” error. If you’re experiencing random reboots, computer crashes, beeps on startup, and AsIO3.sys issues, this could be an indication that your PC’s memory is corrupted. To solve this issue, you should identify and fix RAM problems on your PC through Memory Diagnostic. Please follow the steps below to check RAM:
Step 1: Type memory diagnostic in the Windows search box. Then, double click on the best matched option for Windows Memory Diagnostic.
Step 2: Select Restart now and check for problems.
Step 3: Your computer will restart and diagnose memory. After the diagnostic process is complete, the computer will start automatically. Then you need to view the diagnostic report in Event Viewer by following these steps:
- Open Event Viewer.
- Navigate to Windows Logs > System.
- Click Filter Current Log in the box on the right.
- In the Event sources box, select MemoryDiagnostics-Results and click on the OK button to display a log of all results of the memory test.
- Double click on the latest result log to see if the diagnosis passed.
If the diagnosis is not passed, action should be taken according to the instructions of the diagnosis.
Method 9: Perform a System Restore
If none of the above methods work for you, you can use the System Restore utility to restore your computer state to a good point in time. As for how to do it, please refer to the following posts: How to Restore Computer to Earlier Date in Windows 10/8/7 (2 Ways)
How to fix the “can’t open AsIO3.sys” error on your PC? This post provides you with 9 methods to solve it. You can try these methods and hope they can help you.Click to Tweet
Bottom Line
Did these methods help you resolve the error? Do you have any questions about these methods? If you have any suggestions or need any help when you use MiniTool Wizard Partition, you are welcome to send us an email at [email protected] or leave a comment below. Thank you in advance.
Пользователи Windows 10 могут иногда сталкиваться с ошибками asio.sys на своих компьютерах. Было бы хорошо узнать, что такое asio.sys, прежде чем перейти к решению.
Asio.sys — это драйвер, специфичный для компьютеров ASUS. Поврежденные файлы и неисправное оборудование часто вызывают эту ошибку. Это часто приводит к ошибкам Blue Screen of Death.
Стоит отметить, что ошибка Asio.sys также может быть вызвана заражением вредоносным ПО, повреждением жесткого диска и повреждением памяти.
Шаги для исправления ошибок Asio.sys
Вот подробный список процесса устранения неполадок для решения проблем asio.sys. Имейте в виду, что эти шаги довольно сложны. Итак, выполняйте каждый шаг.
Решение 1. Обновите драйверы системного устройства.
Ошибка типа «синий экран» asio.sys, влияющая на вашу систему, может быть вызвана устаревшими драйверами устройств .
По многим причинам драйверы, которые работают нормально, могут просто перестать работать в следующую минуту. Но вы можете обновить драйвер устройства, чтобы исправить проблему BSOD.
Независимо от того, являетесь ли вы экспертом в поиске, загрузке и обновлении драйверов, процедура все равно может быть очень напряженной и расстраивающей. Ухудшение проблем при загрузке не того драйвера или несовместимой версии драйвера.
Таким образом, из-за сложности и нехватки времени рекомендуется использовать инструмент обновления драйверов для ускорения процесса.
Средство обновления драйверов автоматически обновит все драйверы устройств на вашем компьютере, а не только драйверы, связанные с ошибкой asio.sys.
Одно из самых надежных обновлений драйверов, которое мы тестировали в Tweakbit.
TweakBit Driver Updater — это комплексное решение для автоматического обновления. Обновление драйверов оптимизирует ваш компьютер, обеспечивая правильную работу устройств в соответствии с последними функциями.
- Скачать сейчас TweakBit’s Driver Updater
Решение 2. Исправьте записи реестра
Иногда ошибки Asio.sys Blue Screen могут быть связаны с проблемами в реестре Windows. Таким образом, вам нужно будет исправить любые проблемы реестра, прежде чем вы сможете исправить эту системную ошибку.
Если вы не являетесь экспертом в этом, не пытайтесь редактировать реестр Windows вручную, чтобы избавиться от недействительных ошибок asio.sys. Если вы неправильно отредактируете свой реестр, ваш компьютер может перестать функционировать, и это может привести к необратимому повреждению вашей ОС.
Поэтому по этой причине мы рекомендуем вам использовать надежное средство очистки реестра для сканирования и исправления проблем реестра asio.sys. Когда вы используете очиститель реестра, процедура поиска отсутствующих файлов, неработающей ссылки в реестре или недействительных записей реестра может стать проще.
Если вы не знаете, какой Registry Cleaner установить на свой компьютер, ознакомьтесь с этим руководством.
Решение 3: Запустите полное сканирование вредоносных программ на вашем компьютере
Ошибка остановки файла asio.sys может быть вызвана заражением вашего компьютера вредоносным ПО.
Запустите полное сканирование системы с использованием антивирусных и вредоносных программ . Затем перезагрузите компьютер и проверьте, сохраняется ли проблема.
Не знаете, какой антивирус установить на свой компьютер? Это руководство поможет вам.
Решение 4. Удалите недавно установленные программы
Удаление сторонних приложений может быть правильным решением, если ошибка BSOD asio.sys связана с определенной программой.
Просто зайдите в Панель управления, перейдите в раздел «Программы и компоненты», выберите программу, которую вы недавно установили, и удалите ее с вашего ПК.
Перезагрузите компьютер.
Решение 5: Запустите SFC
Средство проверки файлов Windows — это доступный инструмент Windows, который может сканировать и восстанавливать системные файлы Windows.
Чтобы запустить SFC, откройте командную строку как администратор и введите sfc / scannow . Нажмите Enter.
На этом этапе средство проверки системных файлов начинает сканирование системных файлов. Это должно занять несколько минут, так что наберитесь терпения.
Решение 6. Установите все доступные обновления Windows
Время от времени Microsoft обновляет и улучшает системные файлы Windows, которые могут быть связаны с asio.sys. Время от времени найти подходящее решение проблемы asio.sys может быть легко, как обновить Windows с помощью текущего пакета обновления или любого другого патча, выпущенного Microsoft.
Итак, зайдите в Настройки и проверьте наличие обновлений.
Решение 7. Проверьте наличие повреждений жесткого диска
Как упоминалось ранее, проблемы asio.sys могут быть вызваны проблемами с повреждением жесткого диска.
К счастью, в Microsoft встроен простой сервис, известный как Check Disk, который может исправить проблемы с повреждением жесткого диска.
Чтобы использовать его, запустите командную строку как администратор рекламы и введите chkdsk / f .
CheckDisk начнет сканирование на наличие повреждений жесткого диска.
Решение 9. Проверьте RAM на наличие повреждений
Повреждение памяти может привести к ошибкам BSOD asio.sys. Если вы сталкиваетесь со случайной перезагрузкой компьютера, сбоем компьютера, получением «звуковых» кодов при запуске, а также проблемами BSOD asio.sys, это может указывать на повреждение памяти компьютера.
Для получения дополнительной информации о том, как исправить проблемы с ОЗУ, ознакомьтесь с руководствами ниже:
- Как исправить поврежденный дамп памяти эффективно и результативно
- Решите: у вашего компьютера недостаточно памяти в Windows 10, 8.1 или 7
Мы надеемся, что эти решения помогут вам решить проблемы с asio.sys. Обратная связь от вас будет оценена.
The error “can’t open AsIO.sys” can occur at startup, installing or opening an ASUS utility. If you’re experiencing this error, don’t worry. The tips below may help you fix the error.
What’s AsIO.sys?
AsIO.sys is a driver file that belongs to ASUS. Usually it’s preinstalled on your ASUS computer and installed along with the ASUS motherboard. The error “can’t open AsIO.sys” is one of the common errors that ASUS users have reported. It usually occurs to AURA & AI Suite.
You may encounter this error whenever you start your computer, or when you install AURA or AI Suite. Select one of the links below for the fix depending on your situation.
Fix: If you run into this error when you open AURA or AI Suite
Fix: If you run into this error when you install AURA or AI Suite
Fix: If you run into this error When you start your computer
Fix: If you run into this error when you open AURA or AI Suite
The message “can’t open AsIO.sys” can pop up at opening AURA or AI Suite. To fix the error, you just need to run the utility as administrator.
1) On your keyboard, press the Windows logo key.
2) Type the utility you have the problem with (AURA or AI Suite), and then click on Run as administrator. Then you should be able to open the program.
Fix: If you run into this error when you install AURA or AI Suite
Many users have reported that this error occurs when they install AURA or AI Suite (I, II or III). If you also can’t install AURA or AI Suite due to this error, you can follow these steps to fix it.
1) Right-click on the downloaded file of the utility (the zip file) and select Properties.
2) At the bottom, tick the “Unblock” checkbox, and then click OK to save the changes.
3) Extract the zip file.
4) Open the extracted folder and then locate the file called “AsusSetup.exe”.
5) Right-click on “AsusSetup.exe” and select Run as administrator. Then you should install the utility successfully.
Fix: If you run into this error When you start your computer
If this error message pops up at startup, the ASUS utilities (usually, AURA or AI Suite) could be the culprit.
If you have multiple ASUS utilities installed, to figure out which utility is causing the problem, you can uninstall them one by one then you can determine which one is causing the problem. If you only have one ASUS utility installed, just uninstall it and reinstall it as administrator.
Here’s how to do it:
1) Right-click on the Start menu button and select Apps and Features.
2) Scroll down and select one of the ASUS utilities.
3) Click Uninstall, then the confirmation dialog will pop up, then click Uninstall again.
4) Once the uninstallation is done, restart your computer and check to see if the error still occurs.
If the error still occurs, it means that utility is not the cause. If you have multiple ASUS utilities installed, repeat the steps above until you figure out the one that’s causing the problem.
Once you figure out and uninstall the utility that’s causing the problem, you can reinstall it by following these steps:
a) Right-click on the downloaded file of the utility (.zip file) and select Properties.
b) At the bottom, tick the “Unblock” check box, and then click OK to save the changes.
c) Extract the zip file.
d) Open the extracted folder and locate the file called “AsusSetup.exe”.
e) Right-click on “AsusSetup.exe” and select Run as administrator.
Hopefully you can fix the “Can’t open AsIO.sys” with the above tips. If you have any questions, feel free to drop a comment below. I’ll get back to you ASAP.
Некоторые пользователи Asus столкнулись с ошибкой: не удается открыть AsIO3.sys при работе на компьютере с Windows 11/10. Это ошибка, которая может помешать вам использовать компьютер, так как система не сможет получить доступ к этому файлу. Когда возникает ошибка такого типа, что-то не так с записями реестра или системными файлами, связанными с операционной системой. В этой статье мы объясним причины, по которым файл AsIO3.sys может быть недоступен, и способы решения этой проблемы.
Не удается открыть AsIO3.sys! Ошибка с кодом ошибки 433, Указано несуществующее устройство
Полная проверка системы, обновление драйверов и удаление недавно установленных программ могут помочь решить эту проблему. Читайте дальше, чтобы узнать все, что вам нужно знать об ошибке AsIO3.sys на компьютерах ASUS и о том, как ее исправить.
Что такое AsIO3.sys и почему он не открывается?
AsIO3.sys — это драйвер, разработанный специально для компьютеров ASUS. AsIO расшифровывается как ввод-вывод Asus. Как часть предустановленного программного обеспечения на вашем компьютере ASUS, это приложение отслеживает температуру оперативной памяти и скорость графического процессора. Он также управляет другим оборудованием, например скоростью внутренних вентиляторов. Этот инструмент упрощает мониторинг и управление компьютером ASUS, поскольку он уведомляет вас о возникновении проблем, связанных с оборудованием.
Были сообщения о том, что пользователи сталкивались с сообщением об ошибке «Не удается открыть AsIO3.sys» при попытке запустить свой компьютер. К этой ошибке могут привести несколько факторов, в том числе заражение вредоносным программным обеспечением, неисправность жестких дисков и повреждение памяти. Ознакомьтесь с этой статьей, если вы столкнулись с этой ошибкой на своем компьютере ASUS.
Если вы не можете открыть ошибку AsIO3.sys на компьютерах ASUS, следуйте приведенным ниже советам. Прежде чем применять эти методы, обязательно сделайте резервную копию своих данных на случай, если с ними что-то пойдет не так и ваши данные будут потеряны.
- Переустановите драйвер или программное обеспечение ASUS.
- Отключить или удалить Asus TUF Armoury Crate
- Обновите драйверы вашего устройства
- Запустите средство проверки системных файлов
- Выполнить восстановление системы
Рассмотрим подробнее каждый метод:
1]Переустановите драйвер или программное обеспечение ASUS.
Этот метод требует переустановки драйвера или программного обеспечения Asus, которое включает или устанавливает этот файл AsIO3.sys.
2]Отключить или удалить Asus TUF Armoury Crate
Решение этой проблемы — отключить или удалить Asus TUF Armoury Crate & Aura Creator. Ниже приведены шаги, которые вы можете предпринять, чтобы удалить все приложения и службы Armoury Crate:
- Откройте веб-браузер и перейдите к оружейному ящику. веб-сайт поддержки.
- На Драйвер и утилита нажмите на раскрывающееся меню.
- Здесь вы найдете два варианта, Windows 11 64-разрядная или же Windows 10 64-разрядная версиявыберите тот вариант, который соответствует вашим потребностям, чтобы загрузить инструмент удаления Armoury Crate.
- Нажми на Скачать кнопку, чтобы получить файл.
- Как только вы загрузите его, откройте проводник (Windows+Е ключи) и перейдите к Загрузки папка.
- Распаковать “Armoury_Crate_Uninstall_Tool.zip» и дважды щелкните «Armoury Crate Uninstall Tool.exe», чтобы начать процесс удаления.
- После завершения удаления перезагрузите систему.
Примечание. Официальный инструмент для очистки AC — лучший способ удалить ящик Armory.
3]Обновите драйверы вашего устройства
Неисправный или устаревший драйвер также может быть причиной этой ошибки синего экрана. В таком случае у вас есть два варианта на выбор:
4]Запустите средство проверки системных файлов
Если приведенные выше решения не работают, похоже, ваша система повреждена. Чтобы устранить повреждение системных файлов, вы можете использовать утилиту проверки системных файлов, выполнив следующие действия:
Для начала запустите командную строку от имени администратора.
В командной строке скопируйте и вставьте следующую команду:
sfc/scannow
Теперь нажмите клавишу Enter, и он просканирует систему на наличие поврежденных файлов. Когда сканирование будет завершено, перезагрузите компьютер и посмотрите, решена ли проблема.
5]Выполните восстановление системы
Это решение очень эффективно для устранения многих проблем на ПК с Windows, включая такие ошибки BSOD. Так что, если ничего не помогает, просто восстановите свою систему до прежнего состояния. Таким образом, вы сможете восстановить свою систему в прежнее состояние, которое в то время функционировало должным образом.
Как скачать аудиодрайверы Asus?
Следующие шаги помогут вам выполнить загрузку аудиодрайверов Asus для Windows 11/10:
- Прежде всего, посетите asus.com.
- Затем найдите свой продукт по серийному номеру.
- На следующей странице нажмите Драйверы и утилиты.
- Выберите операционную систему, а затем загрузите аудиодрайвер.
Сообщение по теме: Как исправить ошибку «синий экран» Tcpip.sys на компьютере с Windows