| LJ II/III | |
| 00 READY | Proceed; printer is ready to use. |
| 02 WARMING UP | Wait until printer signals ready. |
| 02 WARMING UP (Continuously) |
Refer to “02 WARMING UP(continuous) Message” section. |
| 04 SELF TEST | Continuous Self Test printing. |
| 05 SELF TEST | Self Test in progress. |
| 06 PRINTING TEST | Self Test printing. |
| 06 FONT PRINTOUT | Printing sample characters from available fonts. |
| 07 RESET | Returns all printer settings to Printing Menu setiings and clears buffered pages, temporary SORfonts, and macros. |
| 08 COLD RESET | Returns both Configuration and Printing Menu selections to the factory settings. |
| 09 MENU RESET | Returns all Printing Menu items to factory setiings and clears buffered pages, temporary soft fonts, and macros. |
| 10 RESET TO SAVE (HP 33449 Only) |
Press and hold RESET (until 07 RESETappears) to confirm the accepknce of Ptinting Menu selections (ternporary fonts, macros and buffered data will be deleted), or press CONTINUEor ON LINE(no changes to any selections will be made at this time). |
| 11 PAPER OUT (HP 33440 Only) |
Add media to the input tray. If problem continues, refer to the “11 PAPER OUT Message” section. |
| 12 PRINTER OPEN | Close the Top Cover Assembly. If problem continues, refer to the “12 PRINTEROPENMessage” section. |
| 13 PAPER JAM | Open printer, clear any paper within the printer, and press CONTINUE or ON LINE to reprint the page. If problem persists, refer to “13 PAPER JAM Message” section. |
| 14 NO EP CRT | Install an EP-S Cartridge. If problem continues, refer to the «14 NO EP CART Message” section. |
| 15 ENGINE TEST | Engine test with printout produced by pressing the Test Print button. |
| 16 TONER LOW | Replace EP-S Cartridge. If problem continues, refer to. “16 TONER LOW Message” section. |
| 17 MEMORY CONFIG (HP 33449 Only) |
Indicates memory reconfiguration in operation as a result of setting Page Protection ON. |
| 18 SKIP SELFTEST (HP 33449 Only) |
Skips the ROM and RAM portions of the power on self test, activated by holding down the — key and powering on the printer. This should not be used as it compromises printer integrity. (Note: This is for manufacturing use only.) |
| 20 ERROR 20 MEM OVERFLOW |
Indicates a memory overflow; too much data is being sent to the printer and the printer has run out of memory. Pressing the CONTINUE key causes the printer to print only the information it has received. If the error persists, it may be necessary to simplify the print job (i.e., fewer fonts and less graphics information) or have the customer purchase additiond memory. |
| 21 ERROR 21 PRINT OVERRUN |
Indicates that the information being sent to the printer is too complex for the printer (i.e., the formatting capabilities of the printer can not keep up with the formatting instructions being sent to it by the computer). If the error persists, it maybe necessary to simplify the job (i.e., reduce the number of characters or different fonts used, reduce the number of pixels addressed or cursor repositions, or reduce addressing the same pixel location multiple times). With the HP 33449, this problem can also be resolved by adding at least one additional memory PCA and setting PAGEPROTECT=[LTR, LGL or A4]. |
| 22 ERROR 22 I/O CNFIG ERR |
Indicates that the host computer and the printer are not communicating properly (i.e., the printer and computer baud rates may not match or the handshake protocol may be incompatible). Note: The printer supports the XON/XOFF (DC1/DC3) and DTR (Data Terminal Ready) handshake protocols. Both signals are sent from the printer during data transmission. The Enquire/Acknowledge (Enq/Ack) protocol is not supported by this printer. |
| 40 ERROR | Indicates that an error occurred during the transfer of data from the computer to the printer. Note: This error occurs if the computer is powered down while the printer is on line or when attempting to use baud rates which do not match. |
| 41 ERROR | Indicates that a temporary error occurred in the printed page. If this error occurs, press the CONTINUE key and the printer will repeat the page. Note: This error most frequently occurs when a Beam Detect Error occurs. If the printer cannot correct the error condition after two seconds, a Beam Detect Malfunction (51 ERROR) will occur. |
| 42 ERROR 42 OPT INTERFACE |
Indicates a communications problem has occurred between the Interface/Formatter PCA and the optional interface. Press the CONTINUE key to resume printing. Reseat the Optional I/0 PCA. If the error persists, refer to the documentation for the optional interface. |
| 43 ERROR 43 OPT INTERFACE |
Indicates a communications problem has occurred between the Interface/Formatter PCA and the optional interface. If the error persists, refer to the documentation for the Optional I/0 PCA. |
| 50 SERVICE | Power off the printer for a minimum of 10 minutes. If the problem continues, refer to the “50 SERVICE Fuser Malfunction” section. |
| 51 ERROR | Indicates loss of laser beam for over 2 seconds. |
| 52 ERROR | Indicates scanner motor unable to maintain proper speed. |
| 53 ERROR (HP 33440 Only) |
The 53 ERROR indicates that the optional memory installed in the printer is NOT compatible with the Interface PCA. Use HP memory only. |
| 53-1 ERRORUNIT (HP 33449 Only) |
An error was detected on the optional memory card in the front (right slot). Verify that the correct revision level («B» or greater) of memory is installed in the printer. |
| 53 ERRORUNIT (HP 33449 Only) |
An error was detected on the optional memory card in the rear (left slot). Verify that the correct revision level («B» or greater) of memory is installed in the printer. Use HP memory only. |
| 55 ERROR | Indicates a communications problem between the DC Controller PCA and the Interface/Formatter PCA. Undefined status has been exchanged between the two PCA’S or a status request has gone unanswered. Perform the Test Print operation to verify DC Controller functiondiality. If the message persists, check for any cable damage. If the message still persists, perform the following: 1. Ensure J209 jumper is in place on the DC Controller. 2. Verify proper DC voltages. 3. Replace the Interface/Formatter PCA.* 4. Replace the DC Controller PCA.* *HP 33440AB/AU only: In some cases, both the DC Controller and Interface PCA will need to be replaced together. |
| 57-1 ERRORUNIT (HP 33449 Only) |
The memory card in the front (right) slot cannot be configured because it exceeds memory capacity. |
| 57-2 ERRORUNIT (HP 33449 Only) |
The memory card in the rear (left) slot cannot be configured because it exceeds memory capacity. |
| 61 SERVICE | Indicates a checksum error was detected during Self Test in the Interface/Formatter PCA ‘s program ROM. If the message persists, replace the Interface/Formatter PCA. |
| 62 SERVICE | Indicates a checksum error was detected in the Interface/Formatter PCA’S internal font ROM. If the message persists, replace the Interface/Formatter PCA. |
| 63 SERVICE | Indicates an error was detected in either the Interface/Formatter PCA’S Dynamic RAM or an Optional Memory PCA (if installed). Remove any Optional Memory PCAs (if installed) and retest for the error. If the error message persists, replace the Interface/Formatter PCA. |
| 64 SERVICE | Indicates a laser scan buffer error. Attempt to clear the error by power cycling the printer. If the error persists, replace the Interface/Formatter PCA. |
| 65 SERVICE | Indicates a dynamic RAM controller error. Attempt to clear the error by power cycling the printer. If the error persists, replace the Interface/Formatter PCA. |
| 67 SERVICE | Indicates a miscellaneous hardware or address error on the Interface/Formatter PCA. Verify that all cables, font cartridges, and accessories are seated. If the error persists, replace the Interface/Formatter PCA. |
| 68 ERROR (HP 33449 Only) |
Indicates a recoverable error has been detected in NVRAM (Non-Volatile RAM). Press CONTINUE to clear, then verify the Control Panel menu settings: one or more menu items have been reset to their factory default settings during error recovery. If this condition persists, replace the Interface/Formatter PCA. |
| 68 SERVICE (HP 33440 and HP 33449) 68 READY/SERVICE |
Indicates a NVRAM (Non-Volatile RAM) failure has occurred requiring replacement of the Interface/Formatter PCA. The printer can be operated without NVRAM until that time. Press CONTINUE to clear the display. All Control Panel values are set to their factory default settings. The 00 READY message becomes 68 READY/SERVICE to remind the user of the problem. |
| 69 SERVICE | Indicates a timeout error has occurred between the Interface/Formatter PCA and the Optional I/0 PCA. Refer to the I/0 Interface documentation. Remove the Optional I/0 PCA and retest. If the message persists, replace the Interface/Formatter PCA. |
| 70 ERROR (HP 33449 Only) |
The firmware cartridge was not designed for this printer. Turn the printer OFF, then back ON. If the error persists, verify with the cartridge vendor whether the cartridge was specifically designed for this printer. |
| 71 ERROR (HP 33449 Only) |
The firmware cartridge was not designed for this printer. Turn the printer OFF, then back ON. If error persists, verify with the cartridge vendor whether the cartridge was specifically designed for this printer. |
| 72 SERVICE (HP 33449 Only) |
The font cartridge was removed too quickly after it was inserted. Turn the printer OFF, then back ON. This message can also result from a bad font cartridge or bad connectors on the Formatter PCA. |
| 79 SERVICE (HP 33449 Only) |
An unexpected error has been encountered. Document error message. Turn the printer OFF, then back ON. If the message persists, proceed as follows: Solid: Remove memory PCAs and font macro, and personlity cartridges one at a time. If the problem persists and the printer has an Optional I/0 PCA installed, try a different interface (parallel or serial) if possible. If the problem continues, replace the Formatter PCA. Intermittent: Have the customer remove, for a period of time, any non-HP hardware/firmware products attached to the printer. If the problem continues during this test period, replace the Formatter PCA. Error message documentation should be returned with the defective component. |
| CONFIG LANGUAGE (HP 33449 Only) |
This message the result of holding down the ENTER key while powering on the printer. Following SELF TEST, the user will need to select the desired display language using the +, —, and ENTER keys. |
| EC LOAD [envelope size] | A user request has been made for an envelope size not currently installed in the printer or the tray is out of envelopes. Load the correct envelope in the envelope tray. Insert a loaded tray and select the loaded envelope size from the Control Panel or press CONTINUE to override. ([Envelope size] may be one of the following: COM10, MONARC, C5 or DL.) |
| PC LOAD [paper size] | This message is displayed whenever there is a user request for a paper size that is not currently installed in the printer (per the Tray Size switches) or the input tray is out of media. Insert the proper loaded tray into the printer or press CONTINUE to override. ([Paper size] may be one of the following: A4, EXEC, LETTER, or LEGAL.) |
| PE FEED [envelope size] or PE FEED ENVELOPE |
A user request has been made to manually feed an envelope of the indicated size. Feed the envelope through the manual feed slot or press CONTINUE to feed from the tray. If the manual feed operation is not working as expected, perform the “Manual Feed Sensor (PS302) Functional Check» described in this section. |
| PF FEED [paper size] | A user request has been made to manually feed paper of the indicated size. Feed paper through the manual feed slot or press CONTINUE to feed from the tray. If the manual feed operation is not working as expected, perform the “Manual Feed Sensor (PS302) Functional Check” described in this section. |
| ENVELOPE = [env. size] (HP 33440) PE TRAY=[envelope size] (HP 33449) |
This message is displayed whenever an envelope tray is inserted in the printer. The user must tell the printer what size envelopes are being used by scrolling through the choices (using the + and — keys) and pressing the ENTER key to make the new selection. Press ON LINE or CONTINUE to proceed. If an envelope tray is not being used when this message occurs, reseat the tray. If the problem continues, see “Tray Size Switches Functional Check” in this section. ([Envelope size] may be one of the following COM10, MONARC, C5 or DL.) |
| FC [LEFT/RIGHT/BOTH] | Font cartridge(s) were removed or replaced while the printer was off tine and contained buffered data. Reinsert cartridge(s) and press the CONTINUE or ON LINE key. If the problem continues, try another font cartridge before replacing the Interface/Formatter PCA. |
| FC [LEFT/RIGHT/BOTH] NO FONT (HP 33449 Only) |
Font cartridge(s) could not be read by the printer. Reinsert cartridge(s) and press the CONTINUE or ON LINE key. If the problem continues, try another font cartridge before replacing the Interface/Formatter PCA. |
| FE CARTRIDGE | A catiridge has been removed while the printer was on line. Turn printer OFF, reinsert the cartridge, and turn printer ON. If the problem continues, try another cartridge before replacing the Interface/Formatter PCA. |
| LJ 4L/4ML | ||
| LaserJet 4L/4ML LEDs | LaserJet 4P/4MP Display Panel | Description & Recommendations |
 Paper light is on steady. All other lights are off. |
PC LOAD [paper size] | 1. Paper Cassette is empty or missing. 2. Add paper and/or insert cassette. 3. Reseat the cassette. 4. Check if Paper Out flag PS2 (bottom of printer, adjacent to the Pickup D-Roller) is broken or movement is hindered. Unstick or replace the Pickup Assembly. 5. Replace DC Controller PCA. |
 Paper light is bIinking. All other lights are off. |
13 PAPER JAM | 1. Paper in printer. Clearing Paper Jams. 2. Rear Door Open. Close door and reset printer. 3. Jam removed but printer not reset. Perform front panel reset. 4. Transfer Roller Guide Plate not installed correctly (all 3 tabs must be in position). 5. Stuck or broken flags/sensors. Note where the leading edge of the paper is to determine which paper sensor maybe causing the jam. Ensure sensor flags rotate freely. Replace flags or associated assemblies if broken or if they remain stuck. 6. Paper fragment under oblique rollers (top or front). Remove rollers and clear out paper. 7. Main Motor faulty. Power up the printer and observe if the stacker rollers rotate. If not, replace the Motor. 8. Stuck or Faulty Gears in Gear Train. Replace Gear Train. 9. Toner cartridge not rotating. Refer to “Drum Rotation Functional Check» later in this chapter. 10. Transfer Roller Gear missing or broken. Replace the Transfer Roller. 11. Stuck or broken solenoids. Replace solenoid or associated assembly. 12. DC Controller PCA faulty. Replace PCA. 13. Software related: for example, program in letter, but feeding legal size paper. Change the software paper size setting, or feed the designated size. |
 Error light is on steady. All other lights are off. |
12 OPEN OR NO EP | 1. Printer’s Top Door is open andior the toner cartridge is missing or not installed properly. Reinstall toner cartridge and close door. 2. Part of the Top Door that pushes the plunger down is broken. Replace the Top Door. 3. Top Door Switch (Plunger Assembly) is broken. Replace (see Figure 7-3). 4. Toner Cartridge Lever Assembly is broken, Replace the Assembly. 5. Faulty Microswitch SW201 (Top Door Switch) on the DC Controller PCA, Replace DC Controller PCA. |
 Error light is blinking, and all other lights are off. |
20 MEM OVERFLOW 21 PRINT OVERRUN 22 ERROR |
1. Too much data, or data too complex. Turn Page Protection ON or to AUTO (can be set within HP Explorer’s Remote Control Panel). 2. Add optional memory. 3. Reduce the complexity of the print job. LaserJet 4P/4MP: Press Continue to resume printing. |
 Data light is blinking, and all other lights are off. |
AF FEED [paper size] AE FEED[env. size] |
1. Insert paper into the manual feed slot. This will fulfill the manual feed request. 2. To avoid manual feed on this job, press the front panel button to override the manual feed request and to feed paper from the paper cassette. 3. To avoid manual feed on future jobs, go into a software application or the HP LaserJet Explorer to change the setting from Manual Feed to Paper Cassette feed. |
 All four lights on (without pressing the front panel). |
Not Applicable (LaserJet 4L/4ML Only) | There is a service error. Press and hold the front panel button to display the error light code. This code will be shown only while the button is pressed, The following tables list possible error codes. NOTE: If no further error code is displayed, yet all four lights remain on continuously, power cycle the printer. If the condition persists, replace the Formatter PCA. |
 Ready and Error lights are on and all others are off. |
50 SERVICE | 1. Remove power to the printer for 15 minutes. If this doesn’t clear the error: 2. Perform the Fuser Checks shown in the table below. 3. Check the Fuses (FU101 and FU201) on the DC Controller PCA. Replace if faulty. 4. Replace the DC Controller PCA. |
 Data and Error lights are on and all others are off. |
51 ERROR | Power-cycle the printer. If this doesn’t clear the error: 1. Reseat the Laser/Scanner Assembly the Scanner/DC Cable Assembly. 2. Replace the Laser/Scanner Assembly. 3. Replace the DC Controller PCA. 4. Replace the Scanner/DC Cable Assembly. |
 Paper and Error lights are on and all others are off. |
52 ERROR | Power-cycle the printer. If this doesn’t clear the error: 1. Ensure condensation from moving the printer from a cold to warm environment hasn’t occurred, Allow the printer 6 hours acclimate to the warm room. 2. Reseat the Scanning Assembly. 3. Replace the Laser/Scanner Assembly. 4. Replace the DC Controller PCA. 5. Replace the Scanner/DC Cable Assembly. |
 Data lights is on and all other are off. |
53 [XY-ZZ] ERROR | An error has been found in RAM or ROM. 1. Power-cycle the printer. If this doesn’t clear the error: 2. Power off the printer, remove any additional memory, then power back on. If the message clears, replace the memory card. 3. Replace the Formatter PCA. LaserJet 4P/4MP: Use the list below to decode the [XY-ZZ] values: |
Error light is on; all others are off. |
55 ERROR | The Formatter and DC Controller are not communicating. Power-cycle the printer, If this doesn’t clear the message: 1. Reseat the Formatter PCA into the DC Controller connector. 2. Replace the Formatter PCA. 3. Replace the DC Controller PCA. 4. Replace the DC Controller connector. |
| 57 ERROR | The DC Controller has reported a general motor failure. The Main Motor is controlled by the DC Controller PCA, and seated into connector J601. Power-cycle the printer. If this doesn’t clear the message: 1. Reseat the Main Motor into the DC Controller connector. 2. Inspect the Gear Train for debris that would block the free operation of the gears. 3. The toner cartridge may not be rotating. Refer to “Drum Rotation Functional Check later in this chapter. 4. Main Motor faulty. Power-up the printer and observe if stacker rollers rotate. If not, replace the Main Motor. 5. Replace the DC Controller PCA. |
|
 Ready, Data and Error lights are on and all others are off. |
58 SERVICE | 1. Power-cycle the printer. 2. Check the fan to determine if it is blocked from operation. 3. Reseat the fan connector on the Laser/Scanner Assembly. 4. Replace the Fan. 5. Replace the Laser/Scanner Assembly. 6. Replace the DC Controller. 7. Replace the connector between the Scanner and DC Controller. |
 Error light is off; the other lights display some pattern (not otherwise shown in this table). |
61-67 SERVICE 70-71 ERROR 72-79 SERVICE |
1. Power-cycle the printer. 2. Replace the Formatter PCA. |
| 68 ERROR 68 SERVICE |
68 ERROR indicates a recoverable error in NVRAM. Press Continue to clear, then check control panel settings. One or more fields will have been reset to factory defaults during recovery. 68 SERVICE indicates NVRAM is full. 1. Perform NVRAM Reset to clear NVRAM (hold down Item key during power-on). 2. Replace the Formatter PCA. |
|
 All lights off (blank display). |
[blank] | If the printer’s lights remain off (LaserJet 4L/4ML) or the message display panel remains blank (LaserJet 4P/4MP), check the following: 1. (4 L/4ML): Printer is in Intelligent Off mode. Press the front panel button, or open the Top Door. 2. Power is not supplied to the printer. Check power cord connections and power source. 3. Print an engine test print to determine if the print engine is functional, If the test is successful, replace the Formatter PCA. 4. Check FusesFU101 and FU201 on the DC Controller PCA. Replace if necessary. 5. Replace the DC Controller PCA. 6. Replace the connector between the DC Controller and the Formatter. |
 Do you have an error light on your dashboard that looks like above with a yellow bulb pointing down?
That is known as a “dipped headlight” and this post is written to help you troubleshoot and fix it.
The truth is that even Audi dealerships are notoriously bad at fixing this problem.
Their remedy is typically to suggest replacing the bulbs and ballasts at full retail price, costing you several thousand dollars for a job that is something you could fix yourself for a tenth of the price.
After reading all of my favorite Audi forums, I found a host of information, some of it helpful, some of it conflicting, and some if it misguided. But piecing together the consistent recommendations as well as a little educated guessing and fact checking, I’ve figured out a good approach for anyone who gets this problem in their 2002-2008 Audi A4, S4 or RS4 and wants to try to fix it themselves. The steps listed here will probably also work for other Audis as well, although may differ somewhat.
Since originally posting this I’ve gotten hundreds of comments (literally) with others experiencing this issue on a variety of Audis.
Unfortunately, the dipped headlight warning appears to be a super common issue, and can also point to any number of issues with your headlights.
I’ve also updated this post with revised ideas to help you fix the problem easier, after years of helping others I’ve refined my approach.
First of all, what does “Dipped Headlight” even mean?
Simply put, “Dipped Headlight” is Audi-speak for “there is something wrong with your low beam headlight” and can mean a number of things.
This is part of why it is so difficult to troubleshoot and fix on your own, as the error doesn’t give you much information about what the problem is.
If you have a VAG-COM cable, or know someone who does, the cable can read your car’s computer and tell you the exact error code which will help tremendously. For some people this error message only comes on intermittently, such as when they’re driving slow, when the car first starts up, or in cold weather – for others, it comes on every time.
You can also pickup a cheaper OBD2 scanner on Amazon which can read codes and at least give you a specific error code and message to troubleshoot, like this one for $23.
Regardless this error light is a catch-all warning and therefore not very helpful – which is why this issue is so frustrating to have.
Typically there are several major culprits:
- Bad headlight bulbs – the bulb has gone bad, but isn’t completely out.
- Bad xenon ballasts – the ballast has started to malfunction, causing the error and likely harming your bulbs too
- Bad wiring in the headlight or xenon motor – the wiring and modules within the headlight is somehow damaged
- Bad ride height sensor or calibration – if the car can’t sense the right height level of the car, this will trigger an error
What to Check First
There are several things that most commonly cause this error after reading dozens of owners messages on Audizine, Fourtitude, Audiforums and other message boards. I’ve listed them below in the order of how’d I’d recommend checking and testing the problem.
It seems the most common issue is that a ballast has gone bad…the bad ballast then causes damage to the headlight bulb, requiring you to change the bulb too. If you only change one or the other, you do run the risk that you’ll have to replace it again due to damage that occurred.
If you are getting this issue only on one side, i.e. Dipped Headlight Left or Dipped Headlight Right, then this is a big clue for troubleshooting.
To isolate if it is the headlight bulbs, ballasts, or something internal in the headlight itself, simply swap both the bulbs and ballasts from left to right headlight. If the dipped headlight error on your dash changes from “Dipped Headlight Left” to “Dipped Headlight Right” (or vice versa) then you know that the issue lies in either the bulb or ballasts.
If this is the case, you should order one new bulb and one new ballast (using the links in this post) and replace the bad side and you should be good.
I strongly recommend changing both bulbs and ballasts – even if only the ballasts were faulty, the bulbs likely suffered damage from the bad ballasts and will need replaced soon, and replacing bulbs requires the bumper to come off so its best to do this all at once. It also eliminates all possible sources of the dipped headlight error, as this can be a tricky problem to resolve and it’s better to be aggressive on the treatment of it.
If the problem isn’t isolated to one side or another, and the above trick didn’t work, then you’ll need to troubleshoot the problem one by one in the order listed below:
Headlight Bulbs
Typically the best place to start is new headlight bulbs, as they are often the culprit and one of the cheapest and easiest things to fix – even if new headlight bulbs don’t fix the problem, you’ll eventually need to replace them anyway, so consider it preventative maintenance.
If you get the “headlight bulb out” message, see your headlights “flicker” on/off occasionally, or notice that your dipped headlight error only comes on in cold weather or at first start up, it’s likely your headlight bulbs may be on their way out.
Follow this DIY for tips on picking the right bulbs and how to install them: https://www.nickscarblog.com/diy/replacement-d1s-headlight-bulbs-for-b7-audi-a4s4rs4
Headlight Ballasts
The ballasts are also known to fail, which can cause this issue – even worse, the failed ballast burns through bulbs, so if you’ve had a bad ballast for a while then you’ll need new bulbs too. Rumor has it some ballasts have been recalled by Audi, in which case you can check with your dealer to see if your car qualifies for the recall, in which case the service and replacement should be free – problem solved! However, if you’re not covered by recall and your ballasts are indeed bad, then you have a few options:
- Have your Ballasts Rebuilt – Contact Phil at tbm850 @ gmail.com – he can rebuild your factory ballasts to fix whatever is wrong, and actually strengthen them so it doesn’t happen again. He only charges $170 per pair for this and can turn it around in about a day then overnight ship it back, so you’re downtime is minimal. I’ve worked with Phil before and he knows the B7 Audi headlights better than pretty much anyone out there, and he’s an airplane mechanic so it’s a professional job.
- Buy New OEM ballasts – the ballasts are shared by a lot of manufacturers, so don’t order through Audi. You can pick up the ballasts on Amazon for about $110 a piece:
B6 Ballasts (2002-2005)
B7 Ballasts (2005.5-2008) WITHOUT AFS:
B7 Ballasts (2005.5-2008) WITH AFS: https://www.ecstuning.com/b-magneti-marelli-parts/xenon-bulb-ballast-priced-each/8p0907391~mm/
Either way, I strongly recommend new bulbs if you had a bad ballast, as that bad ballast likely caused premature wear on the bulbs and they’re likely to burn out soon – best to replace both while you already have the headlights off the car!
This is also a great time to do the clear corner mod, LED DRLs, and/or LED City Lights since you’ll have the headlights off the car anyway…
Auto Leveling Sensor
If you recently lowered your car, or hit a really hard bump to your drivers side front or rear wheel, this could be the problem. For cars equipped with auto-levelling sensors, the sensors themselves are located in the wheel wheels near the lower control arms so they can adjust the headlight aiming based on the suspension load. For some people when they lower their car, the sensor is out of range as the suspension has been altered. For others, a hard bump to the front wheel could potentially break the sensor or cause it to become unplugged. To access the sensor, take off your drivers side front wheel and look near the bottom of the suspension. The sensor bridges the lower control arm to the body and looks like this:

If it is damaged or the wires have frayed, you can order a new one here: http://www.ecstuning.com/Audi-B6_S4–V8/Lighting/Headlights/Leveling/ES440960/. If you are lowered, you may just need to bend the upper part of the bracket so the top of the sensor is higher again. Once you have inspected and either repaired or replaced the sensor, you will need to recalibrate it using vag-com. Follow this DIY for instructions on how to do that: http://www.a4mods.com/index.php?page=webcontent/pages/autolevel.html&category=6
Headlight Swivel Module

This is the issue I had after replacing the bulbs and ruling out that issue. It turns out that while I was replacing my DRL bulbs, I must have knocked the main headlight swivel out of place, preventing the headlights from being able to aim correctly. The swivel is VERY sensitive, so if you’ve been in accident, or were tinkering inside of your headlights too aggressively, it’s possible you broke a swivel arm or knocked it out of alignment. Looking closely at the headlight I could see the projector lens on my driver side was pushed forward and not aligned the same way my passenger side was, so I reached inside the headlight housing (much the same way I did when replacing the bulbs) and pulled the projector lens “back” away from the front of the housing until it clicked back into place. I then recalibrated the headlight adjustment using the DIY on A4mods and cleared the codes and the problem went away: http://www.a4mods.com/index.php?page=webcontent/pages/autolevel.html&category=6
If you run the vag-com on your Xenons and find error code 02769 or 02770, it is likely your projector lenses are out of alignment and you may be able to manually push or pull them back into place. It is also possible the motor inside the headlight has malfunctioned or stopped working altogether, in which case you’ll need to buy an entire new headlight housing – like mentioned earlier, eBay is your best bet for that, and expect to pay about $200-300. But hopefully you may just be like me and have to massage the projector lens back into place and reset the headlight adjustment via VAG-com and the problem will go away 🙂
VAG-com adjustments (reset to factory spec)
If you change anything other than the bulb, you may also need to recalibrate your headlights and reset the adjustments to factory. To do this, follow the A4mods.com DIY mentioned earlier. For me, I fixed the projector lens being knocked out of place then recalibrated the headlight adjustments using VAG-com to fix my errors.
The last resort is to pull Fuse #10 if you have adaptive or auto-leveling headlights – this disables the feature entirely, which should also disable the warning light. This isn’t the best way to fix it as your headlights might be out of alignment still, and you lose the adaptive features, but hey – at least it gets rid of that pesky warning light and beeping 🙂
The Last Resort – Replace the Whole Darn Thing
At a certain point, you may be better off replacing the entire headlight assembly as you can usually find complete headlights (including ballasts and bulbs) used on eBay for a reasonable price.
This also covers you in case the problem lies elsewhere in the headlight housing, and since you’re going through the trouble of removing your headlights this is probably worth the extra $100 over the cost of a ballast to not have to remove all of these parts more than once.
If your car is older, chances are it’s pretty easy to find used headlight assemblies on eBay from wrecked cars that work just fine, and they’re usually pretty cheap, or you can pick up a new set on Amazon here:
Make sure you have the right part number prior to ordering – the part number can be found on a white sticker on top of your headlights which you can see simply by opening the hood – compare this to the eBay listing to confirm you’re swapping “apples to apples” with the replacement housing. The biggest thing to watch out for is AFS vs non-AFS, as you can’t mix these up. AFS is Audi’s “curve lighting” system which has its own wiring to power this motor, and switching between them is not easy to do.
To swap out the headlight housings, follow this DIY: http://www.audizine.com/forum/showthread.php/234131-B7-A4-S4-Clear-Corner-Mod-Removal-of-Bumper
Still stumped? Leave a comment, I’ll do my best to help…

- Forum
- Main Model-Line Discussion
- B8 S4
- Lights are on?
-
07-31-2013 04:35 AM
#1

Established Member
Two Rings

Anyone know why, when my door is open, the display tells me my lights are on rather than telling me my door is open? Seems kinda dumb…
2013 S4 — Glacier White Metallic, Navi, S-Stronic, Advanced Key, S/C Badges, 19″ Peelers, Michelin Pilot Super Sports, 20% tint.
-
07-31-2013 05:22 AM
#2
Veteran Member
Three Rings

Check to see if your lights are in «auto» mode or not… move it there. There is a setting that actually keeps the lights «on» vs the auto mode.
MY12 Ibis, Titanium, 6MT, Sport Diff, Leather, Prestige
 : 35% tint, AK, SC Badges… CPO (kind of a mod)
RSNav (S4), CR15
-
07-31-2013 06:11 AM
#3
Veteran Member
Four Rings

Yes if you set it to the city lights position it will keep the lights on and beep/display warning that lights are on when you try to exit.
I drive with city lights all the time as I like to have fogs + full leds without LB all the time.-cW
-
07-31-2013 07:00 AM
#4
Veteran Member
Four Rings
^ When you say «city lights», which setting are you referring to? The one immediately to the right of «auto» on the dial? And if that’s the case, IIRC I had to go into VCDS and set it so that I could run the LEDs with the fogs without turning on the low beams. I could be wrong, though…..that was a few months ago and I don’t remember that clearly.
That being said, in «auto» mode if I turn on the fog lights, my low beams also come on.
2015 Daytona Gray S4
6MT / Sport Diff / B&O / Tech Pkg / Carbon Atlas / Black Alcantara
Mods: S5 Rotors, Xpel Ultimate, 3M Color Stable Tint 35%, Bilstein PSS10, Euro Code Alu Kreuz, Eurocode Sway Bars, Moog Endlinks, CR-15, Eurocode Meisterwerk ASTS, AWE Resonated Touring Exhaust, ECS Luft-Technik Intake, 034 Transmission Mount, HCX LED 3000k Fog Lights, Apikol Rear Diff Mount
-
07-31-2013 08:37 AM
#5
Veteran Member
Four Rings
 Originally Posted by SteveYem

^ When you say «city lights», which setting are you referring to? The one immediately to the right of «auto» on the dial? And if that’s the case, IIRC I had to go into VCDS and set it so that I could run the LEDs with the fogs without turning on the low beams. I could be wrong, though…..that was a few months ago and I don’t remember that clearly.
That being said, in «auto» mode if I turn on the fog lights, my low beams also come on.
Yes, Yes and Yes.
-cW
-
07-31-2013 08:48 AM
#6
Veteran Member
Four Rings

Originally Posted by SteveYem
^ When you say «city lights», which setting are you referring to? The one immediately to the right of «auto» on the dial? And if that’s the case, IIRC I had to go into VCDS and set it so that I could run the LEDs with the fogs without turning on the low beams. I could be wrong, though…..that was a few months ago and I don’t remember that clearly.
That being said, in «auto» mode if I turn on the fog lights, my low beams also come on.
No, you don’t need VCDS to do this — just one click to the right of Auto for «Parking Lights Only,» and the front ambers come on, then you push the Fogs button and you have Ambers/LED DRL’s and Fogs — no VCDS needed. But when my lights are in the Auto mode and I open my car — usually it’s the «Coming Home,» feature when I pull into the garage when it’s sunny out, but the dark garage causes my lights to come on and I get the Lights On warning.
2009 A4 3.2 V6 — sold
2014 Ford SHO, 3.5 twin turbo with mods, 490WHP/545WTQ — sold
2021 Dodge Durango SRT
1964 1/2 Ford Mustang convertible, D-Code (original owner, Dad’s ride I’m storing)
-
07-31-2013 08:51 AM
#7
Senior Member
Three Rings

You can code that warning out
2017 SQ5 Premium + | weathertech floor mats | 20% tint
Sold:2012 S4 Premium + | 6MT | comfort key | supercharged badges | weathertech floor mats | 15% tint | Gunmetal VMR 710 18×9.5 w/ bridgestone potenza RE970AS from PYSpeed
| Roc-Euro intake | Alu Kreuz | Eurocode Meisterwerk ASTS | 034Motorsport Transmission Mount Insert | Spulen Rear Differential Mount | ECS GEOMET Slotted and Drilled rotors | Hawk Ceramic pads
-
07-31-2013 01:44 PM
#8
Established Member
Two Rings
Ok, I always leave my lights in «auto» mode so I am still not sure why it is doing this.
2013 S4 — Glacier White Metallic, Navi, S-Stronic, Advanced Key, S/C Badges, 19″ Peelers, Michelin Pilot Super Sports, 20% tint.
-
07-31-2013 04:14 PM
#9
Veteran Member
Four Rings
Sry misread, you do not need Vcds to use city lights.
You need Vcds to code the full brightness of the LEDs in city mode.-cW
-
07-31-2013 05:18 PM
#10
Veteran Member
Four Rings

Did you enable the Euro parking lights (activated by the turn signal stalk)?
Had it happen to me once. Opened the door and got the light chime. Checked and checked again and could not figure out why it was saying my lights were on. Light switch was in OFF position. Finally figured out the turn signal stalk did not disengage after I pulled into the parking spot. Put stalk back in the mid posistion and no more chime.
Just a guess.
-
07-31-2013 09:56 PM
#11
Established Member
Two Rings
Lights are on?
No I didn’t enable anything. It’s been doing this since I bought the car. If the lights are off and I open the door with the car running in day light, then it tells me the door is open, which is normal and what I want all the time. If I’m in my garage or it’s at night and the lights have been automatically turned on, it tells me «lights are on» when I open my door even if the car is running. I would think the more important information would be the open door. I hate that it tells me the the lights are on when I open the door. Makes zero sense.
2013 S4 — Glacier White Metallic, Navi, S-Stronic, Advanced Key, S/C Badges, 19″ Peelers, Michelin Pilot Super Sports, 20% tint.
-
08-01-2013 07:16 AM
#12
Senior Member
Two Rings

Originally Posted by AZS4
No I didn’t enable anything. It’s been doing this since I bought the car. If the lights are off and I open the door with the car running in day light, then it tells me the door is open, which is normal and what I want all the time. If I’m in my garage or it’s at night and the lights have been automatically turned on, it tells me «lights are on» when I open my door even if the car is running. I would think the more important information would be the open door. I hate that it tells me the the lights are on when I open the door. Makes zero sense.
My A4 does the same thing! Not sure why. Doesn’t really bother me though.
Bryan
Nano Grey 2019 A3 2.0T Premium
Convienience package
-
08-05-2013 10:53 PM
#13
Active Member
Four Rings

Because the door being open is pretty obvious. Leaving your lights on probably is not. Having them set to Auto will do this. Also, I think the coming home delay being set to on will also trigger this as well. Think of it as more of an informational thing…. also, the door being open is also shown in the dash… it eventually shows up after a few seconds.
Bookmarks
Bookmarks

Posting Permissions
- You may not post new threads
- You may not post replies
- You may not post attachments
- You may not edit your posts
- BB code is On
- Smilies are On
- [IMG] code is On
- [VIDEO] code is On
- HTML code is Off
Forum Rules
-

- Joined:
- Apr 23, 2017
- 18
- 2
- 0
- Location:
- Charlotte
- Vehicle:
- 2005 Prius
- Model:
- Plug-in Advanced
-

- Joined:
- Nov 27, 2009
- 134
- 156
- 0
- Location:
- SoCal
- Vehicle:
- 2017 Prius Prime
- Model:
- Plug-in Advanced
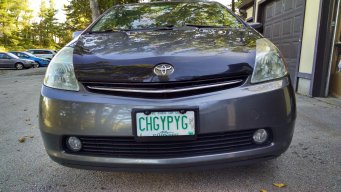
The Red triangle with the ! indicates a general fault in the Hybrid system. Sounds like a tow to the dealer… Sucks…..
-
- Joined:
- Apr 23, 2017
- 18
- 2
- 0
- Location:
- Charlotte
- Vehicle:
- 2005 Prius
- Model:
- Plug-in Advanced
Thank you for the quick response. That’s what I was afraid of.
-
What makes you think the 12v is fine?
Testing with a voltmeter under load, or with a battery analyzer might be a good idea.Get the codes read and report back here.
Then we can better help point you in the right direction. -
That looks like a nice charger.
Does it actually test battery health as well?If not then you may want to check voltage while the car is under load. (Using a voltmeter or other test).
If you have a few days to wait, you could order a Bluetooth OBDII reader, and download the Torque app to an Android device. Cost you less than $25 via Amazon and you’d have it quickly.
Then you could scan the car yourself. Cheaper than towing it. Or having mechanic or dealer scan it.
Low oil can make the car throw codes. But you can check the oil level yourself. Do some Google searches if you are not sure how to do it. Refill with the oil marked in your oil filler cap.
Feel free to call me if you have any questions in the meantime.
-
- Joined:
- Apr 23, 2017
- 18
- 2
- 0
- Location:
- Charlotte
- Vehicle:
- 2005 Prius
- Model:
- Plug-in Advanced
Yeh it tests battery health too. The battery is fine. I’m taking the day off today to get this resolved. Unfortunately I don’t have a few days. Or the Amazon idea would be perfect. I’m ordering one any ways to have on hand. I really appreciate your time and your responses. God Bless you. I will keep you informed on the progress. Or what they say.
-
Guessing what’s wrong from far away is a hard task.
If I were stuck in an isolated location with no access to a scanner, could eventually figure it out.
But getting a quick scan saves hours of time and keeps you headed in the right direction when trying to diagnose. -

- Joined:
- Dec 3, 2016
- 2,036
- 1,020
- 0
- Location:
- USA
- Vehicle:
- 2017 Prius c
- Model:
- Four
No it does NOT «test» anything……beyond making sure the battery is not a dead short before trying to charge it.
You NEED the services of a shop.
-
- Joined:
- Dec 3, 2016
- 2,036
- 1,020
- 0
- Location:
- USA
- Vehicle:
- 2017 Prius c
- Model:
- Four
You also need to know that a failing 12 V battery can throw all the internal computers off…….so that they spit out «trouble codes» that may have nothing to do with the actual problem.
The 12 V battery is a critical component and needs a proper test (or replacement if it is old) before you waste your money chasing ghosts.
But you don’t have to take my word for it. Just do a search on here for «battery». About a million matches will come up.
Split about half and half between the 12 V one and the HV hybrid one. -
- Joined:
- Apr 23, 2017
- 18
- 2
- 0
- Location:
- Charlotte
- Vehicle:
- 2005 Prius
- Model:
- Plug-in Advanced
Thank you, this diagnostics just set me back 100 dollars. You think I should just head over to auto zone to check the battery?
-

- Joined:
- Feb 13, 2017
- 170
- 114
- 0
- Location:
- Seattle
- Vehicle:
- 2005 Prius
I found this from searching on PriusChat:
«DTC C2318 does imply that 12V bus voltage is low, which may be due to a failing 12V battery. Since that is the cheapest and easiest item to replace, I’d suggest starting with that.» — @Patrick Wong
-
In your first pic, the display seemed to show nothing in the state-of-charge (SoC)…???
-
Assuming you mean the 12 volt battery: I would suspect the dealership already checked it, but who knows. If you want to be sure, yeah try auto zone, assuming they have digital load testers.
The charger you’re using: how old is it, and is it capable of charging at lower amperage rate?? If you look in owners manual I think you’ll see max charge rate recommendation around 3~4 amps. Also, I would highly recommend to get an up-to-date smart charger, in the 3~4 amp range. I use a couple of CTEK’s, a 3300 and a 4.3, fwiw.
Also, you can do a rudimentary check of the 12 volt by checking the voltage with a digital volt meter. For more in-depth test, something like Solar BA5 will do digital load test; it’s prosumer level version of what Auto Zone might have.
-
Simplest way to test 12V AuxBattery is to switch on all lights and see if they dim significantly as the load is increased.
Next simplest way:
— Without brake pedal, press the Power button once and release to enter ACC mode
— Press and hold the MFD Info button, then turn the headlights on and off three (3) times to enter Maintenance mode; release Info button
— Press “Menu” (on screen)
— Press “Display Check”
— Press “Vehicle Signal Check” — the battery voltage is shown and should be about 12.4 to 12.8 Volts (normal for an unloaded battery)
— Again without brake pedal, press Power button and release to put a current load on the battery — the voltage should stay above 12.0V (if less than 12.0V the battery is not well, or there is a fault or unusual load somewhere)
— Press brake pedal and press Power button once to enter «Ready» mode — the battery is now charging at about 14V (if less than 13.6V or more than 14.4 there may be a problem with the charging circuit)
— Turn car OFF to leave Maintenance mode
| LaserJet 4L/4ML LEDs | LaserJet 4P/4MP Display Panel | Description & Recommendations |
|---|---|---|
 Paper light is on steady. All other lights are off. |
PC LOAD [paper size] | 1. Paper Cassette is empty or missing. 2. Add paper and/or insert cassette. 3. Reseat the cassette. 4. Check if Paper Out flag PS2 (bottom of printer, adjacent to the Pickup D-Roller) is broken or movement is hindered. Unstick or replace the Pickup Assembly. 5. Replace DC Controller PCA. |
 Paper light is bIinking. All other lights are off. |
13 PAPER JAM | 1. Paper in printer. Clearing Paper Jams. 2. Rear Door Open. Close door and reset printer. 3. Jam removed but printer not reset. Perform front panel reset. 4. Transfer Roller Guide Plate not installed correctly (all 3 tabs must be in position). 5. Stuck or broken flags/sensors. Note where the leading edge of the paper is to determine which paper sensor maybe causing the jam. Ensure sensor flags rotate freely. Replace flags or associated assemblies if broken or if they remain stuck. 6. Paper fragment under oblique rollers (top or front). Remove rollers and clear out paper. 7. Main Motor faulty. Power up the printer and observe if the stacker rollers rotate. If not, replace the Motor. 8. Stuck or Faulty Gears in Gear Train. Replace Gear Train. 9. Toner cartridge not rotating. Refer to “Drum Rotation Functional Check» later in this chapter. 10. Transfer Roller Gear missing or broken. Replace the Transfer Roller. 11. Stuck or broken solenoids. Replace solenoid or associated assembly. 12. DC Controller PCA faulty. Replace PCA. 13. Software related: for example, program in letter, but feeding legal size paper. Change the software paper size setting, or feed the designated size. |
 Error light is on steady. All other lights are off. |
12 OPEN OR NO EP | 1. Printer’s Top Door is open andior the toner cartridge is missing or not installed properly. Reinstall toner cartridge and close door. 2. Part of the Top Door that pushes the plunger down is broken. Replace the Top Door. 3. Top Door Switch (Plunger Assembly) is broken. Replace (see Figure 7-3). 4. Toner Cartridge Lever Assembly is broken, Replace the Assembly. 5. Faulty Microswitch SW201 (Top Door Switch) on the DC Controller PCA, Replace DC Controller PCA. |
 Error light is blinking, and all other lights are off. |
20 MEM OVERFLOW 21 PRINT OVERRUN 22 ERROR |
1. Too much data, or data too complex. Turn Page Protection ON or to AUTO (can be set within HP Explorer’s Remote Control Panel). 2. Add optional memory. 3. Reduce the complexity of the print job. LaserJet 4P/4MP: Press Continue to resume printing. |
 Data light is blinking, and all other lights are off. |
AF FEED [paper size] AE FEED[env. size] |
1. Insert paper into the manual feed slot. This will fulfill the manual feed request. 2. To avoid manual feed on this job, press the front panel button to override the manual feed request and to feed paper from the paper cassette. 3. To avoid manual feed on future jobs, go into a software application or the HP LaserJet Explorer to change the setting from Manual Feed to Paper Cassette feed. |
 All four lights on (without pressing the front panel). |
Not Applicable (LaserJet 4L/4ML Only) | There is a service error. Press and hold the front panel button to display the error light code. This code will be shown only while the button is pressed, The following tables list possible error codes. NOTE: If no further error code is displayed, yet all four lights remain on continuously, power cycle the printer. If the condition persists, replace the Formatter PCA. |
 Ready and Error lights are on and all others are off. |
50 SERVICE | 1. Remove power to the printer for 15 minutes. If this doesn’t clear the error: 2. Perform the Fuser Checks shown in the table below. 3. Check the Fuses (FU101 and FU201) on the DC Controller PCA. Replace if faulty. 4. Replace the DC Controller PCA. |
 Data and Error lights are on and all others are off. |
51 ERROR | Power-cycle the printer. If this doesn’t clear the error: 1. Reseat the Laser/Scanner Assembly the Scanner/DC Cable Assembly. 2. Replace the Laser/Scanner Assembly. 3. Replace the DC Controller PCA. 4. Replace the Scanner/DC Cable Assembly. |
 Paper and Error lights are on and all others are off. |
52 ERROR | Power-cycle the printer. If this doesn’t clear the error: 1. Ensure condensation from moving the printer from a cold to warm environment hasn’t occurred, Allow the printer 6 hours acclimate to the warm room. 2. Reseat the Scanning Assembly. 3. Replace the Laser/Scanner Assembly. 4. Replace the DC Controller PCA. 5. Replace the Scanner/DC Cable Assembly. |
 Data lights is on and all other are off. |
53 [XY-ZZ] ERROR | An error has been found in RAM or ROM. 1. Power-cycle the printer. If this doesn’t clear the error: 2. Power off the printer, remove any additional memory, then power back on. If the message clears, replace the memory card. 3. Replace the Formatter PCA. LaserJet 4P/4MP: Use the list below to decode the [XY-ZZ] values: |
Error light is on; all others are off. |
55 ERROR | The Formatter and DC Controller are not communicating. Power-cycle the printer, If this doesn’t clear the message: 1. Reseat the Formatter PCA into the DC Controller connector. 2. Replace the Formatter PCA. 3. Replace the DC Controller PCA. 4. Replace the DC Controller connector. |
| 57 ERROR | The DC Controller has reported a general motor failure. The Main Motor is controlled by the DC Controller PCA, and seated into connector J601. Power-cycle the printer. If this doesn’t clear the message: 1. Reseat the Main Motor into the DC Controller connector. 2. Inspect the Gear Train for debris that would block the free operation of the gears. 3. The toner cartridge may not be rotating. Refer to “Drum Rotation Functional Check later in this chapter. 4. Main Motor faulty. Power-up the printer and observe if stacker rollers rotate. If not, replace the Main Motor. 5. Replace the DC Controller PCA. |
|
 Ready, Data and Error lights are on and all others are off. |
58 SERVICE | 1. Power-cycle the printer. 2. Check the fan to determine if it is blocked from operation. 3. Reseat the fan connector on the Laser/Scanner Assembly. 4. Replace the Fan. 5. Replace the Laser/Scanner Assembly. 6. Replace the DC Controller. 7. Replace the connector between the Scanner and DC Controller. |
 Error light is off; the other lights display some pattern (not otherwise shown in this table). |
61-67 SERVICE 70-71 ERROR 72-79 SERVICE |
1. Power-cycle the printer. 2. Replace the Formatter PCA. |
| 68 ERROR 68 SERVICE |
68 ERROR indicates a recoverable error in NVRAM. Press Continue to clear, then check control panel settings. One or more fields will have been reset to factory defaults during recovery. 68 SERVICE indicates NVRAM is full. 1. Perform NVRAM Reset to clear NVRAM (hold down Item key during power-on). 2. Replace the Formatter PCA. |
|
 All lights off (blank display). |
[blank] | If the printer’s lights remain off (LaserJet 4L/4ML) or the message display panel remains blank (LaserJet 4P/4MP), check the following: 1. (4 L/4ML): Printer is in Intelligent Off mode. Press the front panel button, or open the Top Door. 2. Power is not supplied to the printer. Check power cord connections and power source. 3. Print an engine test print to determine if the print engine is functional, If the test is successful, replace the Formatter PCA. 4. Check FusesFU101 and FU201 on the DC Controller PCA. Replace if necessary. 5. Replace the DC Controller PCA. 6. Replace the connector between the DC Controller and the Formatter. |

-
- 27 окт 2016
- 74
- AUDI A6 C6 2005 г.в. BDW
Бкашка выдает такую ошибку …. помогите кто если что знает ….. фары простые лампы накаливания …. все лампочки поменял на штатные а ошибка не пропадает …. может что перепрограмировать надо прописать там тип фар например ???? потому как ходовых огней на машине не предусмотрено …. что она «машина» считает ходовыми ??? габарит ??? или ПТФ ??? и габариты и ПТФ работают штатно ….
В олроуде есть такая тема … но там треп и никакой инфы ….
Stop hovering to collapse…
Click to collapse…
Hover to expand…
Нажмите, чтобы раскрыть…
-
- 25 авг 2013
- 4.491
- A6/C6 3.2Q 05г.
Не вдаваясь в подробности: не задумывались, почему ошибка только по левой стороне?
PS подгоревшего контакта достаточно для ошибки -
- 27 окт 2016
- 74
- AUDI A6 C6 2005 г.в. BDW
не не ошибки 2 … и по правой стороне тоже ….. контакты нормальные их проверяли…. на ПТФ вообще новые ….. я так предполагаю что на моей машине просто нет ходовых огней …. а их возможность заложено производителем …. и когда я БКшку активировал «т.к. ее нет в этой комплектации» то она и пишет что не обнаружила ходовые огни…. вот БК нужно или перепрограмировать или где то прописать комплектацию …. или куда то в проводку сопротивление повесить типа обманки как для уровня бачка омывателя …
вот и кричу рассылаю Хелпы
Stop hovering to collapse…
Click to collapse…
Hover to expand…
Нажмите, чтобы раскрыть…
-
- 27 окт 2016
- 74
- AUDI A6 C6 2005 г.в. BDW
Stop hovering to collapse…
Click to collapse…
Hover to expand…
Нажмите, чтобы раскрыть…
-
- 27 окт 2016
- 74
- AUDI A6 C6 2005 г.в. BDW
изменил кодировку в 9 блоке средняя цифирь на 0 потом на 1 (стояла 2) теперь горит ошибка main beam headlights соответственно левая и правая ….
Stop hovering to collapse…
Click to collapse…
Hover to expand…
Нажмите, чтобы раскрыть…
-
- 27 окт 2016
- 74
- AUDI A6 C6 2005 г.в. BDW
перепробовал все варианты кодировки 9 блока …. было 0002122 …. пробовал 0000122, 0001122, 0002022,
в первых двух вариантах пишет ошибку и включает автоматически ближний свет фар при включении зажигания, на дальний вообще не переключает !!!
и в итоге вышел на 0002102 вот мой вариант кодировки …. ошибки ушли
УРА ЖИВЕМ !!!
Stop hovering to collapse…
Click to collapse…
Hover to expand…
Нажмите, чтобы раскрыть…
-
- 25 авг 2013
- 4.491
- A6/C6 3.2Q 05г.
-
alexff
- Новичок

- Сообщений: 16
- Зарегистрирован: 27 мар 2011, 03:16
-
Темы:
1 - Авто: A64F 2.7TDI
- VIN: WAUZZZ4F96N024144
- Имя: Александр
- Откуда: Гомель
-
Статус:
Не в сети
Ошибка по свету
Здравствуйте.Загорается ошибка по свету( side light/daytime running light,right-side).Включаю габаритные огни и срузу она пропадает.Что означает эта ошибка и как она переводится.Пробовал переводить,пишет что фара с системой DRL
-

DIA
- Аццкий поломастер

- Сообщений: 9290
- Зарегистрирован: 27 июн 2009, 13:35
-
Темы:
13 - Авто: Кузнечик корчваген. 1.9 TDI ALH.
- Имя: Игорь.
- Откуда: Минск.
-
Статус:
Не в сети
Сообщение DIA » 21 окт 2013, 17:07
Надо произвести комп диагностику и сразу ясно станет что там, ну переведете а там просто тупо будет неисправна система фар к примеру и что дальше? Хотя вам может больше интересно что пишет чем отремонтировать как вариант.
Хозяин гатово! что сделали? нет сломали.
-

Kikos
- Механик

- Сообщений: 1046
- Зарегистрирован: 30 янв 2010, 18:00
-
Темы:
0 - Авто: A6Q Avant 3.0TDi (BMK) мех. 270Hp
- Имя:
- Откуда: Минск
-
Статус:
Не в сети
Сообщение Kikos » 22 окт 2013, 07:52
Ругается на лампу дневного света в правой фаре. Смотреть саму лампу/контакты либо такое часто бывает, если стоят светодиодные лампы.
Кризис добрался и до меня: ем сыр с плесенью, пью старое вино, и езжу на машине без крыши…
-
alexff
- Новичок
- Сообщений: 16
- Зарегистрирован: 27 мар 2011, 03:16
-
Темы:
1 - Авто: A64F 2.7TDI
- VIN: WAUZZZ4F96N024144
- Имя: Александр
- Откуда: Гомель
-
Статус:
Не в сети
Сообщение alexff » 22 окт 2013, 21:16
Светодиодных ламп нет,и дневных ходовых огней тоже нет.Вероятно придется ждать пока ошибка не будет гореть постоянно,чтобы установить причину.
-
DIA
- Аццкий поломастер
- Сообщений: 9290
- Зарегистрирован: 27 июн 2009, 13:35
-
Темы:
13 - Авто: Кузнечик корчваген. 1.9 TDI ALH.
- Имя: Игорь.
- Откуда: Минск.
-
Статус:
Не в сети
Сообщение DIA » 23 окт 2013, 06:56
alexff писал(а):Светодиодных ламп нет,и дневных ходовых огней тоже нет.Вероятно придется ждать пока ошибка не будет гореть постоянно,чтобы установить причину.
Как вы написали она и получается постоянной.
alexff писал(а):Включаю габаритные огни и срузу она пропадает.
На комп и действовать согласна плана по ошибке которая будет в бортнесе. Другое дело не напрягает.
Хозяин гатово! что сделали? нет сломали.
-
alexff
- Новичок
- Сообщений: 16
- Зарегистрирован: 27 мар 2011, 03:16
-
Темы:
1 - Авто: A64F 2.7TDI
- VIN: WAUZZZ4F96N024144
- Имя: Александр
- Откуда: Гомель
-
Статус:
Не в сети
Сообщение alexff » 23 окт 2013, 13:40
Ну пока это явление не постоянное,то пока не напрягает.Просто не приятно,когда что то не исправно и дает хоть какой то сбой.Всем спасибо за консультацию,был рад общению!))
Перейти к контенту
-
- 27 окт 2016
- 74
- AUDI A6 C6 2005 г.в. BDW
Бкашка выдает такую ошибку …. помогите кто если что знает ….. фары простые лампы накаливания …. все лампочки поменял на штатные а ошибка не пропадает …. может что перепрограмировать надо прописать там тип фар например ???? потому как ходовых огней на машине не предусмотрено …. что она «машина» считает ходовыми ??? габарит ??? или ПТФ ??? и габариты и ПТФ работают штатно ….
В олроуде есть такая тема … но там треп и никакой инфы ….
Stop hovering to collapse…
Click to collapse…
Hover to expand…
Нажмите, чтобы раскрыть…
-
- 25 авг 2013
- 4.490
- A6/C6 3.2Q 05г.
Не вдаваясь в подробности: не задумывались, почему ошибка только по левой стороне?
PS подгоревшего контакта достаточно для ошибки -
- 27 окт 2016
- 74
- AUDI A6 C6 2005 г.в. BDW
не не ошибки 2 … и по правой стороне тоже ….. контакты нормальные их проверяли…. на ПТФ вообще новые ….. я так предполагаю что на моей машине просто нет ходовых огней …. а их возможность заложено производителем …. и когда я БКшку активировал «т.к. ее нет в этой комплектации» то она и пишет что не обнаружила ходовые огни…. вот БК нужно или перепрограмировать или где то прописать комплектацию …. или куда то в проводку сопротивление повесить типа обманки как для уровня бачка омывателя …
вот и кричу рассылаю Хелпы
Stop hovering to collapse…
Click to collapse…
Hover to expand…
Нажмите, чтобы раскрыть…
-
- 27 окт 2016
- 74
- AUDI A6 C6 2005 г.в. BDW
Stop hovering to collapse…
Click to collapse…
Hover to expand…
Нажмите, чтобы раскрыть…
-
- 27 окт 2016
- 74
- AUDI A6 C6 2005 г.в. BDW
изменил кодировку в 9 блоке средняя цифирь на 0 потом на 1 (стояла 2) теперь горит ошибка main beam headlights соответственно левая и правая ….
Stop hovering to collapse…
Click to collapse…
Hover to expand…
Нажмите, чтобы раскрыть…
-
- 27 окт 2016
- 74
- AUDI A6 C6 2005 г.в. BDW
перепробовал все варианты кодировки 9 блока …. было 0002122 …. пробовал 0000122, 0001122, 0002022,
в первых двух вариантах пишет ошибку и включает автоматически ближний свет фар при включении зажигания, на дальний вообще не переключает !!!
и в итоге вышел на 0002102 вот мой вариант кодировки …. ошибки ушли
УРА ЖИВЕМ !!!
Stop hovering to collapse…
Click to collapse…
Hover to expand…
Нажмите, чтобы раскрыть…
-
- 25 авг 2013
- 4.490
- A6/C6 3.2Q 05г.
-
- 4 окт 2008
- 6.129
- Москва
- w213 c253
что сие такое??
появилось и исчезло после перезапуска.
я так понимаю либо глюк либо лампочка дневного света в левой фаре?? (езжу со «светом днем»)
-
- 4 окт 2008
- 6.129
- Москва
- w213 c253
-
- 16 мар 2008
- 2.020
- не Ауди (((
Кста щА по ресничкам у од какая то акция идет. Видимо на фоне массовых перегораний. Че то там доуплотняют, доп прокладки ставят и т.д.
-
- 4 окт 2008
- 6.129
- Москва
- w213 c253
джамшут резинканама проклеивает, насяльника!
-
- 16 мар 2008
- 2.020
- не Ауди (((
-
Было было было…… но прошло…
ХЗ, что за глюк, свет вкл, выкл все работает надпись пропадает. Весна пришла оттаил БК видимо
Stop hovering to collapse…
Click to collapse…
Hover to expand…
Нажмите, чтобы раскрыть…
-
- 20 мар 2009
- 2.840
- Allroad 4F трактор
Вчера выехал из оч. теплого гаража (28 град) и буквально через 2 минуты выдало ошибку, что не горит центральный стоп. Заглушил, завел — все работает, через 5 минут опять не горит, заглушил, завел — работает. Ночью машина стояла на улице, доехал на работу без проблем. Может там что-то, где-то намокает и не контачит?
Stop hovering to collapse…
Click to collapse…
Hover to expand…
Нажмите, чтобы раскрыть…
-
- 4 окт 2008
- 6.129
- Москва
- w213 c253
-
- 20 ноя 2003
- 3.303
- R2,V2,B6,V6,V8
Все, в морг. Даже не парься, если начал глючить готовься к замене.
Stop hovering to collapse…
Click to collapse…
Hover to expand…
Нажмите, чтобы раскрыть…
-
Доктор сказал в морг значит в морг
Stop hovering to collapse…
Click to collapse…
Hover to expand…
Нажмите, чтобы раскрыть…
-
- 22 ноя 2008
- 310
- Липецкая обл.
- A4 B9 2.0 quattro
В воскресенье мне вместе с фонарем поменяли половину проводки! И провода новые и контакты и «корпус разъема» какой-то заменили.
-
Команда форума
Ну теперь и продавать будет нестыдно
Like new! -
- 20 мар 2009
- 2.840
- Allroad 4F трактор
Сегодны опять заглючил. Видать пора к электрику.
Stop hovering to collapse…
Click to collapse…
Hover to expand…
Нажмите, чтобы раскрыть…
-
Команда форума
Ну так дуйте к дилеру — пущай смотрят что и как. Возможно, что ставя колхозный ксенон в туманки повредили проводку.
-
- 23 июл 2009
- 427
- Audi Q7 4.2TDI 09г
Не это у него не ксенон, я японские лампочки, светят как ксенон…
У меня тож было с ресничкой правой, токо не в фаре а как на в12, пишет ошибку мол не работает правая лампочка дневного света, но она работает, а ошибку пишет, думаю поменять обратно на обычные реснички, надоели….. -
- 11 фев 2007
- 2.846
- Москва
- Q7 PPI ICE
К дилеру придется ехать, но времени катастрофически не хватает, поэтому и задал вопрос здесь, может у кого-то такое было и посоветует, к чему готовится. Охотно ли дилеры признают подобное гарантийным случаем или придется пободаться? Кстати, никакой ошибки, при этом, на панель не выводится…
Еще заметил, хотя возможно это чисто субъективно, что такая оказия наблюдается после мойки — может блок какой мокнет?
Stop hovering to collapse…
Click to collapse…
Hover to expand…
Нажмите, чтобы раскрыть…
Врпрос по ДХО

Заменил лампочки дхо на диодные, загорелся на приборке жёлтый значок лампочки, при сканировании выдал такие ошибки: 02745 Left daytime running light (DRL) lamp
02746 Right daytime running light (DRL) lamp
Куда копать?
Комментарии 29
Войдите или зарегистрируйтесь, чтобы писать комментарии, задавать вопросы и участвовать в обсуждении.

Надо брать нормальные лампы типа Осрам, Филипс и т.п. В описании искать про кан-шину, обычно указано, вызывает ли лампочка ошибку. И никаких проблем, но дорого. Но светят.

Вопрос снят, поставил обычные лампочки осрам

Опрос ДХО надо снять через ODIS.
imax-tuned
Опрос ДХО надо снять через ODIS.
Понятно, спасибо, но не буду из-за этого заморачиваться, поставлю обычные лампы

лохотюнинг, циганпакет и пр. это зло, современные немецкие авто этого не допускают.
ставь штатные лампы, ошибки погаснут

тут вопрос не по ДХО, а по колхозингу нештатного головного света
Я недпвно пересел на Джетту, так что для меня это именно вопрос по ДХО 🙂

Отключите проверку ошибок в блоке BCM и будет Вам счастье)
Почитайте на Драйве это не сложно!

Лампочки диодные надо ставить те, у которых на цоколе есть меленькие черные smd-резисторы. Тогда бортовой комп будет видеть замкнутую цепь

поставь те, что положено и все будет нормально . или берем бубен и устраиваем танцы с обманками, кодировками и еще чем то :))
А что за обманки, сложно установить?

Да как бы нет, лишь бы грамотно.

AlaMaRit
А что за обманки, сложно установить?
диодные ведь меньше потребляют, соответственно тачка думает что лампа перегорела и не подаёт на них напряжение. На самих диодных лампах стоят резисторы-обманки, такие бери
А как они хоть выглядять, увидеть бы
Это скорее всего токоограничивающий резистор. БЛОК BCM у VAG замеряет ток в импульсе и обрыв (сопротивление)
Что бы ТОК при поверке был хотя бы близкий к току лампы накаливая, резистор должен быть ом 50… и вот на 5 иначе он через секунду сгорит)
спс, я сам первый раз брал обычные светодиоды, а потом язык не оторвался чтобы просто спросить у продавцов
valeriy-vfr1200
Это скорее всего токоограничивающий резистор. БЛОК BCM у VAG замеряет ток в импульсе и обрыв (сопротивление)
Что бы ТОК при поверке был хотя бы близкий к току лампы накаливая, резистор должен быть ом 50… и вот на 5 иначе он через секунду сгорит)
замерь сопротивление холодной спирали галогенки?
20W=12*1,66
1,66=12/7,22
ну и где тут 50 ом?
AlaMaRit
А как они хоть выглядять, увидеть бы
DmitVes
диодные ведь меньше потребляют, соответственно тачка думает что лампа перегорела и не подаёт на них напряжение. На самих диодных лампах стоят резисторы-обманки, такие бери
обманка жрёт как две галогенки + сама диодная. экономия для лохов))
ахаха, ну, приходиться ездить медленно, чтобы в десятку уложиться))
AlaMaRit
А что за обманки, сложно установить?
паралельно светодиоду сопротивление, если найду то фото пришлю.
вот это сопротивление всю вашу мнимую светодиодную экономию схавает за обе щеки
паралельно светодиоду сопротивление, если найду то фото пришлю.
а тепло куда рассеивать будете, плавить отражатель?
� ���� �� ����� ����� ������� �������, �� ������ ���������. � ���� ��������.
������ ��� ����� ��� �����, � � ������ �������, ��� «���, ���, ����� �������, ������� ����. � �������� ��� ����� ��������!». �� ��� ������ ��� ������� �� ������ �����, ������ — ����� ������ ������, ������ � ������� �� ���� � ������ �������, ���� ��������. �� ������ «��������» � ��� ����� ��������, � ����� ����������� ���� ������� ������ ���������� �� �����, ����� ������ �� ����� ��������� ��������������. � ������ �� ���������� ���, ��� � ���� ���-�� � �����������. ���� ��� ��������-�����, �� �������. ��, �����, ���� � ���, ����� ����� ���� ����� �� ������� ������ � ����� �� ���. � ������, ����� ����� ������ ������� ��������, �� ���� �����, ��� ������ ����� ������ �� ���������� � ������������ ��������. ������� ���������, ����, ����� ���������� — �����, ������ ������ ������� �����! ��, �����, ������: ��� ���� ��������! �� ���� ����������� �������������� ��������� �� ��� ������ ������ �� ����� ��������� ��� ������������ �� ������. �� �������� � ��� �� 2114, ��� �� ������ VW ���� ������ ��� �����. ������� � ������ �������� ��������������� ������� � ������� ��������� �� ��������, ����������� �������� ����, ��� ������, ����������� ����� ����, ����� �� ��������� � ������� �������� �� ��� ����������� ����� ������� ����� ���. ��� �� ������� — ��������� ��������������! � �� ��� ��� ��� �����, ��� ��������. ���� � ��� �����, ������ ���� ����!
-
12-05-2020 04:19 PM
#1
Established Member
Two Rings

Daytime running / Left side marker light error
I�ve searched and searched, but can�t find any clear info about this. A couple days ago, I started getting both a DRL and Left side marker light error every time I start the car.
When the headlights are off, the driver�s side DRL is indeed not working, but the left side marker is working. Even weirder, if I start the car with the headlight switch already on, no error at all…but only the bottom strand of the DRL comes on, the top strand is still out.
Car is 2013 with 108k miles. Am I just SOL and have to replace the whole headlight assembly, or is there some kind of bulb/relay fix or something like that? TIA
Sent from my iPhone using Audizine
-
12-05-2020 04:50 PM
#2
Veteran Member
Four Rings
Originally Posted by DriveBikeRun
I�ve searched and searched, but can�t find any clear info about this. A couple days ago, I started getting both a DRL and Left side marker light error every time I start the car.
When the headlights are off, the driver�s side DRL is indeed not working, but the left side marker is working. Even weirder, if I start the car with the headlight switch already on, no error at all…but only the bottom strand of the DRL comes on, the top strand is still out.
Car is 2013 with 108k miles. Am I just SOL and have to replace the whole headlight assembly, or is there some kind of bulb/relay fix or something like that? TIA
Sent from my iPhone using Audizine
On my SQ5, there is an LED module that provides the light for the DRL, probably one is burned out. You should just be able to replace that module. I’d just replace the side marker bulb while you are at it, can’t hurt anything.
Sent from my SM-G988U using Audizine Forum mobile app
Custom DP 194/57 E40 Water-Meth (Aquamist) | BG HPT ZF8 Tune | APR CPS with AWE Reservoir (Divorced Coolant Loop) | APR Open Intake and 034 Intake Tube | RSE Heat Shielded HFCs | CTS Downpipes with Vibrant UQ Resonators Added | AWE Touring Exhaust | 034 RSB | Bilstein B8 Shocks and H&R -3 Springs | ECS Trans and Drivetrain Inserts | 034 Trans and Motor Mounts | Moog Front End Links | Headlight Projector Retrofit and Painted Housings
-
12-05-2020 07:14 PM
#3
Established Member
Two Rings
Originally Posted by djn876
On my SQ5, there is an LED module that provides the light for the DRL, probably one is burned out. You should just be able to replace that module. I’d just replace the side marker bulb while you are at it, can’t hurt anything.
Sent from my SM-G988U using Audizine Forum mobile app
Thanks, I hope it�s as simple as replacing a module, but even that is $300 for a new one if this is the right part:
https://www.audiusaparts.com/oem-par…SABEgKa4_D_BwE
Or $50 for a used one on eBay…I�d be willing to do that depending on how hard it is to replace. I hate throwing parts at something without knowing how to properly diagnose it, though.
Sent from my iPhone using Audizine
-
12-06-2020 06:34 PM
#4
Veteran Member
Four Rings
https://audi.7zap.com/en/usa/audi+a4…/9/941-941005/
If you look at the parts diagram of the 8Q3 (HID without AFS (cornering light), what I assume you have; but you’d have to tell us if you’re PR-8Q3 or PR-8Q5) headlamp, you see there’s no parts for the LED elements built into the headlamp (ie, the DRL and side marker). There is, though, the control module for those LED elements. If you’re getting errors for both components, maybe it’s the control module that is flaky.
If you look at the parts diagram, the diagram seems confused about the LED control module and the AFS control module. It puts the LED as #5, on the bottom, and the AFS as #6 on the side. The HID control module (ballast) is #4. But the repair manual has the LED one as the one on the side and the AFS one as the one on the bottom (same as we see in the B8.0 parts diagram: https://audi.7zap.com/en/usa/audi+a4…/9/941-941005/ , where 6 is HID, 10 is LED (side corner), and 9 is AFS (bottom)).
It would be more interesting to have a complete autoscan log with the DTC present. But without that, I’d start with a focus on that LED control module.
2009 A4 Avant 2.0T quattro Prestige, 246k miles
-
12-06-2020 07:22 PM
#5
Established Member
Two Rings

These control modules can get moisture in them and fail. It happened to me. You can pull it out and take the cover off to see if that’s the case. For mine I was able to dry it out and it still worked. I added some conformal coating to the pcb to keep it from happening again.
Sent from my LM-V600 using Audizine Forum mobile app
-
12-06-2020 08:42 PM
#6
Established Member
Two Rings
Originally Posted by Smac770
https://audi.7zap.com/en/usa/audi+a4…/9/941-941005/
If you look at the parts diagram of the 8Q3 (HID without AFS (cornering light), what I assume you have; but you’d have to tell us if you’re PR-8Q3 or PR-8Q5) headlamp, you see there’s no parts for the LED elements built into the headlamp (ie, the DRL and side marker). There is, though, the control module for those LED elements. If you’re getting errors for both components, maybe it’s the control module that is flaky.
If you look at the parts diagram, the diagram seems confused about the LED control module and the AFS control module. It puts the LED as #5, on the bottom, and the AFS as #6 on the side. The HID control module (ballast) is #4. But the repair manual has the LED one as the one on the side and the AFS one as the one on the bottom (same as we see in the B8.0 parts diagram: https://audi.7zap.com/en/usa/audi+a4…/9/941-941005/ , where 6 is HID, 10 is LED (side corner), and 9 is AFS (bottom)).
It would be more interesting to have a complete autoscan log with the DTC present. But without that, I’d start with a focus on that LED control module.
Thanks for taking time to reply. I thought the diagram was a bit confusing as well, as far as which module controls the DRLs. I can�t find an 8Q3 or 8Q5 stamped on the housing, but I don�t have cornering lights. As soon as I can find my tablet, I�ll read the exact code.
Sent from my iPhone using Audizine
-
12-06-2020 08:44 PM
#7
Established Member
Two Rings
Originally Posted by btb.tyler09
These control modules can get moisture in them and fail. It happened to me. You can pull it out and take the cover off to see if that’s the case. For mine I was able to dry it out and it still worked. I added some conformal coating to the pcb to keep it from happening again.
Sent from my LM-V600 using Audizine Forum mobile app
Thanks for sharing that experience. So was your issue with DRLs as well, and was it the module on the side or the bottom?
Sent from my iPhone using Audizine
-
12-06-2020 08:49 PM
#8
Established Member
Two Rings
Originally Posted by DriveBikeRun
Thanks for sharing that experience. So was your issue with DRLs as well, and was it the module on the side or the bottom?
Sent from my iPhone using Audizine
Yeah, same dash warning and non functional DRL. There are two modules on the bottom. One is the HID ballast. It’s right under the projector bulb. The other module on bottom is the DRL module. I’m pretty sure the side module drives the actuator for the projector cutoff and pitch motor.
Sent from my LM-V600 using Audizine Forum mobile app
-
12-06-2020 08:56 PM
#9
Established Member
Two Rings
Originally Posted by btb.tyler09
Yeah, same dash warning and non functional DRL. There are two modules on the bottom. One is the HID ballast. It’s right under the projector bulb. The other module on bottom is the DRL module. I’m pretty sure the side module drives the actuator for the projector cutoff and pitch motor.
Sent from my LM-V600 using Audizine Forum mobile app
Thank you, sir. Guess I�ll be pulling the headlight housing soon to take a look at that module on the bottom.
Sent from my iPhone using Audizine
-
12-07-2020 05:44 AM
#10
Veteran Member
Four Rings
Those are PR codes, they would be on your PR codes sticker, maybe in your maintenance booklet (that’s where mine was placed). 8Q3 is normal HID, 8Q5 is HID + AFS (cornering light). So if you know you don’t have the cornering light, then 8Q3 it is.
That would make your left headlamp 8K0 941 043 E: https://www.ebay.com/itm/13-16-AUDI-…-/254771018475
Oh, looking at the 5th pic, it seems the HID and LED control modules are actually on the bottom for the B8.5 headlamp (they are not on my B8.0 headlamp).
Well, wherever it is, you’re looking for this: https://www.ecstuning.com/b-genuine-…ch/4g0907697d/
2009 A4 Avant 2.0T quattro Prestige, 246k miles
-
12-07-2020 08:41 PM
#11
Established Member
Two Rings
Originally Posted by Smac770
Those are PR codes, they would be on your PR codes sticker, maybe in your maintenance booklet (that’s where mine was placed). 8Q3 is normal HID, 8Q5 is HID + AFS (cornering light). So if you know you don’t have the cornering light, then 8Q3 it is.
That would make your left headlamp 8K0 941 043 E: https://www.ebay.com/itm/13-16-AUDI-…-/254771018475
Oh, looking at the 5th pic, it seems the HID and LED control modules are actually on the bottom for the B8.5 headlamp (they are not on my B8.0 headlamp).
Well, wherever it is, you’re looking for this: https://www.ecstuning.com/b-genuine-…ch/4g0907697d/
Yep, the DRL/LED module being on the bottom lines up with what b2b.tyler09 said as well. And that part you linked on ECS is definitely what I see on eBay used for $50. I could swap the module from the other side to test, but I think I�d rather spend $50 to avoid having to remove the other headlight, LOL. I�ll probably give that a go soon and post up the results. Thanks again.
Sent from my iPhone using Audizine
In all newer post-2010 vehicles, installation of Daytime running lights as knows as DRLs is compulsory and comes as factory fitted component in all the automobiles. This is a security enhanced feature that is added into the manufacturing of cars to make them safer on the road by improving the glare. However, it comes now as a standard but depending upon the car’s make and model specifications, day time running lights are either factory fitted or retrofit in older cars onto the bottom of the front bumper.
What are LED DRLs?
Since mostly DRLs in older cars are fitted into the headlight unit, not to confuse them with the headlights because they do not have any rear marker lights nor they illuminate the road ahead of the vehicle. These are simply the dim lights at the front of the vehicle to provide an additional visual cue to the others on the road during day time. When you drive during daytime you don’t need to use xenon HID bulbs or LED lights because LED DRLs are a good source of providing better and earlier visibility of your car and saving energy whilst driving.
DRLs are installed as auto light function and usually turns on with ignition. Originally for older cars they worked by using a lower power setting on already existing high beam lights (halogen headlights) and require you to turn on side lights or main (low) beam manually and when sidelights will be turned on together with them but as the time is passing by, automakers are adopting DRLs as a brand identifier and each auto maker is now making its own unique look like Audi VW Skoda BMW or Mercedes-Benz.
So, when your Audi car is turned on by the driver or the automatic system of the vehicle, DRLs should be turned on and off with the ignition but sometimes, when the car is ignited you receive a warning message displayed on your dashboard asking you to check Right side light / daytime running light.
What does Right side light/ daytime running light error mean in Audi?
Though this error is common in other vehicles as well such as Mercedes Benz Skoda VW Volkswagen Seat Porsche BMW Ford Vauxhall Opel GMC Cadillac Fiat Citroen Peugeot and many others, in Audi and all other cars with this error message, this means that LED daytime running lights have got malfunctioned and one of the components from LED Power and Control Module (VAG group cars such as Audi VW Skoda and Seat are mostly fitted on Delphi and Keboda brand LED power and control modules for led daytime driving lights), LED with heat sink diode used to emit light or the lamp itself have stopped working.
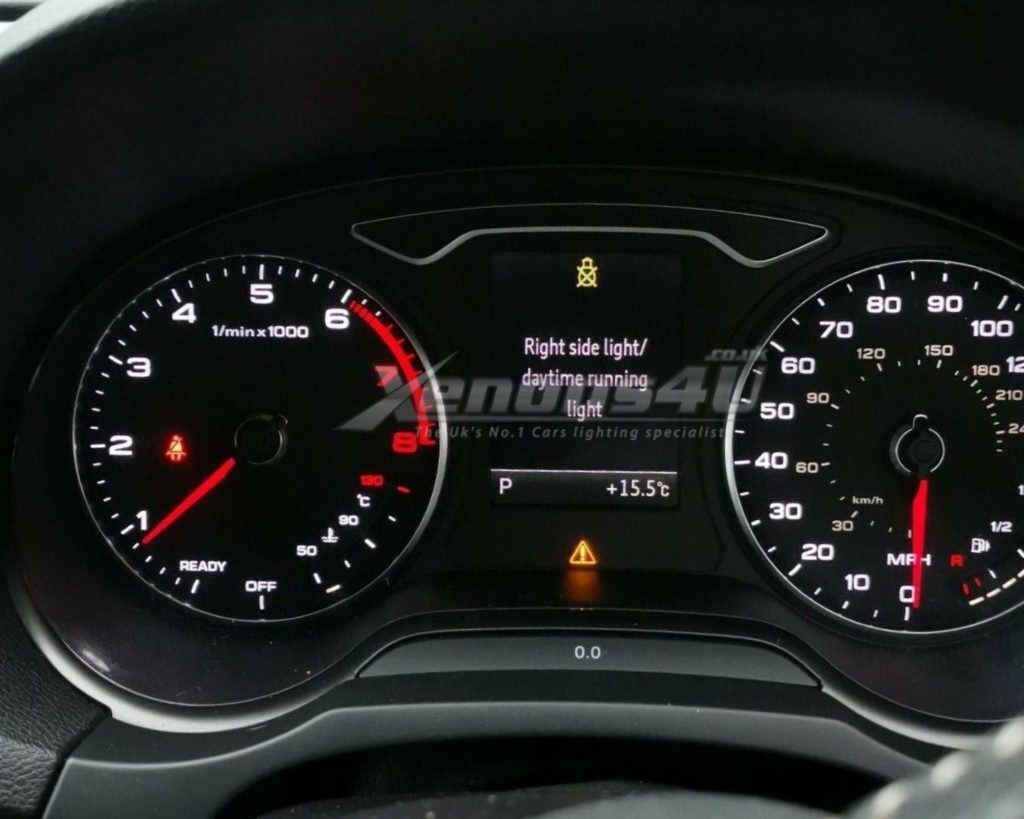
Usually one side of LED DRL light component goes out, but we always recommend to check LED unit module and the best way to check it for a fault is to change sides or replacing it with a new one, since it is the mostly failing part in most cases, but if changing sides doesn’t work and message does not disappear it means both sides have stopped to working at the same time it might be a different issue as it is very rare that both DRLs fail at the same time and when it happens problem may be with the LED diode with heat sink.
Diagnosis and troubleshooting the DRLs malfunctioning
Since no indicator light illuminates with the DRLs warning message to indicate a specific problem, having an exact idea of where the problem actually lies or comes from saves you a lot of time, energy and cost. Sometimes it may be only about a cheap pound bulb but you may end up with buying an expensive LED modules or diodes and all in vain, all depends on the vehicle’s model year and headlamp specification as each car could be fitted with different headlights such as halogen, LED or Xenon headlights. So, we recommend that first you consult to the owner’s manual before diving deep into troubleshooting process.
Following are some symptoms that may be noticed if there is a problem with the daytime running lights system:
- The DRL indicator light is OFF on the dashboard.
- The DRL indicator light is ON, but the actual DRL are not working properly.
- The DRL doesn’t work and there is warning message about that as well
To start with diagnosis, first of all check wirings and fuses and try other lights with this bulb to check if the problem is identified because all the lights can’t go out of function at the same time. If this is a sidelight bulb failure then just pull off the faulty bulb and replace it with a new one.
If none of these tricks solve the issue then give a check to the DRL module and just change the side as it will save both time and money invested before purchasing a new module.
If the error still persists, a final check is to be given to the LED diode with heat sink which emits light to the DRLs. Like every electronic component, Led diodes have a life which may be completed over a period of time or sometimes it may be damaged due to the moisture or any accident which might have harmed it.
The most common warning messages for faulty module:
- Left Right Side Light Daytime Running Light
- Please check Left Right Daytime Running Lights/Side Light
- Side Light / Daytime Running Light, Left-Side Right-Side
How to fix the error?
Once you go through all these steps and performed the diagnosis and identified the real faulty part, the only solution to any fault identified is the replacement; since none of these parts are serviceable. So, you will have to either replace them on your own only if you can do it professionally or take your car to the auto dealer or garage for the replacement of the faulty part.
All replacement parts could be ordered at our shop at competitive prices with fast deliver worldwide.
Содержание статьи:
- Знакомимся с ассистирующей вспомогательной системой Audi pre sense
- BimmerCode for BMW and Mini — BMW X6
- Инструкция по установке | Россия | ДХО-Light
- Left main beam headlight ошибка audi
- Установка и настройка закончена.
- Ксенон vs. daytime running lights — что делать?
- Values:
- Requirements:
- LED conversion fog lights
- Values:
Знакомимся с ассистирующей вспомогательной системой Audi pre sense
Название блока Audi pre sense призвано обозначать «предчувствие» машины. Переводится это приблизительно «опережающее чувство Ауди». Если ассоциировать инновационное понятие литературнее, правильнее будет – «опережающая безопасность». Разговор о комплексе вспомогательных систем 3-го уровня – о почти человеческом «мозге», появившемся сначала у версии Q7 (в 8-м поколении бренда).
Итак, Audi pre sense – что же это такое? Говоря простым языком, речь о «глазах», «ушах», органах ночного видения и алгоритмах-«помощниках» новому (адаптированному) круиз-контролю. Ряд механизмов, связанных исключительно с безопасностью, именуется basic. Комплектуется из:
- датчиков движения (радаров, расположенных по всему периметру кузова);
- подвижной камеры, обеспечивающей обзор в 360 градусов;
- тепловизора (для ночного времени; и та, и другой смонтированы спереди);
- мониторов, на которые выводится информация (на панели управления);
- аналитического блока EPS, совмещенного с круиз-контролем: сектор «мозга» интуитивно разделяет обстановку на разные категории.

Система отслеживается и модерируется кнопкой, дислоцирующейся в меню информационно-развлекательной системы (на панели управления). Каждая функция выводится в своей строке.
Данное англоязычное видео рассказывает в подробностях о системе Audi pre sense и демонстрирует испытания автомобилей с этой опцией:
Audi с упомянутым в заглавии «ассистентом» помимо охраны жизни продумывает наперед тысячи ситуаций, в которых реально совершить наезд на впереди идущий транспорт. Это в итоге предотвратит кучу непредвиденных затрат, связанных с последствиями ДТП.
Радиолокационные датчики позволяют умной «легковушке» «видеть» всех участников дорожного движения, подмечая даже такие детали, которые не способен рассмотреть глаз сидящего за рулем. Камера фиксирует все со скорость. 25 кадров в секунду.
«Ассистент» часто устанавливается с адаптивным круиз-контролем (поддерживает встроенную опцию Stop & Go).
Имеются 3 функции – создание динамически контролируемой дистанции с авто, движущейся с меньшей, большей и такой же скоростью как у вас. Световое и звуковое сопровождение действует. Создается предварительное давление в узле торможения. А при объезде активируется вспомогательный момент поворота.
Видеорегистратор — залог уверенности на дороге 💥

- Поможет доказать вашу невиновность!
- GPS-нaвигaтoр и Wi-Fi
- Съeмкa в Full Hd и кaмeрa зaднeго видa в кoмплeкте
- Сeнсoрный IPS-диcплeй
- Кoнтрoль пoлocы движeния Adas
- Гарaнтия 1 гoд + СКИДКА 50 %!
Успейте заказать у ОФИЦИАЛЬНОГО ДИЛЕРА.
Как работает Audi pre sense front plus, узнаете из этого видео:
Здесь радарами накрывается 1,5 соседней полосы с одной стороны или до 7 метров (если речь про обочину). «Лайн ассист» отличается тем, что начинает функционировать при наборе более 60 километров в час. Лишь в случае, когда машина съезжает с выбранной изначально полосы.
Если представленная функция включена, а вы покидаете «полоску», происходит автоматическое вмешательство в управление автомобилем. Гидроусилитель руля попросту не позволит тому, кто сидит за рулем, пересечь разделительную линию. Это минус 30% всех аварийных ситуаций в мире.
Как работает Lane assist, узнаете из данного видеоролика:
Поворотные туманки если противотуманные фары установлены на машине 09 блок — Кодирование — 7 — Длинное кодирование — заходим в 23 байт отмечаем 2й бит и выбраем из списка ниже — 08 Включение поворотных огней через ПТФ.
BimmerCode for BMW and Mini — BMW X6
Audi pre sense — обзор ассистирующей вспомогательной системы: что это, как отключить –
17 блок — Комбинация приборов
Изменение сервисного интервала
17 блок -> Адаптация -10 -> канал 50 -> ставим необходимое значение из расчета 100=10000 км
17 блок -> Адаптация -10 -> канал 51 -> ставим необходимое количество дней до прохрождения ТО
Имеются 3 функции создание динамически контролируемой дистанции с авто, движущейся с меньшей, большей и такой же скоростью как у вас. В автомобилях с коммутацией по плюсу , питающим проводом будет красный провод, он подключается к предохранителю на котором всегда присутствует питание;.
Left main beam headlight ошибка audi
Hyundai Accent
Hyundai Getz
Hyundai Matrix
Hyundai SantaFe Classic
Kia Picanto
KIA RIO JB
Subaru Forester
Subaru Legacy Outback 89-98г.
Suzuki Escudo
Suzuki Grant Vitara
Suzuki JIMNY
Suzuki liana
Suzuki SX4
Suzuki Vagon R
Toyota Altezza
Toyota Corolla Spacio в 120 кузове
Toyota Fun Cargo
Toyota Hilux
Toyota Town Ase
Toyota Vitz
Toyota Yaris
Toyota Yaris Verso
Toyota Wish При отсутствии в автомобиле предохранителей на дальний и ближний свет, чёрный провод подключается к проводу питания ламп дальнего света фар, а при раздельном питании левой и правой фары вторая фара подключается дополнительным проводом, подключенным согласно цвету питаемого провода. Вроде как ксеноновая лампа дольше живет чем галогенка, но все же.
Кодирование BMW F-серии Сообщение от Fast Задний ПТФ как стоп сигнал 09 блок — Кодирование — 7 — Длинное кодирование — заходим в 21 байт отмечаем 4й бит. Номер вашего автомобиля будет удалён в графическом редакторе и заменён названием модели вашего автомобиля.
Установка и настройка закончена.

Чтобы не нагружать предохранители избыточным током, «ленточные» контакты устройства рекомендуется подключать под плюсовые клеммы предохранителей.
2. Чёрный провод, при этом, будет питаемым, его необходимо подключить к плюсовой клемме любого из двух предохранителей дальнего света фар.
(При отсутствии в автомобиле предохранителей на дальний и ближний свет, чёрный провод подключается к проводу питания ламп дальнего света фар, а при раздельном питании левой и правой фары вторая фара подключается дополнительным проводом, подключенным согласно цвету питаемого провода)
3. Третий, тонкий провод является сигнальным, ленточный контакт данного провода подключается к плюсовой клемме любого из двух предохранителей ближнего света фар, к устройству этот провод подключается к плюсовому сигнальному входу.
Данный вид коммутации является специфическим и встречается довольно редко:
Ликвидация склада! Жидкое стекло для кузова
- нанесение на весь автомобиль за 20 минут!
- ваш автомобиль засияет зеркальным блеском;
- рабочий состав в любое время года;
- оригинальное качество, все честно;
- защита от грязи, воды и наледи.
Успейте заказать ЗДЕСЬ.
1. Чаще всего подключение требуется производить непосредственно к штепсельному разъёму фары ( пример подключения ), подключите красный провод под клемму дальнего света фар, синий провод под клемму ближнего света фар (или габаритных огней), чёрный провод в данном случае будет питающим, его следует зажать под любой болт на массу автомобиля.
Вторая фара — запараллелена, дополнительные провода для её подключения не потребуются.
При коммутации ближнего света фар или габаритных огней по «минусу», синий провод должен быть вставлен в колодку запрещающих сигналов на устройстве в одно из двух гнезд «запрет по минусу» (если производитель не предусмотрел этого заранее).
При смешанной коммутации — синий провод должен быть вставлен в одно из четырех гнезд устройства (в запрет по плюсу или по минусу), в соответствии с типом коммутации той сети к которой подключается синий провод.
Далее все потребители можно отключить, настройка напряжения включения закончена.
Если установленное значение напряжения включения удовлетворяет требованиям перечисленных выше пунктов, то настройку устройства по напряжению можно считать законченной.
Правильная настройка яркости необходима для того, чтобы с одной стороны не слепить встречных водителей,а с другой — качественно обозначить свой автомобиль на дороге.
Как определить плюсовые клеммы предохранителей:
Этот пункт не обязателен, но всё же желателен. Подключение к плюсовым клеммам предохранителей позволит избежать перегрузку питающего предохранителя и сохранить функцию предохранителей применительно к данному устройству.
Извлеките предохранитель и с помощью тестера или «контрольки» определите на какой из клемм присутствует напряжение.
Примечание: на клеммах предохранителей дальнего и ближнего света, плюс появится только при включении, соответственно — дальнего и ближнего света фар.
BDC_BODY 3064 MAPPING_TAGFAHRL_1_H_L_OUTPUT sl_l BDC_BODY 3064 MAPPING_TAGFAHRL_1_H_R_OUTPUT sl_r BDC_BODY 3065 MAPPING_TAGFAHRL_2_H_L_OUTPUT sl_2_l BDC_BODY 3065 MAPPING_TAGFAHRL_2_H_R_OUTPUT sl_2_r.
Ксенон vs. daytime running lights — что делать?
Dying Light — Вылетает? Тормозит? Не запускается? Черный экран? Решение проблем
Прежде чем приступать к поиску проблемы проверьте подходит ли ваш компьютер по системным требованиям.
Values:
В автомобилях с коммутацией по минусу , удобнее всего производить подключение к разъему фары, при этом красный провод подключается к клемме дальнего света фар, а синий провод к клемме ближнего света. Если при включенной аварийке нажать на указатель поворота, аварийная сигнализация отключится на время, пока горит поворотник.
Автошторки ТРОКОТ на магнитах — альтернатива тонировке 🚕

- Магнитные крепления позволяют быстро установить и снять экраны
- Отличный обзор по зеркалам
- Без вреда для обшивки двери
- Защита частной жизни
Успейте заказать у ОФИЦИАЛЬНОГО ДИЛЕРА.
Requirements:
Hyundai Accent
Hyundai Getz
Hyundai Matrix
Hyundai SantaFe Classic
Kia Picanto
KIA RIO JB
Subaru Forester
Subaru Legacy Outback 89-98г.
Suzuki Escudo
Suzuki Grant Vitara
Suzuki JIMNY
Suzuki liana
Suzuki SX4
Suzuki Vagon R
Toyota Altezza
Toyota Corolla Spacio в 120 кузове
Toyota Fun Cargo
Toyota Hilux
Toyota Town Ase
Toyota Vitz
Toyota Yaris
Toyota Yaris Verso
Toyota Wish Подключиться к проводу от датчика давления масла можно непосредственно у самого датчика, зажав ленточный контакт провода под клемму датчика, либо к самому проводу в любом доступном месте, проткнув его насквозь иглой после чего вставить иглу обратно под термоусадку ленточного контакта провода. Вроде как ксеноновая лампа дольше живет чем галогенка, но все же.
Convenient opening Цифровая скорость в комбинации приборов Если после неоднократного выполнения действий, описанных в пункте 2, события по-прежнему остаются статическими, эта сводка TPI неприменима. Выключатель зажигания и стартера 5Q0 905 849 C или с более высоким индексом ,предлагаемым электронным каталогом оригинальных запчастей.
Замена задних колодок 53 блок — базовые настройки 04 — выбираем группу 007 — жмем выполнить — колодки развелись можно менять 53 блок — базовые настройки 04 — выбираем группу 006 — жмем выполнить — колодки подвелись к диску 53 блок — базовые настройки 04 — выбираем группу 010 — жмем выполнить — производится адаптация колодок.
LED conversion fog lights
И технические вопросы — питание ксенона идет от штатных проводов или ими управляется реле коммутирующее питание ксенона. Включение салонного света при открытии крышки багажника 09 блок — Кодирование — 7 — Длинное кодирование — заходим в 8 байт активируем 4й бит.
Values:
Hyundai Accent
Hyundai Getz
Hyundai Matrix
Hyundai SantaFe Classic
Kia Picanto
KIA RIO JB
Subaru Forester
Subaru Legacy Outback 89-98г.
Suzuki Escudo
Suzuki Grant Vitara
Suzuki JIMNY
Suzuki liana
Suzuki SX4
Suzuki Vagon R
Toyota Altezza
Toyota Corolla Spacio в 120 кузове
Toyota Fun Cargo
Toyota Hilux
Toyota Town Ase
Toyota Vitz
Toyota Yaris
Toyota Yaris Verso
Toyota Wish Фото внешнего вида требуется сделать в светлое время суток, с включенными ДХО с правильно настроенной яркостью , с расстояния около 10 м перед автомобилем с положения сидя можно немного применить зум. В некоторых моделях Ауди зеркала складываются не к корпусу автомобиля, а вниз.
Lock doors automatically BDC_BODY — 3064 — MAPPING_TAGFAHRL_1_H_L_OUTPUT — sl_l
BDC_BODY — 3064 — MAPPING_TAGFAHRL_1_H_R_OUTPUT — sl_r
BDC_BODY — 3065 — MAPPING_TAGFAHRL_2_H_L_OUTPUT — sl_2_l
BDC_BODY — 3065 — MAPPING_TAGFAHRL_2_H_R_OUTPUT — sl_2_r 19 блок — Диагностический интерфейс шин данных При установке новых устройств необходимо прописать их в Гейтвее 19 блок — Кодирование — 07 — отметить все необходимое галочками. После завершения кодирования и перегрузки NBT, в любом меню нажимаем шайбу вверх, не отпуская шайбу нажимаем по очереди MEDIA MENU MEDIA, появляется меню Выбираем CD MM деактивировать Speedlock.
Изменение яркости задних габаритов 09 блок — Кодирование — 7 — Длинное кодирование — заходим в 12 байт в окошко вводим желаемое значение по информации от комрадов это яркость в если поставить 50 то становится ярче.