I installed TensorFlow on my Windows Python 3.5 Anaconda environment
The validation was successful (with a warning)
(tensorflow) C:>python
Python 3.5.3 |Intel Corporation| (default, Apr 27 2017, 17:03:30) [MSC v.1900 64 bit (AMD64)] on win32
Type «help», «copyright», «credits» or «license» for more information.
Intel(R) Distribution for Python is brought to you by Intel Corporation.
Please check out: https://software.intel.com/en-us/python-distribution
>>> import tensorflow as tf
>>> hello = tf.constant('Hello, TensorFlow!')
>>> sess = tf.Session()
2017-10-04 11:06:13.569696: W C:tf_jenkinshomeworkspacerel-winMwindowsPY35tensorflowcoreplatformcpu_feature_guard.cc:45] The TensorFlow library wasn’t compiled to use AVX instructions, but these are available on your machine and could speed up CPU computations.
>>> print(sess.run(hello))
b’Hello, TensorFlow!’
However, when I attempt to import it into my python code
from __future__ import print_function, division
import numpy as np
import os
import matplotlib
import tensorflow as tf
I get this error
ImportError: No module named ‘tensorflow’
This is the location of the tensorflow package on my C drive
C:UsersmynameAnaconda2envstensorflowLibsite-packagestensorflow
When I go to Anaconda Navigator, it seems I have to choose either root, Python35, or Tensorflow. It looks like the Tensorflow environment includes Python35.
Anaconda Navigator launcher had to be reinstalled recently, possibly due to the Tensorflow installation. Maybe if there were another way to set the environment to Tensorflow within Anaconda /Spyder IDE other than the Navigator it might help
Method of installing tensorflow
conda create --name tensorflow python=3.5;
pip install --ignore-installed --upgrade tensorflow
I did try:
uninstalling and reinstalling protobuf, as suggesed by some blogs
I see another SO user asked the same question in March, received no reply
Python is known for its versatile syntax and English-like keywords. With thousands of modules, you can do data visualization, data processing and even deploy machine learning models. There are many known machine learning models published which help you, namely, Keras, Sklearn, Tensorflow, and PyTorch. Although, while using Tensorflow, you can encounter a No Module named Tensorflow error while running your first program.
No Module Named Tensorflow Error is a known error that arises when the Python Environment is unable to fetch TensorFlow files in site-packages. There are two main reasons for this error to appear, either you have not installed the TensorFlow external module or you are working on a different python environment that doesn’t have Tensorflow. There are several easy ways to fix this error which are mentioned later in this post. Let’s understand the root cause of the error before jumping on the solution.
When a module is absent from the external site-library of the environment, the Python interpreter throws ModuleNotFoundError No Module Named Tensorflow. This error arises most of the time on low-end devices because TensorFlow requires proper setup of the c++ path and other requirements. Most of the time, this error is solved by using the pip install method. But if you have multiple Python versions installed, then you’ll definitely face this error.
Why do I get No Module Named Tensorflow Error?
There is no other reason for the No Module Named Tensorflow error other than missing module files. The main problem arises when you’re using multiple python versions and their virtual environment. Keep in mind that, Anaconda, PyCharm, Jupyter, and Spyder have their own virtual environment and it’s tricky to install modules in that environment.
Causes of No Module Named Tensorflow Error
There are some known causes of this ModuleNotFoundError. As Python lets you handle these errors easily, you can debug them quickly. Following are the cause of the No Module Tensorflow error –
Module Not Installed
If you haven’t installed TensorFlow yet and tried importing TensorFlow in code, then it’ll throw this error. Modules are managed by ‘pip’ which is a package management system for your python. Most of the time, the users forget to tick Add Python to the PATH option while installing it. This creates problems in managing the modules.
Supporting Module Not Installed
Tensorflow has many other supporting modules like numpy, scipy, jupyter, matplotlib, pillow, and scikit-learn. If any of these modules is absent, then it’ll throw an error. Make sure that these modules exist in your library.
Moreover, there are other supporting TensorFlow modules like, tensorflow-addons, tensorflow.contrib which might be absent from your library leading to this error.
Tip: To check which libraries are installed in your environment, enter pip list on your console.
Working on Different Virtual Environment
Virtual Environment: Method by which you isolate your working Python environment from the globally installed Python. This environment has its own installation directories and doesn’t share the libraries from globally installed Python.
Many of the code editors in Windows come with their own virtual environment. Each of these environments acts independently to global python installation and is started with blank external modules. Many times, you install a module but it’s installed on global python, not the python from your virtual environment. This can lead to ModuleNotFoundError No Module named Tensorflow in the code execution.
Code editors namely, Anaconda, Jupyter, and Spyder have their own virtual environment. If you have a similar case, head over to the corresponding solution for each code editor.
Solutions for No Module Named Tensorflow
Following are the solutions for this error in each code editor and OS –
Windows
In Windows, the path-related issues harras the programmers all the time. As you have limited functionality over the terminal, you’re constantly facing with ModuleNotFoundError error. To install TensorFlow in your Windows, make sure you follow these steps –
- Uninstall existing python versions to avoid any conflicts.
- Go to Python.org and install the Python setup. Make sure you install the 64-bit version. Unfortunately, Tensorflow is not supported in 32 bit systems.
- Open the installer and select the “Add Python x.x to your PATH” option. This will ensure, that python executes from the path.
- After installing, open the command terminal or PowerShell and enter the command
pip install tensorflowin it. - Wait for it to finish the installation and run your python file by command
python file.py
Linux
In Linux, it’s relatively easier to install TensorFlow. First of all, check if you are working on a virtual environment by a command which python. This command will return the path of python which you’re going to execute. If you are in a virtual environment, either leave the environment directory or enter the command deactivate to deactivate the virtual environment.
Note: Please do not try to uninstall python in Linux as it’ll interfere with your GDM (Graphical Display Manager). Instead, install a new version and then create your own virtual environment.
Follow these steps to install Tensorflow in Linux –
sudo pip3 install tensorflow
Mac
In Mac, No Module named Tensorflow is a persistent error because of environment errors. If you are working on your virtual environment, you need to deactivate and activate it again. Then use the pip list command to check if the TensorFlow module exists in your library. If not, then use the pip3 install tensorflow to install TensorFlow.
Anaconda
If you’re using Anaconda and you face no module named Tensorflow error, then you probably haven’t installed TensorFlow in the conda environment. As anaconda has a different environment than your default python environment, you need to install TensorFlow in it. To do it follow these steps –
- Open Anaconda Prompt on your computer.
- Enter the command
conda install tensorflowin it. - Wait for the installation to complete and restart the conda shell and run your program.
Jupyter
If you’ve installed Juptyter Notebook from Anaconda, it’ll use a conda environment. By default, the libraries in this environment need to be installed via command. To do the same, open your Conda Prompt and enter the command conda install tensorflow. This will ensure that your Juptyer Notebook has TensorFlow in it.
If your Jupyter is not installed via Anaconda, then use the pip install tensorflow to install the TensorFlow module. This will resolve the error ModuleNotFoundError No module named Tensorflow instantly.
Spyder
Spyder is installed via Anaconda which operates an Anaconda environment. Simply use the command conda install tensorflow in your Anaconda Prompt to install TensorFlow.
PyCharm
PyCharm is a special application that operates in its own virtual environment. Due to the unavailability of the TensorFlow error, you can face the no module found error. Follow these steps to install TensorFlow –
- Press Settings and select the Project Interpreter tab under projects.
- Now enter Tensorflow in the box and install it.
- After installing the package, your error will be resolved.
Supporting ModuleNotFoundError for Tensorflow
Tensorflow has many addons which come in handy to avoid writing long code. These addons and contributions are added separately in other packages and combine with the original TensorFlow module. Following are the examples of ModuleNotFoundError –
No module named ‘tensorflow.contrib’
Unfortunately, the contrib module in TensorFlow is not included in version 2.0. If you still want to use the contrib module, you’ll have to install the previous version of TensorFlow. Follow these steps –
pip uninstall tensorflow
pip install tensorflow==1.13.2
No module named ‘tensorflow_addons’
Use pip install tensorflow-addons to install the addons for TensorFlow.
No Module Named Tensorflow Still Not Resolved?
If you’ve tried all the methods and were still not able to solve the issue then, there might be some hardware limitations. Tensorflow requires Python 3.5-3.7, 64-bit system, and pip>=19.0. If you’re unable to fulfill these hardware + software requirements, then don’t worry, we still have a solution for you!
Google released a free product named ‘Colab‘ in 2018. Colab allows you to run and test machine learning models online. To explain more, it’s a replica of the jupyter notebook with all modules installed. To use Tensorflow in Google Colab follow these steps –
- Sign in to your Google account.
- Open Colab in your browser.
- Create a new Jupyter Notebook. (This notebook will be saved in your google drive).
- Type your code and run it.
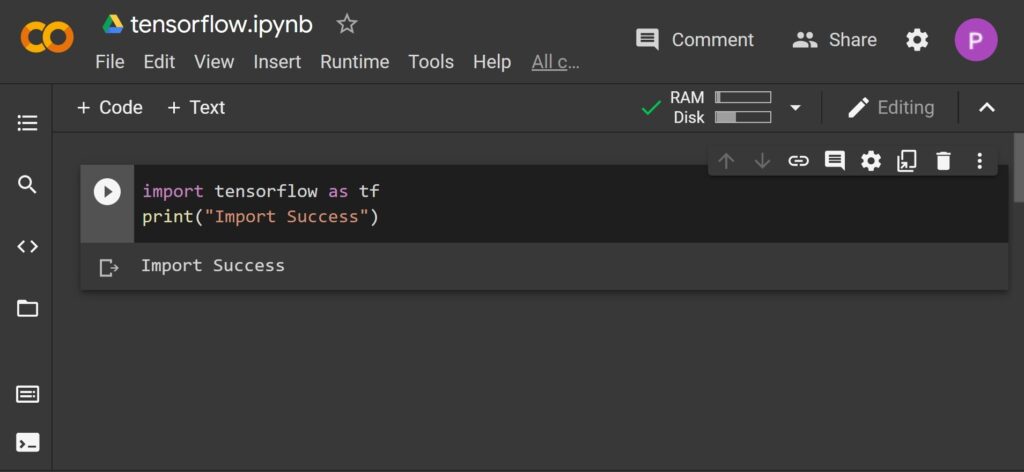
Colab has many libraries like TensorFlow, numpy, pandas, etc pre-installed in its shell. Make sure you make good use of it.
Tip: Do not use Colab to store/process peer-to-peer files. This may result in a ban!
See Also
Conclusion
Tensor flow has a flexible architecture. The easy deployment of the code makes it special in nature. However, we have to be very careful before using it. Any small syntax error can result in incorrect importing of the library.
Python 3.7.5 (default, Oct 31 2019, 15:18:51) [MSC v.1916 64 bit (AMD64)] :: Anaconda, Inc. on win32
Type «help», «copyright», «credits» or «license» for more information.
import tensorflow
Traceback (most recent call last):
File «C:Usersrosha.condaenvsMachineLEarninglibsite-packagestensorflow_corepythonpywrap_tensorflow.py», line 58, in
from tensorflow.python.pywrap_tensorflow_internal import *
File «C:Usersrosha.condaenvsMachineLEarninglibsite-packagestensorflow_corepythonpywrap_tensorflow_internal.py», line 28, in
_pywrap_tensorflow_internal = swig_import_helper()
File «C:Usersrosha.condaenvsMachineLEarninglibsite-packagestensorflow_corepythonpywrap_tensorflow_internal.py», line 24, in swig_import_helper
_mod = imp.load_module(‘_pywrap_tensorflow_internal’, fp, pathname, description)
File «C:Usersrosha.condaenvsMachineLEarninglibimp.py», line 242, in load_module
return load_dynamic(name, filename, file)
File «C:Usersrosha.condaenvsMachineLEarninglibimp.py», line 342, in load_dynamic
return _load(spec)
ImportError: DLL load failed: The specified module could not be found.
During handling of the above exception, another exception occurred:
Traceback (most recent call last):
File «», line 1, in
File «C:Usersrosha.condaenvsMachineLEarninglibsite-packagestensorflow_init_.py», line 101, in
from tensorflow_core import *
File «C:Usersrosha.condaenvsMachineLEarninglibsite-packagestensorflow_core_init_.py», line 40, in
from tensorflow.python.tools import module_util as module_util
File «C:Usersrosha.condaenvsMachineLEarninglibsite-packagestensorflow_init.py», line 50, in getattr
module = self.load()
File «C:Usersrosha.condaenvsMachineLEarninglibsite-packagestensorflow_init.py», line 44, in _load
module = importlib.import_module(self.name)
File «C:Usersrosha.condaenvsMachineLEarninglibimportlib_init.py», line 127, in import_module
return _bootstrap.gcd_import(name[level:], package, level)
File «C:Usersrosha.condaenvsMachineLEarninglibsite-packagestensorflow_corepython_init.py», line 49, in
from tensorflow.python import pywrap_tensorflow
File «C:Usersrosha.condaenvsMachineLEarninglibsite-packagestensorflow_corepythonpywrap_tensorflow.py», line 74, in
raise ImportError(msg)
ImportError: Traceback (most recent call last):
File «C:Usersrosha.condaenvsMachineLEarninglibsite-packagestensorflow_corepythonpywrap_tensorflow.py», line 58, in
from tensorflow.python.pywrap_tensorflow_internal import *
File «C:Usersrosha.condaenvsMachineLEarninglibsite-packagestensorflow_corepythonpywrap_tensorflow_internal.py», line 28, in
_pywrap_tensorflow_internal = swig_import_helper()
File «C:Usersrosha.condaenvsMachineLEarninglibsite-packagestensorflow_corepythonpywrap_tensorflow_internal.py», line 24, in swig_import_helper
_mod = imp.load_module(‘_pywrap_tensorflow_internal’, fp, pathname, description)
File «C:Usersrosha.condaenvsMachineLEarninglibimp.py», line 242, in load_module
return load_dynamic(name, filename, file)
File «C:Usersrosha.condaenvsMachineLEarninglibimp.py», line 342, in load_dynamic
return _load(spec)
ImportError: DLL load failed: The specified module could not be found.
Failed to load the native TensorFlow runtime.
See https://www.tensorflow.org/install/errors
for some common reasons and solutions. Include the entire stack trace
above this error message when asking for help.
exit()
(MachineLEarning) C:UsersroshaDownloadsDocumentsPythonDMProject>pip install tensorflow==2.0.0a0
Collecting tensorflow==2.0.0a0
Downloading https://files.pythonhosted.org/packages/c7/90/cf5e7fbf4a3c14b314e1ed6571eae1f9ad3b5e32a4e24b2b817466435a21/tensorflow-2.0.0a0-cp37-cp37m-win_amd64.whl (49.4MB)
|████████████████████████████████| 49.5MB 139kB/s
Requirement already satisfied: termcolor>=1.1.0 in c:usersrosha.condaenvsmachinelearninglibsite-packages (from tensorflow==2.0.0a0) (1.1.0)
Requirement already satisfied: numpy<2.0,>=1.14.5 in c:usersrosha.condaenvsmachinelearninglibsite-packages (from tensorflow==2.0.0a0) (1.18.2)
Requirement already satisfied: google-pasta>=0.1.2 in c:usersrosha.condaenvsmachinelearninglibsite-packages (from tensorflow==2.0.0a0) (0.2.0)
Requirement already satisfied: gast>=0.2.0 in c:usersrosha.condaenvsmachinelearninglibsite-packages (from tensorflow==2.0.0a0) (0.2.2)
Collecting tb-nightly<1.14.0a20190302,>=1.14.0a20190301
Downloading https://files.pythonhosted.org/packages/a9/51/aa1d756644bf4624c03844115e4ac4058eff77acd786b26315f051a4b195/tb_nightly-1.14.0a20190301-py3-none-any.whl (3.0MB)
|████████████████████████████████| 3.0MB 156kB/s
Requirement already satisfied: wheel>=0.26 in c:usersrosha.condaenvsmachinelearninglibsite-packages (from tensorflow==2.0.0a0) (0.34.2)
Requirement already satisfied: protobuf>=3.6.1 in c:usersrosha.condaenvsmachinelearninglibsite-packages (from tensorflow==2.0.0a0) (3.11.3)
Requirement already satisfied: absl-py>=0.7.0 in c:usersrosha.condaenvsmachinelearninglibsite-packages (from tensorflow==2.0.0a0) (0.9.0)
Requirement already satisfied: six>=1.10.0 in c:usersrosha.condaenvsmachinelearninglibsite-packages (from tensorflow==2.0.0a0) (1.14.0)
Requirement already satisfied: keras-preprocessing>=1.0.5 in c:usersrosha.condaenvsmachinelearninglibsite-packages (from tensorflow==2.0.0a0) (1.1.0)
Requirement already satisfied: astor>=0.6.0 in c:usersrosha.condaenvsmachinelearninglibsite-packages (from tensorflow==2.0.0a0) (0.8.1)
Requirement already satisfied: keras-applications>=1.0.6 in c:usersrosha.condaenvsmachinelearninglibsite-packages (from tensorflow==2.0.0a0) (1.0.8)
Requirement already satisfied: grpcio>=1.8.6 in c:usersrosha.condaenvsmachinelearninglibsite-packages (from tensorflow==2.0.0a0) (1.28.1)
Collecting tf-estimator-nightly<1.14.0.dev2019030116,>=1.14.0.dev2019030115
Downloading https://files.pythonhosted.org/packages/13/82/f16063b4eed210dc2ab057930ac1da4fbe1e91b7b051a6c8370b401e6ae7/tf_estimator_nightly-1.14.0.dev2019030115-py2.py3-none-any.whl (411kB)
|████████████████████████████████| 419kB 182kB/s
Requirement already satisfied: werkzeug>=0.11.15 in c:usersrosha.condaenvsmachinelearninglibsite-packages (from tb-nightly<1.14.0a20190302,>=1.14.0a20190301->tensorflow==2.0.0a0) (1.0.1)
Requirement already satisfied: markdown>=2.6.8 in c:usersrosha.condaenvsmachinelearninglibsite-packages (from tb-nightly<1.14.0a20190302,>=1.14.0a20190301->tensorflow==2.0.0a0) (3.2.1)
Requirement already satisfied: setuptools in c:usersrosha.condaenvsmachinelearninglibsite-packages (from protobuf>=3.6.1->tensorflow==2.0.0a0) (46.1.3)
Requirement already satisfied: h5py in c:usersrosha.condaenvsmachinelearninglibsite-packages (from keras-applications>=1.0.6->tensorflow==2.0.0a0) (2.10.0)
Installing collected packages: tb-nightly, tf-estimator-nightly, tensorflow
Found existing installation: tensorflow 2.1.0
Uninstalling tensorflow-2.1.0:
Successfully uninstalled tensorflow-2.1.0
Successfully installed tb-nightly-1.14.0a20190301 tensorflow-2.0.0a0 tf-estimator-nightly-1.14.0.dev2019030115
(MachineLEarning) C:UsersroshaDownloadsDocumentsPythonDMProject>python
Python 3.7.5 (default, Oct 31 2019, 15:18:51) [MSC v.1916 64 bit (AMD64)] :: Anaconda, Inc. on win32
Type «help», «copyright», «credits» or «license» for more information.
import tensorflow
C:Usersrosha.condaenvsMachineLEarninglibsite-packagestensorflowpythonframeworkdtypes.py:523: FutureWarning: Passing (type, 1) or ‘1type’ as a synonym of type is deprecated; in a future version of numpy, it will be understood as (type, (1,)) / ‘(1,)type’.
_np_qint8 = np.dtype([(«qint8», np.int8, 1)])
C:Usersrosha.condaenvsMachineLEarninglibsite-packagestensorflowpythonframeworkdtypes.py:524: FutureWarning: Passing (type, 1) or ‘1type’ as a synonym of type is deprecated; in a future version of numpy, it will be understood as (type, (1,)) / ‘(1,)type’.
_np_quint8 = np.dtype([(«quint8», np.uint8, 1)])
C:Usersrosha.condaenvsMachineLEarninglibsite-packagestensorflowpythonframeworkdtypes.py:525: FutureWarning: Passing (type, 1) or ‘1type’ as a synonym of type is deprecated; in a future version of numpy, it will be understood as (type, (1,)) / ‘(1,)type’.
_np_qint16 = np.dtype([(«qint16», np.int16, 1)])
C:Usersrosha.condaenvsMachineLEarninglibsite-packagestensorflowpythonframeworkdtypes.py:526: FutureWarning: Passing (type, 1) or ‘1type’ as a synonym of type is deprecated; in a future version of numpy, it will be understood as (type, (1,)) / ‘(1,)type’.
_np_quint16 = np.dtype([(«quint16», np.uint16, 1)])
C:Usersrosha.condaenvsMachineLEarninglibsite-packagestensorflowpythonframeworkdtypes.py:527: FutureWarning: Passing (type, 1) or ‘1type’ as a synonym of type is deprecated; in a future version of numpy, it will be understood as (type, (1,)) / ‘(1,)type’.
_np_qint32 = np.dtype([(«qint32», np.int32, 1)])
C:Usersrosha.condaenvsMachineLEarninglibsite-packagestensorflowpythonframeworkdtypes.py:532: FutureWarning: Passing (type, 1) or ‘1type’ as a synonym of type is deprecated; in a future version of numpy, it will be understood as (type, (1,)) / ‘(1,)type’.
np_resource = np.dtype([(«resource», np.ubyte, 1)])
C:Usersrosha.condaenvsMachineLEarninglibsite-packagestensorboardcompattensorflow_stubdtypes.py:541: FutureWarning: Passing (type, 1) or ‘1type’ as a synonym of type is deprecated; in a future version of numpy, it will be understood as (type, (1,)) / ‘(1,)type’.
_np_qint8 = np.dtype([(«qint8», np.int8, 1)])
C:Usersrosha.condaenvsMachineLEarninglibsite-packagestensorboardcompattensorflow_stubdtypes.py:542: FutureWarning: Passing (type, 1) or ‘1type’ as a synonym of type is deprecated; in a future version of numpy, it will be understood as (type, (1,)) / ‘(1,)type’.
_np_quint8 = np.dtype([(«quint8», np.uint8, 1)])
C:Usersrosha.condaenvsMachineLEarninglibsite-packagestensorboardcompattensorflow_stubdtypes.py:543: FutureWarning: Passing (type, 1) or ‘1type’ as a synonym of type is deprecated; in a future version of numpy, it will be understood as (type, (1,)) / ‘(1,)type’.
_np_qint16 = np.dtype([(«qint16», np.int16, 1)])
C:Usersrosha.condaenvsMachineLEarninglibsite-packagestensorboardcompattensorflow_stubdtypes.py:544: FutureWarning: Passing (type, 1) or ‘1type’ as a synonym of type is deprecated; in a future version of numpy, it will be understood as (type, (1,)) / ‘(1,)type’.
_np_quint16 = np.dtype([(«quint16», np.uint16, 1)])
C:Usersrosha.condaenvsMachineLEarninglibsite-packagestensorboardcompattensorflow_stubdtypes.py:545: FutureWarning: Passing (type, 1) or ‘1type’ as a synonym of type is deprecated; in a future version of numpy, it will be understood as (type, (1,)) / ‘(1,)type’.
_np_qint32 = np.dtype([(«qint32», np.int32, 1)])
C:Usersrosha.condaenvsMachineLEarninglibsite-packagestensorboardcompattensorflow_stubdtypes.py:550: FutureWarning: Passing (type, 1) or ‘1type’ as a synonym of type is deprecated; in a future version of numpy, it will be understood as (type, (1,)) / ‘(1,)type’.
np_resource = np.dtype([(«resource», np.ubyte, 1)])
import tensorflow as tf
import tensorflow as tf
import tensorflow
tensorflow —version
Traceback (most recent call last):
File «», line 1, in
NameError: name ‘version’ is not defined
tf.VERSION
Traceback (most recent call last):
File «», line 1, in
AttributeError: module ‘tensorflow’ has no attribute ‘VERSION’
x1 = tf.constant([1,2,3,4])
2020-04-17 07:27:33.083319: I tensorflow/core/platform/cpu_feature_guard.cc:142] Your CPU supports instructions that this TensorFlow binary was not compiled to use: AVX2
x1 = tf.constant([1])
x2 = tf.constant([5])
result = tf.multiply(x1,x2)
print(result)
tf.Tensor([5], shape=(1,), dtype=int32)
a = tf.constant([3,4])
b = tf.constant([45,8])
print(tf.mu;tiply(a,b))
File «», line 1
print(tf.mu;tiply(a,b))
^
SyntaxError: invalid syntax
print(tf.multiply(a,b))
tf.Tensor([135 32], shape=(2,), dtype=int32)
x1 = tf.constant([1,2,3,4])
x2 = tf.constant([5,6,7,8])
result = tf.multiply(x1, x2)
print(result)
tf.Tensor([ 5 12 21 32], shape=(4,), dtype=int32)
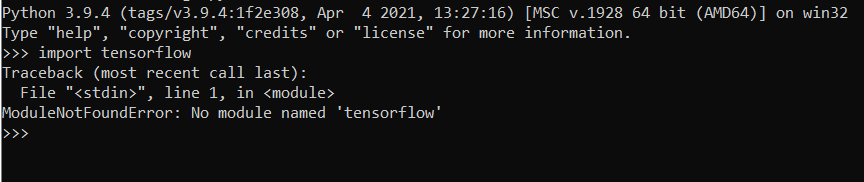
The “ModuleNotFoundError: No module named ‘tensorflow’” error in Python shows that Python cannot find the module ‘tensorflow’ that is imported in your code or some packages your code imports. This tutorial will show you how to fix the error by installing ‘tensorflow’ in your environment.
When you run your Python code, the Python runtime will look for all the packages or modules you import to your code and their dependencies. If the runtime cannot find a module, it will throw a ModuleNotFoundError. The error “ModuleNotFoundError: No module named ‘tensorflow’” show that Python cannot find ‘tensorflow’ in your environment, so you need to install it to run your code correctly. Here I have an example code that imports ‘tensorflow’ and prints its version. You will get the error if you run this code in a Python environment without ‘tensorflow’ installed.
Example code:
import tensorflow as tf
print("Tensorflow version:", tf.__version__)
Output:
Traceback (most recent call last):
  File "main.py", line 1, in <module>
    import tensorflow as tf
ModuleNotFoundError: No module named 'tensorflow'
How to solve the error?
Method 1: Install tensorflow directly with pip
Pip is the package installer for Python that comes with Python when you install Python on your machine. You can check the version of pip by the following command in your terminal of Linux/MacOS or the Command prompt of Windows.
pip --versionOutput:
pip 21.1.3 from <the path where pip installed on your machine>To install ‘tensorflow’ using pip, you can easily run this command.
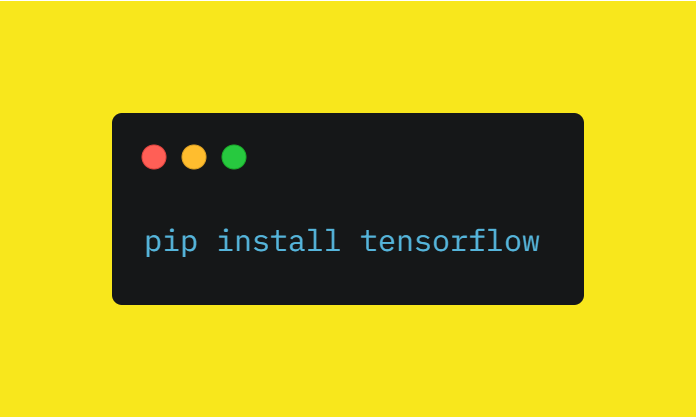
pip install tensorflowYou can also specify the ‘tensorflow’ version that you want to install like this.
pip install tensorflow==2.10.0After successfully installing ‘tensorflow’, you can use it in your code as you want.
Example code:
import tensorflow as tf
print("Tensorflow version:", tf.__version__)
Output:
Tensorflow version: 2.10.0Method 2: Install tensorflow in a python virtual environment
It is recommended to install the packages that you need for different projects in different environments because you may want to use different versions of a package in your projects. Using different environments helps to keep the packages not conflict with each other. You can create and activate a virtual environment by the following steps.
- Step 1: Install virtualenv package
pip install virtualenv- Step 2: Create the environment folder where the packages will be installed
python -m venv env- Step 3: Activate the environment
On Linux/MacOS:
source env/bin/activateOn Windows:
cd env/Scripts
activate.bat
Step 2 will create an environment folder name env in the directory where you run the command. After activating your environment, you can normally install ‘tensorflow’ using the pip command:
pip install tensorflowMethod 3: Install tensorflow using conda
Another way to create python environments is using conda. You can download and install the conda by following this instruction. After installing conda, you can create a new environment by the command:
conda create -n myenv pythonThen, you can activate your environment:
conda activate myenvFinally, you can install ‘tensorflow’ using pip or conda if you want.
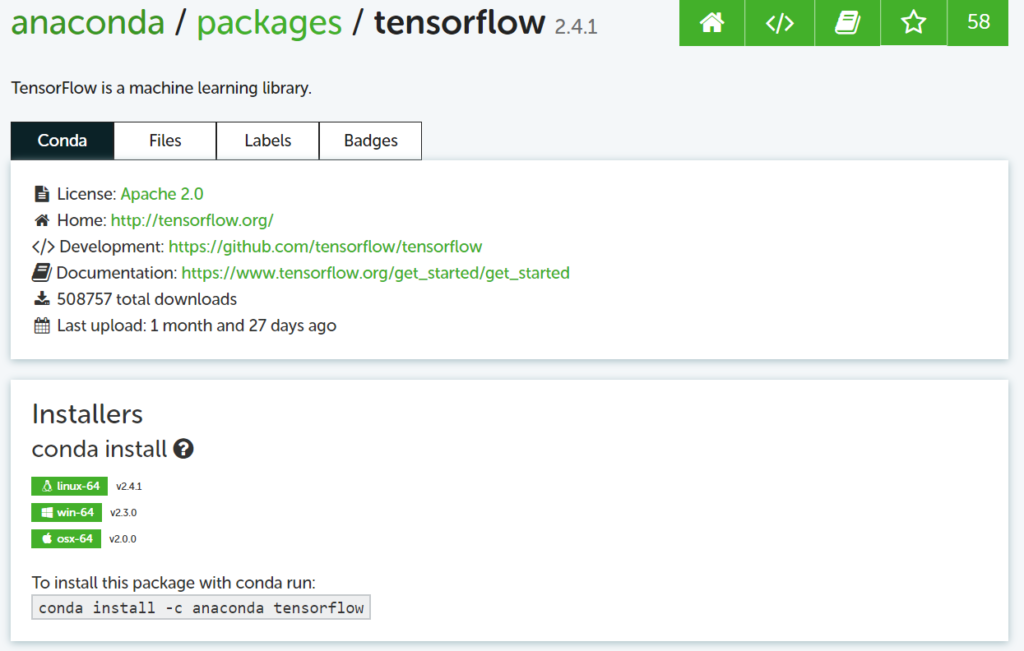
conda install -c conda-forge tensorflowSummary
In this tutorial, I’ve showed you how to solve the error “ModuleNotFoundError: No module named ‘tensorflow’” In Python. You can install ‘tensorflow’ directly with pip, but it is recommended to create an environment by the Python virtualenv or conda.
Maybe you are interested in similar errors:
- No module named ‘pkg_resources’ in Python
- How To ModuleNotFoundError: No Module Named ‘absl’ In Python

Hello, I’m Joseph Stanley. My major is IT and I want to share programming languages to you. If you have difficulty with JavaScript, TypeScript, C#, Python, C, C++, Java, let’s follow my articles. They are helpful for you.
Job: Developer
Name of the university: HUST
Major: IT
Programming Languages: JavaScript, TypeScript, C#, Python, C, C++, Java
A common error you may encounter when using Python is modulenotfounderror: no module named ‘tensorflow’. This error occurs when Python cannot detect the Tensorflow library in your current environment. This tutorial goes through the exact steps to troubleshoot this error for the Windows, Mac and Linux operating systems.
Table of contents
- ModuleNotFoundError: no module named ‘tensorflow’
- What is ModuleNotFoundError?
- What is Tensorflow?
- How to Install Tensorflow on Windows Operating System
- How to Install Tensorflow on Mac Operating System
- How to Install Tensorflow on Linux Operating Systems
- Installing pip for Ubuntu, Debian, and Linux Mint
- Installing pip for CentOS 8 (and newer), Fedora, and Red Hat
- Installing pip for CentOS 6 and 7, and older versions of Red Hat
- Installing pip for Arch Linux and Manjaro
- Installing pip for OpenSUSE
- Check Tensorflow Version
- Installing Tensorflow Using Anaconda
- Summary
ModuleNotFoundError: no module named ‘tensorflow’
What is ModuleNotFoundError?
The ModuleNotFoundError occurs when the module you want to use is not present in your Python environment. There are several causes of the modulenotfounderror:
The module’s name is incorrect, in which case you have to check the name of the module you tried to import. Let’s try to import the re module with a double e to see what happens:
import ree---------------------------------------------------------------------------
ModuleNotFoundError Traceback (most recent call last)
1 import ree
ModuleNotFoundError: No module named 'ree'To solve this error, ensure the module name is correct. Let’s look at the revised code:
import re

print(re.__version__)2.2.1You may want to import a local module file, but the module is not in the same directory. Let’s look at an example package with a script and a local module to import. Let’s look at the following steps to perform from your terminal:
mkdir example_package

cd example_package

mkdir folder_1

cd folder_1

vi module.py
Note that we use Vim to create the module.py file in this example. You can use your preferred file editor, such as Emacs or Atom. In module.py, we will import the re module and define a simple function that prints the re version:
import re

def print_re_version():

    print(re.__version__)
Close the module.py, then complete the following commands from your terminal:
cd ../

vi script.py
Inside script.py, we will try to import the module we created.
import module

if __name__ == '__main__':

    mod.print_re_version()
Let’s run python script.py from the terminal to see what happens:
Traceback (most recent call last):
  File "script.py", line 1, in module
    import module
ModuleNotFoundError: No module named 'module'
To solve this error, we need to point to the correct path to module.py, which is inside folder_1. Let’s look at the revised code:
import folder_1.module as mod

if __name__ == '__main__':

    mod.print_re_version()
When we run python script.py, we will get the following result:
2.2.1Lastly, you can encounter the modulenotfounderror when you import a module that is not present in your Python environment.
What is Tensorflow?
Tensorflow is an open-source library for machine learning and deep learning, written in C++, Python, and CUDA. Tensorflow does not come automatically with Python. The easiest way to install Tensorflow is to use the package manager for Python called pip. The following installation instructions are for the major Python version 3 and the latest version of Tensorflow, Tensorflow 2.
How to Install Tensorflow on Windows Operating System
To install Tensorflow 2 on Windows, you need Python version 3.7+ and Windows 7 or later.
You need to download and install Python on your PC. Ensure you select the install launcher for all users and Add Python to PATH checkboxes. The latter ensures the interpreter is in the execution path. Pip is automatically on Windows for Python versions 2.7.9+ and 3.4+.
You can install pip on Windows by downloading the installation package, opening the command line and launching the installer. You can install pip via the CMD prompt by running the following command.
python get-pip.pyYou may need to run the command prompt as administrator. Check whether the installation has been successful by typing:
pip --versionTo install TensorFlow with pip, run the following command from the command prompt:
# Requires the latest pip
pip3 install --upgrade pip

# Current stable release for CPU and GPU
pip3 install tensorflow
How to Install Tensorflow on Mac Operating System
Open a terminal by pressing command (⌘) + Space Bar to open the Spotlight search. Type in terminal and press enter.
To get pip, first ensure you have installed Python3. You can install Python3 by using the Homebrew package manager:
/usr/bin/ruby -e "$(curl -fsSL https://raw.githubusercontent.com/Homebrew/install/master/install)"

export PATH="/usr/local/opt/python/libexec/bin:$PATH"

# if you are on macOS 10.12 (Sierra) use `export PATH="/usr/local/bin:/usr/local/sbin:$PATH"`

brew update

brew install python  # Python 3
You can check your Python version with the following command:
python3 --versionPython 3.8.8Download pip by running the following curl command:
curl https://bootstrap.pypa.io/get-pip.py -o get-pip.pyThe curl command allows you to specify a direct download link, and using the -o option sets the name of the downloaded file.
Install pip by running:
python3 get-pip.pyFrom the terminal, use the pip3 command to install TensorFlow:
# Requires the latest pip
pip3 install --upgrade pip

# Current stable release for CPU and GPU
pip3 install tensorflow
How to Install Tensorflow on Linux Operating Systems
All major Linux distributions have Python installed by default. However, you will need to install pip. You can install pip from the terminal, but the installation instructions depend on the Linux distribution you are using. You will need root privileges to install pip. Open a terminal and use the commands relevant to your Linux distribution to install pip.
Installing pip for Ubuntu, Debian, and Linux Mint
sudo apt install python-pip3Installing pip for CentOS 8 (and newer), Fedora, and Red Hat
sudo dnf install python-pip3Installing pip for CentOS 6 and 7, and older versions of Red Hat
sudo yum install epel-release

sudo yum install python-pip3
Installing pip for Arch Linux and Manjaro
sudo pacman -S python-pipInstalling pip for OpenSUSE
sudo zypper python3-pipOnce you have installed pip, you can install TensorFlow using:
# Requires the latest pip
pip3 install --upgrade pip

# Current stable release for CPU and GPU
pip3 install tensorflow
Check Tensorflow Version
Once you have successfully installed TensorFlow, you can use two methods to check the version of TensorFlow. First, you can use pip from your terminal:
pip show tensorflowName: tensorflow
Version: 2.3.1
Summary: TensorFlow is an open source machine learning framework for everyone.
Home-page: https://www.tensorflow.org/
Author: Google Inc.
Author-email: [email protected]
License: Apache 2.0
Location: /Users/Yusufu.Shehu/opt/anaconda3/lib/python3.8/site-packages
Requires: opt-einsum, absl-py, google-pasta, gast, tensorflow-estimator, grpcio, keras-preprocessing, h5py, termcolor, numpy, astunparse, protobuf, wheel, wrapt, tensorboard, six
Required-by: Second, within your python program, you can import TensorFlow and reference and then __version__ attribute:
import tensorflow as tf

print(tf.__version__)2.3.1Installing Tensorflow Using Anaconda
Anaconda is a distribution of Python and R for scientific computing and data science. You can install Anaconda by going to the installation instructions, and Anaconda provides a complete list of packages available in the distribution across all operating systems. The following operating system versions support TensorFlow with the Anaconda distribution:
- 64-bit Windows 7 or later,
- 64-bit Ubuntu Linux 14.04 or later,
- 64-bit CentOS Linux 6 or later,
- macOS 10.10 or later.
To install TensorFlow in your conda virtual environment, follow these steps
- Download and install Anaconda or the smaller Miniconda
- On Windows open the Start menu and open an Anaconda Command Prompt. On macOS or Linux open a terminal window. Use the default bash shell on macOS or Linux.
- Choose a name for your TensorFlow environment, such as “tf”.
- You can either install the CPU-only release of TensorFlow with the following commands
conda create -n tf tensorflow

conda activate tf
Or install the GPU release of TensorFlow on Linux or Windows
conda create -n tf-gpu tensorflow-gpu

conda activate tf-gpu
You may want the nightly build of TensorFlow. However, the nightly builds are unstable and typically for advanced users. You can install nightly builds using pip:
pip install tf-nightlySummary
Congratulations on reading to the end of this tutorial. The modulenotfounderror occurs if you misspell the module name, incorrectly point to the module path or do not have the module installed in your Python environment. If you do not have the module installed in your Python environment, you can use pip to install the package. You must ensure you have pip installed on your system. You can also install Tensorflow on Anaconda.
For further reading on installing data science and machine learning libraries, you can go to the articles:
- OpenCV: How to Solve Python ModuleNotFoundError: no module named ‘cv2’
- Requests: How to Solve Python ModuleNotFoundError: no module named ‘requests’
- Numpy: How to Solve Python ModuleNotFoundError: no module named ‘numpy’
- Keras: How to Solve Python ModuleNotFoundError: no module named ‘keras’
Go to the online courses page on Python to learn more about Python for data science and machine learning.
Have fun and happy researching!