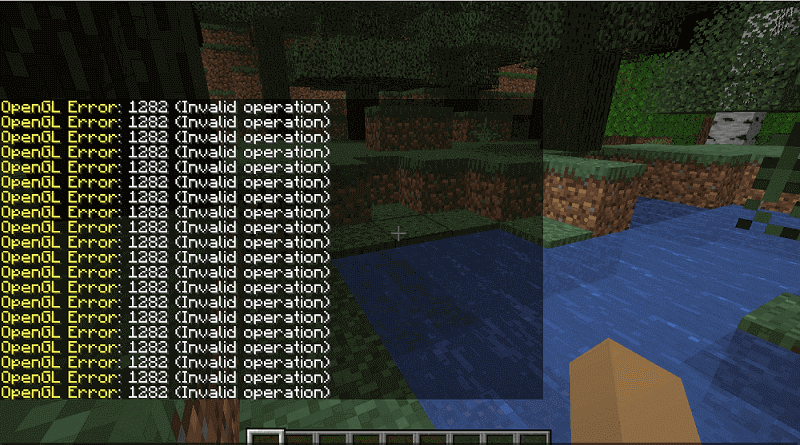
Ошибка OpenGL: 1282 (недопустимая операция) — распространенная ошибка Minecraft. Эта ошибка особенно распространена в версии Minecraft с установленными модами. Сообщение об ошибке рассылается спамом в ваш чат и иногда даже делает ваш экран черным. По словам игроков Minecraft, эта проблема расстраивает и требует быстрого решения. Именно поэтому в этом посте мы обсудим этот вопрос и посмотрим, что вам нужно делать, если вы видите Ошибка OpenGL: 1282 (недопустимая операция) в Майнкрафте.
 в Minecraft")
Исправить ошибку OpenGL: 1282 (недопустимая операция) в Minecraft
Если вы видите ошибку OpenGL: 1282 (недопустимая операция) в Minecraft, попробуйте следующие решения и предложения для решения проблемы.
- Отключить отображение ошибок GL
- Убедитесь, что ваши моды не повреждены
- Установите последнюю версию Java
- Отключить шейдеры
- Обновить Optfine
- Обновите графические драйверы
- Переустановите Майнкрафт
Поговорим о них подробно.
1]Отключить Показать ошибки GL
Некоторые пользователи просто видят ошибку GL без каких-либо последствий и вполне могут играть в игру. Если вы относитесь к этой категории, то ваша проблема будет решена путем простого отключения параметра «Показать ошибки GL» в настройках Minecraft. Вы не увидите спам-сообщения после внесения следующих настроек.
- Запустите Майнкрафт.
- Откройте свой мир и нажмите клавишу Esc (Escape).
- Перейти к Параметры > Настройки видео.
- Нажмите «Другие», а затем отключите «Показать ошибки GL».
- Наконец, выберите Готово.
Надеюсь, это поможет вам.
2]Убедитесь, что ваши моды не повреждены
Чаще всего с проблемой сталкивались пользователи, установившие моды Minecraft на свои компьютеры. Если это применимо в вашем случае, мы рекомендуем вам удалить все моды и посмотреть, решена ли проблема. Если удаление модов привело к удалению спама с ошибками GL, добавьте их один за другим, чтобы вы могли наткнуться на фактического виновника. Если причина, по которой вы видите эту ошибку, заключается в повреждении модов, это решение поможет.
3]Установите последнюю версию Java
Если вы используете Java-версию Minecraft, важно поддерживать Java на вашем компьютере в актуальном состоянии. Чтобы сделать то же самое, вы можете посетить OEM-производителя Java и загрузить его последнюю версию или выполнить предписанные шаги для обновления Java.
- Откройте панель управления.
- Изменить Просмотр по к Большие иконки.
- Перейти к Обновлять вкладка
- Нажми на Обновить сейчас кнопка.
- Вам будет предложено подтвердить свои действия, если доступно обновление, поэтому сделайте то же самое и закройте панель управления.
Запустите Minecraft и посмотрите, сохраняется ли проблема. Надеюсь, это поможет вам.
4]Отключить шейдеры
Если у вас есть шейдеры, работающие вместе с Optifine Minecraft, это может конфликтовать с некоторыми модами Minecraft. Эти шейдеры могут сделать ваш Minecraft эстетически привлекательным, но они также могут потреблять много памяти и мощности процессора. Итак, если вы видите ошибку OpenGL, отключите шейдеры. Затем запустите Minecraft и посмотрите, видите ли вы спам с ошибкой OpenGL. Если проблема вызвана шейдерами, их отключение поможет.
5]Обновить Optfine
Если вы используете устаревшую версию Optfine, вполне вероятно, что она вызывает рассматриваемую ошибку. Вот почему нам нужно установить последнюю версию с optfine.net. После загрузки установите инструмент и запустите Minecraft. Вам нужно выбрать последнюю версию Optfine внутри Minecraft. Итак, сделайте это и проверьте, решена ли проблема.
6]Обновите графические драйверы
OpenGL работает вместе с вашим графическим процессором для улучшения графики Minecraft. Когда вы обновляете свои графические драйверы, прошивка OpenGL автоматически обновляется. И если вы являетесь активным пользователем Windows, вы знаете, как легко обновляются драйверы в большинстве случаев. Так вот, «большую часть времени» не означает постоянно. Существует вероятность того, что ваш драйвер графического процессора устарел, в результате чего вы видите соответствующее сообщение об ошибке. Существует множество способов обновления графических драйверов, некоторые из которых мы упомянули ниже, поэтому выберите один и приступайте к делу.
Надеюсь, это поможет вам.
7]Переустановите Майнкрафт
Если ничего не помогло, в крайнем случае переустановите Minecraft и посмотрите, поможет ли это. Вы также можете создать резервную копию файлов игры перед ее установкой. Откройте «Выполнить», введите %appdata% и нажмите Enter. Откройте папку .minecraft и создайте резервную копию сейвы, скриншоты, ресурспаки, а также моды. Вы можете удалить приложение, переустановить его и вставить резервную копию в соответствующие места. Когда вы открываете Minecraft, спам с ошибкой OpenGL не появляется.
Надеюсь, вы сможете решить проблему, используя решения, упомянутые в этом посте.
Как избавиться от ошибки OpenGL 1282?
В большинстве случаев ошибка OpenGL 1282 — это не что иное, как спам-сообщения, которые мешают пользователю играть в игру. Это можно решить, отключив параметр «Показать ошибки GL» в настройках Minecraft. Однако пользователи сообщают о случаях, когда это сообщение об ошибке делало весь экран черным. Поскольку это более серьезный случай, существует несколько решений, которые могут устранить несколько причин этой ошибки. Вы должны проверить решения, упомянутые в этом посте, чтобы решить проблему.
Читайте: исправить ошибку удаления программы запуска Minecraft 0x80080204
Что означает ошибка OpenGL в Minecraft?
OpenGL или Open Graphics Library — это кроссплатформенный API, используемый для рендеринга 2D- и 3D-векторной графики. В Minecraft он используется для улучшения графики игры. Если вы видите ошибку OpenGL, это означает, что что-то не так с этим API или инструментами, которые работают вместе с ним.
Читайте также: Исправлена ошибка, из-за которой игра Minecraft вылетала с кодом выхода 0.
Ошибка OpenGL: 1282 (недопустимая операция) — распространенная ошибка Minecraft. Эта ошибка особенно распространена в версии Minecraft с установленными модами. Сообщение об ошибке рассылается спамом в ваш чат и иногда даже делает ваш экран черным. По словам игроков Minecraft, эта проблема расстраивает и требует быстрого решения. Именно поэтому в этом посте мы обсудим этот вопрос и посмотрим, что вам нужно делать, если вы видите Ошибка OpenGL: 1282 (недопустимая операция) в Майнкрафте.
Исправить ошибку OpenGL: 1282 (недопустимая операция) в Minecraft
Если вы видите ошибку OpenGL: 1282 (недопустимая операция) в Minecraft, попробуйте следующие решения и предложения для решения проблемы.
- Отключить отображение ошибок GL
- Убедитесь, что ваши моды не повреждены
- Установите последнюю версию Java
- Отключить шейдеры
- Обновить Optfine
- Обновите графические драйверы
- Переустановите Майнкрафт
Поговорим о них подробно.
1]Отключить Показать ошибки GL
Некоторые пользователи просто видят ошибку GL без каких-либо последствий и вполне могут играть в игру. Если вы относитесь к этой категории, то ваша проблема будет решена путем простого отключения параметра «Показать ошибки GL» в настройках Minecraft. Вы не увидите спам-сообщения после внесения следующих настроек.
- Запустите Майнкрафт.
- Откройте свой мир и нажмите клавишу Esc (Escape).
- Перейти к Параметры > Настройки видео.
- Нажмите «Другие», а затем отключите «Показать ошибки GL».
- Наконец, выберите Готово.
Надеюсь, это поможет вам.
2]Убедитесь, что ваши моды не повреждены
Чаще всего с проблемой сталкивались пользователи, установившие моды Minecraft на свои компьютеры. Если это применимо в вашем случае, мы рекомендуем вам удалить все моды и посмотреть, решена ли проблема. Если удаление модов привело к удалению спама с ошибками GL, добавьте их один за другим, чтобы вы могли наткнуться на фактического виновника. Если причина, по которой вы видите эту ошибку, заключается в повреждении модов, это решение поможет.
3]Установите последнюю версию Java
Если вы используете Java-версию Minecraft, важно поддерживать Java на вашем компьютере в актуальном состоянии. Чтобы сделать то же самое, вы можете посетить OEM-производителя Java и загрузить его последнюю версию или выполнить предписанные шаги для обновления Java.
- Откройте панель управления.
- Изменить Просмотр по к Большие иконки.
- Перейти к Обновлять вкладка
- Нажми на Обновить сейчас кнопка.
- Вам будет предложено подтвердить свои действия, если доступно обновление, поэтому сделайте то же самое и закройте панель управления.
Запустите Minecraft и посмотрите, сохраняется ли проблема. Надеюсь, это поможет вам.
4]Отключить шейдеры
Если у вас есть шейдеры, работающие вместе с Optifine Minecraft, это может конфликтовать с некоторыми модами Minecraft. Эти шейдеры могут сделать ваш Minecraft эстетически привлекательным, но они также могут потреблять много памяти и мощности процессора. Итак, если вы видите ошибку OpenGL, отключите шейдеры. Затем запустите Minecraft и посмотрите, видите ли вы спам с ошибкой OpenGL. Если проблема вызвана шейдерами, их отключение поможет.
5]Обновить Optfine
Если вы используете устаревшую версию Optfine, вполне вероятно, что она вызывает рассматриваемую ошибку. Вот почему нам нужно установить последнюю версию с optfine.net. После загрузки установите инструмент и запустите Minecraft. Вам нужно выбрать последнюю версию Optfine внутри Minecraft. Итак, сделайте это и проверьте, решена ли проблема.
6]Обновите графические драйверы
OpenGL работает вместе с вашим графическим процессором для улучшения графики Minecraft. Когда вы обновляете свои графические драйверы, прошивка OpenGL автоматически обновляется. И если вы являетесь активным пользователем Windows, вы знаете, как легко обновляются драйверы в большинстве случаев. Так вот, «большую часть времени» не означает постоянно. Существует вероятность того, что ваш драйвер графического процессора устарел, в результате чего вы видите соответствующее сообщение об ошибке. Существует множество способов обновления графических драйверов, некоторые из которых мы упомянули ниже, поэтому выберите один и приступайте к делу.
Надеюсь, это поможет вам.
7]Переустановите Майнкрафт
Если ничего не помогло, в крайнем случае переустановите Minecraft и посмотрите, поможет ли это. Вы также можете создать резервную копию файлов игры перед ее установкой. Откройте «Выполнить», введите %appdata% и нажмите Enter. Откройте папку .minecraft и создайте резервную копию сейвы, скриншоты, ресурспаки, а также моды. Вы можете удалить приложение, переустановить его и вставить резервную копию в соответствующие места. Когда вы открываете Minecraft, спам с ошибкой OpenGL не появляется.
Надеюсь, вы сможете решить проблему, используя решения, упомянутые в этом посте.
Как избавиться от ошибки OpenGL 1282?
В большинстве случаев ошибка OpenGL 1282 — это не что иное, как спам-сообщения, которые мешают пользователю играть в игру. Это можно решить, отключив параметр «Показать ошибки GL» в настройках Minecraft. Однако пользователи сообщают о случаях, когда это сообщение об ошибке делало весь экран черным. Поскольку это более серьезный случай, существует несколько решений, которые могут устранить несколько причин этой ошибки. Вы должны проверить решения, упомянутые в этом посте, чтобы решить проблему.
Читайте: исправить ошибку удаления программы запуска Minecraft 0x80080204
Что означает ошибка OpenGL в Minecraft?
OpenGL или Open Graphics Library — это кроссплатформенный API, используемый для рендеринга 2D- и 3D-векторной графики. В Minecraft он используется для улучшения графики игры. Если вы видите ошибку OpenGL, это означает, что что-то не так с этим API или инструментами, которые работают вместе с ним.
Читайте также: Исправлена ошибка, из-за которой игра Minecraft вылетала с кодом выхода 0.
The “OpenGL Error 1282 (Invalid operation)” is one of the common errors occurring in Minecraft. When this error occurs, you may experience lag issues or error message pop-ups. It’s annoying. But don’t worry. You can fix the error easily with the following methods.
There are seven methods available for you to try. You can try them one by one:
Method 1: Manually add the opengl32.dll file
Method 2: Update graphics card drivers
Method 3: Disable shaders
Method 4: Update OptiFine
Method 5: Update Java
Method 6: Try a different game version
Method 7: Turn off Show GL Errors
Method 1: Manually add the opengl32.dll file
The OpenGL error 1282 can be caused by missing the opengl32.dll file in the Minecraft folder. To fix the error , you can try manually adding the opengle32.dll file to the folder. Many Minecraft users have reported they fixed the same error with this fix. You can give it a try and see if it works for you too.
You can follow these steps to manually add the opengl32.dll file.
Firstly, download the opengl32.dll file.
1) Download the “OpenGL fix.7z” file to your computer (you can download the file from mediafire.com).
2) Extract the file.
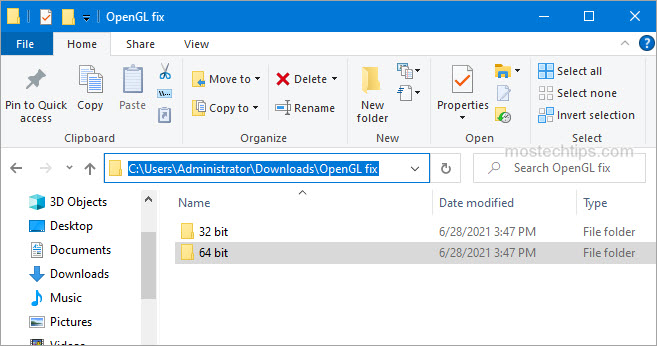
3) In the extracted folder, you’ll see two subfolders: 32 bit and 64 bit. Select one of them according to your Windows version (How to check what Windows version you have?). In my case, I have Windows 10 64-bit version, then I need to open the 64 bit folder (see the screenshot below).
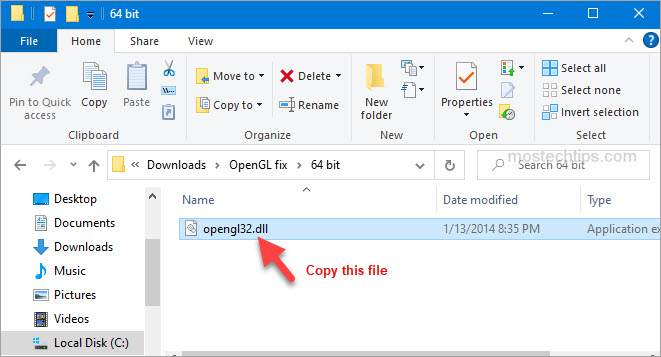
4) Copy the opengl32.dll file.
Secondly, paste the opengl32.dll file to the Minecraft folder.
1) Right-click on the shortcut of Minecraft and then select Open file location.
2) Navigate to the following location
MinecraftRuntime*JRE Version*bin
Note: The JRE Version is simply a placeholder. It depends on the game version you have, for example, Jre-x64, or something like that.
3) Paste the opengl32.dll file to the bin folder mentioned in Step 2).
4) Re-launch Minecraft and see if the error persists. If the error persists, continue to try Method 2.
Method 2: Update graphics card drivers
A faulty or missing graphics card driver can cause the Minecraft OpenGL 1282 error. You can try updating your graphics card driver and see if it helps.
You can update the graphics card driver via Device Manager:
1) Right-click on the Start menu button and select Device Manager. Then the Device Manager window will open.

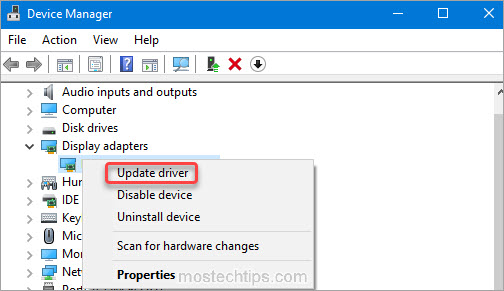
2) Expand category “Display adapters”. Right-click on your graphics card device and then select Update driver.
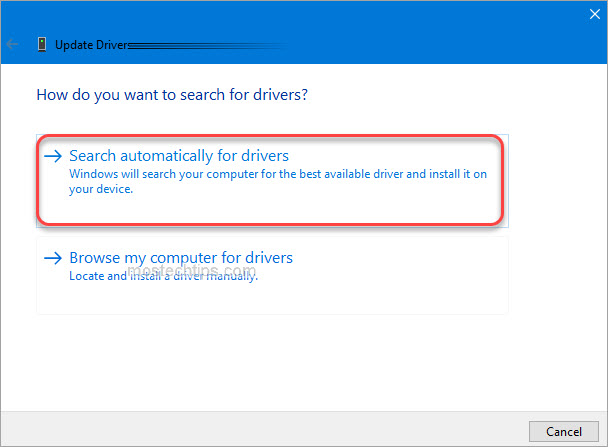
3) Select Search automatically for drivers. Then Windows will search for a new driver and install the driver automatically.
Alternatively, you can go to the PC manufacturer’s website to download the latest graphics card driver. Usually, drivers can be downloaded from the Drivers, Support or Download section.
Method 3: Disable shaders
Shaders in Minecraft allow you to set different terrains and settings so you can have a better game experience. But in the meantime, they can take up a lot of system resources, and may cause the OpenGL 1282 error. To fix the error, you can try disabling shaders in Minecraft. To do so:
1) Launch Minecraft.
2) On your keyboard, press the Esc key to pull up the Menu screen.
3) Go to Options -> Shaders.
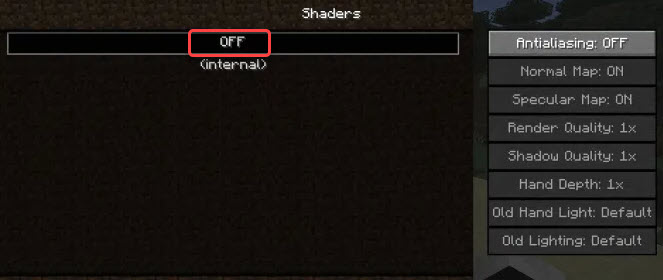
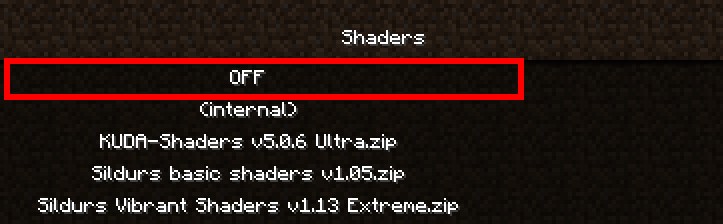
4) Select OFF and click Done.
After you’re done with it, re-launch Minecraft and see if you’re still facing the OpenGL 1282 error.
Method 4: Update OptiFine
The OpenGL Error 1282 can be an OptiFine issue. If you’re using OptiFine for Minecraft , updating OptiFine to the latest version may help remove the error. If you’re using OptiFine, skip this method and continue to the next method.
Go to OptiFine’s official website and download the latest version of OptiFine, then install it on your computer. Once done, check to see if the error still occurs.

Method 5: Update Java
Minecraft relies on Java very much. If you have a low version Java or the Java files are corrupted, the OpenGL Error 1282 can occur. To fix the error, you can try updating Java to the latest version.
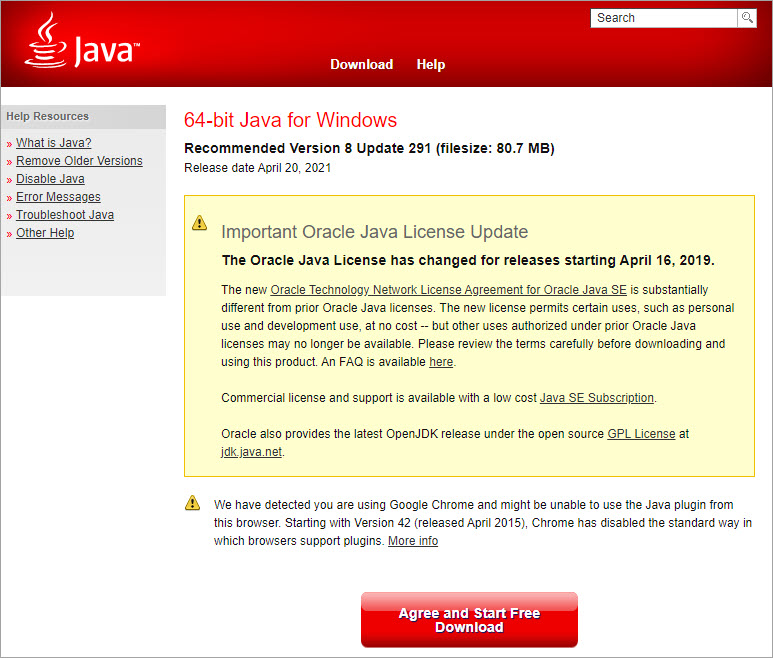
Go to Java’s website and download the latest version of Java to your computer, then follow the on-screen instructions to install it.
Once the installation completes, re-launch Minecraft and check to see if the OpenGL Error 1282 is fixed.
Method 6: Try a different game version
The error can occur in a specific version of Minecraft. So you could try switching to a different game version, for example a lower version, and see if the error continues.
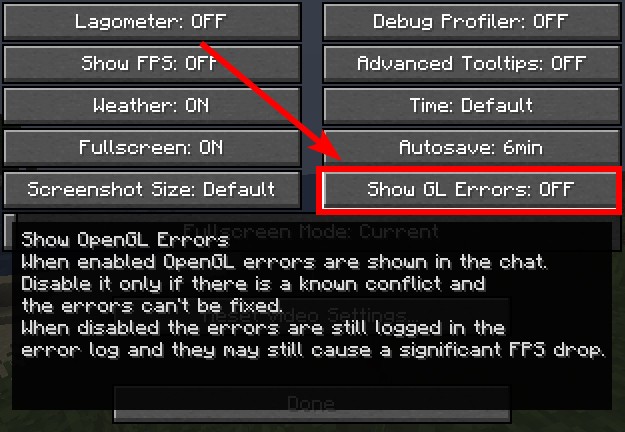
Method 7: Turn off Show GL Errors
In some cases, the OpenGL Error 1282 is not a real error but just a bunch of pop-ups. If your game performance is not influenced due to this error, it’s nothing to worry about. To get rid of these annoying notifications, you can just turn off the Show GL Errors option in Minecraft. After that, you won’t receive any error notifications.
Here’s how to turn off the Show GL Errors option in Minecraft.
1) Launch Minecraft.
2) Go to Options > Video Settings > Others…
3) Click Show GL Errors and turn it off.

4) Save the changes and re-launch Minecraft, then you won’t see the annoying OpenGL Error 1282 message.
Hopefully you can fix OpenGL Error 1282 (Invalid operation) with the steps above. If you have any questions or suggestions, feel free to leave a comment below. I’ll get back to you ASAP.
If you’re playing Minecraft with mods installed, you may encounter the infamous “OpenGL Error 1282” bug, which spams itself in your chat and even turns your entire screen black in some cases.

This may seem like a very serious bug, but don’t be alarmed, as it can be quite easy to fix once you figure out what you’re dealing with. There can be several reasons why you’re experiencing this error in Minecraft. You have to figure out the exact root cause of this problem and what you can do to solve it.
So below, we’ve compiled a list of all the possible causes of the OpenGL 1282 Error in Minecraft.
- Missing .dll File: DLL files are special files used by programs to execute their required operations. If you’re missing a DLL file, it can cause programs to malfunction. One of the possible causes of OpenGL Error 1282 is a missing DLL file named opengl32.dll.
- Shaders: Shaders are known to be troublemakers in Minecraft, especially if you have mods installed. They use a great number of your system’s resources and tend to conflict with the mods you’ve installed, causing errors.
- Incompatible Mods: Each Minecraft mod is designed to work with a specific game version. Trying to run the mod on a different version will cause many issues.
- Outdated Java: Java is required by Minecraft and its third-party mod installers to be able to run. Outdated versions of Java can hinder the game’s performance and cause bugs.
- Outdated Optifine: Outdated versions of Optifine are a major cause of OpenGL Errors in Minecraft.
- Outdated Graphics Drivers: If you haven’t updated your GPU drivers in a while, they can cause issues, especially if you’re trying to play with newer mods.
1. Disable the Show GL Errors Option
There are two types of OpenGL Error 1282 bug in Minecraft. In the first type, the bug just spams a message in your game chat that says “OpenGL Error: 1282 (Invalid operation)“.
In the second type, not only does the bug spam this message in your chat, but it also makes your screen completely black.
If you’re experiencing the first type of this bug, where it only shows up in your chat, and the rest of your game works fine, there’s a very simple solution to your problem.
All you need to do to fix this type of OpenGL error is to disable the “Show GL Errors” options from the in-game menu of Minecraft. To disable this option, follow the steps we’ve listed below:
- Open Minecraft and head into your world.
- Once you’ve loaded in, press Escape on your keyboard.
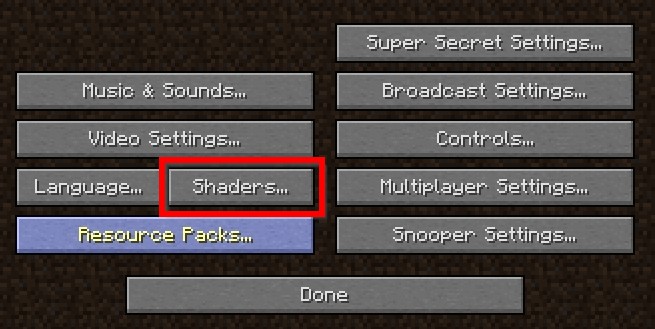
- Click on “Options…” in the menu.

Going into Minecraft options - Click on “Video Settings…”

Opening Minecraft Video Settings - Click on “Other…”

Click on Others - Click on the “Show GL Errors” option to disable it.

Disabling the OpenGL Error Notifications - Click on Done.
This method will turn off the chat notifications for the OpenGL Errors, instantly fixing your problem!
Now, if you’re experiencing the second type of the OpenGL Error 1282 bug, which turns your screen black, try the solutions we’ve listed below.
2. Download the Missing DLL File
Each program you download to your PC needs a set of DLL (Dynamic Library Link) files to function properly. These DLL files contain instructions, and programs like Minecraft use them to perform their required operations.
For a program to be able to work as intended, it needs all of its required DLL files.
So the first fix to the OpenGL Error 1282 bug will be to download a specific DLL file named opengl32.dll. You have to download this file and paste it into your Minecraft folder. This will likely fix your issue.
To download this missing DLL file, follow the steps listed below:
- Head to this website and download the opengl32.dll file by clicking on the orange download button.
- If you have a 32-bit processor, download the 32-bit file; if you have a 64-bit processor, download the 64-bit file.

Downloading the missing DLL file - Extract the ZIP file into an empty folder.
- Copy the opengl32.dll file.

Copying the opengl32.dll file - Open File Explorer and paste the following address in the address bar:
C:Program FilesJava
- Press enter and then open the JRE folder.

Opening the Java folder - Open the bin folder and paste the opengl32.dll file in there.

Opening the bin folder - Launch Minecraft and see if the error is fixed.
If you don’t know what type of processor you have, there’s no need to worry. You can easily determine whether you have a 32 or 64-bit processor within a few clicks of your mouse.
Go to your desktop and right-click on the “This PC” icon. Select Properties and then look at the System Type to determine your processor’s architecture (type).

If it says 32-bit processor, return to the website linked above and download the “Architecture: 32” file. And if it’s a 64-bit processor, download the “Architecture: 64” file.

3. Disable Your Shaders
Shaders are used to change Minecraft’s entire look completely, but this comes at a cost. Shaders are known to cause all types of problems in Minecraft.
They consume a hefty amount of your system’s resources, causing game performance issues. But if Optifine and/or mods are installed, Shaders can conflict with them and create problems, such as OpenGL errors.
So if you have Shaders installed and are experiencing the OpenGL Error 1282 bug, make sure to disable the Shaders before you try other troubleshooting methods. These Shaders may just be the root cause of this error.
4. Check the Compatability of Your Mods
Whenever a developer makes a mod for Minecraft, they design it to run on a specific game version and the mod launcher (Forge). So if you try to run a mod on a game version and/or mod launcher it’s not designed for, it will cause many issues.
Therefore, whenever you download a mod, remember to check what game and mod launcher version it is compatible with. On the download page for the mod, there will be information regarding its compatibility.

And on top of that, not all mods work together flawlessly. If you download a bunch of mods made by different developers, there’s a chance that they will conflict with each other and create errors.
If this happens, you can solve the issue by uninstalling all your mods and then reinstalling them. Each time you install a new mod, run the game and see if there are any errors.
As soon as you encounter an error, it’ll mean that the last mod you installed conflicts with the rest. You can either uninstall that mod or find a different version of it. If it continues to cause problems, keep it uninstalled.
To avoid this hassle altogether, you should try using modpacks instead. Modpacks are filled with dozens of mods that have been carefully picked out by their creators. These modpacks are designed to work flawlessly.
5. Update Java
You must keep Java updated if you’re playing the Java Edition of Minecraft. We know how annoying the constant Java update reminders can get, but it’ll only take a few minutes of your time to update it.
To update Java, follow the steps we’ve listed below:
- Press Windows Key and type Java in the search bar.
- Click on “Check for Updates”

Checking for Java Updates - In the Java Window that opens up, click on Update Now.

Updating Java - Click on Update.

Update Java - Allow Java SE Runtime Environment to make changes to your PC.
- Click on Install.

Installing Java
After Java is done installing, relaunch Minecraft and see if your problem is resolved. If it isn’t, continue with the solutions listed below.
6. Update Optifine (If Applicable)
Updates for Optifine are released quite often, so many players forget to keep downloading all of its updates.
If you don’t keep your Optifine up to date, it’s a big mistake. An outdated version of Optifine can cause errors, especially if you’re using other mods.
So make sure to update your Optifine from time to time. If you don’t remember how to, first close Minecraft and then follow the steps listed below:
- Head to the official Optifine website and download the latest version of Optifine.

Downloading Optifine - After it finishes downloading, open up the file.
- Click on Install.

Installing Optifine - After it’s done installing, open up your Minecraft launcher and select the latest Optifine profile before pressing play.

Selecting the Optifine profile
7. Update Your Graphics Card Drivers
If none of the above solutions have worked for you, then the next step to fixing is to update your Graphics Card (GPU) drivers.
Unless you have a super old GPU, your GPU’s manufacturer is likely still releasing driver updates for it. You must regularly install these driver updates to ensure your GPU performs at its highest potential.
Now, to update your GPU drivers, you must first determine your GPU’s exact brand and model. To figure this out, follow the steps we’ve listed down below:
- Right-click on the Windows icon at the bottom-left corner of your screen.
- Select Device Manager.

Opening Device Manager - Click on the arrow next to Display Adapters to expand it.
- Note down the name of the GPU that appears.

Identifying GPU model using Device Manager
Unless your GPU drivers are corrupted or completely missing, this method should allow you to determine your GPU’s exact model.
But if it simply says, “Microsoft Basic Display Adapter,” instead of showing any unique model/brand name, then it means that GPU drivers are, in fact, corrupt/missing.
In this case, you’ll need to find your GPU’s model through another method. Follow the steps listed below:
- Right-click on the Windows icon at the bottom-left corner of your screen.
- Select Device Manager.
Opening Device Manager - Click on the arrow next to Display Adapters to expand it.
- Right-click on the Microsoft Basic Display Adapter.
- Click on Properties.

Selecting GPU Properties - In the Properties Window, navigate to the Details tab.
- Open up the drop-down list under Property.
- Select Hardware Ids.

Selecting Hardware Ids - Right-click on the first line of text written under Value.
- Click on Copy.

Copying Hardware Id - Open your browser, paste this text line into the search bar, and press enter.
When you press enter, the top results on Google will have your GPU’s exact brand and model written in their title, allowing you to easily figure out what GPU you’re working with.

Since we now know the name of your Graphics Card, we can start searching for its drivers online. But before we do that, we have to uninstall the GPU drivers that are currently installed in your system.
To do this, we’ll use a program called “Display Driver Uninstaller.” This program is far superior to the native Windows driver uninstaller.
This is because the Windows driver uninstaller does not delete the drivers well. It tends to miss out on some files, leaving residue behind. These residue files can cause problems when you update the drivers.
So to ensure that the current drivers are completely wiped from your system, we’ll be using DDU.
After you’ve downloaded and installed DDU, we have to ensure the safest driver removal process by booting the PC in Safe Mode.
- Press Windows Key and click on the Power button.
- Hold the shift key on your keyboard and click on the Restart option.
- Select Troubleshoot.
- Head to Advanced Options and then select Startup Settings.
- Enter Safe Mode by pressing the F5 key on your keyboard.

Going into Advanced Options 
Selecting Startup Settings 
Entering Safe Mode
Now that your PC is in Safe Mode, we can begin the driver removal process. Launch the Display Driver Uninstaller app, select “GPU” as your device type, and then select the brand of your GPU.
Click on the “Clean and restart” option to start wiping your GPU’s drivers.

After the drivers are completely wiped, the next step is to download the latest drivers of your GPU.
But before we do that, keep in mind that installing the latest version of GPU drivers can sometimes cause problems if your system is a laptop.
The drivers provided by your laptop’s Original Equipment Manufacturer (OEM) perform the best with your system. So it’s better to use the drivers provided by the OEM instead of just installing the latest drivers.
But if your system is a desktop, you don’t need to worry about this. Feel free to download the latest drivers for your GPU.
To do so, you’ll need to head to the official website of your GPU’s manufacturer.
For NVIDIA drivers, head to this website and then use the drop-down lists to find your GPU’s exact model.

For AMD drivers, head to this website and then use the drop-down lists to find your GPU’s exact model.

Once the driver file is downloaded, simply double-click on it to start installing the drivers. When asked for the installation type, select “Express” instead of “Custom”.
After the driver installation process finishes, restart your PC and launch Minecraft. The OpenGL 1282 Error should now be fixed.
Reinstall Minecraft
If all else fails, the final step is to reinstall Minecraft. This can fix your problem, as the root cause of the error might just be some corrupted game files. So when you reinstall Minecraft, there won’t be an issue of corrupted files.
So to reinstall Minecraft, first uninstall it from your system. But before we do that, note that when you uninstall Minecraft, your saved worlds, inventories, mods, and screenshots will be gone forever unless you create a backup for them.
To create a backup, follow the steps listed below:
- Open your documents folder and create a new folder within it titled “Minecraft Backup.”
- Press Windows Key + R to open the Run dialogue box.
- Type %appdata% and press enter.

Opening the AppData folder - Open the .minecraft folder.

Navigating to the .minecraft folder - Create a copy of the saves, screenshots, resource packs, and mods folder.

Copying important Minecraft save files - Paste them into the Minecraft Backup folder that you created earlier.

Creating the backup for the save files
When you reinstall Minecraft, you’ll be able to restore your progress by simply pasting these folders into the new .minecraft folder.
Once you’re ready, you can uninstall Minecraft from your PC by following these steps:
- Press the Windows Key, type Settings in the search bar, and enter.

Opening Settings - In the Settings menu, click on Apps.

Opening the Apps menu - In the search bar above the list of apps, type Minecraft.
- Click on Minecraft and press Uninstall.

Uninstalling Minecraft - Press Windows Key + R to open the Run Dialogue Box.
- Type %appdata% and press enter.
Opening the AppData folder - Right-click on the .minecraft folder.
- Press delete.

Deleting residue files of Minecraft - Open up Recycle Bin and permanently delete the .minecraft folder from there.
Minecraft is now fully wiped from your system. So the next step is to install it again by going to Minecraft’s official website. After installing Minecraft, launch the game and see if the OpenGL error went away.
-
03.06.2016, 15:36
#1

Мистер MinecraftOnly 2022


В данной теме представлены инструкции по исправлению ошибок, связанных с OpenGL
Ошибки 1286 и 1282
Следуем инструкции ниже:
1.Зайдите в папку с игрой и перейдите в сборку сервера, на котором вы получаете данные ошибки.К примеру возьмём сборку Classic.Путь будет выглядеть так — Том(С/D):Users(Имя Пользователя)AppDataRoaming.minecra ftonlyClassic
2. Открываем файл options.txt через Notepad++ (можно и через обычный Блокнот)
3. Ищём строку fboEnable.
4. Заменяем true на false.
5. Сохраняем, закрываем.
Последний раз редактировалось cheald; 28.06.2018 в 09:28.

DC: bezbashn#3688Ваш проводник в мир Minecraft
Дизайнер, квестодел и просто сладкая булочка
-
11 пользователей сказали cпасибо cheald за это полезное сообщение:
Akrux (17.06.2017),Cataclysme42 (14.08.2017),DoKe11 (27.06.2017),fresh3 (21.06.2016),Hinter (20.06.2016),KalleAK (16.10.2016),Kotowey10223 (07.09.2019),lifes (19.11.2016),MrDeltoFros (22.03.2017),MrGospo (30.12.2016),Veteran3 (03.06.2016)
-
17.06.2017, 03:37
#2
Большое спасибо. Исправил как написано выше, а то эта бяка задолбала. Должно помочь.
у меня такой путь C:Documents and Settings (Имя пользователя)Application Data.minecraftonlyTechnoMagic
Windows XP.
строчка 13. В строке 12 стоит: maxFps:120
————————————
Жаль что 1285 не исправляет
Последний раз редактировалось Akrux; 17.06.2017 в 05:01.
Информация о теме
Пользователи, просматривающие эту тему
Эту тему просматривают: 1 (пользователей: 0 , гостей: 1)

Ваши права
- Вы не можете создавать новые темы
- Вы не можете отвечать в темах
- Вы не можете прикреплять вложения
- Вы не можете редактировать свои сообщения
- BB коды Вкл.
- Смайлы Вкл.
- [IMG] код Вкл.
- HTML код Выкл.
Правила форума
С таким количеством движущихся частей в Minecraft: Java Edition ваша игра может легко перестать работать должным образом. Если ваш экран потемнел, а в игровом чате продолжает появляться сообщение «Ошибка OpenGL: 1282 (недопустимая операция)», вы определенно не хотите продолжать биться головой о стену, надеясь, что проблема исправится сама собой. Вот как исправить эту надоедливую ошибку и снова запустить игру.
Что делать, если вы получаете ошибку OpenGL 1282 в Minecraft: Java Edition
Если единственная проблема, которую вы видите, — это всплывающее окно чата с кодом ошибки, и все остальное в порядке, вы можете отключить это сообщение. Перейдите в «Параметры» в меню паузы и войдите в «Настройки видео». Прокрутите вниз, чтобы найти «Другое», и отключите параметр «Показывать ошибки GL».

Если вы получаете ошибку OpenGL 1282 в Minecraft, когда экран становится черным, вероятно, где-то в вашей игре есть какой-то поврежденный или устаревший файл, который все портит. Для начала выйдите из игры и убедитесь, что у вас установлена последняя версия Minecraft: Java Edition. Чтобы быть в полной безопасности, вы можете удалить и переустановить игру, просто убедитесь, что вы сделали копию своего мира, чтобы не потерять его.
После того, как игра будет полностью обновлена, вы также захотите проверьте и убедитесь, что Java также обновлена. Зайдите на официальный сайт и скачайте нужную версию для вашей операционной системы. Следуйте инструкциям по установке, пока она не будет завершена. Вы также можете попробовать обновить графический драйвер, если он в этом нуждается.
Если описанное выше не помогло вам решить проблему, возможно, у вас несовместимые или поврежденные моды. Если у вас куча модов от разных создателей, они могут конфликтовать друг с другом и вызывать ошибки. Проверьте страницу загрузки для каждого мода, чтобы узнать, для каких обновлений эти моды работают, и посмотрите, есть ли какие-либо сообщения о том, что они не работают с другими имеющимися у вас модами. Удалите все последние установленные вами моды, которые могут все испортить. Если у вас есть OptiFine, обязательно проверьте и обновите его.
Keep seeing an OpenGL Error: 1282 (Invalid operation) error popping up on your Minecraft game? This is a very common error for Minecraft players. If you’re one of them, it can be very annoying for you, as it sometimes occurs along with other issues like black screen or lagging.
But don’t worry! There have already been some effective ways to fix this issue. Here we list the fixes you can try for the OpenGL Error: 1282. Take a look at them below and see if they are able to help you.
Download the opengl32.dll file and place it in your Minecraft folder
This error usually occurs when the opengl32.dll file is missing in your Minecraft folder. To fix this:
Step 1: Go to this web page and download the opengl32.dll that is right for your system.
* We recommend you check the compatibility and security of the downloaded file before you use it.
Step 2: Unzip the downloaded file and then copy the opengl32.dll file.
Step 3: Go to where your Minecraft is installed (if you don’t know, right click your Minecraft desktop shortcut, select Properties, then click Open File Location). Then go to Runtime[the JRE Version] > bin and paste the opengl32.dll file there.
Step 4: Launch your Minecraft game again and test your OpenGL Error 1282 issue.
Check your Minecraft settings
A lot of the times turning off some in-game settings can help you fix your OpenGL Error 1282 issue. There are two things you can check:
Shader
Step 1: Launch Minecraft.
Step 2: On the home menu, click Options.
Step 3: Select Shaders.
Step 4: Select OFF.
Now you’ve disabled Shaders on Minecraft. Check to see if this helped you resolve your OpenGL Error: 1282 problem. If not, then move on to try disabling the next setting…
Render Regions
Step 1: On the home menu, click Options.
Step 2: Select Video Options > Performance.
Step 3: Set Render Regions to OFF.
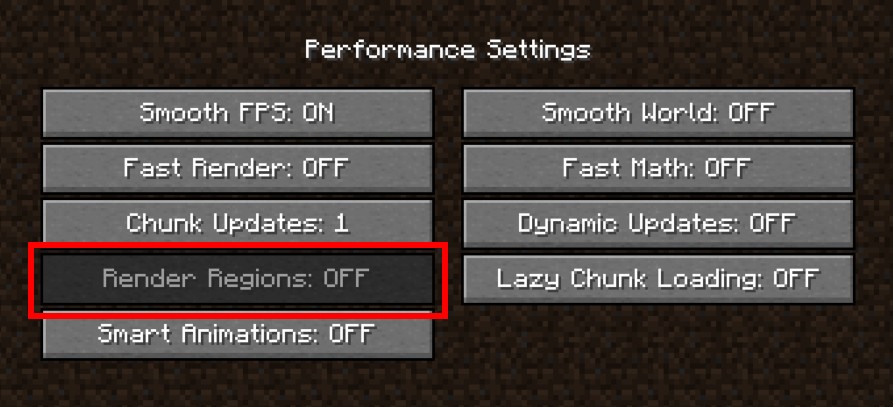
Now test your issue to see if this worked. If the OpenGL Error: 1282 message still occurs, don’t worry, there are still other fixes you can try below.
Update OptiFine
The OpenGL Error: 1282 message can also appear if you are using an out-of-date version of OptiFine. You can try updating this software and then see if this is helpful. To download the latest version of OptiFine, go to the OptiFine official download page, and download the newest version of this software. Then install it on your computer and see if this can get rid of the OpenGL Error: 1282 error.
Update your graphics driver
Sometimes you see OpenGL Error: 1282 error on Minecraft because of a problem graphics driver. To fix it, you should try updating that driver.
You can use Device Manager on your Windows system, or go to your hardware manufacturer website to find the correct driver manually. Either way, you should make sure the driver you get is correct and up to date.
Or you can use a driver updater. This is a more convenient option — it only takes a few mouse clicks to update a driver!
The driver updater we recommend is Driver Booster, because it’s powerful and easy to use, and you can use it to update drivers for free!
And what’s more, it provides a 60-day money back guarantee. So you can give it a try without taking any risks.
To use Driver Booster to update your graphics driver:
Step 1: Download Driver Booster and install it on your computer.
Step 2: Launch Driver Booster, and scan for driver updates.
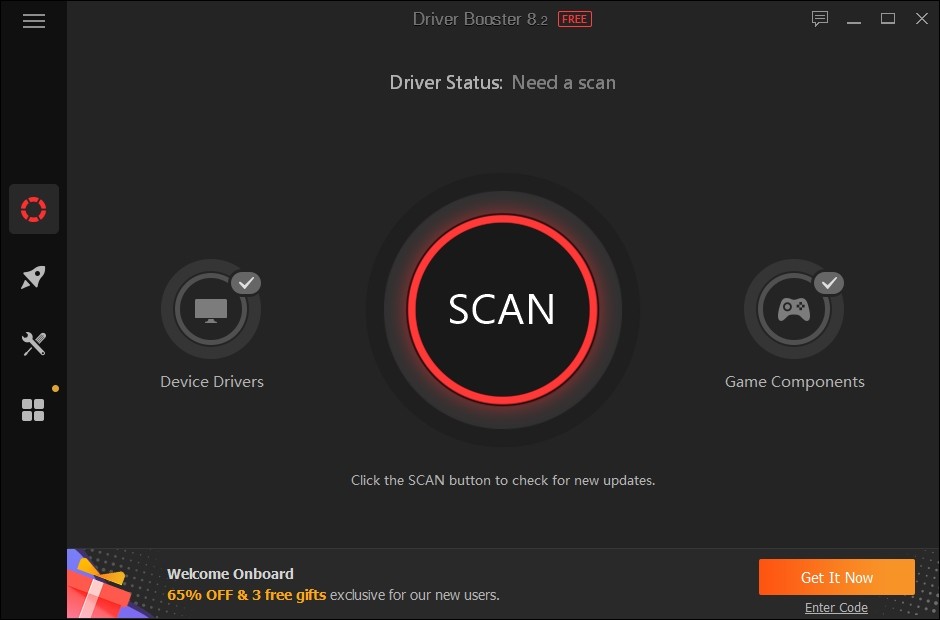
Step 3: Update your graphics driver (click the update button next to it). Or click the red Update Now button to update all your drivers.
Note that the download speed is slow in the free version of Driver Booster. If you want to get rid of the speed limit and unlock its full features, you need to upgrade to its PRO version.

Once your graphics driver is updated, test to see if this fixes your OpenGL 1282 error.
Disable the Show GL Errors setting
Sometimes you’ll see everything else is working properly even though OpenGL Error: 1282 keeps popping up. In this case, it is fine to just turn the notification off and ignore the message. To do so:
Step 1: Launch Minecraft.
Step 2: On the home menu, click Options.
Step 3: Select Video Settings > Others.
Step 4: Set the Show GL Errors option to OFF.
Now you won’t see the annoying message in the chat again.
Has any of the fixes above worked for you? Or do you have any other effective ways to fix the the OpenGL Error: 1282 issue? Tell us by leaving a comment below!
OpenGL Error: 1282 (Invalid Operation) is a common Minecraft error. This error is especially prevalent in the Minecraft version with Mods installed. The error message spams itself in your chat and sometimes even turns your screen black. According to Minecraft gamers, this issue is frustrating and needs a remedy quickly. That is why, in this post, we will discuss this issue and see what you need to do if you see OpenGL Error: 1282 (Invalid Operation) in Minecraft.
 in Minecraft")
If you see OpenGL Error: 1282 (Invalid Operation) in Minecraft, try the following solutions and suggestions to resolve the issue.
- Turn off Show GL Errors
- Make sure that your mods are not corrupted
- Install the latest version of Java
- Turn off Shaders
- Update Optfine
- Update your Graphics Drivers
- Reinstall Minecraft
Let us talk about them in detail.
1] Turn off Show GL Errors
Some users are just seeing the GL Error without any consequences and are perfectly able to play the game. If you are in that category, then your issue will be resolved by just disabling the Show GL Errors option from Minecraft’s settings. You won’t see the spam messages after making the following adjustments.
- Launch Minecraft.
- Open your world and click on the Esc (Escape) key.
- Go to Options > Video Settings.
- Click on Others and then turn off Show GL Errors.
- Finally, select Done.
Hopefully, this will do the job for you.
2] Make sure that your mods are not corrupted
More often than not, the issue has been encountered by users who had installed Minecraft mods on their computers. If that is applicable in your case, then we would recommend you remove all the mods and see if the issue is resolved. If removing mods resulted in the removal of the GL error spam, then add them one by one so that you can stumble upon the actual culprit. If the reason why you see this error is corrupted mods, this solution will do the job.
3] Install the latest version of Java

If you are running the Java edition of Minecraft, it is important to keep Java on your computer up-to-date. To do the same, you can visit your Java OEM and download the latest version of it or follow the prescribed steps to update Java.
- Open Control Panel.
- Change the View by to Large icons.
- Go to the Update tab.
- Click on the Update now button.
- You will be prompted to confirm your actions if an update is available, so do the same and close Control Panel.
Launch Minecraft and see if the issue persists. Hopefully, this will do the job for you.
4] Turn off Shaders
If you have Shaders working alongside Optifine Minecraft, it might conflict with some Minecraft mods. These shaders might make your Minecraft aesthetically pleasing, but they might also consume a lot of memory and CPU power. So, if you see the OpenGL error, go ahead and disable Shaders. Then, launch Minecraft and see if you see the OpenGL error spam. If the issue is caused due to Shaders, disabling them would do the job.
5] Update Optfine
If you are using an outdated version of Optfine, it is likely that it is causing the error in question. That is why we need to install the latest version from optfine.net. After downloading, install the tool and launch Minecraft. You need to select the latest version of Optfine inside Minecraft. So, do that and check if the issue is resolved.
6] Update your Graphics Drivers
OpenGL works alongside your GPU to improve the graphics of Minecraft. When you update your Graphics Drivers, the OpenGL firmware automatically gets updated. And if you are an avid Windows user, you know how seamlessly drivers get updated most of the time. Now, “most of the time” doesn’t mean, all the time. There is a possibility that your GPU driver is outdated as a result of which you see the error message in question. There are a lot of methods to update Graphics Drivers, we have mentioned a few below, so, pick one and get on with it.
- Download the latest version of your GPU driver from the manufacturer’s website. You should visit the official website of both Integrated and dedicated Graphics Cards OEMs.
- Try one of the free Graphics Driver update tools.
- Update the driver from Device Manager.
- Open Windows Settings and install Driver and Optional Updates.
Hopefully, this will do the job for you.
7] Reinstall Minecraft
If nothing worked, your last resort is to reinstall Minecraft and see if that helps. You can also create a backup of the game files before installing it. Open Run, type %appdata%, and hit Enter. Open the .minecraft folder and create a backup of saves, screenshots, resource packs, and mods. You can uninstall the app, reinstall it, and paste the backup into their respective locations. When you open Minecraft, the OpenGL error spam will not appear.
Hopefully, you can resolve the issue using the solutions mentioned in this post.
How do I get rid of OpenGL error 1282?
Most of the time, the OpenGL error 1282 is nothing but spam messages that stops the user from playing the game. It can be resolved by turning off the Show GL Errors option from Minecraft’s settings. However, there are instances reported by users when this error message made the whole screen black. Since this is a more serious instance, there are multiple solutions that can troubleshoot multiple causes of this error. You should check the solutions mentioned in this post to resolve the issue.
Read: Fix Minecraft Launcher Uninstall Error 0x80080204
What does OpenGL error mean in Minecraft?
OpenGL or Open Graphics Library is a cross-platform API used for rendering 2D and 3D vector graphics. In Minecraft, it is used to improve the game’s graphics. If you see an OpenGL error, this means that there is something wrong with that API or tools that work alongside it.
Also Read: Fix Minecraft game has crashed with Exit Code 0.
-
#1
Открыл лог файл и заметил вот такую спам ошибку:
[Client thread/ERROR]: ########## GL ERROR ##########
[Client thread/ERROR]: @ Pre render
[Client thread/ERROR]: 1282: Invalid operation
Игра при этом не крашиться но эта ошибка раздражает немного. Драйвера видео карты самые последние, проверил. Видеокарта Radeon HD 6850. В сборке есть Optifine, FastCraft, BetterFPS….
-
#2
GL Error -> криворукость и рукожопость рендера в оптифайне. Удаляй нафиг.
-
#3
Нахера тебе столько, у тебя комп 2003 года?
-
#4
Старый или багнутый оптинефайн
-
#5
Dragon2488 написал(а):
Старый или багнутый оптинефайн
Он всегда багнутый.
-
#6
Develance написал(а):
Нахера тебе столько, у тебя комп 2003 года?
нет…для ещё большей производительности… То что мощный ПК это ещё не означает что Майн лагать не будет.
[merge_posts_bbcode]Добавлено: 07.10.2015 16:39:01[/merge_posts_bbcode]
Dragon2488 написал(а):
Старый или багнутый оптинефайн
Последняя версия для 1.7.10
[merge_posts_bbcode]Добавлено: 07.10.2015 16:39:56[/merge_posts_bbcode]
FanKar написал(а):
GL Error -> криворукость и рукожопость рендера в оптифайне. Удаляй нафиг.
Интересно получается. на одном форуме говорят что это кривой рендер модов, тут же говорят что это оптифайн.. интересно..
-
#8
Tsyklop написал(а):
Интересно получается. на одном форуме говорят что это кривой рендер модов, тут же говорят что это оптифайн.. интересно..
Много чего тебе могут сказать на cwelth /). Вообще как бы оптифайн ужасен (Мне хватает других 2 вышеприведённых модов). Удаляй Optifine, пробуй.
-
#11
CoomingSoon написал(а):
Спасибо!
-
#13
А оптифайн уже не мод, что ли?
1) Скачиваешь http://sourceforge.net/projects/java-game-lib/files/Official%20Releases/LWJGL%202.9.3/lwjgl-2.9.3.zip/download2) Кладешь оттуда lwjgl-debug.jar вместо твоего lwjgl.jar.
3) Запускаешь майн. Он крашнется на первой opengl-ошибке, и будет видно, где проблема
Прошаренные люди, подсобите, а.
Играю на 1.16.5 такая же ошибка, хочу её решить (естественно) но не знаю в душе что такое lwjgl-debug.jar и lwjgl.jar, и где это находится
ОЗУ 8гб, Выделено 6гб. Видеокарта, хоть и ноутбучная, но мощная, 1650ti 2гб. Обшарил уже все форумы, нигде ясного решения, кроме как ту, я не нашёл. Но по сути своей туповат и не знаю что где куда менять)))
Последнее редактирование: 14 Янв 2022
-
#14
Решение из 15 года не актуально, кубач давно переехал на lwjgl 3, в котором нет побочной фичи. Столь же удобного способа дебажить огльные ошибки не знаю. Обнови драйвера и если не поможет иди методом тыка отрубай моды.
-
Partition Wizard
-
Partition Manager
- How to Fix Minecraft OpenGL Error 1282 (Invalid Operation)?
By Charlotte | Follow |
Last Updated October 18, 2022
OpenGL Error 1282 is a very common OpenGL error that appears in Minecraft and many other OpenGL games. This post form MiniTool Partition Wizard shows you how to fix Minecraft OpenGL Error 1282 (Invalid option) successfully.
Introduction to OpenGL Error 1282
Minecraft is a game that is popular around the world. There are also many different mods that you can use to customize your gaming experience.
However, there is an annoying error in the game if you have installed mods in Minecraft, such as OpenGL Error 1282 (Invalid operation).
When the error occurs on your PC, you will encounter two different types of errors: One just spams a message in your game chat that says «OpenGL Error: 1282 (Invalid operation»)», and the other is that not only does the bug spam this message in your chat, but it also makes your screen completely black.
What causes Minecraft OpenGL Error 1282 (Invalid Operation)? The OpenGL Error 1282 can be caused by various errors. Here are the main reasons:
- Outdated or corrupt graphic drive
- Corrupted shaders
- Your computer may not have the proper hardware
- Your browser may not support OpenGL
- Incompatible Mods
- Malware infection
- Outdated java program
- The opengl32.dll file is missing
- Outdated Optifine
Here are some helpful solutions for the OpenGL Error 1282. You can select the one you like to solve the Open GL Error 1282 on your PC.
Solution 1. Update Graphics Driver
If your graphics drive is outdated or corrupt, you can encounter the OpenGL Error 1282 easily. So, you can update your graphics drive to fix it. Here’s the way:
- Press the Windows and R keys at the same time.
- Type «devmgmt.msc» in the box and click OK to open the Device Manager window.
- Next, expand the Display adapters category and then right-click the drive name.
- Then select Update driver from the menu.
- In the new window, select the «Search automatically for drivers» option and then follow the on-screen instructions.
- Update all the available drivers and restart your system.
- Once done, restart your PC and check if the OpenGL Error 1282 is fixed.
Solution 2. Update Minecraft
Updating Minecraft can fix many basic errors, including OpenGL Error 1282. To update it, you can go to the Microsoft Store or the official forum of Minecraft to download and install the latest update manually.
Solution 3. Update Java
Java not only has an important effect on your system, but it also plays a crucial role in the smooth gameplay of Minecraft. If your Java program is outdated, you will see OpenGL Error 1282 (invalid operation) on your PC. You can do as follows to update it:
- Write down what system type your computer is.
- Open the browser on your PC and then go to the official Java site to download the compatible update for your OS architecture.
- Then, double-click the file to begin updating, and then follow the on-screen instructions to finish it
- Once done, copy the entire folder from the root directory.
- Next, press the Windows and E keys to open the Windows Explorer.
- Navigate to «C:\Program Files\Java» (32-bit)» or «C:\Program Files (x86)\Java» (64-bit) in Windows Explorer.
- Paste the folder which you have copied already and select the «Replace All» button on the pop-up window.
- Go back to your desktop and launch Minecraft.
- Then select the «Forge MOD Manager» option from the welcome screen.
- Select the «Edit Profile» option and then assign the correct Java path on your system under the «Java Settings (Advanced)» option.
- Save the settings and relaunch your game. Once done, check if the error is fixed.
Solution 4. Update OptiFine
An outdated version of Optifine can cause errors, especially if you’re using other mods. If the OpenGL Error 1282 error on your PC is caused by the outdated Optifine, you can try keeping your Optifine Mod up to date to fix it.
Solution 5. Disable Shaders
Although Shaders can change Minecraft’s entire look completely, it can use a hefty amount of your system’s resources and result in game performance issues.
In addition to this, it can also conflict with Optifine or Mods and cause errors like OpenGL Error 1282. So, if you encounter OpenGL Error 1282 (Invalid Operation) on your PC, you can try disabling Shaders to fix it.
Solution 6. Add the OpenGL32.dll File Manually
Many people have reported that by adding the opengl32.dll file manually, they were able to resolve the Minecraft OpenGL Error 1282 (Invalid Operation). You can also have a try. Here’s the guide:
- Press Windows and I keys to open the Settings
- Select System and then select About from the left panel.
- Write down your computer’s System type (either 32-bit or 64-bit).
- Open a web browser and go to the official website of DLL-Files or any other trusted third-party sites.
- Download a compatible DLL file according to your OS architecture and copy the entire file.
- Back to your desktop and then right-click the Minecraft Launcher icon.
- Select the «Open File Location» option from the menu.
- Next, find the «Runtime» folder and open the «JRE-x64» folder inside it.
- Find and open the «bin» folder inside it and paste the DLL file which you have already copied.
- Restart your Windows system and relaunch the game to check if the error is fixed.
Solution 7. Disable the Show GL Errors Option
If the Minecraft OpenGL Error 1282 (Invalid Operation) on your PC is the first type that only shows up in your chat, and the rest of your game works fine, you can try disabling the Show GL Errors option to fix it. Here are the steps:
- Open Minecraft and then press Escape on your keyboard.
- Select Options… > Video Settings… > Other… button.
- Click on the «ShowGL Errors» option to disable it.
- Click on Done. Then you can play the game without the error message showing on the chat location.
Bottom Line
Are you interested in MiniTool Partition Wizard and want to know more about it? If you are, you can visit MiniTool Partition Wizard’s official website by clicking the hyperlink. MiniTool Partition Wizard is an all-in-one partition manager and can be used for data recovery and disk diagnosis.
About The Author

Position: Columnist
Charlotte is a columnist who loves to help others solve errors in computer use. She is good at data recovery and disk & partition management, which includes copying partitions, formatting partitions, etc. Her articles are simple and easy to understand, so even people who know little about computers can understand. In her spare time, she likes reading books, listening to music, playing badminton, etc.
The “OpenGL Error 1282 (Invalid operation)” is one of the common errors occurring in Minecraft. When this error occurs, you may experience lag issues or error message pop-ups. It’s annoying. But don’t worry. You can fix the error easily with the following methods.
There are seven methods available for you to try. You can try them one by one:
Method 1: Manually add the opengl32.dll file
Method 2: Update graphics card drivers
Method 3: Disable shaders
Method 4: Update OptiFine
Method 5: Update Java
Method 6: Try a different game version
Method 7: Turn off Show GL Errors
Method 1: Manually add the opengl32.dll file
The OpenGL error 1282 can be caused by missing the opengl32.dll file in the Minecraft folder. To fix the error , you can try manually adding the opengle32.dll file to the folder. Many Minecraft users have reported they fixed the same error with this fix. You can give it a try and see if it works for you too.
You can follow these steps to manually add the opengl32.dll file.
Firstly, download the opengl32.dll file.
1) Download the “OpenGL fix.7z” file to your computer (you can download the file from mediafire.com).
2) Extract the file.
3) In the extracted folder, you’ll see two subfolders: 32 bit and 64 bit. Select one of them according to your Windows version (How to check what Windows version you have?). In my case, I have Windows 10 64-bit version, then I need to open the 64 bit folder (see the screenshot below).
4) Copy the opengl32.dll file.
Secondly, paste the opengl32.dll file to the Minecraft folder.
1) Right-click on the shortcut of Minecraft and then select Open file location.
2) Navigate to the following location
MinecraftRuntime*JRE Version*bin
Note: The JRE Version is simply a placeholder. It depends on the game version you have, for example, Jre-x64, or something like that.
3) Paste the opengl32.dll file to the bin folder mentioned in Step 2).
4) Re-launch Minecraft and see if the error persists. If the error persists, continue to try Method 2.
Method 2: Update graphics card drivers
A faulty or missing graphics card driver can cause the Minecraft OpenGL 1282 error. You can try updating your graphics card driver and see if it helps.
You can update the graphics card driver via Device Manager:
1) Right-click on the Start menu button and select Device Manager. Then the Device Manager window will open.
2) Expand category “Display adapters”. Right-click on your graphics card device and then select Update driver.
3) Select Search automatically for drivers. Then Windows will search for a new driver and install the driver automatically.
Alternatively, you can go to the PC manufacturer’s website to download the latest graphics card driver. Usually, drivers can be downloaded from the Drivers, Support or Download section.
Method 3: Disable shaders
Shaders in Minecraft allow you to set different terrains and settings so you can have a better game experience. But in the meantime, they can take up a lot of system resources, and may cause the OpenGL 1282 error. To fix the error, you can try disabling shaders in Minecraft. To do so:
1) Launch Minecraft.
2) On your keyboard, press the Esc key to pull up the Menu screen.
3) Go to Options -> Shaders.
4) Select OFF and click Done.
After you’re done with it, re-launch Minecraft and see if you’re still facing the OpenGL 1282 error.
Method 4: Update OptiFine
The OpenGL Error 1282 can be an OptiFine issue. If you’re using OptiFine for Minecraft , updating OptiFine to the latest version may help remove the error. If you’re using OptiFine, skip this method and continue to the next method.
Go to OptiFine’s official website and download the latest version of OptiFine, then install it on your computer. Once done, check to see if the error still occurs.
Method 5: Update Java
Minecraft relies on Java very much. If you have a low version Java or the Java files are corrupted, the OpenGL Error 1282 can occur. To fix the error, you can try updating Java to the latest version.
Go to Java’s website and download the latest version of Java to your computer, then follow the on-screen instructions to install it.
Once the installation completes, re-launch Minecraft and check to see if the OpenGL Error 1282 is fixed.
Method 6: Try a different game version
The error can occur in a specific version of Minecraft. So you could try switching to a different game version, for example a lower version, and see if the error continues.
Method 7: Turn off Show GL Errors
In some cases, the OpenGL Error 1282 is not a real error but just a bunch of pop-ups. If your game performance is not influenced due to this error, it’s nothing to worry about. To get rid of these annoying notifications, you can just turn off the Show GL Errors option in Minecraft. After that, you won’t receive any error notifications.
Here’s how to turn off the Show GL Errors option in Minecraft.
1) Launch Minecraft.
2) Go to Options > Video Settings > Others…
3) Click Show GL Errors and turn it off.
4) Save the changes and re-launch Minecraft, then you won’t see the annoying OpenGL Error 1282 message.
Hopefully you can fix OpenGL Error 1282 (Invalid operation) with the steps above. If you have any questions or suggestions, feel free to leave a comment below. I’ll get back to you ASAP.
If you’re playing Minecraft with mods installed, you may encounter the infamous “OpenGL Error 1282” bug, which spams itself in your chat and even turns your entire screen black in some cases.
This may seem like a very serious bug, but don’t be alarmed, as it can be quite easy to fix once you figure out what you’re dealing with. There can be several reasons why you’re experiencing this error in Minecraft. You have to figure out the exact root cause of this problem and what you can do to solve it.
So below, we’ve compiled a list of all the possible causes of the OpenGL 1282 Error in Minecraft.
- Missing .dll File: DLL files are special files used by programs to execute their required operations. If you’re missing a DLL file, it can cause programs to malfunction. One of the possible causes of OpenGL Error 1282 is a missing DLL file named opengl32.dll.
- Shaders: Shaders are known to be troublemakers in Minecraft, especially if you have mods installed. They use a great number of your system’s resources and tend to conflict with the mods you’ve installed, causing errors.
- Incompatible Mods: Each Minecraft mod is designed to work with a specific game version. Trying to run the mod on a different version will cause many issues.
- Outdated Java: Java is required by Minecraft and its third-party mod installers to be able to run. Outdated versions of Java can hinder the game’s performance and cause bugs.
- Outdated Optifine: Outdated versions of Optifine are a major cause of OpenGL Errors in Minecraft.
- Outdated Graphics Drivers: If you haven’t updated your GPU drivers in a while, they can cause issues, especially if you’re trying to play with newer mods.
1. Disable the Show GL Errors Option
There are two types of OpenGL Error 1282 bug in Minecraft. In the first type, the bug just spams a message in your game chat that says “OpenGL Error: 1282 (Invalid operation)“.
In the second type, not only does the bug spam this message in your chat, but it also makes your screen completely black.
If you’re experiencing the first type of this bug, where it only shows up in your chat, and the rest of your game works fine, there’s a very simple solution to your problem.
All you need to do to fix this type of OpenGL error is to disable the “Show GL Errors” options from the in-game menu of Minecraft. To disable this option, follow the steps we’ve listed below:
- Open Minecraft and head into your world.
- Once you’ve loaded in, press Escape on your keyboard.
- Click on “Options…” in the menu.
Going into Minecraft options - Click on “Video Settings…”
Opening Minecraft Video Settings - Click on “Other…”
Click on Others - Click on the “Show GL Errors” option to disable it.
Disabling the OpenGL Error Notifications - Click on Done.
This method will turn off the chat notifications for the OpenGL Errors, instantly fixing your problem!
Now, if you’re experiencing the second type of the OpenGL Error 1282 bug, which turns your screen black, try the solutions we’ve listed below.
2. Download the Missing DLL File
Each program you download to your PC needs a set of DLL (Dynamic Library Link) files to function properly. These DLL files contain instructions, and programs like Minecraft use them to perform their required operations.
For a program to be able to work as intended, it needs all of its required DLL files.
So the first fix to the OpenGL Error 1282 bug will be to download a specific DLL file named opengl32.dll. You have to download this file and paste it into your Minecraft folder. This will likely fix your issue.
To download this missing DLL file, follow the steps listed below:
- Head to this website and download the opengl32.dll file by clicking on the orange download button.
- If you have a 32-bit processor, download the 32-bit file; if you have a 64-bit processor, download the 64-bit file.
Downloading the missing DLL file - Extract the ZIP file into an empty folder.
- Copy the opengl32.dll file.
Copying the opengl32.dll file - Open File Explorer and paste the following address in the address bar:
C:Program FilesJava
- Press enter and then open the JRE folder.
Opening the Java folder - Open the bin folder and paste the opengl32.dll file in there.
Opening the bin folder - Launch Minecraft and see if the error is fixed.
If you don’t know what type of processor you have, there’s no need to worry. You can easily determine whether you have a 32 or 64-bit processor within a few clicks of your mouse.
Go to your desktop and right-click on the “This PC” icon. Select Properties and then look at the System Type to determine your processor’s architecture (type).
If it says 32-bit processor, return to the website linked above and download the “Architecture: 32” file. And if it’s a 64-bit processor, download the “Architecture: 64” file.
3. Disable Your Shaders
Shaders are used to change Minecraft’s entire look completely, but this comes at a cost. Shaders are known to cause all types of problems in Minecraft.
They consume a hefty amount of your system’s resources, causing game performance issues. But if Optifine and/or mods are installed, Shaders can conflict with them and create problems, such as OpenGL errors.
So if you have Shaders installed and are experiencing the OpenGL Error 1282 bug, make sure to disable the Shaders before you try other troubleshooting methods. These Shaders may just be the root cause of this error.
4. Check the Compatability of Your Mods
Whenever a developer makes a mod for Minecraft, they design it to run on a specific game version and the mod launcher (Forge). So if you try to run a mod on a game version and/or mod launcher it’s not designed for, it will cause many issues.
Therefore, whenever you download a mod, remember to check what game and mod launcher version it is compatible with. On the download page for the mod, there will be information regarding its compatibility.
And on top of that, not all mods work together flawlessly. If you download a bunch of mods made by different developers, there’s a chance that they will conflict with each other and create errors.
If this happens, you can solve the issue by uninstalling all your mods and then reinstalling them. Each time you install a new mod, run the game and see if there are any errors.
As soon as you encounter an error, it’ll mean that the last mod you installed conflicts with the rest. You can either uninstall that mod or find a different version of it. If it continues to cause problems, keep it uninstalled.
To avoid this hassle altogether, you should try using modpacks instead. Modpacks are filled with dozens of mods that have been carefully picked out by their creators. These modpacks are designed to work flawlessly.
5. Update Java
You must keep Java updated if you’re playing the Java Edition of Minecraft. We know how annoying the constant Java update reminders can get, but it’ll only take a few minutes of your time to update it.
To update Java, follow the steps we’ve listed below:
- Press Windows Key and type Java in the search bar.
- Click on “Check for Updates”
Checking for Java Updates - In the Java Window that opens up, click on Update Now.
Updating Java - Click on Update.
Update Java - Allow Java SE Runtime Environment to make changes to your PC.
- Click on Install.
Installing Java
After Java is done installing, relaunch Minecraft and see if your problem is resolved. If it isn’t, continue with the solutions listed below.
6. Update Optifine (If Applicable)
Updates for Optifine are released quite often, so many players forget to keep downloading all of its updates.
If you don’t keep your Optifine up to date, it’s a big mistake. An outdated version of Optifine can cause errors, especially if you’re using other mods.
So make sure to update your Optifine from time to time. If you don’t remember how to, first close Minecraft and then follow the steps listed below:
- Head to the official Optifine website and download the latest version of Optifine.
Downloading Optifine - After it finishes downloading, open up the file.
- Click on Install.
Installing Optifine - After it’s done installing, open up your Minecraft launcher and select the latest Optifine profile before pressing play.
Selecting the Optifine profile
7. Update Your Graphics Card Drivers
If none of the above solutions have worked for you, then the next step to fixing is to update your Graphics Card (GPU) drivers.
Unless you have a super old GPU, your GPU’s manufacturer is likely still releasing driver updates for it. You must regularly install these driver updates to ensure your GPU performs at its highest potential.
Now, to update your GPU drivers, you must first determine your GPU’s exact brand and model. To figure this out, follow the steps we’ve listed down below:
- Right-click on the Windows icon at the bottom-left corner of your screen.
- Select Device Manager.
Opening Device Manager - Click on the arrow next to Display Adapters to expand it.
- Note down the name of the GPU that appears.
Identifying GPU model using Device Manager
Unless your GPU drivers are corrupted or completely missing, this method should allow you to determine your GPU’s exact model.
But if it simply says, “Microsoft Basic Display Adapter,” instead of showing any unique model/brand name, then it means that GPU drivers are, in fact, corrupt/missing.
In this case, you’ll need to find your GPU’s model through another method. Follow the steps listed below:
- Right-click on the Windows icon at the bottom-left corner of your screen.
- Select Device Manager.
Opening Device Manager - Click on the arrow next to Display Adapters to expand it.
- Right-click on the Microsoft Basic Display Adapter.
- Click on Properties.
Selecting GPU Properties - In the Properties Window, navigate to the Details tab.
- Open up the drop-down list under Property.
- Select Hardware Ids.
Selecting Hardware Ids - Right-click on the first line of text written under Value.
- Click on Copy.
Copying Hardware Id - Open your browser, paste this text line into the search bar, and press enter.
When you press enter, the top results on Google will have your GPU’s exact brand and model written in their title, allowing you to easily figure out what GPU you’re working with.
Since we now know the name of your Graphics Card, we can start searching for its drivers online. But before we do that, we have to uninstall the GPU drivers that are currently installed in your system.
To do this, we’ll use a program called “Display Driver Uninstaller.” This program is far superior to the native Windows driver uninstaller.
This is because the Windows driver uninstaller does not delete the drivers well. It tends to miss out on some files, leaving residue behind. These residue files can cause problems when you update the drivers.
So to ensure that the current drivers are completely wiped from your system, we’ll be using DDU.
After you’ve downloaded and installed DDU, we have to ensure the safest driver removal process by booting the PC in Safe Mode.
- Press Windows Key and click on the Power button.
- Hold the shift key on your keyboard and click on the Restart option.
- Select Troubleshoot.
- Head to Advanced Options and then select Startup Settings.
- Enter Safe Mode by pressing the F5 key on your keyboard.
Going into Advanced Options Selecting Startup Settings Entering Safe Mode
Now that your PC is in Safe Mode, we can begin the driver removal process. Launch the Display Driver Uninstaller app, select “GPU” as your device type, and then select the brand of your GPU.
Click on the “Clean and restart” option to start wiping your GPU’s drivers.
After the drivers are completely wiped, the next step is to download the latest drivers of your GPU.
But before we do that, keep in mind that installing the latest version of GPU drivers can sometimes cause problems if your system is a laptop.
The drivers provided by your laptop’s Original Equipment Manufacturer (OEM) perform the best with your system. So it’s better to use the drivers provided by the OEM instead of just installing the latest drivers.
But if your system is a desktop, you don’t need to worry about this. Feel free to download the latest drivers for your GPU.
To do so, you’ll need to head to the official website of your GPU’s manufacturer.
For NVIDIA drivers, head to this website and then use the drop-down lists to find your GPU’s exact model.
For AMD drivers, head to this website and then use the drop-down lists to find your GPU’s exact model.
Once the driver file is downloaded, simply double-click on it to start installing the drivers. When asked for the installation type, select “Express” instead of “Custom”.
After the driver installation process finishes, restart your PC and launch Minecraft. The OpenGL 1282 Error should now be fixed.
Reinstall Minecraft
If all else fails, the final step is to reinstall Minecraft. This can fix your problem, as the root cause of the error might just be some corrupted game files. So when you reinstall Minecraft, there won’t be an issue of corrupted files.
So to reinstall Minecraft, first uninstall it from your system. But before we do that, note that when you uninstall Minecraft, your saved worlds, inventories, mods, and screenshots will be gone forever unless you create a backup for them.
To create a backup, follow the steps listed below:
- Open your documents folder and create a new folder within it titled “Minecraft Backup.”
- Press Windows Key + R to open the Run dialogue box.
- Type %appdata% and press enter.
Opening the AppData folder - Open the .minecraft folder.
Navigating to the .minecraft folder - Create a copy of the saves, screenshots, resource packs, and mods folder.
Copying important Minecraft save files - Paste them into the Minecraft Backup folder that you created earlier.
Creating the backup for the save files
When you reinstall Minecraft, you’ll be able to restore your progress by simply pasting these folders into the new .minecraft folder.
Once you’re ready, you can uninstall Minecraft from your PC by following these steps:
- Press the Windows Key, type Settings in the search bar, and enter.
Opening Settings - In the Settings menu, click on Apps.
Opening the Apps menu - In the search bar above the list of apps, type Minecraft.
- Click on Minecraft and press Uninstall.
Uninstalling Minecraft - Press Windows Key + R to open the Run Dialogue Box.
- Type %appdata% and press enter.
Opening the AppData folder - Right-click on the .minecraft folder.
- Press delete.
Deleting residue files of Minecraft - Open up Recycle Bin and permanently delete the .minecraft folder from there.
Minecraft is now fully wiped from your system. So the next step is to install it again by going to Minecraft’s official website. After installing Minecraft, launch the game and see if the OpenGL error went away.