
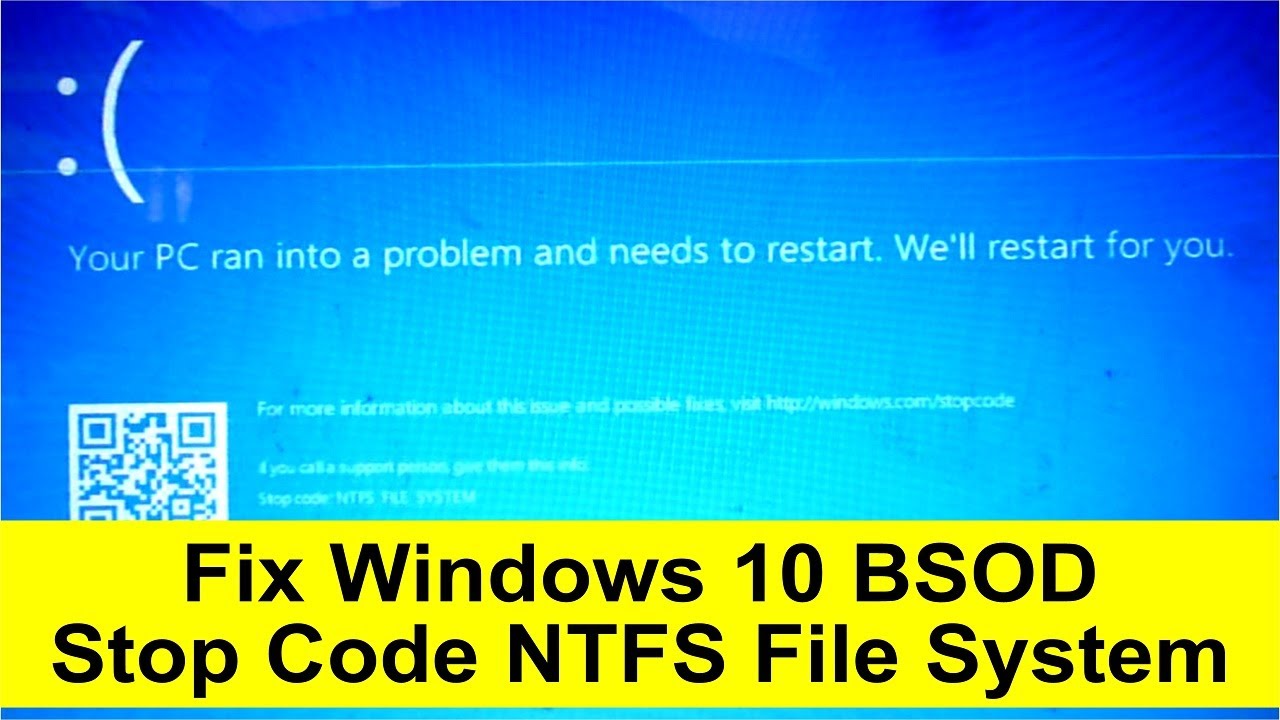
Ошибка чтения файла NTFS.sys и следующий за ней синий экран на Windows 10 свидетельствует о наличии проблем в состоянии накопителей: жестких дисков и твердотельных накопителей. Иногда причина ее проявления может быть вызвана программным сбоем, тогда ее можно будет исправить, а иногда – ошибка свидетельствует о физической неисправности. В таком случае решить проблему можно будет только посредством ремонта или замены комплектующих.
Причины ошибки NTFS_FILE_SYSTEM
Чаще всего ошибка чтения файла NTFS.sys появляется после установки нового накопителя в компьютер, на котором уже есть операционная система. В такой ситуации достаточно обновить или установить отдельный драйвер, предназначенный специально для нового накопителя.
Однако ошибка невозможности чтения файла NTFS.sys, также обозначающаяся кодом 0x00000024, может свидетельствовать и о других программных и аппаратных проблемах. К первым относятся:
- нарушение целостности системных файлов ОС;
- сбой базовых настроек операционной системы;
- повреждение, неправильная установка или отсутствие драйверов для работы с накопителями данных;
- последствия заражения ПК вирусами.

В список аппаратных проблем можно включить:
- повреждение разъемов подключения на накопителях или на материнской плате;
- повреждение кабеля SATA или IDE;
- повреждение кабеля питания накопителя;
- вышедшие из строя комплектующие жесткого диска;
- деградация чипов памяти на твердотельном накопителе и прочие.
Методы решения проблемы
Решить проблему чтения файла NTFS.sys, вызывающую БСОД (с англ. «Blue Screed of Death», что дословно переводится как «синий экран смерти»), удается не всегда. Если причиной ее появления является аппаратная неисправность, то устранить проблему никаким другим способом, кроме починки накопителя, что возможно далеко не всегда, не удастся.
Однако, в любом случае, стоит попробовать следующие манипуляции: проверить секторы накопителя на предмет ошибок, восстановить поврежденный файл или переустановить драйвера устройства.
Если причина возникновения ошибки вызвана программными сбоями, системными ошибками или отсутствием подходящих драйверов, то после проделанных манипуляций пользователю удастся восстановить стабильную работу накопителя.
Проверка диска
Если на экране BSOD появился код остановки работы систем 0х00000024, то можно попробовать решить проблему посредством проверки секторов накопителя на ошибки. Если после сбора информации о проблеме система запустилась, то это можно сделать следующим образом:
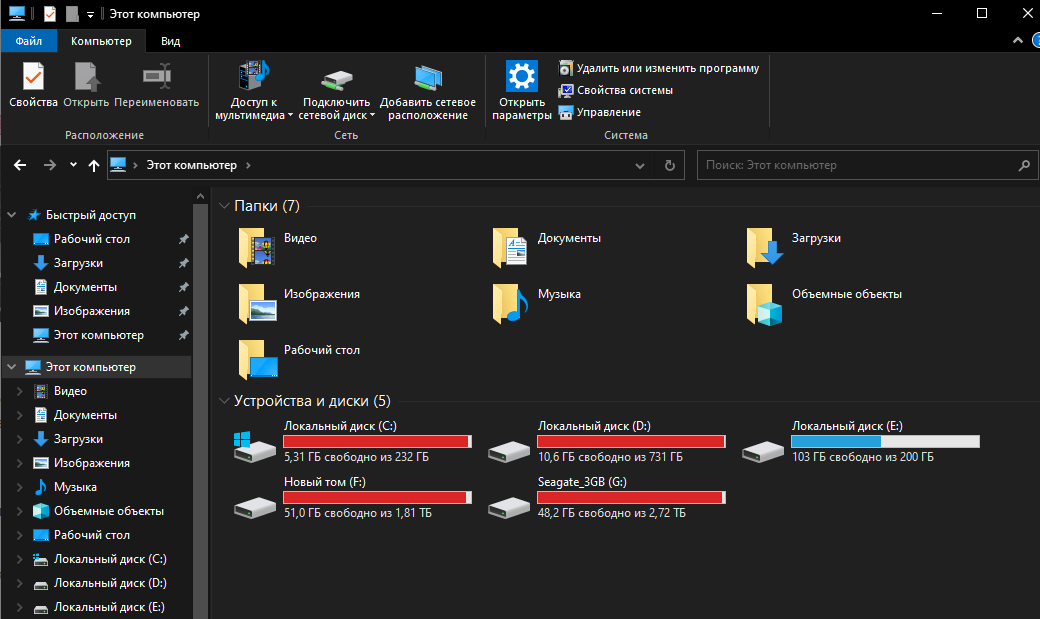
- Открыть «Компьютер».
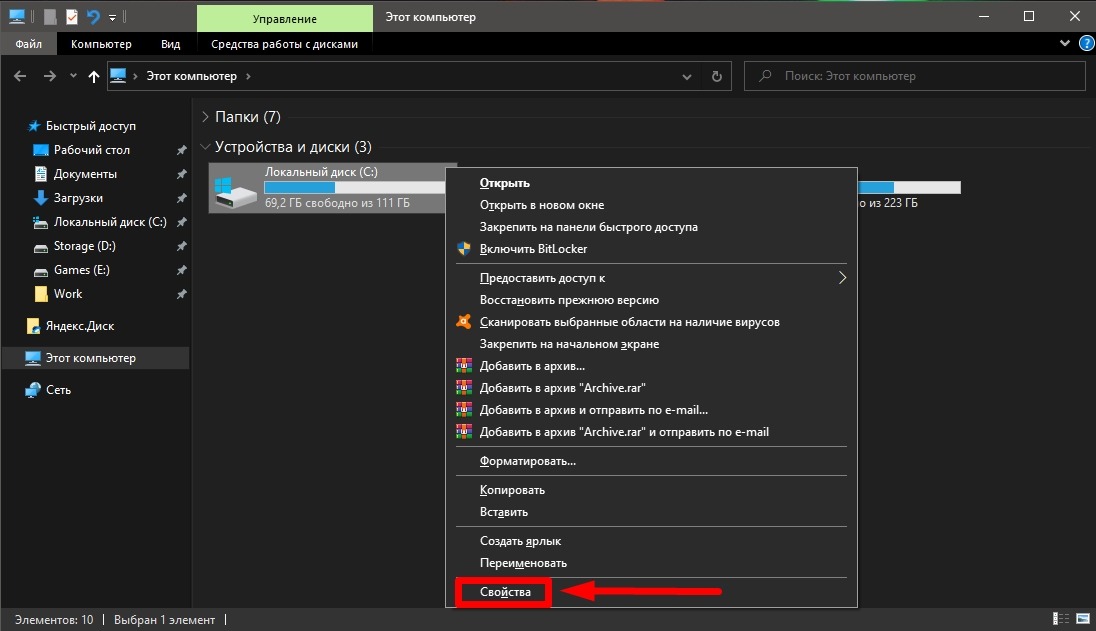
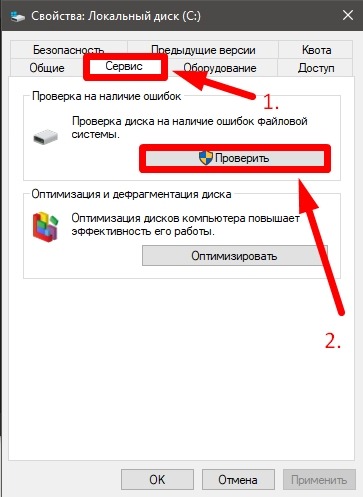
- Нажать правой клавишей на раздел «С» и выбрать вариант «Свойства».
- Перейти в раздел «Сервис» и запустить проверку диска, предварительно проставив все галочки (в поздних версиях Windows 10 настройка дополнительных параметров перед запуском проверки не требуется).
Если запуск системы был неудачен, то перед пользователем появится окно восстановления. Тогда следует:
- Перейти в раздел дополнительных параметров.
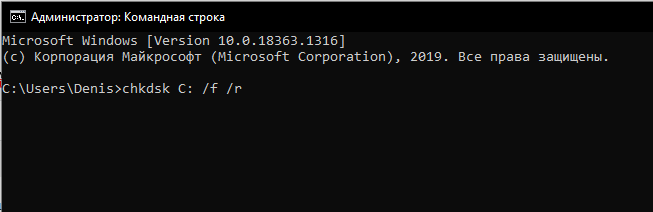
- Выбрать вариант «Командная строка».
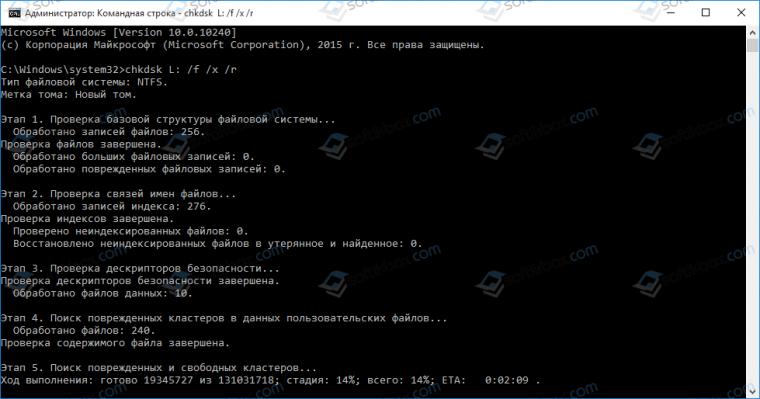
- Ввести команду без кавычек «chkdsk C: /f /r» и нажать клавишу «Enter».
- Дождаться завершения проверки и попытаться запустить систему.
Восстановление системного файла
Второй вариант как можно исправить ошибку с файлом NTFS.sys – это восстановление. Операция выполняется через Командную строку. Запустить процесс можно следующим образом:
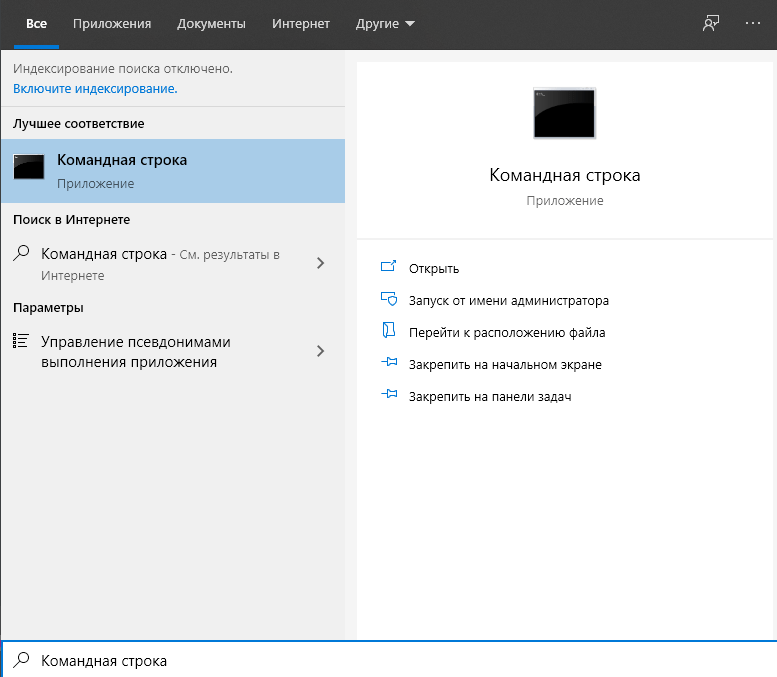
- Открыть консоль:
- если доступ в систему есть, то это можно сделать, набрав в поиске CMD.exe и выбрав вариант запуска с правами Администратора;
- если доступа в систему нет, то это можно сделать на экране восстановления, перейдя в раздел дополнительных параметров и выбрав пункт «Командная строка».

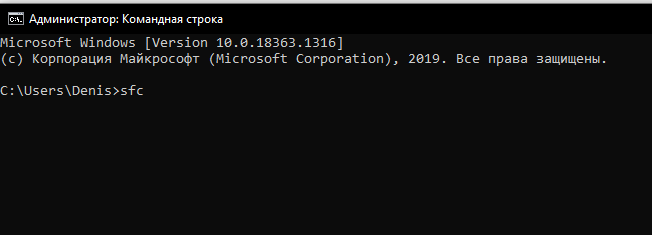
- Поочередно ввести команды без кавычек «>sfc», затем «/scannow».
- Дождаться завершения процедуры и перезагрузить/запустить операционную систему.
Удаление устройства
Способ удаления устройства для чистой установки драйверов поможет только в том случае, если ошибка появилась после установки нового накопителя (HDD, Sata SSD или M2SSD). При таких обстоятельствах после синего экрана ПК, в любом случае, запустится до Рабочего стола.
При выполнении всех операций важно не обращаться к новому накопителю (не открывать его в компьютере, не копировать туда файлы).
Для восстановления драйвера потребуется:
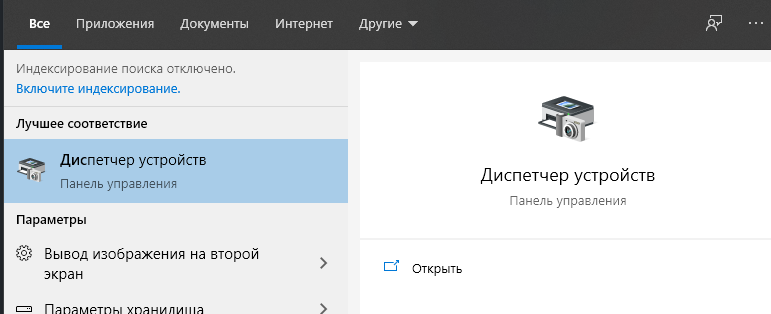
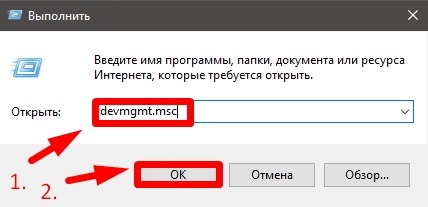
- Открыть Диспетчер устройств. Открыть меню Выполнить («Win+R»), ввести без кавычек «devmgmt.msc» и нажать клавишу «Enter».
- Развернуть список «Контроллеры IDE ATA/ATAPI» и для каждого пункта нажать правую клавишу мыши и выбрать вариант удаления устройства.
- Перезагрузить ПК. Система сама в автоматическом режиме установит новые драйверы.

На заметку: если после перезагрузки в Диспетчере устройств напротив контроллеров стоит восклицательный знак или же в списке появится неизвестное устройство, при этом доступа к накопителю в компьютере не будет, то пользователю придется самостоятельно загрузить и установить драйвер с официального сайта производителя накопителя.
Summary: Failed NTFS.SYS is a Blue Screen of Death (BSOD) error, which may appear with the stop code — System_Service_Exception. This error may lead your Windows PC to a malfunction or crash, resulting in total data loss. To fix this issue, try some of the most recommended methods shared in this blog. You may also download the trial version of Windows Data Recovery Tool to recover your data lost due to this error.


-Source
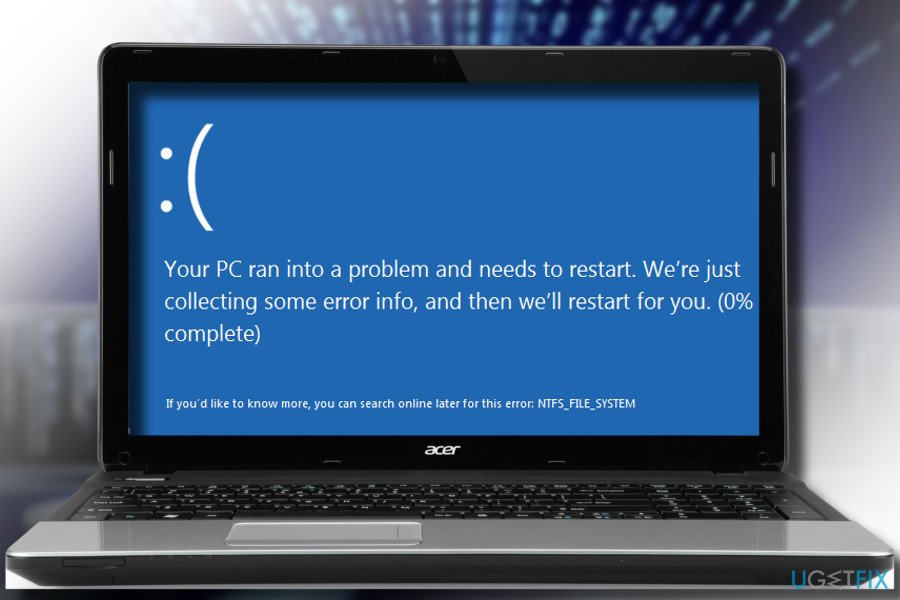
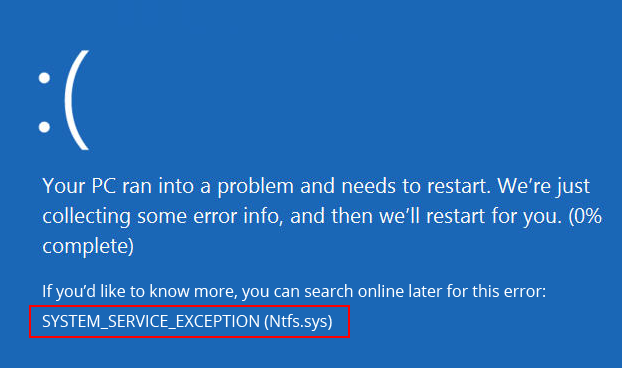
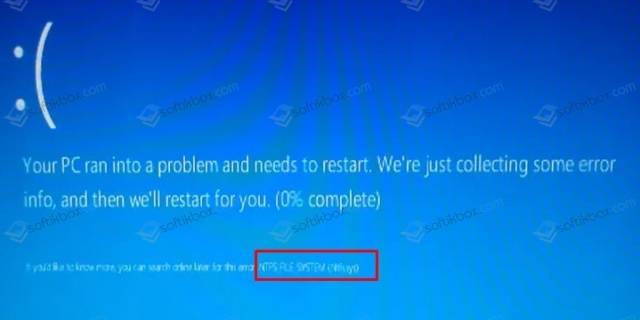
If you encounter NTFS.SYS blue screen error on your system, it is probably because of corrupt NTFS, bad sectors on the hard drive, or incompatible device drivers. Sometimes, depletion of non-paged pool memory, malware attack on your PC, and corrupt system files may also induce this error. You may see this error showing up with the stop code – System_Service_Exception (See Image 1).

Due to this error, your system may shut down abruptly, get stuck at a booting loop, or even crash, making you lose access to your data. Read this guide to learn some popular methods to fix NTFS.sys problem on your own.
Recover data lost due to Ntfs.sys crash with a professional Windows Data Recovery Tool.
Fix Failed NTFS.SYS (System_Service_Exception) in Windows 10
Enable the safe mode with networking before performing any methods to make sure you don’t face any interruption/problem while trying to solve this error.
Follow the given steps to Enable Safe Mode with Networking:
a. If you see this blue screen error on your system, turn it off.
b. Reboot it and as it starts showing up Windows logo on the screen, turn it off with the power button.
c. Repeat this step thrice and then allow your PC to restart.
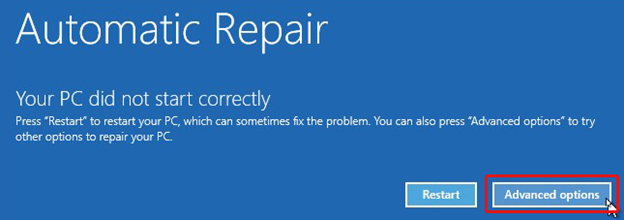
d. After this, choose Advanced options from the Automatic Repair environment. (See Image 2)

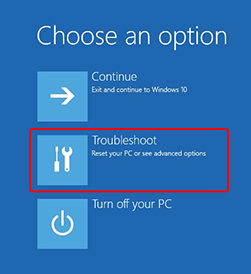
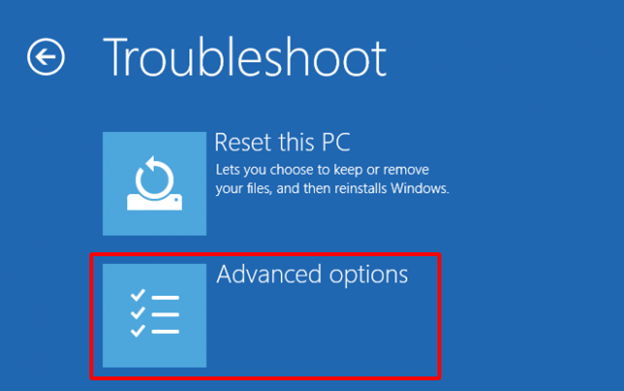
e. On the Choose an option screen, click Troubleshoot. (See Image 3)

f. Next, on the Troubleshoot screen, choose Advanced options. (See Image 4)

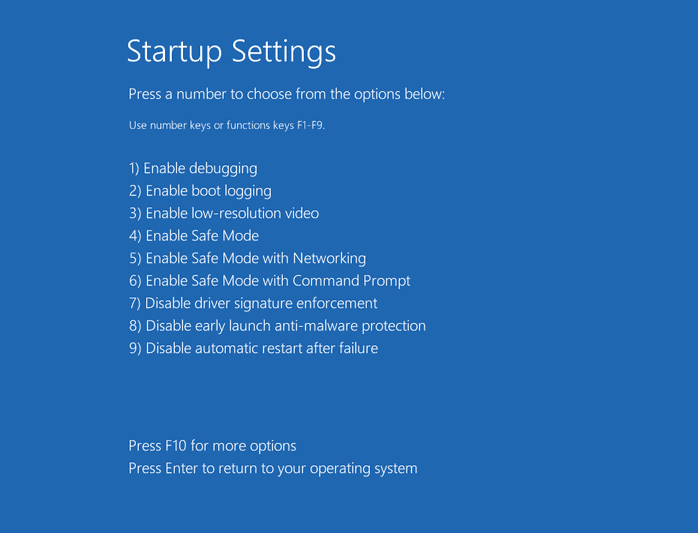
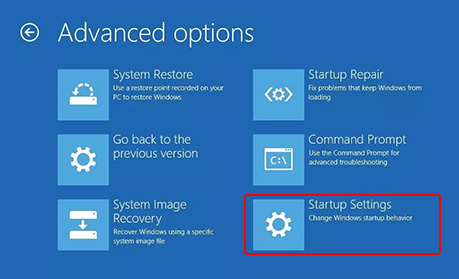
g. On the Advanced options screen, click Startup Settings. (See Image 5)

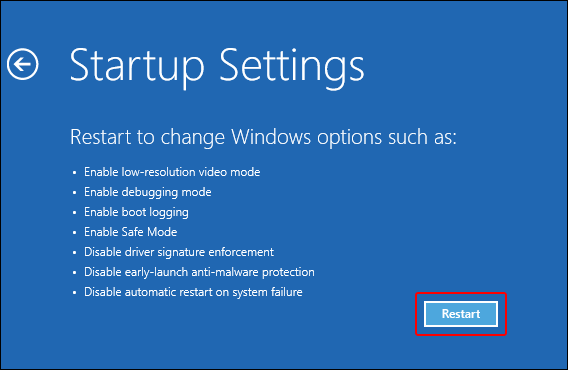
h. Afterward, click Restart on the Startup Settings screen. (See Image 6)

i. Once the PC restarts, choose option 5 from the list or press F5 for enabling safe mode with networking.
j. After enabling the Safe Mode, you may start performing the following fixes to solve error- Ntfs.sys system service exception on windows 10.
Method 1: Update Device Driver
Sometimes, the outdated, incompatible, or corrupt device drivers may cause this blue screen of death error. You may download and install updated device drivers by following the given steps:
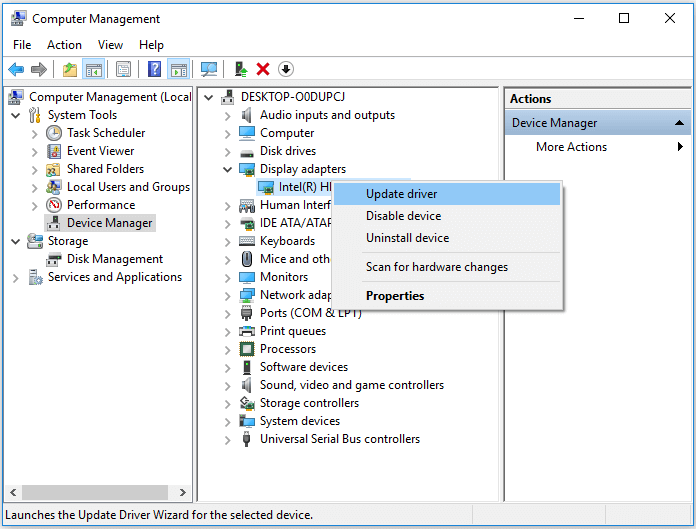
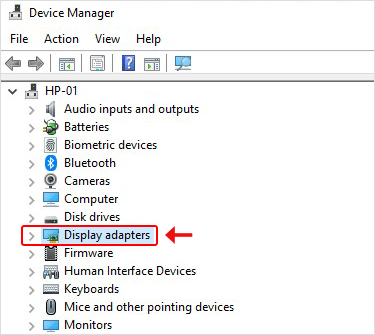
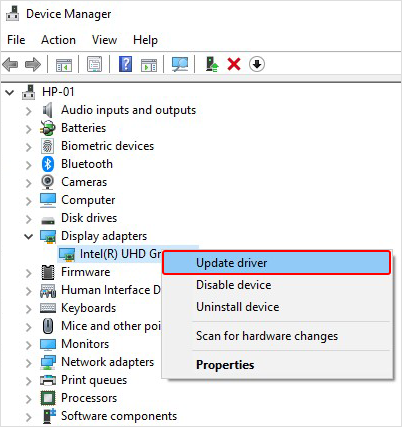
a. Open Device Manager and navigate to Display Adapters. (See Image 7)

b. Expand Display Adapters and select the problematic driver.
c. Right-click on the driver and select Update driver from the available options. (See Image 8)

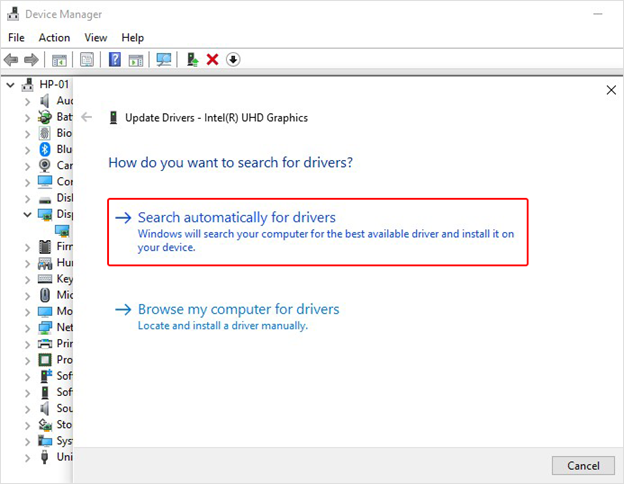
d. On the next prompt, click ‘Search automatically for drivers.’ (See Image 9)

e. Windows starts searching for an updated version of the drivers. You may install the latest driver software to fix the error ‘System Service Exception Windows 10.’
You may also update the driver through Windows Update. Follow the given steps to do so:
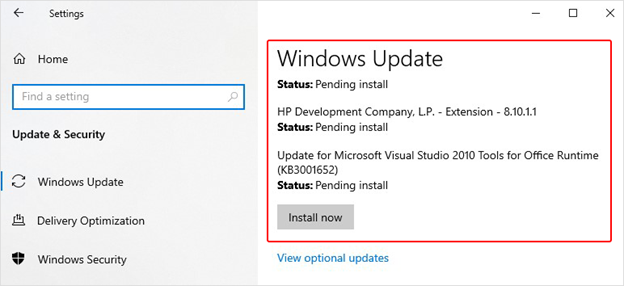
a. Open System Settings and follow Update & Security > Windows Update.
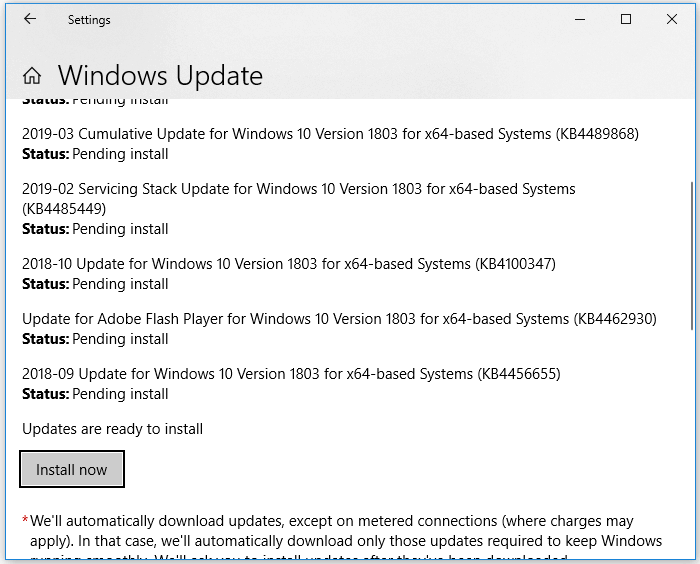
b. Check for the latest updates available. If the updates are available, click ‘Install now’ and then restart your system. (See Image 10)

c. Reboot your PC and check whether the error is resolved.
Method 2: Scan your computer for computer viruses
If the system is affected by a virus or malware, you may encounter this error. You may scan for malware ‘Windows Security’ utility. To do so, follow the given steps:
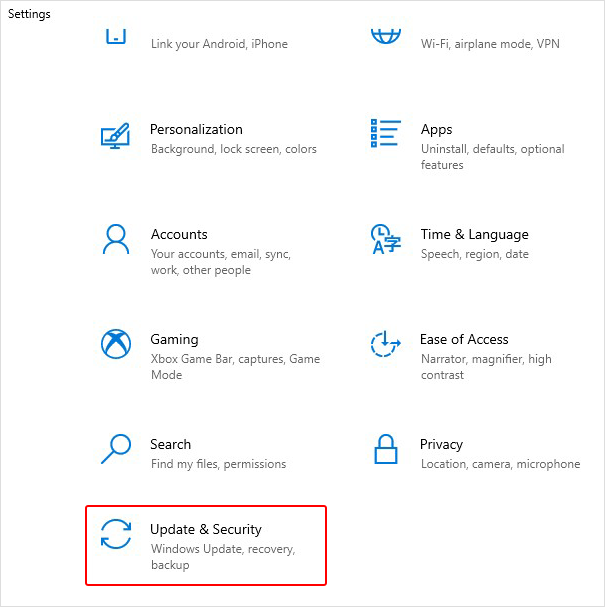
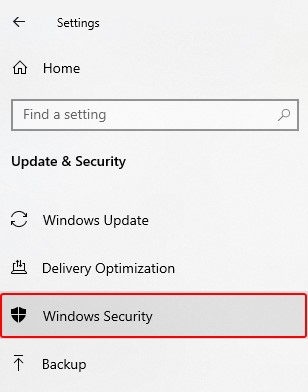
a. Open System Settings and go to Update & Security. (See Image 11)

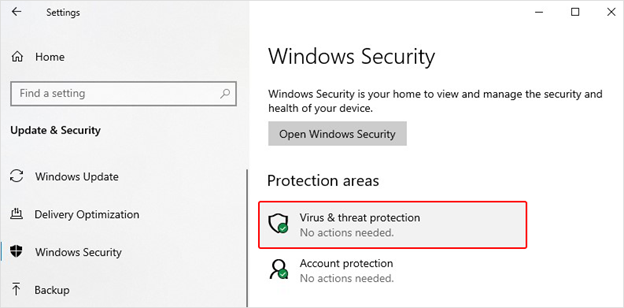
b. Navigate to Windows Security and open it. (See Image 12)

c. Move to the Virus & threat protection on the right panel. (See Image 13)

d. Follow the given instructions on the screen to check malware and get rid of it.
Method 3: Remove BitDefender and/or Webroot
Some of the third-party antivirus programs may lead Windows to malfunction and cause NTFS.SYS BSOD error with stop code ‘System Service Exception’. You may fix this by removing BitDefender or Webroot using the following steps:
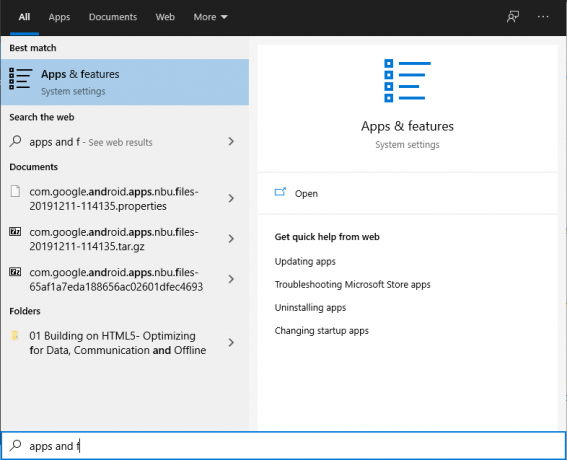
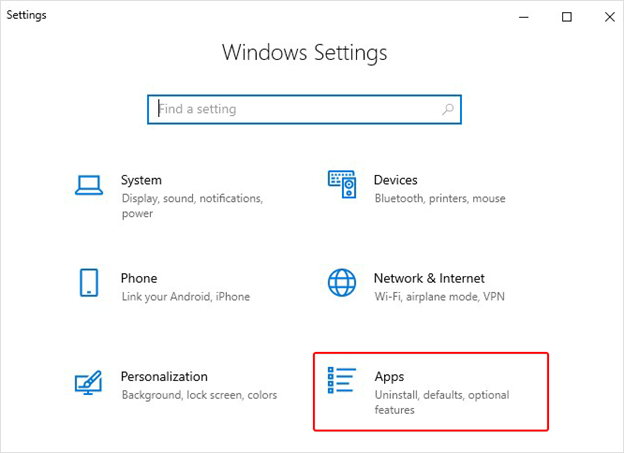
a. Open System Settings and go to Apps. (See Image 14)

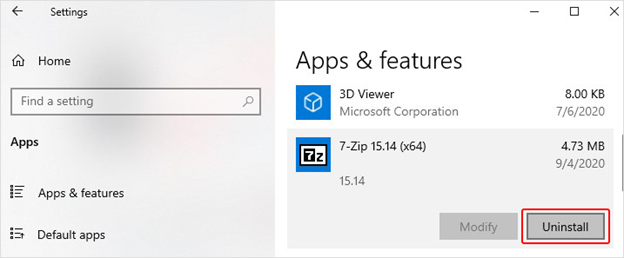
b. Find if you have BitDefender or Webroot installed on your system.
c. If it is installed in your PC, right-click on it to Uninstall. (See Image 15)

d. Restart the system to see if the stop code system service exception persists.
Method 4: Run SFC Scan
This error may also occur due to missing or corrupt system files. You may run SFC (System File Checker) utility to check for any system files’ corruption and fix it. Follow the below-given steps:
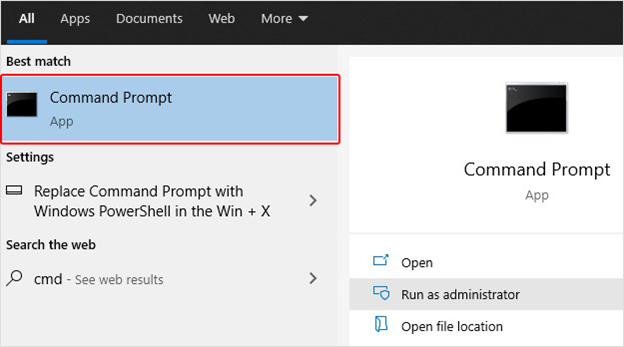
a. Type cmd in Windows’ search box to open Command Prompt and run it as an administrator. (See Image 16)

b. Click ‘Yes’ to open Command Prompt.
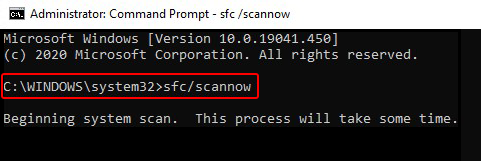
c. On Command Prompt screen, type sfc/scannow and hit Enter. (See Image 17)

d. The process will take time to check the corrupt system files and fix it to resolve the error code: System Service Exception in Windows 10.
Method 5: Run CHKDSK Command
Sometimes, this problem may occur if the hard drive is faulty or consists of bad sectors. You may check your hard disk for errors and fix it by running the CHKDSK command. Follow the below-said steps:
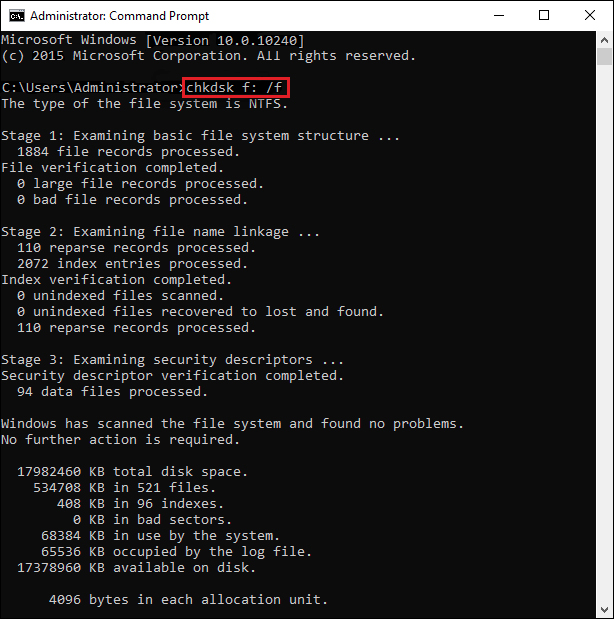
a. Open Command Prompt, run it as administrator and type chkdsk f: /f and press Enter. (See Image 18)

b. Wait until the process is completed and then exit the Command Prompt.
c. Restart the system and check if you have fixed the issue.
[Caution: Running the CHKDSK command can fix the hard drive corruption. However, you will end up losing your data after performing this method as it scans the drive and marks down the bad sectors on it, helping Windows understand not to read or store data from bad sectors.]
It is suggested to use a powerful data recovery tool such as Stellar Data Recovery Professional to recover lost data after using the CHKDSK command. This do-it-yourself (DIY) software can efficiently extract multiple kinds of data simultaneously. Be it your favorite pictures and videos or your essential official documents, emails, files, etc. you may recover them quickly using this software. The software facilitates data recovery from formatted, corrupted, or missing drive partitions and storage devices. It features ‘Create Recovery Drive’ utility. Using this utility, you may create a bootable media to restore data from unbootable, dead, crashed, or BSOD affected systems. Check out this video:
Method 6: Run Memory Diagnostic Tool
Non-paged pool memory may be another cause of the error- System Service Exception Windows 10. The non-paged pool, containing the virtual memory addresses, always remains in the physical memory as long as the corresponding kernel objects are allocated. It can never be paged out into pagefile when the system runs out of the free physical memory.
If you encounter stop code- system_service_exception on your system, the depletion of non-paged pool memory may be the reason. Other related reasons could be as following:
- Low amount of available non-paged pool memory during the indexing process
- Another kernel-mode driver requiring this memory
To resolve the depletion of non-paged pool memory, you may add new physical memory to the system to improve the non-paged pool memory available to the kernel. Also, you may try running the Windows Memory Diagnostic Tool to check and fix the stop code System Service Exception. Follow the below-mentioned steps:
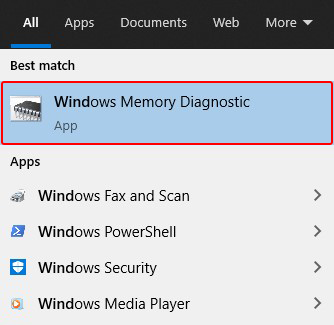
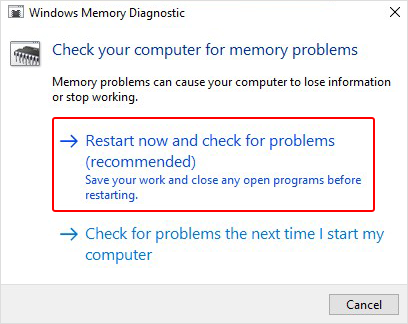
a. Type Windows Memory Diagnostic in Windows’ search bar and hit Enter to open it. (See Image 19)

b. On the Windows Memory Diagnostic screen, select ‘Restart now and check for problems (recommended.) (See Image 20)

c. The Windows Memory Diagnostic tool screen will display on the screen.
d. Let the test begin and wait until it is done. (See Image 21)

e. When the test is completed, the system will restart automatically and return to the Windows desktop.
f. You may check the test results and see if the error is fixed.
Wrapping up
The System_Service_Exception error may occur without any warning and make you lose access to your PC and data stored on it. There could be several reasons behind this error, as explained above. To fix this error, try methods such as CHKDSK command, SFC Scan, Windows update, etc. However, if you’ve lost your data due to this Ntfs.sys error, try using an efficient data recovery tool such as Stellar Data Recovery Professional. This software can get back your data from Windows PCs and storage devices such as HDD, SSD, USB and SD card, etc.
Also read – Fixed: Critical Process Died BSOD Error in Windows 10
About The Author
Mansi Verma
Mansi Verma is a Senior Technology Writer at Stellar®. She is a Tech enthusiast, holding over 8 years of experience in Data Recovery, IoT, Artificial Intelligence, and the Robotics technology domain. She loves researching and providing DIY solutions to solve Windows technical issues. In her spare time, she likes reading novels, and poetry. She also enjoys Travelling, Rafting, Trekking, etc.
Ошибка чтения файла NTFS.sys и следующий за ней синий экран на Windows 10 свидетельствует о наличии проблем в состоянии накопителей: жестких дисков и твердотельных накопителей. Иногда причина ее проявления может быть вызвана программным сбоем, тогда ее можно будет исправить, а иногда – ошибка свидетельствует о физической неисправности. В таком случае решить проблему можно будет только посредством ремонта или замены комплектующих.
Причины ошибки NTFS_FILE_SYSTEM
Чаще всего ошибка чтения файла NTFS.sys появляется после установки нового накопителя в компьютер, на котором уже есть операционная система. В такой ситуации достаточно обновить или установить отдельный драйвер, предназначенный специально для нового накопителя.
Однако ошибка невозможности чтения файла NTFS.sys, также обозначающаяся кодом 0x00000024, может свидетельствовать и о других программных и аппаратных проблемах. К первым относятся:
- нарушение целостности системных файлов ОС;
- сбой базовых настроек операционной системы;
- повреждение, неправильная установка или отсутствие драйверов для работы с накопителями данных;
- последствия заражения ПК вирусами.
В список аппаратных проблем можно включить:
- повреждение разъемов подключения на накопителях или на материнской плате;
- повреждение кабеля SATA или IDE;
- повреждение кабеля питания накопителя;
- вышедшие из строя комплектующие жесткого диска;
- деградация чипов памяти на твердотельном накопителе и прочие.
Методы решения проблемы
Решить проблему чтения файла NTFS.sys, вызывающую БСОД (с англ. «Blue Screed of Death», что дословно переводится как «синий экран смерти»), удается не всегда. Если причиной ее появления является аппаратная неисправность, то устранить проблему никаким другим способом, кроме починки накопителя, что возможно далеко не всегда, не удастся.
Однако, в любом случае, стоит попробовать следующие манипуляции: проверить секторы накопителя на предмет ошибок, восстановить поврежденный файл или переустановить драйвера устройства.
Если причина возникновения ошибки вызвана программными сбоями, системными ошибками или отсутствием подходящих драйверов, то после проделанных манипуляций пользователю удастся восстановить стабильную работу накопителя.
Проверка диска
Если на экране BSOD появился код остановки работы систем 0х00000024, то можно попробовать решить проблему посредством проверки секторов накопителя на ошибки. Если после сбора информации о проблеме система запустилась, то это можно сделать следующим образом:
- Открыть «Компьютер».
- Нажать правой клавишей на раздел «С» и выбрать вариант «Свойства».
- Перейти в раздел «Сервис» и запустить проверку диска, предварительно проставив все галочки (в поздних версиях Windows 10 настройка дополнительных параметров перед запуском проверки не требуется).
Если запуск системы был неудачен, то перед пользователем появится окно восстановления. Тогда следует:
- Перейти в раздел дополнительных параметров.
- Выбрать вариант «Командная строка».
- Ввести команду без кавычек «chkdsk C: /f /r» и нажать клавишу «Enter».
- Дождаться завершения проверки и попытаться запустить систему.
Восстановление системного файла
Второй вариант как можно исправить ошибку с файлом NTFS.sys – это восстановление. Операция выполняется через Командную строку. Запустить процесс можно следующим образом:
- Открыть консоль:
- если доступ в систему есть, то это можно сделать, набрав в поиске CMD.exe и выбрав вариант запуска с правами Администратора;
- если доступа в систему нет, то это можно сделать на экране восстановления, перейдя в раздел дополнительных параметров и выбрав пункт «Командная строка».
- Поочередно ввести команды без кавычек «>sfc», затем «/scannow».
- Дождаться завершения процедуры и перезагрузить/запустить операционную систему.
Удаление устройства
Способ удаления устройства для чистой установки драйверов поможет только в том случае, если ошибка появилась после установки нового накопителя (HDD, Sata SSD или M2SSD). При таких обстоятельствах после синего экрана ПК, в любом случае, запустится до Рабочего стола.
При выполнении всех операций важно не обращаться к новому накопителю (не открывать его в компьютере, не копировать туда файлы).
Для восстановления драйвера потребуется:
- Открыть Диспетчер устройств. Открыть меню Выполнить («Win+R»), ввести без кавычек «devmgmt.msc» и нажать клавишу «Enter».
- Развернуть список «Контроллеры IDE ATA/ATAPI» и для каждого пункта нажать правую клавишу мыши и выбрать вариант удаления устройства.
- Перезагрузить ПК. Система сама в автоматическом режиме установит новые драйверы.
На заметку: если после перезагрузки в Диспетчере устройств напротив контроллеров стоит восклицательный знак или же в списке появится неизвестное устройство, при этом доступа к накопителю в компьютере не будет, то пользователю придется самостоятельно загрузить и установить драйвер с официального сайта производителя накопителя.
Содержание
- Как исправить сбой NTFS.SYS в Windows 10
- Разное / by admin / September 12, 2021
- Исправление проблемы «Ошибка Ntfs.sys в Windows 10».
- ИСПРАВЛЕНИЕ 1: войдите в безопасный режим с загрузкой сетевых драйверов:
- ИСПРАВЛЕНИЕ 2: Обновите драйвер устройства:
- Для обновления драйвера вручную:
- Для автоматического обновления драйвера:
- ИСПРАВЛЕНИЕ 3: Проверьте наличие проблем с ОЗУ:
- ИСПРАВЛЕНИЕ 4: Удалите BitDefender и / или Webroot:
- How to Fix Failed Ntfs.sys in Windows 10?
- Fix Failed NTFS.SYS (System_Service_Exception) in Windows 10
- Wrapping up
- About The Author
Разное / by admin / September 12, 2021
Недавно произошла ошибка BSOD NTFS.sys (синий экран смерти), которая беспокоит многих пользователей Windows 10. Ntfs.sys — это системный файл, расположенный в папке C: Windows System32 drivers, он необходим для работы Windows, или драйвер оборудования, который помогает Windows читать и записывать данные на диски NTFS. Однако, несмотря на некоторую помощь, файл Ntfs.sys по-прежнему выдает ошибку.
- Исправление проблемы «Ошибка Ntfs.sys в Windows 10».
- ИСПРАВЛЕНИЕ 1: войдите в безопасный режим с загрузкой сетевых драйверов:
- ИСПРАВЛЕНИЕ 2: Обновите драйвер устройства:
- ИСПРАВЛЕНИЕ 3: Проверьте наличие проблем с ОЗУ:
- ИСПРАВЛЕНИЕ 4: Удалите BitDefender и / или Webroot:
Исправление проблемы «Ошибка Ntfs.sys в Windows 10».
Неудачная ошибка Ntfs.sys в Windows 10 — это проблема, которая может вызвать сбой системы, что еще больше приведет к потере данных. Это может произойти из-за повреждения диска, устаревших или поврежденных драйверов жесткого диска, проблемных модулей оперативной памяти или конфликта антивируса с системой. Сегодня, учитывая все эти возможные причины, мы составили список некоторых проверенных решений, которые помогут вам решить проблему «Неудачный Ntfs.sys в Windows 10». Посмотри:
ИСПРАВЛЕНИЕ 1: войдите в безопасный режим с загрузкой сетевых драйверов:
Прежде чем приступить к выполнению любого из шагов, мы рекомендуем сначала войти в безопасный режим с подключением к сети. Для этого выполните следующие действия:
ИСПРАВЛЕНИЕ 2: Обновите драйвер устройства:
Поврежденные или устаревшие драйверы устройств могут в конечном итоге привести к проблеме «Неудачный Ntfs.sys в Windows 10». Лучшее средство, которое вы можете попробовать, — это обновить драйвер устройства. Теперь вы можете выполнить процесс обновления вручную или автоматически с помощью специального программного обеспечения. Ниже мы объяснили оба. Посмотрите и следуйте инструкциям:
Для обновления драйвера вручную:
- Во-первых, щелкните правой кнопкой мыши на Значок Windows на панели рабочего стола и выберите опцию Диспетчер устройств.
- Теперь внутри Окно диспетчера устройств, перейдите к Видеоадаптеры, разверните его, и вы увидите список драйверов.
- Здесь щелкните правой кнопкой мыши над проблемный драйвер и выберите вариант Обновить драйвер из подменю.
- Далее на следующем экране выбираем опцию Автоматический поиск драйверов, и Windows автоматически начнет поиск последнего обновления.
- Найдя их, вы можете установить их на свой компьютер.
- Перезагрузите компьютер как только вы закончите.
Для автоматического обновления драйвера:
Автоматическое обновление драйверов — довольно простая задача, и вы можете выполнить то же самое с несколькими драйверами, обновляющими программное обеспечение, доступное в Интернете. Если вам не хватает времени и сил, рекомендуем использовать только автоматический способ.
ИСПРАВЛЕНИЕ 3: Проверьте наличие проблем с ОЗУ:
Как обсуждалось ранее в статье, проблемные карты памяти RAM также могут привести к проблеме «Неудачный Ntfs.sys в Windows 10». Здесь мы рекомендуем вам проверить, все ли с вашим оборудованием в порядке. Для этого посмотрите ниже:
Во-первых, проверьте свое оборудование. Для этого,
- Начните с выключения компьютера. Убедитесь, что вы отключили и его.
- Далее снимаем все флешки RAM.
- Теперь попробуйте включить компьютер с одной за другой вставками RAM. Убедитесь, что вы проверяете каждую карту RAM отдельно.
- При попытке установить RAM-накопители по отдельности, если ваш компьютер не загружается с какой-либо конкретной установкой, то в этом заключается повреждение.
Во-вторых, проверьте тайминги и частоту ОЗУ. Для этого
- Перейдите на официальный сайт производителя вашей оперативной памяти и найдите значения по умолчанию и рекомендуемые значения.
- Здесь, если значения не совпадают, это означает, что вам, возможно, придется разогнать / заблокировать ОЗУ.
ЗАМЕТКА: Если вы плохо знакомы с литьем BIOS, мы рекомендуем вам связаться с некоторыми профессионалами.
ИСПРАВЛЕНИЕ 4: Удалите BitDefender и / или Webroot:
Есть несколько сторонних программ, которые плохо работают с нашей операционной системой, что приводит к ошибкам и сбоям. Однако мы выяснили, что из-за сбойного файла Ntfs.sys BitDefender и Webroot являются наиболее ответственными. Здесь мы рекомендуем вам удалить BitDefender и Webroot и проверить, помогает это или нет. Для этого выполните следующие действия:
- Сначала перейдите в панель поиска на рабочем столе, введите «Программы» и запускаем опцию Приложения и функции.
- Теперь прокрутите список приложений и найдите BitDefender а также Webroot.
- Как только вы найдете их, щелкните по ним, и некоторые параметры будут расширены. Здесь выберите Удалить вкладка для обоих приложений.
- Наконец, перезагрузите компьютер.
ЗАМЕТКА: При удалении приложения вручную не удаляются различные файлы, относящиеся к этому конкретному приложению. Таким образом, если вы хотите удалить все файлы и папки, связанные с ними, мы рекомендуем вам использовать любой специальный инструмент для удаления программного обеспечения.
Это все проверенные, проверенные и проверенные исправления для проблемы «Неудачный Ntfs.sys в Windows 10». Все они сработали для большинства пострадавших пользователей, и поэтому мы надеемся, что они окажутся полезными и в вашем случае.
Помимо вышеупомянутых исправлений, мы рекомендуем вам также запустить сканирование на наличие вредоносных программ. Это было проверенное решение для нескольких пострадавших пользователей, и поэтому мы надеемся, что оно сработает и для вас. Если у вас есть какие-либо вопросы или отзывы, напишите комментарий в поле для комментариев ниже.
Источник
How to Fix Failed Ntfs.sys in Windows 10?
Summary: Failed NTFS.SYS is a Blue Screen of Death (BSOD) error, which may appear with the stop code — System_Service_Exception. This error may lead your Windows PC to a malfunction or crash, resulting in total data loss. To fix this issue, try some of the most recommended methods shared in this blog. You may also download the trial version of Windows Data Recovery Tool to recover your data lost due to this error.
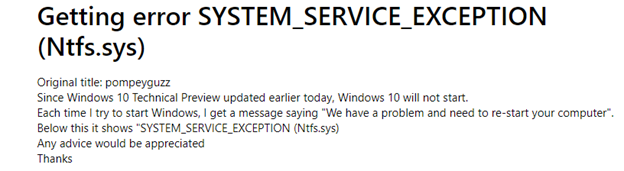
If you encounter NTFS.SYS blue screen error on your system, it is probably because of corrupt NTFS, bad sectors on the hard drive, or incompatible device drivers. Sometimes, depletion of non-paged pool memory, malware attack on your PC, and corrupt system files may also induce this error. You may see this error showing up with the stop code – System_Service_Exception (See Image 1).
Due to this error, your system may shut down abruptly, get stuck at a booting loop, or even crash, making you lose access to your data. Read this guide to learn some popular methods to fix NTFS.sys problem on your own.
Recover data lost due to Ntfs.sys crash with a professional Windows Data Recovery Tool.
Fix Failed NTFS.SYS (System_Service_Exception) in Windows 10
Enable the safe mode with networking before performing any methods to make sure you don’t face any interruption/problem while trying to solve this error.
Follow the given steps to Enable Safe Mode with Networking:
a. If you see this blue screen error on your system, turn it off.
b. Reboot it and as it starts showing up Windows logo on the screen, turn it off with the power button.
c. Repeat this step thrice and then allow your PC to restart.
d. After this, choose Advanced options from the Automatic Repair environment. (See Image 2)
e. On the Choose an option screen, click Troubleshoot. (See Image 3)
f. Next, on the Troubleshoot screen, choose Advanced options. (See Image 4)
g. On the Advanced options screen, click Startup Settings. (See Image 5)
h. Afterward, click Restart on the Startup Settings screen. (See Image 6)
i. Once the PC restarts, choose option 5 from the list or press F5 for enabling safe mode with networking.
j. After enabling the Safe Mode, you may start performing the following fixes to solve error- Ntfs.sys system service exception on windows 10.
Method 1: Update Device Driver
Sometimes, the outdated, incompatible, or corrupt device drivers may cause this blue screen of death error. You may download and install updated device drivers by following the given steps:
a. Open Device Manager and navigate to Display Adapters. (See Image 7)
b. Expand Display Adapters and select the problematic driver.
c. Right-click on the driver and select Update driver from the available options. (See Image 8)
d. On the next prompt, click ‘Search automatically for drivers.’ (See Image 9)
e. Windows starts searching for an updated version of the drivers. You may install the latest driver software to fix the error ‘System Service Exception Windows 10.’
You may also update the driver through Windows Update. Follow the given steps to do so:
a. Open System Settings and follow Update & Security > Windows Update.
b. Check for the latest updates available. If the updates are available, click ‘Install now’ and then restart your system. (See Image 10)
c. Reboot your PC and check whether the error is resolved.
Method 2: Scan your computer for computer viruses
If the system is affected by a virus or malware, you may encounter this error. You may scan for malware ‘Windows Security’ utility. To do so, follow the given steps:
a. Open System Settings and go to Update & Security. (See Image 11)
b. Navigate to Windows Security and open it. (See Image 12)
c. Move to the Virus & threat protection on the right panel. (See Image 13)
d. Follow the given instructions on the screen to check malware and get rid of it.
Method 3: Remove BitDefender and/or Webroot
Some of the third-party antivirus programs may lead Windows to malfunction and cause NTFS.SYS BSOD error with stop code ‘System Service Exception’. You may fix this by removing BitDefender or Webroot using the following steps:
a. Open System Settings and go to Apps. (See Image 14)
b. Find if you have BitDefender or Webroot installed on your system.
c. If it is installed in your PC, right-click on it to Uninstall. (See Image 15)
d. Restart the system to see if the stop code system service exception persists.
Method 4: Run SFC Scan
This error may also occur due to missing or corrupt system files. You may run SFC (System File Checker) utility to check for any system files’ corruption and fix it. Follow the below-given steps:
a. Type cmd in Windows’ search box to open Command Prompt and run it as an administrator. (See Image 16)
b. Click ‘Yes’ to open Command Prompt.
c. On Command Prompt screen, type sfc/scannow and hit Enter. (See Image 17)
d. The process will take time to check the corrupt system files and fix it to resolve the error code: System Service Exception in Windows 10.
Method 5: Run CHKDSK Command
Sometimes, this problem may occur if the hard drive is faulty or consists of bad sectors. You may check your hard disk for errors and fix it by running the CHKDSK command. Follow the below-said steps:
a. Open Command Prompt, run it as administrator and type chkdsk f: /f and press Enter. (See Image 18)
b. Wait until the process is completed and then exit the Command Prompt.
c. Restart the system and check if you have fixed the issue.
[Caution: Running the CHKDSK command can fix the hard drive corruption. However, you will end up losing your data after performing this method as it scans the drive and marks down the bad sectors on it, helping Windows understand not to read or store data from bad sectors.]
It is suggested to use a powerful data recovery tool such as Stellar Data Recovery Professional to recover lost data after using the CHKDSK command. This do-it-yourself (DIY) software can efficiently extract multiple kinds of data simultaneously. Be it your favorite pictures and videos or your essential official documents, emails, files, etc. you may recover them quickly using this software. The software facilitates data recovery from formatted, corrupted, or missing drive partitions and storage devices. It features ‘Create Recovery Drive’ utility. Using this utility, you may create a bootable media to restore data from unbootable, dead, crashed, or BSOD affected systems. Check out this video:
Method 6: Run Memory Diagnostic Tool
Non-paged pool memory may be another cause of the error- System Service Exception Windows 10. The non-paged pool, containing the virtual memory addresses, always remains in the physical memory as long as the corresponding kernel objects are allocated. It can never be paged out into pagefile when the system runs out of the free physical memory.
If you encounter stop code- system_service_exception on your system, the depletion of non-paged pool memory may be the reason. Other related reasons could be as following:
- Low amount of available non-paged pool memory during the indexing process
- Another kernel-mode driver requiring this memory
To resolve the depletion of non-paged pool memory, you may add new physical memory to the system to improve the non-paged pool memory available to the kernel. Also, you may try running the Windows Memory Diagnostic Tool to check and fix the stop code System Service Exception. Follow the below-mentioned steps:
a. Type Windows Memory Diagnostic in Windows’ search bar and hit Enter to open it. (See Image 19)
b. On the Windows Memory Diagnostic screen, select ‘Restart now and check for problems (recommended.) (See Image 20)
c. The Windows Memory Diagnostic tool screen will display on the screen.
d. Let the test begin and wait until it is done. (See Image 21)
e. When the test is completed, the system will restart automatically and return to the Windows desktop.
f. You may check the test results and see if the error is fixed.
Wrapping up
The System_Service_Exception error may occur without any warning and make you lose access to your PC and data stored on it. There could be several reasons behind this error, as explained above. To fix this error, try methods such as CHKDSK command, SFC Scan, Windows update, etc. However, if you’ve lost your data due to this Ntfs.sys error, try using an efficient data recovery tool such as Stellar Data Recovery Professional. This software can get back your data from Windows PCs and storage devices such as HDD, SSD, USB and SD card, etc.
Mansi Verma is a Technology Writer at Stellar®. She is a Tech enthusiast, holding over 7 years of experience in Data Recovery, IoT, Artificial Intelligence, and the Robotics technology domain. She loves researching and providing DIY solutions and tips & tricks to solve Windows technical issues. In her spare time, she likes reading novels, and poetry. She also enjoys traveling and trekking.
Источник
The failed Ntfs.sys will generate different error codes, so the fixes are different. Here’s a quick view of all errors and solutions:
| Workable Solutions | Step-by-step Troubleshooting |
|---|---|
| Fix Error Code 1. NTFS_File_SYSTEM (Ntfs.sys) |
Method 1. Fix disk corruptions with Windows built-in Chkdsk utility. Enter «Safe Mode with Command Prompt». Open «This PC», right-click the problematic drive…Full steps Method 2. Update outdated drivers that cause failed Ntfs.sys problem. Right-click on «This PC» and go to «Manage» > «Device Manager»…Full steps |
| Error Code 2. SYSTEM_SERVICE_EXCEPTION (Ntfs.sys) |
Method 1. Update Windows. Enter safe mode, click «Start» and type update. Choose «Check for updates»…Full steps Method 2. Run system file checker tool: DISM and SFC scan. In safe mode, click «Start» and type cmd…Full steps Method 3. Check the RAM. Faulty RAM stick installation or incorrect RAM setup may induce an Ntfs.sys…Full steps |
What Is NTFS.sys
Ntfs.sys is located in C:WindowsSystem32drivers folder. Ntfs.sys indicates either the system file that is essential in running Windows or the hardware driver that allows the Windows operating system to read and write to NTFS drives. Thus, if you get a BSOD with the stop code: NTFS_File_SYSTEM (Ntfs.sys), that means there is something wrong with the hardware driver. If you receive the error code: SYSTEM_SERVICE_EXCEPTION (Ntfs.sys), you probably get a corrupted system file.
What Caused Failed NTFS.sys
Every error has its causes. The culprit for NTFS_File_SYSTEM (Ntfs.sys) is likely to be disk corruption, be it NTFS file system corruption or disk errors like bad sectors. Besides, corrupted hard drive drivers can also result in a failed Ntfs.sys. And the SYSTEM_SERVICE_EXCEPTION (Ntfs.sys) may be induced by antivirus software that is conflicted with the system, corrupted or outdated driver, or problematic RAM sticks.
Specify the error message on your computer screen and carry out the corresponding fixes to remove the Ntfs.sys error.
How to Recover Files Lost Due to NTFS.sys Error
Before you fix the missing or corrupt NTFS.sys file in Windows XP/7/8/10, export your data first. Usually, computer data files may possibly lose after such an NTFS.sys error and EaseUS EaseUS Data Recovery Wizard software can take good care of it.
EaseUS File Recovery Software
- Support data recovery for sudden deletion, formatting, hard drive corruption, virus attack, system crash under different situations.
- Restore data after formatting, emptying recycle bin, virus attack, system crash, and more.
- Support over 1000 types of files like DOC/DOCX, XLS/XLSX, PPT/PPTX, AIF/AIFF, MP3, JPG/JPEG, AVI, MOV, MP4, and more.
Download EaseUS EaseUS Data Recovery Wizard to restore whatever disappeared on your computer, HDD or external SD card, USB flash drive, etc. That’s how you’re guaranteed an effective and safe fix for missing or corrupt NTFS.sys files without losing data.
Step 1. Launch EaseUS file recovery software on your Windows computer. Choose the exact location where you lost the files and click the «Scan» button.

Step 2. The software will immediately start scanning the drive, and the deleted files will be displayed soon. If you find the files you need during the scan, you can stop the scan. In order to find the target file quickly, you can use the file format filter.

Step 3. Select files, such as Word, Excel, PDF, photos, videos, or emails and click the «Recover» button. You can browse for a different location to keep the recovered files.

Error Code 1. NTFS_File_SYSTEM (Ntfs.sys)
As mentioned, the main culprit for a failed Ntfs.sys in such a situation is a file system error, bad sectors, or outdated device drivers. Given that, the solutions to this issue are quite clear: fix disk corruptions and update the device driver.
Since there are multiple disks and drivers on a computer, you first need to specify the drive(or device) or driver that is causing the problem using the Event Viewer. To check it, you need to enter Safe Mode.
Step 1. Hold down the power button for 10s to shut down the computer.
Step 2. Press the power button to start the computer. Once you see the first sign of Windows has started, e.g., the logo of the manufacturer, hold down the power button for 10s again to turn off the device.
Step 3. Press the power button to start the computer. Once Windows restarts, hold down the power button for 10s to turn off the computer.
Step 4. Press the power button to start the computer, and don’t interrupt it this time. Then you will see your computer in WinRE.
Step 5. On the «Choose an option» screen, choose «Troubleshoot» > «Advanced options» > «Startup Settings» > «Restart».
Step 6. After the restart, you will see a list of options, as shown in the image below. Select «5» or press «F5» to enable Safe Mode with Networking.
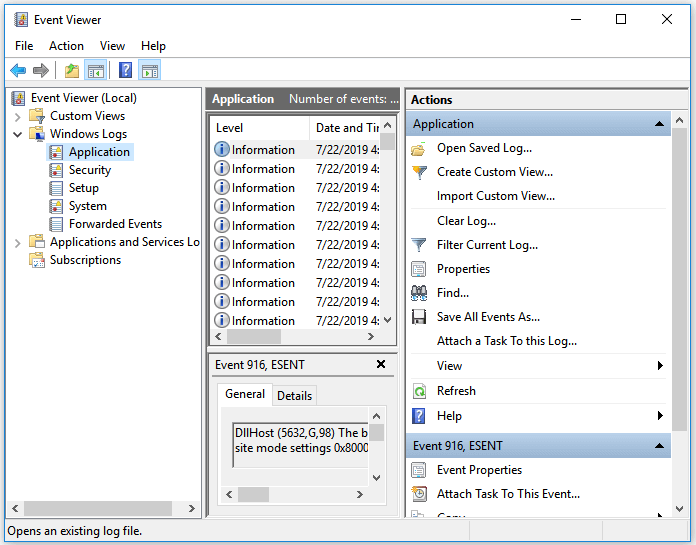
Now you need to check Event Viewer:
Step 1. Click «Start» and enter the event viewer.
Step 2. Right-click «Event Viewer» and choose «Run as administrator».
Step 3. Expand «Windows Logs» and choose «System».
Step 4. Check the errors that coincided with the blue screen and fix the error according to the information.
Method 1. Fix Disk Corruptions
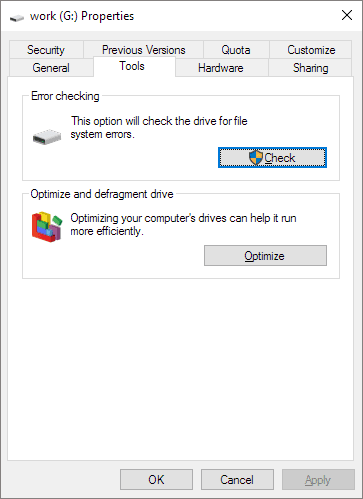
The Windows built-in Chkdsk utility can fix disk errors like file system errors and bad sectors. Thus, you can solve the disk corruption with the command-line tool. If you don’t want to use command lines, applying the disk checking feature has the same effect.
Step 1. Enter «Safe Mode with Command Prompt» using the way introduced above.
Step 2. Open «This PC», right-click the problematic drive, and choose «Properties».
Step 3. Go to the «Tools» tab, click «Check».
Method 2. Update Device Driver
An outdated or corrupted driver is the cause of the failed Ntfs.sys in most cases. If you figure out the faulty driver via Event Viewer, go to Safe Mode with Networking to update the corresponding driver.
Step 1. Right-click on «This PC» and go to «Manage» > «Device Manager».
Step 2. Expand «Display adapters», right-click on the graphics card driver, and choose «Update driver».
According to Microsoft, there are other tips worth trying to fix the blue screen of death caused by the Ntfs.sys error.
- Disable any virus scanners, backup programs, or disk defragment tools.
- Run hardware diagnostics provided by the manufacturer.
- Ensure there is enough space on the system drive. If not, you can extend the system drive to make Windows run properly.
Error Code 2. SYSTEM_SERVICE_EXCEPTION (Ntfs.sys)
Based on the possible reasons that lead to the Ntfs.sys error, in addition to updating the driver using the way introduced above, here are other solutions you can apply.
Method 1. Update Windows
Updating Windows can not only fix some known bugs or problems but also update necessary drivers.
Step 1. Enter safe mode following the steps provided.
Step 2. Click «Start» and type update.
Step 3. Choose «Check for updates».
Step 4. Windows will show you the new updates available. Click «Install now» to update your Windows. (Make sure you install all the updates available.)
Method 2. Run System File Checker Tools
System File Checker tool is a built-in utility in Windows that can check and repair missing or corrupted system files. It will repair the failed Ntfs.sys file automatically. Follow the steps introduced in the last part to enter Safe Mode with Command Prompt and then:
Step 1. In safe mode, click «Start» and type cmd.
Step 2. Right-click «Command Prompt» and choose «Run as administrator».
Step 3. If you are using Windows 10, you should first run DISM.exe: DISM.exe /Online /Cleanup-image /Restorehealth to make a Windows image to protect your data:
Step 4. When the DISM command has been completed, type the following command: sfc /scannow to start scanning and repairing your system files.
Method 3. Check the RAM
Faulty RAM stick installation or incorrect RAM setup may also induce an Ntfs.sys error. First, you need to check the hardware. To do so, turn off your computer and reconnect the RAM sticks. You can troubleshoot the problematic RAM stick by removing all of them and trying to power on each stick one by one.
If there is nothing wrong with the hardware, you need to check the timings and frequencies of the RAM. You can get the recommended values from the manufacturer and apply third-party tools to check the actual values of the RAM sticks. If they don’t match, you can enter BIOS to adjust the RAM values to the recommended ones.
Tips and Notifications
- You can also apply the driver installation disc to update the corresponding hardware driver.
- Both updating driver and running System File Checker tool can be applied to both of the situations.
- Disable antivirus or similar software is only helpful in Windows 10.
The Bottom Line
Ntfs.sys is a system file that enables the communication between the operating system and the hardware. Therefore, it’s necessary for Windows to run smoothly. When Ntfs.sys fails, you may get a blue screen of death. To fix it, the most effective way is to update the faulty driver. If that doesn’t help, use the other ways detailed to have a try. I hope one of them will help you solve the Ntfs.sys error.
The failed Ntfs.sys will generate different error codes, so the fixes are different. Here’s a quick view of all errors and solutions:
| Workable Solutions | Step-by-step Troubleshooting |
|---|---|
| Fix Error Code 1. NTFS_File_SYSTEM (Ntfs.sys) |
Method 1. Fix disk corruptions with Windows built-in Chkdsk utility. Enter «Safe Mode with Command Prompt». Open «This PC», right-click the problematic drive…Full steps Method 2. Update outdated drivers that cause failed Ntfs.sys problem. Right-click on «This PC» and go to «Manage» > «Device Manager»…Full steps |
| Error Code 2. SYSTEM_SERVICE_EXCEPTION (Ntfs.sys) |
Method 1. Update Windows. Enter safe mode, click «Start» and type update. Choose «Check for updates»…Full steps Method 2. Run system file checker tool: DISM and SFC scan. In safe mode, click «Start» and type cmd…Full steps Method 3. Check the RAM. Faulty RAM stick installation or incorrect RAM setup may induce an Ntfs.sys…Full steps |
What Is NTFS.sys
Ntfs.sys is located in C:WindowsSystem32drivers folder. Ntfs.sys indicates either the system file that is essential in running Windows or the hardware driver that allows the Windows operating system to read and write to NTFS drives. Thus, if you get a BSOD with the stop code: NTFS_File_SYSTEM (Ntfs.sys), that means there is something wrong with the hardware driver. If you receive the error code: SYSTEM_SERVICE_EXCEPTION (Ntfs.sys), you probably get a corrupted system file.
What Caused Failed NTFS.sys
Every error has its causes. The culprit for NTFS_File_SYSTEM (Ntfs.sys) is likely to be disk corruption, be it NTFS file system corruption or disk errors like bad sectors. Besides, corrupted hard drive drivers can also result in a failed Ntfs.sys. And the SYSTEM_SERVICE_EXCEPTION (Ntfs.sys) may be induced by antivirus software that is conflicted with the system, corrupted or outdated driver, or problematic RAM sticks.
Specify the error message on your computer screen and carry out the corresponding fixes to remove the Ntfs.sys error.
How to Recover Files Lost Due to NTFS.sys Error
Before you fix the missing or corrupt NTFS.sys file in Windows XP/7/8/10, export your data first. Usually, computer data files may possibly lose after such an NTFS.sys error and EaseUS EaseUS Data Recovery Wizard software can take good care of it.
EaseUS File Recovery Software
- Support data recovery for sudden deletion, formatting, hard drive corruption, virus attack, system crash under different situations.
- Restore data after formatting, emptying recycle bin, virus attack, system crash, and more.
- Support over 1000 types of files like DOC/DOCX, XLS/XLSX, PPT/PPTX, AIF/AIFF, MP3, JPG/JPEG, AVI, MOV, MP4, and more.
Download EaseUS EaseUS Data Recovery Wizard to restore whatever disappeared on your computer, HDD or external SD card, USB flash drive, etc. That’s how you’re guaranteed an effective and safe fix for missing or corrupt NTFS.sys files without losing data.
Step 1. Launch EaseUS file recovery software on your Windows computer. Choose the exact location where you lost the files and click the «Scan» button.
Step 2. The software will immediately start scanning the drive, and the deleted files will be displayed soon. If you find the files you need during the scan, you can stop the scan. In order to find the target file quickly, you can use the file format filter.
Step 3. Select files, such as Word, Excel, PDF, photos, videos, or emails and click the «Recover» button. You can browse for a different location to keep the recovered files.
Error Code 1. NTFS_File_SYSTEM (Ntfs.sys)
As mentioned, the main culprit for a failed Ntfs.sys in such a situation is a file system error, bad sectors, or outdated device drivers. Given that, the solutions to this issue are quite clear: fix disk corruptions and update the device driver.
Since there are multiple disks and drivers on a computer, you first need to specify the drive(or device) or driver that is causing the problem using the Event Viewer. To check it, you need to enter Safe Mode.
Step 1. Hold down the power button for 10s to shut down the computer.
Step 2. Press the power button to start the computer. Once you see the first sign of Windows has started, e.g., the logo of the manufacturer, hold down the power button for 10s again to turn off the device.
Step 3. Press the power button to start the computer. Once Windows restarts, hold down the power button for 10s to turn off the computer.
Step 4. Press the power button to start the computer, and don’t interrupt it this time. Then you will see your computer in WinRE.
Step 5. On the «Choose an option» screen, choose «Troubleshoot» > «Advanced options» > «Startup Settings» > «Restart».
Step 6. After the restart, you will see a list of options, as shown in the image below. Select «5» or press «F5» to enable Safe Mode with Networking.
Now you need to check Event Viewer:
Step 1. Click «Start» and enter the event viewer.
Step 2. Right-click «Event Viewer» and choose «Run as administrator».
Step 3. Expand «Windows Logs» and choose «System».
Step 4. Check the errors that coincided with the blue screen and fix the error according to the information.
Method 1. Fix Disk Corruptions
The Windows built-in Chkdsk utility can fix disk errors like file system errors and bad sectors. Thus, you can solve the disk corruption with the command-line tool. If you don’t want to use command lines, applying the disk checking feature has the same effect.
Step 1. Enter «Safe Mode with Command Prompt» using the way introduced above.
Step 2. Open «This PC», right-click the problematic drive, and choose «Properties».
Step 3. Go to the «Tools» tab, click «Check».
Method 2. Update Device Driver
An outdated or corrupted driver is the cause of the failed Ntfs.sys in most cases. If you figure out the faulty driver via Event Viewer, go to Safe Mode with Networking to update the corresponding driver.
Step 1. Right-click on «This PC» and go to «Manage» > «Device Manager».
Step 2. Expand «Display adapters», right-click on the graphics card driver, and choose «Update driver».
According to Microsoft, there are other tips worth trying to fix the blue screen of death caused by the Ntfs.sys error.
- Disable any virus scanners, backup programs, or disk defragment tools.
- Run hardware diagnostics provided by the manufacturer.
- Ensure there is enough space on the system drive. If not, you can extend the system drive to make Windows run properly.
Error Code 2. SYSTEM_SERVICE_EXCEPTION (Ntfs.sys)
Based on the possible reasons that lead to the Ntfs.sys error, in addition to updating the driver using the way introduced above, here are other solutions you can apply.
Method 1. Update Windows
Updating Windows can not only fix some known bugs or problems but also update necessary drivers.
Step 1. Enter safe mode following the steps provided.
Step 2. Click «Start» and type update.
Step 3. Choose «Check for updates».
Step 4. Windows will show you the new updates available. Click «Install now» to update your Windows. (Make sure you install all the updates available.)
Method 2. Run System File Checker Tools
System File Checker tool is a built-in utility in Windows that can check and repair missing or corrupted system files. It will repair the failed Ntfs.sys file automatically. Follow the steps introduced in the last part to enter Safe Mode with Command Prompt and then:
Step 1. In safe mode, click «Start» and type cmd.
Step 2. Right-click «Command Prompt» and choose «Run as administrator».
Step 3. If you are using Windows 10, you should first run DISM.exe: DISM.exe /Online /Cleanup-image /Restorehealth to make a Windows image to protect your data:
Step 4. When the DISM command has been completed, type the following command: sfc /scannow to start scanning and repairing your system files.
Method 3. Check the RAM
Faulty RAM stick installation or incorrect RAM setup may also induce an Ntfs.sys error. First, you need to check the hardware. To do so, turn off your computer and reconnect the RAM sticks. You can troubleshoot the problematic RAM stick by removing all of them and trying to power on each stick one by one.
If there is nothing wrong with the hardware, you need to check the timings and frequencies of the RAM. You can get the recommended values from the manufacturer and apply third-party tools to check the actual values of the RAM sticks. If they don’t match, you can enter BIOS to adjust the RAM values to the recommended ones.
Tips and Notifications
- You can also apply the driver installation disc to update the corresponding hardware driver.
- Both updating driver and running System File Checker tool can be applied to both of the situations.
- Disable antivirus or similar software is only helpful in Windows 10.
The Bottom Line
Ntfs.sys is a system file that enables the communication between the operating system and the hardware. Therefore, it’s necessary for Windows to run smoothly. When Ntfs.sys fails, you may get a blue screen of death. To fix it, the most effective way is to update the faulty driver. If that doesn’t help, use the other ways detailed to have a try. I hope one of them will help you solve the Ntfs.sys error.
Summary: Failed NTFS.SYS is a Blue Screen of Death (BSOD) error, which may appear with the stop code — System_Service_Exception. This error may lead your Windows PC to a malfunction or crash, resulting in total data loss. To fix this issue, try some of the most recommended methods shared in this blog. You may also download the trial version of Windows Data Recovery Tool to recover your data lost due to this error.
-Source
If you encounter NTFS.SYS blue screen error on your system, it is probably because of corrupt NTFS, bad sectors on the hard drive, or incompatible device drivers. Sometimes, depletion of non-paged pool memory, malware attack on your PC, and corrupt system files may also induce this error. You may see this error showing up with the stop code – System_Service_Exception (See Image 1).
Due to this error, your system may shut down abruptly, get stuck at a booting loop, or even crash, making you lose access to your data. Read this guide to learn some popular methods to fix NTFS.sys problem on your own.
Recover data lost due to Ntfs.sys crash with a professional Windows Data Recovery Tool.
Fix Failed NTFS.SYS (System_Service_Exception) in Windows 10
Enable the safe mode with networking before performing any methods to make sure you don’t face any interruption/problem while trying to solve this error.
Follow the given steps to Enable Safe Mode with Networking:
a. If you see this blue screen error on your system, turn it off.
b. Reboot it and as it starts showing up Windows logo on the screen, turn it off with the power button.
c. Repeat this step thrice and then allow your PC to restart.
d. After this, choose Advanced options from the Automatic Repair environment. (See Image 2)
e. On the Choose an option screen, click Troubleshoot. (See Image 3)
f. Next, on the Troubleshoot screen, choose Advanced options. (See Image 4)
g. On the Advanced options screen, click Startup Settings. (See Image 5)
h. Afterward, click Restart on the Startup Settings screen. (See Image 6)
i. Once the PC restarts, choose option 5 from the list or press F5 for enabling safe mode with networking.
j. After enabling the Safe Mode, you may start performing the following fixes to solve error- Ntfs.sys system service exception on windows 10.
Method 1: Update Device Driver
Sometimes, the outdated, incompatible, or corrupt device drivers may cause this blue screen of death error. You may download and install updated device drivers by following the given steps:
a. Open Device Manager and navigate to Display Adapters. (See Image 7)
b. Expand Display Adapters and select the problematic driver.
c. Right-click on the driver and select Update driver from the available options. (See Image 8)
d. On the next prompt, click ‘Search automatically for drivers.’ (See Image 9)
e. Windows starts searching for an updated version of the drivers. You may install the latest driver software to fix the error ‘System Service Exception Windows 10.’
You may also update the driver through Windows Update. Follow the given steps to do so:
a. Open System Settings and follow Update & Security > Windows Update.
b. Check for the latest updates available. If the updates are available, click ‘Install now’ and then restart your system. (See Image 10)
c. Reboot your PC and check whether the error is resolved.
Method 2: Scan your computer for computer viruses
If the system is affected by a virus or malware, you may encounter this error. You may scan for malware ‘Windows Security’ utility. To do so, follow the given steps:
a. Open System Settings and go to Update & Security. (See Image 11)
b. Navigate to Windows Security and open it. (See Image 12)
c. Move to the Virus & threat protection on the right panel. (See Image 13)
d. Follow the given instructions on the screen to check malware and get rid of it.
Method 3: Remove BitDefender and/or Webroot
Some of the third-party antivirus programs may lead Windows to malfunction and cause NTFS.SYS BSOD error with stop code ‘System Service Exception’. You may fix this by removing BitDefender or Webroot using the following steps:
a. Open System Settings and go to Apps. (See Image 14)
b. Find if you have BitDefender or Webroot installed on your system.
c. If it is installed in your PC, right-click on it to Uninstall. (See Image 15)
d. Restart the system to see if the stop code system service exception persists.
Method 4: Run SFC Scan
This error may also occur due to missing or corrupt system files. You may run SFC (System File Checker) utility to check for any system files’ corruption and fix it. Follow the below-given steps:
a. Type cmd in Windows’ search box to open Command Prompt and run it as an administrator. (See Image 16)
b. Click ‘Yes’ to open Command Prompt.
c. On Command Prompt screen, type sfc/scannow and hit Enter. (See Image 17)
d. The process will take time to check the corrupt system files and fix it to resolve the error code: System Service Exception in Windows 10.
Method 5: Run CHKDSK Command
Sometimes, this problem may occur if the hard drive is faulty or consists of bad sectors. You may check your hard disk for errors and fix it by running the CHKDSK command. Follow the below-said steps:
a. Open Command Prompt, run it as administrator and type chkdsk f: /f and press Enter. (See Image 18)
b. Wait until the process is completed and then exit the Command Prompt.
c. Restart the system and check if you have fixed the issue.
[Caution: Running the CHKDSK command can fix the hard drive corruption. However, you will end up losing your data after performing this method as it scans the drive and marks down the bad sectors on it, helping Windows understand not to read or store data from bad sectors.]
It is suggested to use a powerful data recovery tool such as Stellar Data Recovery Professional to recover lost data after using the CHKDSK command. This do-it-yourself (DIY) software can efficiently extract multiple kinds of data simultaneously. Be it your favorite pictures and videos or your essential official documents, emails, files, etc. you may recover them quickly using this software. The software facilitates data recovery from formatted, corrupted, or missing drive partitions and storage devices. It features ‘Create Recovery Drive’ utility. Using this utility, you may create a bootable media to restore data from unbootable, dead, crashed, or BSOD affected systems. Check out this video:
Method 6: Run Memory Diagnostic Tool
Non-paged pool memory may be another cause of the error- System Service Exception Windows 10. The non-paged pool, containing the virtual memory addresses, always remains in the physical memory as long as the corresponding kernel objects are allocated. It can never be paged out into pagefile when the system runs out of the free physical memory.
If you encounter stop code- system_service_exception on your system, the depletion of non-paged pool memory may be the reason. Other related reasons could be as following:
- Low amount of available non-paged pool memory during the indexing process
- Another kernel-mode driver requiring this memory
To resolve the depletion of non-paged pool memory, you may add new physical memory to the system to improve the non-paged pool memory available to the kernel. Also, you may try running the Windows Memory Diagnostic Tool to check and fix the stop code System Service Exception. Follow the below-mentioned steps:
a. Type Windows Memory Diagnostic in Windows’ search bar and hit Enter to open it. (See Image 19)
b. On the Windows Memory Diagnostic screen, select ‘Restart now and check for problems (recommended.) (See Image 20)
c. The Windows Memory Diagnostic tool screen will display on the screen.
d. Let the test begin and wait until it is done. (See Image 21)
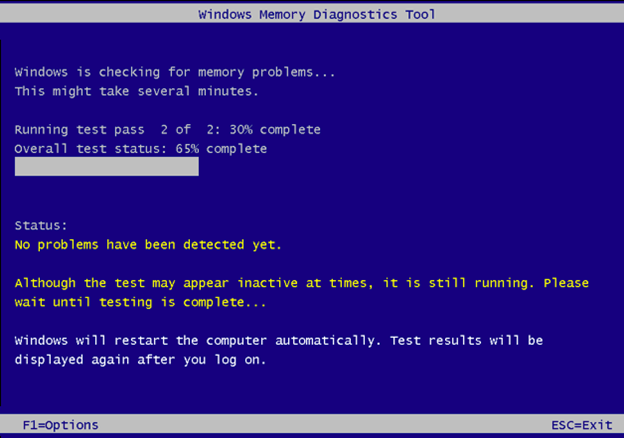
e. When the test is completed, the system will restart automatically and return to the Windows desktop.
f. You may check the test results and see if the error is fixed.
Wrapping up
The System_Service_Exception error may occur without any warning and make you lose access to your PC and data stored on it. There could be several reasons behind this error, as explained above. To fix this error, try methods such as CHKDSK command, SFC Scan, Windows update, etc. However, if you’ve lost your data due to this Ntfs.sys error, try using an efficient data recovery tool such as Stellar Data Recovery Professional. This software can get back your data from Windows PCs and storage devices such as HDD, SSD, USB and SD card, etc.
Also read – Fixed: Critical Process Died BSOD Error in Windows 10
About The Author

Mansi
Mansi Verma is a Technology Writer at Stellar®. She is a Tech enthusiast, holding over 7 years of experience in Data Recovery, IoT, Artificial Intelligence, and the Robotics technology domain. She loves researching and providing DIY solutions and tips & tricks to solve Windows technical issues. In her spare time, she likes reading novels, and poetry. She also enjoys traveling and trekking.
Best Selling Products
Stellar Data Recovery Premium
Stellar Data Recovery Premium for Window
Read More
Stellar Data Recovery Technician
Stellar Data Recovery Technician intelli
Read More
Stellar Data Recovery Toolkit
Stellar Data Recovery Toolkit is an adva
Read More
BitRaser File Eraser
BitRaser File Eraser is a 100% secure so
Read More
Содержание
- 1 Ошибка в файле: в чем причина?
- 2 Откат системы
- 3 Проверка диска и восстановление раздела NTFS
- 4 Смена режима SATA
- 5 Сбой Windows: обновление и откат драйверов
- 6 Проблемы реестра
- 7 Вирусы
- 8 Универсальность
- 9 Синий экран ntfs.sys в Windows 7
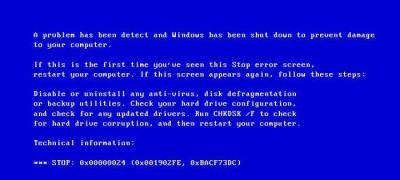
BSOD со stop кодом 0x00000024 на операционных системах Windows XP, 7, 8, 10 указывает на то, что проблема возникла с драйвером ntfs.sys, который отвечает за считку и запись данных с накопителей NTFS.
На официальном форуме Microsoft, разбирая этот синий экран NTFS FILE SYSTEM Windows любой версии, многие указывают на то, что виной ошибки физическая поломка или износ жесткого диска. Однако такое утверждение верно только частично. Сама по себе ошибка 0x00000024 состоит из цифр. Все они идентифицируют исходную строку в файле, который и вызвал ошибку. Этот код можно считать благодаря базе бсодов, расположенной в сети. Мы же на сайте предлагаем способы решения ошибки NTFS FILE SYSTEM.
Читайте на SoftikBox:Способы, как определить сокет материнской платы и процессора
Содержание:
Синий экран смерти NTFS_FILE_SYSTEM с кодом stop 0x00000024 возникает на компьютерах с Windows XP, 7, 8, 10 по следующим причинам:
- Повреждение жесткого диска, наличие битых секторов;
- Отсутствие или повреждение драйвера SCSI и IDE;
- Недостаточно памяти на жестком диске для нормальной работы операционной системы и установленных приложений;
- Разгон оперативной памяти;
- Неправильная прошивка материнской платы;
- Недостаточное «количество» подкачиваемой памяти. Во время процесса индексации может появиться BSOD, так как драйвер требующий пул не получает достаточно памяти для выполнения операции.
Кроме перечисленных причин ошибки 0x00000024 синий экран смерти могут вызывать и другие неполадки, связанные с работой вирусного приложения.
Поскольку ошибка NTFS FILE SYSTEM на Windows в 89% процентах случаев появляется при повреждении файловой системы и самого жесткого диска, то первое действие, которое стоит выполнить – это запуск команды Chkdsk/f/r с правами Администратора, чтобы обнаружить и исправить любое структурное повреждение системы NTFS.
ВАЖНО! Вы должны перезапустить систему до того момента, пока дисковое сканирование не началось на системном разделе. Или же воспользоваться программами MHDD или Victoria.
В случае, если загрузиться в Windows не получается, то действия будут следующими:
- Загружаемся в BIOS, нажав быстро и несколько раз клавишу «F2» и «DEL» (нужно до появления логотипа операционной системы).
- Меняем порядок загрузки дисков: из C на D, где D – это сторонний накопитель (жесткий диск), на котором также установлена Windows.
- Сохраняем заданный приоритет загрузки и выходим.
- ПК загрузиться с другой Windows.
- Теперь нужно открыть командную строку с правами Администратора и запустить chkdsk / rc, заменив C буквой того диска, который не работает.
- Утилита проверить подключенный к компьютеру проблемный носитель.
Также разрешить проблему истощения пула, когда нахватает памяти для подкачки, можно путем добавления физической памяти к ПК. Это увеличит объем пула не подкачиваемой памяти, доступной ядру или сократит количество файлов для SFM.
Поскольку проблема может крыться в недостатки памяти, то лучше запустить очистку системы от мусора и убрать с автозагрузки программы, которыми пользуетесь редко. Они потребляют оперативную память при загрузке, что может быть решающим фактором. Недостача нескольких мегабайтов ОЗУ может вызвать синий экран смерти с указанным выше кодом. Также нужно очистить виртуальную память системы.
Если же при возникновении такой ошибки в скобках указывается файл, то стоит найти информацию о нем в сети. Зачастую, это драйвер. Его нужно удалить и установить новый.
В случае, если описание способы не помогли решить проблемы, то нужно запустить восстановление Windows с LiveCD или же переустановить саму систему.
Практически во всех Windows-системах, в которых в качестве основной структуры организации файлов используется NTFS, достаточно часто можно встретить сбой в файле ntfs.sys. Синий экран (Windows XP или версий рангом выше, неважно) отображает полный стоп-код 0x00000024 NTFS_FILE_SYSTEM, который часто свидетельствует о нарушениях в работе жесткого диска и влечет за собой повреждение самой файловой системы. Но это только общий случай, поскольку причин появления одного и того же стоп-кода может быть гораздо больше. Устранить возникшую проблему легко. Как это сделать? Читайте в статье.
Ошибка в файле: в чем причина?
Системный компонент ntfs.sys представляет собой самый обычный файл драйвера, отвечающий за возможность считывания данных из разделов NTFS, а также за запись информации в такие сектора. Иными словами, драйвер осущствляет связь между файловой организацией жесткого диска, операционной системой и самим винчестером.
Но почему же тогда появляется сбой в файле ntfs.sys? Синий экран (в Windows 7, например) содержит специальный стоп-код, а также выдает рекомендацию по проверке жесткого диска. Сюда же в качестве сопутствующих причин появления такой ошибки можно добавить еще и такие:
- случайные сбои системы;
- некорректно установленный режим работы винчестера SATA;
- повреждение диска или присутствие критических ошибок;
- несоответствие, неправильная установка или устаревание драйверов;
- ошибки в системном реестре.
Откат системы
Итак, если пользователь получает сообщение об ошибке компонента ntfs.sys (синий экран), первым делом можно попытаться устранить проблему обычным восстановлением системы.

Если произвести такую операцию в автоматическом режиме не получается, используйте клавишу F8 при старте и выберите загрузку последней удачной конфигурации.
Когда происходит сбой ntfs.sys (синий экран), Windows 10 такой методикой восстановить нельзя. Придется довольно долго переходить от одного меню к другому. Но во всех системах для чистоты решения, если восстановление не работает, лучше применять загрузку со съемного носителя, с последующим вызовом командной консоли. Кстати, именно командная строка в большинстве случаев предлагает максимально эффективные инструменты для устранения проблем в неработающих системах.
Проверка диска и восстановление раздела NTFS
Если внимательно посмотреть на сообщение, присутствующее на экране, можно заметить, что там есть рекомендация по проведению немедленной проверки жесткого диска.
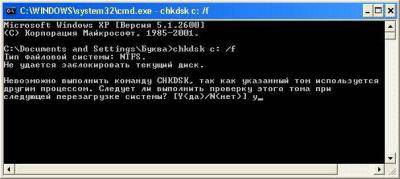
Таким образом, если происходит ошибка файла ntfs.sys (синий экран препятствует нормальной загрузке), после старта с диска или флешки в разделе диагностики вызовите командную строку (Shift + F10) и первым делом пропишите строку проверки винчестера chkdsk c: /f (если появится сообщение о невозможности выполнения команды, согласитесь, и проверка будет произведена при повторной загрузке).
По окончании процесса выйдите из консоли (команда exit), произведите рестарт системы. В случае повторного возникновения сбоя в компоненте ntfs.sys (синий экран появится снова), произведите загрузку с носителя, но в командной строке пропишите строку восстановления файловой системы chkdsk c: /p, после чего снова попробуйте выйти из консоли и произвести перезагрузку.
Смена режима SATA
Однако из-за некорректно установленного режима работы винчестера SATA выше приведенные методы могут не дать желаемого результата.
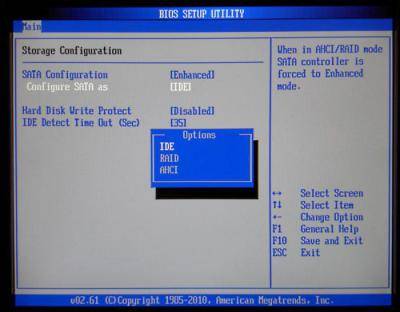
В этом случае при включении компьютера или ноутбука используйте вход в настройки BIOS, где среди параметров жесткого диска нужно найти режим SATA и переключить его с AHCI на IDE. Проверку жесткого диска на стадии загрузки со съемного носителя рекомендуется производить именно в режиме IDE.
Сбой Windows: обновление и откат драйверов
Не последнюю роль в появлении таких сбоев играют и драйверы. Если обычный старт системы оказывается невозможным, можно попытаться загрузить ее в режиме Safe Mode (безопасный старт). Возможно, придется удалить или переустановить некоторые инсталлированные драйверы. Если сбой возник после неправильного обновления, лучше воспользоваться средством отката в «Диспетчере устройств».
Оптимальным вариантом, при наличии постоянного подключения к Интернету, когда используется загрузка с поддержкой сетевых драйверов, станет применение автоматизированных программ-апдейтеров (например, Driver Booster). Они способны самостоятельно находить обновления всех имеющихся в системе драйверов, устанавливать их с официальных ресурсов без вмешательства пользователя в процесс загрузки и интеграции.
Проблемы реестра
Если загрузку системы можно хоть как-то осуществить, следует хорошенько почистить реестр. Вручную этим заниматься рекомендуется только специалистам, а рядовым пользователям можно посоветовать использовать простенькие портативные утилиты для автоматического входа.
Специалисты корпорации Microsoft рекомендуют применять собственную разработку под названием Scanreg, которая представлена в виде портативной программы с одним исполняемым EXE-файлом.
Вирусы
Если система подверглась воздействию вирусов, не загружается даже после применения вышеописанных решений, придется проверить ее. Но как это сделать, ведь старт оказывается невозможным?
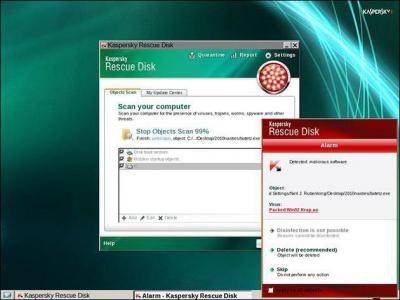
Тут на помощь приходят дисковые программы с общим названием Rescue Disk, при помощи которых можно загрузиться наподобие восстановительного диска, использовать углубленное сканирование всех имеющихся разделов. Возможно, это поможет в решении проблемы.
Универсальность
Остается добавить, что рассмотренные методы помогают практически во всех случаях. При восстановлении разделов NTFS можно еще задействовать команду sfc /scannow, чтобы проверить и восстановить системные компоненты. Это не всегда обязательно, но как дополнительное средство, в общем-то, не помешает.
 Различные ошибки и сбои нельзя назвать редким явлением в ОС Windows 7. Особенно неприятными являются те, что сопровождаются BSOD, после чего бывает невозможно продолжать работу без устранения неполадок. В этой статье мы разберем причины появления синего экрана с ошибкой ntfs.sys в «семерке» и способы их устранения.
Синий экран ntfs.sys в Windows 7
Указанный драйвер является инструментом взаимодействия с томами, отформатированными в файловой системе NTFS. При его повреждении или некорректной работе чтение и запись данных на такие диски будут сопровождаться ошибками. Существуют также факторы, которые косвенно влияют на такое поведение драйвера. Ниже мы поговорим о том, как устранить все возможные причины возникновения данного BSOD.
Причина 1: Ошибки на жестком диске
Ошибки или так называемые битые сектора на жестких дисках (речь сейчас идет о HDD; если в качестве системного носителя используется SSD, описанные ниже рекомендации не сработают) делятся на программные и физические. В первом случае мы имеем дело с повреждением данных вследствие сбоев в системе, вирусных атак, внезапных отключений электроэнергии или завершения работы кнопкой «Reset». Физические «бэды» появляются из-за повреждения поверхности «блинов». Оба эти вида неполадок могут вызвать сбой в драйвере и привести к синему экрану.
В некоторых ситуациях при программных битых секторах помогает только форматирование или использование специального софта, например, Victoria. С ее помощью можно заполнить все пространство диска нулями, что гарантированно помогает избавиться от всех данных. Если причиной стали физические «бэды», единственным выходом будет заменить «хард» и установить на него новую «винду».

Подробнее: Восстанавливаем жесткий диск программой Victoria
Чаще всего нам требуется сохранить данные и продолжить пользоваться системой, поэтому можно воспользоваться встроенной утилитой chkdsk.exe, чтобы исправить ошибки. В статье ниже вы найдете инструкцию по ее применению (параграф «Командная строка»).
Подробнее: Проверяем диски на наличие ошибок в Windows 7
Далее мы поговорим о том, как выполнить проверку и исправление, если Виндовс отказывается загружаться из-за ошибки ntfs.sys. Нам потребуется установочный (загрузочный) носитель с дистрибутивом «семерки», желательно, той версии, которая установлена на ПК.
Подробнее: Создание загрузочной USB флешки с Windows 7
- Загружаем компьютер с созданной флешки. Не забудьте, что перед этим необходимо выполнить некоторые настройки БИОС. Подробнее: Как настроить загрузку с флешки в БИОС
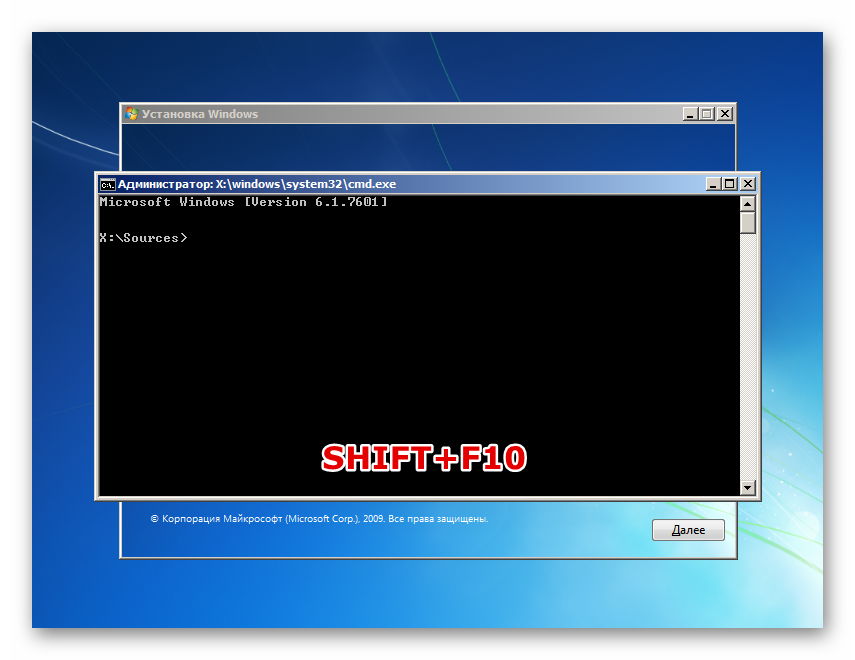
- В первом окне инсталлятора вызываем «Командную строку» сочетанием клавиш SHIFT+F10.
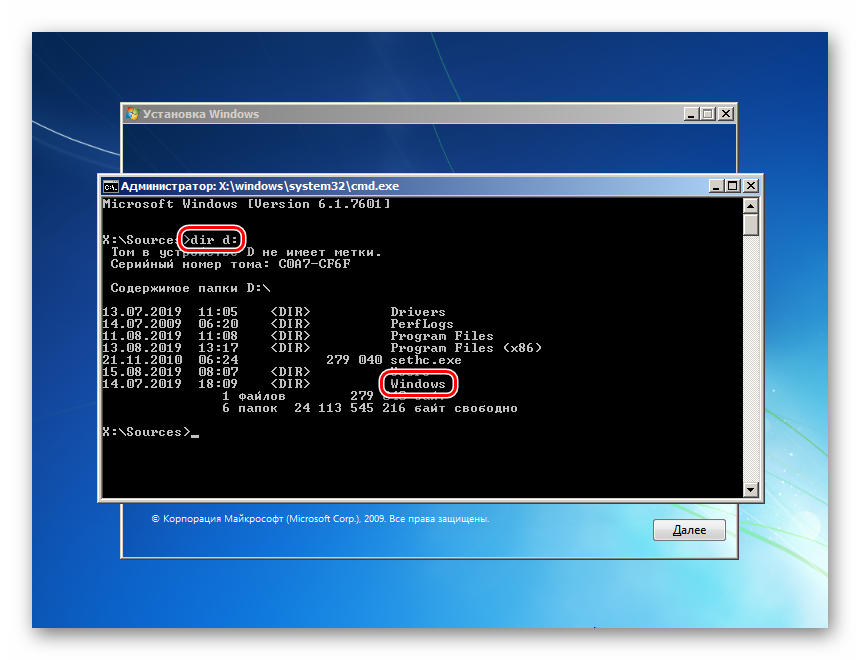
- Поскольку нам требуется исправить ошибки на системном диске, необходимо определить его букву. Делается это с помощью команды, указанной ниже.
dir d:Здесь d: — предполагаемая буква диска. Цель – обнаружить папку «Windows». Если ее нет в списке директорий, проверяем тома с другими буквами.
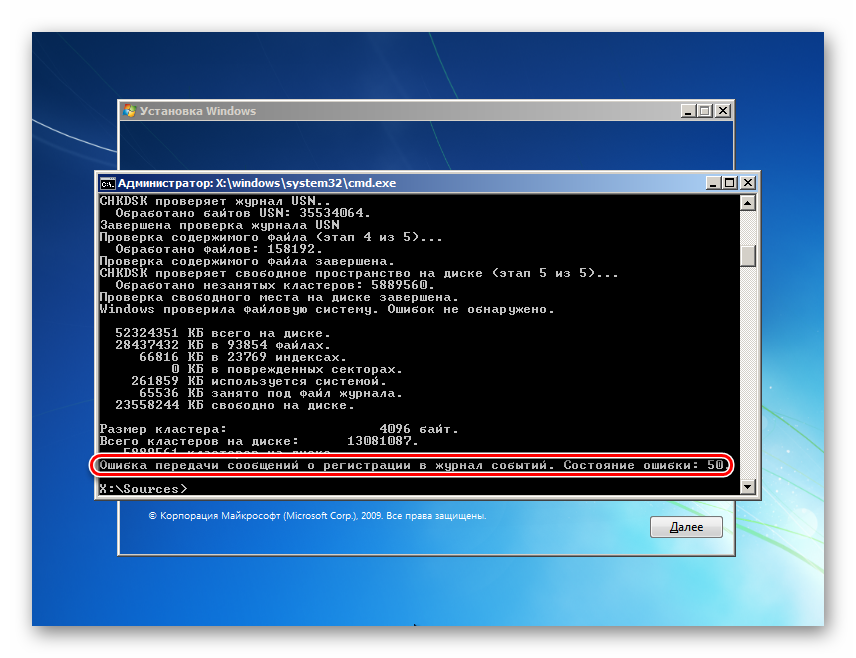
- С диском мы определились, теперь можно запускать проверку и исправление. Команда такая:
chkdsk d: /f /rЗдесь chkdsk – запуск утилиты, d: — буква диска, определенная в пункте 3, /f – атрибут, позволяющий исправлять найденные ошибки, /r – параметр, дающий команду восстанавливать поврежденные сектора.

- Ждем, пока утилита справится с поставленной задачей, и перезагружаем машину. На ошибку, возникающую после завершения проверки, не обращаем внимания.
Причина 2: Оперативная память
Драйвер ntfs.sys запускается во время старта системы, предварительно загрузившись в оперативную память. Если в ней не все в порядке, неизбежно появится ошибка. Такое происходит по разным причинам – из-за разгона, физической неисправности планок или при недостатке объема.
Разгон
Если вы разгоняли ОЗУ с целью повышения общей производительности системы, вполне вероятно, что выбранные настройки не позволяют модулям нормально выполнять свои обязанности. В такой ситуации следует сбросить параметры БИОС к значениям по умолчанию или установить автоматический выбор частот и таймингов. После этого нужно проверить, не появится ли ошибка.
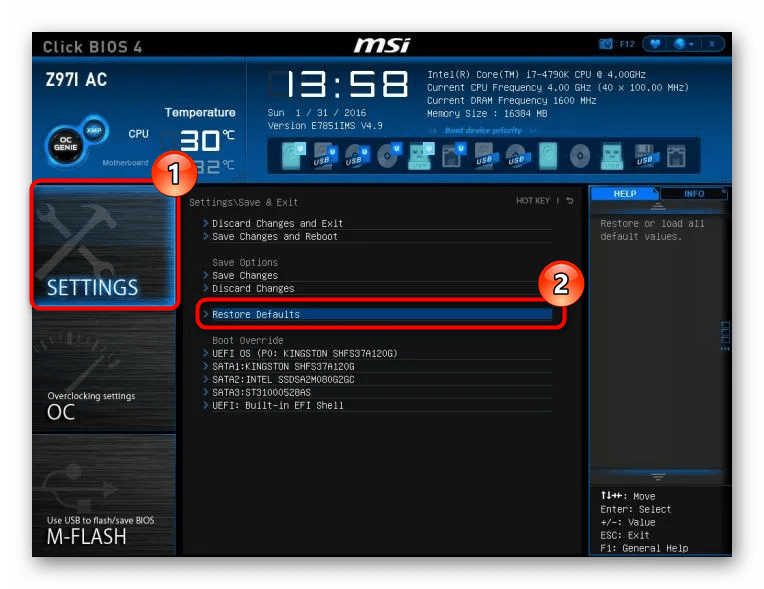
Подробнее:Сброс настроек BIOSЧто такое Restore Default в BIOS
Неисправность
Физические неисправности можно выявить с помощью специальных программ или системного средства проверки памяти, а устранить, только заменив сбойные модули.
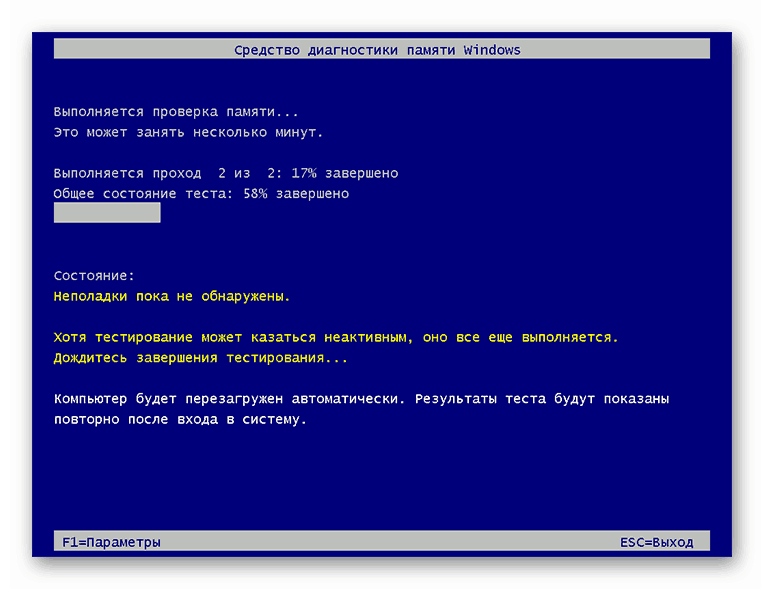
Подробнее: Проверка оперативной памяти в Windows 7
Недостаток объема
Нехватка «оперативки» также может вызывать ошибку драйвера. Здесь есть два решения: отказаться от использования программ, работающих в фоновом режиме (тех, которые «висят» в области уведомлений, и тех, чью деятельность можно увидеть только в «Диспетчере задач»), почистить автозагрузку или установить дополнительные модули ОЗУ.
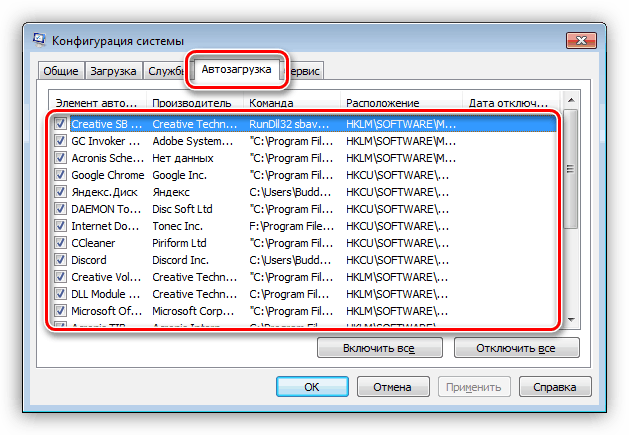
Подробнее:Установка и удаление программ в Windows 7Настраиваем параметры автозапуска программ в Windows 7Как выбрать оперативную память
Причина 3: Драйвера
В системе имеются драйвера, которые влияют на работу ntfs.sys. Это программы, управляющие контроллерами дисков. Если вы пользуетесь дополнительными платами расширения для подключения «хардов», нужно обновить их «дрова». В том случае, если такое оборудование не используется, возможно повреждение соответствующих системных файлов и ситуацию исправит только их восстановление.
Обратите внимание, что этим приемом следует пользоваться с осторожностью в случаях, если на ПК установлена нелицензионная копия Виндовс или имела место установка пакетов оформления, меняющих системные иконки, темы, экран загрузки и так далее. Существует риск полностью лишить ОС работоспособности. Инструкции находятся ниже.
Подробнее:Как восстановить системные файлы в Windows 7Восстановление поврежденных компонентов в Windows 7 при помощи DISM
Существует способ провести данную процедуру в ситуации, когда «винда» отказывается загружаться. В этом нам поможет диск аварийного восстановления ERD Commander, образ которого нужно поместить на съемный носитель.
Подробнее:Как записать ERD Commander на флешкуКак выставить загрузку с флешки в БИОСе
- После загрузки выбираем в списке систему своей разрядности.
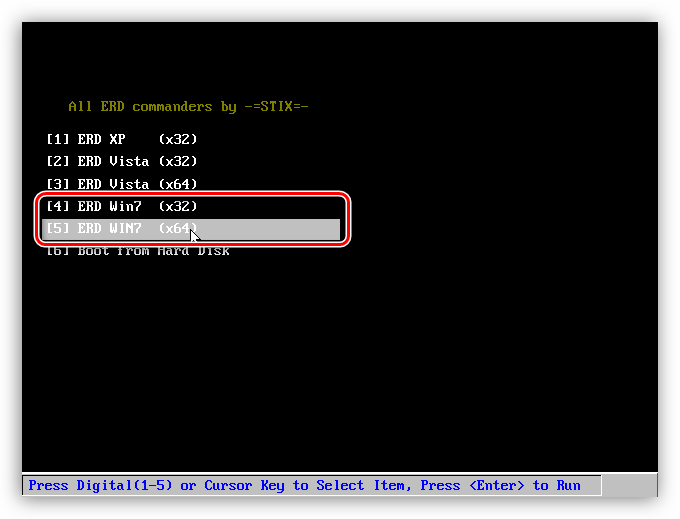
- К сети не подключаемся, так как она нам не понадобится.
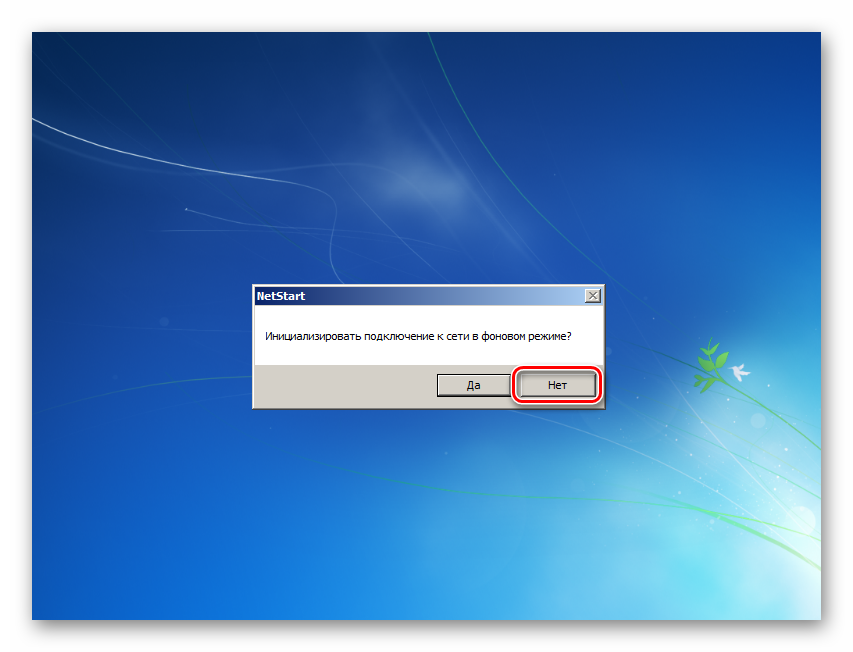
- С буквами дисков также можно ничего не делать. Здесь не важно, какую кнопку нажимать.

- Определяем язык клавиатуры (просто оставляем значение по умолчанию).

- Дожидаемся, пока закончится сканирование дисков на предмет обнаружения инсталлированных систем. Кликаем по найденному пункту и идем далее.
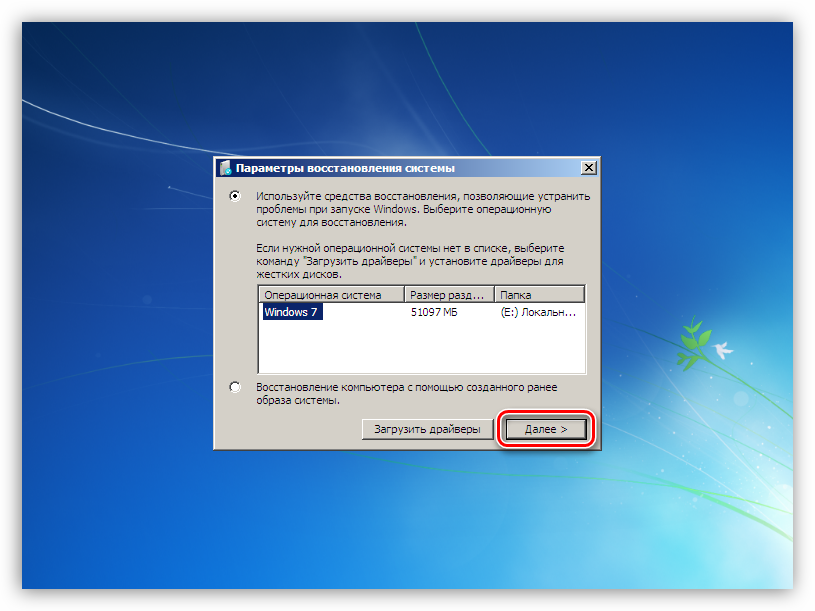
- На следующем этапе появится окно с перечнем доступных инструментов. Нас интересует самый нижний пункт.

- Выбираем средство восстановления системных файлов.
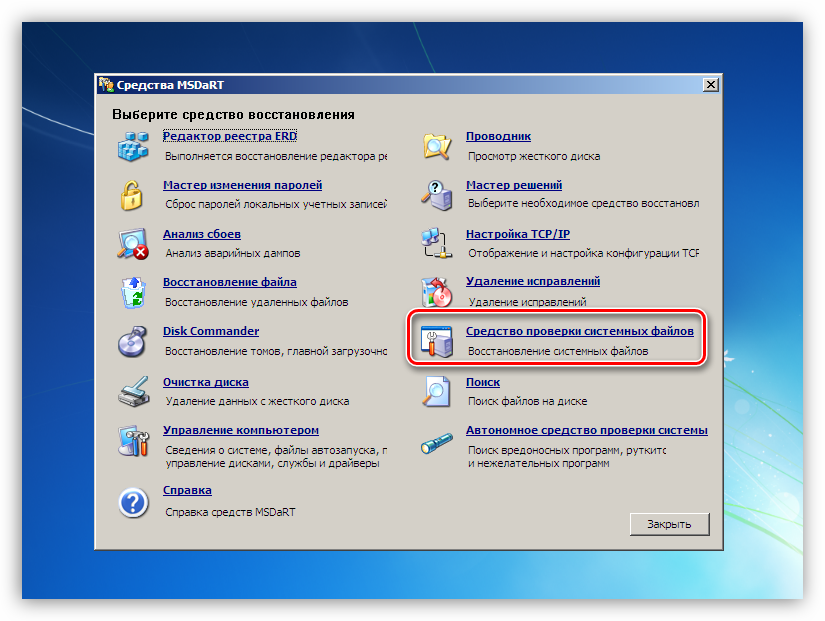
- Откроется «Мастер», в стартовом окне которого нажимаем «Далее».
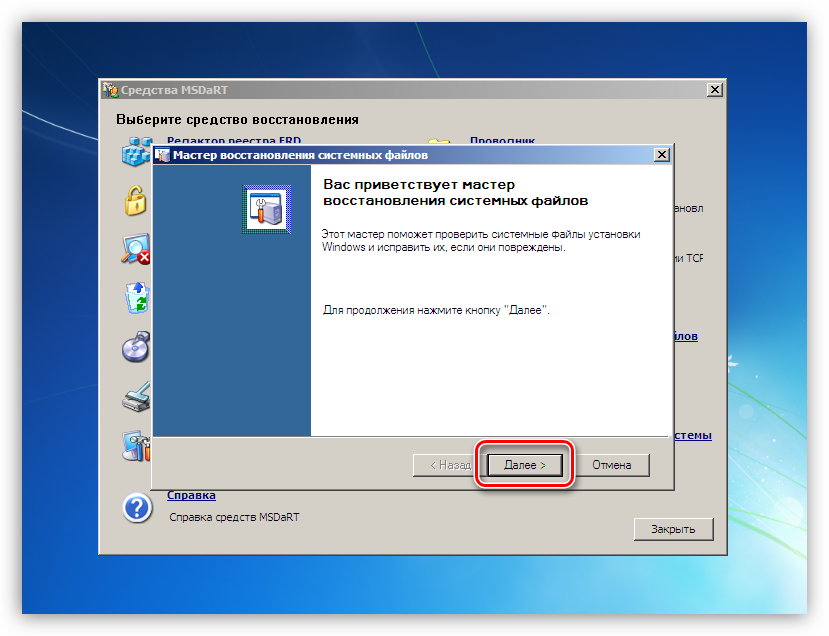
- Параметры восстановления оставляем, как есть, после чего запускаем операцию.
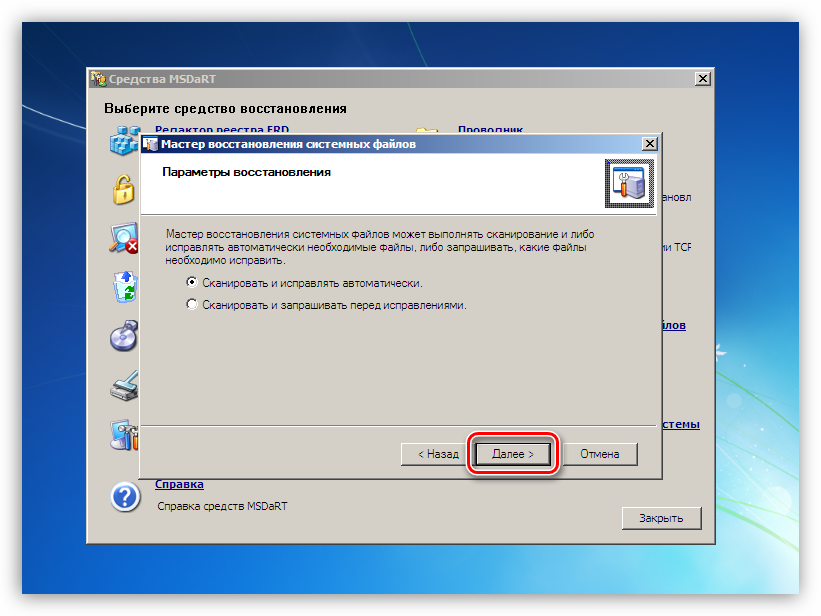
- Ждем, пока завершится процесс, и перезагружаемся.
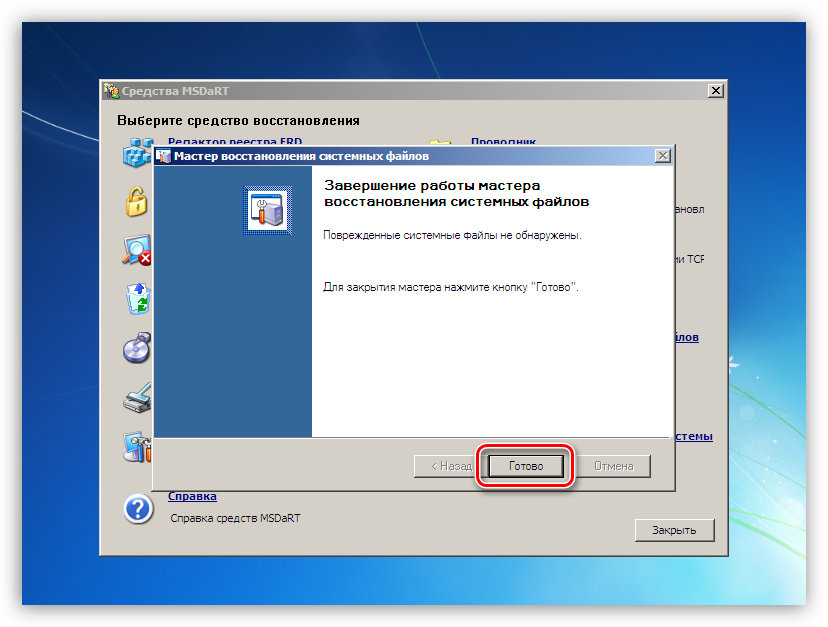
Заключение
Рекомендации по устранению синего экрана с ошибкой ntfs.sys, приведенные в этой статье, помогут, только если в операционной системе не произошел глобальный сбой по какой-либо причине. При таком стечении обстоятельств придется прибегнуть к переустановке Windows. Чтобы не попасть в подобные неприятности в будущем и не потерять данные, следует помнить, что файловая система может быть повреждена, и избегать аварийных перезагрузок, а также беречь компьютер от вирусов. ![]() Мы рады, что смогли помочь Вам в решении проблемы.
Мы рады, что смогли помочь Вам в решении проблемы.![]() Опишите, что у вас не получилось. Наши специалисты постараются ответить максимально быстро.
Опишите, что у вас не получилось. Наши специалисты постараются ответить максимально быстро.
Помогла ли вам эта статья?
Используемые источники:
- https://softikbox.com/reshenie-oshibki-ntfs-file-system-0x00000024-na-windows-28168.html
- https://fb.ru/article/343759/oshibka-v-fayle-ntfs-sys-siniy-ekran-v-chem-prichina-i-kak-ustranit-problemu
- https://lumpics.ru/blue-screen-with-ntfs-sys-error-in-windows-7/
Недавно произошла ошибка BSOD NTFS.sys (синий экран смерти), которая беспокоит многих пользователей Windows 10. Ntfs.sys — это системный файл, расположенный в папке C: Windows System32 drivers, он необходим для работы Windows, или драйвер оборудования, который помогает Windows читать и записывать данные на диски NTFS. Однако, несмотря на некоторую помощь, файл Ntfs.sys по-прежнему выдает ошибку.
Содержание страницы
- Исправление проблемы «Ошибка Ntfs.sys в Windows 10».
- ИСПРАВЛЕНИЕ 1: войдите в безопасный режим с загрузкой сетевых драйверов:
- ИСПРАВЛЕНИЕ 2: Обновите драйвер устройства:
- ИСПРАВЛЕНИЕ 3: Проверьте наличие проблем с ОЗУ:
- ИСПРАВЛЕНИЕ 4: Удалите BitDefender и / или Webroot:
Исправление проблемы «Ошибка Ntfs.sys в Windows 10».
Неудачная ошибка Ntfs.sys в Windows 10 — это проблема, которая может вызвать сбой системы, что еще больше приведет к потере данных. Это может произойти из-за повреждения диска, устаревших или поврежденных драйверов жесткого диска, проблемных модулей оперативной памяти или конфликта антивируса с системой. Сегодня, учитывая все эти возможные причины, мы составили список некоторых проверенных решений, которые помогут вам решить проблему «Неудачный Ntfs.sys в Windows 10». Посмотри:
ИСПРАВЛЕНИЕ 1: войдите в безопасный режим с загрузкой сетевых драйверов:
Прежде чем приступить к выполнению любого из шагов, мы рекомендуем сначала войти в безопасный режим с подключением к сети. Для этого выполните следующие действия:
ИСПРАВЛЕНИЕ 2: Обновите драйвер устройства:
Поврежденные или устаревшие драйверы устройств могут в конечном итоге привести к проблеме «Неудачный Ntfs.sys в Windows 10». Лучшее средство, которое вы можете попробовать, — это обновить драйвер устройства. Теперь вы можете выполнить процесс обновления вручную или автоматически с помощью специального программного обеспечения. Ниже мы объяснили оба. Посмотрите и следуйте инструкциям:
Для обновления драйвера вручную:
- Во-первых, щелкните правой кнопкой мыши на Значок Windows на панели рабочего стола и выберите опцию Диспетчер устройств.
- Теперь внутри Окно диспетчера устройств, перейдите к Видеоадаптеры, разверните его, и вы увидите список драйверов.
- Здесь щелкните правой кнопкой мыши над проблемный драйвер и выберите вариант Обновить драйвер из подменю.
- Далее на следующем экране выбираем опцию Автоматический поиск драйверов, и Windows автоматически начнет поиск последнего обновления.
- Найдя их, вы можете установить их на свой компьютер.
- Перезагрузите компьютер как только вы закончите.
Для автоматического обновления драйвера:
Автоматическое обновление драйверов — довольно простая задача, и вы можете выполнить то же самое с несколькими драйверами, обновляющими программное обеспечение, доступное в Интернете. Если вам не хватает времени и сил, рекомендуем использовать только автоматический способ.
ИСПРАВЛЕНИЕ 3: Проверьте наличие проблем с ОЗУ:
Как обсуждалось ранее в статье, проблемные карты памяти RAM также могут привести к проблеме «Неудачный Ntfs.sys в Windows 10». Здесь мы рекомендуем вам проверить, все ли с вашим оборудованием в порядке. Для этого посмотрите ниже:
Во-первых, проверьте свое оборудование. Для этого,
- Начните с выключения компьютера. Убедитесь, что вы отключили и его.
- Далее снимаем все флешки RAM.
- Теперь попробуйте включить компьютер с одной за другой вставками RAM. Убедитесь, что вы проверяете каждую карту RAM отдельно.
- При попытке установить RAM-накопители по отдельности, если ваш компьютер не загружается с какой-либо конкретной установкой, то в этом заключается повреждение.
Во-вторых, проверьте тайминги и частоту ОЗУ. Для этого
- Перейдите на официальный сайт производителя вашей оперативной памяти и найдите значения по умолчанию и рекомендуемые значения.
- Здесь, если значения не совпадают, это означает, что вам, возможно, придется разогнать / заблокировать ОЗУ.
ЗАМЕТКА: Если вы плохо знакомы с литьем BIOS, мы рекомендуем вам связаться с некоторыми профессионалами.
ИСПРАВЛЕНИЕ 4: Удалите BitDefender и / или Webroot:
Есть несколько сторонних программ, которые плохо работают с нашей операционной системой, что приводит к ошибкам и сбоям. Однако мы выяснили, что из-за сбойного файла Ntfs.sys BitDefender и Webroot являются наиболее ответственными. Здесь мы рекомендуем вам удалить BitDefender и Webroot и проверить, помогает это или нет. Для этого выполните следующие действия:
- Сначала перейдите в панель поиска на рабочем столе, введите «Программы» и запускаем опцию Приложения и функции.
- Теперь прокрутите список приложений и найдите BitDefender а также Webroot.
- Как только вы найдете их, щелкните по ним, и некоторые параметры будут расширены. Здесь выберите Удалить вкладка для обоих приложений.
- Наконец, перезагрузите компьютер.
ЗАМЕТКА: При удалении приложения вручную не удаляются различные файлы, относящиеся к этому конкретному приложению. Таким образом, если вы хотите удалить все файлы и папки, связанные с ними, мы рекомендуем вам использовать любой специальный инструмент для удаления программного обеспечения.
Это все проверенные, проверенные и проверенные исправления для проблемы «Неудачный Ntfs.sys в Windows 10». Все они сработали для большинства пострадавших пользователей, и поэтому мы надеемся, что они окажутся полезными и в вашем случае.
Помимо вышеупомянутых исправлений, мы рекомендуем вам также запустить сканирование на наличие вредоносных программ. Это было проверенное решение для нескольких пострадавших пользователей, и поэтому мы надеемся, что оно сработает и для вас. Если у вас есть какие-либо вопросы или отзывы, напишите комментарий в поле для комментариев ниже.
Ошибка при чтении файла NTFS.sys и следующий синий экран в Windows 10 указывает на наличие проблем с состоянием дисков: жестких дисков и твердотельных накопителей. Иногда причина ее проявления может быть вызвана ошибкой программного обеспечения, поэтому ее можно исправить, а иногда ошибка указывает на физическую неисправность. В этом случае проблему можно решить только ремонтом или заменой комплектующих.
Причины ошибки NTFS_FILE_SYSTEM
Чаще всего ошибка чтения файла NTFS.sys появляется после установки нового диска на компьютер, на котором уже установлена операционная система. В такой ситуации достаточно обновить или установить отдельный драйвер, разработанный специально для нового накопителя.
Однако ошибка, заключающаяся в том, что файл NTFS.sys не может быть прочитана, также обозначенная кодом 0x00000024, может указывать на другие проблемы с программным и аппаратным обеспечением. К первым относятся:
- нарушение целостности системных файлов операционной системы;
- сбой основных настроек операционной системы;
- повреждение, неправильная установка или отсутствие драйверов для работы с устройствами хранения данных;
- последствия заражения ПК вирусами.

В список аппаратных проблем могут входить:
- повреждение разъемов подключения на дисках или на материнской плате;
- поврежден кабель SATA или IDE;
- повреждение кабеля питания агрегата;
- вышедшие из строя компоненты жесткого диска;
- деградация микросхем памяти на твердотельном накопителе и др.

Методы решения проблемы
Не всегда удается решить проблему чтения файла NTFS.sys, вызывающего BSOD (от английского «Blue Screed of Death», что дословно переводится как «синий экран смерти»). Если причина его появления – аппаратная неисправность, то устранить проблему другим способом, кроме ремонта накопителя, не удастся, что не всегда возможно.
Однако в любом случае стоит попробовать следующие манипуляции: проверить сектора накопителя на наличие ошибок, восстановить поврежденный файл или переустановить драйверы устройств.
Если причиной ошибки являются программные ошибки, системные ошибки или отсутствие подходящих драйверов, то после произведенных манипуляций пользователь сможет восстановить стабильную работу агрегата.
Проверка диска
Если на экране BSOD появляется код завершения работы системы 0x00000024, вы можете попытаться решить проблему, проверив сектора диска на наличие ошибок. Если после сбора информации о проблеме система запустится, вы можете сделать это следующим образом:
- Откройте «Компьютер».
- Щелкните правой кнопкой мыши раздел «C» и выберите параметр «Свойства».
- Перейдите в раздел «Сервис» и запустите проверку диска, поставив все флажки (в более поздних версиях Windows 10 вам не нужно задавать дополнительные параметры перед запуском проверки).
Если системе не удалось загрузиться, перед пользователем отобразится окно восстановления. Далее следует:
- Перейти в раздел дополнительных параметров.
- Выберите опцию «Командная строка».
- Введите команду без кавычек «chkdsk C: / f / r» и нажмите клавишу «Enter».
- Дождитесь завершения проверки и попробуйте загрузить систему.
Восстановление системного файла
Второй способ исправить ошибку с файлом NTFS.sys – это исправить. Это делается через командную строку. Вы можете начать процесс следующим образом:
- Открытая консоль:
- если у вас есть доступ к системе, вы можете сделать это, набрав CMD.exe в поле поиска и выбрав вариант запуска с правами администратора;
- если вы не можете получить доступ к системе, вы можете сделать это на экране восстановления, перейдя в раздел дополнительных параметров и выбрав пункт «Командная строка».
- Введите команды одну за другой без кавычек «> sfc», затем «/ scannow».
- Дождитесь завершения процедуры и перезапустите / запустите операционную систему.
Удаление устройства
Метод удаления устройства для чистой установки драйвера будет полезен только в том случае, если ошибка возникла после установки нового диска (HDD, Sata SSD или M2SSD). В таких случаях после появления синего экрана компьютер в любом случае загрузится с рабочего стола.
При выполнении всех операций важно не получить доступ к новому диску (не открывайте его на компьютере, не копируйте туда файлы).
Для восстановления драйвера вам потребуется:
- Откройте диспетчер устройств. Откройте меню «Выполнить» («Win + R»), введите «devmgmt.msc» без кавычек и нажмите клавишу «Enter».
- Разверните список «Контроллеры IDE ATA / ATAPI» и для каждого элемента нажмите правую кнопку мыши и выберите вариант удаления устройства.
- Перезагрузите компьютер. Система автоматически установит новые драйверы.
Примечание. Если после перезапуска в диспетчере устройств перед контроллерами стоит восклицательный знак или в списке отображается неизвестное устройство и к диску невозможно получить доступ на компьютере, пользователю необходимо загрузить и установить драйвер из официальный сайт производителя накопителя.
Источник изображения: it-tehnik.ru
ntfs.sys is a system file, also known as the NT File System Driver of Windows. It’s present in a number of versions of Windows, and can be found in the Drivers folder of Windows. As such, it shouldn’t be modified or deleted, as doing this can cause serious system instability.
The SYSTEM_SERVICE_EXCEPTION (ntfs.sys) can appear due to a number of reasons, because ntfs.sys isn’t directly connected to anything. However, most common causes for this problem include specific antivirus and security software, corrupt or outdated drivers, or bad or incorrectly setup RAM sticks.
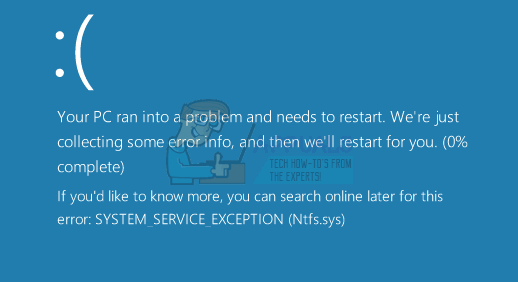
Whichever of these is the cause for your problem, there is an easy fix, so read on to see how you can solve this problem.
Method 1: If using Windows 10, remove BitDefender and/or Webroot
Antivirus software can be the cause for Windows problems more times than you can imagine. For Windows 10, specifically, software such as BitDefender and Webroot can cause anything from small problems, to Blue Screens of Death. If you’re facing this issue and you find that you are using any of them, a solution with a very high chance to work would be to uninstall them and revert to Microsoft’s Windows Defender, which comes built into Windows 10.
You can do this easily with Windows’ built in tools. Press Start on your keyboard and type Change or Remove Programs. Click on the result, and you should see a list of all the software that you currently have installed on your system. Find BitDefender or Webroot, or both, depending on which one you have installed, and click on the Uninstall button. Follow the wizard to remove the software from your computer. When you’re done, you can restart your system to make sure that all files have been deleted.
Once you have done this, press Start again and type Windows Defender. Open the app and if it isn’t turned on (it turns off when you have another antivirus application installed), press Turn On. This is done to ensure that your computer isn’t left unprotected against malware. Close the window and you should be good to go, without any more BSODs.
Method 2: Check and update your drivers
Corrupt or outdated drivers are also the cause for a number of issues, such as this one. What you should do first is to check if any driver is malfunctioning, and then update all the drivers.
Step 1: Check for malfunctioning drivers
To do this, open Device Manager, by pressing the Windows key on your keyboard, typing Device Manager, and selecting the result. You will be presented with all the drivers on your system. Expand all menus one by one, and see if there is a yellow exclamation mark next to any of the drivers. If there is, you can right-click it, and choose Properties, to see what the problem is and search online on how to solve it. The solutions are different for different problems and different drivers. However, one universal solution would be to uninstall a malfunctioning driver by right-clicking it, and selecting Uninstall, and then opening Windows Update from the Start menu, so it can find and install the missing driver.
Step 2: Update all drivers
This can be done through Windows Update, which you can open by pressing the Windows key on your keyboard, typing Windows Update and opening the result. Click Check for updates and let Windows do its thing. If a driver isn’t updated, or it’s missing, it will find it and give you the option to update it. Do that, and when Windows Update is done, reboot your system to make sure everything is settled. This can solve the BSOD if it was a driver issue, and you will have a fully functional system.
Method 3: Check your RAM
Malfunctioning or incorrectly setup RAM can lead to anything from BSODs to systems being completely unable to boot. You should first check the hardware, see if all sticks are functioning properly, and if everything is okay, check the timings and frequencies, as certain motherboards and processors, especially from AMD, can be very tricky with this.
The hardware check is very easy. First of all, turn off your computer. You could also unplug it from the power source as a safety precaution. Open the lid, and locate the RAM sticks. What you should do is remove all of them, and try to power on the computer with every stick, one by one. If one of them is faulty, your system won’t turn on and you will know that you should replace it with a new one.
If everything is okay with the hardware, you should check the timings and frequency of the RAM. Since you’ve already taken a look at the RAM, you should know the manufacturer and model, and you can go to its website to see the defaults and recommended values. You can check what those values are on your system with a software such as Speccy or CPU-Z. If they don’t match, and you haven’t changed them by yourself by overclocking or underclocking the RAM, you should enter the BIOS and take care of that. This is done when you turn on your computer, before Windows boots, by pressing either Esc, F2, F12, DEL or Backspace, depending on your particular motherboard. When inside the BIOS, you can use the arrow keys and function keys to navigate. Each BIOS is different, so you should find the RAM settings and adjust them to the manufacturer’s recommendation. When you’ve done this, save the changes and exit. Your system should now be working properly.
While this error can give you a lot of headache, the cause is almost always one of the aforementioned ones. Follow our guides to solve them and your system will be back to full functionality in absolutely no time.
ntfs.sys is a system file, also known as the NT File System Driver of Windows. It’s present in a number of versions of Windows, and can be found in the Drivers folder of Windows. As such, it shouldn’t be modified or deleted, as doing this can cause serious system instability.
The SYSTEM_SERVICE_EXCEPTION (ntfs.sys) can appear due to a number of reasons, because ntfs.sys isn’t directly connected to anything. However, most common causes for this problem include specific antivirus and security software, corrupt or outdated drivers, or bad or incorrectly setup RAM sticks.
Whichever of these is the cause for your problem, there is an easy fix, so read on to see how you can solve this problem.
Method 1: If using Windows 10, remove BitDefender and/or Webroot
Antivirus software can be the cause for Windows problems more times than you can imagine. For Windows 10, specifically, software such as BitDefender and Webroot can cause anything from small problems, to Blue Screens of Death. If you’re facing this issue and you find that you are using any of them, a solution with a very high chance to work would be to uninstall them and revert to Microsoft’s Windows Defender, which comes built into Windows 10.
You can do this easily with Windows’ built in tools. Press Start on your keyboard and type Change or Remove Programs. Click on the result, and you should see a list of all the software that you currently have installed on your system. Find BitDefender or Webroot, or both, depending on which one you have installed, and click on the Uninstall button. Follow the wizard to remove the software from your computer. When you’re done, you can restart your system to make sure that all files have been deleted.
Once you have done this, press Start again and type Windows Defender. Open the app and if it isn’t turned on (it turns off when you have another antivirus application installed), press Turn On. This is done to ensure that your computer isn’t left unprotected against malware. Close the window and you should be good to go, without any more BSODs.
Method 2: Check and update your drivers
Corrupt or outdated drivers are also the cause for a number of issues, such as this one. What you should do first is to check if any driver is malfunctioning, and then update all the drivers.
Step 1: Check for malfunctioning drivers
To do this, open Device Manager, by pressing the Windows key on your keyboard, typing Device Manager, and selecting the result. You will be presented with all the drivers on your system. Expand all menus one by one, and see if there is a yellow exclamation mark next to any of the drivers. If there is, you can right-click it, and choose Properties, to see what the problem is and search online on how to solve it. The solutions are different for different problems and different drivers. However, one universal solution would be to uninstall a malfunctioning driver by right-clicking it, and selecting Uninstall, and then opening Windows Update from the Start menu, so it can find and install the missing driver.
Step 2: Update all drivers
This can be done through Windows Update, which you can open by pressing the Windows key on your keyboard, typing Windows Update and opening the result. Click Check for updates and let Windows do its thing. If a driver isn’t updated, or it’s missing, it will find it and give you the option to update it. Do that, and when Windows Update is done, reboot your system to make sure everything is settled. This can solve the BSOD if it was a driver issue, and you will have a fully functional system.
Method 3: Check your RAM
Malfunctioning or incorrectly setup RAM can lead to anything from BSODs to systems being completely unable to boot. You should first check the hardware, see if all sticks are functioning properly, and if everything is okay, check the timings and frequencies, as certain motherboards and processors, especially from AMD, can be very tricky with this.
The hardware check is very easy. First of all, turn off your computer. You could also unplug it from the power source as a safety precaution. Open the lid, and locate the RAM sticks. What you should do is remove all of them, and try to power on the computer with every stick, one by one. If one of them is faulty, your system won’t turn on and you will know that you should replace it with a new one.
If everything is okay with the hardware, you should check the timings and frequency of the RAM. Since you’ve already taken a look at the RAM, you should know the manufacturer and model, and you can go to its website to see the defaults and recommended values. You can check what those values are on your system with a software such as Speccy or CPU-Z. If they don’t match, and you haven’t changed them by yourself by overclocking or underclocking the RAM, you should enter the BIOS and take care of that. This is done when you turn on your computer, before Windows boots, by pressing either Esc, F2, F12, DEL or Backspace, depending on your particular motherboard. When inside the BIOS, you can use the arrow keys and function keys to navigate. Each BIOS is different, so you should find the RAM settings and adjust them to the manufacturer’s recommendation. When you’ve done this, save the changes and exit. Your system should now be working properly.
While this error can give you a lot of headache, the cause is almost always one of the aforementioned ones. Follow our guides to solve them and your system will be back to full functionality in absolutely no time.
The failed Ntfs.sys will generate different error codes, so the fixes are different. Here’s a quick view of all errors and solutions:
| Workable Solutions | Step-by-step Troubleshooting |
|---|---|
| Fix Error Code 1. NTFS_File_SYSTEM (Ntfs.sys) |
Method 1. Fix disk corruptions with Windows built-in Chkdsk utility. Enter «Safe Mode with Command Prompt». Open «This PC», right-click the problematic drive…Full steps Method 2. Update outdated drivers that cause failed Ntfs.sys problem. Right-click on «This PC» and go to «Manage» > «Device Manager»…Full steps |
| Error Code 2. SYSTEM_SERVICE_EXCEPTION (Ntfs.sys) |
Method 1. Update Windows. Enter safe mode, click «Start» and type update. Choose «Check for updates»…Full steps Method 2. Run system file checker tool: DISM and SFC scan. In safe mode, click «Start» and type cmd…Full steps Method 3. Check the RAM. Faulty RAM stick installation or incorrect RAM setup may induce an Ntfs.sys…Full steps |
What Is NTFS.sys
Ntfs.sys is located in C:WindowsSystem32drivers folder. Ntfs.sys indicates either the system file that is essential in running Windows or the hardware driver that allows the Windows operating system to read and write to NTFS drives. Thus, if you get a BSOD with the stop code: NTFS_File_SYSTEM (Ntfs.sys), that means there is something wrong with the hardware driver. If you receive the error code: SYSTEM_SERVICE_EXCEPTION (Ntfs.sys), you probably get a corrupted system file.
What Caused Failed NTFS.sys
Every error has its causes. The culprit for NTFS_File_SYSTEM (Ntfs.sys) is likely to be disk corruption, be it NTFS file system corruption or disk errors like bad sectors. Besides, corrupted hard drive drivers can also result in a failed Ntfs.sys. And the SYSTEM_SERVICE_EXCEPTION (Ntfs.sys) may be induced by antivirus software that is conflicted with the system, corrupted or outdated driver, or problematic RAM sticks.
Specify the error message on your computer screen and carry out the corresponding fixes to remove the Ntfs.sys error.
How to Recover Files Lost Due to NTFS.sys Error
Before you fix the missing or corrupt NTFS.sys file in Windows XP/7/8/10, export your data first. Usually, computer data files may possibly lose after such an NTFS.sys error and EaseUS EaseUS Data Recovery Wizard software can take good care of it.
EaseUS File Recovery Software
- Support deleted file recovery, formatting, hard drive corruption, virus attack, system crash under different situations.
- Restore data after formatting, emptying recycle bin, virus attack, system crash, and more.
- Support over 1000 types of files like DOC/DOCX, XLS/XLSX, PPT/PPTX, AIF/AIFF, MP3, JPG/JPEG, AVI, MOV, MP4, and more.
Download EaseUS EaseUS Data Recovery Wizard to restore whatever disappeared on your computer, HDD or external SD card, USB flash drive, etc. That’s how you’re guaranteed an effective and safe fix for missing or corrupt NTFS.sys files without losing data.
Step 1. Launch EaseUS file recovery software on your Windows computer. Choose the exact location where you lost the files and click the «Scan» button.
Step 2. The software will immediately start scanning the drive, and the deleted files will be displayed soon. If you find the files you need during the scan, you can stop the scan. In order to find the target file quickly, you can use the file format filter.
Step 3. Select files, such as Word, Excel, PDF, photos, videos, or emails and click the «Recover» button. You can browse for a different location to keep the recovered files.
Error Code 1. NTFS_File_SYSTEM (Ntfs.sys)
As mentioned, the main culprit for a failed Ntfs.sys in such a situation is a file system error, bad sectors, or outdated device drivers. Given that, the solutions to this issue are quite clear: fix disk corruptions and update the device driver.
Since there are multiple disks and drivers on a computer, you first need to specify the drive(or device) or driver that is causing the problem using the Event Viewer. To check it, you need to enter Safe Mode.
Step 1. Hold down the power button for 10s to shut down the computer.
Step 2. Press the power button to start the computer. Once you see the first sign of Windows has started, e.g., the logo of the manufacturer, hold down the power button for 10s again to turn off the device.
Step 3. Press the power button to start the computer. Once Windows restarts, hold down the power button for 10s to turn off the computer.
Step 4. Press the power button to start the computer, and don’t interrupt it this time. Then you will see your computer in WinRE.
Step 5. On the «Choose an option» screen, choose «Troubleshoot» > «Advanced options» > «Startup Settings» > «Restart».
Step 6. After the restart, you will see a list of options, as shown in the image below. Select «5» or press «F5» to enable Safe Mode with Networking.
Now you need to check Event Viewer:
Step 1. Click «Start» and enter the event viewer.
Step 2. Right-click «Event Viewer» and choose «Run as administrator».
Step 3. Expand «Windows Logs» and choose «System».
Step 4. Check the errors that coincided with the blue screen and fix the error according to the information.
Method 1. Fix Disk Corruptions
The Windows built-in Chkdsk utility can fix disk errors like file system errors and bad sectors. Thus, you can solve the disk corruption with the command-line tool. If you don’t want to use command lines, applying the disk checking feature has the same effect.
Step 1. Enter «Safe Mode with Command Prompt» using the way introduced above.
Step 2. Open «This PC», right-click the problematic drive, and choose «Properties».
Step 3. Go to the «Tools» tab, click «Check».
Method 2. Update Device Driver
An outdated or corrupted driver is the cause of the failed Ntfs.sys in most cases. If you figure out the faulty driver via Event Viewer, go to Safe Mode with Networking to update the corresponding driver.
Step 1. Right-click on «This PC» and go to «Manage» > «Device Manager».
Step 2. Expand «Display adapters», right-click on the graphics card driver, and choose «Update driver».
According to Microsoft, there are other tips worth trying to fix the blue screen of death caused by the Ntfs.sys error.
- Disable any virus scanners, backup programs, or disk defragment tools.
- Run hardware diagnostics provided by the manufacturer.
- Ensure there is enough space on the system drive. If not, you can extend the system drive to make Windows run properly.
Error Code 2. SYSTEM_SERVICE_EXCEPTION (Ntfs.sys)
Based on the possible reasons that lead to the Ntfs.sys error, in addition to updating the driver using the way introduced above, here are other solutions you can apply.
Method 1. Update Windows
Updating Windows can not only fix some known bugs or problems but also update necessary drivers.
Step 1. Enter safe mode following the steps provided.
Step 2. Click «Start» and type update.
Step 3. Choose «Check for updates».
Step 4. Windows will show you the new updates available. Click «Install now» to update your Windows. (Make sure you install all the updates available.)
Method 2. Run System File Checker Tools
System File Checker tool is a built-in utility in Windows that can check and repair missing or corrupted system files. It will repair the failed Ntfs.sys file automatically. Follow the steps introduced in the last part to enter Safe Mode with Command Prompt and then:
Step 1. In safe mode, click «Start» and type cmd.
Step 2. Right-click «Command Prompt» and choose «Run as administrator».
Step 3. If you are using Windows 10, you should first run DISM.exe: DISM.exe /Online /Cleanup-image /Restorehealth to make a Windows image to protect your data:
Step 4. When the DISM command has been completed, type the following command: sfc /scannow to start scanning and repairing your system files.
Method 3. Check the RAM
Faulty RAM stick installation or incorrect RAM setup may also induce an Ntfs.sys error. First, you need to check the hardware. To do so, turn off your computer and reconnect the RAM sticks. You can troubleshoot the problematic RAM stick by removing all of them and trying to power on each stick one by one.
If there is nothing wrong with the hardware, you need to check the timings and frequencies of the RAM. You can get the recommended values from the manufacturer and apply third-party tools to check the actual values of the RAM sticks. If they don’t match, you can enter BIOS to adjust the RAM values to the recommended ones.
Tips and Notifications
- You can also apply the driver installation disc to update the corresponding hardware driver.
- Both updating driver and running System File Checker tool can be applied to both of the situations.
- Disable antivirus or similar software is only helpful in Windows 10.
The Bottom Line
Ntfs.sys is a system file that enables the communication between the operating system and the hardware. Therefore, it’s necessary for Windows to run smoothly. When Ntfs.sys fails, you may get a blue screen of death. To fix it, the most effective way is to update the faulty driver. If that doesn’t help, use the other ways detailed to have a try. I hope one of them will help you solve the Ntfs.sys error.