Ответ
При появлении такой надписи некоторый клиенты думают, что согласившись на пакет « АРЕНДА КОФЕМАШИНЫ В ОФИС » они полностью обезопасили себя от проблем с не работающей кофе машиной. Конечно, вы правы, по условию договора, ремонт и обслуживание кофемашины входит в нашу часть ответственности. Но порой, «отремонтировать» возможно, в течение пары минут, дав совет по телефону и вам не придется ждать целый день нашего мастера. VENTILATE – надпись, которая в 95% случаях высвечивается на дисплее кофемашины после попадания воздуха в гидросистему. Закончилась вода в контейнере и для удобства вы сняли его с посадочного места – разорвав тем самым контур воды в системе – так воздух и попадает в помпу (насос создающий давление в системе). Для снятия ошибки необходимо провести дренаж системы – пропустить по контуру воду – выгнать воздух. В зависимости от системы кофемашины и происходит дренаж. В моделях с функцией быстрого пара для начала необходимо перевести аппарат в режим подачи воды (как правило, активизируется значок — капелька в символьных или надпись HOT WATER (горячая вода) в диалоговых системах, после чего необходимо открыть кран пара/кипятка или нажать кнопку подачи воды. Пропустив 100-150гр. воды ( за это время счетчик воды вырабатывает необходимое количество импульсов ) что и является для кофемашины сигналом исправности системы.
Категория
Ventilate – это сообщение для пользователя, которое появляется от электронного блока кофемашин марки Saeco или тех, что изготовлены на базе данной модели, или по лицензии: Royal cappuccino, Gaggia, Vienna digital, Café Nova, Turmix и другие. Иногда команда на дисплее бывает двойная: decalcify ventilate, что означает провести декальцификацию и удалить воздух из системы.
Что означает надпись
Пользователями кофемашин Saeco Royal cappuccino, Gaggia замечено, что данная марка довольно часто выдает ошибку ventilate, вернее, просьбу продуть систему от застрявшего в ней воздуха.

Особенно часто это начинает происходить, когда машине уже больше 3 лет. Если уход за кофеваркой проводится регулярно и выполняется замена деталей, то надпись может появляться редко.
Что делать, если в кофемашине Saeco royal cappuccino или Gaggia «decalcify ventilate» появляется одновременно. Это говорит о том, что эти две команды как-то связаны, то есть – проблема может быть в очистке, а очистка нужна из-за качества воды.
Предпосылки проблемы
Жесткая городская вода – самая главная проблема для бытовых приборов, не только для кофеварок. Соли откладываются быстро, так как прибор работает с горячей жидкостью. Кроме того, на деталях может скапливаться слизь, если жидкость проходит недостаточную очистку до поступления в водопровод.
Если кофемашина пишет ventilate, значит воздух попал в систему в следующих случаях:
- забит фильтр;
- пережат шланг подачи воды;
- силиконовые шланги пересохли, потрескались и при работе подсасывают воздух.
Машина перестает работать, но при этом греется и изнутри доносятся звуки.
Видео: Все ошибки кофемашины Saeco
Все три проблемы могут быть напрямую связаны с жидкостью, которая заливается в контейнер. Фильтр имеет свой ресурс – около 2000 чашек при условии заливки качественной воды. Если пользоваться неочищенной, фильтр выходит из строя намного раньше: 1,5 – 2 месяца.
Пережать шланг способен кусок накипи или песок, оторвавшийся и застрявший в системе.

В этом случае машина выдаст двойную надпись.
Из-за загрязнения или использования непрофессиональных средств очистки силиконовые шланги могут быстрее испортиться. Если в них появится трещина, то помпа будет набирать воздух, а под аппаратом будет лужа воды. Если помпы две, то проверять отдельно придется каждую. Испорченные трубки необходимо заменить, а дальше пользоваться специальными растворами или таблетками, предназначенными для данного типа кофемашин.
Как устранить самостоятельно
При появлении сообщения ventilate на Saeco необходимо нажать кнопку подачи воды и сливать примерно стакан в какую-нибудь емкость, пока не исчезнет надпись. Иногда она появляется при интенсивной работе, когда одновременно готовится кофе и капучино. Процесс проливки занимает время, поэтому лучше устранить причину кардинально и отнести агрегат в сервис.

Там проверят по отдельности всю систему – возможно, где-то прохудились сальники или прокладки – их придется менять, иначе покупная вода будет выливаться зря. Может понадобиться чистка магнитного клапана или бойлера, замена помпы или расходомеров. Если при домашнем обследовании кофемашины обнаружены греющиеся бойлеры, в которых отсутствует вода, то в такой ситуации нужно нести машину в сервис.
Понравилась статья? Поделись с друзьями:

Всем привет!
Меня зовут Денис, и я — руководитель проекта «Напитки.NET». Рад видеть каждого из вас на его страницах. Надеюсь, что статья вам понравилась и оказалась полезной.
Являюсь заядлым любителем кофе и чая. Думаю — вы тоже 🙂 Все предложения, замечания, что ещё бы хотелось увидеть на сайте можно направлять мне ВКонтакте или Telegram (иконки ниже). Всех благ, заходите ещё 😉
По тексту ошибки на дисплее кофемашины Gaggia можно определить вероятную причину неисправности аппарата. Давайте познакомимся с кодами ошибок кофемашин Gaggia и и рекомендациями по их устранению!
| Текст ошибки | Причины неисправности | Рекомендуемые действия |
| BREWUNIT BLOCKED | Вследствие неправильно проведенной декальцинации или засыпки слишком большого объема кофе было заблокировано заварное устройство. | Обратитесь в сервисный центр. |
| BREWUNIT MISSING |
|
Нажмите кнопку «PRESS», извлеките ЗУ и снова вставьте его. |
| CLOSE DOOR |
|
Откройте и закройте сервисную дверцу. Если надпись не исчезает, потребуется ремонт кофемашины. |
| COFFEE BEANS EMPTY |
|
|
| DREGDRAWER FULL | Переполнен лоток для сбора отходов. | При включенном аппарате очистите лоток от отходов и вставьте его на место не ранее чем через 10 секунд. |
| DREGDRAWER MISSING |
|
Установите или переустановите лоток для сбора кофейных отходов. |
| DESCALING | Гидросистема забита накипью. | Выполните процедуру декальцинации. |
| FILL WATERTANK |
|
|
| ENERGY SAVING | Включен режим экономии энергопотребления. | Переведите аппарат рабочий режим. |
| GRINDER BLOCKED | Заблокирована кофемолка. | Необходима разборка и осмотр кофемолки. Обратитесь в сервисный центр. |
| GRINDER BLOCKED | Необходим дренаж системы. |
Налейте полный бак воды и откройте кран подачи горячей воды. После того, как струя воды потечет равномерно, надпись исчезнет. |
Цены на ремонт кофемашин Gaggia
Примерную стоимость ремонта кофемашины можно узнать по тел. +7 (495) 507-7317 или посмотрев в прайс-лист. Точная цена будет известна только после диагностики.
- Печать
Страницы: [1] 2 Вниз

Тема: ошибка VENTILATE на Gaggia Sincrony Compact Digital (Прочитано 26749 раз)
0 Пользователей и 1 Гость просматривают эту тему.
alexandr
После автоматической очитки от накипи» DESCALING FINISHED» и последующей промывки остатков раствора «RINSING FINISHED» высветилось «VENTILATE»(неисправность).При выкл/вкл кофеварки редуктор в заварнике чуть проварачивается на 2-3 мм сначало почасовой,затем против и стаёт в исходное положение,после светится «VENTILATE».Подскажите в чём неисправность.Всё работало,сейчас не идёт горячая вода.

Записан
Это где то у Вас машинка воздуха насосала, вот и ругается, можно воду спустить попробовать через «носик»
Записан
может флуометр тупить(загрязнился) начал,или фильтр воды забился и не даёт нужного обьёма воды.
Записан
alexandr
Очистка от накипи прошла хорошо и ополаскивание от расвора тоже ,машина выдала надпись SELECT PRODUCT READY FOR USE.Нажал кнопку молотого кофе и без кофе нажал на среднюю чашку.Машина сделала бжик-бжик (попытку провернуть редуктор)и выдала VENTILATE. Течи воды нет нигде,а по поводу подсоса воздуха через «носик»надо проверить.Я проливал воду через «носик»сняв с заварника и одел на «носик»штучер и ополоснул систему ещё в такой способ,может и воздух подсосал.Не идёт ни горячая вода ,ни пар.После пара промывка идёт не чётко,выдаёт VENTILATE.
Записан
Засорена гидросистема. Начните проверку от счетчика воды, бойлер, трубки, кран п/в.
Записан
alexandr
Засорена гидросистема. Начните проверку от счетчика воды, бойлер, трубки, кран п/в.
а если ещё раз очистить от накипи,после первой очистки было всё хорошо,а когда начал ещё промывать (2литра пролил горячей воды)то выдало ventilate.Когда добирался до редуктора то от помпы отсоединил один контур воды,наверно тогда и воздух попал,но после ведь работала очистка накипи и промывка и уже была надпись МАШИНА ГОТОВА К РАБОТЕ,но вздумал побольше промыть раствор и на тебе гранату.Так что надо разбирать гидросистему,отсоединять трубки подачи воды???
« Последнее редактирование: Ноябрь 04, 2011, 20:49:20 от alexandr »
Записан
Не стоит спешить раскурочивать всю машину. Для начала отсоедините силиконовые шланги: от танка к счетчику воды (фолоуметру)+от счетчика к помпе. Убедитесь, при помощи легких!, что засор на данном участке гидросистемы отсутствует. А еще результативнее, разобрать фолоуметр (верхняя и нижняя части против часовой стрелки на десять минут). Входное отверстие значительнее уже выходного, а соответственно засоряется чаще.
Если это мероприятие не поможет установить проблему, тогда идем дальше- отсоединим трубку высокого давления от помпы (крепится скобкой), переведем ручку крана «пар-горячая вода» в положение открыто и используя, опять таки легкие!, проверим на предмет засора эту часть магистрали.
Если всеже проблема вскроется на втором этапе диагностики, то дело-дрянь, хотя и это поправимо.
Удачи!!!
Записан
При помощи легких — дунуть ртом в шланг!
Записан
Горжусь тобой моя Россия
так точно, expert, просто «дунуть ртом в шланг», как-то некультурно
Записан
alexandr
:-продул силиконовые и тефлоновые шланги высокого давления,ошибка ушла,машина пишет,что готова к работе.Обнаружил течь в трубке высокого давления,которая идёт от бойлера к «носику» из-под гайки,она с одной стороны,открутил гайку от бойлера,а трубка крепко сидит.Не хочу усердствовать,подскажите как они снимаются,резьбы на них нет вроде,чо просто пасатижами тянуть? ?Как устранить течь???Только замена на новую???
Записан
Записан
Горжусь тобой моя Россия
alexandr
И ещё запускал машину,когда писала она о готовности,но всё равно она не крутит редуктор на подачу(ЗУ не вставлял),опять бжик-бжик по-часовой,затем против,я выше писал.Возможен вариант,что не крутит из-за течи,но машина после запуска выдаёт,что опять готова работать и не пишет никаких ошибок.ГОТОВА К РАБОТЕ,ВЫБЕРИ ПРОДУКТ.Выбираю молотый кофе и 1или2или3 кнопку-чашки.ИИИИ…..Бжик-бжик???
Записан
alexandr
« Последнее редактирование: Ноябрь 07, 2011, 22:58:46 от alexandr »
Записан
Записан
Горжусь тобой моя Россия
Для того что бы отсоединить трубку, аккуратно захватите пассатижами медное кольцо, то что находится под гайкой и соединяется с бойлером в месте сопряжения и попробуйте «сорвать». Но, не хочу расстраивать Вас заранее, но скорее течь не из под трубки, а лопнула резьба на самом бойлере, а в этом случае- замена оного.
« Последнее редактирование: Ноябрь 08, 2011, 08:21:32 от admin »
Записан
- Печать
Страницы: [1] 2 Вверх
Ответ
При появлении такой надписи некоторый клиенты думают, что согласившись на пакет « АРЕНДА КОФЕМАШИНЫ В ОФИС » они полностью обезопасили себя от проблем с не работающей кофе машиной. Конечно, вы правы, по условию договора, ремонт и обслуживание кофемашины входит в нашу часть ответственности. Но порой, «отремонтировать» возможно, в течение пары минут, дав совет по телефону и вам не придется ждать целый день нашего мастера. VENTILATE – надпись, которая в 95% случаях высвечивается на дисплее кофемашины после попадания воздуха в гидросистему. Закончилась вода в контейнере и для удобства вы сняли его с посадочного места – разорвав тем самым контур воды в системе – так воздух и попадает в помпу (насос создающий давление в системе). Для снятия ошибки необходимо провести дренаж системы – пропустить по контуру воду – выгнать воздух. В зависимости от системы кофемашины и происходит дренаж. В моделях с функцией быстрого пара для начала необходимо перевести аппарат в режим подачи воды (как правило, активизируется значок — капелька в символьных или надпись HOT WATER (горячая вода) в диалоговых системах, после чего необходимо открыть кран пара/кипятка или нажать кнопку подачи воды. Пропустив 100-150гр. воды ( за это время счетчик воды вырабатывает необходимое количество импульсов ) что и является для кофемашины сигналом исправности системы.
Категория
|
0 / 0 / 0 Регистрация: 07.01.2007 Сообщений: 252 |
|
|
1 |
|
|
20.09.2017, 12:38. Показов 18237. Ответов 7
Кофемашина Gaggia Titanium SUP027YDR не выполняет команду «Ventilate». Изначально принесли машину с незаконченным циклом промывки. Сдох насос и выбил симистор в модуле. Всё заменил. Машина запросила провести декальцинацию. Всё сделал. Теперь машина пишет произвести дренаж системы «Ventilate» и на кнопку провести дренаж ( та что с двумя капельками) не откликается ни как. После нажатия должно появиться сообщение HOT WATER WARMING UP. Ничего не происходит. Кнопка исправна, проверял от силового модуля. Проверил флоуметр -живой.
0 |

|
Programming Эксперт 94731 / 64177 / 26122 Регистрация: 12.04.2006 Сообщений: 116,782 |
20.09.2017, 12:38 |
|
Ответы с готовыми решениями: кофемашина Gaggia Titanium SUP027YDR, на дисплее только Кофемашина Gaggia Titanium, Надпись на дисплее SKOLJINGSPROGRAM В общем на дисплее пишет вот так в 2-е строки кофемашина Gaggia Titanium, выгорела плата,BREW UNIT BLOCKED Gaggia Titanium горит сообщение BREWUNIT BLOCKED Gaggia Titanium, не работает перколатор. выгорели дорожки 7 |
|
0 / 0 / 0 Регистрация: 21.09.2010 Сообщений: 892 |
|
|
20.09.2017, 14:04 |
2 |
|
как вариант
0 |
|
0 / 0 / 0 Регистрация: 07.01.2007 Сообщений: 252 |
|
|
20.09.2017, 14:37 |
3 |
|
Похоже ничего из этого не подходит. Насос исправен, импульсы с флоуметра отличные, утечек в машине нет. Вода есть, засоров нет. Нет отклика на кнопку промывки
0 |
|
9482 / 559 / 19 Регистрация: 12.04.2006 Сообщений: 11,674 |
|
|
20.09.2017, 14:44 |
4 |
|
Вообще-то Ventilate это значит «воздух в системе». В этом режиме работает только режим горячей воды. Открой краник, для начала, а тогда уже жми на кнопки.
0 |
|
0 / 0 / 0 Регистрация: 21.09.2010 Сообщений: 892 |
|
|
20.09.2017, 14:48 |
5 |
|
Вообще-то Ventilate это значит «воздух в системе». В этом режиме работает только режим горячей воды. Открой краник, для начала, а тогда уже жми на кнопки. думаешь ,так всё запущено)))
0 |
|
0 / 0 / 0 Регистрация: 07.01.2007 Сообщений: 252 |
|
|
20.09.2017, 15:04 |
6 |
|
Всё проделано много раз, и с открыты краном и с закрытым. По инструкции нужно на жать на кнопочку «две капельки», появится другое сообщение на дисплее, а потом отрыть кран. После нажатия ничего не изменяется.
0 |
|
9482 / 559 / 19 Регистрация: 12.04.2006 Сообщений: 11,674 |
|
|
20.09.2017, 15:11 |
7 |
|
Другое сообщение появится только тогда когда через фловметр пройдут импульсы. До этого он просто должен прокачать воду через канал горячей воды. Надпись остаётся Ventilate до тех пор пока он почует что вода в канале уже есть. По импульсам.
0 |
|
0 / 0 / 0 Регистрация: 07.01.2007 Сообщений: 252 |
|
|
20.09.2017, 15:12 |
8 |
|
Alexx ТЫ ВОЛШЕБНИК!!! Сначала нужно открыть кран а потом нажать кнопку. В инструкции чёрным по белому написано. Направьте трубку подачи пара горячей воды (14) на поднос (12).Поместите чашку или другую
0 |
Gaggia Titanium

Set-Up & Use

Cleaning & Maintenance

Troubleshooting

Diagrams & Manuals
- Coffee Tastes Bad
- Frothing Difficulty
- Flow Issues
- Leaking Machine
- No Heat or Power
- Steaming Issues
- Brew Unit Blocked Or Stuck
- Brew Unit Squeaking
- No Beans, Grinder Blocked, Or E01 Error Code
- Screen Flashing
- Machine Stuck In Rinsing
- Cracked Cover
- Refill Water Tank Message Won’t Clear
- Part Fell Off The Brew Unit
No Crema or Bad Tasting Shots
Typically, issues with crema or the flavor of the shot do not indicate a malfunction of the machine. Instead, this indicates that an adjustment needs to be made in the brewing process or that different beans need to be used.
The type of bean that is being used is particularly important for super-automatic machines, because the built in burr grinders only accept certain types of beans. Another consideration is the roast of the bean, which greatly influences how much crema can be produced, as well as the flavor of the shot. Super-automatic machines are not compatible with oily, caramelized, or flavored beans. Properly stored and recently roasted beans are best. You can find more information on why bean selection and storage is important for super-automatic machines by watching the video below.
5 Things New Super Automatic Espresso Machine Owners Should Know
Appropriately adjusting the grinder is also important. Poor shots can also be the result of incorrect grind settings.
- If the shot is too bitter:
- The grind is set too fine. Try adjusting the grind to a coarser setting, typically indicated by a large dot symbol or higher number.
- If applicable, the aroma setting is set too high. Lower the aroma setting so that less coffee is ground per shot.
- The beans being used are over-roasted, and a lighter roast is needed.
- If the shot is too sour or weak tasting:
- The grind is set too coarse. Try adjusting the grind to a finer setting, indicated by a lower number. Whenever moving the grind to a finer setting it is important to make minor adjustments, and to only adjust the grinder while in operation.
- If there is little crema:
- The beans are probably stale and fresher beans need to be used.
- The grind setting does not match the drink that is being made. Smaller drinks such as an espresso require finer grind size; larger drinks such as a longo require a coarser grind.
- Oily or dark roasted beans are being used. These beans are not compatible with the unit, and are not suitable for espresso brewing. The oils and chemicals that are needed to produce a rich crema have been roasted out of the bean. Switch to a drier/lighter roast.
- Keep the machine properly cleaned and maintained for good tasting shots. Your grinder may need to be cleaned or calibrated, or you may need to descale your machine to remove any unwanted residues or flavors.
Difficulty Frothing
As with brewing, frothing is highly dependent on technique. If the machine is producing steam then an adjustment to technique may need to be made. Frothing is very sensitive to technique, so there is a steep learning curve. The video below shows proper frothing technique:

How to Froth with a Pannarello Wand
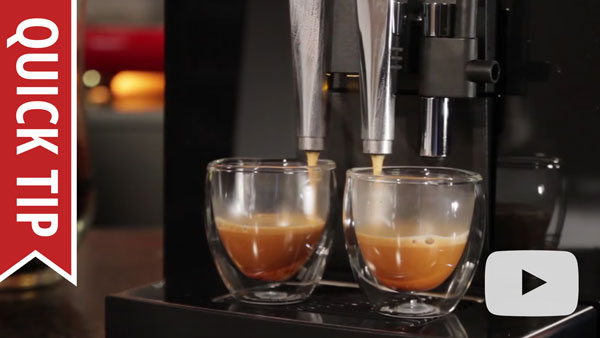
There are also common frothing mistakes which are made that will result in poor or no froth. The video below identifies these mistakes and shows how to correct them:

Quick Tip: Six Common Milk Frothing Mistakes
This machine also utilizes a special nozzle attachment called a pannarello. The pannarello nozzle needs to be regularly cleaned and properly attached to the machine in order to function. The video below reviews how to attach the pannarello properly. When disassembling the pannarello please make sure all of the separate pieces shown in the video are present. The pannarello should be taken apart frequently and the separate parts should be soaked in some hot water to help remove any built-up milk residues.

How to Attach a Pannarello Wand
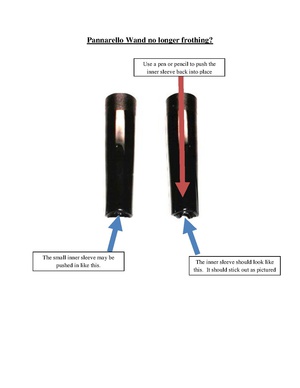
Inside the tube of the pannarello nozzle there should be a plastic insert which must be present in order for this nozzle attachment to work. If this insert is missing or improperly inserted the machine will not be able to create froth. Please check the position of this insert as shown in this troubleshooting document:
Alternatively you can try frothing on the machine without the pannarello attachment. The naked wand can also produce a tight microfoam, and is preferred by some users. The major disadvantage of frothing with the naked wand is that it reduces the length of the steam wand by several inches.
Flow Issues
The first place to start with any flow issue is cleaning the machine. Before going through these steps please make sure the machine is cleaned according to the Cleaning & Maintenance section of this article.
Poor Or No Flow Or E05 Error
If you are not able to get water to flow through the machine at all, or if the machine displays an E05 code, then something is blocking water flow through the machine. This issue typically indicates the machine is not being cleaned on a regular basis. Review the cleaning & maintenance rundown for this machine, and make sure maintenance is done at least as often as is suggested with the recommended product. Once flow is restored, even if it is minimal flow, a descaling should be done immediately.
- The water tank is not seating properly. Please remove the tank and reinsert it firmly. Make sure there are no beans or debris beneath the water tank preventing it from seating flush with the machine.
- If you are using an Intenza water filter in the machine then it might be blocking the flow of water. Try removing the water filter and using the machine without it. If the machine works without the water filter, then the filter was blocking the flow of water. Keep the filter out of the machine for the remaining steps.
- Debris has been drawn into the system from the water tank. This kind of debris can get lodged in valves/water circuits and cause flow issues.
- Try cleaning the brew unit check valve using the instructions here.
- If you have been able to restore some flow to the brew circuit, a brew unit cleaning cycle should be completed. The process can be found on pp. 49 of the machine manual.
- The machine may require a manual prime.
No Flow From Steam Wand
Once the flow issue has been resolved the machine should be immediately descaled with the recommended product. Flow issues and blockages are typically due to lack of maintenance or excessive scale buildup.
- First remove any attachments on the wand and set the machine to hot water mode.
- Once the pump is activated turn the steam knob to the steaming position. The pump will start to vibrate and hot water should begin to flow through the wand.
- If hot water does flow through the wand stop the machine from dispensing hot water and switch the wand to steam mode to test for flow. There may have been a piece of debris in the steam wand blocking the flow of water.
- If water does not flow through the wand then there may be a more severe blockage. Proceed to the next step.
- Soak the wand in a mixture of descaler and hot water. Test flow using the hot water function again.
- Use a pipe cleaner to manually clean the inside of the wand. Only use a pipe cleaner with synthetic or plastic bristles; do not use one with metal bristles as it can damage the wand. Test the flow again.
- If none of these cleanings have resolve the behavior then there is an internal blockage, or the steam thermostat has failed. The machine will require a repair.
Reduced Or No Flow During Brewing
- If there is no flow while brewing specifically, then something is blocked along the brew circuit. Begin by running a descale of the machine using the recommended product. Scale buildup is the most common cause of flow issues. Descaling will most likely resolve the issue.
- If the machine is set to a really fine grind, the grinds can block the flow. Set the grind to a coarser setting and see if flow is restored. Leave the grind on the coarse setting for the remainder of flow testing.
- There may be an issue with the brew unit.
- First remove the unit and rinse it off with cold water. Do not use any sort of detergent or soap to rinse it off or necessary lubricant will be removed.
- Wipe down the brew unit chamber with a damp cloth to remove any leftover grounds. A microfiber cloth is best, to prevent any cloth fibers from remaining behind.
- Clean the check-valve.Instructions to follow can be found here.
- Reinsert the brew unit and test for flow.
- This machine allows beverage length to be reprogrammed. Make sure it isn’t set to the minimum brew length. If the machine is programmed to the minimum beverage length the machine may not dispense any coffee, or it may only dispense a few drops. Try reprogramming the machine to a longer length drink to see if it resolves the no flow issue.
- Check the brew unit to make sure it is lining up with the spout assembly and connecting with the spout assembly properly.
- If you are noticing a lot of brewed coffee or coffee sprayed inside the brew unit chamber then the brew unit o-ring may be damaged or out of place.
- Remove the brew unit and inspect the large red o-ring attached to the tamping assembly. Make sure it is clean, properly positioned, and not damaged.
- If the o-ring is broken or damaged it should be replaced. A brew unit o-ring can be purchased here.
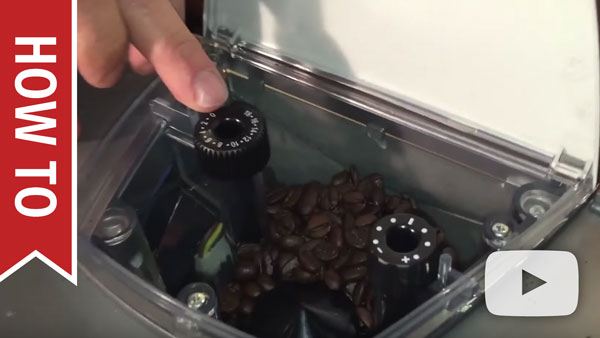
- Your machine features an e-plus dial which may be blocked. Try brewing a shot and while the pump is activated turn the e-plus dial back and forth. This may clear up the blockage and restore flow. E-plus dial is pictured right.
- The dispensing spout may be blocked. Try very gently cleaning the dispensing spout holes with a toothpick to remove any blockages.
Have Flow But Getting No Flow Error
In some situations, you will be able to get flow through the machine for all functions, but the machine thinks there is no water flowing through. There is a device in the machine called a flow meter, and it tells the machine when water is flowing through or not. The device operates by having small fan-like blades spin when water passes through it. If those blades get stuck from excessive scale buildup or debris, then they will not spin. As a result, even though water is flowing through the machine, you will get a flow error.
If your machine uses a water filter, temporarily remove it from the water tank and add the recommended descaling product to the water tank. The descaler needs to work its way into the system to start dissolving the scale buildup in the flow meter. You may have to keep restarting the machine so that it can keep attempting to prime, which will draw the descaler/water solution into the system. If at any point you are able to clear the flow message then you will want to do an immediate descale of the machine. After you have descaled, run 4-5 tanks of plain water through the hot water function for the wand in order to ensure the system is completely free of debris.
Ventilate Message Won’t Clear
If the machine keeps giving a ventilate error it could be from significant scale buildup inside the machine, or a vapor lock in the pump. The video below will show you how to clear the ventilate message if the pump is vapor locked.

Ventilating the Gaggia Titanium
Machine Is Leaking
From The Bottom
- Check the internal drip tray and make sure it is not overfilling. If the drip tray full indicator came on, and the trip tray was removed and reinserted but never emptied, it will reset the machine sensor and possibly result in the tray overflowing.
- If the machine only leaks while the water tank is attached, but is properly inserted, then the intake line may be broken or disconnected. This will require a repair.
- If leaking only occurs while the machine’s pump is activated then the drain area of the machine may be blocked. The drain area relieves excess water from the brewing process and should be cleaned regularly. Use these instructions to clean the drain area.
- If this does not resolve the leaking, then the leaking may be coming from an internal component and the machine should be repaired.
From The Back
- The leaking is coming from the water tank. If the water tank is not positioned properly it can cause water to continuously drain from the tank, even while the machine is turned off. This happens when the water tank is inserted far enough to open the release valve, but not far enough to seal with the intake line. This water can leak out from the water tank and end up on the bottom of the machine. This particular issue is usually indicated by lots of clear water leaking between the tank and the machine, and then leaking down the back side of the machine.
- Remove the water tank and make sure there isn’t anything, such as coffee beans, which could be blocking the tank from seating properly.
- Firmly reinsert the tank into the machine and press firmly on it to make sure it creates a good seal with the intake line.
- The grommet which seals the tank to the intake line is broken, dirty, or out of place. Remove the grommet, clean it off and inspect it for damage, and then reseat it into the machine. If reseating the grommet does not fix the leak then the grommet will need to be replaced. This document explains how to access the grommet and replace it.
From The Wand
If the steam wand is leaking while the machine is on and/or brewing, the steam valve is open inside the machine. It is likely that scale has built up inside the valve, and the buildup is holding the valve open. Try the following to resolve the leak:
- First begin by descaling the machine using the recommended descaling product.
- After descaling flush 4-5 tanks of plain water through the system using the hot water function for the steam wand. This will ensure any debris or scale buildup the descaling loosened is fully removed.
- If this does not work then the machine should be sent in for repair since the steam valve may need to be replaced.
Machine Not Heating Or Powering On
No Power
- Make sure the machine is plugged into an appropriate power source.
- Do not use the machine on a surge protector. This machine has a high power draw, more than a typical kitchen appliance such as a refrigerator or a microwave. Surge protectors are typically not rated to handle the amperage this machine requires.
- Make sure the power cord is firmly inserted into the power socket on the machine.
- Try using the machine on a different outlet, and make sure the machine is the only appliance plugged into that outlet.
- Try testing another appliance on the same outlet.
- Make sure the power switches are functioning properly and not broken. If the machine isn’t powering on try pressing and holding the power button in the on position to see if the machine turns on. If you are able to power the machine on this way then the power switch needs to be replaced.
- If the machine recently had a leak, had water spilled on it, or any other exposure to moisture then the machine may be shorting out. Try letting the machine sit unplugged for 48 hours to make sure there isn’t a short caused by moisture.
No Or Little Steam
- If you are getting no or little steam then there may just be a blockage in the steam circuit. Do the cleanings suggested in the section of this article which discusses steam wand blockages.
- Check the steam knob to make sure it is correctly positioned. If the knob spins in place and doesn’t reach a stopping point then the knob may be broken, or something is disconnected in the steam valve assembly.
- Make sure to give the machine sufficient time to heat up. Even a machine that uses a rapid steam boiler will still take thirty seconds to a minute to be fully heated.
- Make sure that you are purging the steam line before frothing. Purging is an important process for any machine that has a steam wand. Since the steam leaving the boiler hits the cold room temperature wand it is going to condense back into water. Wait until there is mostly steam coming out of the wand and then close the knob. You are now ready to steam with the machine now that the line has been purged.
- If the cleanings haven’t worked and there is still no steam then the machine may have a bad thermostat and it will require a repair.
Cold Shots or E14 Error
- If the machine is producing shots that are hot, but you would like them to be hotter, check the beverage programming menu. Make sure all of the drinks are set to brew at the highest temperature.
- Make sure you are using a preheated cup. Ceramic cups will sap a lot of heat from the shot resulting in a colder shot. Preheating the cups using the machine’s hot water function will allow the cup a great deal more heat. Alternatively, you can brew into a paper, styrofoam, or other well insulated cup. This video explains the importance of a pre-heated cup during espresso brewing:
- If the shots are completely cold, or the machine is displaying an E14 error code, then there is a thermostat issue. Try restarting the machine to resolve the issue. If the error code continues to appear, then the thermostat is damaged and the machine will need to be repaired.
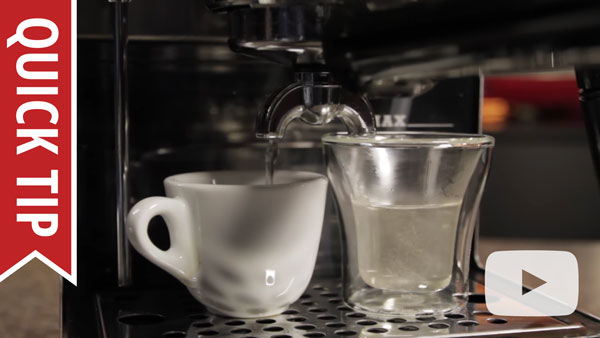
Brew Temperature Comparison: Pre-heated vs. Room Temp Espresso Cups
Steaming Issues
Loose Steam Wand
If the steam wand is loose and falls down easily when raised then there is just a loose clip in the machine that needs to be tightened. The video below shows how to fix this.
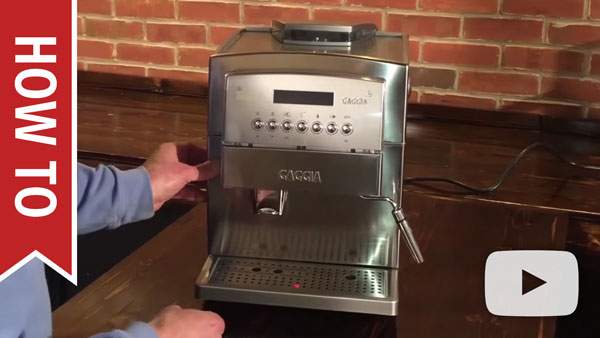
How To Fix a Loose Steam Wand on a Gaggia Titanium
Steam Won’t Activate, Steam Knob Loose or Spinning
If your machine won’t activate the steam or hot water functions when you turn the knob then the knob is probably misaligned. The video below shows how to get the knob correctly positioned again. This video will also help fix knobs that spin in place without stopping, or knobs that feel particularly loose.
How To Fix a Gaggia Titanium Steam Knob
Too Much Steam/Milk Boiling
If you think your wand is producing too much steam, or your milk looks like it is boiling, then you may need to make an adjustment to your frothing technique. Boiling milk, or milk that is getting to hot before frothing is completed is an indication that incorrect frothing technique is being used. Review the section of this article that addresses frothing difficulties for more information.
If you have tried adjusting your technique and the wand still appears to be producing too much steam, then a steam test should be completed. Follow these instructions to perform a steam test.
If the machine is within the specified steam test range, then the machine is producing the correct amount of steam and an adjustment to frothing technique is necessary. Using a carafe that is chilled in a freezer before frothing is helpful for keeping the milk cooler for longer, allowing for more time to froth before the milk begins to scald.
Brew Unit Blocked Or Stuck
The machine is sensing that the brew unit motor is working too hard to engage the brew unit. This is a fail-safe built into the machine to prevent itself from damaging the brew unit; the machine will stop working and display an error. This issue is typically resolved through normal maintenance.
-
- First restart the machine to clear the error message and reset the brew unit back to the home position so that it can be removed. If the machine is in an active rinse cycle do not try to remove the brew unit. The rinse cycle must be completed before the brew unit can be removed.
- Try running a blank bypass shot. To do this just run a normal bypass shot but do not add any coffee. You should just have plain water come out of the spouts. If the machine successfully completes this cycle then we know it’s a coffee issue. Refer to the section of this article that discusses grinding issues.
- If this happened when you were using the bypass function specifically, then you may have added too much pre-ground coffee. The machine only accepts about a maximum of 8-9 grams per shot. The scoop that comes with the machine doses more than this. To make sure you are adding the appropriate amount take one level scoop of pre-ground coffee and remove a large pinch from it. This should about about 8 grams of coffee and should work in the machine.
How to Remove Stuck Brew Group
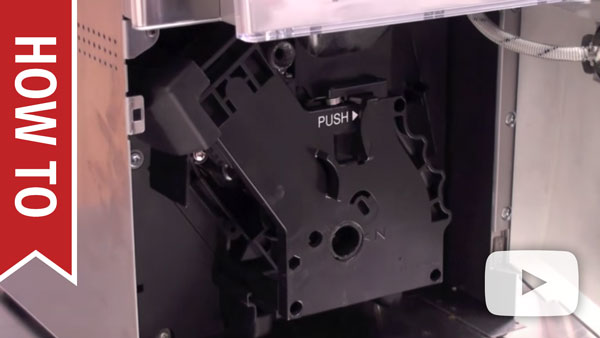
- When the machine indicates that it is ready for use open the door to the brew unit chamber.
-
- Try removing the brew unit. If the brew unit does not come out easily, do not force it out. The brew unit is stuck in an engaged position and will need to be properly reset. Forcing it out of the machine can break the brew unit and possibly cause damage other parts of the machine. Follow the instructions in the video below to reset the brew unit before moving on to the next step. If the brew unit won’t reset to the home position, the motor that manipulates the brew unit may be damaged, and the machine may require a repair.
- If the brew unit is easily removed then rinse it off with cold water and let it dry.
- The brew unit will need to be cleaned and lubricated.
- Reinsert the brew unit into the machine and try brewing a shot.
My Brew Unit is Squeaking While Brewing or Rinsing
If you hear a squeaking sound while brewing or rinsing, your brew unit o-ring likely needs to be lubricated. In some cases, your brew unit o-ring may need to be replaced. You can use Gaggia Food-Safe Lubricant or petroleum gel, such as Vaseline to lubricate the o-ring. Only a little bit of lubricant is needed.
The brew unit brews, as the name suggests, but, just as importantly, it’s also responsible for tamping ground coffee into a consistent puck. Inside the unit are two tracks which should be lubricated every six months or so for best results in the cup. Watch the video on the right to get the low down on food safe lubricant and how to keep the brew unit functioning smoothly.
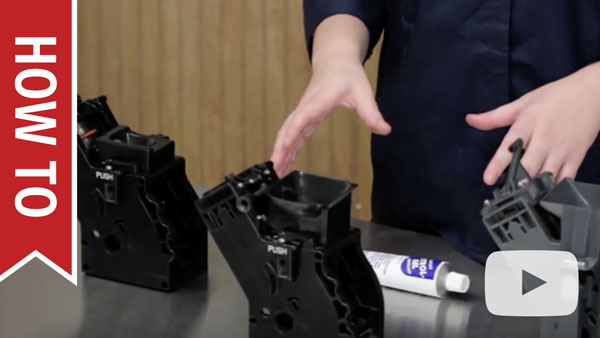
Espresso Machine Maintenance — How To Lubricate A Brew Unit
No Beans, Grinder Blocked, Or E01 Error Code
The grinder may be blocked. This typically happens if beans are being used that are not compatible with the machine. This machine does not accept oily, caramelized, or flavored beans. Use of these beans can cause permanent damage to the machine that is not covered under warranty. These beans can be identified easily. They will be shiny and feel slippery or sticky. Dry beans that are appropriate for the machine will look dull and feel rough.
How To Clean and Calibrate a Gaggia Titanium Grinder
- Do the cleaning and calibration instructions in this video.
- After reassembling the machine according to these instructions do not add beans in. First make sure the grinder adjustment knob is set to the coarsest setting, which is the 18 setting. Make sure not to do this until the grinder assembly is fully assembly. If you set the grind coarseness to 18 while reinstalling the hopper it will throw the grinder out of calibration and the cleaning and calibration instructions will need to be done again.
- Add beans back into the machine. The beans must be dry, do not add oily beans back into the unit.
- If this clears the no beans error and shots are pulling successfully on this grind setting then you can move the grind back to the original setting. Only move the knob a few numbers at a time, and only while the grinder is running. To do this press one of the drink options to start a shot, and then when the grinder turns on make the adjustment.
- If this does not clear the no beans error, there is no sensor on the grinder to communicate to the control board that the machine is out of beans like on other Gaggia machines, so the issue is likely that the microswitch at the trap door is not being activate. There are a few reasons the microswitch may not be activating:
- The beans being used in the machine are not the correct type. If the beans are a dark roast that are shiny in appearance, the oils from the beans could be preventing the microswitch and trap door from operating properly
- The burrs in the grinder could be worn out or broken
- The trap door may be stuck
- The microswitch may have failed
- The control board may not be functioning properly
- To test to see whether or not the microswitch is being activated, select one of the three buttons to brew a coffee. As soon as the machine begins grinding, turn the dose knob, which goes from plus to minus to a lower (minus) setting. This will draw the trap door into the grinds that are stuck in the chute, which should activate the microswitch. If it does, then the issue is a stuck door or malfunctioning microswitch.
- If the machine successfully completes the brewing cycle, try performing another brewing cycle with the dosing knob still on the lower setting. If the machine successfully brews again, try increasing the dose amount. If the machine brews successfully again, the trap door was likely just stuck, and the issue is likely resolved.
- If the issue comes back, first try manually and thoroughly cleaning the trap door area. If this does not resolve the issue, the burrs should be replaced.
Screen Flashing
If the screen of the machine is flashing then there is a short somewhere inside the machine. If the machine experienced a leak recently, or something was spilled on the machine, it can cause the machine to short out. In any case, a flashing screen indicates that the control board or TAP card has gone bad, and a repair will be necessary.
Machine Stuck In Rinsing
There are two separate rinsing cycles on this machine. There is a short rinse cycle that occurs when the machine is starting up, but there is also a formal cleaning rinse cycle. This cleaning rinse cycle is a forced maintenance and the machine cannot exit out of this function. The only way to complete this rinse cycle is to run the full cycle, which can take anywhere from 1-2 hours depending on how well water is flowing through the machine.
While the machine is in this rinse cycle DO NOT attempt to remove any of the internal machine components. Removal of these components can damage the machine. Also do not press any buttons or turn the machine on/off. If any buttons are pressed, or the machine is cycled on/off, it will reset the current rinse cycle and then add another rinse cycle to the queue.
To avoid accidental activation of this rinse cycle be careful not to hold the water droplet button down. Please be aware that certain menu options in the machine menu will activate a rinse cycle by default.
Cracked Cover
A frequent complaint on this unit is that the faceplate is cracked. The cracks referred to appear above each button. These are actually not cracks but intentional slits in the plastic that appear on every Gaggia Titanium unit to prevent cracks from forming. Since the faceplate of the machine is curved, pressure put on it from pressing on the buttons frequently could cause a crack. The splits help redistribute the pressure to prevent that from happening.
Refill Water Tank Message Won’t Clear
If the refill water tank message won’t clear then there is likely an issue with the water tank magnet or water tank magnet sensor.
- Make sure the water tank is completely filled.
- The tank magnet may not be floating.
- Remove the water tank from the machine, keep it filled.
- Look at the side of the tank that normally faces the machine.
- At the bottom left corner of the inside of the tank will be a small chamber with a grey rectangular plastic box in it. This is the float magnet. When the tank is filled it should be floating at the top of the chamber. If it is sunk to the bottom then it will need to be replaced. A replacement float magnet can be purchased here.
- The tank magnet is in the wrong direction.
- If the tank magnet is floating but the machine still can’t sense that the tank is filled then the float may be in the wrong direction.
- Empty the water from the tank.
- Remove the black rubber cap from the top of the float chamber. The cap just pulls off and pushes back on.
- Check to make sure the magnet is oriented correctly. The flat side of the magnet should face upwards and the side with curved edges should face downward.
- After the magnet is inserted in the correct direction replace the rubber cap on the float chamber, refill the water tank, and check the machine to see if it recognizes the tank is filled.
- The tank magnet has lost its magnetism.
- Take another magnet, like a refrigerator magnet, and see if it is attracted to the tank magnet.
- You can also use the refrigerator magnet to test the float magnet sensor. Place the refrigerator magnet on the back of the machine about where the float magnet would normally sit. If this clears the fill water tank message then the float magnet has gone bad and needs to be replaced. A replacement can be purchase here. If the machine is still not clearing the message when you do this then the float magnet sensor is broken or disconnected and the machine will need to be repaired.
Part Fell Off The Brew Unit
Older versions of the Titanium featured a splash guard on the brew unit, to reduce the amount of coffee sprayed inside the brew unit chamber. This part is removable, and is frequently mistaken for a broken part. The splash guard simply slides on and off the top of the brew unit. This part is not necessary for the function of the machine and is no longer included with new Titaniums.
-
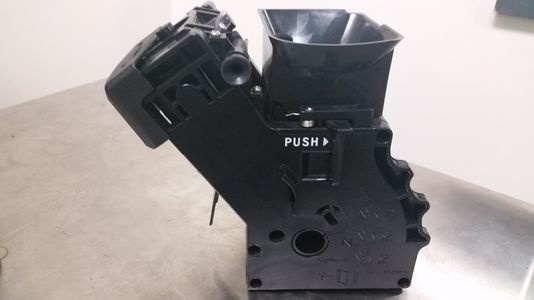
Brew unit with the splash guard attached.
-
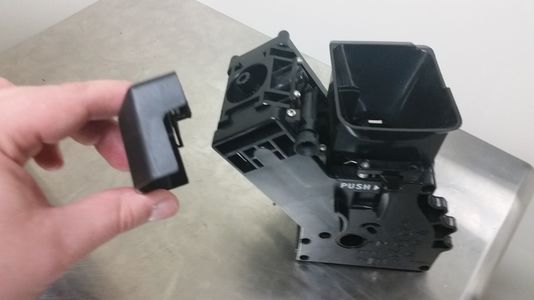
Brew unit with the splash guard removed.