What can be more frustrating than to be slapped with an error code while upgrading the BIOS? I know your pain as I was in your shoes once.
As a lifelong user of Gigabyte motherboards for multiple years on different platforms, I know how to fix the error more elegantly and effortlessly.
In this article, I’m going to help you with only two questions, why this error occurs and how to solve it.
Sounds fair? Let’s get to the first question. Why does Gigabyte BIOS Id check error happen?
The primary reason behind this blunder is installing the wrong BIOS version. Other than that, a corrupted BIOS file that you have downloaded, a bad internet connection, and a non-bootable drive containing media files also can be responsible for BIOS error.
So, which one is causing you all the trouble? Continue reading to find out.
Check out our separate post: What is SVM mode in BIOS
What Causes BIOS ID Error?
The BIOS is the prime source of your operating system. So, any improper implementation of settings would likely fail the BIOS. Connectivity issues or downloading a corrupted update may also cause BIOS errors. I have shortlisted some common reasons behind the id check error in this part. Determine which one is causing you the hassle and follow the measures accordingly.
Here are the possible reasons behind BIOS Id error:
- Corrupted BIOS version: In order to upgrade BIOS, you need to download the latest available version from the internet. If that downloaded variant is corrupted, then there is a possibility that your screen will show a BIOS id error.
- Terrible Internet Connection; Another reason behind the id check error can be an awful internet connection. Imagine downloading an update with several disconnectivity. The fact that it kills your time and some parts of the downloaded file can get corrupted easily. This will undoubtedly lead to a BIOS error.
- Installing Existing Update: Have you ever tried updating the BIOS version before this time? If yes, then there is a possibility that you have already installed the latest version and you are trying to do that again. In that case, your computer might notify this as an Id check error.
- Mismatched BIOS Version: Are you sure that the edition you are downloading does match exactly with your motherboard? Most of the time, downloading the mismatched version of BIOS creates this issue. You can consider this as the main reason behind the BIOS id check error.
- Failed Devices: It is not so common a reason but still possible that failed USB drivers, broken Hard drives can lead you to this horrific problem. If you have recently installed new hardware on your computer and after that, the error appears, then it’s because of the recent hardware changes.
These are the most possible causes behind your computer’s ID check error, and finding the exact one will help you to solve the issue.
Don’t you know how to solve the error? No worries, I’m here to guide you. Just read the following chapters, and you are going to solve the issue effortlessly.
Follow our guide to Fix keyboard not working in BIOS
How to Solve BIOS ID Check Error
There are plenty of fixes available throughout the web. Most of them are temporary solutions. But, in this document, I’ll be explaining the advanced procedures that will permanently disappear the BIOS error.
This might be a little tricky, but as I am here to help, I’ll explain it in an adequate method.
So, without bushing around, let’s make your system workable.
Go through our epic guide: Is SSD Compatible with All Motherboards
Here are the steps to fix the BIOS ID error:
First Method: Reset BIOS to Default
Resetting BIOS to default settings helps the system to get over compatibility issues. BIOS returns to the last saved configuration if you complete the action, and most of the error messages get solved automatically.
You can reset BIOS either by getting into the boot menu or reinstalling the CMOS battery. I’m explaining both so that you can choose whichever seems easy.
You may also like to read: Will motherboard boot without CMOS battery
Reinstall CMOS: You can reinstall CMOS by following these steps:
- Shut down the computer and remove power cables.
- Locate a small, silver-colored battery on your motherboard.
- Remove the battery for 5-10 minutes and put it back on.
- Close the computer casing.
Your BIOS settings will be default if you follow these steps. Or you can do it manually by getting into the boot menu.
Quickly check out our epic guide on how to fix CPU fan not detected in BIOS
Boot menu settings: You can perform the following steps>
- Press F2 / Delete while booting up the pc to enter the boot menu.
- Press F9 to set the BIOS settings to default.
- Go to the last tab and select Save & Exit.
Restart the computer to complete the process.
These are the proper ways to reset BIOS settings to default. Once you complete either one of these processes, check if the BIOS id error has been resolved or not.
If not, apply the next method precisely as I explain.
You may check out the easiest way to gateway BIOS updates
Second Method: Update BIOS Properly
The most probable reason behind the BIOS id error is updating a version that is not particularly made for your motherboard. That happens when you download without being sure about the BIOS model.
In this method, I am going to teach you how you can get proper BIOS information and install it in a more efficient way.
Here’s the method to check BIOS version:
- Type cmd on your windows search box.
- Right click on the result and select Run as administrator from the list.
- Type this command wmic bios get smbiosbiosversion and press Enter.
The command prompt will show the current BIOS version of your motherboard. Download the latest version from the motherboard’s manufacturer website and follow the installation process.
NOTE: Before installing, remember that, while flashing the BIOS, if the power goes away, you will face more trouble than you are in right now. It can even fail your motherboard. So, try to get an alternative power source like UPS and then proceed.
Also, check our exclusive tutorial on BIOS not detecting USB
How to Install the Files
At this point, I can assume you’ve downloaded the exact BIOS file, and you’re ready to move further. Now you only need to install the files.
Here’s how you flash the BIOS properly:
- Insert an empty USB flash drive into your computer.
- Extract the downloaded files onto the flash drive. Note down the name of the update file exactly as it is named.
- Restart the computer after copying. And press F2 to enter the boot menu.
- Change the Primary Boot Device to the attached USB drive.
- Press F10 to save changes and exit to reboot the computer.
- Wait for a moment for the Command Prompt to appear on display.
- Type the name of BIOS files that you took a note of.
- Press Enter to begin the process and press the Y key to confirm the process.
That’s a lot to do, right? Trust me; this is by far the simplest yet workable solution you can find. Don’t hesitate to perform the action. Just do it and see the result.
Pro tip: Don’t install the update if there’s a b on the file name. Like “ U1b.exe,” That b means beta version. They are most likely bugged and problematic to install. Bonus tip: Before extracting the files to the USB, make sure it is formatted as FAT32. The other formats prevent updating efficiently. That problem happened to me.
Check out our separate post on how to Fix motherboard HDMI no signal
Conclusion
The very last thing I would like to add is you must be careful with the downloading process. I have said earlier and I am repeating again, Match the BIOS model and the downloaded version character by character.
Did that already? Well, do it for the last time and proceed to install. In this manner, the solution will work properly.
If you are at this point of the article and read every word I have put there, I can ensure you that you will be able to solve the BIOS id error all by yourself, and you won’t feel a slight complication doing that.
Then again, If you face any difficulties solving the issue, feel free to comment below, and I’ll solve them as soon as possible.

Почему появляется BIOS id Check Error при обновлении Bios?
С данной ошибкой можно столкнуться в процессе обновления прошивки BIOS на материнских платах Gigabyte. Появляется она после выбора файла обновления в стандартной утилите Q-Flash. В данной статье мы рассмотрим возможные варианты устранения этой ошибки, а также способы ее обхода для удачного обновления BIOS.
Из-за чего может появляться ошибка?
BIOS id Check Error говорит о том, что проверка идентификатора BIOS не пройдена. Другими словами – этот BIOS, который Вы пытаетесь прошить, несовместим с материнской платой.
Итак, первое, что Вам стоит знать для успешного обновления BIOS через утилиту Q-Flash – флешка, на которую вы сбрасываете файл обновления, должна быть отформатирована в системе Fat32.
Далее проверяем все пункты, описанные ниже.
Соответствие BIOS вашей материнской плате
Как бы банально это не звучало, но достаточно часто пользователи неправильно определяют модель своей материнской платы и как следствие, скачивают неподходящий BIOS.
Поэтому внимательно сверьте модель своей мат.платы с той, для которой вы скачиваете BIOS. Соответствие должно быть полным! Вплоть до последней цифры и буквы!
Промежуточное обновление
Бывает так, что если между той версией BIOS, которая у Вас установлена, и той, которую вы пытаетесь установить, выходили промежуточные обновления, сперва следует установить их.
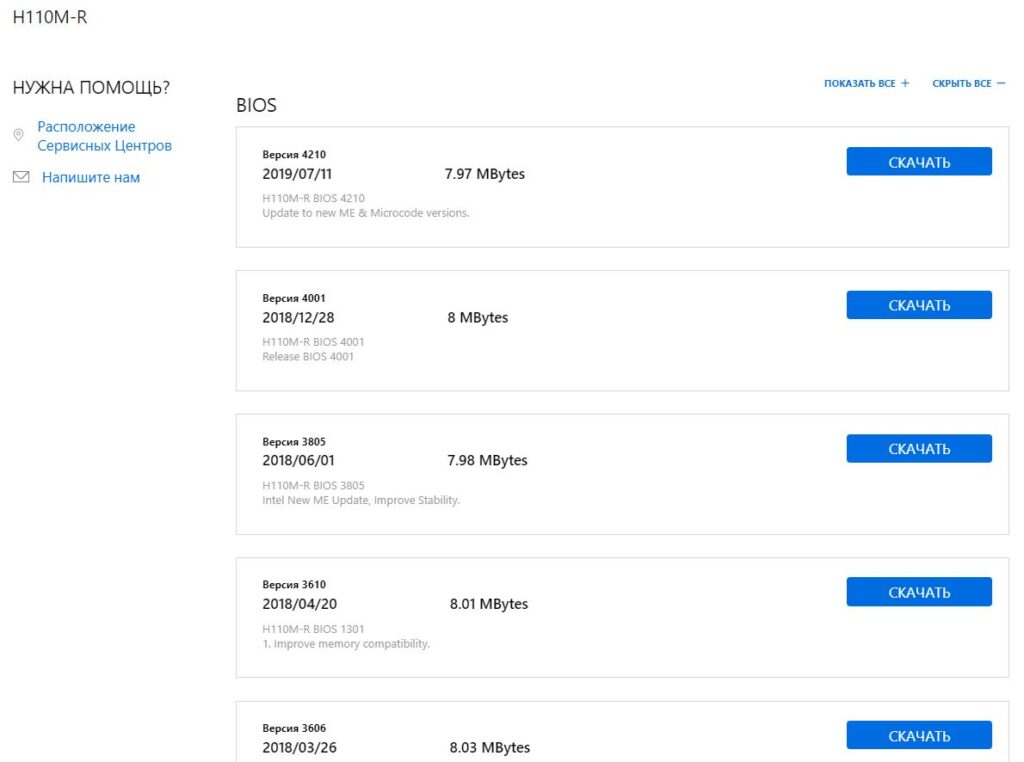
Разнообразие версий BIOS
К примеру, на Вашей плате стоит BIOS версии 1a, установить Вы пытаетесь версию 3c, а между ними были еще 1b, 2a, 2c и 3b, то при возникновении ошибки BIOS id Check Error перед установкой версии 3c попробуйте поставить 1b или 2a, а после успешной установки уже версию 3c.
Использование утилиты @bios
На сайте Gigabyte в разделе поддержки есть ссылка на скачивание утилиты @BIOS. Она позволяет легко и быстро обновить BIOS прямо из-под Windows.
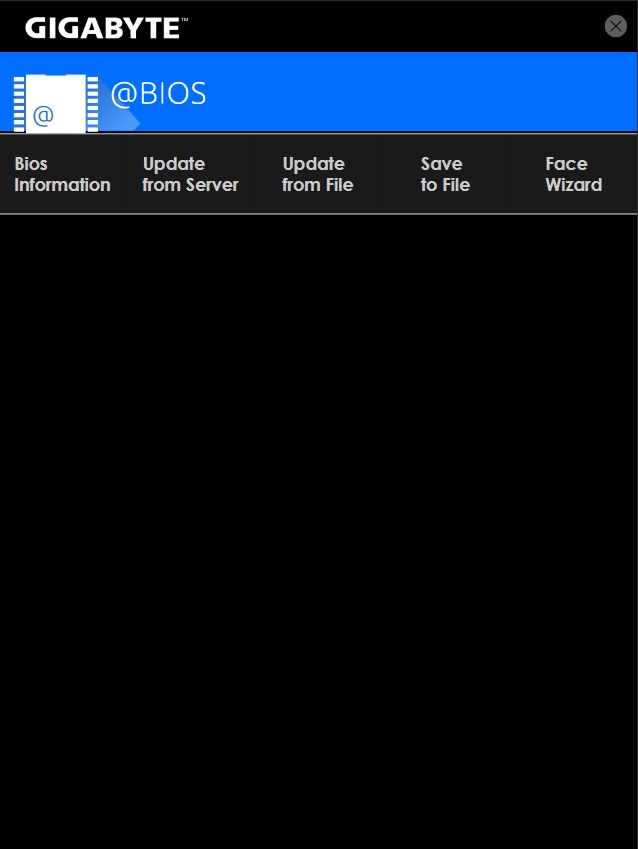
Утилита @BIOS
Поэтому при возникновении проблем с обновлением BIOS утилитой Q-Flash можно попробовать @BIOS.
Прошивка программатором
Если ничего из вышеперечисленного не помогло и обновить BIOS все равно не получилось, то остается лишь один вариант – прошивка программатором. Но для этого потребуется снятие флешки BIOS с мат. платы, а также специальный программатор. Доверить это лучше сервисному центру.
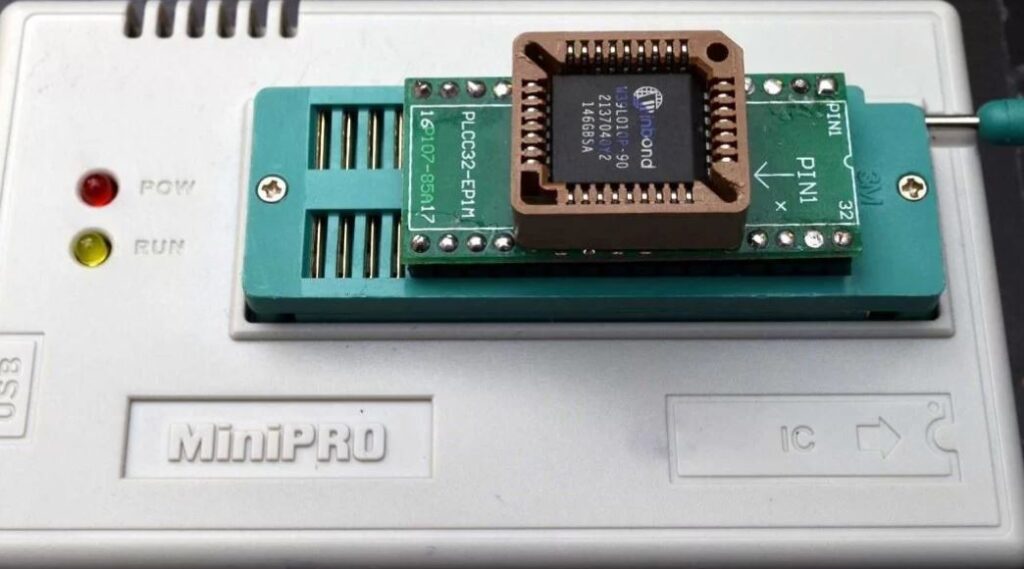
Прошивка на программаторе
Лучшая благодарность автору — репост к себе на страничку:
What can be more frustrating than to be slapped with an error code while upgrading the BIOS? I know your pain as I was in your shoes once.
As a lifelong user of Gigabyte motherboards for multiple years on different platforms, I know how to fix the error more elegantly and effortlessly.
In this article, I’m going to help you with only two questions, why this error occurs and how to solve it.
Sounds fair? Let’s get to the first question. Why does Gigabyte BIOS Id check error happen?
The primary reason behind this blunder is installing the wrong BIOS version. Other than that, a corrupted BIOS file that you have downloaded, a bad internet connection, and a non-bootable drive containing media files also can be responsible for BIOS error.
So, which one is causing you all the trouble? Continue reading to find out.
What Causes BIOS ID Error?
The BIOS is the prime source of your operating system. So, any improper implementation of settings would likely fail the BIOS. Connectivity issues or downloading a corrupted update may also cause BIOS errors. I have shortlisted some common reasons behind the id check error in this part. Determine which one is causing you the hassle and follow the measures accordingly.
Here are the possible reasons behind BIOS Id error:
- Corrupted BIOS version: In order to upgrade BIOS, you need to download the latest available version from the internet. If that downloaded variant is corrupted, then there is a possibility that your screen will show a BIOS id error.
- Terrible Internet Connection; Another reason behind the id check error can be an awful internet connection. Imagine downloading an update with several disconnectivity. The fact that it kills your time and some parts of the downloaded file can get corrupted easily. This will undoubtedly lead to a BIOS error.
- Installing Existing Update: Have you ever tried updating the BIOS version before this time? If yes, then there is a possibility that you have already installed the latest version and you are trying to do that again. In that case, your computer might notify this as an Id check error.
- Mismatched BIOS Version: Are you sure that the edition you are downloading does match exactly with your motherboard? Most of the time, downloading the mismatched version of BIOS creates this issue. You can consider this as the main reason behind the BIOS id check error.
- Failed Devices: It is not so common a reason but still possible that failed USB drivers, broken Hard drives can lead you to this horrific problem. If you have recently installed new hardware on your computer and after that, the error appears, then it’s because of the recent hardware changes.
These are the most possible causes behind your computer’s ID check error, and finding the exact one will help you to solve the issue.
Don’t you know how to solve the error? No worries, I’m here to guide you. Just read the following chapters, and you are going to solve the issue effortlessly.
Follow our guide to Fix keyboard not working in BIOS.
How to Solve BIOS ID Check Error
There are plenty of fixes available throughout the web. Most of them are temporary solutions. But, in this document, I’ll be explaining the advanced procedures that will permanently disappear the BIOS error.
This might be a little tricky, but as I am here to help, I’ll explain it in an adequate method.
So, without bushing around, let’s make your system workable.
Here are the steps to fix the BIOS ID error:
First Method: Reset BIOS to Default
Resetting BIOS to default settings helps the system to get over compatibility issues. BIOS returns to the last saved configuration if you complete the action, and most of the error messages get solved automatically.
You can reset BIOS either by getting into the boot menu or reinstalling the CMOS battery. I’m explaining both so that you can choose whichever seems easy.
Reinstall CMOS: You can reinstall CMOS by following these steps:
- Shut down the computer and remove power cables.
- Locate a small, silver-colored battery on your motherboard.
- Remove the battery for 5-10 minutes and put it back on.
- Close the computer casing.
Your BIOS settings will be default if you follow these steps. Or you can do it manually by getting into the boot menu.
Boot menu settings: You can perform the following steps>
- Press F2 / Delete while booting up the pc to enter the boot menu.
- Press F9 to set the BIOS settings to default.
- Go to the last tab and select Save & Exit.
Restart the computer to complete the process.
These are the proper ways to reset BIOS settings to default. Once you complete either one of these processes, check if the BIOS id error has been resolved or not.
If not, apply the next method precisely as I explain.
Second Method: Update BIOS Properly
The most probable reason behind the BIOS id error is updating a version that is not particularly made for your motherboard. That happens when you download without being sure about the BIOS model.
In this method, I am going to teach you how you can get proper BIOS information and install it in a more efficient way.
Here’s the method to check BIOS version:
- Type cmd on your windows search box.
- Right click on the result and select Run as administrator from the list.
- Type this command wmic bios get smbiosbiosversion and press Enter.
The command prompt will show the current BIOS version of your motherboard. Download the latest version from the motherboard’s manufacturer website and follow the installation process.
NOTE: Before installing, remember that, while flashing the BIOS, if the power goes away, you will face more trouble than you are in right now. It can even fail your motherboard. So, try to get an alternative power source like UPS and then proceed.
Also, check our exclusive tutorial on BIOS not detecting USB.
How to Install the Files
At this point, I can assume you’ve downloaded the exact BIOS file, and you’re ready to move further. Now you only need to install the files.
Here’s how you flash the BIOS properly:
- Insert an empty USB flash drive into your computer.
- Extract the downloaded files onto the flash drive. Note down the name of the update file exactly as it is named.
- Restart the computer after copying. And press F2 to enter the boot menu.
- Change the Primary Boot Device to the attached USB drive.
- Press F10 to save changes and exit to reboot the computer.
- Wait for a moment for the Command Prompt to appear on display.
- Type the name of BIOS files that you took a note of.
- Press Enter to begin the process and press the Y key to confirm the process.
That’s a lot to do, right? Trust me; this is by far the simplest yet workable solution you can find. Don’t hesitate to perform the action. Just do it and see the result.
Pro tip: Don’t install the update if there’s a b on the file name. Like “ U1b.exe,” That b means beta version. They are most likely bugged and problematic to install. Bonus tip: Before extracting the files to the USB, make sure it is formatted as FAT32. The other formats prevent updating efficiently. That problem happened to me.
Check out our separate post on how to Fix motherboard HDMI no signal.
Conclusion
The very last thing I would like to add is you must be careful with the downloading process. I have said earlier and I am repeating again, Match the BIOS model and the downloaded version character by character.
Did that already? Well, do it for the last time and proceed to install. In this manner, the solution will work properly.
If you are at this point of the article and read every word I have put there, I can ensure you that you will be able to solve the BIOS id error all by yourself, and you won’t feel a slight complication doing that.
Then again, If you face any difficulties solving the issue, feel free to comment below, and I’ll solve them as soon as possible.
Recently, while upgrading my PC, I faced an error, and the error was nothing but an infinite boot loop. I inserted a new RAM into my PC, and it booted endlessly. It was very strange because everything in my motherboard, e.g., voltage timing, was working just fine before the installation.
So I started seeking help on the internet, and everyone suggested upgrading my BIOS. I went to gigabyte’s official website, downloaded the file, and attempted to upgrade my BIOS. But it came up with an error message that said, Bios id check error.

As a lifelong GigaByte motherboard user, I was disappointed. Believe me; I was in your shoes. But no worries, I have figured out the solution. Stay calm and stay with me now as I share my findings on this error so that you can be benefitted from reading the article. So stick with me!
Why does the Gigabyte BIOS ID Check Error Occur?
BIOS ID check error mainly occurred by mismatched BIOS version installation. Besides, a corrupted BIOS file or an unstable internet connection can cause the problem too. Even sometimes, it may occur if you use a non-bootable USB device.
It is usual now you want to know from the above which one is causing the trouble. So I have sorted out some common reasons behind the ID check error. Now go ahead and find out which one is causing the trouble and take the necessary steps to resolve the problem easily.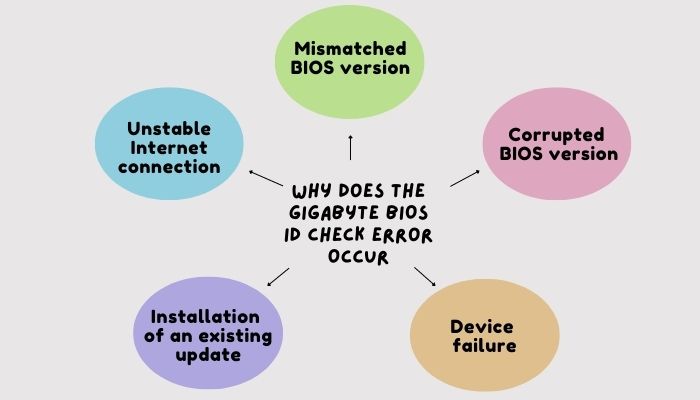
Here are the all possible Causes behind the ID check error:
1. Mismatched BIOS version:
Are you confident that the version you have downloaded for the upgrade is an exact match for your motherboard? Primarily this is the main reason behind the problem. Most of the time, people don’t download the exactly matched BIOS version for their respective PC. You can say it is the main reason behind the error.
Related contents you should read about 8 ways to fix M.2 SSD not showing Up in BIOS.
2. Corrupted BIOS version:
If you have downloaded the installation media file from a third-party website, you may have downloaded a corrupted file. To upgrade, you need to download the latest version released for your motherboard; otherwise, your PC will show you a BIOS ID CHECK ERROR.
3. Unstable Internet connection:
A vital reason behind the BIOS id check error can be the discontinuation of the internet connection. Suppose, when downloading the file, the internet was disconnected several times, which could easily lead to file corruption. Eventually, this corrupted file will result in a BIOS ID CHECK ERROR.
Related guide about 7 ways to fix Keyboard not working in BIOS.
4. Installation of an existing update:
Suppose you have already installed BIOS update once before. Maybe you already have the latest version. If you try installing an existing update file, your PC may show the ID check error.
5. Device failure
The device you are using to boot, like a non-bootable USB or a broken Hard Drive, may cause the problem. These are not commonly seen. But if you are facing a problem after installing a new component, there is a strong possibility of device failure. [device-failure
These are the possible reasons behind the BIOS ID CHECK error. Let’s find out the exact reason and solve the problem as I will explain all the solving methods.
Some more guides on 4 Tested fixes for Black Screen after BIOS Update.
Most of the solutions you will find on the Internet may be temporary, which will work fine for some time but won’t last long. Here I will share some advanced methods to solve your problem, so you don’t get deceived. The techniques are gonna be tricky, but I am here to make it effortless. Without wasting any more time, let’s jump right into the solutions.
Check out the easiest way for the keyboard and Mouse to work in BIOS but not in Windows.
1. Reset BIOS to Default
You can reset BIOS settings to help the system get over the compatibility issue. Bios will return to the last saved configuration if you complete the action. This will automatically solve most of your problems.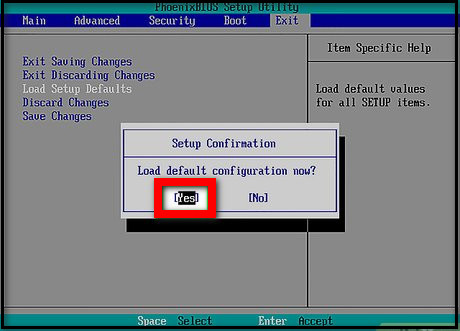
You can reset BIOS in other ways by resetting from the boot menu or installing the CMOS battery again. I will tell you both methods, choose which seems to be easy for you.
Reinstall CMOS:
Here are the steps to reinstall COMS:
- Shut down your PC
- Open the casing and remove the power cables from the motherboard.
- Find a small, silver-colored battery on your motherboard.
- Pull out the battery for 5-10 minutes and put it back on.
- Now, Close the computer casing.
By doing so, your BIOS settings will be reset. You can do it manually from the boot menu. See the next part.
Also related to this guide PC Keeps Restarting Before BIOS.
Follow the steps to reset your BIOS from the boot menu:
- Enter the boot menu by pressing F2 / Delete from the keyboard while booting up Your PC.
- Now, press F9 from the keyboard to set the BIOS settings to default.
- Go to the last tab and select Save & Exit.
Next, restart your PC to complete the process. Now check if the BIOS ID Check error is solved or not.
If the error remains on your PC, follow the next method to solve it properly.
Follow our guide to fix a PC that won’t Boot to BIOS?
2. Update BIOS Properly
Installation of mismatched bios is probably the main reason behind the problem. This happens when you directly go to the website and download the wrong file without confirming your motherboard model. So you need to know your motherboard model number and BIOS version.
Here are the steps to check the BIOS version:
The command prompt will show the current BIOS version of your motherboard. Download the latest version from the motherboard manufacturer’s website and follow the installation process.
Now grab the exact installation file and move to the next section.
How to Install the files
I hope you have downloaded the exact BIOS file from the website and are ready to move to the installation process.
Here are the installation steps you must follow:
- Insert a USB flash drive into your computer.
- Extract the downloaded files onto the flash drive. (Note down the name of the update file exactly as it is named.)
- Restart the computer after copying. To enter the boot menu, press F2 on the keyboard.
- Change the Primary Boot Device to the attached USB drive.
- Save changes by pressing F10 on the keyboard and exit to reboot the computer.
- Wait for a moment for the Command Prompt to appear on display.
- Type the name of the BIOS files that you took note of.
- Now, Press Enter to begin the installation and press the Y key to confirm the installation.
It seems like a lot of work has been done. But I can assure you that this is the easiest and working method for the problem. DO IT AND SEE THE RESULT.
Pro tip: If there’s a b on the file name. e.g., U1b.exe, then don’t install the file. That b means beta version. They are often bugged, and further trouble may occur after installation.
Note: When extracting the files to the USB, ensure it is formatted as FAT32. The other formats hinder updating successfully. I faced the problem on the first try.
FAQs
1. Do I need to update BIOS regularly?
You don’t need to update the bios regularly. You are all right to go until you are facing a boot problem. Sometimes inserting new components may lead to an error, but I have discussed how you can eradicate the problem easily.
2. Can I use an older version of BIOS?
Yeah, of course, you can use the older version of BIOS without any doubt, but the problem you will face while upgrading your rig. Just like my case, I was trying to add extra RAM for that, and I needed the latest version of BIOS.
3. Do older BIOS hamper the performance?
No, not all. The performance of your PC doesn’t hugely depend on the BIOS version installed. With the increase of age, the performance of your PC will decrease gradually. But when you stay updated, for the time being, the efficiency decreases slowly.
Conclusion
Still, in the article’s final section, I will advise you to stay extra careful while downloading the BIOS file. Please match the bios model word by word.
When you read this part of the article, I can assume that you have successfully eliminated the BIOS ID check problem. If you have followed the steps I have described above, then there will remain no issue with the BIOS ID check error.
Hopefully, this article has helped you a lot to make your PC run again. If a problem arises in front of you, don’t become upset; just stay cool and calm and look for the best possible solution out there. If you have more queries, then feel free to ask us. We will reach out to you ASAP with the best solution.
![]() Добавлено: 07.02.2021 20:02
Добавлено: 07.02.2021 20:02
помогите пожалуйста!
купил gigabyte b550 aorus pro ax
ryzen 5900x
32 гига(2*16) 3600 crucial ballistic
https://www.gigabyte.ru/products/page/m … -rev-10#kf
в сервисном залили биос f11
сегодня увидел, что появились новые биосы: f12 и f13a
форматнул флешку в fat32, закинул на нее биос, зашел биосе в qflash
биос видит флешкуи биос, но при попытке прошить, появляется окно:
ошибка проверки идентификатора bios
жду вашей помощи!
mol61
alex urgant писал(а):
в сервисном залили биос f11
А на сайте в списке нету версии F11. Что же они вам залили? 
alex urgant
Sania.
Пробуйте через дос.
alex urgant
как это сделать?
Sania.
Закинуть дос на флешку, закинуть все файлы из архива, можно сразу архиватором, запуститься из флешки через бут меню.
alex urgant
можно поподробней?
Sania.
Это как, как купить или найти флешку, как выглядит разъём usb и как в него вставить? Идите в сервис, там подробно сами зальют если вам вышеперечисленные действия непонятны.
alex urgant
через дос тоже не вышло:
bios id mismatch
Sania.
Либо мать перепутали вы, либо не на ту модель на сайте зашли.
mol61
Sania. писал(а):
Либо мать перепутали вы, либо не на ту модель на сайте зашли.
Наверняка. Защита от дурака срабатывает, чтобы чужой биос не шили. Либо биос не родной сейчас залит на материнку. я например чтобы залить не родной биос использовал Flash Programming Tool для DOS.