
![]() Listen to this article
Listen to this article
В этой статье мы расскажем о нескольких способах решения таких трудностей. Все эти способы актуальны только для Android 4.4 и новее, так как на более старых версиях microG не работает полностью.
1) Установить свежий microG
Самым простым, но не всегда рабочим способом является установка более свежей версии приложения microG, которое позволяет авторизоваться в YouTube Vanced с Google-аккаунтом.
Скачать более свежий microG можно на сайте. Перед установкой желательно удалить старый microG и переустановить YouTube Vanced.
Если же новый APK не сработал, то переходим к следующему пункту.
2) Откатываем Chrome и WebView
Переходим в Настройки → Приложения и находим там две программы — Chrome и Android System WebView. После этого удаляем обновления у обоих приложений. У Chrome нужно только удалить обновления, а WebView нужно еще Отключить.
Потом удаляем Vanced и microG, а также перезагружаем устройство. Также стоит отключить настройку Многопоцессорный WebView. После перезагрузки устанавливаем Vanced и microG обратно, пытаемся войти. Если все сработало, то можно установить Chrome и WebView обратно.
3) Настройки на MIUI / Flyme / EMUI
Владельцам устройств от Xiaomi, Meizu и Huawei можем порекомендовать перейти в настройки и выдать приложениям microG и YouTube Vanced все разрешения, включая работу в фоновом режиме. Также можно сделать оба приложения системными с помощью Lucky Patcher.
4) Другие способы
- Устанавливайте сначала microG, а потом YouTube Vanced.
- Попробуйте удалить Google-аккаунт из настроек смартфона, а потом добавить его уже через microG.
- Удалите антивирусы и различные оптимизаторы перед добавлением аккаунта. Все эти программы убивают работу microG в фоне.
5) Дополнение
Все делается намного проще, достаточно в настройках для разработчиков переключить Сервис WebView с Chrome на Android System WebView
Если Вам понравилась статья — поделитесь с друзьями
21 945 просмотров
Отказ от ответственности: Автор или издатель не публиковали эту статью для вредоносных целей. Вся размещенная информация была взята из открытых источников и представлена исключительно в ознакомительных целях а также не несет призыва к действию. Создано лишь в образовательных и развлекательных целях. Вся информация направлена на то, чтобы уберечь читателей от противозаконных действий. Все причиненные возможные убытки посетитель берет на себя. Автор проделывает все действия лишь на собственном оборудовании и в собственной сети. Не повторяйте ничего из прочитанного в реальной жизни. | Так же, если вы являетесь правообладателем размещенного на страницах портала материала, просьба написать нам через контактную форму жалобу на удаление определенной страницы, а также ознакомиться с инструкцией для правообладателей материалов. Спасибо за понимание.
Если вам понравились материалы сайта, вы можете поддержать проект финансово, переведя некоторую сумму с банковской карты, счёта мобильного телефона или из кошелька ЮMoney.

New issue
Have a question about this project? Sign up for a free GitHub account to open an issue and contact its maintainers and the community.
By clicking “Sign up for GitHub”, you agree to our terms of service and
privacy statement. We’ll occasionally send you account related emails.
Already on GitHub?
Sign in
to your account
Closed
Batu145 opened this issue
Jan 8, 2021
· 31 comments
Labels
bug
Something isn’t working
Comments
I updated my samsung galaxy s20 to one ui 3 and after reboot my youtube vanced disappear.
- Try to install again showing error: there was a problem parsing the package
- Uninstall microg and reinstall works fine with youtube vanced music
- Using sai installer, gets me the same problem as 1st one
- With vanced manager i got an error saying:
Error
Installation failed because of the app conflicts with an already installed app. Uninstall the current version of the app then try again.
Advance:
INSTALL_FAILED_UPDATE_INCOMPATIBLE: Package com.vanced.android.youtube signatures do not mach previously installed version: ignoring!
If you ask me i think youtube vanced dosent support one ui 3 i think you need to updated it and i saw some more guys having same issue when i was searching about it. And i asked your support group about help they tryed everything but it didint work. And somehow i can download youtube music vanced but not youtube vanced. My microg everything works fine but my youtube vanced is not working.
Also its [Non ROOT]


It still do be a problemo. Samsung’s fault?
Same problem, I think vanced that I had before not disappeared. I think some files stayed in data folder, and because of them new version can’t be installed.
I do find a solution without doing the factory reset.
My issue is exactly same as yours. YouTube Vanced (not microG) disappeared in my installed App and can’t be launched/installed/updated/uninstalled anymore after the Android OS upgraded from Android 10 to Android 11 on Samsung Note20 Ultra.
Error: incompatible……updated…..signature does not match…..
I think that the root cause of this issue has nothing to do with the OneUI 3 but this un-official YouTube cracking app got wiped by the new Android system upgrade automatically.
The YouTube Vanced didn’t get completely removed in fact, and some residual app data remains on the phone.
Alright, the following way I tried is a little bit complicated, but no need ROOT nor any additional HACK or CRACKs.
And, of course, no need to reset the phone.
-
Find a Windows PC. (Windows 10)
-
Download the Android Debug Bridge (as known as «adb») files from the URL:
https://developer.android.com/studio/releases/platform-tools.html -
Extract the downloaded zip to C:, and a folder «platform-tools» will be extracted to there.
-
Launch Command Prompt on Windows:
https://www.howtogeek.com/235101/10-ways-to-open-the-command-prompt-in-windows-10/ -
Type: cd C:platform-tools and press [Enter] to let command prompt locate the extracted folder.
-
Use your phone and open developer options on Android:
https://www.samsung.com/uk/support/mobile-devices/how-do-i-turn-on-the-developer-options-menu-on-my-samsung-galaxy-device/ -
Enable the USB debugging mode option.
-
Find a USB-A to USB-C cable, and please use the cable that originally shipped in the box of your Samsung phone if possible. (Older Samsung phone like note8 might give you one).
Note: I’m not sure if a C-to-C cable might work or not, and some PCs don’t have a USB-C port.
-
Connect your phone to PC using the above cable.
-
The Windows will run an automatic process to setup the phone connection, it might take about 30 seconds, and there would be a dialog prompts on your phone to ask you to select the USB connection. Please select the file transfer (MTP) mode.
-
Go to the Command Prompt window that you opened and ran the command in the step 5.
-
Type: adb devices and press [Enter] to let Android Debug Bridge locate your phone on PC.
-
The above command will list your Android phone in the Command Prompt window, and then there will be a security prompt on your phone. Please allow the USB debugging mode on the phone accordingly.
-
See if there is a device showing with an serial (it should be your phone’s internal hardware serial but not the model number) after the adb devices command. If yes, do the following steps.
-
Type adb shell pm uninstall com.vanced.android.youtube, and press [Enter] in the Windows Command Prompt window.
-
If the uninstallation works, the command prompt will show SUCCESS message. The process might take few seconds or accomplish right away.
-
Unplug the USB connection.
-
Launch Vanced Manager app on your phone to install the YouTube Vanced app, and the setup should work fine this time.
By the way, I didn’t reboot my phone or my Windows PC during the whole process.
Hope the above info save some people’s ass.
[Revision History]
2021-03-21
- Corrected the term «Android Debug Module» to «Android Debug Bridge».
- Minor adjustments on the English writing.
rajatrangila, CristianMoisei, SEM24, Wartexnik, vurvn, brucechaser, kepo4ka, RealRedStar, Rishi-666, Seregaqe2, and 8 more reacted with thumbs up emoji
brucechaser, kepo4ka, RealRedStar, simpaul13, Seregaqe2, and haripari546 reacted with laugh emoji
Ilgam4ik, brucechaser, kepo4ka, RealRedStar, Rishi-666, simpaul13, Seregaqe2, haripari546, gabirat, farisnp, and vaibhav1369 reacted with heart emoji
@qc20foster why did you specify a windows pc?
From what I read here you can do this just fine on a Linux PC or even a Mac and it should work better too. you can even Skip over a lot of these steps for Linux.
Vanced is not a «crack» it’s a mod, and no data gets left behind by uninstalling the non-root version; it’s essentially like any other app and yet it still gets fucked by the Samsung updating engine. Plus if you already have root you can remove it easily with the privileges you already have.
A guide for setting up adb can already be found in this repository’s Readme. Instead of running the logcat command you would just run adb shell pm uninstall com.vanced.android.youtube
@qc20foster why did you specify a windows pc?
From what I read here you can do this just fine on a linux PC, you can even Skip over a lot of these steps and it should work better too…
Vanced is not a «crack» it’s is a mod, and no data gets left behind by uninstalling the non-root version; it’s essentially like any other app and yet it still gets fucked by the Samsung updating engine. Plus if you already have root you can remove it easily with the privileges you already have.
Looks like I touched the nerv of contributors here then this topic got «your replies» pretty quickly.
First of all, I’m not trying to claim it’s a Vanced’s bug. It could be caused by Samsung’s OTA and it could be caused by Google. Anyway, I’m not a judge here.
And, I just ran into this problem since I received Android 11 OTA this week. After googled lots of users guide which might be created for dummies or geeks, I found my own way to run the adb. And it’s my first time to run the adb. I just SHARED MY SOLUTION HERE. Don’t QUESTION ME WHY I SPECIFIED A WINDOWS PC.
Most of entry level users DIDN’T use LINUX.
I uses Windows, so I shared the steps on Windows in such very details for pretty entry level users who might probably not know adb at all.
It is very easy for developers to reset their testing phone, but for normal users they stored too many personal data on their personal phone, and a reset is such a big pain for them.
I know here is for developers to develop software projects, but clearly this thread is reported by a normal and entry-level user. And they might not know how to root their phone, either. Less geek wording might be more helpful for these guys.
You don’t have to thank me, but do not trash talk by questioning a given solution that might be helpful for some users.
@qc20foster why did you specify a windows pc?
From what I read here you can do this just fine on a linux PC, you can even Skip over a lot of these steps and it should work better too…
Vanced is not a «crack» it’s is a mod, and no data gets left behind by uninstalling the non-root version; it’s essentially like any other app and yet it still gets fucked by the Samsung updating engine. Plus if you already have root you can remove it easily with the privileges you already have.Looks like I touched the nerv of contributors here then this topic got «your replies» pretty quickly.
First of all, I’m not trying to claim it’s a Vanced’s bug. It could be caused by Samsung’s OTA and it could be caused by Google. Anyway, I’m not a judge here.
And, I just ran into this problem since I received Android 11 OTA this week. After googled lots of users guide which might be created for dummies or geeks, I found my own way to run the adb. And it’s my first time to run the adb. I just SHARED MY SOLUTION HERE. Don’t QUESTION ME WHY I SPECIFIED A WINDOWS PC.
Most of entry level users DIDN’T use LINUX.I uses Windows, so I shared the steps on Windows in such very details for pretty entry level users who might probably not know adb at all.
It is very easy for developers to reset their testing phone, but for normal users they stored too many personal data on their personal phone, and a reset is such a big pain for them.
I know here is for developers to develop software projects, but clearly this thread is reported by a normal and entry-level user. And they might not know how to root their phone, either. Less geek wording might be more helpful for these guys.
You don’t have to thank me, but do not trash talk by questioning a given solution that might be helpful for some users.
When did I ever say that normal entry-level user can’t use it? Nor did I ever say they have to be root.
You had inaccuracies and I corrected them (it’s called constructive criticism) it’s as simple as that, don’t be a prick. 👍
I have the same problem as describde here, but qc20foster solution didn’t work, On step 16 instead of Success i get error message:
cmd: Failure calling service package: Broken pipe (32)
Also my S10 begin to rastart at exact moment I execute step 15 command
Any suggestions what to do?
I’m bellow-entry level user, so don’t kknow what to do without step-by-step guide
When did I ever say that normal entry-level user can’t use it? Nor did I ever say they have to be root.
You had inaccuracies and I corrected them (it’s called constructive criticism) it’s as simple as that, don’t be a prick. 👍
WHEN DID I SAY YOU SAID «normal entry-level user can’t use it»??????????
You «corrected» my INACCURACIES by suggesting users: Hey Linux PC is a better idea, and a lot of steps can be skipped (but didn’t specify what steps are skip-able). Then, said that root user can easily do the app uninstallation.
All of the above are your «inaccuracies correction and constructive criticism».
You are soooooo genius, and now called me a prick here.
From what the OP claimed, this guy cannot even uninstall YouTube Vanced because it is no longer existed on the App list of the phone after the Android system upgraded.
Now, there is another user who cannot even run the basic adb command to remove the YouTube Vanced app.
Perhaps you have a Linux PC and Android is based on Linux, too.
Hope you are able to give some suggestions to this user and troubleshoot the errors of the adb command.
Lotter88 has followed my steps and failed, Let’s assume he/she uses a Windows PC.
It would be very grateful if you can help this guy.
I am really sorry that my steps contain inaccuracies.
When did I ever say that normal entry-level user can’t use it? Nor did I ever say they have to be root.
You had inaccuracies and I corrected them (it’s called constructive criticism) it’s as simple as that, don’t be a prick. 👍WHEN DID I SAY YOU SAID «normal entry-level user can’t use it»??????????
You «corrected» my INACCURACIES by suggesting users: Hey Linux PC is a better idea, and a lot of steps can be skipped (but didn’t specify what steps are skip-able). Then, said that root user can easily do the app uninstallation.
All of the above are your «inaccuracies correction and constructive criticism».
You are soooooo genius, and now called me a prick here.From what the OP claimed, this guy cannot even uninstall YouTube Vanced because it is no longer existed on the App list of the phone after the Android system upgraded.
Now, there is another user who cannot even run the basic adb command to remove the YouTube Vanced app.
Perhaps you have a Linux PC and Android is based on Linux, too.
Hope you are able to give some suggestions to this user and troubleshoot the errors of the adb command.Lotter88 has followed my steps and failed, Let’s assume he/she uses a Windows PC.
It would be very grateful if you can help this guy.I am really sorry that my steps contain inaccuracies.
Ok I will help him. 😏
Yandere Dev much 🤣
I have the same problem as describde here, but qc20foster solution didn’t work, On step 16 instead of Success i get error message:
cmd: Failure calling service package: Broken pipe (32)
Also my S10 begin to rastart at exact moment I execute step 15 commandAny suggestions what to do?
I’m bellow-entry level user, so don’t kknow what to do without step-by-step guide
Check your driver’s and make sure they’re installed properly, you can run adb devices to see if it’s all set-up correctly.
What type of drivers do you mean? When I run adb devices command I see (as in the instruction) serial for my device, thought it mean it’s ok at this step

What type of drivers do you mean? When I run
adb devicescommand I see (as in the instruction) serial for my device, thought it mean it’s ok at this step
Try running it as administrator. Just open command prompt as administrator and try.
Try adb uninstall com.vanced.android.youtube
1.)
ADB Setup
Windows
Download the Android Debug Bridge (Aka ADB)
ADB Link
Extract the zip
Now open a command prompt in this directory. You can do so by holding shift and right clicking the folder and then pressing Open Powershell here
alternatively you can cd into the location if you have to run command prompt as administrator for any reason
Mac
-
Mac is basically the windows method but your using Bash or Zsh like on Linux
Download the Android Debug Bridge (Aka ADB)
ADB Link
Extract the zip
Now open a Terminal in this directory.
You can use cd
Linux
Debian
sudo apt install adb -y
Arch
sudo pacman -S adb
Alternatively you can do the same as the Mac guide.
2.)
On Android Device
- Enable Developer Options. You can do so by going to
Settings > About Phoneand tapping Build Number 7 times - Now go to
Settings > System > Developer optionsand enable Usb Debugging
3.)
ADB
Omit the . if you’re using Mac/Linux
- Find a USB cable, Doesn’t matter what it is (USB-A — USB-C or USB-A — microUSB or USB-C — USB-C) as long as it has proper USB capabilities and can connect your PC and Phone.
- In the command prompt run
.adb devicesa pop-up should come up on the phone, hit allow. - run
.adb devicesagain and your device should be shown if all goes well. - run
.adb shell pm uninstall com.vanced.android.youtube
Root Users
- First you need a Terminal. I recommend Termux
- Open it up and run the following command
su -c "pm uninstall com.vanced.android.youtube"
If you used Root Vanced and the bug accrued you can try using a Root browser and navigate to data/adb and delete the Vanced folder and reboot, that should revert youtube back to normal.
@qc20foster
You can stop acting like a child now.
OK, YOU FINALLY ARE ACTING LIKE A DEVELOPER AND CONTRIBUTOR NOW by giving some constructive solution.
Thank you for not keep questioning me why I specified Windows and cool talk why not used Linux as it is easir and claiming lots of steps are skip-able without giving any actual helpful solution yourself.
What you repied is just giving more details or make some adjustments on the steps I specified previously . It’s the same solution at technical wise.
If you gave some constructive steps but not questioned others with simple words at the beginning, you won’t humiliate yourself in this public thread like now still a prick trying to insult me.
Please grow up now.
@qc20foster
You can stop acting like a child now.OK, YOU FINALLY ARE ACTING LIKE A DEVELOPER AND CONTRIBUTOR NOW by giving some constructive solution.
Thank you for not keep questioning me why I specified Windows and cool talk why not used Linux as it is easir and claiming lots of steps are skip-able without giving any actual helpful solution yourself.What you repied is just giving more details or make some adjustments on the steps I specified previously . It’s the same solution at technical wise.
If you gave some constructive steps but not questioned others with simple words at the beginning, you won’t humiliate yourself in this public thread like now still a prick trying to insult me.
Please grow up now.
The more you talk the more you just make a fool out of yourself man. You could have just taken the constructive criticism and edited your own shit, but no you took it personal and went on some stupid ass long rants and tried attacking my character instead, you acted like a fucking child and the only thing you can do now is own up to your faults or don’t, either way nobody cares friend. ✌️

Its work fine, thanks matee !!
I do find a solution without doing the factory reset.
My issue is exactly same as yours. YouTube Vanced (not microG) disappeared in my installed App and can’t be launched/installed/updated/uninstalled anymore after the Android OS upgraded from Android 10 to Android 11 on Samsung Note20 Ultra.
Error: incompatible……updated…..signature does not match…..
I think that the root cause of this issue has nothing to do with the OneUI 3 but this un-official YouTube cracking app got wiped by the new Android system upgrade automatically.
The YouTube Vanced didn’t get completely removed in fact, and some residual app data remains on the phone.Alright, the following way I tried is a little bit complicated, but no need ROOT nor any additional HACK or CRACKs.
And, of course, no need to reset the phone.
- Find a Windows PC. (Windows 10)
- Download the Android Debug Module (as known as «adb») files from the URL:
https://developer.android.com/studio/releases/platform-tools.html- Extract the downloaded zip to C:, and a folder «platform-tools» will be extracted to there.
- Launch Command Prompt on Windows:
https://www.howtogeek.com/235101/10-ways-to-open-the-command-prompt-in-windows-10/- Type: cd C:platform-tools and press [Enter] to let command prompt locate the extracted folder.
- Use your phone and open developer options on Android:
https://www.samsung.com/uk/support/mobile-devices/how-do-i-turn-on-the-developer-options-menu-on-my-samsung-galaxy-device/- Enable the USB debugging mode option.
- Find a USB-A to USB-C cable, and please use the cable that originally shipped in the box of your Samsung phone if possible. (Older Samsung phone like note8 might give you one).
Note: I’m not sure if a C-to-C cable might work or not, and some PCs don’t have a USB-C port.
- Connect your phone to PC using the above cable.
- The Windows will run an automatic process to setting up the phone connection, it might take about 30 seconds, and there would be dialog pops up on your phone to ask you to select the USB connection. Please select the file transfer (MTP) one.
- Go to the Command Prompt window that you opened and ran the command in the step 5.
- Type: adb devices and press [Enter] to let Android Debug Module locate your phone on PC.
- The above command will list your Android phone in the Command Prompt window, and then there will be an access prompt pops up on your phone. Please allow the USB debugging mode accordingly.
- See if there is a device showing with an serial (it should be your phone’s internal hardware serial but not the model number) after the adb devices command. If yes, do the following steps.
- Type adb shell pm uninstall com.vanced.android.youtube, and press [Enter] in the Windows Command Prompt window.
- If the uninstallation works, the command prompt will show SUCCESS message. The process might take few seconds or accomplish right away.
- Unplug the USB connection.
- Launch Vanced Manager app on your phone to install the YouTube Vanced app, and the setup should work fine this time.
By the way, I didn’t reboot my phone or my Windows PC during the above process.
Hope the above info save some people’s ass.
Thanks My friend,,,, this worked fine for me
I do find a solution without doing the factory reset.
My issue is exactly same as yours. YouTube Vanced (not microG) disappeared in my installed App and can’t be launched/installed/updated/uninstalled anymore after the Android OS upgraded from Android 10 to Android 11 on Samsung Note20 Ultra.
Error: incompatible……updated…..signature does not match…..
I think that the root cause of this issue has nothing to do with the OneUI 3 but this un-official YouTube cracking app got wiped by the new Android system upgrade automatically.
The YouTube Vanced didn’t get completely removed in fact, and some residual app data remains on the phone.Alright, the following way I tried is a little bit complicated, but no need ROOT nor any additional HACK or CRACKs.
And, of course, no need to reset the phone.
Find a Windows PC. (Windows 10)
Download the Android Debug Module (as known as «adb») files from the URL:
https://developer.android.com/studio/releases/platform-tools.htmlExtract the downloaded zip to C:, and a folder «platform-tools» will be extracted to there.
Launch Command Prompt on Windows:
https://www.howtogeek.com/235101/10-ways-to-open-the-command-prompt-in-windows-10/Type: cd C:platform-tools and press [Enter] to let command prompt locate the extracted folder.
Use your phone and open developer options on Android:
https://www.samsung.com/uk/support/mobile-devices/how-do-i-turn-on-the-developer-options-menu-on-my-samsung-galaxy-device/Enable the USB debugging mode option.
Find a USB-A to USB-C cable, and please use the cable that originally shipped in the box of your Samsung phone if possible. (Older Samsung phone like note8 might give you one).
Note: I’m not sure if a C-to-C cable might work or not, and some PCs don’t have a USB-C port.
Connect your phone to PC using the above cable.
The Windows will run an automatic process to setting up the phone connection, it might take about 30 seconds, and there would be dialog pops up on your phone to ask you to select the USB connection. Please select the file transfer (MTP) one.
Go to the Command Prompt window that you opened and ran the command in the step 5.
Type: adb devices and press [Enter] to let Android Debug Module locate your phone on PC.
The above command will list your Android phone in the Command Prompt window, and then there will be an access prompt pops up on your phone. Please allow the USB debugging mode accordingly.
See if there is a device showing with an serial (it should be your phone’s internal hardware serial but not the model number) after the adb devices command. If yes, do the following steps.
Type adb shell pm uninstall com.vanced.android.youtube, and press [Enter] in the Windows Command Prompt window.
If the uninstallation works, the command prompt will show SUCCESS message. The process might take few seconds or accomplish right away.
Unplug the USB connection.
Launch Vanced Manager app on your phone to install the YouTube Vanced app, and the setup should work fine this time.
By the way, I didn’t reboot my phone or my Windows PC during the above process.
Hope the above info save some people’s ass.
LMAO! Thanks Man! I’ve updated my phone today and that piece of shit vanished from my phone like a fart in the air! I’ve accessed android files by third pay file manager and deleted vanced files but it didn’t work! I’ve wasted 1hour searching for solution on the internet and I’ve seen this finally! And obviously it worked! :p
Arigató Gosaimasu!
I wish the adb solution worked
However it just reboots my phone with an error message
Failure calling service package: Broken pipe (32)
This worked for me but with a forward slash on the mac (/) not a backward slash () So:
./adb shell pm uninstall com.vanced.android.youtube
Thanks for the suggestions.
Я нахожу решение, не выполняя сброс настроек до заводских.
Моя проблема точно такая же, как у вас. YouTube Vanced (не microG) исчез в моем установленном приложении и больше не может быть запущен / установлен / обновлен / удален после обновления ОС Android с Android 10 до Android 11 на Samsung Note20 Ultra.
Ошибка: несовместимо …… обновлено ….. подпись не совпадает …..
Я думаю, что основная причина этой проблемы не имеет ничего общего с OneUI 3, но это неофициальное приложение для взлома YouTube автоматически стерто при обновлении новой системы Android.
На самом деле YouTube Vanced не был полностью удален, и некоторые остаточные данные приложения остались на телефоне.Хорошо, следующий способ, который я пробовал, немного сложен, но не требует ROOT или каких-либо дополнительных HACK или CRACK.
И, конечно же, не нужно перезагружать телефон.
- Найдите ПК с Windows. (Windows 10)
- Загрузите файлы Android Debug Bridge (также известные как «adb») по URL-адресу:
https://developer.android.com/studio/releases/platform-tools.html.- Распакуйте загруженный zip-архив в C :, и туда будет извлечена папка «platform-tools».
- Запустить командную строку в Windows:
https://www.howtogeek.com/235101/10-ways-to-open-the-command-prompt-in-windows-10/- Введите: cd C: platform-tools и нажмите [Enter], чтобы командная строка обнаружила извлеченную папку.
- Используйте свой телефон и откройте параметры разработчика на Android:
https://www.samsung.com/uk/support/mobile-devices/how-do-i-turn-on-the-developer-options-menu-on-my- Самсунг-галактика-устройство /- Включите опцию режима отладки USB.
- Найдите кабель USB-A — USB-C и по возможности используйте кабель, который изначально был поставлен в коробке с телефоном Samsung. (Более старый телефон Samsung, такой как note8, может дать вам его).
Примечание: я не уверен, может ли работать кабель C-to-C или нет, а на некоторых ПК нет порта USB-C.
- Подключите телефон к ПК с помощью указанного выше кабеля.
- Windows запустит автоматический процесс настройки телефонного соединения, это может занять около 30 секунд, и на вашем телефоне появится диалоговое окно с предложением выбрать USB-соединение. Пожалуйста, выберите режим передачи файлов (MTP).
- Перейдите в открывшееся окно командной строки и выполните команду на шаге 5.
- Введите: adb devices и нажмите [Enter], чтобы Android Debug Bridge обнаружил ваш телефон на ПК.
- Приведенная выше команда отобразит ваш телефон Android в окне командной строки, а затем на вашем телефоне появится запрос безопасности. Пожалуйста, разрешите режим отладки USB на телефоне соответственно.
- Посмотрите, отображается ли устройство с серийным номером (это должен быть внутренний серийный номер вашего телефона, а не номер модели) после команды adb devices. Если да, выполните следующие действия.
- Введите adb shell pm uninstall com.vanced.android.youtube и нажмите [Enter] в окне командной строки Windows.
- Если удаление работает, в командной строке появится сообщение УСПЕХ. Процесс может занять несколько секунд или завершиться сразу.
- Отключите USB-соединение.
- Запустите приложение Vanced Manager на своем телефоне, чтобы установить приложение YouTube Vanced, и на этот раз настройка должна работать нормально.
Кстати, я не перезагружал ни телефон, ни компьютер с Windows в течение всего процесса.
Надеюсь, что приведенная выше информация спасет некоторых людей.[История изменений]
21.03.2021
- Исправлен термин «Android Debug Module» на «Android Debug Bridge».
- Небольшие исправления в английском письме.
Thank you so much, redmi note 9s phone, after the update there was such an error, I looked everywhere, and finally found your site and finally the solution helped)))) Всем русским привет!!!
I do find a solution without doing the factory reset.
My issue is exactly same as yours. YouTube Vanced (not microG) disappeared in my installed App and can’t be launched/installed/updated/uninstalled anymore after the Android OS upgraded from Android 10 to Android 11 on Samsung Note20 Ultra.
Error: incompatible……updated…..signature does not match…..
I think that the root cause of this issue has nothing to do with the OneUI 3 but this un-official YouTube cracking app got wiped by the new Android system upgrade automatically.
The YouTube Vanced didn’t get completely removed in fact, and some residual app data remains on the phone.Alright, the following way I tried is a little bit complicated, but no need ROOT nor any additional HACK or CRACKs.
And, of course, no need to reset the phone.
- Find a Windows PC. (Windows 10)
- Download the Android Debug Bridge (as known as «adb») files from the URL:
https://developer.android.com/studio/releases/platform-tools.html- Extract the downloaded zip to C:, and a folder «platform-tools» will be extracted to there.
- Launch Command Prompt on Windows:
https://www.howtogeek.com/235101/10-ways-to-open-the-command-prompt-in-windows-10/- Type: cd C:platform-tools and press [Enter] to let command prompt locate the extracted folder.
- Use your phone and open developer options on Android:
https://www.samsung.com/uk/support/mobile-devices/how-do-i-turn-on-the-developer-options-menu-on-my-samsung-galaxy-device/- Enable the USB debugging mode option.
- Find a USB-A to USB-C cable, and please use the cable that originally shipped in the box of your Samsung phone if possible. (Older Samsung phone like note8 might give you one).
Note: I’m not sure if a C-to-C cable might work or not, and some PCs don’t have a USB-C port.
- Connect your phone to PC using the above cable.
- The Windows will run an automatic process to setup the phone connection, it might take about 30 seconds, and there would be a dialog prompts on your phone to ask you to select the USB connection. Please select the file transfer (MTP) mode.
- Go to the Command Prompt window that you opened and ran the command in the step 5.
- Type: adb devices and press [Enter] to let Android Debug Bridge locate your phone on PC.
- The above command will list your Android phone in the Command Prompt window, and then there will be a security prompt on your phone. Please allow the USB debugging mode on the phone accordingly.
- See if there is a device showing with an serial (it should be your phone’s internal hardware serial but not the model number) after the adb devices command. If yes, do the following steps.
- Type adb shell pm uninstall com.vanced.android.youtube, and press [Enter] in the Windows Command Prompt window.
- If the uninstallation works, the command prompt will show SUCCESS message. The process might take few seconds or accomplish right away.
- Unplug the USB connection.
- Launch Vanced Manager app on your phone to install the YouTube Vanced app, and the setup should work fine this time.
By the way, I didn’t reboot my phone or my Windows PC during the whole process.
Hope the above info save some people’s ass.[Revision History]
2021-03-21
- Corrected the term «Android Debug Module» to «Android Debug Bridge».
- Minor adjustments on the English writing.
THIS WORKED FOR ME!!
THANK YOU MAN.
If you do not have Xiaomi ADB drivers just download the MiPCSuite, install and estart the PC.
milindgoel15
changed the title
[Bug] Youtube vanced dosent support Android 11 (One Ui 3)
[Bug] Youtube vanced doesn’t install on Android 11 based custom skins update(e.g., One Ui 3)
Jul 22, 2021
I do find a solution without doing the factory reset.
My issue is exactly same as yours. YouTube Vanced (not microG) disappeared in my installed App and can’t be launched/installed/updated/uninstalled anymore after the Android OS upgraded from Android 10 to Android 11 on Samsung Note20 Ultra.
Error: incompatible……updated…..signature does not match…..
I think that the root cause of this issue has nothing to do with the OneUI 3 but this un-official YouTube cracking app got wiped by the new Android system upgrade automatically. The YouTube Vanced didn’t get completely removed in fact, and some residual app data remains on the phone.
Alright, the following way I tried is a little bit complicated, but no need ROOT nor any additional HACK or CRACKs. And, of course, no need to reset the phone.
- Find a Windows PC. (Windows 10)
- Download the Android Debug Bridge (as known as «adb») files from the URL:
https://developer.android.com/studio/releases/platform-tools.html- Extract the downloaded zip to C:, and a folder «platform-tools» will be extracted to there.
- Launch Command Prompt on Windows:
https://www.howtogeek.com/235101/10-ways-to-open-the-command-prompt-in-windows-10/- Type: cd C:platform-tools and press [Enter] to let command prompt locate the extracted folder.
- Use your phone and open developer options on Android:
https://www.samsung.com/uk/support/mobile-devices/how-do-i-turn-on-the-developer-options-menu-on-my-samsung-galaxy-device/- Enable the USB debugging mode option.
- Find a USB-A to USB-C cable, and please use the cable that originally shipped in the box of your Samsung phone if possible. (Older Samsung phone like note8 might give you one).
Note: I’m not sure if a C-to-C cable might work or not, and some PCs don’t have a USB-C port.
- Connect your phone to PC using the above cable.
- The Windows will run an automatic process to setup the phone connection, it might take about 30 seconds, and there would be a dialog prompts on your phone to ask you to select the USB connection. Please select the file transfer (MTP) mode.
- Go to the Command Prompt window that you opened and ran the command in the step 5.
- Type: adb devices and press [Enter] to let Android Debug Bridge locate your phone on PC.
- The above command will list your Android phone in the Command Prompt window, and then there will be a security prompt on your phone. Please allow the USB debugging mode on the phone accordingly.
- See if there is a device showing with an serial (it should be your phone’s internal hardware serial but not the model number) after the adb devices command. If yes, do the following steps.
- Type adb shell pm uninstall com.vanced.android.youtube, and press [Enter] in the Windows Command Prompt window.
- If the uninstallation works, the command prompt will show SUCCESS message. The process might take few seconds or accomplish right away.
- Unplug the USB connection.
- Launch Vanced Manager app on your phone to install the YouTube Vanced app, and the setup should work fine this time.
By the way, I didn’t reboot my phone or my Windows PC during the whole process. Hope the above info save some people’s ass.
[Revision History] 2021-03-21
- Corrected the term «Android Debug Module» to «Android Debug Bridge».
- Minor adjustments on the English writing.
When I type a command «adb devices» it gives an error as ‘adb’ is not recognised as an internal or external command, operable program or batch file…. It would be a great help if I find a video on this whole thing
My Dear Friend,
I really appreciate your help!!!! I was looking for months a solution in many different blogs to reinstall YouTube Vanced in my Xiaomi MI9, after upgrading to MIUI 12.5. I just followed instructions to unistall and reinstall the app as you explain, and now I’m happy again with YouTube Vanced working like a charm..THANKS A LOT!!!
I do find a solution without doing the factory reset.
My issue is exactly same as yours. YouTube Vanced (not microG) disappeared in my installed App and can’t be launched/installed/updated/uninstalled anymore after the Android OS upgraded from Android 10 to Android 11 on Samsung Note20 Ultra.
Error: incompatible……updated…..signature does not match…..
I think that the root cause of this issue has nothing to do with the OneUI 3 but this un-official YouTube cracking app got wiped by the new Android system upgrade automatically. The YouTube Vanced didn’t get completely removed in fact, and some residual app data remains on the phone.
Alright, the following way I tried is a little bit complicated, but no need ROOT nor any additional HACK or CRACKs. And, of course, no need to reset the phone.
- Find a Windows PC. (Windows 10)
- Download the Android Debug Bridge (as known as «adb») files from the URL:
https://developer.android.com/studio/releases/platform-tools.html- Extract the downloaded zip to C:, and a folder «platform-tools» will be extracted to there.
- Launch Command Prompt on Windows:
https://www.howtogeek.com/235101/10-ways-to-open-the-command-prompt-in-windows-10/- Type: cd C:platform-tools and press [Enter] to let command prompt locate the extracted folder.
- Use your phone and open developer options on Android:
https://www.samsung.com/uk/support/mobile-devices/how-do-i-turn-on-the-developer-options-menu-on-my-samsung-galaxy-device/- Enable the USB debugging mode option.
- Find a USB-A to USB-C cable, and please use the cable that originally shipped in the box of your Samsung phone if possible. (Older Samsung phone like note8 might give you one).
Note: I’m not sure if a C-to-C cable might work or not, and some PCs don’t have a USB-C port.
- Connect your phone to PC using the above cable.
- The Windows will run an automatic process to setup the phone connection, it might take about 30 seconds, and there would be a dialog prompts on your phone to ask you to select the USB connection. Please select the file transfer (MTP) mode.
- Go to the Command Prompt window that you opened and ran the command in the step 5.
- Type: adb devices and press [Enter] to let Android Debug Bridge locate your phone on PC.
- The above command will list your Android phone in the Command Prompt window, and then there will be a security prompt on your phone. Please allow the USB debugging mode on the phone accordingly.
- See if there is a device showing with an serial (it should be your phone’s internal hardware serial but not the model number) after the adb devices command. If yes, do the following steps.
- Type adb shell pm uninstall com.vanced.android.youtube, and press [Enter] in the Windows Command Prompt window.
- If the uninstallation works, the command prompt will show SUCCESS message. The process might take few seconds or accomplish right away.
- Unplug the USB connection.
- Launch Vanced Manager app on your phone to install the YouTube Vanced app, and the setup should work fine this time.
By the way, I didn’t reboot my phone or my Windows PC during the whole process. Hope the above info save some people’s ass.
[Revision History] 2021-03-21
- Corrected the term «Android Debug Module» to «Android Debug Bridge».
- Minor adjustments on the English writing.
Working for me (OnePlus 7)
thank you @KarthikMp18 your solution worked without factory reset (non-root)
Labels
bug
Something isn’t working
Всем доброго времени суток!
До этого времени не занимался вопросом установки YouTube. Сам им пользуюсь дома, с ноутбука, в движении автомобиля видео не смотрю, да и не советую это делать водителям, чтобы не отвлекаться от дороги. А вот для пассажиров — очень даже неплохое развлечение. Решил этим вопросом заморочиться исключительно после многочисленных вопросов о установке Youtube на наше ГУ.
Видео по установке прилагаю, текст с описанием и ссылками на используемые файлы далее по тексту
Для установки YouTube на наше ГУ потребуются 2 программы, они должны по версии быть совместимы: MicroG Vanced и YouTube Vanced. Данные файлы взял с сайта 4pda. Проверил на собственном автомобиле, все работает.
Что нужно сделать.
1) Сначала устанавливаем MicroG Vanced. Ссылка на файл: disk.yandex.ru/d/JrK9Y00ExNpivw
2) Затем устанавливаем YouTube Vanced. Версия: 16.29.39 Ссылка на файл: disk.yandex.ru/d/t_3lzs8KAJzu3w
Оба файла под архитектуру x86, Youtube Vanced взял самой «свежей версии» (Версия: 16.29.39 ) на момент выпуска данного поста.
В принципе больше ничего не нужно, все заранее в настройках установлено как надо, можно изменить на свой вкус.
Загружается все нормально, использовал интернет с Wi-Fi соединения, т.к. не знаю, каков лимит трафика с ESim МТС, встроенном в ГУ.
На полный экран разворачивается хорошо, на правую панель с часами не залазит.
Как убрать правую панель с часами — до сих пор пока не знаю. Перелистывается по таймингу хорошо. Можно настроить фоновое воспроизведение, при сворачивании приложения — все продолжает воспроизводиться из главного экрана.
В аккаунт Youtube входит, нужно выбрать в окне «Huawei» т.е. для устройств, не имеющих Гугл-сервисов
Поиск работает, воспроизведение видео — на отлично. Перемотка работает хорошо, на паузу ставится, рекламы нет. Когда буду сам пользоваться — не знаю, только если в глухих пробках или по просьбе пассажиров))
Всем удачи на дорогах!

Мод, позволяющий наслаждаться YouTube’ом без рекламы.
📝
Текущая версия
15.05.54

Язык
Русский
Скриншоты
Видео
Инструкции
1) Активировать только два первых патча андроида в Lucky Patcher и удалить стоковый ютуб
2) установить SAI (Split APKs Installer), выдать ему root права, включить в нём опцию «Использовать root» и обязательно выключить «Подписывать APKs»
3) установить .apks через SAI
4) отключить обновления в маркете
Самый популярный в мире видеохостинг YouTube прочно занял топовое место среди просматриваемых людьми в интернете ресурсов. Каждый день сотни миллионов людей просматривают интересующие их видео, следят за жизнью блогеров и так далее.
Но зачастую наслаждаться любимыми видео мешает назойливая реклама. YouTube Vanced + MicroG призван избавить вас от неё! Вы можете смотреть видео в фоновом режиме, настроить интерфейс в приятной тёмной теме и привязать свой аккаунт для получения регулярных рекомендаций и полного списка своих видеоблогеров!
Как установить (обновить) программу
- Скачайте APK файл на ваш андроид. Если у вас уже установлена старая версия приложения, то обновляем до свежей поверх имеющейся версии, иначе возможна потеря сохранённых данных.
- Начните установку с помощью ES Проводник или подобного менеджера файлов (обычно загруженные файлы хранятся в папке Download).
- Запустите приложение на вашем телефоне или планшете

Смотрите длинные видео из Инстаграм во весь экран!
v. 50.1.0.44.119

Популярная социальная сеть с видеороликами.
v. 3.1.1.510242

Позволяет транслировать видео в реальном времени.
v. 1.3.1.4

Сохраняйте фото и видео из Инстаграм легко.
v. 1.0.6

Делай свои лучшие снимки и делись ими с друзьями!
v. 123.0.0.21.114
Оставьте, пожалуйста, свой комментарий к программе YouTube Vanced + MicroG
Комментарии пользователей
У многих популярных приложений есть неофициальные модификации, созданные энтузиастами. Как правило, такие аналоги предлагают ту же программу, но с расширенным набором функций. Плюс ко всему модификации позволяют использовать приложение даже в том случае, если оно изначально недоступно на вашем устройстве. Яркий пример подобной программы — YouTube Vanced. Если вы до сих пор ничего не слышали о ней, то сейчас самое время познакомиться.

Несмотря на закрытие проекта, Vanced продолжает работать, но не без проблем
Содержание
- 1 Чем Vanced лучше обычного YouTube
- 2 Где скачать YouTube Vanced на Android
- 3 Как установить Vanced на телефон
- 4 Контент недоступен в этом приложении — ошибка Vanced
Чем Vanced лучше обычного YouTube
Приложение Vanced — это неофициальный мобильный клиент видеохостинга YouTube. Но в чем заключается преимущество его использования, если стандартный Ютуб тоже работает вполне себе неплохо? Для ответа на этот вопрос предлагаю взглянуть на главные особенности стороннего приложения:
- возможность простой установки на устройства, которые не сертифицированы Google (например, HUAWEI);
- отсутствие рекламы даже с VPN;
- работа в фоновом режиме (в окне или на выключенном экране) без подписки YouTube Premium;
- дизлайки на Ютубе;
- автоматический пропуск вступлений и рекламных интеграций в видео.
Плюс ко всему в последней версии Вансед доступны все функции, которыми славится и сам YouTube. Правда, по состоянию на март 2022 года. Дело в том, что ровно год назад поддержка проекта прекратилась. Всему виной вполне обоснованные юридические претензии со стороны YouTube. Тем не менее, вы все еще можете скачать Vanced на телефон и пользоваться почти всеми премиум-функциями видеохостинга бесплатно.
Где скачать YouTube Vanced на Android

Все эти приложения далеки от настоящего Vanced
⚡ Подпишись на Androidinsider в Дзене, чтобы получать новости из мира Андроид первым
Если вбить запрос «Vanced» в поисковую строку любого магазина от AppGallery до GetApps, то вы что-нибудь да найдете. Вот только предлагаемые программы не имеют ничего общего с тем самым приложением. Поэтому, чтобы бесплатно скачать Vanced, необходимо обратиться либо к официальному сайту разработчиков, либо к магазину APKPure, где располагается APK-файл последней на сегодняшний день версии 17.03.38, после выхода которой уже год Вансед не обновляется.

Качайте Vanced с официального сайта или через APKPure
Скачать с официального сайта
Скачать через APKPure
На сайте vanced.me вы найдете ссылки для загрузки сразу нескольких приложений. Я рекомендую скачивать Vanced Manager, так как неоднократно сталкивался с проблемой запуска стандартной программы. С менеджером таких проблем не возникает.
Читайте также: Как настроить YouTube на телефоне Android
Как установить Vanced на телефон
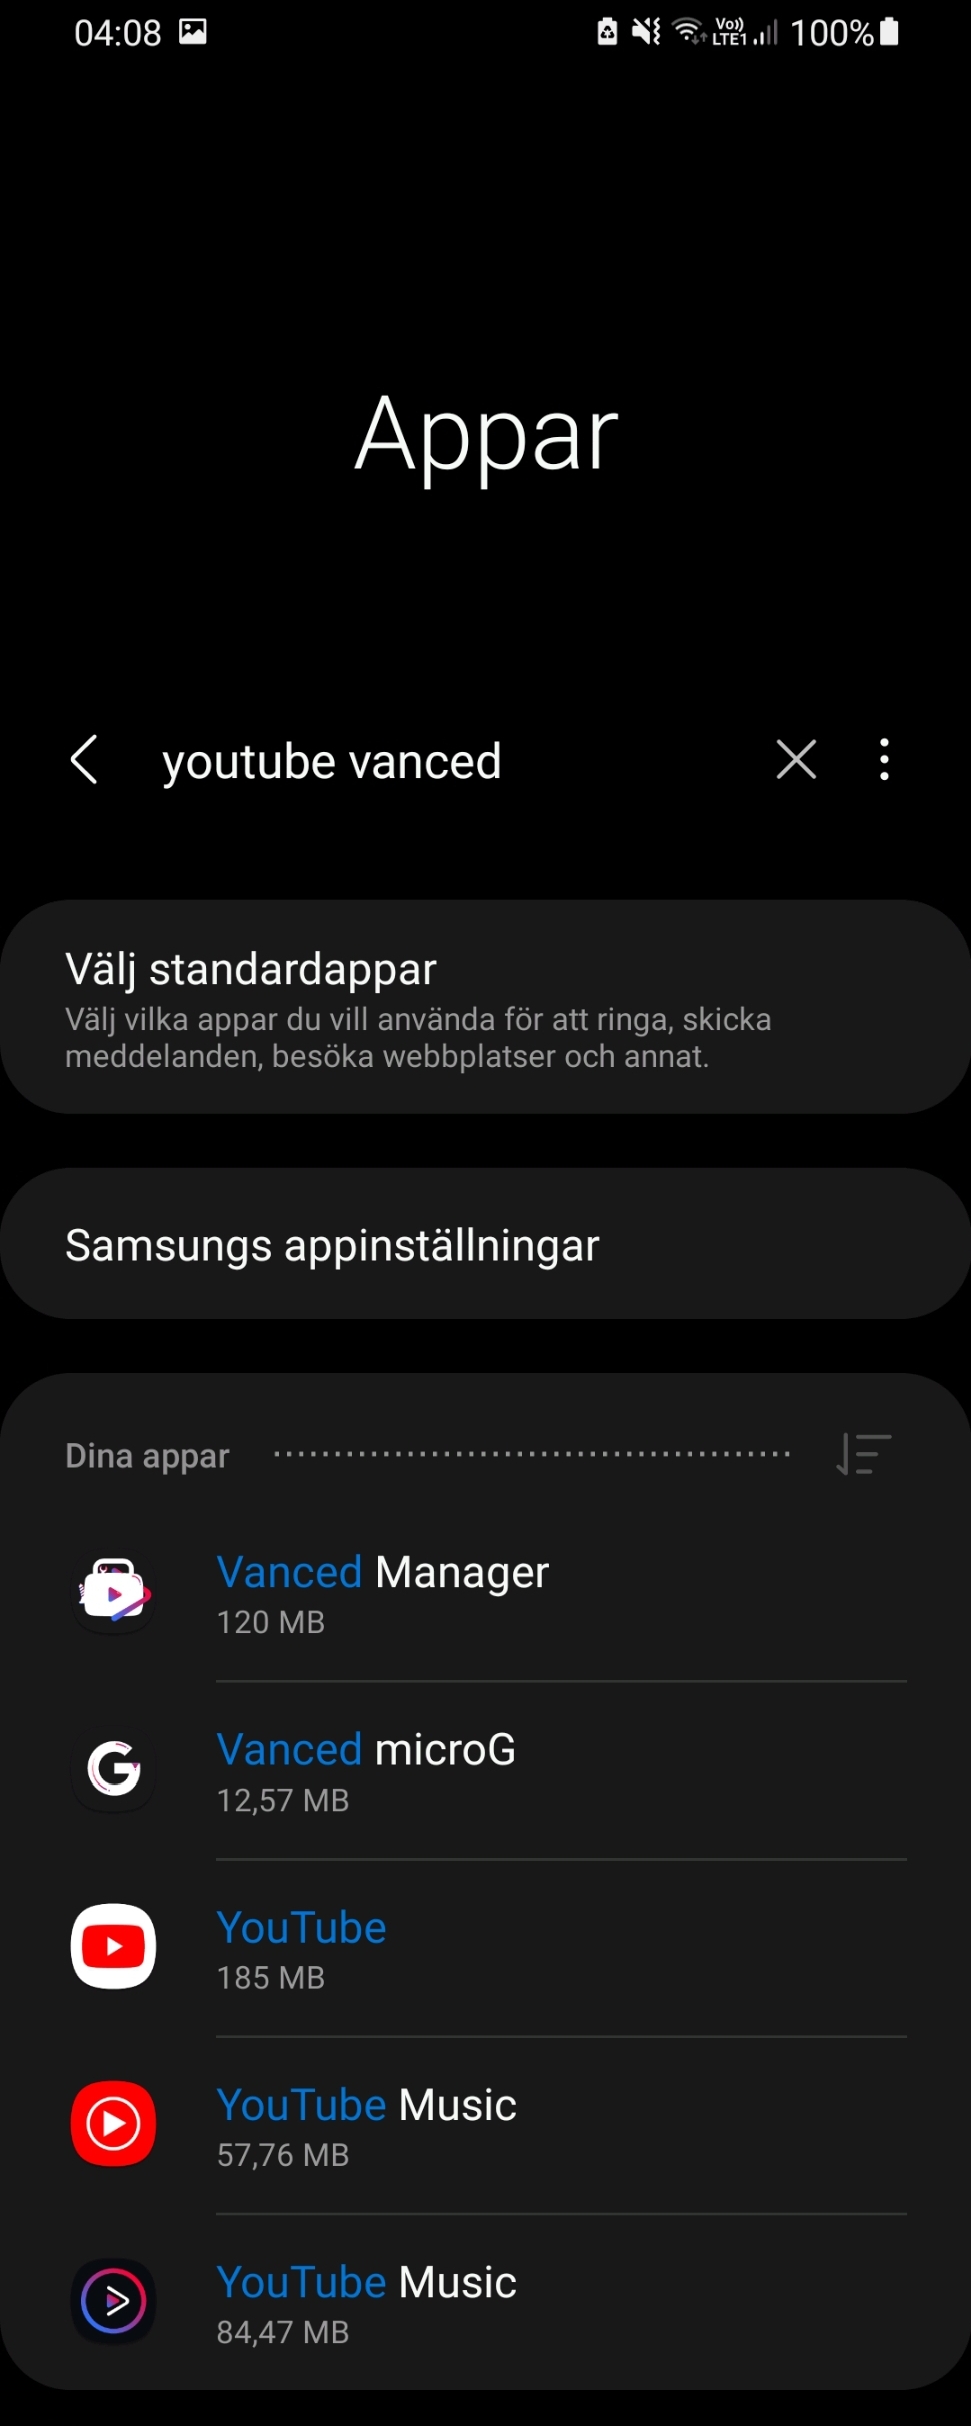
Vanced устанавливается так же, как и любой другой APK на Андроид. Вам нужно просто скачать файл, после чего запустить его и нажать кнопку «Установить». А вот дальше начинается интересное. Если у вас не запускается Vanced, удалите приложение и установите Vanced Manager. Откройте его и сделайте следующее:
- Раскройте вкладки «YouTube Vanced» и «Vanced MicroG».
- Скачайте и установите MicroG (надстройка, позволяющая войти в аккаунт YouTube).
- Сделайте то же самое с YouTube Vanced.

Устанавливайте Vanced через специальный менеджер
🔥 Загляни в телеграм-канал Сундук Али-Бабы, где мы собрали лучшие товары с АлиЭкспресс
Проблемы с запуском приложения чаще всего возникают именно из-за того, что многие игнорируют предварительную установку MicroG. Если сделать все так, как показано в инструкции, то проблем не будет. Далее вы наверняка захотите войти в аккаунт Vanced, для чего нужно сделать несколько простых шагов:
- Запустите приложение и откройте вкладку «Библиотека».
- Нажмите «Войти», а затем — «Добавить аккаунт».
- Нажмите кнопку «HUAWEI», если пользуетесь смартфоном этой компании, или «Войти», если вы являетесь владельцем устройства другого производителя.
- Авторизуйтесь в учетной записи Google, используя логин и пароль.

Вход выполняется так же легко, как и в обычном YouTube
Далее вы можете открыть настройки Vanced, чтобы отрегулировать работу автовоспроизведения или даже сделать видными дизлайки на Ютубе. С этой целью посетите раздел «Настройки Return YouTube Dislike» и активируйте соответствующий переключатель.

Через Vanced можно вернуть дизлайки
Параметры пропуска рекламных интеграций и вступлений регулируйте через вкладку «Настройки SponsorBlock». А в разделе «Настройки Vanced» вы найдете кучу фишек, которых нет в стандартном приложении YouTube от активации кодека VP9 для экономии трафика при сохранении качества до автоматического выбора самого высокого разрешения видео.
❗ Поделись своим мнением или задай вопрос в нашем телеграм-чате
Контент недоступен в этом приложении — ошибка Vanced
Многие пользователи Vanced при попытке запустить воспроизведение ролика видят на экране сообщение с текстом о том, что контент недоступен в этом приложении. Ниже приводится гиперссылка, перейдя по которой вы попадаете на страницу скачивания официального приложения YouTube через Google Play.

Вот такое сообщение можно увидеть при попытке открыть видео
С такой проблемой я ни разу не сталкивался, но часто слышал, что в YouTube Vanced контент недоступен. Изучив отзывы других пользователей, мне удалось составить список рекомендаций, позволяющих устранить ошибку:
- удалите Vanced, а потом установите приложение по инструкции, представленной ранее в этом материале;
- включите VPN, загрузив на смартфон одну из программ нашей подборки;
- покиньте учетную запись Google в приложении Vanced или наоборот войдите в нее, если не сделали этого раньше.
Причина возникновения проблемы, когда не работает Вансед, — блокировка воспроизведения видео со стороны YouTube, которая на данный момент осуществляется выборочно в некоторых странах. Если даже после выполнения всех рекомендаций вы продолжаете видеть, что в Ютуб Вансед этот контент недоступен, скачайте модификацию YouTube Vanced 17.33.42, предварительно установив MicroG через Vanced Manager или вручную при помощи файла на сайте vanced.me.
В этом руководстве мы покажем вам различные способы исправления ошибки «Контент недоступен» в YouTube Vanced. Это стороннее приложение использует клиент API YouTube и бесплатно открывает все платные функции оригинального приложения Youtube. Кроме того, он также имеет множество интригующих функций. Помимо очевидного отсутствия рекламы и фонового воспроизведения, вы даже можете вернуть счетчик неприязни или заблокировать спонсоров.
Тем не менее, Google недавно забил последний гвоздь в крышку гроба, и это только вопрос времени, когда мы встретим его печальную кончину, намеки на которую уже видны. В последнее время многие пользователи сообщил что они получают ошибку Content Not Available при попытке воспроизвести любое видео в приложении YouTube Vanced.
Полное сообщение об ошибке гласит: «Следующий контент недоступен в этом приложении. Смотрите этот контент в последней версии YouTube». Кроме того, некоторые также часто сталкиваются с проблемами буферизации в приложении Vsnced. Если вас также беспокоят какие-либо из этих проблем, это руководство поможет вам их исправить. Следуйте вместе.
Рекомендуется попробовать каждый из нижеперечисленных обходных путей, а затем посмотреть, какой из них приводит к успеху. Итак, имея это в виду, давайте начнем.
ИСПРАВЛЕНИЕ 1. Попробуйте обновленную версию YouTube
Если вы не хотите вдаваться в технические подробности исправления YouTube Vanced, вы можете попробовать его аналог YouTube Revanced. Он обладает всеми теми же функциями, что и Vanced, и работает хорошо и без каких-либо проблем как таковых. Так что качайте с официального сайта XDA [Direct Download Link 1 | Direct Download Link 2] и сразу установите его на свое устройство.
ИСПРАВЛЕНИЕ 2. Установите YouTube Vanced версии 18.02.33.
- Версия 18.02.33 YouTube Vanced поставляется с исправлением основной проблемы.
- Поэтому удалите текущую версию приложений YouTube Vanced и microG со своего устройства.
- Затем установите YouTube Vanced версии 18.02.33 и microG версии 0.2.26.225014 снизу:Vanced.microG.0.2.26.225014.apk
YouTube.Vanced.v18.02.33_Black_Universal_hotfix.apk - После того, как вы установили оба приложения, проверьте, исправляет ли оно ошибку Content Not Available в YouTube Vanced.
- Если проблема не устранена, включите спуф vp9 и protobuf, как показано в FIX 3 ниже.
ИСПРАВЛЕНИЕ 3. Включите подделку VP9 и Protobuf
- Запустите YouTube Vanced vv18.02.33 и перейдите в «Настройки» > «Настройки Vanced».
- Затем перейдите в «Видео» и включите «Подмена Protobuf» и «Кодек VP9».
- Теперь нажмите «Перезагрузить» в диалоговом окне подтверждения. Дождитесь перезапуска приложения.
- Проверьте, исправляет ли он ошибку Content Not Available в YouTube Vanced.
ИСПРАВЛЕНИЕ 4. Создайте новую учетную запись
Вы также можете создать новую учетную запись Google, войти в YouTube Vanced, используя эту новую учетную запись, и начать ее использовать. Вы больше не будете получать сообщение об ошибке «Контент недоступен».
ИСПРАВЛЕНИЕ 5. Использование YouTube Vanced в режиме инкогнито
Если вы не хотите создавать новую учетную запись, вы можете смотреть YouTube Vanced в режиме инкогнито, и вы не получите никаких ошибок.
ИСПРАВЛЕНИЕ 6. Удаление microG
Затем вы также можете удалить microG со своего устройства и без проблем смотреть YouTube Vanced. Однако, как и в случае с вышеуказанным исправлением, оно имеет тот же недостаток: вы больше не будете получать видео на основе ваших рекомендаций и интересов.
ИСПРАВЛЕНИЕ 7. Попробуйте YouTube Vanced v17.03.38
- Удалите текущую установленную версию YouTube Vanced с вашего устройства.
- Затем скачайте и установите YouTube Vanced версия 17.03.38.
- Проверьте, исправляет ли он ошибку Content Not Available в YouTube Vanced.
ИСПРАВЛЕНИЕ 8: Изменить YouTube Vanced APK
Этот твик поделился Реддитор и требует вашего ручного вмешательства, чтобы внести некоторые изменения в Vanced APK. Вот что вам нужно сделать:
- Откройте менеджер Vanced и загрузите Vanced (не устанавливайте его)
- Затем установите Apktool M и откройте его. Теперь перейдите в Android>Данные>com.vanced.manager>файлы>vanced>nonroot.
- Там у вас должны быть разделенные apks Vanced. Ссылаться на эти шаги объединить их в 1 APK (нажимайте ровно на значки).
- Как только Apktool M будет готов, он сообщит вам, где именно был сохранен файл APK.
- Теперь откройте ReVanced Manager. Перейдите в Patcher> Select application> Storage и выберите apk Vanced, который Apktool M только что антирасколол.
- Затем выберите только эти патчи: Client Spoof и Hide ads (остальные не трогайте) и нажмите на патч.
- После того, как исправление будет выполнено, в правом верхнем углу появятся три точки с дополнительными параметрами.
- Нажмите на них и выберите «Экспорт APK» и сохраните его на свое устройство.
- Не пытайтесь установить из менеджера, так как вы получите ошибку. Скорее заходите в сохраненный APK в вашем хранилище, устанавливайте его и наслаждайтесь!
Вот и все. Это были различные методы, которые должны помочь вам исправить ошибку «Контент недоступен» в YouTube Vanced. Если у вас есть какие-либо вопросы относительно вышеупомянутых шагов, сообщите нам об этом в комментариях. Мы вернемся к вам с решением в ближайшее время.
Skip to content
Sign up
-
In this repository
All GitHub
- No suggested jump to results
-
In this repository
All GitHub
-
In this organization
All GitHub
-
In this repository
All GitHub
Sign in
Sign up
This repository has been archived by the owner on Mar 15, 2022. It is now read-only.
TeamVanced
/
VancedManager
Public archive
- Notifications
-
Fork
1.2k -
Star
8.2k
Open
2 tasks done
ElBaltazar opened this issue
Oct 24, 2021
· 1 comment
Open
2 tasks done
Does not install the microg youtube vanced [Bug]:
#722
ElBaltazar opened this issue
Oct 24, 2021
· 1 comment
Assignees
Labels
bug
Something isn’t working
Comments
Copy link
ElBaltazar
commented
Oct 24, 2021
ElBaltazar
commented
Oct 24, 2021
Device
Device:honor 8A
Operating System:emui
Android Version:
9.1. 0. 468
Version
2.6.2
Bug Description
No download, install microg youtube vanced
Additional checks
- I have checked other bug reports and this is not a duplicate.
- This is a bug in Vanced Manager and NOT YouTube Vanced/YouTube Vanced Music/Vanced microG.
ElBaltazar
added
the
bug
Something isn’t working
label
Oct 24, 2021
ElBaltazar
assigned X1nto
Oct 24, 2021
Copy link
codedstrings
commented
Oct 28, 2021
codedstrings
commented
Oct 28, 2021
same here…
device : samsung J8
android version: 10
(fixed by installing microG externally but vanced manager shows dirty install and the update option still has the same issue..)
Sign up for free
to subscribe to this conversation on GitHub.
Already have an account?
Sign in.
Assignees
X1nto
Labels
bug
Something isn’t working
Projects
None yet
Milestone
No milestone
Development
No branches or pull requests
3 participants