You’ll be able to run Citrix Receiver after executing our solutions
by Claudiu Andone
Oldtimer in the tech and science press, Claudiu is focused on whatever comes new from Microsoft. His abrupt interest in computers started when he saw the first Home… read more
Updated on January 18, 2023
Reviewed by
Vlad Turiceanu

Passionate about technology, Windows, and everything that has a power button, he spent most of his time developing new skills and learning more about the tech world. Coming… read more
- If you can’t launch Citrix Receiver, your work-from-home day can be compromised.
- Your applications may cause the Citrix Receiver not to establish a problem.
- You must ensure that you have full permission for the user account.
XINSTALL BY CLICKING THE DOWNLOAD FILE
Fortect is a tool that does not simply cleans up your PC, but has a repository with several millions of Windows System files stored in their initial version. When your PC encounters a problem, Fortect will fix it for you, by replacing bad files with fresh versions. To fix your current PC issue, here are the steps you need to take:
- Download Fortect and install it on your PC.
- Start the tool’s scanning process to look for corrupt files that are the source of your problem
- Right-click on Start Repair so the tool could start the fixing algorythm
- Fortect has been downloaded by 0 readers this month.
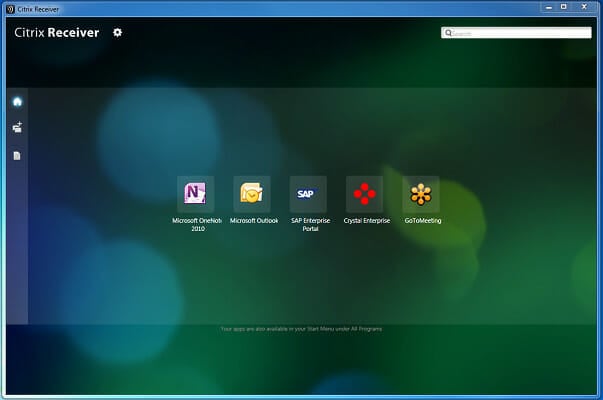
Citrix Receiver for Windows 10 has incredible features that help you work smarter from anywhere. However, this doesn’t mean that you’ll never get to experience its fair share of flaws. For example, you could be out of luck when you can’t launch Citrix Receiver.
While you can do so without elevated permissions and logging in with the regular domain user account, you cannot launch any applications and desktops.
However, if you launch Citrix with elevated permissions and then log in with the regular domain user account, launching them works like a breeze. For those looking to fix this, that means one thing.
Why is Citrix Receiver not working?
First, you must confirm your complete authorization to use the app. And then, you should see if the app has the most recent update.
These are the two most typical factors contributing to the inability to launch Citrix Receiver in Windows 10 or 11.
In addition, many problems were reported by our users, which were quite similar to one another. The following are examples of some of them:
- Citrix desktop not launching – The programs you’re utilizing may be causing the problem with Citrix Receiver not starting up.
- The Citrix workspace does not launch – You may run into this problem using an older version of Citrix Workspace or Citrix Receiver. In that case, the application won’t be able to start a desktop or apps.
- Citrix workspace not opening – If you are utilizing Citrix Workspace, there are situations when an upgrade by itself will not function.
- The Citrix workspace won’t open – The Internet connection you are utilizing is perhaps the most typical reason Citrix Workspace (formerly known as Citrix Receiver) is not functioning correctly.
- Windows 10’s Citrix Receiver is not launching applications – In the event that one or more Citrix Receiver apps are unable to be started in Windows 10, the first thing that you should do is likely be to refresh them.
- Mac’s Citrix Receiver is not launching applications – It is possible that you will need to uninstall the application. And then delete all of its registry values in order to solve the problem of the app failing to open a desktop.
- Citrix application disappears after launching – The problem arises when the default time-out of one minute is surpassed. At this point, the session logs off automatically because the program takes a long time to start.
- Citrix application not launching no error – The problem can only occur when the published application is used outside a published session.
- Begin app failed please call system administrator – Any customization, such as a script that pushes changes to the TWI registry key, has the potential to lead to the deletion of needed data from the TWI registry. Which will result in an error when the program is launched.
- Citrix workspace not opening ICA file – Simply navigate to the directory where the ICA file was downloaded to correct this. When selecting the file, click the right mouse button to select Open with from the context menu. Next, choose Citrix Connection Manager as your software.
- Citrix Receiver not working in Chrome on Mac – Activate the Receiver Utility for cleaning up a Citrix Receiver installation that has been corrupted or that was performed in the past.
- Citrix Receiver not launching in Windows 10 – Refresh the applications you’re using in order to fix this error.
Is Citrix having issues today?
To see if Citrix is having issues at a particular moment, you can access their status page to see if they are up or not.
There you will see analytics and the states of gateways for every continent the service provides access to.
Today’s guide will show you how to quickly launch Citrix applications and desktops. So keep on reading the brief list of fixes you may apply in that regard.
What can I do if the Citrix workspace is not launching?
1. Refresh applications
If one or more Citrix Receiver applications cannot be launched in Windows 10, refreshing them is arguably the first thing you should do.
Immediately click the drop-down next to your name in the upper-right corner of the menu. Then, click Refresh Apps and see if the issue persists.
2. Ensure full permissions for the user account
If you’re looking to launch Citrix Receiver in Windows 10 with no effort again, note that Full Permissions are required for the user account. You will find this under HKEY_USERSUSER_SIDSOFTWARECitrix on the client machine.
We recommend ensuring you have full permissions for the user account used to log in to Citrix Receiver for the Registry Key.
If the domain user account does not have permissions, delete the Citrix Registry key after taking a backup. Then, exit Citrix Receiver and launch it back.
Some PC issues are hard to tackle, especially when it comes to missing or corrupted system files and repositories of your Windows.
Be sure to use a dedicated tool, such as Fortect, which will scan and replace your broken files with their fresh versions from its repository.
The Registry key will be created once more, with all relevant required permissions, and thus fix the Citrix workspace not opening ICA file error.
- How to open ICA files on Windows 10
- FIX: Citrix ceip.exe Application Error [Quick Guide]
- 3+ confirmed tips for fixing the Windows Remote Access Service error
3. Use another remote working solution
If Citrix Receiver is only giving you more headaches, maybe you should try another remote desktop solution. This way, you may increase your productivity.
To be more exact, the recommended solution below can deliver applications and desktops to any employee from a network.
But the best part is that it’s not complicated to implement within any environment. Moreover, it addresses the most significant concern in a company network: data security.
You will be able to secure all the online communication channels. From data leakage and theft by using the Secure Sockets Layer (SSL), data encryption using FIPS, and 2-way identification.
All the data transfers are monitored and reported in a central console for the IT manager in a visual manner.
This solution is perfectly integrated with a lot of other security solutions. Some examples are SafeNet, DualShield, Azure MFA, RADIUS server, and Google Authenticator.

Parallels RAS
Start using this all-in-one remote work solution for accessing your applications.
4. Download the latest version available
- In a browser, go to Citrix’s website to find the Citrix Windows 11 download file then click Download.
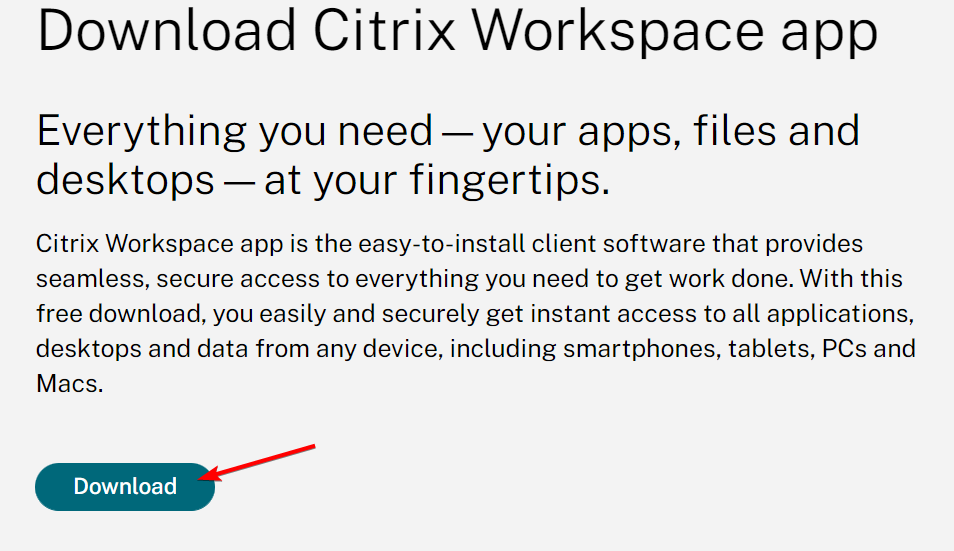
- The latest available version of the Citrix Workspace app should be there specified. Follow the on-screen steps to install it.
5. Reset Citrix Receiver
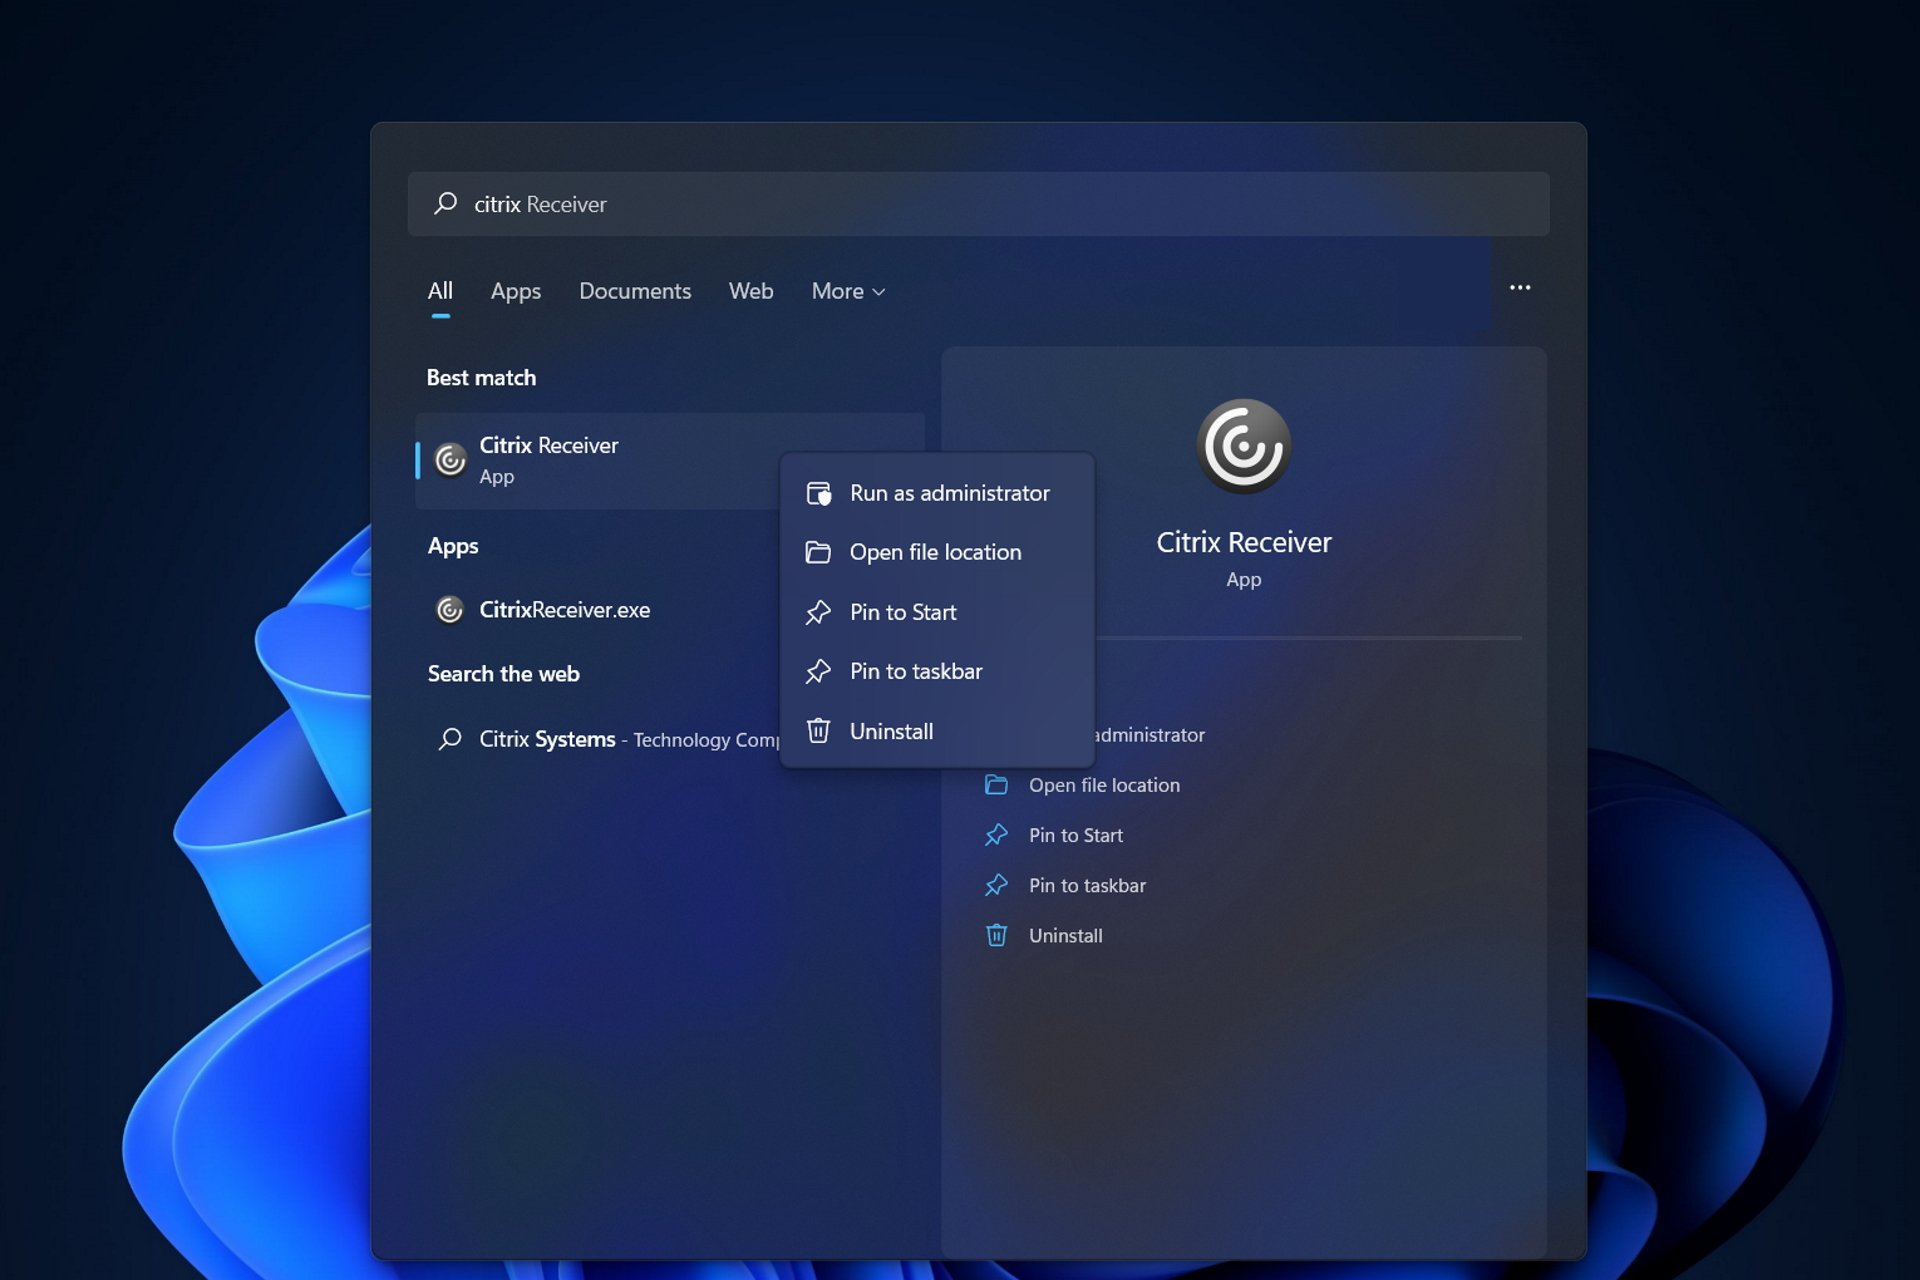
- Firstly, right-click the Receiver icon in the system tray.
- Click Advanced Preferences next and select the Reset Receiver option.
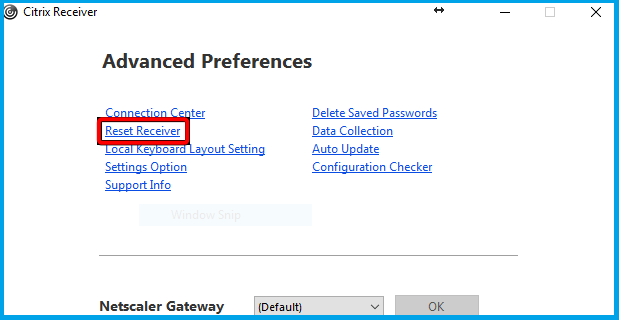
- A prompt will appear asking if you are sure you want to reset the receiver back to default settings. Confirm by clicking on Yes, reset Receiver.
- If Citrix Receiver requires you to add your account again. Enter your Domain username and password. You may be prompted to log in twice. This is also how you can fix Citrix apps not launching on Mac.
If things worsen and nothing seems to work, resetting the Citrix Receiver can help. Perform the above steps, and you should now be able to log onto Citrix as usual.
Note that resetting does not impact the Receiver or plug-in installation, per-machine ICA lockdown settings, or GPOs. However, accounts, apps delivered by the Self-Service plug-in, cached files, and saved passwords are removed.
Uninstalling with the receiver cleanup utility and reinstalling is also a potential solution. Just give it a go when all other fixes fail.
While each user has different expectations, this guide will provide a good overview of what you can do when you cannot launch Citrix Receiver in Windows 10/11.
For more potential solutions, check out how to fix the Citrix Receiver fatal error on Windows 10/11.
Do you have any ideas or tips to make Citrix Receiver work properly? Please drop a comment below and let us know your thoughts.
Still experiencing issues?
SPONSORED
If the above suggestions have not solved your problem, your computer may experience more severe Windows troubles. We suggest choosing an all-in-one solution like Fortect to fix problems efficiently. After installation, just click the View&Fix button and then press Start Repair.
![]()
Citrix Receiver для Windows 10 обладает большим набором функций, которые помогут вам работать эффективнее, где бы вы ни находились.
Это не означает, что вы никогда не столкнетесь с его недостатками. Например, вам может не повезти при попытке запустить Citrix Receiver.
Хотя вы можете сделать это без повышенных разрешений и входа в систему с обычной учетной записью пользователя домена, вы не можете запускать какие-либо приложения и рабочие столы, которые там появляются.
Однако, если вы запустите Citrix с повышенными правами, а затем войдете в систему с обычной учетной записью пользователя домена, их запуск будет очень простым. Для тех, кто хочет это исправить, это означает одно.
Цель сегодняшнего руководства — показать вам, как легко запускать приложения и рабочие столы Citrix. Просто продолжайте читать краткий список исправлений, которые вы можете применить в этом отношении.
Как исправить ошибку запуска Citrix Receiver в Windows 10?
1. Обновить приложения

Если одно или несколько приложений Citrix Receiver не могут быть запущены в Windows 10, возможно, первое, что вам следует сделать, это обновить их.
Немедленно щелкните раскрывающийся список рядом с вашим именем в правом верхнем углу меню. Затем нажмите «Обновить приложения» и посмотрите, сохраняется ли проблема.
2. Обеспечить полные права для учетной записи пользователя

Если вы хотите снова запустить Citrix Receiver в Windows 10 без каких-либо усилий, обратите внимание, что для учетной записи пользователя в разделе HKEY_USERSUSER_SIDSOFTWARECitrix на клиентском компьютере требуются полные разрешения.
Вот почему мы рекомендуем убедиться, что у вас есть полные разрешения для учетной записи пользователя, используемой для входа в Citrix Receiver для ключа реестра.
Если учетная запись пользователя домена не имеет разрешений, удалите ключ реестра Citrix после создания резервной копии. Затем выйдите из Citrix Receiver и снова запустите его.
Ключ реестра будет создан еще раз, на этот раз со всеми соответствующими необходимыми разрешениями.
3. Используйте другое решение для удаленной работы

Если Citrix Receiver только доставляет вам больше головной боли, возможно, вам следует подумать о том, чтобы попробовать другое решение для удаленного рабочего стола, которое может повысить вашу производительность.
Точнее, рекомендуемое ниже решение способно доставлять приложения и рабочие столы любому сотруднику по сети.
Но самое приятное то, что его совсем не сложно внедрить в любой среде, и он решает самую большую проблему в корпоративной сети: безопасность данных.
Вы сможете обезопасить все каналы онлайн-коммуникаций от утечки и кражи данных с помощью протокола защищенных сокетов (SSL), шифрования данных с использованием FIPS и двусторонней идентификации.
Все передачи данных отслеживаются и отображаются на центральной консоли для ИТ-менеджера в визуальной форме.
Кроме того, это решение отлично интегрируется со многими другими решениями для обеспечения безопасности, такими как SafeNet, DualShield, Azure MFA, RADIUS-сервер и даже Google Authenticator.
4. Загрузите последнюю доступную версию

- Найдите значок Citrix Receiver на панели задач.
- Щелкните его правой кнопкой мыши, чтобы выбрать «Дополнительные настройки».
- В разделе «О программе» обратите внимание на версию.
- В браузере перейдите по адресу Receiver.citrix.com.
- Затем нажмите «Загрузить для Windows».
- Там должна быть указана последняя доступная версия приложения Citrix Workspace. Сравните свою версию с этой.
- Если онлайн-версия отличается, загрузите новую версию следующей.
5. Сбросьте Citrix-приемник

- Во-первых, щелкните правой кнопкой мыши значок приемника на панели задач.
- Нажмите «Дополнительные настройки» далее.
- Выберите опцию «Сбросить приемник».
- Появится подсказка с вопросом, уверены ли вы, что хотите сбросить ресивер к настройкам по умолчанию. Подтвердите, нажав «Да, сбросить приемник».
- Введите remote.ptlgateway.net.
- Citrix Receiver требует, чтобы вы снова добавили свою учетную запись. Введите имя пользователя и пароль вашего домена. Вам может быть предложено дважды войти в систему.
- Вы также можете поставить галочку, чтобы запомнить учетные данные.
Если ситуация ухудшается и кажется, что ничего не работает, может помочь сброс Citrix Receiver. Выполните вышеуказанные шаги, и теперь вы сможете войти в Citrix как обычно.
Обратите внимание, что сброс не влияет на установку Receiver или подключаемого модуля, настройки блокировки ICA для каждой машины или объекты групповой политики. Однако учетные записи, приложения, предоставляемые подключаемым модулем самообслуживания, а также кэшированные файлы и сохраненные пароли, удаляются.
Удаление с помощью утилиты очистки приемника, а затем повторная установка также описываются как потенциальное решение. Просто попробуйте, когда все другие исправления не помогли.
Есть ли у вас какие-либо идеи или советы по правильной работе Citrix Receiver? Оставьте комментарий ниже и дайте нам знать ваши мысли.
You’ll be able to run Citrix Receiver after executing our solutions
by Claudiu Andone
Oldtimer in the tech and science press, Claudiu is focused on whatever comes new from Microsoft. His abrupt interest in computers started when he saw the first Home… read more
Updated on January 18, 2023
Reviewed by
Vlad Turiceanu

Passionate about technology, Windows, and everything that has a power button, he spent most of his time developing new skills and learning more about the tech world. Coming… read more
- If you can’t launch Citrix Receiver, your work-from-home day can be compromised.
- Your applications may cause the Citrix Receiver not to establish a problem.
- You must ensure that you have full permission for the user account.
XINSTALL BY CLICKING THE DOWNLOAD FILE
This software will repair common computer errors, protect you from file loss, malware, hardware failure and optimize your PC for maximum performance. Fix PC issues and remove viruses now in 3 easy steps:
- Download Restoro PC Repair Tool that comes with Patented Technologies (patent available here).
- Click Start Scan to find Windows issues that could be causing PC problems.
- Click Repair All to fix issues affecting your computer’s security and performance
- Restoro has been downloaded by 0 readers this month.
Citrix Receiver for Windows 10 has incredible features that help you work smarter from anywhere. However, this doesn’t mean that you’ll never get to experience its fair share of flaws. For example, you could be out of luck when you can’t launch Citrix Receiver.
While you can do so without elevated permissions and logging in with the regular domain user account, you cannot launch any applications and desktops.
However, if you launch Citrix with elevated permissions and then log in with the regular domain user account, launching them works like a breeze. For those looking to fix this, that means one thing.
Why is Citrix Receiver not working?
First, you must confirm your complete authorization to use the app. And then, you should see if the app has the most recent update.
These are the two most typical factors contributing to the inability to launch Citrix Receiver in Windows 10 or 11.
In addition, many problems were reported by our users, which were quite similar to one another. The following are examples of some of them:
- Citrix desktop not launching – The programs you’re utilizing may be causing the problem with Citrix Receiver not starting up.
- The Citrix workspace does not launch – You may run into this problem using an older version of Citrix Workspace or Citrix Receiver. In that case, the application won’t be able to start a desktop or apps.
- Citrix workspace not opening – If you are utilizing Citrix Workspace, there are situations when an upgrade by itself will not function.
- The Citrix workspace won’t open – The Internet connection you are utilizing is perhaps the most typical reason Citrix Workspace (formerly known as Citrix Receiver) is not functioning correctly.
- Windows 10’s Citrix Receiver is not launching applications – In the event that one or more Citrix Receiver apps are unable to be started in Windows 10, the first thing that you should do is likely be to refresh them.
- Mac’s Citrix Receiver is not launching applications – It is possible that you will need to uninstall the application. And then delete all of its registry values in order to solve the problem of the app failing to open a desktop.
- Citrix application disappears after launching – The problem arises when the default time-out of one minute is surpassed. At this point, the session logs off automatically because the program takes a long time to start.
- Citrix application not launching no error – The problem can only occur when the published application is used outside a published session.
- Begin app failed please call system administrator – Any customization, such as a script that pushes changes to the TWI registry key, has the potential to lead to the deletion of needed data from the TWI registry. Which will result in an error when the program is launched.
- Citrix workspace not opening ICA file – Simply navigate to the directory where the ICA file was downloaded to correct this. When selecting the file, click the right mouse button to select Open with from the context menu. Next, choose Citrix Connection Manager as your software.
- Citrix Receiver not working in Chrome on Mac – Activate the Receiver Utility for cleaning up a Citrix Receiver installation that has been corrupted or that was performed in the past.
- Citrix Receiver not launching in Windows 10 – Refresh the applications you’re using in order to fix this error.
Is Citrix having issues today?
To see if Citrix is having issues at a particular moment, you can access their status page to see if they are up or not.
There you will see analytics and the states of gateways for every continent the service provides access to.
Today’s guide will show you how to quickly launch Citrix applications and desktops. So keep on reading the brief list of fixes you may apply in that regard.
What can I do if the Citrix workspace is not launching?
1. Refresh applications
If one or more Citrix Receiver applications cannot be launched in Windows 10, refreshing them is arguably the first thing you should do.
Immediately click the drop-down next to your name in the upper-right corner of the menu. Then, click Refresh Apps and see if the issue persists.
2. Ensure full permissions for the user account
If you’re looking to launch Citrix Receiver in Windows 10 with no effort again, note that Full Permissions are required for the user account. You will find this under HKEY_USERSUSER_SIDSOFTWARECitrix on the client machine.
We recommend ensuring you have full permissions for the user account used to log in to Citrix Receiver for the Registry Key.
If the domain user account does not have permissions, delete the Citrix Registry key after taking a backup. Then, exit Citrix Receiver and launch it back.
Some PC issues are hard to tackle, especially when it comes to corrupted repositories or missing Windows files. If you are having troubles fixing an error, your system may be partially broken.
We recommend installing Restoro, a tool that will scan your machine and identify what the fault is.
Click here to download and start repairing.
The Registry key will be created once more, with all relevant required permissions, and thus fix the Citrix workspace not opening ICA file error.
- How to open ICA files on Windows 10
- FIX: Citrix ceip.exe Application Error [Quick Guide]
- 3+ confirmed tips for fixing the Windows Remote Access Service error
3. Use another remote working solution
If Citrix Receiver is only giving you more headaches, maybe you should try another remote desktop solution. This way, you may increase your productivity.
To be more exact, the recommended solution below can deliver applications and desktops to any employee from a network.
But the best part is that it’s not complicated to implement within any environment. Moreover, it addresses the most significant concern in a company network: data security.
You will be able to secure all the online communication channels. From data leakage and theft by using the Secure Sockets Layer (SSL), data encryption using FIPS, and 2-way identification.
All the data transfers are monitored and reported in a central console for the IT manager in a visual manner.
This solution is perfectly integrated with a lot of other security solutions. Some examples are SafeNet, DualShield, Azure MFA, RADIUS server, and Google Authenticator.
Parallels RAS
Start using this all-in-one remote work solution for accessing your applications.
4. Download the latest version available
- In a browser, go to Citrix’s website to find the Citrix Windows 11 download file then click Download.
- The latest available version of the Citrix Workspace app should be there specified. Follow the on-screen steps to install it.
5. Reset Citrix Receiver
- Firstly, right-click the Receiver icon in the system tray.
- Click Advanced Preferences next and select the Reset Receiver option.
- A prompt will appear asking if you are sure you want to reset the receiver back to default settings. Confirm by clicking on Yes, reset Receiver.
- If Citrix Receiver requires you to add your account again. Enter your Domain username and password. You may be prompted to log in twice. This is also how you can fix Citrix apps not launching on Mac.
If things worsen and nothing seems to work, resetting the Citrix Receiver can help. Perform the above steps, and you should now be able to log onto Citrix as usual.
Note that resetting does not impact the Receiver or plug-in installation, per-machine ICA lockdown settings, or GPOs. However, accounts, apps delivered by the Self-Service plug-in, cached files, and saved passwords are removed.
Uninstalling with the receiver cleanup utility and reinstalling is also a potential solution. Just give it a go when all other fixes fail.
While each user has different expectations, this guide will provide a good overview of what you can do when you cannot launch Citrix Receiver in Windows 10/11.
For more potential solutions, check out how to fix the Citrix Receiver fatal error on Windows 10/11.
Do you have any ideas or tips to make Citrix Receiver work properly? Please drop a comment below and let us know your thoughts.
Still having issues? Fix them with this tool:
SPONSORED
If the advices above haven’t solved your issue, your PC may experience deeper Windows problems. We recommend downloading this PC Repair tool (rated Great on TrustPilot.com) to easily address them. After installation, simply click the Start Scan button and then press on Repair All.
![]()
Newsletter
You’ll be able to run Citrix Receiver after executing our solutions
by Claudiu Andone
Oldtimer in the tech and science press, Claudiu is focused on whatever comes new from Microsoft. His abrupt interest in computers started when he saw the first Home… read more
Updated on January 18, 2023
Reviewed by
Vlad Turiceanu
Passionate about technology, Windows, and everything that has a power button, he spent most of his time developing new skills and learning more about the tech world. Coming… read more
- If you can’t launch Citrix Receiver, your work-from-home day can be compromised.
- Your applications may cause the Citrix Receiver not to establish a problem.
- You must ensure that you have full permission for the user account.
XINSTALL BY CLICKING THE DOWNLOAD FILE
This software will repair common computer errors, protect you from file loss, malware, hardware failure and optimize your PC for maximum performance. Fix PC issues and remove viruses now in 3 easy steps:
- Download Restoro PC Repair Tool that comes with Patented Technologies (patent available here).
- Click Start Scan to find Windows issues that could be causing PC problems.
- Click Repair All to fix issues affecting your computer’s security and performance
- Restoro has been downloaded by 0 readers this month.
Citrix Receiver for Windows 10 has incredible features that help you work smarter from anywhere. However, this doesn’t mean that you’ll never get to experience its fair share of flaws. For example, you could be out of luck when you can’t launch Citrix Receiver.
While you can do so without elevated permissions and logging in with the regular domain user account, you cannot launch any applications and desktops.
However, if you launch Citrix with elevated permissions and then log in with the regular domain user account, launching them works like a breeze. For those looking to fix this, that means one thing.
Why is Citrix Receiver not working?
First, you must confirm your complete authorization to use the app. And then, you should see if the app has the most recent update.
These are the two most typical factors contributing to the inability to launch Citrix Receiver in Windows 10 or 11.
In addition, many problems were reported by our users, which were quite similar to one another. The following are examples of some of them:
- Citrix desktop not launching – The programs you’re utilizing may be causing the problem with Citrix Receiver not starting up.
- The Citrix workspace does not launch – You may run into this problem using an older version of Citrix Workspace or Citrix Receiver. In that case, the application won’t be able to start a desktop or apps.
- Citrix workspace not opening – If you are utilizing Citrix Workspace, there are situations when an upgrade by itself will not function.
- The Citrix workspace won’t open – The Internet connection you are utilizing is perhaps the most typical reason Citrix Workspace (formerly known as Citrix Receiver) is not functioning correctly.
- Windows 10’s Citrix Receiver is not launching applications – In the event that one or more Citrix Receiver apps are unable to be started in Windows 10, the first thing that you should do is likely be to refresh them.
- Mac’s Citrix Receiver is not launching applications – It is possible that you will need to uninstall the application. And then delete all of its registry values in order to solve the problem of the app failing to open a desktop.
- Citrix application disappears after launching – The problem arises when the default time-out of one minute is surpassed. At this point, the session logs off automatically because the program takes a long time to start.
- Citrix application not launching no error – The problem can only occur when the published application is used outside a published session.
- Begin app failed please call system administrator – Any customization, such as a script that pushes changes to the TWI registry key, has the potential to lead to the deletion of needed data from the TWI registry. Which will result in an error when the program is launched.
- Citrix workspace not opening ICA file – Simply navigate to the directory where the ICA file was downloaded to correct this. When selecting the file, click the right mouse button to select Open with from the context menu. Next, choose Citrix Connection Manager as your software.
- Citrix Receiver not working in Chrome on Mac – Activate the Receiver Utility for cleaning up a Citrix Receiver installation that has been corrupted or that was performed in the past.
- Citrix Receiver not launching in Windows 10 – Refresh the applications you’re using in order to fix this error.
Is Citrix having issues today?
To see if Citrix is having issues at a particular moment, you can access their status page to see if they are up or not.
There you will see analytics and the states of gateways for every continent the service provides access to.
Today’s guide will show you how to quickly launch Citrix applications and desktops. So keep on reading the brief list of fixes you may apply in that regard.
What can I do if the Citrix workspace is not launching?
1. Refresh applications
If one or more Citrix Receiver applications cannot be launched in Windows 10, refreshing them is arguably the first thing you should do.
Immediately click the drop-down next to your name in the upper-right corner of the menu. Then, click Refresh Apps and see if the issue persists.
2. Ensure full permissions for the user account
If you’re looking to launch Citrix Receiver in Windows 10 with no effort again, note that Full Permissions are required for the user account. You will find this under HKEY_USERSUSER_SIDSOFTWARECitrix on the client machine.
We recommend ensuring you have full permissions for the user account used to log in to Citrix Receiver for the Registry Key.
If the domain user account does not have permissions, delete the Citrix Registry key after taking a backup. Then, exit Citrix Receiver and launch it back.
Some PC issues are hard to tackle, especially when it comes to corrupted repositories or missing Windows files. If you are having troubles fixing an error, your system may be partially broken.
We recommend installing Restoro, a tool that will scan your machine and identify what the fault is.
Click here to download and start repairing.
The Registry key will be created once more, with all relevant required permissions, and thus fix the Citrix workspace not opening ICA file error.
- How to open ICA files on Windows 10
- FIX: Citrix ceip.exe Application Error [Quick Guide]
- 3+ confirmed tips for fixing the Windows Remote Access Service error
3. Use another remote working solution
If Citrix Receiver is only giving you more headaches, maybe you should try another remote desktop solution. This way, you may increase your productivity.
To be more exact, the recommended solution below can deliver applications and desktops to any employee from a network.
But the best part is that it’s not complicated to implement within any environment. Moreover, it addresses the most significant concern in a company network: data security.
You will be able to secure all the online communication channels. From data leakage and theft by using the Secure Sockets Layer (SSL), data encryption using FIPS, and 2-way identification.
All the data transfers are monitored and reported in a central console for the IT manager in a visual manner.
This solution is perfectly integrated with a lot of other security solutions. Some examples are SafeNet, DualShield, Azure MFA, RADIUS server, and Google Authenticator.
Parallels RAS
Start using this all-in-one remote work solution for accessing your applications.
4. Download the latest version available
- In a browser, go to Citrix’s website to find the Citrix Windows 11 download file then click Download.
- The latest available version of the Citrix Workspace app should be there specified. Follow the on-screen steps to install it.
5. Reset Citrix Receiver
- Firstly, right-click the Receiver icon in the system tray.
- Click Advanced Preferences next and select the Reset Receiver option.
- A prompt will appear asking if you are sure you want to reset the receiver back to default settings. Confirm by clicking on Yes, reset Receiver.
- If Citrix Receiver requires you to add your account again. Enter your Domain username and password. You may be prompted to log in twice. This is also how you can fix Citrix apps not launching on Mac.
If things worsen and nothing seems to work, resetting the Citrix Receiver can help. Perform the above steps, and you should now be able to log onto Citrix as usual.
Note that resetting does not impact the Receiver or plug-in installation, per-machine ICA lockdown settings, or GPOs. However, accounts, apps delivered by the Self-Service plug-in, cached files, and saved passwords are removed.
Uninstalling with the receiver cleanup utility and reinstalling is also a potential solution. Just give it a go when all other fixes fail.
While each user has different expectations, this guide will provide a good overview of what you can do when you cannot launch Citrix Receiver in Windows 10/11.
For more potential solutions, check out how to fix the Citrix Receiver fatal error on Windows 10/11.
Do you have any ideas or tips to make Citrix Receiver work properly? Please drop a comment below and let us know your thoughts.
Still having issues? Fix them with this tool:
SPONSORED
If the advices above haven’t solved your issue, your PC may experience deeper Windows problems. We recommend downloading this PC Repair tool (rated Great on TrustPilot.com) to easily address them. After installation, simply click the Start Scan button and then press on Repair All.
![]()
Newsletter
Если у вас возникли сложности с установкой программы Citrix Workspace, например, вы производите обновление с неподдерживаемой версии приложения Citrix Workspace или предыдущая установка или обновление завершились неудачно, в новых версиях установщика вы можете воспользоваться ключом командной строки /forceinstall.
Для этого откройте командную строку от имени администратора, перейдите в папку с инсталлятором программы и выполните установку, как показано ниже:
CitrixWorkspaceApp.exe /forceinstallКлюч /forceinstall определяет, требуется ли очистка, и в случае необходимости очищает все существующие записи конфигурации и реестра приложения Citrix Workspace в системе и повторяет попытку установки.
Если по каким-то причинам вам не удается корректно переустановить программу Citrix Workspace, вы также можете воспользоваться утилитой Receiver Clean-Up. Утилита представляет собой отдельный исполняемый файл и не требует установки.
Скачать утилиту вы можете здесь.
Хотя утилита очистки создаст резервную копию ключей реестра перед их удалением, рекомендуется самостоятельно сделать резервную копию реестра перед запуском этого инструмента.
Требования:
Утилита очистки Receiver Clean-Up не поддерживает пользователей без прав администратора с перемещаемым профилем.
Для корректной работы утилиты Receiver Clean-Up требуется полный доступ к следующим разделам реестра и папкам:
- Реестр локального компьютера (HKLM)
- Локальный реестр пользователей (HKCU)
- Профиль пользователя по умолчанию на компьютере
- Папка %programfiles%citrix в 32-разрядных системах или %programfiles(x86)%citrix в 64-разрядных системах
Порядок действий:
- Запустите утилиту очистки Receiver Clean-Up с правами администратора.
- Перезагрузите компьютер после завершения работы утилиты.
Примечание. При желании утилиту очистки можно запустить в автоматическом режиме с помощью параметра командной строки /silent.
ReceiverCleanupUtility.exe /silentПримечание: Если программа Citrix Workspace не установлена в папке по умолчанию, утилита очистки Receiver Clean-Up может работать неправильно.
Результат работы утилиты Receiver Clean-Up можно найти в папке ReceiverLogs, которая создается в том месте, где запущена утилита. Там же находится резервная копия ключей реестра программы Citrix Receiver.
Содержание
- 3 простых шага по исправлению ошибок CITRIXRECEIVER.EXE
- 1- Очистите мусорные файлы, чтобы исправить citrixreceiver.exe, которое перестало работать из-за ошибки.
- 2- Очистите реестр, чтобы исправить citrixreceiver.exe, которое перестало работать из-за ошибки.
- 3- Настройка Windows для исправления критических ошибок citrixreceiver.exe:
- Как вы поступите с файлом citrixreceiver.exe?
- Некоторые сообщения об ошибках, которые вы можете получить в связи с citrixreceiver.exe файлом
- CITRIXRECEIVER.EXE
- процессов:
- Citrix: после обновления Windows 10 Receiver не открывается
- FIX: Unable to launch Citrix Receiver in Windows 10
- How can I fix Citrix Receiver launch error in Windows 10?
- 1. Refresh applications
- 2. Ensure full permissions for the user account
- 3. Use another remote working solution
- Parallels RAS
- 4. Download the latest version available
- 5. Reset Citrix Receiver
- Citrix: после обновления Windows 10 Receiver не открывается
- 1 ответ 1
- Не устанавливается citrix receiver на windows 10
- АГЕНТ РЯДОМ – найдите своего страхового консультанта
- Лента новостей
3 простых шага по исправлению ошибок CITRIXRECEIVER.EXE
В вашей системе запущено много процессов, которые потребляют ресурсы процессора и памяти. Некоторые из этих процессов, кажется, являются вредоносными файлами, атакующими ваш компьютер.
Чтобы исправить критические ошибки citrixreceiver.exe,скачайте программу Asmwsoft PC Optimizer и установите ее на своем компьютере
1- Очистите мусорные файлы, чтобы исправить citrixreceiver.exe, которое перестало работать из-за ошибки.
2- Очистите реестр, чтобы исправить citrixreceiver.exe, которое перестало работать из-за ошибки.

3- Настройка Windows для исправления критических ошибок citrixreceiver.exe:

Всего голосов ( 181 ), 115 говорят, что не будут удалять, а 66 говорят, что удалят его с компьютера.
Как вы поступите с файлом citrixreceiver.exe?
Некоторые сообщения об ошибках, которые вы можете получить в связи с citrixreceiver.exe файлом
(citrixreceiver.exe) столкнулся с проблемой и должен быть закрыт. Просим прощения за неудобство.
(citrixreceiver.exe) перестал работать.
citrixreceiver.exe. Эта программа не отвечает.
(citrixreceiver.exe) — Ошибка приложения: the instruction at 0xXXXXXX referenced memory error, the memory could not be read. Нажмитие OK, чтобы завершить программу.
(citrixreceiver.exe) не является ошибкой действительного windows-приложения.
(citrixreceiver.exe) отсутствует или не обнаружен.
CITRIXRECEIVER.EXE

Проверьте процессы, запущенные на вашем ПК, используя базу данных онлайн-безопасности. Можно использовать любой тип сканирования для проверки вашего ПК на вирусы, трояны, шпионские и другие вредоносные программы.
процессов:
Cookies help us deliver our services. By using our services, you agree to our use of cookies.
Источник
Citrix: после обновления Windows 10 Receiver не открывается
Мы подключаемся к веб-сайту SaaS, который использует Citrix XenApp 6.5. Нам представлен список приложений, которые запускаются с помощью Citrix Receiver. Это работало нормально на моем ПК, пока я не обновил Windows 10 Anniversary Update. Теперь, когда я нажимаю на любое из доступных приложений на веб-сайте и открываю файл ICA, ничего не происходит. Он изолирован только от этого ПК.
Я попытался удалить Citrix с помощью утилиты очистки приемника и переустановить Citrix Receiver версии 14.4.1000.16. и получить тот же результат. Я не могу вернуться с помощью восстановления системы, потому что точка восстановления до обновления больше не доступна.
Извините за поздний ответ, но у меня есть решение для вас. Это касается именно вашей проблемы и любых других программ, которые ломаются после выполнения Windows 10 «крупного обновления / обновления ОС».
Пакеты обновлений Windows 10 / Обновления (Anniversary, Creator и т. Д.) Представляют собой более или менее обновления ОС и создают папку Windows.old, перемещают туда папку «Пользователи» и «Windows», обновляют ОС и при нормальных обстоятельствах должны двигаться назад. папку «Пользователи» и все, что ей нужно, из резервной копии папки Windows.
Что происходит, я считаю, что ваш профиль находится в подвешенном состоянии или осиротел или что-то в этом роде. Некоторые из ваших данных могут быть связаны с папкой C: windows.old users в качестве примера.
Мое исправление: создать новый профиль.
У меня был домашний пользователь, который принес свой ноутбук, который мог войти в Citrix до недавнего обновления в прошлом месяце. Я создал новый профиль, и Citrix снова работает правильно. ее документы и рабочий стол не были перемещены назад и были связаны с папкой C: windows.old users. Я предполагаю, что ее папка Appdata, а также информация о ее реестре хранились там также, и хотя я уверен, что есть способ это исправить, но в то время мне было проще создать новый профиль.
Конечно, вы также можете просто сделать резервную копию ваших данных и перезагрузить Windows 10. Если бы это случилось с моим компьютером, я бы сделал это, потому что я не доверял бы ОС в этот момент. Тем не менее, создать новый профиль проще, и если у вас есть время, вы, вероятно, могли бы выяснить, почему и как исправить проблему с привязкой профиля, если создание новой учетной записи / профиля не является вариантом.
Источник
FIX: Unable to launch Citrix Receiver in Windows 10


Citrix Receiver for Windows 10 has a great array of features that help you work smarter from anywhere.
This doesn’t mean that you’ll never get to experience its fair share of flaws. For example, you could be out of luck when you try launching Citrix Receiver.
While you can do so without elevated permissions and logging in with the regular domain user account, you cannot launch any of the applications and desktops that appear there.
However, if you launch Citrix with elevated permissions and then login with the regular domain user account, launching them works like a breeze. For those looking to fix this, that means one thing.
The goal of today’s guide is to show you how to launch Citrix applications and desktops with ease. Just keep on reading the brief list of fixes you may apply in that regard.
How can I fix Citrix Receiver launch error in Windows 10?
1. Refresh applications

If one or more Citrix Receiver applications cannot be launched in Windows 10, refreshing them is arguably the first thing that you should do.
Immediately click the drop-down next to your name in the upper-right corner of the menu. Then, click Refresh Apps and see if the issue persists.
2. Ensure full permissions for the user account

If you’re looking to launch Citrix Receiver in Windows 10 with no efforts again, note that Full Permissions are required for the user account under HKEY_USERSUSER_SIDSOFTWARECitrix on the client machine.
That’s why we’re recommending making sure you have full permissions for the user account used to log in to Citrix Receiver for the Registry Key.
If the domain user account does not have permissions, delete the Citrix Registry key after taking a backup. Then, exit Citrix Receiver and launch it back.
The Registry key will be once more created, this time with all relevant required permissions.
3. Use another remote working solution

Expert Tip: Some PC issues are hard to tackle, especially when it comes to corrupted repositories or missing Windows files. If you are having troubles fixing an error, your system may be partially broken. We recommend installing Restoro, a tool that will scan your machine and identify what the fault is.
Click here to download and start repairing.
If Citrix Receiver is only giving you more headaches, maybe you should think about trying another remote desktop solution that may increase your productivity.
To be more exact, the recommended solution below is capable of delivering applications and desktops to any employee from a network.
But the best part is that it’s not complicated at all to implement within any environment and addresses the biggest concern in a company network: data security.
You will be able to secure all the online communication channels from data leakage and theft by using the Secure Sockets Layer (SSL), data encryption using FIPS and 2-way identification.
All the data transfers are monitored and reported in a central console for the IT manager in a visual manner.
Moreover, this solution is perfectly integrated with lot of other security solutions like SafeNet, DualShield, Azure MFA, RADIUS server, and even Google Authenticator.

Parallels RAS
Parallels RAS and it’s remote working solutions can be life saving for your company and your employees.
4. Download the latest version available

5. Reset Citrix Receiver
If things turn for the worse and nothing seems to work, resetting the Citrix Receiver can help. Perform the above steps and you should now be able to log onto Citrix as normal.
Note that resetting does not impact the Receiver or plug-in installation, per-machine ICA lockdown settings, or GPOs. However, accounts, apps delivered by the Self-Service plug-in, along with cached files and saved passwords are all removed.
Uninstalling with the receiver cleanup utility and then reinstalling is also described as a potential solution. Just give it a go when all other fixes failed.
While each user has different expectations, this guide will provide you with a good overview of what you can do when you’re unable to launch Citrix Receiver in Windows 10.
Do you have any ideas or tips to make Citrix Receiver work properly? Drop a comment below and let us know your thoughts.
Restoro has been downloaded by 0 readers this month.
Источник
Citrix: после обновления Windows 10 Receiver не открывается
Мы подключаемся к веб-сайту SaaS, который использует Citrix XenApp 6.5. Нам представлен список приложений, которые запускаются с использованием Citrix Receiver. Это работало нормально на моем ПК, пока я не обновил Windows 10 Anniversary Update. Теперь, когда я нажимаю на любое из доступных приложений на веб-сайте и открываю файл ICA, ничего не происходит. Он изолирован только от этого ПК.
Я попытался удалить Citrix с помощью утилиты очистки приемника и переустановить Citrix Receiver версии 14.4.1000.16. и получить тот же результат. Я не могу вернуться с помощью восстановления системы, потому что точка восстановления до обновления больше не доступна.
1 ответ 1
Извините за поздний ответ, но у меня есть решение для вас. Это касается именно вашей проблемы и любых других программ, которые ломаются после выполнения Windows 10 «крупного обновления / обновления ОС».
Пакеты обновлений Windows 10 / Обновления (Anniversary, Creator и т.д.) Представляют собой более или менее обновления ОС и создают папку Windows.old, перемещают туда папку «Пользователи» и «Windows», обновляют ОС и при нормальных обстоятельствах должны двигаться назад. ваша папка Users и все, что нужно из резервной копии папки Windows.
Что происходит, я считаю, что ваш профиль находится в подвешенном состоянии или осиротел или что-то в этом роде. Некоторые из ваших данных могут быть связаны с папкой C:windows.oldusers в качестве примера.
Мое исправление: создать новый профиль.
У меня был домашний пользователь, который принес свой ноутбук, который мог войти в Citrix до недавнего обновления в прошлом месяце. Я создал новый профиль, и Citrix снова работает правильно. ее документы и рабочий стол не были перемещены назад и были связаны с папкой C:windows.oldusers. Я предполагаю, что ее папка Appdata, а также информация о ее реестре также хранились там, и хотя я уверен, что есть способ это исправить, но в то время мне было проще создать новый профиль.
Конечно, вы также можете просто сделать резервную копию ваших данных и перезагрузить Windows 10. Если бы это случилось с моим компьютером, я бы сделал это, потому что я не доверял бы ОС на тот момент. Тем не менее, создать новый профиль проще, и если у вас есть время, вы, вероятно, могли бы выяснить, почему и как исправить проблему с привязкой профиля, если создание новой учетной записи / профиля не вариант.
Источник
Не устанавливается citrix receiver на windows 10
Купите ОСАГО онлайн
Простое оформление за 5 минут
Купите ОСАГО онлайн
Простое оформление за 5 минут
Путешествуйте по России и миру
c туристическим полисом
Путешествуйте с комфортом
Год онлайн-консультаций
врачей и психологов за 1800 рублей
Врачи онлайн за 1800 рублей
Антикризисное предложение
опытным агентам
Антикризисное предложение
опытным агентам
Страхование от несчастных случаев
Защитите себя и своих близких
на случай непредвиденных ситуаций
Страхование от несчастных случаев
Добровольное медицинское
страхование
Сохраните здоровье вместе с РЕСО-Гарантия
Добровольное медицинское страхование


АГЕНТ РЯДОМ – найдите своего страхового консультанта
Мы ищем агентов рядом с вами на основе геоданных. Чтобы воспользоваться сервисом, разрешите нам отслеживать ваше местонахождение.

Лента новостей
Здоровье сотрудников университета путей сообщения в Санкт-Петербурге под защитой РЕСО-Гарантия
Изменения в графике работы Центра выплат в Москве на период с 28 октября по 8 ноября
РЕСО-Гарантия выплатила более 5 млн рублей за разобранный автомобиль
Отслеживайте статус страхового случая в приложении РЕСО Мобайл


Автострахование от РЕСО-Гарантия
РЕСО-Гарантия © – универсальная страховая компания. В числе наших приоритетов автострахование (как автоКАСКО, так и страхование ОСАГО), добровольное медицинское страхование, страхование имущества (в т.ч. страхование недвижимости), страхование ответственности (в т.ч. добровольная автогражданка) и грузов. Для определения стоимости страховых полисов на калькуляторах сайта вы можете произвести расчет КАСКО (страхование рисков «Хищение», «Ущерб»), рассчитать стоимость полиса ОСАГО и дополнительного страхования АГО, «Зеленая карта» и таких услуг, как ипотечное страхование, страхование квартиры, страхование дачи, ДМС, страхование путешественников, страхование жизни.
Источник
Ряд пользователей сообщили, что сталкивались с этим сообщением об ошибке. Неустранимая ошибка произошла из Citrix Receiver в Windows 10.
Причины появления этого сообщения об ошибке, кажется, различны, но наиболее распространенными причинами являются либо неправильные настройки приемника в профиле пользователя, либо невыполнение требований.NET. Последний вариант также приводит к сбою окна самообслуживания и отображает это сообщение об ошибке.
, мы рассмотрим некоторые из лучших методов устранения неполадок, чтобы попытаться решить эту проблему. Пожалуйста, внимательно следуйте методам, представленным в этом списке, чтобы избежать дальнейших осложнений. Читайте дальше, чтобы узнать, как это сделать.
1. Загрузите и установите.NET Framework .NET 3.5 с пакетом обновления 1
- Нажмите на поиск Cortana на панели задач -> Тип Включите и выключите функции Windows -> выберите первый вариант сверху.
- В окне Windows Features -> снимите флажок рядом с .NET Framework 4.6 Advanced Services.

- Дождитесь завершения процесса -> нажмите Закрыть.
- Загрузите Microsoft.NET Framework 3.5 с пакетом обновления 1.
- После завершения загрузки запустите программу установки -> выберите Установить эту функцию.
- После завершения процесса нажмите « Закрыть».
- Нажмите на поиск Cortana на панели задач -> введите Включить и выключить функции Windows -> выберите первый вариант сверху.
- Внутри окна Windows Features -> установите флажок рядом с .NET Framework 4.6 Advanced Services.
- Дождитесь завершения процесса -> нажмите Закрыть.
Нужно скачать.NET Framework на Windows 10? Вот все, что вам нужно знать!
2. Установите .NET 2.0 с пакетом обновления 1
- Посетите эту официальную ссылку Microsoft -> нажмите кнопку Загрузить.

- Установите программное обеспечение на свой компьютер, следуя инструкциям на экране.
- Перезагрузите компьютер, а затем следуйте следующему способу.
3. Загрузите и установите распространяемый пакет Microsoft Visual C ++ 2008 с пакетом обновления 1 (SP1).
- Нажмите здесь, чтобы загрузить функцию.

- Запустите установщик и следуйте инструкциям на экране.
- Перезагрузите компьютер и выполните следующий шаг.
4. Установите автономный плагин Citrix и Receiver для Windows 4.12.
Автономный плагин Citrix:
- Посетите эту страницу -> скачать программное обеспечение.

- Запустите и установите на свой компьютер.
Приемник для Windows 4.12:
- Посетите эту страницу -> сохраните установочный файл на вашем компьютере.

- Щелкните правой кнопкой мыши -> выберите Запуск от имени администратора.
- Следуйте инструкциям на экране для завершения установки.
Пожалуйста, не стесняйтесь сообщить нам, помогло ли это руководство решить вашу проблему, используя раздел комментариев ниже.
ЧИТАЙТЕ ТАКЖЕ:
- Исправьте испорченные проблемы профиля Citrix, используя эти методы
- Теперь возможно развернуть рабочие столы Windows 10 в Microsoft Azure с Citrix.
- Citrix объявляет о полной поддержке Windows 10
Перейти к содержанию
На чтение 2 мин. Просмотров 847 Опубликовано 28.04.2021
Citrix Receiver – это клиентский компонент для XenDesktop и XenApp. Полный доступ к полным рабочим столам через XenDesktop предоставляется только устройствам, на которых установлен Citrix Receiver. Citrix – это приложение, которое обеспечивает виртуализацию серверов, рабочих столов и приложений. Однако совсем недавно стало поступать много сообщений о том, что пользователи не могут открывать онлайн-приложения с помощью веб-портала. 
Сообщение об ошибке « Функция, которую вы пытаетесь использовать, находится на недоступном сетевом ресурсе. Введите путь к папке, содержащей установочный пакет для «ICAWebwrapper.msi », отображаемого при попытке доступа к приложению. В этой статье мы сообщим вам причину возникновения этой ошибки, а также предложим жизнеспособное решение этой проблемы.
Что вызывает «ошибку ICAWebWrapper.msi» при запуске приложения с веб-портала?
Получив многочисленные отчеты от нескольких пользователей, мы решили изучить проблему и разработали решение чтобы исправить это полностью. Кроме того, мы изучили причину, из-за которой он срабатывает, и перечислили ее следующим образом.
- Отсутствующий файл: Как следует из сообщения об ошибке, ошибка возникает, когда приложение не может найти файл «ICAWebWrapper.msi» в каталоге установки. Поэтому он просит пользователя указать его местоположение. Однако в большинстве случаев этот файл полностью отсутствует на компьютере.
Теперь, когда у вас есть базовое представление о природе проблемы, мы продолжим к решениям. Обязательно соблюдайте инструкции, чтобы избежать конфликта.
Решение: установка ICAWebWrapper.msi
Если файл «ICAWebWrapper.msi» отсутствует на компьютере, эта ошибка срабатывает. Поэтому на этом этапе мы будем загружать и устанавливать файл в установочный каталог приложения. Для этого:
- Обязательно загрузите и установите «Winrar» или любой другой инструмент для извлечения на свой компьютер, прежде чем продолжить действия, описанные ниже.
- Загрузите CitrixReceiver.exe по этой ссылке.
- После загрузки right – щелкните по файл и выберите « Извлечь в CitrixReceiver /scheme.

- Будет извлечено содержимое файла « .exe » в папку с именем « CitrixReceiver » в том же каталоге.
- Откройте папку, прокрутите вниз и щелкните правой кнопкой мыши файл « ICAWebWrapper.msi »..
- Выберите « Копировать » и перейдите к Citrix каталог установки .

- Щелкните правой кнопкой мыши в любом месте и выберите « Вставить ».
- Откройте программу из Citrix и, если вы снова получите сообщение об ошибке, нажмите на « Обзор »и выберите« ICAWebWrapper.msi »в каталоге Citrix.

- Проверьте , сохраняется ли проблема.
Citrix Receiver для Windows 10 обладает большим набором функций, которые помогут вам работать эффективнее, где бы вы ни находились.
Это не означает, что вы никогда не столкнетесь с его недостатками. Например, вам может не повезти при попытке запустить Citrix Receiver.
Хотя вы можете сделать это без повышенных разрешений и входа в систему с обычной учетной записью пользователя домена, вы не можете запускать какие-либо приложения и рабочие столы, которые там появляются.
Однако, если вы запустите Citrix с повышенными правами, а затем войдете в систему с обычной учетной записью пользователя домена, их запуск будет очень простым. Для тех, кто хочет это исправить, это означает одно.
Цель сегодняшнего руководства — показать вам, как легко запускать приложения и рабочие столы Citrix. Просто продолжайте читать краткий список исправлений, которые вы можете применить в этом отношении.
Как исправить ошибку запуска Citrix Receiver в Windows 10?
1. Обновить приложения

Если одно или несколько приложений Citrix Receiver не могут быть запущены в Windows 10, возможно, первое, что вам следует сделать, это обновить их.
Немедленно щелкните раскрывающийся список рядом с вашим именем в правом верхнем углу меню. Затем нажмите «Обновить приложения» и посмотрите, сохраняется ли проблема.
2. Обеспечить полные права для учетной записи пользователя

Если вы хотите снова запустить Citrix Receiver в Windows 10 без каких-либо усилий, обратите внимание, что для учетной записи пользователя в разделе HKEY_USERSUSER_SIDSOFTWARECitrix на клиентском компьютере требуются полные разрешения.
Вот почему мы рекомендуем убедиться, что у вас есть полные разрешения для учетной записи пользователя, используемой для входа в Citrix Receiver для ключа реестра.
Если учетная запись пользователя домена не имеет разрешений, удалите ключ реестра Citrix после создания резервной копии. Затем выйдите из Citrix Receiver и снова запустите его.
Ключ реестра будет создан еще раз, на этот раз со всеми соответствующими необходимыми разрешениями.
3. Используйте другое решение для удаленной работы

Если Citrix Receiver только доставляет вам больше головной боли, возможно, вам следует подумать о том, чтобы попробовать другое решение для удаленного рабочего стола, которое может повысить вашу производительность.
Точнее, рекомендуемое ниже решение способно доставлять приложения и рабочие столы любому сотруднику по сети.
Но самое приятное то, что его совсем не сложно внедрить в любой среде, и он решает самую большую проблему в корпоративной сети: безопасность данных.
Вы сможете обезопасить все каналы онлайн-коммуникаций от утечки и кражи данных с помощью протокола защищенных сокетов (SSL), шифрования данных с использованием FIPS и двусторонней идентификации.
Все передачи данных отслеживаются и отображаются на центральной консоли для ИТ-менеджера в визуальной форме.
Кроме того, это решение отлично интегрируется со многими другими решениями для обеспечения безопасности, такими как SafeNet, DualShield, Azure MFA, RADIUS-сервер и даже Google Authenticator.
4. Загрузите последнюю доступную версию

- Найдите значок Citrix Receiver на панели задач.
- Щелкните его правой кнопкой мыши, чтобы выбрать «Дополнительные настройки».
- В разделе «О программе» обратите внимание на версию.
- В браузере перейдите по адресу Receiver.citrix.com.
- Затем нажмите «Загрузить для Windows».
- Там должна быть указана последняя доступная версия приложения Citrix Workspace. Сравните свою версию с этой.
- Если онлайн-версия отличается, загрузите новую версию следующей.
5. Сбросьте Citrix-приемник

- Во-первых, щелкните правой кнопкой мыши значок приемника на панели задач.
- Нажмите «Дополнительные настройки» далее.
- Выберите опцию «Сбросить приемник».
- Появится подсказка с вопросом, уверены ли вы, что хотите сбросить ресивер к настройкам по умолчанию. Подтвердите, нажав «Да, сбросить приемник».
- Введите remote.ptlgateway.net.
- Citrix Receiver требует, чтобы вы снова добавили свою учетную запись. Введите имя пользователя и пароль вашего домена. Вам может быть предложено дважды войти в систему.
- Вы также можете поставить галочку, чтобы запомнить учетные данные.
Если ситуация ухудшается и кажется, что ничего не работает, может помочь сброс Citrix Receiver. Выполните вышеуказанные шаги, и теперь вы сможете войти в Citrix как обычно.
Обратите внимание, что сброс не влияет на установку Receiver или подключаемого модуля, настройки блокировки ICA для каждой машины или объекты групповой политики. Однако учетные записи, приложения, предоставляемые подключаемым модулем самообслуживания, а также кэшированные файлы и сохраненные пароли, удаляются.
Удаление с помощью утилиты очистки приемника, а затем повторная установка также описываются как потенциальное решение. Просто попробуйте, когда все другие исправления не помогли.
Есть ли у вас какие-либо идеи или советы по правильной работе Citrix Receiver? Оставьте комментарий ниже и дайте нам знать ваши мысли.
Содержание
- Полное удаление Citrix Receiver
- Не удается удалить Citrix?
- Как удалить Citrix?
- Как удалить программу, которая не удаляется?
- Как полностью удалить рабочую область Citrix?
- Как удалить Citrix из реестра?
- Что делает Citrix Receiver?
- Как принудительно удалить программу?
- Как удалить программу, которая не отображается в Панели управления?
- Как принудительно удалить файл?
- Следует ли мне удалить Citrix Receiver?
- Как очистить кеш Citrix?
- Как отключить рабочую область Citrix?
- Как принудительно удалить Citrix Receiver?
- Могу ли я удалить программу запуска Citrix Online?
- Как исправить мой Citrix Receiver?
- Как мне вручную сбросить мой профиль Citrix?
- Как мне сбросить мой профиль пользователя?
- Где хранятся профили Citrix?
- Как сбросить сеанс Citrix?
- Как разрешить временный профиль в Citrix?
- Как сбросить профиль по умолчанию в Windows 10?
- Как исправить поврежденный профиль пользователя в Windows 10?
- Как очистить мой профиль Citrix?
- Где хранятся перемещаемые профили?
- Как создать профиль Citrix?
- Что дает сброс Citrix Receiver?
- Как мне устранить неполадки в моем Citrix Receiver?
- Как сбросить настройки Citrix Receiver в Windows 10?
- Что вызывает повреждение профиля Citrix?
- Что такое служба телеметрии Citrix?
- CS Professional Suite®
- Help & How-To Center
- Uninstall, download, and install (or reinstall) Citrix Receiver
- Uninstall and reinstall
- First, uninstall Citrix Receiver
- Then download and reinstall Citrix Receiver
- Updates
- Can’t open applications?
- Any other issues
- Как мне вручную сбросить мой профиль Citrix?
- Как мне сбросить мой профиль пользователя?
- Где хранятся профили Citrix?
- Как сбросить сеанс Citrix?
- Как разрешить временный профиль в Citrix?
- Как сбросить профиль по умолчанию в Windows 10?
- Как исправить поврежденный профиль пользователя в Windows 10?
- Как очистить мой профиль Citrix?
- Где хранятся перемещаемые профили?
- Как создать профиль Citrix?
- Что дает сброс Citrix Receiver?
- Как мне устранить неполадки в моем Citrix Receiver?
- Как сбросить настройки Citrix Receiver в Windows 10?
- Что вызывает повреждение профиля Citrix?
- Что такое служба телеметрии Citrix?
 Столкнулся я с такой проблемой, что запускаться клиент Citrix Receiver на машине с Dibian (на машине с ОС Windows тоже столкнулся с такой проблемой, но она решается легко, и решение описано в самом конце данной статьи). Что только не делал, переустановка не давала положительного результата. Пришлось методом «научного тыка» искать варианты полного удаления следов программы и повторной её установки.
1. Запуск консоли, и выполнение команды ниже
2. Вычистил «хвосты» от Citrix
3. Удалил libmotif3
ВАЖНО! Обязательно после этого перезагружаем ПК, если хотим повторно устанавливать Citrix Receiver
Алгоритм установки Citrix Receiver
1. скачал файл linuxx86-12.0.0.189834.tar.gz и распаковал
2. консоль, зашел в папку под root
3. Выбрал пункт установки 1
4. Выбрал папку не по умолчанию, и установил все
5. Установил libmotif3, и делаем ссылку на файл
Как результат — Все заработало!
В Операционной системе Windows сталкивался с подобной проблемой, но она решается намного проще 🙂 Достаточно скачать утилиту с оф. сайта, и запустить ее от имени Администратора. После удаления, можно повторно запустить установку клиента Citrix Receiver
Ниже указана ссылка, где можно скачать последнюю версию утилиты Receiver Clean-Up Utility, для полного удаления Citrix Receiver
Receiver Clean-Up Utility
Источник
Как удалить Citrix?
Выберите Удалить приложение Citrix Workspace и следуйте инструкциям на экране. Файл. dmg — это файл, который загружается из Citrix при первой установке приложения Citrix Workspace для Mac. Если файла больше нет на вашем компьютере, загрузите файл еще раз из Citrix Downloads, чтобы удалить приложение.
Как удалить программу, которая не удаляется?
Все, что вам нужно сделать, это:
Как полностью удалить рабочую область Citrix?
Вы можете удалить приложение Citrix Workspace с помощью утилиты «Программы и компоненты» Windows («Установка и удаление программ»). Примечание. Во время установки приложения Citrix Workspace вы получите запрос на удаление пакета Citrix HDX RTME. Щелкните ОК, чтобы продолжить удаление.
Как удалить Citrix из реестра?
GUID можно найти в следующем разделе реестра: HKEY_LOCAL_MACHINE Software Microsoft Windows CurrentVersion Uninstall. Когда выбран ключ «Удалить», нажмите Ctrl + F и найдите термин Citrix. Подключ, содержащий запись клиента Citrix ICA, отображается как открытый (левая панель) и помечен идентификатором GUID.
Что делает Citrix Receiver?
Citrix Receiver — это клиентское программное обеспечение, необходимое для доступа к приложениям и полным рабочим столам, размещенным на серверах Citrix, с удаленного клиентского устройства. … Когда вы посещаете страницу загрузки Citrix Receiver, она автоматически определяет операционную систему и предлагает вам загрузить нужное клиентское программное обеспечение.
Как принудительно удалить программу?
Удалить папку в реестре Windows. Отображаемое имя реестра Windows. Удалите ключи, которые показывают имя вашей программы в DisplayName, щелкнув правой кнопкой мыши по элементам и выбрав Удалить. Теперь ваша программа не будет отображаться в списке «Установка и удаление программ».
Как удалить программу, которая не отображается в Панели управления?
Как удалить программы, не указанные в панели управления
Как принудительно удалить файл?
Для этого сначала откройте меню «Пуск» (клавиша Windows), введите «выполнить» и нажмите «Ввод». В появившемся диалоговом окне введите cmd и снова нажмите Enter. В открытой командной строке введите del / f имя_файла, где имя_файла — это имя файла или файлов (вы можете указать несколько файлов с помощью запятых), которые вы хотите удалить.
Следует ли мне удалить Citrix Receiver?
Однако оставление Citrix Receiver установленным на домашнем компьютере не вызывает никаких известных проблем с безопасностью. Если вы хотите оставить его в покое, это безопасно. Он не занимает много места и после отключения автоматического запуска не будет использовать память или процессор.
Как очистить кеш Citrix?
Как отключить рабочую область Citrix?
Все, что вам нужно сделать, это открыть диспетчер задач, щелкнув правой кнопкой мыши на панели задач или используя сочетание клавиш CTRL + SHIFT + ESC, нажав «Подробнее», переключившись на вкладку «Автозагрузка» и нажав кнопку «Отключить».
Как принудительно удалить Citrix Receiver?
Удалите Citrix Receiver из Windows
Войдите на устройство с правами администратора. Откройте Панель управления и выберите «Программы и компоненты». Приложение Citrix Receiver должно быть найдено в папке «Программы и компоненты», чтобы его можно было удалить. Щелкните приложение правой кнопкой мыши и выберите Удалить.
Могу ли я удалить программу запуска Citrix Online?
Windows: откройте «Программы и компоненты». Щелкните правой кнопкой мыши «Citrix Online Launcher». Выберите «Удалить», затем при появлении запроса нажмите «Да».
Как исправить мой Citrix Receiver?
Проблема с запуском Citrix Receiver может быть вызвана используемыми вами приложениями.
…
Как исправить ошибку запуска Citrix Receiver в Windows 10?
Источник
Как мне вручную сбросить мой профиль Citrix?
Как мне сбросить мой профиль пользователя?
Профиль пользователя — это набор файлов, используемых Windows для обеспечения рабочего стола пользователя при входе в систему на компьютере в сети.
…
Сброс профиля пользователя
Где хранятся профили Citrix?
Профили локальных пользователей хранятся на локальном сервере, к которому пользователь вошел в систему. Менеджер паролей сохраняет информацию реестра в кусте HKCU Software Citrix MetaFrame Password Manager в реестре пользователей, расположенном по адресу:% SystemDrive% Documents and Settings % username% NTUSER. DAT.
Как сбросить сеанс Citrix?
Как разрешить временный профиль в Citrix?
Как: как исправить учетные записи Citrix, которые создают временные профили
Как сбросить профиль по умолчанию в Windows 10?
5. Сбросить Windows 10.
Как исправить поврежденный профиль пользователя в Windows 10?
Исправить поврежденный профиль пользователя в Windows 8, 8.1 или Windows 10
Как очистить мой профиль Citrix?
Сбросить профиль пользователя
Где хранятся перемещаемые профили?
Перемещаемый профиль хранится на центральном сервере, к которому можно получить доступ со всех компьютеров домена. Это позволяет вам иметь одинаковые настройки среды на каждой машине, к которой вы входите. Ваш перемещаемый профиль копируется на компьютер при входе в систему и синхронизируется обратно на сервер при выходе из системы.
Как создать профиль Citrix?
Политика Citrix Studio
Что дает сброс Citrix Receiver?
При сбросе Receiver к заводским настройкам по умолчанию удаляются следующие элементы: Все учетные записи и магазины. Все приложения, предоставляемые подключаемым модулем самообслуживания, вместе с их значками и ключами реестра. … Параметры реестра для отдельных пользователей, которые являются пользовательскими предпочтениями, а для установок на уровне компьютера — все параметры реестра для конкретных пользователей.
Как мне устранить неполадки в моем Citrix Receiver?
Устранение проблем с пользователями
Как сбросить настройки Citrix Receiver в Windows 10?
Процедура сброса в ОС Windows:
Что вызывает повреждение профиля Citrix?
Наиболее заметной причиной подобных проблем является повреждение указанного файла, особенно если компьютер пользователя выключается до того, как будет записан файл DAT. Если файл только частично записывается через UPM, профиль будет поврежден и возникнут проблемы.
Что такое служба телеметрии Citrix?
Citrix Insight Services (CIS) — это платформа Citrix для инструментальных средств, телеметрии и анализа бизнес-информации. Возможности инструментария и телеметрии позволяют техническим пользователям (клиентам, партнерам и инженерам) самостоятельно диагностировать и устранять проблемы, а также оптимизировать свои среды.
Источник
CS Professional Suite®
Help & How-To Center
Uninstall, download, and install (or reinstall) Citrix Receiver
Reinstalling Citrix Receiver may be required during Citrix Receiver updates, Virtual Office CS / SaaS migrations, or as part of troubleshooting Citrix issues.
Uninstall and reinstall
First, uninstall Citrix Receiver
You’ll need to uninstall Citrix Receiver and delete all Citrix-related program files and folders. Watch the video or follow the written steps below.
Your browser does not support HTML5 video.
Note: This video covers uninstalling from Windows 10.
Note: The AppData folder is hidden by default. You may need to make hidden folders visible to gain access to it, or manually enter the path in the address bar in Windows Explorer.
Note: The AppData folder is hidden by default. You may need to make hidden folders visible on the PC to gain access to it, or manually enter the path in the address bar in Windows Explorer.
Then download and reinstall Citrix Receiver
Once Citrix Receiver is uninstalled and all Citrx-related files are removed, you can download and install a new copy. Watch the video or follow the written instructions below.
Your browser does not support HTML5 video.
Note: This video covers downloading and installing with Windows 10 and Chrome.
Note: If you don’t see this link, you don’t have access to applications through Virtual Client Office.

Windows 10 users will need to choose open in folder, then right click on the file and choose run as administrator.
If you experience any issues installing or running VOCitrixReceiver.exe, try running the installation as administrator, or disable the user account control (UAC) setting.
Windows 10 users will need to choose save file, then right click on the file and choose run as administrator.
Note: If you are prompted with an Open Executable File? dialog, click OK.
Windows 10 users will need to choose open in folder, then right click on the file and choose run as administrator.
Note: If you are also prompted with an Internet Explorer Security Warning dialog, click the Run button.
Updates
Some versions of Citrix Receiver will periodically check for updates. We recommend that you set your preferences to not check for updates. You can do this using the following steps.
If you do not see this option, you don’t need to turn off update notifications.
Can’t open applications?
Any other issues
Visit the Tips and troubleshooting section of the Citrix Receiver overview. You’ll also want to make sure you meet the requirements for using Citrix Receiver; there are some environmental settings like antivirus and firewall that can interfere with the installation and usage of Citrix. Sometimes these issues come to light during the uninstall / reinstall process.
Was this article helpful?
Great! Can you tell us why? (optional)
We’re sorry. Can you tell us why? (optional)
Thank you for the feedback!
Internal only
The Citrix Cleanup Utility is built into the Citrix install, therefore this tool should only be used as a last resort. This tool should be used by the firm’s qualified IT professional.
Источник
Как мне вручную сбросить мой профиль Citrix?
Как мне сбросить мой профиль пользователя?
Профиль пользователя — это набор файлов, используемых Windows для обеспечения рабочего стола пользователя при входе в систему на компьютере в сети.
…
Сброс профиля пользователя
Где хранятся профили Citrix?
Профили локальных пользователей хранятся на локальном сервере, к которому пользователь вошел в систему. Менеджер паролей сохраняет информацию реестра в кусте HKCU Software Citrix MetaFrame Password Manager в реестре пользователей, расположенном по адресу:% SystemDrive% Documents and Settings % username% NTUSER. DAT.
Как сбросить сеанс Citrix?
Как разрешить временный профиль в Citrix?
Как: как исправить учетные записи Citrix, которые создают временные профили
Как сбросить профиль по умолчанию в Windows 10?
5. Сбросить Windows 10.
Как исправить поврежденный профиль пользователя в Windows 10?
Исправить поврежденный профиль пользователя в Windows 8, 8.1 или Windows 10
Как очистить мой профиль Citrix?
Сбросить профиль пользователя
Где хранятся перемещаемые профили?
Перемещаемый профиль хранится на центральном сервере, к которому можно получить доступ со всех компьютеров домена. Это позволяет вам иметь одинаковые настройки среды на каждой машине, к которой вы входите. Ваш перемещаемый профиль копируется на компьютер при входе в систему и синхронизируется обратно на сервер при выходе из системы.
Как создать профиль Citrix?
Политика Citrix Studio
Что дает сброс Citrix Receiver?
При сбросе Receiver к заводским настройкам по умолчанию удаляются следующие элементы: Все учетные записи и магазины. Все приложения, предоставляемые подключаемым модулем самообслуживания, вместе с их значками и ключами реестра. … Параметры реестра для отдельных пользователей, которые являются пользовательскими предпочтениями, а для установок на уровне компьютера — все параметры реестра для конкретных пользователей.
Как мне устранить неполадки в моем Citrix Receiver?
Устранение проблем с пользователями
Как сбросить настройки Citrix Receiver в Windows 10?
Процедура сброса в ОС Windows:
Что вызывает повреждение профиля Citrix?
Наиболее заметной причиной подобных проблем является повреждение указанного файла, особенно если компьютер пользователя выключается до того, как будет записан файл DAT. Если файл только частично записывается через UPM, профиль будет поврежден и возникнут проблемы.
Что такое служба телеметрии Citrix?
Citrix Insight Services (CIS) — это платформа Citrix для инструментальных средств, телеметрии и анализа бизнес-информации. Возможности инструментария и телеметрии позволяют техническим пользователям (клиентам, партнерам и инженерам) самостоятельно диагностировать и устранять проблемы, а также оптимизировать свои среды.
Источник
 Столкнулся я с такой проблемой, что запускаться клиент Citrix Receiver на машине с Dibian (на машине с ОС Windows тоже столкнулся с такой проблемой, но она решается легко, и решение описано в самом конце данной статьи). Что только не делал, переустановка не давала положительного результата. Пришлось методом «научного тыка» искать варианты полного удаления следов программы и повторной её установки.
1. Запуск консоли, и выполнение команды ниже
sudo apt-get autoremove icaclient
2. Вычистил «хвосты» от Citrix
/home/user/.icaclient
/opt/citrix
3. Удалил libmotif3
sudo apt-get autoremove libmotif3
ВАЖНО! Обязательно после этого перезагружаем ПК, если хотим повторно устанавливать Citrix Receiver
Алгоритм установки Citrix Receiver
1. скачал файл linuxx86-12.0.0.189834.tar.gz и распаковал
2. консоль, зашел в папку под root
cd /home/user/data
./setupwfc
3. Выбрал пункт установки 1
4. Выбрал папку не по умолчанию, и установил все
5. Установил libmotif3, и делаем ссылку на файл
sudo apt-get install libmotif3
sudo ln -s /usr/lib/libXm.so.3 /usr/lib/libXm.so.4
Как результат — Все заработало!
В Операционной системе Windows сталкивался с подобной проблемой, но она решается намного проще 🙂 Достаточно скачать утилиту с оф. сайта, и запустить ее от имени Администратора. После удаления, можно повторно запустить установку клиента Citrix Receiver
Ниже указана ссылка, где можно скачать последнюю версию утилиты Receiver Clean-Up Utility, для полного удаления Citrix Receiver
Receiver Clean-Up Utility
Attached are the info prompt from the system:
15:34:57: Information — CApp::InitializeLog(662) — * Version: 13.4.0.25
15:34:57: Information — CApp::InitializeLog(664) — * Build Date: Dec 14 2012
15:34:57: Information — CApp::InitializeLog(665) — * Build Time: 15:20:10
15:34:57: Information — CApp::InitializeLog(666) — * Command Line: /uninstall /cleanup
15:34:57: Information — CCommandLine::ParseParam(94) — Command Line Parameter: uninstall = true
15:34:57: Information — CCommandLine::ParseParam(94) — Command Line Parameter: cleanup = true
15:34:57: Information — CApp::InitializeResourceModule(770) — Processing Resource Module Path: C:ProgramDataCitrixCitrix Receiverenen-US
15:34:57: Information — CApp::InitializeResourceModule(781) — Resource Module Path 1: C:ProgramDataCitrixCitrix Receiverenen-USTrolleyExpressUI_en.dll
15:34:57: Information — CApp::InitializeResourceModule(782) — Resource Module Path 2: C:ProgramDataCitrixCitrix Receiverenen-USTrolleyExpressUI_en-US.dll
15:34:57: Information — CApp::InitializeResourceModule(770) — Processing Resource Module Path: C:ProgramDataCitrixCitrix Receiveren
15:34:57: Information — CApp::InitializeResourceModule(781) — Resource Module Path 1: C:ProgramDataCitrixCitrix ReceiverenTrolleyExpressUI_en.dll
15:34:57: Information — CApp::InitializeResourceModule(782) — Resource Module Path 2: C:ProgramDataCitrixCitrix ReceiverenTrolleyExpressUI_en-US.dll
15:34:57: Information — CApp::InitializeResourceModule(770) — Processing Resource Module Path: C:ProgramDataCitrixCitrix Receiver
15:34:57: Information — CApp::InitializeResourceModule(781) — Resource Module Path 1: C:ProgramDataCitrixCitrix ReceiverTrolleyExpressUI_en.dll
15:34:57: Information — CApp::InitializeResourceModule(782) — Resource Module Path 2: C:ProgramDataCitrixCitrix ReceiverTrolleyExpressUI_en-US.dll
15:34:57: Information — CApp::InitializeResourceModule(794) — Loaded Resource Module: C:ProgramDataCitrixCitrix ReceiverTrolleyExpressUI_en.dll
15:34:57: Information — CResourceManager::ProcessResources(188) — Processing Resources: C:ProgramDataCitrixCitrix Receiverenen-US
15:34:57: Information — CResourceManager::ProcessResources(188) — Processing Resources: C:ProgramDataCitrixCitrix Receiveren
15:34:57: Information — CResourceManager::ProcessResources(188) — Processing Resources: C:ProgramDataCitrixCitrix Receiverenen-US
15:34:57: Information — CResourceManager::ProcessResources(188) — Processing Resources: C:ProgramDataCitrixCitrix Receiveren
15:34:57: Information — CResourceManager::ProcessResources(188) — Processing Resources: C:ProgramDataCitrixCitrix Receiver
15:34:57: Information — CResourceManager::ProcessResources(227) — Resource: FileName = AuthManager.msi, FilePath = C:ProgramDataCitrixCitrix ReceiverAuthManager.msi
15:34:57: Information — CResourceManager::ProcessResources(227) — Resource: FileName = CitrixHDXMediaStreamForFlash-ClientInstall.msi, FilePath = C:ProgramDataCitrixCitrix ReceiverCitrixHDXMediaStreamForFlash-ClientInstall.msi
15:34:57: Information — CResourceManager::ProcessResources(227) — Resource: FileName = CitrixReceiverUpdater-User.msi, FilePath = C:ProgramDataCitrixCitrix ReceiverCitrixReceiverUpdater-User.msi
15:34:57: Information — CResourceManager::ProcessResources(227) — Resource: FileName = DesktopViewer.msi, FilePath = C:ProgramDataCitrixCitrix ReceiverDesktopViewer.msi
15:34:57: Information — CResourceManager::ProcessResources(227) — Resource: FileName = dualpk.cab, FilePath = C:ProgramDataCitrixCitrix Receiverdualpk.cab
15:34:57: Information — CResourceManager::ProcessResources(227) — Resource: FileName = EULA_de.rtf, FilePath = C:ProgramDataCitrixCitrix ReceiverEULA_de.rtf
15:34:57: Information — CResourceManager::ProcessResources(227) — Resource: FileName = EULA_en.rtf, FilePath = C:ProgramDataCitrixCitrix ReceiverEULA_en.rtf
15:34:57: Information — CResourceManager::ProcessResources(227) — Resource: FileName = EULA_es.rtf, FilePath = C:ProgramDataCitrixCitrix ReceiverEULA_es.rtf
15:34:57: Information — CResourceManager::ProcessResources(227) — Resource: FileName = EULA_fr.rtf, FilePath = C:ProgramDataCitrixCitrix ReceiverEULA_fr.rtf
15:34:57: Information — CResourceManager::ProcessResources(227) — Resource: FileName = EULA_ja.rtf, FilePath = C:ProgramDataCitrixCitrix ReceiverEULA_ja.rtf
15:34:57: Information — CResourceManager::ProcessResources(227) — Resource: FileName = EULA_ko.rtf, FilePath = C:ProgramDataCitrixCitrix ReceiverEULA_ko.rtf
15:34:57: Information — CResourceManager::ProcessResources(227) — Resource: FileName = EULA_ru.rtf, FilePath = C:ProgramDataCitrixCitrix ReceiverEULA_ru.rtf
15:34:57: Information — CResourceManager::ProcessResources(227) — Resource: FileName = EULA_zh-CN.rtf, FilePath = C:ProgramDataCitrixCitrix ReceiverEULA_zh-CN.rtf
15:34:57: Information — CResourceManager::ProcessResources(227) — Resource: FileName = EULA_zh-TW.rtf, FilePath = C:ProgramDataCitrixCitrix ReceiverEULA_zh-TW.rtf
15:34:57: Information — CResourceManager::ProcessResources(227) — Resource: FileName = GenericUSB.msi, FilePath = C:ProgramDataCitrixCitrix ReceiverGenericUSB.msi
15:34:57: Information — CResourceManager::ProcessResources(227) — Resource: FileName = Global.xml, FilePath = C:ProgramDataCitrixCitrix ReceiverGlobal.xml
15:34:57: Information — CResourceManager::ProcessResources(227) — Resource: FileName = HeaderLogo.bmp, FilePath = C:ProgramDataCitrixCitrix ReceiverHeaderLogo.bmp
15:34:57: Information — CResourceManager::ProcessResources(227) — Resource: FileName = ICAWebWrapper.msi, FilePath = C:ProgramDataCitrixCitrix ReceiverICAWebWrapper.msi
15:34:57: Information — CResourceManager::ProcessResources(227) — Resource: FileName = Localized_de.xml, FilePath = C:ProgramDataCitrixCitrix ReceiverLocalized_de.xml
15:34:57: Information — CResourceManager::ProcessResources(227) — Resource: FileName = Localized_en.xml, FilePath = C:ProgramDataCitrixCitrix ReceiverLocalized_en.xml
15:34:57: Information — CResourceManager::ProcessResources(227) — Resource: FileName = Localized_es.xml, FilePath = C:ProgramDataCitrixCitrix ReceiverLocalized_es.xml
15:34:57: Information — CResourceManager::ProcessResources(227) — Resource: FileName = Localized_fr.xml, FilePath = C:ProgramDataCitrixCitrix ReceiverLocalized_fr.xml
15:34:57: Information — CResourceManager::ProcessResources(227) — Resource: FileName = Localized_ja.xml, FilePath = C:ProgramDataCitrixCitrix ReceiverLocalized_ja.xml
15:34:57: Information — CResourceManager::ProcessResources(227) — Resource: FileName = Localized_ko.xml, FilePath = C:ProgramDataCitrixCitrix ReceiverLocalized_ko.xml
15:34:57: Information — CResourceManager::ProcessResources(227) — Resource: FileName = Localized_ru.xml, FilePath = C:ProgramDataCitrixCitrix ReceiverLocalized_ru.xml
15:34:57: Information — CResourceManager::ProcessResources(227) — Resource: FileName = Localized_zh-CN.xml, FilePath = C:ProgramDataCitrixCitrix ReceiverLocalized_zh-CN.xml
15:34:57: Information — CResourceManager::ProcessResources(227) — Resource: FileName = Localized_zh-TW.xml, FilePath = C:ProgramDataCitrixCitrix ReceiverLocalized_zh-TW.xml
15:34:57: Information — CResourceManager::ProcessResources(227) — Resource: FileName = RIInstaller.msi, FilePath = C:ProgramDataCitrixCitrix ReceiverRIInstaller.msi
15:34:57: Information — CResourceManager::ProcessResources(227) — Resource: FileName = SelfServicePlugin.msi, FilePath = C:ProgramDataCitrixCitrix ReceiverSelfServicePlugin.msi
15:34:57: Information — CResourceManager::ProcessResources(227) — Resource: FileName = SideBarBackground.bmp, FilePath = C:ProgramDataCitrixCitrix ReceiverSideBarBackground.bmp
15:34:57: Information — CResourceManager::ProcessResources(227) — Resource: FileName = SSONWrapper.msi, FilePath = C:ProgramDataCitrixCitrix ReceiverSSONWrapper.msi
15:34:57: Information — CResourceManager::ProcessResources(227) — Resource: FileName = TrolleyExpress.exe, FilePath = C:ProgramDataCitrixCitrix ReceiverTrolleyExpress.exe
15:34:57: Information — CResourceManager::ProcessResources(227) — Resource: FileName = TrolleyExpressUI_de.dll, FilePath = C:ProgramDataCitrixCitrix ReceiverTrolleyExpressUI_de.dll
15:34:57: Information — CResourceManager::ProcessResources(227) — Resource: FileName = TrolleyExpressUI_en.dll, FilePath = C:ProgramDataCitrixCitrix ReceiverTrolleyExpressUI_en.dll
15:34:57: Information — CResourceManager::ProcessResources(227) — Resource: FileName = TrolleyExpressUI_es.dll, FilePath = C:ProgramDataCitrixCitrix ReceiverTrolleyExpressUI_es.dll
15:34:57: Information — CResourceManager::ProcessResources(227) — Resource: FileName = TrolleyExpressUI_fr.dll, FilePath = C:ProgramDataCitrixCitrix ReceiverTrolleyExpressUI_fr.dll
15:34:57: Information — CResourceManager::ProcessResources(227) — Resource: FileName = TrolleyExpressUI_ja.dll, FilePath = C:ProgramDataCitrixCitrix ReceiverTrolleyExpressUI_ja.dll
15:34:57: Information — CResourceManager::ProcessResources(227) — Resource: FileName = TrolleyExpressUI_ko.dll, FilePath = C:ProgramDataCitrixCitrix ReceiverTrolleyExpressUI_ko.dll
15:34:57: Information — CResourceManager::ProcessResources(227) — Resource: FileName = TrolleyExpressUI_ru.dll, FilePath = C:ProgramDataCitrixCitrix ReceiverTrolleyExpressUI_ru.dll
15:34:57: Information — CResourceManager::ProcessResources(227) — Resource: FileName = TrolleyExpressUI_zh-CN.dll, FilePath = C:ProgramDataCitrixCitrix ReceiverTrolleyExpressUI_zh-CN.dll
15:34:57: Information — CResourceManager::ProcessResources(227) — Resource: FileName = TrolleyExpressUI_zh-TW.dll, FilePath = C:ProgramDataCitrixCitrix ReceiverTrolleyExpressUI_zh-TW.dll
15:34:57: Information — CResourceManager::ProcessResources(227) — Resource: FileName = Vd3dClient.msi, FilePath = C:ProgramDataCitrixCitrix ReceiverVd3dClient.msi
15:34:57: Information — CResourceManager::ProcessResources(188) — Processing Resources: C:ProgramDataCitrixCitrix Receiver
15:34:57: Information — CConfigurationManager::Create(20) — globalDocumentPath: C:ProgramDataCitrixCitrix ReceiverGlobal.xml
15:34:57: Information — CConfigurationManager::Create(21) — localizedDocumentPath: C:ProgramDataCitrixCitrix ReceiverLocalized_en.xml
15:34:57: Information — CConfigurationManager::LoadStrings(516) — String: Key = ProductVersion, Value = 13.4.0.25
15:34:57: Information — CConfigurationManager::LoadStrings(516) — String: Key = DUalMode, Value = Install
15:34:57: Information — CConfigurationManager::LoadStrings(516) — String: Key = ProductUninstallKey, Value = CitrixOnlinePluginPackWeb
15:34:57: Information — CConfigurationManager::LoadStrings(516) — String: Key = ProductPermission, Value = Permachine
15:34:57: Information — CConfigurationManager::LoadStrings(516) — String: Key = ProductName, Value = Citrix Receiver
15:34:57: Information — CConfigurationManager::LoadStrings(516) — String: Key = ApplicationTitle, Value = Citrix Receiver
15:34:57: Information — CConfigurationManager::LoadStrings(516) — String: Key = UninstallPrompt, Value = Are you sure you want to uninstall this software?
15:34:57: Information — CConfigurationManager::LoadStrings(516) — String: Key = Publisher, Value = Citrix Systems, Inc.
15:34:57: Information — CConfigurationManager::LoadStrings(516) — String: Key = Contact, Value = Citrix Systems, Inc.
15:34:57: Information — CConfigurationManager::LoadStrings(516) — String: Key = Telephone, Value = 1-800-424-8749
15:34:57: Information — CConfigurationManager::LoadStrings(516) — String: Key = UrlInfoAbout, Value = www.citrix.com
15:34:57: Information — CConfigurationManager::LoadStrings(516) — String: Key = NoModify, Value = Yes
15:34:57: Information — CConfigurationManager::LoadStrings(516) — String: Key = NoRepair, Value = Yes
15:34:57: Information — CConfigurationManager::LoadStrings(516) — String: Key = SSON-Pkg, Value = Citrix PNA Installation
15:34:57: Information — CConfigurationManager::LoadStrings(516) — String: Key = UsageText, Value = Supported parameters:
/help — Displays this usage information
/uninstall — Re
15:34:57: Information — CConfigurationManager::LoadImages(650) — Image: Key = HeaderLogo, Path = C:ProgramDataCitrixCitrix ReceiverHeaderLogo.bmp
15:34:57: Information — CConfigurationManager::LoadImages(650) — Image: Key = SideBarBackground, Path = C:ProgramDataCitrixCitrix ReceiverSideBarBackground.bmp
15:34:57: Information — CConfigurationManager::LoadGroup(977) — Group: ID = XenAppSuite, DisplayName = XenApp Plugin Suite, Description = These installations are shared for all products using the XenApp Plugin.
15:34:57: Information — CComponent::InitializeFromRegistry(592) — Found version of Component: XenAppSuiteReceiverInside = 3.4.0.29585
15:34:57: Information — CComponent::InitializeFromRegistry(612) — Read ProductCode from registry: {9D431014-9F90-4335-A58E-8A14B0BD77F1}
15:34:57: Warning — CComponent::InitializeFromMsi(410) — Cannot open package. Package Path =
15:34:57: Information — CConfigurationManager::LoadComponent(1202) — Component: ID = ReceiverInside, Name = , Family = , Version = 3.4.0.29585, GroupID = XenAppSuite, DisplayName = Receiver Inside, Description = These installations are specific to XenApp or
XenDesktop., ProductCode = {9D431014-9F90-4335-A58E-8A14B0BD77F1}, UserPermission = Permachine, InstalledClientProductCodePM = , InstalledClientProductCodePU = , PackagePath = , InstallOrder = 01, TransformPath = , RootFeature = Complete, LogFilePath = C:UsersCYCHEN~1AppDataLocalTempCtxInstall-RIInstaller.log,
Installed = True, CurrentVersionInstalled = True, InstalledVersion = 3.4.0.29585, Selected = True, InstallResult = -536866816, DebugInstallResult = -536866816, InstallSuccess = False, InstallRebootRequired = False, InstallSkipped = False
15:34:57: Information — CComponent::InitializeFromRegistry(592) — Found version of Component: XenAppSuiteReceiverUpdater = 3.4.0.29577
15:34:57: Information — CComponent::InitializeFromRegistry(612) — Read ProductCode from registry: {7468ACCE-6FA8-4794-90B9-C28BD9CC79DD}
15:34:57: Warning — CComponent::InitializeFromMsi(410) — Cannot open package. Package Path =
15:34:57: Information — CConfigurationManager::LoadComponent(1202) — Component: ID = ReceiverUpdater, Name = , Family = , Version = 3.4.0.29577, GroupID = XenAppSuite, DisplayName = Receiver, Description = These installations are specific to XenApp or XenDesktop.,
ProductCode = {7468ACCE-6FA8-4794-90B9-C28BD9CC79DD}, UserPermission = Permachine, InstalledClientProductCodePM = , InstalledClientProductCodePU = , PackagePath = , InstallOrder = 02, TransformPath = , RootFeature = Complete, LogFilePath = C:UsersCYCHEN~1AppDataLocalTempCtxInstall-CitrixReceiverUpdater-User.log,
Installed = True, CurrentVersionInstalled = True, InstalledVersion = 3.4.0.29577, Selected = True, InstallResult = -536866816, DebugInstallResult = -536866816, InstallSuccess = False, InstallRebootRequired = False, InstallSkipped = False
15:34:57: Information — CComponent::InitializeFromRegistry(592) — Found version of Component: XenAppSuiteICA_Client = 13.4.0.25
15:34:57: Information — CComponent::InitializeFromRegistry(612) — Read ProductCode from registry: {7BD3DC6D-A2BE-4345-B6EE-D146193DB18F}
15:34:57: Warning — CComponent::InitializeFromMsi(410) — Cannot open package. Package Path =
15:34:57: Information — CConfigurationManager::LoadComponent(1202) — Component: ID = ICA_Client, Name = , Family = , Version = 13.4.0.25, GroupID = XenAppSuite, DisplayName = XenApp Web Plugin, Description = These installations are specific to XenApp., ProductCode
= {7BD3DC6D-A2BE-4345-B6EE-D146193DB18F}, UserPermission = Permachine, InstalledClientProductCodePM = , InstalledClientProductCodePU = , PackagePath = , InstallOrder = 03, TransformPath = , RootFeature = Complete, LogFilePath = C:UsersCYCHEN~1AppDataLocalTempCtxInstall-ICAWebWrapper.log,
Installed = True, CurrentVersionInstalled = True, InstalledVersion = 13.4.0.25, Selected = True, InstallResult = -536866816, DebugInstallResult = -536866816, InstallSuccess = False, InstallRebootRequired = False, InstallSkipped = False
15:34:57: Information — CComponent::InitializeFromRegistry(592) — Found version of Component: XenAppSuiteUSB = 13.4.0.25
15:34:57: Information — CComponent::InitializeFromRegistry(612) — Read ProductCode from registry: {3068513C-3AAC-410B-BAE7-C7837FFF8DEB}
15:34:57: Warning — CComponent::InitializeFromMsi(410) — Cannot open package. Package Path =
15:34:57: Information — CConfigurationManager::LoadComponent(1202) — Component: ID = USB, Name = , Family = , Version = 13.4.0.25, GroupID = XenAppSuite, DisplayName = USB, Description = These installations are specific to XenApp., ProductCode = {3068513C-3AAC-410B-BAE7-C7837FFF8DEB},
UserPermission = Permachine, InstalledClientProductCodePM = , InstalledClientProductCodePU = , PackagePath = , InstallOrder = 04, TransformPath = , RootFeature = Complete, LogFilePath = C:UsersCYCHEN~1AppDataLocalTempCtxInstall-GenericUSB.log, Installed
= True, CurrentVersionInstalled = True, InstalledVersion = 13.4.0.25, Selected = True, InstallResult = -536866816, DebugInstallResult = -536866816, InstallSuccess = False, InstallRebootRequired = False, InstallSkipped = False
15:34:57: Information — CComponent::InitializeFromRegistry(592) — Found version of Component: XenAppSuiteDesktopViewer = 13.4.0.25
15:34:57: Information — CComponent::InitializeFromRegistry(612) — Read ProductCode from registry: {D29DDA9B-FE05-48F1-A9D1-F6346A0A301A}
15:34:57: Warning — CComponent::InitializeFromMsi(410) — Cannot open package. Package Path =
15:34:57: Information — CConfigurationManager::LoadComponent(1202) — Component: ID = DesktopViewer, Name = , Family = , Version = 13.4.0.25, GroupID = XenAppSuite, DisplayName = Citrix Receiver (DV), Description = These installations are specific to XenApp
or XenDesktop., ProductCode = {D29DDA9B-FE05-48F1-A9D1-F6346A0A301A}, UserPermission = Permachine, InstalledClientProductCodePM = , InstalledClientProductCodePU = , PackagePath = , InstallOrder = 05, TransformPath = , RootFeature = Complete, LogFilePath =
C:UsersCYCHEN~1AppDataLocalTempCtxInstall-DesktopViewer.log, Installed = True, CurrentVersionInstalled = True, InstalledVersion = 13.4.0.25, Selected = True, InstallResult = -536866816, DebugInstallResult = -536866816, InstallSuccess = False, InstallRebootRequired
= False, InstallSkipped = False
15:34:57: Information — CComponent::InitializeFromRegistry(592) — Found version of Component: XenAppSuiteFlash = 13.4.0.25
15:34:57: Information — CComponent::InitializeFromRegistry(612) — Read ProductCode from registry: {0E8DC723-F1CD-424A-96CC-12428E7A1B4B}
15:34:57: Warning — CComponent::InitializeFromMsi(410) — Cannot open package. Package Path =
15:34:57: Information — CConfigurationManager::LoadComponent(1202) — Component: ID = Flash, Name = , Family = , Version = 13.4.0.25, GroupID = XenAppSuite, DisplayName = HDX Flash, Description = These installations are specific to XenApp., ProductCode = {0E8DC723-F1CD-424A-96CC-12428E7A1B4B},
UserPermission = Permachine, InstalledClientProductCodePM = , InstalledClientProductCodePU = , PackagePath = , InstallOrder = 06, TransformPath = , RootFeature = Complete, LogFilePath = C:UsersCYCHEN~1AppDataLocalTempCtxInstall-CitrixHDXMediaStreamForFlash-ClientInstall.log,
Installed = True, CurrentVersionInstalled = True, InstalledVersion = 13.4.0.25, Selected = True, InstallResult = -536866816, DebugInstallResult = -536866816, InstallSuccess = False, InstallRebootRequired = False, InstallSkipped = False
15:34:57: Information — CComponent::InitializeFromRegistry(592) — Found version of Component: XenAppSuiteVd3d = 13.4.0.25
15:34:57: Information — CComponent::InitializeFromRegistry(612) — Read ProductCode from registry: {E3A60962-B768-4EA3-B0B6-DA671276B81A}
15:34:57: Warning — CComponent::InitializeFromMsi(410) — Cannot open package. Package Path =
15:34:57: Information — CConfigurationManager::LoadComponent(1202) — Component: ID = Vd3d, Name = , Family = , Version = 13.4.0.25, GroupID = XenAppSuite, DisplayName = HDX Aero, Description = These installations are specific to XenApp or XenDesktop., ProductCode
= {E3A60962-B768-4EA3-B0B6-DA671276B81A}, UserPermission = Permachine, InstalledClientProductCodePM = , InstalledClientProductCodePU = , PackagePath = , InstallOrder = 07, TransformPath = , RootFeature = Complete, LogFilePath = C:UsersCYCHEN~1AppDataLocalTempCtxInstall-Vd3dClient.log,
Installed = True, CurrentVersionInstalled = True, InstalledVersion = 13.4.0.25, Selected = True, InstallResult = -536866816, DebugInstallResult = -536866816, InstallSuccess = False, InstallRebootRequired = False, InstallSkipped = False
15:34:57: Information — CComponent::InitializeFromRegistry(592) — Found version of Component: XenAppSuiteAM = 4.0.0.53726
15:34:57: Information — CComponent::InitializeFromRegistry(612) — Read ProductCode from registry: {B92051A3-3ABB-4A26-A615-2298BE7CBC28}
15:34:57: Warning — CComponent::InitializeFromMsi(410) — Cannot open package. Package Path =
15:34:57: Information — CConfigurationManager::LoadComponent(1202) — Component: ID = AM, Name = , Family = , Version = 4.0.0.53726, GroupID = XenAppSuite, DisplayName = Authentication Manager, Description = These installations are specific to XenApp or XenDesktop.,
ProductCode = {B92051A3-3ABB-4A26-A615-2298BE7CBC28}, UserPermission = Permachine, InstalledClientProductCodePM = , InstalledClientProductCodePU = , PackagePath = , InstallOrder = 08, TransformPath = , RootFeature = Complete, LogFilePath = C:UsersCYCHEN~1AppDataLocalTempCtxInstall-AuthManager.log,
Installed = True, CurrentVersionInstalled = True, InstalledVersion = 4.0.0.53726, Selected = True, InstallResult = -536866816, DebugInstallResult = -536866816, InstallSuccess = False, InstallRebootRequired = False, InstallSkipped = False
15:34:57: Information — CComponent::ReadStoredRegString(526) — No existing package SOFTWARECitrixPluginPackagesXenAppSuiteSSON. (Key not present.)
15:34:57: Information — CComponent::ReadStoredRegString(526) — No existing package SOFTWARECitrixPluginPackagesXenAppSuiteSSON. (Key not present.)
15:34:57: Information — CComponent::ReadStoredRegString(526) — No existing package SOFTWARECitrixPluginPackagesXenAppSuiteSSON. (Key not present.)
15:34:57: Warning — CComponent::InitializeFromMsi(410) — Cannot open package. Package Path =
15:34:57: Information — CComponent::InitializeFromInstalledMsi(726) — Cache client version : 11.2.0.0
15:34:57: Information — CtxInstallHelpers::CInstalledClientPkg::FindInstalledClient(134) — No existing clients found with given upgrade code: {B8F4F4A9-24B8-4C77-8A59-202F515EC0B6}
15:34:57: Information — CtxInstallHelpers::CInstalledClientPkg::FindInstalledClient(134) — No existing clients found with given upgrade code: {FED202C4-EA51-490C-93A5-62B16AAD8563}
15:34:57: Information — CConfigurationManager::LoadComponent(1202) — Component: ID = SSON, Name = , Family = , Version = 1.0.0.0, GroupID = XenAppSuite, DisplayName = Single Sign on, Description = These installations are specific to XenApp or XenDesktop., ProductCode
= , UserPermission = Permachine, InstalledClientProductCodePM = , InstalledClientProductCodePU = , PackagePath = , InstallOrder = 09, TransformPath = , RootFeature = Complete, LogFilePath = C:UsersCYCHEN~1AppDataLocalTempCtxInstall-SSONWrapper.log, Installed
= False, CurrentVersionInstalled = False, InstalledVersion = 0.0.0.0, Selected = True, InstallResult = -536866816, DebugInstallResult = -536866816, InstallSuccess = False, InstallRebootRequired = False, InstallSkipped = False
15:34:57: Information — CComponent::InitializeFromRegistry(592) — Found version of Component: XenAppSuiteSELFSERVICE = 3.4.0.33684
15:34:57: Information — CComponent::InitializeFromRegistry(612) — Read ProductCode from registry: {EF269F8D-1DFE-4C3B-9CE9-09C5773C0CF9}
15:34:57: Warning — CComponent::InitializeFromMsi(410) — Cannot open package. Package Path =
15:34:57: Information — CConfigurationManager::LoadComponent(1202) — Component: ID = SELFSERVICE, Name = , Family = , Version = 3.4.0.33684, GroupID = XenAppSuite, DisplayName = Self Service Plug-in, Description = These installations are specific to XenApp
or XenDesktop., ProductCode = {EF269F8D-1DFE-4C3B-9CE9-09C5773C0CF9}, UserPermission = Permachine, InstalledClientProductCodePM = , InstalledClientProductCodePU = , PackagePath = , InstallOrder = 10, TransformPath = , RootFeature = Complete, LogFilePath =
C:UsersCYCHEN~1AppDataLocalTempCtxInstall-SelfServicePlugin.log, Installed = True, CurrentVersionInstalled = True, InstalledVersion = 3.4.0.33684, Selected = True, InstallResult = -536866816, DebugInstallResult = -536866816, InstallSuccess = False, InstallRebootRequired
= False, InstallSkipped = False
15:34:57: Information — CApp::CheckIsNonAdminRoamingProfile(2231) — Admin user.
15:34:57: Information — CApp::KillRunningCtxProcesses(2365) — KillRunningCtxProcesses
15:34:57: Information — CApp::ProcessIsElevated(2144) — Process is elevated.
15:34:57: Information — CApp::InitInstance(346) — CApp::Run(): Before DualModeSelection. This is an uninstall.
15:34:57: Information — CApp::DumpComponents(1636) — Component: ID = ReceiverInside, Name = , Family = , Version = 3.4.0.29585, GroupID = XenAppSuite, DisplayName = Receiver Inside, Description = These installations are specific to XenApp or XenDesktop., ProductCode
= {9D431014-9F90-4335-A58E-8A14B0BD77F1}, UserPermission = Permachine, InstalledClientProductCodePM = , InstalledClientProductCodePU = , PackagePath = , InstallOrder = 01, TransformPath = , RootFeature = Complete, LogFilePath = C:UsersCYCHEN~1AppDataLocalTempCtxInstall-RIInstaller.log,
Installed = True, CurrentVersionInstalled = True, InstalledVersion = 3.4.0.29585, Selected = True, InstallResult = -536866816, DebugInstallResult = -536866816, InstallSuccess = False, InstallRebootRequired = False, InstallSkipped = False
15:34:57: Information — CApp::DumpComponents(1636) — Component: ID = ReceiverUpdater, Name = , Family = , Version = 3.4.0.29577, GroupID = XenAppSuite, DisplayName = Receiver, Description = These installations are specific to XenApp or XenDesktop., ProductCode
= {7468ACCE-6FA8-4794-90B9-C28BD9CC79DD}, UserPermission = Permachine, InstalledClientProductCodePM = , InstalledClientProductCodePU = , PackagePath = , InstallOrder = 02, TransformPath = , RootFeature = Complete, LogFilePath = C:UsersCYCHEN~1AppDataLocalTempCtxInstall-CitrixReceiverUpdater-User.log,
Installed = True, CurrentVersionInstalled = True, InstalledVersion = 3.4.0.29577, Selected = True, InstallResult = -536866816, DebugInstallResult = -536866816, InstallSuccess = False, InstallRebootRequired = False, InstallSkipped = False
15:34:57: Information — CApp::DumpComponents(1636) — Component: ID = ICA_Client, Name = , Family = , Version = 13.4.0.25, GroupID = XenAppSuite, DisplayName = XenApp Web Plugin, Description = These installations are specific to XenApp., ProductCode = {7BD3DC6D-A2BE-4345-B6EE-D146193DB18F},
UserPermission = Permachine, InstalledClientProductCodePM = , InstalledClientProductCodePU = , PackagePath = , InstallOrder = 03, TransformPath = , RootFeature = Complete, LogFilePath = C:UsersCYCHEN~1AppDataLocalTempCtxInstall-ICAWebWrapper.log, Installed
= True, CurrentVersionInstalled = True, InstalledVersion = 13.4.0.25, Selected = True, InstallResult = -536866816, DebugInstallResult = -536866816, InstallSuccess = False, InstallRebootRequired = False, InstallSkipped = False
15:34:57: Information — CApp::DumpComponents(1636) — Component: ID = USB, Name = , Family = , Version = 13.4.0.25, GroupID = XenAppSuite, DisplayName = USB, Description = These installations are specific to XenApp., ProductCode = {3068513C-3AAC-410B-BAE7-C7837FFF8DEB},
UserPermission = Permachine, InstalledClientProductCodePM = , InstalledClientProductCodePU = , PackagePath = , InstallOrder = 04, TransformPath = , RootFeature = Complete, LogFilePath = C:UsersCYCHEN~1AppDataLocalTempCtxInstall-GenericUSB.log, Installed
= True, CurrentVersionInstalled = True, InstalledVersion = 13.4.0.25, Selected = True, InstallResult = -536866816, DebugInstallResult = -536866816, InstallSuccess = False, InstallRebootRequired = False, InstallSkipped = False
15:34:57: Information — CApp::DumpComponents(1636) — Component: ID = DesktopViewer, Name = , Family = , Version = 13.4.0.25, GroupID = XenAppSuite, DisplayName = Citrix Receiver (DV), Description = These installations are specific to XenApp or XenDesktop.,
ProductCode = {D29DDA9B-FE05-48F1-A9D1-F6346A0A301A}, UserPermission = Permachine, InstalledClientProductCodePM = , InstalledClientProductCodePU = , PackagePath = , InstallOrder = 05, TransformPath = , RootFeature = Complete, LogFilePath = C:UsersCYCHEN~1AppDataLocalTempCtxInstall-DesktopViewer.log,
Installed = True, CurrentVersionInstalled = True, InstalledVersion = 13.4.0.25, Selected = True, InstallResult = -536866816, DebugInstallResult = -536866816, InstallSuccess = False, InstallRebootRequired = False, InstallSkipped = False
15:34:57: Information — CApp::DumpComponents(1636) — Component: ID = Flash, Name = , Family = , Version = 13.4.0.25, GroupID = XenAppSuite, DisplayName = HDX Flash, Description = These installations are specific to XenApp., ProductCode = {0E8DC723-F1CD-424A-96CC-12428E7A1B4B},
UserPermission = Permachine, InstalledClientProductCodePM = , InstalledClientProductCodePU = , PackagePath = , InstallOrder = 06, TransformPath = , RootFeature = Complete, LogFilePath = C:UsersCYCHEN~1AppDataLocalTempCtxInstall-CitrixHDXMediaStreamForFlash-ClientInstall.log,
Installed = True, CurrentVersionInstalled = True, InstalledVersion = 13.4.0.25, Selected = True, InstallResult = -536866816, DebugInstallResult = -536866816, InstallSuccess = False, InstallRebootRequired = False, InstallSkipped = False
15:34:57: Information — CApp::DumpComponents(1636) — Component: ID = Vd3d, Name = , Family = , Version = 13.4.0.25, GroupID = XenAppSuite, DisplayName = HDX Aero, Description = These installations are specific to XenApp or XenDesktop., ProductCode = {E3A60962-B768-4EA3-B0B6-DA671276B81A},
UserPermission = Permachine, InstalledClientProductCodePM = , InstalledClientProductCodePU = , PackagePath = , InstallOrder = 07, TransformPath = , RootFeature = Complete, LogFilePath = C:UsersCYCHEN~1AppDataLocalTempCtxInstall-Vd3dClient.log, Installed
= True, CurrentVersionInstalled = True, InstalledVersion = 13.4.0.25, Selected = True, InstallResult = -536866816, DebugInstallResult = -536866816, InstallSuccess = False, InstallRebootRequired = False, InstallSkipped = False
15:34:57: Information — CApp::DumpComponents(1636) — Component: ID = AM, Name = , Family = , Version = 4.0.0.53726, GroupID = XenAppSuite, DisplayName = Authentication Manager, Description = These installations are specific to XenApp or XenDesktop., ProductCode
= {B92051A3-3ABB-4A26-A615-2298BE7CBC28}, UserPermission = Permachine, InstalledClientProductCodePM = , InstalledClientProductCodePU = , PackagePath = , InstallOrder = 08, TransformPath = , RootFeature = Complete, LogFilePath = C:UsersCYCHEN~1AppDataLocalTempCtxInstall-AuthManager.log,
Installed = True, CurrentVersionInstalled = True, InstalledVersion = 4.0.0.53726, Selected = True, InstallResult = -536866816, DebugInstallResult = -536866816, InstallSuccess = False, InstallRebootRequired = False, InstallSkipped = False
15:34:57: Information — CApp::DumpComponents(1636) — Component: ID = SSON, Name = , Family = , Version = 1.0.0.0, GroupID = XenAppSuite, DisplayName = Single Sign on, Description = These installations are specific to XenApp or XenDesktop., ProductCode = , UserPermission
= Permachine, InstalledClientProductCodePM = , InstalledClientProductCodePU = , PackagePath = , InstallOrder = 09, TransformPath = , RootFeature = Complete, LogFilePath = C:UsersCYCHEN~1AppDataLocalTempCtxInstall-SSONWrapper.log, Installed = False, CurrentVersionInstalled
= False, InstalledVersion = 0.0.0.0, Selected = True, InstallResult = -536866816, DebugInstallResult = -536866816, InstallSuccess = False, InstallRebootRequired = False, InstallSkipped = False
15:34:57: Information — CApp::DumpComponents(1636) — Component: ID = SELFSERVICE, Name = , Family = , Version = 3.4.0.33684, GroupID = XenAppSuite, DisplayName = Self Service Plug-in, Description = These installations are specific to XenApp or XenDesktop.,
ProductCode = {EF269F8D-1DFE-4C3B-9CE9-09C5773C0CF9}, UserPermission = Permachine, InstalledClientProductCodePM = , InstalledClientProductCodePU = , PackagePath = , InstallOrder = 10, TransformPath = , RootFeature = Complete, LogFilePath = C:UsersCYCHEN~1AppDataLocalTempCtxInstall-SelfServicePlugin.log,
Installed = True, CurrentVersionInstalled = True, InstalledVersion = 3.4.0.33684, Selected = True, InstallResult = -536866816, DebugInstallResult = -536866816, InstallSuccess = False, InstallRebootRequired = False, InstallSkipped = False
15:34:57: Information — CApp::DumpSelectedComponents(1760) — Selected Component: ID = SSON, Name = , Family = , Version = 1.0.0.0, GroupID = XenAppSuite, DisplayName = Single Sign on, Description = These installations are specific to XenApp or XenDesktop.,
ProductCode = , UserPermission = Permachine, InstalledClientProductCodePM = , InstalledClientProductCodePU = , PackagePath = , InstallOrder = 09, TransformPath = , RootFeature = Complete, LogFilePath = C:UsersCYCHEN~1AppDataLocalTempCtxInstall-SSONWrapper.log,
Installed = False, CurrentVersionInstalled = False, InstalledVersion = 0.0.0.0, Selected = True, InstallResult = -536866816, DebugInstallResult = -536866816, InstallSuccess = False, InstallRebootRequired = False, InstallSkipped = False
15:34:57: Information — CApp::DumpInstallComponents(1783) — Install Component: ID = SSON, Name = , Family = , Version = 1.0.0.0, GroupID = XenAppSuite, DisplayName = Single Sign on, Description = These installations are specific to XenApp or XenDesktop., ProductCode
= , UserPermission = Permachine, InstalledClientProductCodePM = , InstalledClientProductCodePU = , PackagePath = , InstallOrder = 09, TransformPath = , RootFeature = Complete, LogFilePath = C:UsersCYCHEN~1AppDataLocalTempCtxInstall-SSONWrapper.log, Installed
= False, CurrentVersionInstalled = False, InstalledVersion = 0.0.0.0, Selected = True, InstallResult = -536866816, DebugInstallResult = -536866816, InstallSuccess = False, InstallRebootRequired = False, InstallSkipped = False
15:34:57: Information — CApp::SpawnSelfCleaningUninstall(1806) — SelfCleaningUninstall invoked with /uninstall and /cleanup…
15:34:57: Information — CApp::SpawnSelfCleaningUninstall(1857) — Copying uninstaller from C:ProgramDataCitrixCitrix ReceiverTrolleyExpress.exe to C:UsersCYCHEN~1AppDataLocalTempCln8816.tmp
15:34:59: Information — CApp::SpawnSelfCleaningUninstall(1893) — Forked uninstall cleanup watcher: «C:UsersCYCHEN~1AppDataLocalTempCln8816.tmp» /processid=1016 /cleanup=»C:ProgramDataCitrixCitrix Receiver»
15:34:59: Information — CApp::Run(552) — IN CApp::Run().
15:34:59: Information — CApp::Run(560) — CApp::Run(): pre-mainDialog
15:34:59: Information — CMainDialog::CMainDialog(131) — Deleted the subkey ID Installer.
15:34:59: Information — CProgressDialog::OnInitDialog(60) — In CProgressDialog::OnInitDialog() Citrix Receiver
15:34:59: Information — CInstallationManager::Install(10) — Running core Install method.
15:34:59: Information — FixCacheOfflinePluginRedistForCPR227754(1391) — Checking the vcredist MSI name key…
15:34:59: Information — CInstallationManager::InstallComponents(238) — Evaluating deployment for 9 components…
15:34:59: Information — CInstallationManager::InstallComponents(241) — Just before entering the saving installdir location block. uninstall value : 1.
15:35:00: Information — CInstallationManager::InstallComponent(421) — Running InstallComponent method for: SELFSERVICE.
15:35:00: Information — CInstallationManager::InstallComponent(457) — Installing Component: ID = SELFSERVICE
15:35:00: Information — CInstallationManager::InstallComponent(561) — Component UnInstall Commandline: MSIRESTARTMANAGERCONTROL=0 REBOOTRETURNCODE=YES REBOOT=ReallySuppress
15:35:03: Information — CInstallationManager::InstallComponent(578) — Uninstall return code for component SELFSERVICE is 0
15:35:03: Information — CComponent::RemoveRegistryRecords(664) — Removing registry records for uninstall.
15:35:03: Warning — CComponent::DeleteComponentKey(653) — Cannot delete subkey XenAppSuite. (May not be empty.)
15:35:03: Information — CInstallationManager::InstallComponent(651) — Component Install Status: ID = SELFSERVICE, InstallMode = Uninstall, InstallResult = 0, InstallSuccess = True, InstallRebootRequired = False, InstallSuppressed = False
15:35:03: Information — CInstallationManager::InstallComponent(676) — InstallComponent complete for SELFSERVICE.
15:35:03: Information — CInstallationManager::InstallComponent(421) — Running InstallComponent method for: AM.
15:35:03: Information — CInstallationManager::InstallComponent(457) — Installing Component: ID = AM
15:35:03: Information — CInstallationManager::InstallComponent(561) — Component UnInstall Commandline: MSIRESTARTMANAGERCONTROL=0 REBOOTRETURNCODE=YES REBOOT=ReallySuppress
15:35:03: Information — CInstallationManager::InstallComponent(578) — Uninstall return code for component AM is 0
15:35:03: Information — CComponent::RemoveRegistryRecords(664) — Removing registry records for uninstall.
15:35:03: Warning — CComponent::DeleteComponentKey(653) — Cannot delete subkey XenAppSuite. (May not be empty.)
15:35:03: Information — CInstallationManager::InstallComponent(651) — Component Install Status: ID = AM, InstallMode = Uninstall, InstallResult = 0, InstallSuccess = True, InstallRebootRequired = False, InstallSuppressed = False
15:35:03: Information — CInstallationManager::InstallComponent(676) — InstallComponent complete for AM.
15:35:03: Information — CInstallationManager::InstallComponent(421) — Running InstallComponent method for: Vd3d.
15:35:03: Information — CInstallationManager::InstallComponent(457) — Installing Component: ID = Vd3d
15:35:03: Information — CInstallationManager::InstallComponent(561) — Component UnInstall Commandline: MSIRESTARTMANAGERCONTROL=0 REBOOTRETURNCODE=YES REBOOT=ReallySuppress
15:35:03: Information — CInstallationManager::InstallComponent(578) — Uninstall return code for component Vd3d is 0
15:35:03: Information — CComponent::RemoveRegistryRecords(664) — Removing registry records for uninstall.
15:35:03: Warning — CComponent::DeleteComponentKey(653) — Cannot delete subkey XenAppSuite. (May not be empty.)
15:35:03: Information — CInstallationManager::InstallComponent(651) — Component Install Status: ID = Vd3d, InstallMode = Uninstall, InstallResult = 0, InstallSuccess = True, InstallRebootRequired = False, InstallSuppressed = False
15:35:03: Information — CInstallationManager::InstallComponent(676) — InstallComponent complete for Vd3d.
15:35:03: Information — CInstallationManager::InstallComponent(421) — Running InstallComponent method for: Flash.
15:35:03: Information — CInstallationManager::InstallComponent(457) — Installing Component: ID = Flash
15:35:03: Information — CInstallationManager::InstallComponent(561) — Component UnInstall Commandline: MSIRESTARTMANAGERCONTROL=0 REBOOTRETURNCODE=YES REBOOT=ReallySuppress
15:35:04: Information — CInstallationManager::InstallComponent(578) — Uninstall return code for component Flash is 0
15:35:04: Information — CComponent::RemoveRegistryRecords(664) — Removing registry records for uninstall.
15:35:04: Warning — CComponent::DeleteComponentKey(653) — Cannot delete subkey XenAppSuite. (May not be empty.)
15:35:04: Information — CInstallationManager::InstallComponent(651) — Component Install Status: ID = Flash, InstallMode = Uninstall, InstallResult = 0, InstallSuccess = True, InstallRebootRequired = False, InstallSuppressed = False
15:35:04: Information — CInstallationManager::InstallComponent(676) — InstallComponent complete for Flash.
15:35:04: Information — CInstallationManager::InstallComponent(421) — Running InstallComponent method for: DesktopViewer.
15:35:04: Information — CInstallationManager::InstallComponent(457) — Installing Component: ID = DesktopViewer
15:35:04: Information — CInstallationManager::InstallComponent(561) — Component UnInstall Commandline: MSIRESTARTMANAGERCONTROL=0 REBOOTRETURNCODE=YES REBOOT=ReallySuppress
15:35:04: Information — CInstallationManager::InstallComponent(578) — Uninstall return code for component DesktopViewer is 0
15:35:04: Information — CComponent::RemoveRegistryRecords(664) — Removing registry records for uninstall.
15:35:04: Warning — CComponent::DeleteComponentKey(653) — Cannot delete subkey XenAppSuite. (May not be empty.)
15:35:04: Information — CInstallationManager::InstallComponent(651) — Component Install Status: ID = DesktopViewer, InstallMode = Uninstall, InstallResult = 0, InstallSuccess = True, InstallRebootRequired = False, InstallSuppressed = False
15:35:04: Information — CInstallationManager::InstallComponent(676) — InstallComponent complete for DesktopViewer.
15:35:04: Information — CInstallationManager::InstallComponent(421) — Running InstallComponent method for: USB.
15:35:04: Information — CInstallationManager::InstallComponent(457) — Installing Component: ID = USB
15:35:04: Information — CInstallationManager::InstallComponent(561) — Component UnInstall Commandline: MSIRESTARTMANAGERCONTROL=0 REBOOTRETURNCODE=YES REBOOT=ReallySuppress
15:35:07: Information — CInstallationManager::InstallComponent(578) — Uninstall return code for component USB is 1603
15:35:07: Information — CInstallationManager::InstallComponent(651) — Component Install Status: ID = USB, InstallMode = Uninstall, InstallResult = 1603, InstallSuccess = False, InstallRebootRequired = False, InstallSuppressed = False
15:35:07: Information — CInstallationManager::InstallComponent(676) — InstallComponent complete for USB.
15:35:07: Warning — CInstallationManager::InstallComponents(388) — Component result is false: 5
15:35:07: Warning — CInstallationManager::UpdateUninstallInfo(900) — Uninstall may have failed for a component. Not removing uninstall entries.
15:35:07: Information — CApp::SetExitCode(45) — Exit code is 1602 (called with 1602)
15:35:08: Information — CComponentManager::GetInstallStatus(505) — Component was Self Service Plug-in installed successfully.
15:35:08: Information — CComponentManager::GetInstallStatus(505) — Component was Authentication Manager installed successfully.
15:35:08: Information — CComponentManager::GetInstallStatus(505) — Component was HDX Aero installed successfully.
15:35:08: Information — CComponentManager::GetInstallStatus(505) — Component was HDX Flash installed successfully.
15:35:08: Information — CComponentManager::GetInstallStatus(505) — Component was Citrix Receiver (DV) installed successfully.
15:35:08: Error — CComponentManager::GetInstallStatus(493) — Installation NOT successful for ‘USB’, error: 1603.
15:35:08: Warning — CComponentManager::GetInstallStatus(498) — Installation NOT successful for ‘XenApp Web Plugin’, it never fully tried to install, possibly due to issues.
15:35:08: Warning — CComponentManager::GetInstallStatus(498) — Installation NOT successful for ‘Receiver’, it never fully tried to install, possibly due to issues.
15:35:08: Warning — CComponentManager::GetInstallStatus(498) — Installation NOT successful for ‘Receiver Inside’, it never fully tried to install, possibly due to issues.
15:35:08: Error — CMainDialog::CMainDialog(157) — GetComponentManager() returned FALSE on GetInstallStatus().
15:35:08: Information — CComponentManager::GetInstallStatus(505) — Component was Self Service Plug-in installed successfully.
15:35:08: Information — CComponentManager::GetInstallStatus(505) — Component was Authentication Manager installed successfully.
15:35:08: Information — CComponentManager::GetInstallStatus(505) — Component was HDX Aero installed successfully.
15:35:08: Information — CComponentManager::GetInstallStatus(505) — Component was HDX Flash installed successfully.
15:35:08: Information — CComponentManager::GetInstallStatus(505) — Component was Citrix Receiver (DV) installed successfully.
15:35:08: Error — CComponentManager::GetInstallStatus(493) — Installation NOT successful for ‘USB’, error: 1603.
15:35:08: Warning — CComponentManager::GetInstallStatus(498) — Installation NOT successful for ‘XenApp Web Plugin’, it never fully tried to install, possibly due to issues.
15:35:08: Warning — CComponentManager::GetInstallStatus(498) — Installation NOT successful for ‘Receiver’, it never fully tried to install, possibly due to issues.
15:35:08: Warning — CComponentManager::GetInstallStatus(498) — Installation NOT successful for ‘Receiver Inside’, it never fully tried to install, possibly due to issues.
15:35:08: Information — CFinishDialog::OnInitDialog(76) — app.LoadIcon return code. GetLastError: 0
15:35:08: Information — CFinishDialog::OnPaint(479) — draw icon return code. GetLastError: 0
15:35:08: Information — CFinishDialog::OnPaint(479) — draw icon return code. GetLastError: 0
15:35:20: Information — CFinishDialog::OnViewLogClicked(168) — OnViewLogClicked(): Entry.
15:36:03: Information — CFinishDialog::OnViewLogClicked(168) — OnViewLogClicked(): Entry.
Полное удаление Citrix Receiver
Столкнулся я с такой проблемой, что запускаться клиент Citrix Receiver на машине с Dibian (на машине с ОС Windows тоже столкнулся с такой проблемой, но она решается легко, и решение описано в самом конце данной статьи). Что только не делал, переустановка не давала положительного результата. Пришлось методом «научного тыка» искать варианты полного удаления следов программы и повторной её установки.
1. Запуск консоли, и выполнение команды ниже
2. Вычистил «хвосты» от Citrix
3. Удалил libmotif3
ВАЖНО! Обязательно после этого перезагружаем ПК, если хотим повторно устанавливать Citrix Receiver
Алгоритм установки Citrix Receiver
1. скачал файл linuxx86-12.0.0.189834.tar.gz и распаковал
2. консоль, зашел в папку под root
3. Выбрал пункт установки 1
4. Выбрал папку не по умолчанию, и установил все
5. Установил libmotif3, и делаем ссылку на файл
Как результат — Все заработало!
В Операционной системе Windows сталкивался с подобной проблемой, но она решается намного проще 🙂 Достаточно скачать утилиту с оф. сайта, и запустить ее от имени Администратора. После удаления, можно повторно запустить установку клиента Citrix Receiver
Ниже указана ссылка, где можно скачать последнюю версию утилиты Receiver Clean-Up Utility, для полного удаления Citrix Receiver
Receiver Clean-Up Utility
Источник
Как удалить Citrix?
Выберите Удалить приложение Citrix Workspace и следуйте инструкциям на экране. Файл. dmg — это файл, который загружается из Citrix при первой установке приложения Citrix Workspace для Mac. Если файла больше нет на вашем компьютере, загрузите файл еще раз из Citrix Downloads, чтобы удалить приложение.
Как удалить программу, которая не удаляется?
Все, что вам нужно сделать, это:
Как полностью удалить рабочую область Citrix?
Вы можете удалить приложение Citrix Workspace с помощью утилиты «Программы и компоненты» Windows («Установка и удаление программ»). Примечание. Во время установки приложения Citrix Workspace вы получите запрос на удаление пакета Citrix HDX RTME. Щелкните ОК, чтобы продолжить удаление.
Как удалить Citrix из реестра?
GUID можно найти в следующем разделе реестра: HKEY_LOCAL_MACHINE Software Microsoft Windows CurrentVersion Uninstall. Когда выбран ключ «Удалить», нажмите Ctrl + F и найдите термин Citrix. Подключ, содержащий запись клиента Citrix ICA, отображается как открытый (левая панель) и помечен идентификатором GUID.
Что делает Citrix Receiver?
Citrix Receiver — это клиентское программное обеспечение, необходимое для доступа к приложениям и полным рабочим столам, размещенным на серверах Citrix, с удаленного клиентского устройства. … Когда вы посещаете страницу загрузки Citrix Receiver, она автоматически определяет операционную систему и предлагает вам загрузить нужное клиентское программное обеспечение.
Как принудительно удалить программу?
Удалить папку в реестре Windows. Отображаемое имя реестра Windows. Удалите ключи, которые показывают имя вашей программы в DisplayName, щелкнув правой кнопкой мыши по элементам и выбрав Удалить. Теперь ваша программа не будет отображаться в списке «Установка и удаление программ».
Как удалить программу, которая не отображается в Панели управления?
Как удалить программы, не указанные в панели управления
Как принудительно удалить файл?
Для этого сначала откройте меню «Пуск» (клавиша Windows), введите «выполнить» и нажмите «Ввод». В появившемся диалоговом окне введите cmd и снова нажмите Enter. В открытой командной строке введите del / f имя_файла, где имя_файла — это имя файла или файлов (вы можете указать несколько файлов с помощью запятых), которые вы хотите удалить.
Следует ли мне удалить Citrix Receiver?
Однако оставление Citrix Receiver установленным на домашнем компьютере не вызывает никаких известных проблем с безопасностью. Если вы хотите оставить его в покое, это безопасно. Он не занимает много места и после отключения автоматического запуска не будет использовать память или процессор.
Как очистить кеш Citrix?
Как отключить рабочую область Citrix?
Все, что вам нужно сделать, это открыть диспетчер задач, щелкнув правой кнопкой мыши на панели задач или используя сочетание клавиш CTRL + SHIFT + ESC, нажав «Подробнее», переключившись на вкладку «Автозагрузка» и нажав кнопку «Отключить».
Как принудительно удалить Citrix Receiver?
Удалите Citrix Receiver из Windows
Войдите на устройство с правами администратора. Откройте Панель управления и выберите «Программы и компоненты». Приложение Citrix Receiver должно быть найдено в папке «Программы и компоненты», чтобы его можно было удалить. Щелкните приложение правой кнопкой мыши и выберите Удалить.
Могу ли я удалить программу запуска Citrix Online?
Windows: откройте «Программы и компоненты». Щелкните правой кнопкой мыши «Citrix Online Launcher». Выберите «Удалить», затем при появлении запроса нажмите «Да».
Как исправить мой Citrix Receiver?
Проблема с запуском Citrix Receiver может быть вызвана используемыми вами приложениями.
…
Как исправить ошибку запуска Citrix Receiver в Windows 10?
Источник
3 простых шага по исправлению ошибок CITRIXRECEIVER.EXE
В вашей системе запущено много процессов, которые потребляют ресурсы процессора и памяти. Некоторые из этих процессов, кажется, являются вредоносными файлами, атакующими ваш компьютер.
Чтобы исправить критические ошибки citrixreceiver.exe,скачайте программу Asmwsoft PC Optimizer и установите ее на своем компьютере
1- Очистите мусорные файлы, чтобы исправить citrixreceiver.exe, которое перестало работать из-за ошибки.
2- Очистите реестр, чтобы исправить citrixreceiver.exe, которое перестало работать из-за ошибки.
3- Настройка Windows для исправления критических ошибок citrixreceiver.exe:
Всего голосов ( 181 ), 115 говорят, что не будут удалять, а 66 говорят, что удалят его с компьютера.
Как вы поступите с файлом citrixreceiver.exe?
Некоторые сообщения об ошибках, которые вы можете получить в связи с citrixreceiver.exe файлом
(citrixreceiver.exe) столкнулся с проблемой и должен быть закрыт. Просим прощения за неудобство.
(citrixreceiver.exe) перестал работать.
citrixreceiver.exe. Эта программа не отвечает.
(citrixreceiver.exe) — Ошибка приложения: the instruction at 0xXXXXXX referenced memory error, the memory could not be read. Нажмитие OK, чтобы завершить программу.
(citrixreceiver.exe) не является ошибкой действительного windows-приложения.
(citrixreceiver.exe) отсутствует или не обнаружен.
CITRIXRECEIVER.EXE
Проверьте процессы, запущенные на вашем ПК, используя базу данных онлайн-безопасности. Можно использовать любой тип сканирования для проверки вашего ПК на вирусы, трояны, шпионские и другие вредоносные программы.
процессов:
Cookies help us deliver our services. By using our services, you agree to our use of cookies.
Источник
Ошибка запрошенной операции модуля citrix для опубликованных приложений при попытке удалить


All New Hotfixes for XenApp 5.0 for Windows Server 2003 x86/x64 and Windows Server 2008 x86/x64 
Последняя версия: 5.0
Оф.сайт: Официальный сайт
По-русски: ФорумВсего записей: 98 | Зарегистр. 08-12-2001 | Отправлено: 13:25 15-12-2001 | Исправлено: shrmn, 16:54 05-05-2012
| ppmpeter
В логах появляется 2 ошибки : A timeout (30000 milliseconds) was reached while waiting for a transaction response from the CryptSvc service. A timeout (30000 milliseconds) was reached while waiting for a transaction response from the NlaSvc service. Применены все последние обновления для Server 2008 R2 SP1 и установлен последний roll-up от Citrix XenApp 6.5 Проблема уже широко обсуждается на форумах поддержки Citrix, но однозначного ответа нет. Со стороны Microsoft предложены два хотфикса Newbie |
Редактировать | Профиль | Сообщение | Цитировать | Сообщить модератору abgluck Цитата: Отключается не доступ по rdp, а доступ к рабочему столу по rdp. Это немного разные вещи (к опубликованным приложениям вполне можно подключаться и по rdp). В свойствах протокола rdp такого не нашёл. Нашёл объяснения и лечение у Citrix : RDP or ICA Direct Desktop Connections Started by Non-Administrative Users Fail
Junior Member |
Редактировать | Профиль | Сообщение | Цитировать | Сообщить модератору Обсуждения
Сервер без Active directory Распределение ресурсов делается через Simplify Sute Добавлено: |
| Всего записей: 84 | Зарегистр. 11-11-2002 | Отправлено: 23:49 20-05-2014 |

| ppmpeter
Junior Member |
Редактировать | Профиль | Сообщение | Цитировать | Сообщить модератору Применил обновление KB2775511 ошибка пока не проявлялась. http://support.microsoft.com/kb/2775511/en-us |
| Всего записей: 84 | Зарегистр. 11-11-2002 | Отправлено: 10:53 26-05-2014 |
| Zhirafis
Junior Member |
Редактировать | Профиль | Сообщение | Цитировать | Сообщить модератору Доброго времени суток
Столкнулся с такой багой: сам не очень часто юзаю citrix но вот бага заключается в следующем устанавливаю клиента Не подскажите как победить эту багу. |
| Всего записей: 43 | Зарегистр. 13-10-2011 | Отправлено: 22:48 14-06-2014 |
| AlienOnliner
Junior Member |
Редактировать | Профиль | Сообщение | Цитировать | Сообщить модератору смотри настройки сайта пересоздай сайт с одного компа проблема, с любых? лето, телепаты в отпусках. |
| Всего записей: 64 | Зарегистр. 25-06-2007 | Отправлено: 22:45 23-06-2014 | Исправлено: AlienOnliner, 22:46 23-06-2014 |

| stangen
Junior Member |
Редактировать | Профиль | Сообщение | ICQ | Цитировать | Сообщить модератору После удаления трояна, Citrix стал выдавать сообщение:
«Приложение Сетевой модуль Citrix не может связаться с сервером.
Junior Member |
Редактировать | Профиль | Сообщение | Цитировать | Сообщить модератору stangen систему переустанови все равно закончишь этим |
| Всего записей: 64 | Зарегистр. 25-06-2007 | Отправлено: 01:42 06-07-2014 |

|
ntden1 Собственно вопрос, можно ли настроить клиенты на компах, чтобы они не лазили на прокси сервера? Сам себе и отвечаю, внести изменения в реестр ProxyType и AltProxyType как None. |
| Всего записей: 24 | Зарегистр. 20-11-2012 | Отправлено: 16:35 31-07-2014 | Исправлено: ntden1, 15:22 05-08-2014 |
| FAetoNets
Junior Member |
Редактировать | Профиль | Сообщение | Цитировать | Сообщить модератору MastHave for all http://support.citrix.com/servlet/KbServlet/download/29413-102-705928/XA%20-%20Windows%202008%20R2%20Optimization%20Guide.pdf.pdf |
| Всего записей: 71 | Зарегистр. 19-12-2005 | Отправлено: 01:14 17-08-2014 |
| demossproject
Junior Member |
Редактировать | Профиль | Сообщение | Цитировать | Сообщить модератору Здравствуйте. ХЕЛП! XenApp 7.5 не хочет работать с терминальными серверами с измененной системной буквой, почему? Существует проверенный на XA65 рабочий сервер WI+SG на Win2008r2 Установил ферму XenApp 7.5 на win2012r2 на два отдельных сервера: Опубликовал приложение и рабочий стол в Studio. Прописал DeliveryController на сервере WI+SG, все работает. Почему XenApp 7.5 не хочет работать с терминальными серверами с измененной системной буквой? Имеется сервер WebInterface+SecureGateway на Win2008r2 Опубликовал рабочий стол в цитриксе. Так вооот. Скорость работы рабочего стола через РДП-2012 заметно шустрее, Вопрос: это РДП стал таким шустрым или в цитриксе какие то проблемы? |
| Всего записей: 37 | Зарегистр. 04-10-2007 | Отправлено: 14:31 02-09-2014 | Исправлено: lol2007, 14:38 02-09-2014 |

| Adminny
Junior Member |
Редактировать | Профиль | Сообщение | Цитировать | Сообщить модератору Помогите с PPPoE. Стоит Citrix Presentation Server 4.5 на Windows 2003 SP2. Сетевым интерфейсом прямо в инет, но через pppoe. Одни клиенты нормально работают. Другие успешно заходят в Citrix Program Neighborhood, видят список приложений, но они не открываются. Открывается только один калькулятор. И с MTU игрался, и DisableTaskOffload задавал. Не помогает(((. |
| Всего записей: 134 | Зарегистр. 07-01-2012 | Отправлено: 21:29 21-10-2014 |

| abgluck
Advanced Member |
Редактировать | Профиль | Сообщение | Цитировать | Сообщить модератору Adminny
Цитата: Citrix Program Neighborhood в 4.5 уже работает через задницу, тем более в среде отличной от локалки. Пользуйтесь более свежими клиентами и/или используйте tcp+http/https. Наличие нескольких сетевых интерфейсов тоже вносит свой геморрой в настройку выдаваемых клиентам адресов для подключения. |
| Всего записей: 1735 | Зарегистр. 23-09-2004 | Отправлено: 04:04 22-10-2014 |
| absoloviev
Newbie |
Редактировать | Профиль | Сообщение | Цитировать | Сообщить модератору Коллеги, доброго времени суток!
Дистрибы все сохранились с тех времен. Второй день мучаюсь. MSI (c) (DC:7C) [10:43:23:531]: Attempting to delete file C:DOCUME 1Temp172ec1.mst Что с этим можно сделать? На боевом сервере всё пашет. Пробовал так же ставить с галкой «указать сервер лицензий потом». Все одно. Или лицензии безнадежно умерли просто? дату переводить тоже пробовал. Все нужные компоненты Windows установлены. Кто помнит такую древность? Я с citrix очень давно (года с 2007) не сталкивался. А очень надо. Источник Ошибка запрошенной операции модуля citrix для опубликованных приложений при попытке удалить
All New Hotfixes for XenApp 5.0 for Windows Server 2003 x86/x64 and Windows Server 2008 x86/x64 Последняя версия: 5.0 |
| Всего записей: 98 | Зарегистр. 08-12-2001 | Отправлено: 13:25 15-12-2001 | Исправлено: shrmn, 16:54 05-05-2012 |
| abgluck
Newbie |
Редактировать | Профиль | Сообщение | Цитировать | Сообщить модератору abgluck
Advanced Member |
Редактировать | Профиль | Сообщение | Цитировать | Сообщить модератору bootme Клиент лучше бы обновить. Вместо патча BackEnd.dll лучше использовать штатный алладиновский сетевой менеджер лицензий с тем же эмулем. Попробуй пересоздать слушатель ICA-TCP и проверить что он привязан к внешнему интерфейсу. |
| Всего записей: 1735 | Зарегистр. 23-09-2004 | Отправлено: 18:28 26-02-2009 |
| bootme
Newbie |
Редактировать | Профиль | Сообщение | Цитировать | Сообщить модератору abgluck Тут моё понимание закончилось(( Цитата: пересоздать слушатель ICA-TCP и проверить что он привязан к внешнему интерфейсу к сожалению, не понял. Ткни интерфейсом куда глядеть.Спасибо. |
| Всего записей: 18 | Зарегистр. 19-09-2008 | Отправлено: 00:46 27-02-2009 |
| abgluck
Junior Member |
Редактировать | Профиль | Сообщение | Цитировать | Сообщить модератору Проблема.
После установки нового клиента Citrix 11 версии, перестает работать сквозная проверка подлинности при запуске опубликованного приложения. Зафиксировал такой интересный момент,при первом входе в систему, после установки клиента, сквозная аутонтификация работает без проблем, но следует пользователю выйти и повторно войти, сквозная проверка пропадает, просит ввести имя пользователя, пароль и домен. Также выяснил, что после удаления папки %UserProfile%Application DataICAClient и последующем входе пользователя в систему сквозная проверка подлинности работает, пока пользователь не перелогиниться. У клиентов операционная система Windows XP SP2(SP3). Клиент Citrix 9.0 работал до этого без проблем. Подскажите, че за глюк такой? P.S. |
| Всего записей: 129 | Зарегистр. 04-06-2005 | Отправлено: 15:49 05-03-2009 |
| alexio
Full Member |
Редактировать | Профиль | Сообщение | Цитировать | Сообщить модератору кто ставил на x64 нужно посоветоваться есть проблемы установки SOS! |
| Всего записей: 502 | Зарегистр. 25-11-2003 | Отправлено: 16:42 05-03-2009 |

| baron2006
Junior Member |
Редактировать | Профиль | Сообщение | Цитировать | Сообщить модератору PerPV Аналогичная проблема. Решить не удалось. Вот темка на оф. форуме Citrix http://forums.citrix.com/thread.jspa?threadID=234957&tstart=0 |
| Всего записей: 55 | Зарегистр. 17-02-2006 | Отправлено: 12:45 12-03-2009 |
| anton04
Silver Member |
Редактировать | Профиль | Сообщение | Цитировать | Сообщить модератору baron2006 kraj ребяты изайте четвёрку или 4.5 с ними проблем меньше реально! |
| Всего записей: 2762 | Зарегистр. 14-06-2006 | Отправлено: 13:17 12-03-2009 | Исправлено: anton04, 13:18 12-03-2009 |

| kraj
Junior Member |
Редактировать | Профиль | Сообщение | Цитировать | Сообщить модератору anton04 А причём здесь 4 или 4.5? Надо по делу говорить. |
| Всего записей: 55 | Зарегистр. 17-02-2006 | Отправлено: 18:49 12-03-2009 |
| enixess
Newbie |
Редактировать | Профиль | Сообщение | Цитировать | Сообщить модератору Стоит задача подключения нового клиента к уже существующему citrix MF server с утановленной там 1с.
Дело в том что на сервере постоянно сидят и работают 10 человек. И возникает подозрение что клиент не хочет подлючатся из за ограничения по колличеству польователей. В логах сервера вижу ошибки Сервер терминалов не может выдать клиентскую лицензию. Выдача лицензии невозможна из-за внутренней ошибки, недостаточности памяти или изменениях в клиентской лицензии. дополнительная информация была передана на клиентский компьютер. Дополнительные сведения можно найти в центре справки и поддержки, в «http://go.microsoft.com/fwlink/events.asp». Вот и думаю в чем подвох.. |
| Всего записей: 6 | Зарегистр. 02-10-2007 | Отправлено: 09:38 26-03-2009 |
| abgluck
Advanced Member |
Редактировать | Профиль | Сообщение | Цитировать | Сообщить модератору saton Проблема либо в микрософтовском лицензировании служб терминалов, либо вообще в невозможности сохранить выдаваемую лицензию на стороне клиента (стоит проверить наличие у юзера прав на HKLMsoftwaremicrosoftmslicensing и, возможно, почистить эту ветку). |
| Всего записей: 1735 | Зарегистр. 23-09-2004 | Отправлено: 03:22 27-03-2009 |
| ADminionS
Newbie |
Редактировать | Профиль | Сообщение | Цитировать | Сообщить модератору Ребят, пару тупых воросов.
Так же как и многие получил CITRIX 4.5 EE for Windows 2003 Server в наследство и ничего о нем не слышал))). 1. Есть опубликованное размешеное на 4-х серверах приложение, нужно сделать так что б при закрытие пользователя сессия уходяшия в диссконект, могла быть восстоновленна если тот же пользователь пытается зайти с другова компьютера. 2. Как граматно сделать лоад балансинг на приложени. Сделал во такой файл. [WFClient] [ApplicationServers] [Server Desktop] Он подключается нормально, но вот если допустим есть на сервере с адресом 10.0.139.157 отлюченная сессия, то не факт что он меня туда и направит(((. Как исправить? |
| Всего записей: 16 | Зарегистр. 13-12-2006 | Отправлено: 14:31 01-04-2009 |
| raizo
Junior Member |
Редактировать | Профиль | Сообщение | ICQ | Цитировать | Сообщить модератору ADminionS насколько понимаю у тебя нормальная ферма из серверов, тогда 1. в access консоли зайди в свойства фермы и в разделе session reliability поставь галку и укажи время возможного восстановления 2. балансировка по умолчанию идет по количеству сессий и нагрузке на вход в Citrix Источник Вам также понравится Adblock |

Are you in need of uninstalling Citrix Receiver to fix some problems? Are you looking for an effective solution to completely uninstall it and thoroughly delete all of its files out of your PC? No worry! This page provides detailed instructions on how to completely uninstall Citrix Receiver.
Possible problems when you uninstall Citrix Receiver
* Citrix Receiver is not listed in Programs and Features.
* You do not have sufficient access to uninstall Citrix Receiver.
* A file required for this uninstallation to complete could not be run.
* An error has occurred. Not all of the files were successfully uninstalled.
* Another process that is using the file stops Citrix Receiver being uninstalled.
* Files and folders of Citrix Receiver can be found in the hard disk after the uninstallation.
Citrix Receiver cannot be uninstalled due to many other problems. An incomplete uninstallation of Citrix Receiver may also cause many problems. So, it’s really important to completely uninstall Citrix Receiver and remove all of its files.
How to Uninstall Citrix Receiver Completley?
Method 1: Uninstall Citrix Receiver via Programs and Features.
When a new piece of program is installed on your system, that program is added to the list in Programs and Features. When you want to uninstall the program, you can go to the Programs and Features to uninstall it. So when you want to uninstall Citrix Receiver, the first solution is to uninstall it via Programs and Features.
Steps:
a. Open Programs and Features.
Windows Vista and Windows 7
Click Start, type uninstall a program in the Search programs and files box and then click the result.
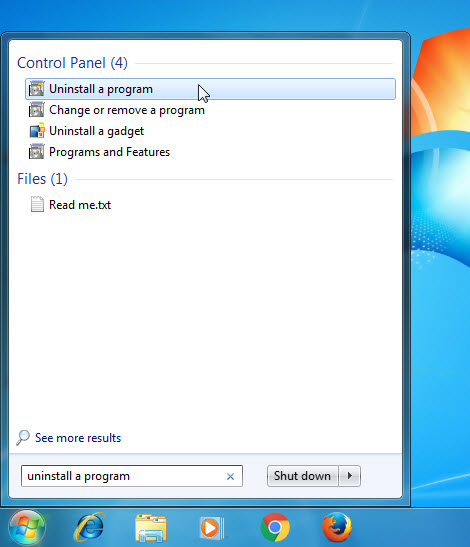
Windows 8, Windows 8.1 and Windows 10
Open WinX menu by holding Windows and X keys together, and then click Programs and Features.
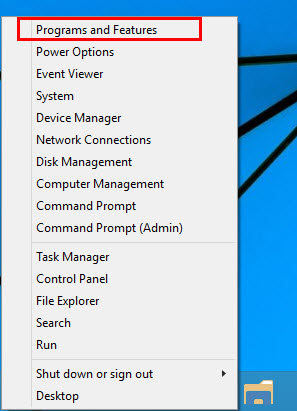
b. Look for Citrix Receiver in the list, click on it and then click Uninstall to initiate the uninstallation.
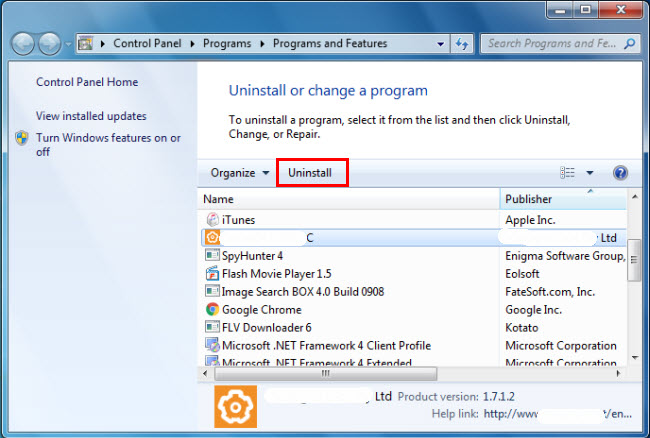
Method 2: Uninstall Citrix Receiver with its uninstaller.exe.
Most of computer programs have an executable file named uninst000.exe or uninstall.exe or something along these lines. You can find this files in the installation folder of Citrix Receiver.
Steps:
a. Go to the installation folder of Citrix Receiver.
b. Find uninstall.exe or unins000.exe.
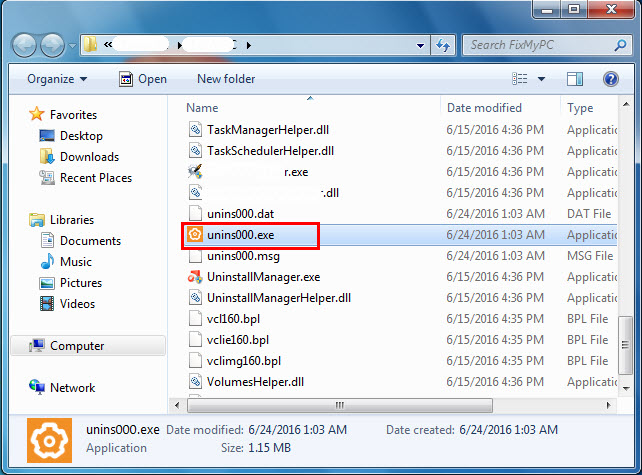
c. Double click on its uninstaller and follow the wizard to uninstall Citrix Receiver.
Method 3: Uninstall Citrix Receiver via System Restore.
System Restore is a utility which comes with Windows operating systems and helps computer users restore the system to a previous state and remove programs interfering with the operation of the computer. If you have created a system restore point prior to installing a program, then you can use System Restore to restore your system and completely eradicate the unwanted programs like Citrix Receiver. You should backup your personal files and data before doing a System Restore.
Steps:
a. Close all files and programs that are open.
b. On the desktop, right click Computer and select Properties. The system window will display.
c. On the left side of the System window, click System protection. The System Properties window will display.
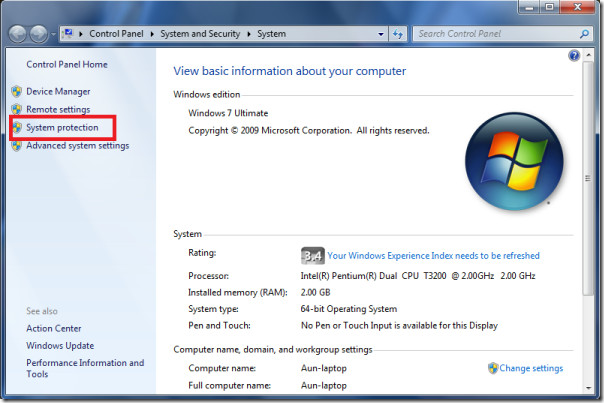
d. Click System Restore and the System Restore window will display.
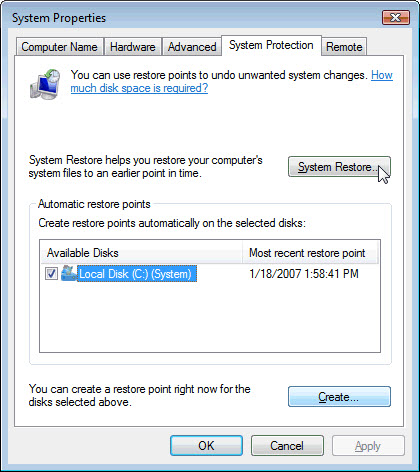
e. Select Choose a different restore point and click Next.
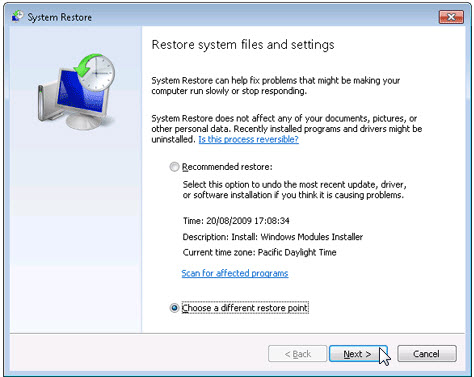
f. Select a date and time from the list and then click Next. You should know that all programs and drivers installed after the selected date and time may not work properly and may need to be re-installed.
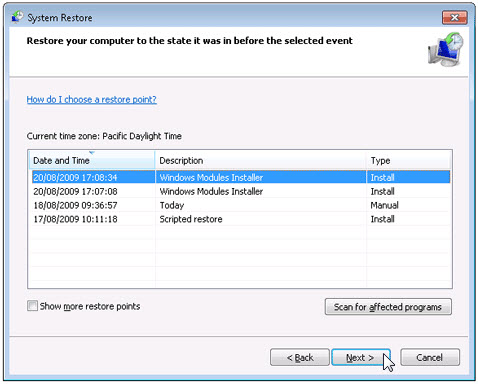
g. Click Finish when the «Confirm your restore point» window appears.
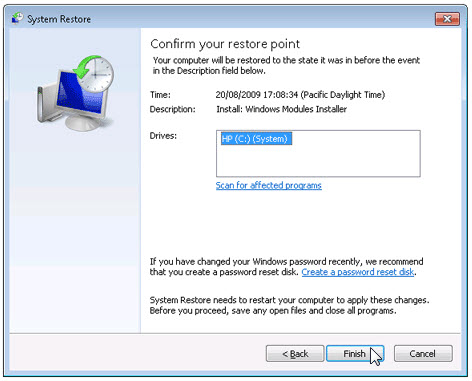
h. Click Yes to confirm again.
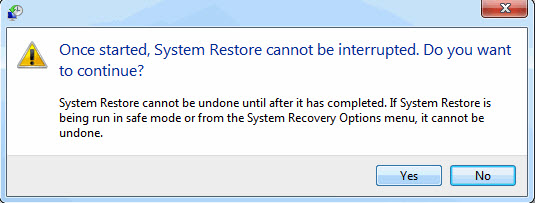
Method 4: Uninstall Citrix Receiver with Antivirus.
Nowadays, computer malware appear like common computer applications but they are much more difficult to remove from the computer. Such malware get into the computer with the help of Trojans and spyware. Other computer malware like adware programs or potentially unwanted programs are also very difficult to remove. They usually get installed on your system by bundling with freeware software like video recording, games or PDF convertors. They can easily bypass the detection of the antivirus programs on your system. If you cannot remove Citrix Receiver like other programs, then it’s worth checking whether it’s a malware or not. Click and download this malware detect tool for a free scan.
Method 5: Reinstall Citrix Receiver to Uninstall.
When the file required to uninstall Citrix Receiver is corrupted or missing, it will not be able to uninstall the program. In such circumstance, reinstalling Citrix Receiver may do the trick. Run the installer either in the original disk or the download file to reinstall the program again. Sometimes, the installer may allow you to repair or uninstall the program as well.
Method 6: Use the Uninstall Command Displayed in the Registry.
When a program is installed on the computer, Windows will save its settings and information in the registry, including the uninstall command to uninstall the program. You can try this method to uninstall Citrix Receiver. Please carefully edit the registry, because any mistake there may make your system crash.
Steps:
a. Hold Windows and R keys to open the Run command, type in regedit in the box and click OK.
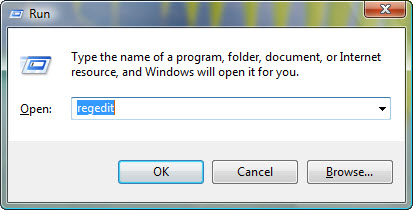
b. Navigate the following registry key and find the one of Citrix Receiver:
HKEY_LOCAL_MACHINESOFTWAREMicrosoftWindowsCurrentVersionUninstall
c. Double click on the UninstallString value, and copy its Value Data.
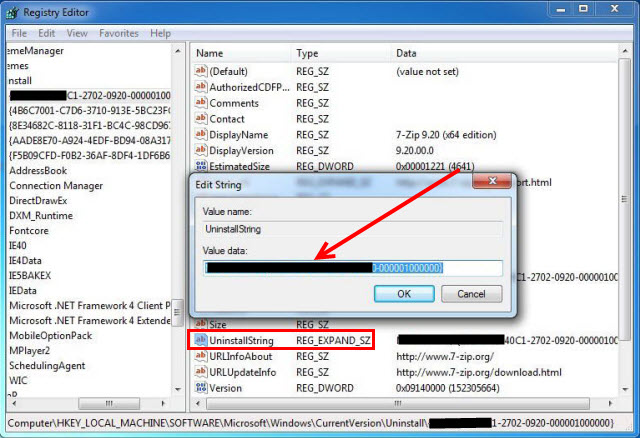
d. Hold Windows and R keys to open the Run command, paste the Value Data in the box and click OK.
e. Follow the wizard to uninstall Citrix Receiver.
Method 7: Uninstall Citrix Receiver with Third-party Uninstaller.
The manual uninstallation of Citrix Receiver requires computer know-how and patience to accomplish. And no one can promise the manual uninstallation will completely uninstall Citrix Receiver and remove all of its files. And an incomplete uninstallation will many useless and invalid items in the registry and affect your computer performance in a bad way. Too many useless files also occupy the free space of your hard disk and slow down your PC speed. So, it’s recommended that you uninstall Citrix Receiver with a trusted third-party uninstaller which can scan your system, identify all files of Citrix Receiver and completely remove them. Download this powerful third-party uninstaller below.
Содержание
- Полное удаление Citrix Receiver
- Что такое citrix.exe? Это безопасно или вирус? Как удалить или исправить это
- Что такое citrix.exe?
- Citrix.exe безопасно, или это вирус или вредоносная программа?
- Могу ли я удалить или удалить citrix.exe?
- Распространенные сообщения об ошибках в citrix.exe
- Как исправить citrix.exe
- Обновлено апреля 2021 года:
- Загрузите или переустановите citrix.exe
- Install and Uninstall
- Using a Windows-based installer
- Using command-line parameters
- List of command-line parameters
- Common parameters
- Install parameters
- /AutoUpdateCheck
- /AutoUpdateStream
- /DeferUpdateCount
- /AURolloutPriority
- /includeappprotection
- /InstallEmbeddedBrowser
- INSTALLDIR
- ADDLOCAL
- HDX features parameters
- ALLOW_BIDIRCONTENTREDIRECTION
- FORCE_LAA
- LEGACYFTAICONS
- ALLOW_CLIENTHOSTEDAPPSURL
- Preference and user interface parameters
- ALLOWADDSTORE
- ALLOWSAVEPWD
- STARTMENUDIR
- DESKTOPDIR
- SELFSERVICEMODE
- ENABLEPRELAUNCH
- DisableSetting
- EnableCEIP
- EnableTracing
- CLIENT_NAME
- ENABLE_DYNAMIC_CLIENT_NAME
- Authentication parameters
- ENABLE_SSON
- ENABLE_KERBEROS
- Examples of a command-line installation
- Uninstall
Полное удаление Citrix Receiver
Столкнулся я с такой проблемой, что запускаться клиент Citrix Receiver на машине с Dibian (на машине с ОС Windows тоже столкнулся с такой проблемой, но она решается легко, и решение описано в самом конце данной статьи). Что только не делал, переустановка не давала положительного результата. Пришлось методом «научного тыка» искать варианты полного удаления следов программы и повторной её установки.
1. Запуск консоли, и выполнение команды ниже
2. Вычистил «хвосты» от Citrix
3. Удалил libmotif3
ВАЖНО! Обязательно после этого перезагружаем ПК, если хотим повторно устанавливать Citrix Receiver
Алгоритм установки Citrix Receiver
1. скачал файл linuxx86-12.0.0.189834.tar.gz и распаковал
2. консоль, зашел в папку под root
3. Выбрал пункт установки 1
4. Выбрал папку не по умолчанию, и установил все
5. Установил libmotif3, и делаем ссылку на файл
Как результат — Все заработало!
В Операционной системе Windows сталкивался с подобной проблемой, но она решается намного проще 🙂 Достаточно скачать утилиту с оф. сайта, и запустить ее от имени Администратора. После удаления, можно повторно запустить установку клиента Citrix Receiver
Ниже указана ссылка, где можно скачать последнюю версию утилиты Receiver Clean-Up Utility, для полного удаления Citrix Receiver
Receiver Clean-Up Utility
Что такое citrix.exe? Это безопасно или вирус? Как удалить или исправить это
Что такое citrix.exe?
citrix.exe это исполняемый файл, который является частью Citrix Licensing Программа, разработанная Citrix Systems, Inc., Программное обеспечение обычно о 28.78 MB по размеру.
Расширение .exe имени файла отображает исполняемый файл. В некоторых случаях исполняемые файлы могут повредить ваш компьютер. Пожалуйста, прочитайте следующее, чтобы решить для себя, является ли citrix.exe Файл на вашем компьютере — это вирус или троянский конь, который вы должны удалить, или это действительный файл операционной системы Windows или надежное приложение.

Citrix.exe безопасно, или это вирус или вредоносная программа?
Первое, что поможет вам определить, является ли тот или иной файл законным процессом Windows или вирусом, это местоположение самого исполняемого файла. Например, такой процесс, как citrix.exe, должен запускаться из C: ProgramData package cache citrixlicensing.exe, а не в другом месте.
Для подтверждения откройте диспетчер задач, выберите «Просмотр» -> «Выбрать столбцы» и выберите «Имя пути к изображению», чтобы добавить столбец местоположения в диспетчер задач. Если вы обнаружите здесь подозрительный каталог, возможно, стоит дополнительно изучить этот процесс.
Еще один инструмент, который иногда может помочь вам обнаружить плохие процессы, — это Microsoft Process Explorer. Запустите программу (не требует установки) и активируйте «Проверить легенды» в разделе «Параметры». Теперь перейдите в View -> Select Columns и добавьте «Verified Signer» в качестве одного из столбцов.
Если статус процесса «Проверенная подписывающая сторона» указан как «Невозможно проверить», вам следует взглянуть на процесс. Не все хорошие процессы Windows имеют метку проверенной подписи, но ни один из плохих.
Самые важные факты о citrix.exe:
- Находится в C: Program Files citrix licensing ls web xslt вложенная;
- Издатель: Citrix Systems, Inc.
- Полный путь: C:ProgramDatapackage cachecitrixlicensing.exe
- Файл справки:
- URL издателя: www.Citrix.com
- Известно, что до 28.78 MB по размеру на большинстве окон;
Если у вас возникли какие-либо трудности с этим исполняемым файлом, вы должны определить, заслуживает ли он доверия, прежде чем удалять citrix.exe. Для этого найдите этот процесс в диспетчере задач.
Найдите его местоположение (оно должно быть в C: Program Files citrix licensing ls web xslt) и сравните размер и т. Д. С приведенными выше фактами.
Если вы подозреваете, что можете быть заражены вирусом, вы должны немедленно попытаться это исправить. Чтобы удалить вирус citrix.exe, необходимо Загрузите и установите приложение полной безопасности, например Malwarebytes., Обратите внимание, что не все инструменты могут обнаружить все типы вредоносных программ, поэтому вам может потребоваться попробовать несколько вариантов, прежде чем вы добьетесь успеха.
Кроме того, функциональность вируса может сама влиять на удаление citrix.exe. В этом случае вы должны включить Безопасный режим с поддержкой сети — безопасная среда, которая отключает большинство процессов и загружает только самые необходимые службы и драйверы. Когда вы можете запустить программу безопасности и полный анализ системы.
Могу ли я удалить или удалить citrix.exe?
Не следует удалять безопасный исполняемый файл без уважительной причины, так как это может повлиять на производительность любых связанных программ, использующих этот файл. Не забывайте регулярно обновлять программное обеспечение и программы, чтобы избежать будущих проблем, вызванных поврежденными файлами. Что касается проблем с функциональностью программного обеспечения, проверяйте обновления драйверов и программного обеспечения чаще, чтобы избежать или вообще не возникало таких проблем.
Согласно различным источникам онлайн, 4% людей удаляют этот файл, поэтому он может быть безвредным, но рекомендуется проверить надежность этого исполняемого файла самостоятельно, чтобы определить, является ли он безопасным или вирусом. Лучшая диагностика для этих подозрительных файлов — полный системный анализ с Reimage, Если файл классифицируется как вредоносный, эти приложения также удаляют citrix.exe и избавляются от связанных вредоносных программ.
Однако, если это не вирус, и вам нужно удалить citrix.exe, вы можете удалить Citrix Licensing с вашего компьютера, используя его деинсталлятор, который должен находиться по адресу: MsiExec.exe / X <16a4d384-a7a8-4989-bacf- 85ff3561fcb9>. Если вы не можете найти его деинсталлятор, то вам может понадобиться удалить Citrix Licensing, чтобы полностью удалить citrix.exe. Вы можете использовать функцию «Установка и удаление программ» на панели управления Windows.
- 1. в Меню Пуск (для Windows 8 щелкните правой кнопкой мыши в нижнем левом углу экрана), нажмите Панель управления, а затем под Программы:
o Windows Vista / 7 / 8.1 / 10: нажмите Удаление программы.
o Windows XP: нажмите Установка и удаление программ.
- 2. Когда вы найдете программу Citrix Licensingщелкните по нему, а затем:
o Windows Vista / 7 / 8.1 / 10: нажмите Удалить.
o Windows XP: нажмите Удалить or Изменить / Удалить вкладка (справа от программы).
- 3. Следуйте инструкциям по удалению Citrix Licensing.
Распространенные сообщения об ошибках в citrix.exe
Наиболее распространенные ошибки citrix.exe, которые могут возникнуть:
• «Ошибка приложения citrix.exe».
• «Ошибка citrix.exe».
• «Citrix.exe столкнулся с проблемой и должен быть закрыт. Приносим извинения за неудобства».
• «citrix.exe не является допустимым приложением Win32».
• «citrix.exe не запущен».
• «citrix.exe не найден».
• «Не удается найти файл citrix.exe».
• «Ошибка запуска программы: citrix.exe.»
• «Неверный путь к приложению: citrix.exe.»
Эти сообщения об ошибках .exe могут появляться во время установки программы, во время выполнения связанной с ней программы, Citrix Licensing, при запуске или завершении работы Windows, или даже при установке операционной системы Windows. Отслеживание момента появления ошибки citrix.exe является важной информацией при устранении неполадок.
Как исправить citrix.exe
Аккуратный и опрятный компьютер — это один из лучших способов избежать проблем с Citrix Licensing. Это означает выполнение сканирования на наличие вредоносных программ, очистку жесткого диска cleanmgr и ПФС / SCANNOWудаление ненужных программ, мониторинг любых автозапускаемых программ (с помощью msconfig) и включение автоматических обновлений Windows. Не забывайте всегда делать регулярные резервные копии или хотя бы определять точки восстановления.
Если у вас возникла более серьезная проблема, постарайтесь запомнить последнее, что вы сделали, или последнее, что вы установили перед проблемой. Использовать resmon Команда для определения процессов, вызывающих вашу проблему. Даже в случае серьезных проблем вместо переустановки Windows вы должны попытаться восстановить вашу установку или, в случае Windows 8, выполнив команду DISM.exe / Online / Очистка-изображение / Восстановить здоровье, Это позволяет восстановить операционную систему без потери данных.
Чтобы помочь вам проанализировать процесс citrix.exe на вашем компьютере, вам могут пригодиться следующие программы: Менеджер задач безопасности отображает все запущенные задачи Windows, включая встроенные скрытые процессы, такие как мониторинг клавиатуры и браузера или записи автозапуска. Единый рейтинг риска безопасности указывает на вероятность того, что это шпионское ПО, вредоносное ПО или потенциальный троянский конь. Это антивирус обнаруживает и удаляет со своего жесткого диска шпионское и рекламное ПО, трояны, кейлоггеры, вредоносное ПО и трекеры.
Обновлено апреля 2021 года:
Мы рекомендуем вам попробовать этот новый инструмент. Он исправляет множество компьютерных ошибок, а также защищает от таких вещей, как потеря файлов, вредоносное ПО, сбои оборудования и оптимизирует ваш компьютер для максимальной производительности. Это исправило наш компьютер быстрее, чем делать это вручную:
- Шаг 1: Скачать PC Repair & Optimizer Tool (Windows 10, 8, 7, XP, Vista — Microsoft Gold Certified).
- Шаг 2: Нажмите «Начать сканирование”, Чтобы найти проблемы реестра Windows, которые могут вызывать проблемы с ПК.
- Шаг 3: Нажмите «Починить все», Чтобы исправить все проблемы.

(опциональное предложение для Reimage — Cайт | Лицензионное соглашение | Политика конфиденциальности | Удалить)
Загрузите или переустановите citrix.exe
Вход в музей Мадам Тюссо не рекомендуется загружать замещающие exe-файлы с любых сайтов загрузки, так как они могут содержать вирусы и т. д. Если вам нужно скачать или переустановить citrix.exe, мы рекомендуем переустановить основное приложение, связанное с ним Citrix Licensing.
Информация об операционной системе
Ошибки citrix.exe могут появляться в любых из нижеперечисленных операционных систем Microsoft Windows:
- Окна 10
- Окна 8.1
- Окна 7
- Windows Vista
- Windows XP
- Windows ME
- Окна 2000
Install and Uninstall
You can install the Citrix Workspace app either by:
- Downloading the CitrixWorkspaceApp.exe installation package from the Download page or
- From your company’s download page (if available).
The package can be installed by:
- Running an interactive Windows-based installation wizard. Or
- Typing the installer file name, installation commands and installation properties using the command-line interface. For information about installing Citrix Workspace app using command-line interface, see Using command-line parameters.
Installation with administrator and non-administrator privileges:
Citrix Workspace app can be installed by both a user and an administrator. Administrator privileges are required only when using pass-through authentication and Citrix Ready workspace hub with Citrix Workspace app for Windows.
The following table describes the differences when Citrix Workspace app is installed as an administrator or a user:
| Installation folder | Installation type | |
|---|---|---|
| Administrator | C:Program Files (x86)CitrixICA Client | Per-system installation |
| User | %USERPROFILE%AppDataLocalCitrixICA Client | Per-user installation |
Administrators can’t install Citrix Workspace app if a user-installed instance is present on the system. We recommend that you uninstall all user-installed instances before installing the Citrix Workspace app as an administrator.
Using a Windows-based installer
You can install Citrix Workspace app for Windows by manually running the CitrixWorkspaceApp.exe installer package, using the following methods:
- Installation media
- Network share
- Windows Explorer
- Command-line interface
By default, the installer logs are at %temp%CTXReceiverInstallLogs*.logs .
- Launch the CitrixWorkspaceApp.exe file and click Start.
- Read and accept the EULA and continue with the installation.
- When installing on a domain-joined machine with administrator privileges, a single sign-on dialog appears. See Domain pass-through authentication for more information.
- Follow the Windows-based installer to complete the installation.
Using command-line parameters
You can customize the Citrix Workspace app installer by specifying different command-line options. The installer package self-extracts to the system temp directory before launching the setup program. The space requirement includes program files, user data, and temp directories after launching several applications.
To install the Citrix Workspace app using the Windows command line, launch the command prompt. And type the installer file name, installation commands and installation properties on a single line. The available installation commands and properties are listed below:
CitrixWorkspaceApp.exe [commands] [properties]
List of command-line parameters
The parameters are broadly classified as follows:
Common parameters
- /? Or /help — Lists all the installation commands and properties.
- /silent — Disables installation dialogs and prompts during installation.
- /noreboot — Suppresses the prompts to reboot during installation. When you suppress the reboot prompt, the USB devices that are in a suspended state are not recognized. The USB devices are activated only after the device is restarted.
- /includeSSON — Requires you to install as an administrator. Indicates that the Citrix Workspace app is installed with the single sign-on component. See Domain pass-through authentication for more information.
- /rcu — This switch is effective only when upgrading from an unsupported version of the software. Indicates that Citrix Workspace app will be installed or upgraded by uninstalling existing version. The /rcu switch also cleans up existing or older settings.
/rcu switch is deprecated from Version 1909. For more information, see Deprecation.
/forceinstall — This switch is effective when cleaning up any existing configuration or entries of Citrix Workspace app in the system. Use this switch in the following scenarios:
- Upgrading from an unsupported version of Citrix Workspace app version.
- The installation or upgrade is unsuccessful.
Install parameters
/AutoUpdateCheck
Indicates that Citrix Workspace app detects when an update is available.
This is a mandatory parameter that you must set to configure other parameters like /AutoUpdateStream , /DeferUpdateCount , /AURolloutPriority .
- Auto (default) — You are notified when an update is available. Example, CitrixWorkspaceApp.exe /AutoUpdateCheck=auto .
- Manual — You are not notified when an update is available. Check for updates manually. Example, CitrixWorkspaceApp.exe /AutoUpdateCheck=manual .
- Disabled — Disables auto-updates. Example, CitrixWorkspaceApp.exe /AutoUpdateCheck=disabled .
/AutoUpdateStream
If you have enabled auto-update, you can choose the release track you would like to update to. See Lifecycle Milestones for more information.
- LTSR — Auto-updates to Long Term Service Release cumulative updates only. Example, CitrixWorkspaceApp.exe /AutoUpdateStream=LTSR .
- Current — Auto-updates to the latest version of Citrix Workspace app. Example, CitrixWorkspaceApp.exe /AutoUpdateStream=Current .
/DeferUpdateCount
Indicates the number of times that you can defer notifications when an update is available. For more information, see Citrix Workspace Updates.
- -1(default) — Allows deferring notifications any number of times. Example, CitrixWorkspaceApp.exe /DeferUpdateCount=-1 .
- 0 — Indicates that you will receive one notification (only) for every available update. You won’t be reminded again about the update. Example, CitrixWorkspaceApp.exe /DeferUpdateCount=0 .
- Any other number ‘n’ — Allows deferring notifications ‘n’ number of times. The Remind me later option is displayed in the ‘n’ count. Example, CitrixWorkspaceApp.exe /DeferUpdateCount= .
/AURolloutPriority
When a new version of the app is released, Citrix rolls out the update for a specific delivery period. With this parameter, you can control at what time during the delivery period you can receive the update.
- Auto (default) — You receive the updates during the delivery period as configured by Citrix. Example, CitrixWorkspaceApp.exe /AURolloutPriority=Auto .
- Fast — You receive the updates at the beginning of the delivery period. Example, CitrixWorkspaceApp.exe /AURolloutPriority=Fast .
- Medium — You receive the updates at the mid-delivery period. Example, CitrixWorkspaceApp.exe /AURolloutPriority=Medium .
- Slow — You receive the updates at the end of the delivery period. Example, CitrixWorkspaceApp.exe /AURolloutPriority=Slow .
/includeappprotection
Provides enhanced security by restricting the ability of clients to be compromised by keylogging and screen-capturing malware.
See App protection for more information.
/InstallEmbeddedBrowser
Excludes the Citrix Embedded Browser binaries. Run the /InstallEmbeddedBrowser=N switch to discontinue the embedded browser feature.
INSTALLDIR
Specifies the custom installation directory for Citrix Workspace app installation. The default path is C:Program FilesCitrix . Example, CitrixWorkspaceApp.exe INSTALLDIR=C:Program FilesCitrix .
ADDLOCAL
Installs one or more of the specified components. Example, CitrixWorkspaceapp.exe ADDLOCAL=ReceiverInside,ICA_Client,AM,SELFSERVICE,DesktopViewer,Flash,Vd3d,WebHelper,BrowserEngine, WorkspaceHub, USB .
By default, ReceiverInside , ICA_Client and AM are installed when installing the Citrix Workspace app.
HDX features parameters
ALLOW_BIDIRCONTENTREDIRECTION
Indicates that the bidirectional content redirection between the client and the host and vice versa is enabled. For more information, see the Bidirectional content redirection policy settings section in Citrix Virtual Apps and Desktops documentation.
- 0 (default) – Indicates that the bidirectional content redirection is disabled. Example, CitrixWorkspaceApp.exe ALLOW_BIDIRCONTENTREDIRECTION=0 .
- 1 — Indicates that the bidirectional content redirection is enabled. Example, CitrixWorkspaceApp.exe ALLOW_BIDIRCONTENTREDIRECTION=1 .
FORCE_LAA
Indicates that Citrix Workspace app is installed with the client-end Local App Access component. You must install the workspace app with administrator privileges for this component to work. See the Local App Access section in Citrix Virtual Apps and Desktops documentation for more information.
- 0 (default)- Indicates that Local App Access component is not installed. Example, CitrixWorkspaceApp.exe FORCE_LAA =0 .
- 1 — Indicates that the client-end Local App Access component is installed. Example, CitrixWorkspaceApp.exe FORCE_LAA =1 .
LEGACYFTAICONS
Specifies if icons are displayed for documents or files that have file type associations with subscribed applications.
- False (default) — Indicates that the icons are displayed for documents or files that have file type associations with subscribed applications. When set to false, the operation system generates an icon for the document that does not have a specific icon assigned to it. The icon generated by the operation system is a generic icon overlaid with a smaller version of the application icon. Example, CitrixWorkspaceApp.exe LEGACYFTAICONS=False .
- True — Indicates that the icons are not displayed for documents or files that have file type associations with subscribed applications. Example, CitrixWorkspaceApp.exe LEGACYFTAICONS=True .
ALLOW_CLIENTHOSTEDAPPSURL
Enables the URL redirection feature on the user device. See the Local App Access section in the Citrix Virtual Apps and Desktops documentation for more information.
- 0 (default)- Disables the URL redirection feature on the user device. Example, CitrixWorkspaceApp.exe ALLOW_CLIENTHOSTEDAPPSURL=0 .
- 1- Enables the URL redirection feature on the user devices. Example, CitrixWorkspaceApp.exe ALLOW_CLIENTHOSTEDAPPSURL=1 .
Preference and user interface parameters
ALLOWADDSTORE
Allows you to configure the stores (HTTP or https) based on the specified parameter.
- S(default)- Allows you to add or remove secure stores only (configured with HTTPS). Example, CitrixWorkspaceApp.exe ALLOWADDSTORE=S .
- A – Allows you to add or remove both secure stores (HTTPS) and non-secure stores (HTTP). Not applicable if Citrix Workspace app is per-user installed. Example, CitrixWorkspaceApp.exe ALLOWADDSTORE=A .
- N – Never allow users to add or remove their own store. Example, CitrixWorkspaceApp.exe ALLOWADDSTORE=N .
ALLOWSAVEPWD
Allows you to save the store credentials locally. This parameter applies only to stores using the Citrix Workspace app protocol.
- S(default) — Allows saving the password for secure stores only (configured with HTTPS). Example, CitrixWorkspaceApp.exe ALLOWSAVEPWD=S .
- N — Does not allow saving the password. Example, CitrixWorkspaceApp.exe ALLOWSAVEPWD=N .
- A — Allows saving the password for both secure stores (HTTPS) and non-secure stores (HTTP). Example, CitrixWorkspaceApp.exe ALLOWSAVEPWD=A .
Specifies the directory for the shortcuts in the Start menu.
- — By default, applications appear under Start >All Programs. You can specify the relative path of the shortcuts in the Programs folder. For example, to place shortcuts under Start > All Programs > Workspace, specify STARTMENUDIR=Workspace .
DESKTOPDIR
Specifies the directory for shortcuts on Desktop.
When using the DESKTOPDIR option, set the PutShortcutsOnDesktop key to True .
- — You can specify the relative path of the shortcuts. For example, to place shortcuts under Start > All Programs > Workspace, specify DESKTOPDIR=Workspace .
SELFSERVICEMODE
Controls access to the self-service Workspace app user interface.
- True — Indicates that the user has access to self-service user interface. Example, CitrixWorkspaceApp.exe SELFSERVICEMODE=True .
- False — Indicates that the user does not have access to the self-service user interface. Example, CitrixWorkspaceApp.exe SELFSERVICEMODE=False .
ENABLEPRELAUNCH
Controls session pre-launch. See Application launch time for more information.
- True — Indicates that session pre-launch is enabled. Example, CitrixWorkspaceApp.exe ENABLEPRELAUNCH=True .
- False — Indicates that session pre-launch is disabled. Example, CitrixWorkspaceApp.exe ENABLEPRELAUNCH=False .
DisableSetting
Hides the Shortcuts and Reconnect option from being displayed in the Advanced Preferences sheet. See Hiding specific settings from the Advanced Preferences sheet for more information.
- 0 (default) – Displays both Shortcuts and Reconnect options in the Advanced Preferences sheet. Example, CitrixWorkspaceApp.exe DisableSetting=0 .
- 1 – Displays only Reconnect option in the Advanced Preferences sheet. Example, CitrixWorkspaceApp.exe DisableSetting=1 .
- 2 – Displays only Shortcuts option in the Advanced Preferences sheet. Example, CitrixWorkspaceApp.exe DisableSetting=2 .
- 3 – Both Shortcuts and Reconnect options are hidden from the Advanced Preferences sheet. Example, CitrixWorkspaceApp.exe DisableSetting=3 .
EnableCEIP
Indicates your participation in the Customer Experience Improvement Program. See CEIP for more information.
- True (default)- Opt in to the Citrix Customer Improvement Program (CEIP). Example, CitrixWorkspaceApp.exe EnableCEIP=True .
- False — Opt out of the Citrix Customer Improvement Program (CEIP). Example, CitrixWorkspaceApp.exe EnableCEIP=False .
EnableTracing
Controls the Always-on tracing feature.
- True (default)- Enables the Always-on tracing feature. Example. CitrixWorkspaceApp.exe EnableTracing=true .
- False — Disables the Always-on tracing feature. Example, CitrixWorkspaceApp.exe EnableTracing=false .
CLIENT_NAME
Specifies the name used to identify the user device to the server.
- — Specifies the name used identify the user device on the server. The default name is %COMPUTERNAME% . Example, CitrixReceiver.exe CLIENT_NAME=%COMPUTERNAME% .
ENABLE_DYNAMIC_CLIENT_NAME
Allows client name to be the same as the computer name. When you change the computer name, the client name changes too.
- Yes (default) – Allows the client name to be the same as the computer name. Example, CitrixWorkspaceApp.exe ENABLE_DYNAMIC_CLIENT_NAME=Yes .
- No — Does not allow the client name to be the same as the computer name. You must specify a value for the CLIENT_NAME property. Example, CitrixWorkspaceApp.exe ENABLE_DYNAMIC_CLIENT_NAME=No .
Authentication parameters
ENABLE_SSON
Enables single sign-on when the Workspace app is installed with the /includeSSON command. See Domain pass-through authentication for more information.
- Yes (default) — Indicates that single sign-on is enabled. Example, CitrixWorkspaceApp.exe ENABLE_SSON=Yes .
- No — Indicates that single sign-on is disabled. Example, CitrixWorkspaceApp.exe ENABLE_SSON=No .
ENABLE_KERBEROS
Specifies whether the HDX engine must use Kerberos authentication. This applies only when single sign-on authentication is enabled. For more information, see Domain pass-through authentication with Kerberos.
- Yes — Indicates that the HDX engine will use Kerberos authentication. Example, CitrixWorkspaceApp.exe ENABLE_KERBEROS=Yes .
- No — Indicates that the HDX engine will not use Kerberos authentication. Example, CitrixWorkspaceApp.exe ENABLE_KERBEROS=No .
In addition to the above properties, you can also specify the store URL that is used with the Workspace app. You can add up to 10 stores. Use the following property to do so:
STOREx=”storename;http[s]://servername.domain/IISLocation/discovery;[On, Off]; [storedescription]»
Values:
- x — Integers 0 through 9 used to identify a store.
- storename — Name of the store. This value must match the name configured on the StoreFront server.
- servername.domain — The fully qualified domain name of the server hosting the store.
- IISLocation — the path to the store within IIS. The store URL must match the URL in the StoreFront provision file. The store URL is in the following format /Citrix/store/discovery . To obtain the URL, export a provisioning file from StoreFront, launch it in Notepad and copy the URL from the Address element.
- [On, Off] — The Off option enables you to deliver disabled stores, giving users the choice of whether they access them. When the store status is not specified, the default setting is On.
- storedescription — Description of the store, such as HR App Store .
Examples of a command-line installation
To specify the Citrix Gateway store URL:
CitrixWorkspaceApp.exe STORE0= HRStore;https://ag.mycompany.com#Storename;On;Store
Where, Storename indicates the name of the store that needs to be configured.
- The Citrix Gateway store URL configured using this method does not support the PNA Services Sites that are using Citrix Gateway.
- In a multi-store setup, Citrix Gateway store URL must be first in the list. Only 2 Citrix Gateway store URL configuration is allowed.
To install all components silently and specify two application stores:
CitrixWorkspaceApp.exe /silent STORE0=»AppStore;https://testserver.net/Citrix/MyStore/discovery;on;HR App Store» STORE1=»BackUpAppStore;https://testserver.net/Citrix/MyBackupStore/discovery;on;Backup HR App Store»
- It is mandatory to include /discovery in the store URL for successful pass-through authentication.
- The Citrix Gateway store URL must be the first entry in the list of configured store URLs.
Uninstall
Using Windows-based uninstaller:
You can uninstall Citrix Workspace app using the Windows Programs and Features utility (Add or Remove Programs).
During Citrix Workspace app installation, you get a prompt to uninstall the Citrix HDX RTME package. Click OK to continue the uninstallation.
Using the command-line interface:
You can uninstall Citrix Workspace app, from a command line by typing the following command:
For silent uninstallation of Citrix Workspace app, run the following switch:
Содержание
- 1 Как удалить Citrix?
- 2 Как удалить программу, которая не удаляется?
- 3 Как полностью удалить рабочую область Citrix?
- 4 Как удалить Citrix из реестра?
- 5 Что делает Citrix Receiver?
- 6 Как принудительно удалить программу?
- 7 Как удалить программу, которая не отображается в Панели управления?
- 8 Как принудительно удалить файл?
- 9 Следует ли мне удалить Citrix Receiver?
- 10 Как очистить кеш Citrix?
- 11 Как отключить рабочую область Citrix?
- 12 Как принудительно удалить Citrix Receiver?
- 13 Могу ли я удалить программу запуска Citrix Online?
- 14 Как исправить мой Citrix Receiver?
Выберите Удалить приложение Citrix Workspace и следуйте инструкциям на экране. Файл. dmg — это файл, который загружается из Citrix при первой установке приложения Citrix Workspace для Mac. Если файла больше нет на вашем компьютере, загрузите файл еще раз из Citrix Downloads, чтобы удалить приложение.
Как удалить программу, которая не удаляется?
Все, что вам нужно сделать, это:
- Откройте меню «Пуск».
- Выполните поиск по запросу «добавить или удалить программы».
- Щелкните результат поиска под названием «Добавить или удалить программы».
- Просмотрите список программ, установленных на вашем компьютере, найдите и щелкните правой кнопкой мыши программу, которую хотите удалить.
- В появившемся контекстном меню нажмите Удалить.
Как полностью удалить рабочую область Citrix?
Вы можете удалить приложение Citrix Workspace с помощью утилиты «Программы и компоненты» Windows («Установка и удаление программ»). Примечание. Во время установки приложения Citrix Workspace вы получите запрос на удаление пакета Citrix HDX RTME. Щелкните ОК, чтобы продолжить удаление.
Как удалить Citrix из реестра?
GUID можно найти в следующем разделе реестра: HKEY_LOCAL_MACHINE Software Microsoft Windows CurrentVersion Uninstall. Когда выбран ключ «Удалить», нажмите Ctrl + F и найдите термин Citrix. Подключ, содержащий запись клиента Citrix ICA, отображается как открытый (левая панель) и помечен идентификатором GUID.
Что делает Citrix Receiver?
Citrix Receiver — это клиентское программное обеспечение, необходимое для доступа к приложениям и полным рабочим столам, размещенным на серверах Citrix, с удаленного клиентского устройства. … Когда вы посещаете страницу загрузки Citrix Receiver, она автоматически определяет операционную систему и предлагает вам загрузить нужное клиентское программное обеспечение.
Как принудительно удалить программу?
Удалить папку в реестре Windows. Отображаемое имя реестра Windows. Удалите ключи, которые показывают имя вашей программы в DisplayName, щелкнув правой кнопкой мыши по элементам и выбрав Удалить. Теперь ваша программа не будет отображаться в списке «Установка и удаление программ».
Как удалить программу, которая не отображается в Панели управления?
Как удалить программы, не указанные в панели управления
- Настройки Windows 10.
- Проверьте его деинсталлятор в папке «Программы».
- Повторно загрузите установщик и посмотрите, сможете ли вы удалить его.
- Удалите программы в Windows с помощью реестра.
- Сократите имя ключа реестра.
- Используйте стороннее программное обеспечение для удаления.
25 сент. 2019 г.
Как принудительно удалить файл?
Для этого сначала откройте меню «Пуск» (клавиша Windows), введите «выполнить» и нажмите «Ввод». В появившемся диалоговом окне введите cmd и снова нажмите Enter. В открытой командной строке введите del / f имя_файла, где имя_файла — это имя файла или файлов (вы можете указать несколько файлов с помощью запятых), которые вы хотите удалить.
Следует ли мне удалить Citrix Receiver?
Однако оставление Citrix Receiver установленным на домашнем компьютере не вызывает никаких известных проблем с безопасностью. Если вы хотите оставить его в покое, это безопасно. Он не занимает много места и после отключения автоматического запуска не будет использовать память или процессор.
Как очистить кеш Citrix?
инструкции
- Откройте проводник Windows.
- Перейдите в C: Users % User% AppData Local Temp.
- Удалите файлы кэша значков (.ico). Дополнительные ресурсы.
Как отключить рабочую область Citrix?
Все, что вам нужно сделать, это открыть диспетчер задач, щелкнув правой кнопкой мыши на панели задач или используя сочетание клавиш CTRL + SHIFT + ESC, нажав «Подробнее», переключившись на вкладку «Автозагрузка» и нажав кнопку «Отключить».
Как принудительно удалить Citrix Receiver?
Удалите Citrix Receiver из Windows
Войдите на устройство с правами администратора. Откройте Панель управления и выберите «Программы и компоненты». Приложение Citrix Receiver должно быть найдено в папке «Программы и компоненты», чтобы его можно было удалить. Щелкните приложение правой кнопкой мыши и выберите Удалить.
Могу ли я удалить программу запуска Citrix Online?
Windows: откройте «Программы и компоненты». Щелкните правой кнопкой мыши «Citrix Online Launcher». Выберите «Удалить», затем при появлении запроса нажмите «Да».
Как исправить мой Citrix Receiver?
Проблема с запуском Citrix Receiver может быть вызвана используемыми вами приложениями.
…
Как исправить ошибку запуска Citrix Receiver в Windows 10?
- Обновите приложения. …
- Обеспечьте полные разрешения для учетной записи пользователя. …
- Загрузите последнюю доступную версию. …
- Сбросьте Citrix Receiver.
4 янв. 2021 г.
Citrix Receiver для Windows 10 обладает большим набором функций, которые помогут вам работать эффективнее, где бы вы ни находились.
Это не означает, что вы никогда не столкнетесь с его недостатками. Например, вам может не повезти при попытке запустить Citrix Receiver.
Хотя вы можете сделать это без повышенных разрешений и входа в систему с обычной учетной записью пользователя домена, вы не можете запускать какие-либо приложения и рабочие столы, которые там появляются.
Однако, если вы запустите Citrix с повышенными правами, а затем войдете в систему с обычной учетной записью пользователя домена, их запуск будет очень простым. Для тех, кто хочет это исправить, это означает одно.
Цель сегодняшнего руководства — показать вам, как легко запускать приложения и рабочие столы Citrix. Просто продолжайте читать краткий список исправлений, которые вы можете применить в этом отношении.
Как исправить ошибку запуска Citrix Receiver в Windows 10?
1. Обновить приложения
Если одно или несколько приложений Citrix Receiver не могут быть запущены в Windows 10, возможно, первое, что вам следует сделать, это обновить их.
Немедленно щелкните раскрывающийся список рядом с вашим именем в правом верхнем углу меню. Затем нажмите «Обновить приложения» и посмотрите, сохраняется ли проблема.
2. Обеспечить полные права для учетной записи пользователя
Если вы хотите снова запустить Citrix Receiver в Windows 10 без каких-либо усилий, обратите внимание, что для учетной записи пользователя в разделе HKEY_USERSUSER_SIDSOFTWARECitrix на клиентском компьютере требуются полные разрешения.
Вот почему мы рекомендуем убедиться, что у вас есть полные разрешения для учетной записи пользователя, используемой для входа в Citrix Receiver для ключа реестра.
Если учетная запись пользователя домена не имеет разрешений, удалите ключ реестра Citrix после создания резервной копии. Затем выйдите из Citrix Receiver и снова запустите его.
Ключ реестра будет создан еще раз, на этот раз со всеми соответствующими необходимыми разрешениями.
3. Используйте другое решение для удаленной работы
Если Citrix Receiver только доставляет вам больше головной боли, возможно, вам следует подумать о том, чтобы попробовать другое решение для удаленного рабочего стола, которое может повысить вашу производительность.
Точнее, рекомендуемое ниже решение способно доставлять приложения и рабочие столы любому сотруднику по сети.
Но самое приятное то, что его совсем не сложно внедрить в любой среде, и он решает самую большую проблему в корпоративной сети: безопасность данных.
Вы сможете обезопасить все каналы онлайн-коммуникаций от утечки и кражи данных с помощью протокола защищенных сокетов (SSL), шифрования данных с использованием FIPS и двусторонней идентификации.
Все передачи данных отслеживаются и отображаются на центральной консоли для ИТ-менеджера в визуальной форме.
Кроме того, это решение отлично интегрируется со многими другими решениями для обеспечения безопасности, такими как SafeNet, DualShield, Azure MFA, RADIUS-сервер и даже Google Authenticator.
4. Загрузите последнюю доступную версию
- Найдите значок Citrix Receiver на панели задач.
- Щелкните его правой кнопкой мыши, чтобы выбрать «Дополнительные настройки».
- В разделе «О программе» обратите внимание на версию.
- В браузере перейдите по адресу Receiver.citrix.com.
- Затем нажмите «Загрузить для Windows».
- Там должна быть указана последняя доступная версия приложения Citrix Workspace. Сравните свою версию с этой.
- Если онлайн-версия отличается, загрузите новую версию следующей.
5. Сбросьте Citrix-приемник
- Во-первых, щелкните правой кнопкой мыши значок приемника на панели задач.
- Нажмите «Дополнительные настройки» далее.
- Выберите опцию «Сбросить приемник».
- Появится подсказка с вопросом, уверены ли вы, что хотите сбросить ресивер к настройкам по умолчанию. Подтвердите, нажав «Да, сбросить приемник».
- Введите remote.ptlgateway.net.
- Citrix Receiver требует, чтобы вы снова добавили свою учетную запись. Введите имя пользователя и пароль вашего домена. Вам может быть предложено дважды войти в систему.
- Вы также можете поставить галочку, чтобы запомнить учетные данные.
Если ситуация ухудшается и кажется, что ничего не работает, может помочь сброс Citrix Receiver. Выполните вышеуказанные шаги, и теперь вы сможете войти в Citrix как обычно.
Обратите внимание, что сброс не влияет на установку Receiver или подключаемого модуля, настройки блокировки ICA для каждой машины или объекты групповой политики. Однако учетные записи, приложения, предоставляемые подключаемым модулем самообслуживания, а также кэшированные файлы и сохраненные пароли, удаляются.
Удаление с помощью утилиты очистки приемника, а затем повторная установка также описываются как потенциальное решение. Просто попробуйте, когда все другие исправления не помогли.
Есть ли у вас какие-либо идеи или советы по правильной работе Citrix Receiver? Оставьте комментарий ниже и дайте нам знать ваши мысли.
Содержание
- 3 простых шага по исправлению ошибок CITRIXRECEIVER.EXE
- 1- Очистите мусорные файлы, чтобы исправить citrixreceiver.exe, которое перестало работать из-за ошибки.
- 2- Очистите реестр, чтобы исправить citrixreceiver.exe, которое перестало работать из-за ошибки.
- 3- Настройка Windows для исправления критических ошибок citrixreceiver.exe:
- Как вы поступите с файлом citrixreceiver.exe?
- Некоторые сообщения об ошибках, которые вы можете получить в связи с citrixreceiver.exe файлом
- CITRIXRECEIVER.EXE
- процессов:
- Citrix: после обновления Windows 10 Receiver не открывается
- FIX: Unable to launch Citrix Receiver in Windows 10
- How can I fix Citrix Receiver launch error in Windows 10?
- 1. Refresh applications
- 2. Ensure full permissions for the user account
- 3. Use another remote working solution
- Parallels RAS
- 4. Download the latest version available
- 5. Reset Citrix Receiver
- Citrix: после обновления Windows 10 Receiver не открывается
- 1 ответ 1
- Не устанавливается citrix receiver на windows 10
- АГЕНТ РЯДОМ – найдите своего страхового консультанта
- Лента новостей
3 простых шага по исправлению ошибок CITRIXRECEIVER.EXE
В вашей системе запущено много процессов, которые потребляют ресурсы процессора и памяти. Некоторые из этих процессов, кажется, являются вредоносными файлами, атакующими ваш компьютер.
Чтобы исправить критические ошибки citrixreceiver.exe,скачайте программу Asmwsoft PC Optimizer и установите ее на своем компьютере
1- Очистите мусорные файлы, чтобы исправить citrixreceiver.exe, которое перестало работать из-за ошибки.
2- Очистите реестр, чтобы исправить citrixreceiver.exe, которое перестало работать из-за ошибки.
3- Настройка Windows для исправления критических ошибок citrixreceiver.exe:
Всего голосов ( 181 ), 115 говорят, что не будут удалять, а 66 говорят, что удалят его с компьютера.
Как вы поступите с файлом citrixreceiver.exe?
Некоторые сообщения об ошибках, которые вы можете получить в связи с citrixreceiver.exe файлом
(citrixreceiver.exe) столкнулся с проблемой и должен быть закрыт. Просим прощения за неудобство.
(citrixreceiver.exe) перестал работать.
citrixreceiver.exe. Эта программа не отвечает.
(citrixreceiver.exe) — Ошибка приложения: the instruction at 0xXXXXXX referenced memory error, the memory could not be read. Нажмитие OK, чтобы завершить программу.
(citrixreceiver.exe) не является ошибкой действительного windows-приложения.
(citrixreceiver.exe) отсутствует или не обнаружен.
CITRIXRECEIVER.EXE
Проверьте процессы, запущенные на вашем ПК, используя базу данных онлайн-безопасности. Можно использовать любой тип сканирования для проверки вашего ПК на вирусы, трояны, шпионские и другие вредоносные программы.
процессов:
Cookies help us deliver our services. By using our services, you agree to our use of cookies.
Источник
Citrix: после обновления Windows 10 Receiver не открывается
Мы подключаемся к веб-сайту SaaS, который использует Citrix XenApp 6.5. Нам представлен список приложений, которые запускаются с помощью Citrix Receiver. Это работало нормально на моем ПК, пока я не обновил Windows 10 Anniversary Update. Теперь, когда я нажимаю на любое из доступных приложений на веб-сайте и открываю файл ICA, ничего не происходит. Он изолирован только от этого ПК.
Я попытался удалить Citrix с помощью утилиты очистки приемника и переустановить Citrix Receiver версии 14.4.1000.16. и получить тот же результат. Я не могу вернуться с помощью восстановления системы, потому что точка восстановления до обновления больше не доступна.
Извините за поздний ответ, но у меня есть решение для вас. Это касается именно вашей проблемы и любых других программ, которые ломаются после выполнения Windows 10 «крупного обновления / обновления ОС».
Пакеты обновлений Windows 10 / Обновления (Anniversary, Creator и т. Д.) Представляют собой более или менее обновления ОС и создают папку Windows.old, перемещают туда папку «Пользователи» и «Windows», обновляют ОС и при нормальных обстоятельствах должны двигаться назад. папку «Пользователи» и все, что ей нужно, из резервной копии папки Windows.
Что происходит, я считаю, что ваш профиль находится в подвешенном состоянии или осиротел или что-то в этом роде. Некоторые из ваших данных могут быть связаны с папкой C: windows.old users в качестве примера.
Мое исправление: создать новый профиль.
У меня был домашний пользователь, который принес свой ноутбук, который мог войти в Citrix до недавнего обновления в прошлом месяце. Я создал новый профиль, и Citrix снова работает правильно. ее документы и рабочий стол не были перемещены назад и были связаны с папкой C: windows.old users. Я предполагаю, что ее папка Appdata, а также информация о ее реестре хранились там также, и хотя я уверен, что есть способ это исправить, но в то время мне было проще создать новый профиль.
Конечно, вы также можете просто сделать резервную копию ваших данных и перезагрузить Windows 10. Если бы это случилось с моим компьютером, я бы сделал это, потому что я не доверял бы ОС в этот момент. Тем не менее, создать новый профиль проще, и если у вас есть время, вы, вероятно, могли бы выяснить, почему и как исправить проблему с привязкой профиля, если создание новой учетной записи / профиля не является вариантом.
Источник
FIX: Unable to launch Citrix Receiver in Windows 10
Citrix Receiver for Windows 10 has a great array of features that help you work smarter from anywhere.
This doesn’t mean that you’ll never get to experience its fair share of flaws. For example, you could be out of luck when you try launching Citrix Receiver.
While you can do so without elevated permissions and logging in with the regular domain user account, you cannot launch any of the applications and desktops that appear there.
However, if you launch Citrix with elevated permissions and then login with the regular domain user account, launching them works like a breeze. For those looking to fix this, that means one thing.
The goal of today’s guide is to show you how to launch Citrix applications and desktops with ease. Just keep on reading the brief list of fixes you may apply in that regard.
How can I fix Citrix Receiver launch error in Windows 10?
1. Refresh applications
If one or more Citrix Receiver applications cannot be launched in Windows 10, refreshing them is arguably the first thing that you should do.
Immediately click the drop-down next to your name in the upper-right corner of the menu. Then, click Refresh Apps and see if the issue persists.
2. Ensure full permissions for the user account
If you’re looking to launch Citrix Receiver in Windows 10 with no efforts again, note that Full Permissions are required for the user account under HKEY_USERSUSER_SIDSOFTWARECitrix on the client machine.
That’s why we’re recommending making sure you have full permissions for the user account used to log in to Citrix Receiver for the Registry Key.
If the domain user account does not have permissions, delete the Citrix Registry key after taking a backup. Then, exit Citrix Receiver and launch it back.
The Registry key will be once more created, this time with all relevant required permissions.
3. Use another remote working solution
Expert Tip: Some PC issues are hard to tackle, especially when it comes to corrupted repositories or missing Windows files. If you are having troubles fixing an error, your system may be partially broken. We recommend installing Restoro, a tool that will scan your machine and identify what the fault is.
Click here to download and start repairing.
If Citrix Receiver is only giving you more headaches, maybe you should think about trying another remote desktop solution that may increase your productivity.
To be more exact, the recommended solution below is capable of delivering applications and desktops to any employee from a network.
But the best part is that it’s not complicated at all to implement within any environment and addresses the biggest concern in a company network: data security.
You will be able to secure all the online communication channels from data leakage and theft by using the Secure Sockets Layer (SSL), data encryption using FIPS and 2-way identification.
All the data transfers are monitored and reported in a central console for the IT manager in a visual manner.
Moreover, this solution is perfectly integrated with lot of other security solutions like SafeNet, DualShield, Azure MFA, RADIUS server, and even Google Authenticator.
Parallels RAS
Parallels RAS and it’s remote working solutions can be life saving for your company and your employees.
4. Download the latest version available
5. Reset Citrix Receiver
If things turn for the worse and nothing seems to work, resetting the Citrix Receiver can help. Perform the above steps and you should now be able to log onto Citrix as normal.
Note that resetting does not impact the Receiver or plug-in installation, per-machine ICA lockdown settings, or GPOs. However, accounts, apps delivered by the Self-Service plug-in, along with cached files and saved passwords are all removed.
Uninstalling with the receiver cleanup utility and then reinstalling is also described as a potential solution. Just give it a go when all other fixes failed.
While each user has different expectations, this guide will provide you with a good overview of what you can do when you’re unable to launch Citrix Receiver in Windows 10.
Do you have any ideas or tips to make Citrix Receiver work properly? Drop a comment below and let us know your thoughts.
Restoro has been downloaded by 0 readers this month.
Источник
Citrix: после обновления Windows 10 Receiver не открывается
Мы подключаемся к веб-сайту SaaS, который использует Citrix XenApp 6.5. Нам представлен список приложений, которые запускаются с использованием Citrix Receiver. Это работало нормально на моем ПК, пока я не обновил Windows 10 Anniversary Update. Теперь, когда я нажимаю на любое из доступных приложений на веб-сайте и открываю файл ICA, ничего не происходит. Он изолирован только от этого ПК.
Я попытался удалить Citrix с помощью утилиты очистки приемника и переустановить Citrix Receiver версии 14.4.1000.16. и получить тот же результат. Я не могу вернуться с помощью восстановления системы, потому что точка восстановления до обновления больше не доступна.
1 ответ 1
Извините за поздний ответ, но у меня есть решение для вас. Это касается именно вашей проблемы и любых других программ, которые ломаются после выполнения Windows 10 «крупного обновления / обновления ОС».
Пакеты обновлений Windows 10 / Обновления (Anniversary, Creator и т.д.) Представляют собой более или менее обновления ОС и создают папку Windows.old, перемещают туда папку «Пользователи» и «Windows», обновляют ОС и при нормальных обстоятельствах должны двигаться назад. ваша папка Users и все, что нужно из резервной копии папки Windows.
Что происходит, я считаю, что ваш профиль находится в подвешенном состоянии или осиротел или что-то в этом роде. Некоторые из ваших данных могут быть связаны с папкой C:windows.oldusers в качестве примера.
Мое исправление: создать новый профиль.
У меня был домашний пользователь, который принес свой ноутбук, который мог войти в Citrix до недавнего обновления в прошлом месяце. Я создал новый профиль, и Citrix снова работает правильно. ее документы и рабочий стол не были перемещены назад и были связаны с папкой C:windows.oldusers. Я предполагаю, что ее папка Appdata, а также информация о ее реестре также хранились там, и хотя я уверен, что есть способ это исправить, но в то время мне было проще создать новый профиль.
Конечно, вы также можете просто сделать резервную копию ваших данных и перезагрузить Windows 10. Если бы это случилось с моим компьютером, я бы сделал это, потому что я не доверял бы ОС на тот момент. Тем не менее, создать новый профиль проще, и если у вас есть время, вы, вероятно, могли бы выяснить, почему и как исправить проблему с привязкой профиля, если создание новой учетной записи / профиля не вариант.
Источник
Не устанавливается citrix receiver на windows 10
Купите ОСАГО онлайн
Простое оформление за 5 минут
Купите ОСАГО онлайн
Простое оформление за 5 минут
Путешествуйте по России и миру
c туристическим полисом
Путешествуйте с комфортом
Год онлайн-консультаций
врачей и психологов за 1800 рублей
Врачи онлайн за 1800 рублей
Антикризисное предложение
опытным агентам
Антикризисное предложение
опытным агентам
Страхование от несчастных случаев
Защитите себя и своих близких
на случай непредвиденных ситуаций
Страхование от несчастных случаев
Добровольное медицинское
страхование
Сохраните здоровье вместе с РЕСО-Гарантия
Добровольное медицинское страхование
АГЕНТ РЯДОМ – найдите своего страхового консультанта
Мы ищем агентов рядом с вами на основе геоданных. Чтобы воспользоваться сервисом, разрешите нам отслеживать ваше местонахождение.
Лента новостей
Здоровье сотрудников университета путей сообщения в Санкт-Петербурге под защитой РЕСО-Гарантия
Изменения в графике работы Центра выплат в Москве на период с 28 октября по 8 ноября
РЕСО-Гарантия выплатила более 5 млн рублей за разобранный автомобиль
Отслеживайте статус страхового случая в приложении РЕСО Мобайл
Автострахование от РЕСО-Гарантия
РЕСО-Гарантия © – универсальная страховая компания. В числе наших приоритетов автострахование (как автоКАСКО, так и страхование ОСАГО), добровольное медицинское страхование, страхование имущества (в т.ч. страхование недвижимости), страхование ответственности (в т.ч. добровольная автогражданка) и грузов. Для определения стоимости страховых полисов на калькуляторах сайта вы можете произвести расчет КАСКО (страхование рисков «Хищение», «Ущерб»), рассчитать стоимость полиса ОСАГО и дополнительного страхования АГО, «Зеленая карта» и таких услуг, как ипотечное страхование, страхование квартиры, страхование дачи, ДМС, страхование путешественников, страхование жизни.
Источник
Troubleshooting
In this section you will find information on how to solve the most common problems.
Failed to get session from client
The error occurs when it is not possible to start a recording or session execution
Solution
Make sure the AllowSimulationAPI key is present in the above registry and not set to 0, as it enables Citrix ICO functionality.
Windows 32bits:
Location : HKEY_LOCAL_MACHINESOFTWARECitrixICA ClientCCM
Name : AllowSimulationAPI
Data : dword:00000001
Windows 64bits:
Location : HKEY_LOCAL_MACHINESOFTWAREWow6432NodeCitrixICA ClientCCM
Name : AllowSimulationAPI
Data : dword:00000001
Black screenshots
Citrix Receiver uses the Windows Manager to capture screenshots of running sessions.
Some video card drivers do not support the capture method used by Citrix.
When that case occurs, the screenshot appears black.
Solution
Option 1: Update the display graphics card drivers.
Option 2: Disabling the main graphics card driver not supported.
Disabling the graphics card driver will enable the Microsoft Windows compatible graphics driver, which is supported by Citrix Receiver.
The most common problematic drivers are those provided by Intel Graphics.
If you have an Intel driver listed, try disabling that driver first before others.
- Go to Device Manager in Windows
- select the category «Display adapters»
- Disable the driver by right-clicking and selecting «Disable device»

Citrix Application Launcher Errors
Some of the most common errors will be listed below, explaining the reason and what is its possible solution.
Solution
ICAFILE_TIMEOUT: Time out waiting for ICAFile
The error occurs at the time of the verification process of the ICA file against the Citrix server.
This can occur due to communication problems with the Citrix server or because it cannot respond in time.
You can adjust the timeout by increasing the value of the bzm.citrix.client_factory.client_property.icafile_timeout_ms property
ICAFILE_ERROR: Failed to load ICAFile
The error occurs at the time of the verification process of the ICA file against the Citrix server.
When this error occurs, the ICA file provided to the server is not a valid ICA file.
Verify the correct operation of the file download cycle, and if the file provider and Citrix server is working correctly.
CONNECT_TIMEOUT: Timed out waiting for OnConnect
The error occurs when trying to create a new session against the Citrix server.
You can try increasing the timeout time by changing the bzm.citrix.client_factory.client_property.connect_timeout_ms property
Check at the Citrix server level if there is a problem where a new session cannot be created.
LOGON_TIMEOUT: Timed out waiting for Logon
The error occurs when the connection and session were established but the windows login event does not occur.
The Logon process may not occur for multiple possible reasons.
It is possible that due to overload the server is not managing to start a Windows session.
You can increase the timeout value by setting the bzm.citrix.client_factory.client_property.logon_timeout_ms property.
ACTIVEAPP_TIMEOUT: Timed out waiting for Active App
The application under load may not be able to start in time or there is some other problem on the server that is preventing the application from starting.
START_SESSION_ERROR: Unable to start session
This error is an unexpected error.
Contact the plugin support team.
Citrix Error 13 «Unsupported Function»
The Citrix Error 13 is a general error code that usually refers to an error for which Citrix does not provide a specific code.
Solution
This error has multiple causes, check the following possible causes:
- The User Account Control (UAC) feature of Windows is not fully disabled and prevents the launching of the Citrix client.
- Another reason for the problem could be when there are Citrix processes (wfica32.exe, wfcrun32.exe, concentr.exe, receiver.exe) already running in other sessions than JMeter session
Fully disable the UAC with registry key:
     Location : HKEY_LOCAL_MACHINESoftwareMicrosoftWindowsCurrentVersionPoliciesSystem
     Name: EnableLUA
     Data: 0
Note that the change requires a restart of the computer!
Use Windows Task Manager to kill all these running processes:
- wfica32.exe,
- wfcrun32.exe,
- concentr.exe,
- receiver.exe before starting the load test.
Make sure to log out all the users before running the test in JMeter.
Error code 0x80070005
Getting error
The module C:Program Files (x86)CitrixICA Clientwfica.ocx was loaded but the call to DLLRegisterServer failed with error code 0x80070005
Solution
Ensure you run the regsvr32 and registry updates as Administrator as per:
- https://techjourney.net/the-call-to-dllregisterserver-failed-with-error-code-0x80004005-on-windows/
- https://social.technet.microsoft.com/Forums/windows/en-US/71037d62-d842-44a3-86df-6ed74df6fc39/0x80070005-error-trying-to-register-dll?forum=itprovistasecurity
Citrix user not logged before …
At execution of a «Citrix Application launcher» sampler, getting error
Citrix user not logged before ...
Solution
It means that the Citrix Client was unable to login in time.
First ensure the downloaded ICA file run a new Citrix session.
Then you can increase the Logon Timeout setting.
Foreground window area must be defined while obtaining the absolute position of a relative selection.
If you get this message at execution of a «Citrix Application launcher» sampler, getting error
Foreground window area must be defined while obtaining the absolute position of a relative selection.
Solution
This means the Timeout of End Clause is too short.
Then you can increase the Timeout setting of End Clause (not the Logon Timeout of Citrix Application Launcher).
Error 2312: The Citrix Receiver Received a Corrupt ICA File
If you get this message at execution
Error 2312: The Citrix Receiver Received a Corrupt ICA File
Solution
Check you’re using a version of Citrix Receiver compatible with plugin, see System requirements and compatibility
Citrix Receiver not start, «Error 70 cannot connect to server»
If you Citrix Receiver not start and in logs your get the error
Error 70 cannot connect to server
Solution
This issue can be solved by clearing the citrix client cache and registry.
Step:
- Close all the citrix processes using Task Manager
- Uninstall Citrix Receiver
- Run regedit and delete:
- Computer > HKEY_CURRENT_USER > Software>Citrix
- Computer > HKEY_CURRENT_LOCAL_MACHINE > Software > WOW6432Node > Citrix > ICA Client
- If any of the below folders have ICAClient and/or Citrix folders, delete ICAClient and/or Citrix located in those folders:
- C:UsersUSER RUNNING CITRIXApplication Data
- C:UsersUSER RUNNING CITRIXLocal
- C:UsersUSER RUNNING CITRIXRoaming
- Reboot the machine
- Reinstall Receiver
Popup when a Citrix Receiver update is available
By default, Citrix Receiver verify updates and notify you if a new version is available.
This behavior can affect the use of the test machine.
Solution
It is possible to disable the checking of new versions.
- Right-click the Citrix Receiver for Windows icon in the notification area.
- Select Advanced Preferences, and click Auto Update. The Citrix Receiver Updates dialog appears.
- Select «No, don’t notify me»

- Click Save.
The option may not be available due to server policies or at installation time.
In those cases, it is possible to change the behavior by adding the following Windows registry values.
Open regedit.exe and set the following keys:
Windows 32bits:
Location : HKEY_LOCAL_MACHINESOFTWARECitrixICA ClientAutoUpdateCommandline Policy
Name : Enable
Data : "false"

Location : HKEY_LOCAL_MACHINESOFTWARECitrixICA ClientAutoUpdateCommandline Policy
Name : Banned
Data : "true"
Windows 64bits:
Location : HKEY_LOCAL_MACHINESOFTWAREWOW6432NodeCitrixICA ClientAutoUpdateCommandline Policy
Name : Enable
Data : "false"

Location : HKEY_LOCAL_MACHINESOFTWAREWOW6432NodeCitrixICA ClientAutoUpdateCommandline Policy
Name : Banned
Data : "true"
High CPU usage on dwm.exe process
Citrix draws session windows using the system component called Desktop Window Manager (DWM)
Under high load, the component generates excessive CPU usage when rendering all the sessions at same time.
Solution
The Citrix plug-in does not require all the visual effects of Desktop Window Manager be enabled.
In order to allow a moderate use of resources without losing functionality, disable some visual effects features.
Under Windows run SystemPropertiesPerformance.exe program.
On the Visual Effects tab, select Custom option.
Just keep the option «Smooth edges of screen fonts» selected.

Image Hash or OCR fails on different machine resolution
Depending on the scaling configuration indicated in the server policy, or the default configuration of Citrix Receiver, the sessions will be scaled to adapt to the resolution of the client machine.
This adaptation of the session images causes the final image of the session to vary according to each machine with a difference in resolution to the machine on which the session was recorded.
This can prevent the Hash and OCR algorithms from working as expected.
Solution
To configure DPI scaling on Citrix Receiver:
- Right-click Citrix Receiver for Windows from the notification area.
- Select Advanced Preferences and click DPI settings.
The DPI settings dialog appears.
Change the settings to «No, use native resolution».

- Click Save.
- Restart the Citrix Receiver for Windows session for the changes to take effect.
In case you do not have access to that configuration screen, this is due to a policy indicated from the server.
It is possible to change the value of the configuration by changing a registry key.
Open regedit.exe and set the following key to disable dpi scaling:
Location : HKEY_CURRENT_USERSoftwareCitrixICA ClientDPI
Name : Enable_DPI
Data : dword:00000000
OutOfMemoryError: Java heap space error
JMeter has a set of default settings that allow the application to run without memory problems in most cases.
However, under some circumstances, an OutOfMemoryError can occur.
When the error occurs, this indicates that the configuration should be changed to consider the current memory usage.
Solution
In general, the OutOfMemoryError is due to the design of JMeter components and how they store information in the application memory for display.
One of the main memory consumers are the listeners.
1. First, let’s allocate as much memory as possible for 32-bit Java.
Locate the directory where jmeter.bat is located and edit it with a text editor.
Add after the line @echo the following line:
set HEAP=-Xms1024M -Xmx1024M -XX:MaxMetaspaceSize=256M
This allocates as much memory as possible to JMeter for the future runs.
Source: JMeter Wiki: JMeter keeps getting «Out of Memory» errors. What can I do?
2. Set a proper limit for the View Result Tree listener.
Locate user.properties file and open them with a text editor.
Add the following line to the configuration:
view.results.tree.max_results = 80
View Result Tree by default shows the last 500 items on the screen.
This consumes memory and can cause long tests to end up with an OutOfMemoryError.
Depending on the type of test you are running, the amount of information that JMeter stores may exceed the available memory.
The recommended setting limits only the last 80 results to remain visible to ensure that all memory is not consumed.
You can try increasing the value until you find the one best suited for the type of test you are running.
Source: JMeter View Results Tree documentation reference
Final notes
With the previous recommendations, in general, most of the problems with memory management in JMeter are solved.
In case they are not enough, there is also a good article available from BlazeMeter that tries to summarize other possible solutions to other possible causes of memory error.
BlazeMeter: 9 Easy Solutions for a JMeter Load Test “Out of Memory” Failure
In case you can’t find a solution, don’t forget to contact support.
Troubleshooting
In this section you will find information on how to solve the most common problems.
Failed to get session from client
The error occurs when it is not possible to start a recording or session execution
Solution
Make sure the AllowSimulationAPI key is present in the above registry and not set to 0, as it enables Citrix ICO functionality.
Windows 32bits:
Location : HKEY_LOCAL_MACHINESOFTWARECitrixICA ClientCCM
Name : AllowSimulationAPI
Data : dword:00000001
Windows 64bits:
Location : HKEY_LOCAL_MACHINESOFTWAREWow6432NodeCitrixICA ClientCCM
Name : AllowSimulationAPI
Data : dword:00000001
Black screenshots
Citrix Receiver uses the Windows Manager to capture screenshots of running sessions.
Some video card drivers do not support the capture method used by Citrix.
When that case occurs, the screenshot appears black.
Solution
Option 1: Update the display graphics card drivers.
Option 2: Disabling the main graphics card driver not supported.
Disabling the graphics card driver will enable the Microsoft Windows compatible graphics driver, which is supported by Citrix Receiver.
The most common problematic drivers are those provided by Intel Graphics.
If you have an Intel driver listed, try disabling that driver first before others.
- Go to Device Manager in Windows
- select the category «Display adapters»
- Disable the driver by right-clicking and selecting «Disable device»
Citrix Application Launcher Errors
Some of the most common errors will be listed below, explaining the reason and what is its possible solution.
Solution
ICAFILE_TIMEOUT: Time out waiting for ICAFile
The error occurs at the time of the verification process of the ICA file against the Citrix server.
This can occur due to communication problems with the Citrix server or because it cannot respond in time.
You can adjust the timeout by increasing the value of the bzm.citrix.client_factory.client_property.icafile_timeout_ms property
ICAFILE_ERROR: Failed to load ICAFile
The error occurs at the time of the verification process of the ICA file against the Citrix server.
When this error occurs, the ICA file provided to the server is not a valid ICA file.
Verify the correct operation of the file download cycle, and if the file provider and Citrix server is working correctly.
CONNECT_TIMEOUT: Timed out waiting for OnConnect
The error occurs when trying to create a new session against the Citrix server.
You can try increasing the timeout time by changing the bzm.citrix.client_factory.client_property.connect_timeout_ms property
Check at the Citrix server level if there is a problem where a new session cannot be created.
LOGON_TIMEOUT: Timed out waiting for Logon
The error occurs when the connection and session were established but the windows login event does not occur.
The Logon process may not occur for multiple possible reasons.
It is possible that due to overload the server is not managing to start a Windows session.
You can increase the timeout value by setting the bzm.citrix.client_factory.client_property.logon_timeout_ms property.
ACTIVEAPP_TIMEOUT: Timed out waiting for Active App
The application under load may not be able to start in time or there is some other problem on the server that is preventing the application from starting.
START_SESSION_ERROR: Unable to start session
This error is an unexpected error.
Contact the plugin support team.
Citrix Error 13 «Unsupported Function»
The Citrix Error 13 is a general error code that usually refers to an error for which Citrix does not provide a specific code.
Solution
This error has multiple causes, check the following possible causes:
- The User Account Control (UAC) feature of Windows is not fully disabled and prevents the launching of the Citrix client.
- Another reason for the problem could be when there are Citrix processes (wfica32.exe, wfcrun32.exe, concentr.exe, receiver.exe) already running in other sessions than JMeter session
Fully disable the UAC with registry key:
     Location : HKEY_LOCAL_MACHINESoftwareMicrosoftWindowsCurrentVersionPoliciesSystem
     Name: EnableLUA
     Data: 0
Note that the change requires a restart of the computer!
Use Windows Task Manager to kill all these running processes:
- wfica32.exe,
- wfcrun32.exe,
- concentr.exe,
- receiver.exe before starting the load test.
Make sure to log out all the users before running the test in JMeter.
Error code 0x80070005
Getting error
The module C:Program Files (x86)CitrixICA Clientwfica.ocx was loaded but the call to DLLRegisterServer failed with error code 0x80070005
Solution
Ensure you run the regsvr32 and registry updates as Administrator as per:
- https://techjourney.net/the-call-to-dllregisterserver-failed-with-error-code-0x80004005-on-windows/
- https://social.technet.microsoft.com/Forums/windows/en-US/71037d62-d842-44a3-86df-6ed74df6fc39/0x80070005-error-trying-to-register-dll?forum=itprovistasecurity
Citrix user not logged before …
At execution of a «Citrix Application launcher» sampler, getting error
Citrix user not logged before ...
Solution
It means that the Citrix Client was unable to login in time.
First ensure the downloaded ICA file run a new Citrix session.
Then you can increase the Logon Timeout setting.
Foreground window area must be defined while obtaining the absolute position of a relative selection.
If you get this message at execution of a «Citrix Application launcher» sampler, getting error
Foreground window area must be defined while obtaining the absolute position of a relative selection.
Solution
This means the Timeout of End Clause is too short.
Then you can increase the Timeout setting of End Clause (not the Logon Timeout of Citrix Application Launcher).
Error 2312: The Citrix Receiver Received a Corrupt ICA File
If you get this message at execution
Error 2312: The Citrix Receiver Received a Corrupt ICA File
Solution
Check you’re using a version of Citrix Receiver compatible with plugin, see System requirements and compatibility
Citrix Receiver not start, «Error 70 cannot connect to server»
If you Citrix Receiver not start and in logs your get the error
Error 70 cannot connect to server
Solution
This issue can be solved by clearing the citrix client cache and registry.
Step:
- Close all the citrix processes using Task Manager
- Uninstall Citrix Receiver
- Run regedit and delete:
- Computer > HKEY_CURRENT_USER > Software>Citrix
- Computer > HKEY_CURRENT_LOCAL_MACHINE > Software > WOW6432Node > Citrix > ICA Client
- If any of the below folders have ICAClient and/or Citrix folders, delete ICAClient and/or Citrix located in those folders:
- C:UsersUSER RUNNING CITRIXApplication Data
- C:UsersUSER RUNNING CITRIXLocal
- C:UsersUSER RUNNING CITRIXRoaming
- Reboot the machine
- Reinstall Receiver
Popup when a Citrix Receiver update is available
By default, Citrix Receiver verify updates and notify you if a new version is available.
This behavior can affect the use of the test machine.
Solution
It is possible to disable the checking of new versions.
- Right-click the Citrix Receiver for Windows icon in the notification area.
- Select Advanced Preferences, and click Auto Update. The Citrix Receiver Updates dialog appears.
- Select «No, don’t notify me»
- Click Save.
The option may not be available due to server policies or at installation time.
In those cases, it is possible to change the behavior by adding the following Windows registry values.
Open regedit.exe and set the following keys:
Windows 32bits:
Location : HKEY_LOCAL_MACHINESOFTWARECitrixICA ClientAutoUpdateCommandline Policy
Name : Enable
Data : "false"

Location : HKEY_LOCAL_MACHINESOFTWARECitrixICA ClientAutoUpdateCommandline Policy
Name : Banned
Data : "true"
Windows 64bits:
Location : HKEY_LOCAL_MACHINESOFTWAREWOW6432NodeCitrixICA ClientAutoUpdateCommandline Policy
Name : Enable
Data : "false"

Location : HKEY_LOCAL_MACHINESOFTWAREWOW6432NodeCitrixICA ClientAutoUpdateCommandline Policy
Name : Banned
Data : "true"
High CPU usage on dwm.exe process
Citrix draws session windows using the system component called Desktop Window Manager (DWM)
Under high load, the component generates excessive CPU usage when rendering all the sessions at same time.
Solution
The Citrix plug-in does not require all the visual effects of Desktop Window Manager be enabled.
In order to allow a moderate use of resources without losing functionality, disable some visual effects features.
Under Windows run SystemPropertiesPerformance.exe program.
On the Visual Effects tab, select Custom option.
Just keep the option «Smooth edges of screen fonts» selected.
Image Hash or OCR fails on different machine resolution
Depending on the scaling configuration indicated in the server policy, or the default configuration of Citrix Receiver, the sessions will be scaled to adapt to the resolution of the client machine.
This adaptation of the session images causes the final image of the session to vary according to each machine with a difference in resolution to the machine on which the session was recorded.
This can prevent the Hash and OCR algorithms from working as expected.
Solution
To configure DPI scaling on Citrix Receiver:
- Right-click Citrix Receiver for Windows from the notification area.
- Select Advanced Preferences and click DPI settings.
The DPI settings dialog appears.
Change the settings to «No, use native resolution».
- Click Save.
- Restart the Citrix Receiver for Windows session for the changes to take effect.
In case you do not have access to that configuration screen, this is due to a policy indicated from the server.
It is possible to change the value of the configuration by changing a registry key.
Open regedit.exe and set the following key to disable dpi scaling:
Location : HKEY_CURRENT_USERSoftwareCitrixICA ClientDPI
Name : Enable_DPI
Data : dword:00000000
OutOfMemoryError: Java heap space error
JMeter has a set of default settings that allow the application to run without memory problems in most cases.
However, under some circumstances, an OutOfMemoryError can occur.
When the error occurs, this indicates that the configuration should be changed to consider the current memory usage.
Solution
In general, the OutOfMemoryError is due to the design of JMeter components and how they store information in the application memory for display.
One of the main memory consumers are the listeners.
1. First, let’s allocate as much memory as possible for 32-bit Java.
Locate the directory where jmeter.bat is located and edit it with a text editor.
Add after the line @echo the following line:
set HEAP=-Xms1024M -Xmx1024M -XX:MaxMetaspaceSize=256M
This allocates as much memory as possible to JMeter for the future runs.
Source: JMeter Wiki: JMeter keeps getting «Out of Memory» errors. What can I do?
2. Set a proper limit for the View Result Tree listener.
Locate user.properties file and open them with a text editor.
Add the following line to the configuration:
view.results.tree.max_results = 80
View Result Tree by default shows the last 500 items on the screen.
This consumes memory and can cause long tests to end up with an OutOfMemoryError.
Depending on the type of test you are running, the amount of information that JMeter stores may exceed the available memory.
The recommended setting limits only the last 80 results to remain visible to ensure that all memory is not consumed.
You can try increasing the value until you find the one best suited for the type of test you are running.
Source: JMeter View Results Tree documentation reference
Final notes
With the previous recommendations, in general, most of the problems with memory management in JMeter are solved.
In case they are not enough, there is also a good article available from BlazeMeter that tries to summarize other possible solutions to other possible causes of memory error.
BlazeMeter: 9 Easy Solutions for a JMeter Load Test “Out of Memory” Failure
In case you can’t find a solution, don’t forget to contact support.
Полное удаление Citrix Receiver
Столкнулся я с такой проблемой, что запускаться клиент Citrix Receiver на машине с Dibian (на машине с ОС Windows тоже столкнулся с такой проблемой, но она решается легко, и решение описано в самом конце данной статьи). Что только не делал, переустановка не давала положительного результата. Пришлось методом «научного тыка» искать варианты полного удаления следов программы и повторной её установки.
1. Запуск консоли, и выполнение команды ниже
2. Вычистил «хвосты» от Citrix
3. Удалил libmotif3
ВАЖНО! Обязательно после этого перезагружаем ПК, если хотим повторно устанавливать Citrix Receiver
Алгоритм установки Citrix Receiver
1. скачал файл linuxx86-12.0.0.189834.tar.gz и распаковал
2. консоль, зашел в папку под root
3. Выбрал пункт установки 1
4. Выбрал папку не по умолчанию, и установил все
5. Установил libmotif3, и делаем ссылку на файл
Как результат — Все заработало!
В Операционной системе Windows сталкивался с подобной проблемой, но она решается намного проще 🙂 Достаточно скачать утилиту с оф. сайта, и запустить ее от имени Администратора. После удаления, можно повторно запустить установку клиента Citrix Receiver
Ниже указана ссылка, где можно скачать последнюю версию утилиты Receiver Clean-Up Utility, для полного удаления Citrix Receiver
Receiver Clean-Up Utility
Источник
Выберите Удалить приложение Citrix Workspace и следуйте инструкциям на экране. Файл. dmg — это файл, который загружается из Citrix при первой установке приложения Citrix Workspace для Mac. Если файла больше нет на вашем компьютере, загрузите файл еще раз из Citrix Downloads, чтобы удалить приложение.
Как удалить программу, которая не удаляется?
Все, что вам нужно сделать, это:
Вы можете удалить приложение Citrix Workspace с помощью утилиты «Программы и компоненты» Windows («Установка и удаление программ»). Примечание. Во время установки приложения Citrix Workspace вы получите запрос на удаление пакета Citrix HDX RTME. Щелкните ОК, чтобы продолжить удаление.
Как удалить Citrix из реестра?
GUID можно найти в следующем разделе реестра: HKEY_LOCAL_MACHINE Software Microsoft Windows CurrentVersion Uninstall. Когда выбран ключ «Удалить», нажмите Ctrl + F и найдите термин Citrix. Подключ, содержащий запись клиента Citrix ICA, отображается как открытый (левая панель) и помечен идентификатором GUID.
Что делает Citrix Receiver?
Citrix Receiver — это клиентское программное обеспечение, необходимое для доступа к приложениям и полным рабочим столам, размещенным на серверах Citrix, с удаленного клиентского устройства. … Когда вы посещаете страницу загрузки Citrix Receiver, она автоматически определяет операционную систему и предлагает вам загрузить нужное клиентское программное обеспечение.
Как принудительно удалить программу?
Удалить папку в реестре Windows. Отображаемое имя реестра Windows. Удалите ключи, которые показывают имя вашей программы в DisplayName, щелкнув правой кнопкой мыши по элементам и выбрав Удалить. Теперь ваша программа не будет отображаться в списке «Установка и удаление программ».
Как удалить программу, которая не отображается в Панели управления?
Как удалить программы, не указанные в панели управления
Как принудительно удалить файл?
Для этого сначала откройте меню «Пуск» (клавиша Windows), введите «выполнить» и нажмите «Ввод». В появившемся диалоговом окне введите cmd и снова нажмите Enter. В открытой командной строке введите del / f имя_файла, где имя_файла — это имя файла или файлов (вы можете указать несколько файлов с помощью запятых), которые вы хотите удалить.
Следует ли мне удалить Citrix Receiver?
Однако оставление Citrix Receiver установленным на домашнем компьютере не вызывает никаких известных проблем с безопасностью. Если вы хотите оставить его в покое, это безопасно. Он не занимает много места и после отключения автоматического запуска не будет использовать память или процессор.
Как очистить кеш Citrix?
Как отключить рабочую область Citrix?
Все, что вам нужно сделать, это открыть диспетчер задач, щелкнув правой кнопкой мыши на панели задач или используя сочетание клавиш CTRL + SHIFT + ESC, нажав «Подробнее», переключившись на вкладку «Автозагрузка» и нажав кнопку «Отключить».
Как принудительно удалить Citrix Receiver?
Удалите Citrix Receiver из Windows
Войдите на устройство с правами администратора. Откройте Панель управления и выберите «Программы и компоненты». Приложение Citrix Receiver должно быть найдено в папке «Программы и компоненты», чтобы его можно было удалить. Щелкните приложение правой кнопкой мыши и выберите Удалить.
Могу ли я удалить программу запуска Citrix Online?
Windows: откройте «Программы и компоненты». Щелкните правой кнопкой мыши «Citrix Online Launcher». Выберите «Удалить», затем при появлении запроса нажмите «Да».
Как исправить мой Citrix Receiver?
Проблема с запуском Citrix Receiver может быть вызвана используемыми вами приложениями.
…
Как исправить ошибку запуска Citrix Receiver в Windows 10?
Источник
3 простых шага по исправлению ошибок CITRIXRECEIVER.EXE
В вашей системе запущено много процессов, которые потребляют ресурсы процессора и памяти. Некоторые из этих процессов, кажется, являются вредоносными файлами, атакующими ваш компьютер.
Чтобы исправить критические ошибки citrixreceiver.exe,скачайте программу Asmwsoft PC Optimizer и установите ее на своем компьютере
1- Очистите мусорные файлы, чтобы исправить citrixreceiver.exe, которое перестало работать из-за ошибки.
2- Очистите реестр, чтобы исправить citrixreceiver.exe, которое перестало работать из-за ошибки.
3- Настройка Windows для исправления критических ошибок citrixreceiver.exe:
Всего голосов ( 181 ), 115 говорят, что не будут удалять, а 66 говорят, что удалят его с компьютера.
Как вы поступите с файлом citrixreceiver.exe?
Некоторые сообщения об ошибках, которые вы можете получить в связи с citrixreceiver.exe файлом
(citrixreceiver.exe) столкнулся с проблемой и должен быть закрыт. Просим прощения за неудобство.
(citrixreceiver.exe) перестал работать.
citrixreceiver.exe. Эта программа не отвечает.
(citrixreceiver.exe) — Ошибка приложения: the instruction at 0xXXXXXX referenced memory error, the memory could not be read. Нажмитие OK, чтобы завершить программу.
(citrixreceiver.exe) не является ошибкой действительного windows-приложения.
(citrixreceiver.exe) отсутствует или не обнаружен.
CITRIXRECEIVER.EXE
Проверьте процессы, запущенные на вашем ПК, используя базу данных онлайн-безопасности. Можно использовать любой тип сканирования для проверки вашего ПК на вирусы, трояны, шпионские и другие вредоносные программы.
процессов:
Cookies help us deliver our services. By using our services, you agree to our use of cookies.
Источник
Ошибка запрошенной операции модуля citrix для опубликованных приложений при попытке удалить
All New Hotfixes for XenApp 5.0 for Windows Server 2003 x86/x64 and Windows Server 2008 x86/x64
Последняя версия: 5.0
Оф.сайт: Официальный сайт
По-русски: ФорумВсего записей: 98 | Зарегистр. 08-12-2001 | Отправлено: 13:25 15-12-2001 | Исправлено: shrmn, 16:54 05-05-2012
| ppmpeter
В логах появляется 2 ошибки : A timeout (30000 milliseconds) was reached while waiting for a transaction response from the CryptSvc service. A timeout (30000 milliseconds) was reached while waiting for a transaction response from the NlaSvc service. Применены все последние обновления для Server 2008 R2 SP1 и установлен последний roll-up от Citrix XenApp 6.5 Проблема уже широко обсуждается на форумах поддержки Citrix, но однозначного ответа нет. Со стороны Microsoft предложены два хотфикса Newbie |
Редактировать | Профиль | Сообщение | Цитировать | Сообщить модератору abgluck Цитата: Отключается не доступ по rdp, а доступ к рабочему столу по rdp. Это немного разные вещи (к опубликованным приложениям вполне можно подключаться и по rdp). В свойствах протокола rdp такого не нашёл. Нашёл объяснения и лечение у Citrix : RDP or ICA Direct Desktop Connections Started by Non-Administrative Users Fail
Junior Member |
Редактировать | Профиль | Сообщение | Цитировать | Сообщить модератору Обсуждения
Сервер без Active directory Распределение ресурсов делается через Simplify Sute Добавлено: |
| Всего записей: 84 | Зарегистр. 11-11-2002 | Отправлено: 23:49 20-05-2014 |
| ppmpeter
Junior Member |
Редактировать | Профиль | Сообщение | Цитировать | Сообщить модератору Применил обновление KB2775511 ошибка пока не проявлялась. http://support.microsoft.com/kb/2775511/en-us |
| Всего записей: 84 | Зарегистр. 11-11-2002 | Отправлено: 10:53 26-05-2014 |
| Zhirafis
Junior Member |
Редактировать | Профиль | Сообщение | Цитировать | Сообщить модератору Доброго времени суток
Столкнулся с такой багой: сам не очень часто юзаю citrix но вот бага заключается в следующем устанавливаю клиента Не подскажите как победить эту багу. |
| Всего записей: 43 | Зарегистр. 13-10-2011 | Отправлено: 22:48 14-06-2014 |
| AlienOnliner
Junior Member |
Редактировать | Профиль | Сообщение | Цитировать | Сообщить модератору смотри настройки сайта пересоздай сайт с одного компа проблема, с любых? лето, телепаты в отпусках. |
| Всего записей: 64 | Зарегистр. 25-06-2007 | Отправлено: 22:45 23-06-2014 | Исправлено: AlienOnliner, 22:46 23-06-2014 |
| stangen
Junior Member |
Редактировать | Профиль | Сообщение | ICQ | Цитировать | Сообщить модератору После удаления трояна, Citrix стал выдавать сообщение:
«Приложение Сетевой модуль Citrix не может связаться с сервером.
Junior Member |
Редактировать | Профиль | Сообщение | Цитировать | Сообщить модератору stangen систему переустанови все равно закончишь этим |
| Всего записей: 64 | Зарегистр. 25-06-2007 | Отправлено: 01:42 06-07-2014 |
|
ntden1 Собственно вопрос, можно ли настроить клиенты на компах, чтобы они не лазили на прокси сервера? Сам себе и отвечаю, внести изменения в реестр ProxyType и AltProxyType как None. |
| Всего записей: 24 | Зарегистр. 20-11-2012 | Отправлено: 16:35 31-07-2014 | Исправлено: ntden1, 15:22 05-08-2014 |
| FAetoNets
Junior Member |
Редактировать | Профиль | Сообщение | Цитировать | Сообщить модератору MastHave for all http://support.citrix.com/servlet/KbServlet/download/29413-102-705928/XA%20-%20Windows%202008%20R2%20Optimization%20Guide.pdf.pdf |
| Всего записей: 71 | Зарегистр. 19-12-2005 | Отправлено: 01:14 17-08-2014 |
| demossproject
Junior Member |
Редактировать | Профиль | Сообщение | Цитировать | Сообщить модератору Здравствуйте. ХЕЛП! XenApp 7.5 не хочет работать с терминальными серверами с измененной системной буквой, почему? Существует проверенный на XA65 рабочий сервер WI+SG на Win2008r2 Установил ферму XenApp 7.5 на win2012r2 на два отдельных сервера: Опубликовал приложение и рабочий стол в Studio. Прописал DeliveryController на сервере WI+SG, все работает. Почему XenApp 7.5 не хочет работать с терминальными серверами с измененной системной буквой? Имеется сервер WebInterface+SecureGateway на Win2008r2 Опубликовал рабочий стол в цитриксе. Так вооот. Скорость работы рабочего стола через РДП-2012 заметно шустрее, Вопрос: это РДП стал таким шустрым или в цитриксе какие то проблемы? |
| Всего записей: 37 | Зарегистр. 04-10-2007 | Отправлено: 14:31 02-09-2014 | Исправлено: lol2007, 14:38 02-09-2014 |
| Adminny
Junior Member |
Редактировать | Профиль | Сообщение | Цитировать | Сообщить модератору Помогите с PPPoE. Стоит Citrix Presentation Server 4.5 на Windows 2003 SP2. Сетевым интерфейсом прямо в инет, но через pppoe. Одни клиенты нормально работают. Другие успешно заходят в Citrix Program Neighborhood, видят список приложений, но они не открываются. Открывается только один калькулятор. И с MTU игрался, и DisableTaskOffload задавал. Не помогает(((. |
| Всего записей: 134 | Зарегистр. 07-01-2012 | Отправлено: 21:29 21-10-2014 |
| abgluck
Advanced Member |
Редактировать | Профиль | Сообщение | Цитировать | Сообщить модератору Adminny
Цитата: Citrix Program Neighborhood в 4.5 уже работает через задницу, тем более в среде отличной от локалки. Пользуйтесь более свежими клиентами и/или используйте tcp+http/https. Наличие нескольких сетевых интерфейсов тоже вносит свой геморрой в настройку выдаваемых клиентам адресов для подключения. |
| Всего записей: 1735 | Зарегистр. 23-09-2004 | Отправлено: 04:04 22-10-2014 |
| absoloviev
Newbie |
Редактировать | Профиль | Сообщение | Цитировать | Сообщить модератору Коллеги, доброго времени суток!
Дистрибы все сохранились с тех времен. Второй день мучаюсь. MSI (c) (DC:7C) [10:43:23:531]: Attempting to delete file C:DOCUME 1Temp172ec1.mst Что с этим можно сделать? На боевом сервере всё пашет. Пробовал так же ставить с галкой «указать сервер лицензий потом». Все одно. Или лицензии безнадежно умерли просто? дату переводить тоже пробовал. Все нужные компоненты Windows установлены. Кто помнит такую древность? Я с citrix очень давно (года с 2007) не сталкивался. А очень надо. Источник Ошибка запрошенной операции модуля citrix для опубликованных приложений при попытке удалить
All New Hotfixes for XenApp 5.0 for Windows Server 2003 x86/x64 and Windows Server 2008 x86/x64 Последняя версия: 5.0 |
| Всего записей: 98 | Зарегистр. 08-12-2001 | Отправлено: 13:25 15-12-2001 | Исправлено: shrmn, 16:54 05-05-2012 |
| abgluck
Newbie |
Редактировать | Профиль | Сообщение | Цитировать | Сообщить модератору abgluck
Advanced Member |
Редактировать | Профиль | Сообщение | Цитировать | Сообщить модератору bootme Клиент лучше бы обновить. Вместо патча BackEnd.dll лучше использовать штатный алладиновский сетевой менеджер лицензий с тем же эмулем. Попробуй пересоздать слушатель ICA-TCP и проверить что он привязан к внешнему интерфейсу. |
| Всего записей: 1735 | Зарегистр. 23-09-2004 | Отправлено: 18:28 26-02-2009 |
| bootme
Newbie |
Редактировать | Профиль | Сообщение | Цитировать | Сообщить модератору abgluck Тут моё понимание закончилось(( Цитата: пересоздать слушатель ICA-TCP и проверить что он привязан к внешнему интерфейсу к сожалению, не понял. Ткни интерфейсом куда глядеть.Спасибо. |
| Всего записей: 18 | Зарегистр. 19-09-2008 | Отправлено: 00:46 27-02-2009 |
| abgluck
Junior Member |
Редактировать | Профиль | Сообщение | Цитировать | Сообщить модератору Проблема.
После установки нового клиента Citrix 11 версии, перестает работать сквозная проверка подлинности при запуске опубликованного приложения. Зафиксировал такой интересный момент,при первом входе в систему, после установки клиента, сквозная аутонтификация работает без проблем, но следует пользователю выйти и повторно войти, сквозная проверка пропадает, просит ввести имя пользователя, пароль и домен. Также выяснил, что после удаления папки %UserProfile%Application DataICAClient и последующем входе пользователя в систему сквозная проверка подлинности работает, пока пользователь не перелогиниться. У клиентов операционная система Windows XP SP2(SP3). Клиент Citrix 9.0 работал до этого без проблем. Подскажите, че за глюк такой? P.S. |
| Всего записей: 129 | Зарегистр. 04-06-2005 | Отправлено: 15:49 05-03-2009 |
| alexio
Full Member |
Редактировать | Профиль | Сообщение | Цитировать | Сообщить модератору кто ставил на x64 нужно посоветоваться есть проблемы установки SOS! |
| Всего записей: 502 | Зарегистр. 25-11-2003 | Отправлено: 16:42 05-03-2009 |
| baron2006
Junior Member |
Редактировать | Профиль | Сообщение | Цитировать | Сообщить модератору PerPV Аналогичная проблема. Решить не удалось. Вот темка на оф. форуме Citrix http://forums.citrix.com/thread.jspa?threadID=234957&tstart=0 |
| Всего записей: 55 | Зарегистр. 17-02-2006 | Отправлено: 12:45 12-03-2009 |
| anton04
Silver Member |
Редактировать | Профиль | Сообщение | Цитировать | Сообщить модератору baron2006 kraj ребяты изайте четвёрку или 4.5 с ними проблем меньше реально! |
| Всего записей: 2762 | Зарегистр. 14-06-2006 | Отправлено: 13:17 12-03-2009 | Исправлено: anton04, 13:18 12-03-2009 |
| kraj
Junior Member |
Редактировать | Профиль | Сообщение | Цитировать | Сообщить модератору anton04 А причём здесь 4 или 4.5? Надо по делу говорить. |
| Всего записей: 55 | Зарегистр. 17-02-2006 | Отправлено: 18:49 12-03-2009 |
| enixess
Newbie |
Редактировать | Профиль | Сообщение | Цитировать | Сообщить модератору Стоит задача подключения нового клиента к уже существующему citrix MF server с утановленной там 1с.
Дело в том что на сервере постоянно сидят и работают 10 человек. И возникает подозрение что клиент не хочет подлючатся из за ограничения по колличеству польователей. В логах сервера вижу ошибки Сервер терминалов не может выдать клиентскую лицензию. Выдача лицензии невозможна из-за внутренней ошибки, недостаточности памяти или изменениях в клиентской лицензии. дополнительная информация была передана на клиентский компьютер. Дополнительные сведения можно найти в центре справки и поддержки, в «http://go.microsoft.com/fwlink/events.asp». Вот и думаю в чем подвох.. |
| Всего записей: 6 | Зарегистр. 02-10-2007 | Отправлено: 09:38 26-03-2009 |
| abgluck
Advanced Member |
Редактировать | Профиль | Сообщение | Цитировать | Сообщить модератору saton Проблема либо в микрософтовском лицензировании служб терминалов, либо вообще в невозможности сохранить выдаваемую лицензию на стороне клиента (стоит проверить наличие у юзера прав на HKLMsoftwaremicrosoftmslicensing и, возможно, почистить эту ветку). |
| Всего записей: 1735 | Зарегистр. 23-09-2004 | Отправлено: 03:22 27-03-2009 |
| ADminionS
Newbie |
Редактировать | Профиль | Сообщение | Цитировать | Сообщить модератору Ребят, пару тупых воросов.
Так же как и многие получил CITRIX 4.5 EE for Windows 2003 Server в наследство и ничего о нем не слышал))). 1. Есть опубликованное размешеное на 4-х серверах приложение, нужно сделать так что б при закрытие пользователя сессия уходяшия в диссконект, могла быть восстоновленна если тот же пользователь пытается зайти с другова компьютера. 2. Как граматно сделать лоад балансинг на приложени. Сделал во такой файл. [WFClient] [ApplicationServers] [Server Desktop] Он подключается нормально, но вот если допустим есть на сервере с адресом 10.0.139.157 отлюченная сессия, то не факт что он меня туда и направит(((. Как исправить? |
| Всего записей: 16 | Зарегистр. 13-12-2006 | Отправлено: 14:31 01-04-2009 |
| raizo
Junior Member |
Редактировать | Профиль | Сообщение | ICQ | Цитировать | Сообщить модератору ADminionS насколько понимаю у тебя нормальная ферма из серверов, тогда 1. в access консоли зайди в свойства фермы и в разделе session reliability поставь галку и укажи время возможного восстановления 2. балансировка по умолчанию идет по количеству сессий и нагрузке на вход в Citrix Источник Вам также понравится Adblock |
You’ll be able to run Citrix Receiver after executing our solutions
by Claudiu Andone
Oldtimer in the tech and science press, Claudiu is focused on whatever comes new from Microsoft. His abrupt interest in computers started when he saw the first Home… read more
Updated on January 18, 2023
Reviewed by
Vlad Turiceanu
Passionate about technology, Windows, and everything that has a power button, he spent most of his time developing new skills and learning more about the tech world. Coming… read more
- If you can’t launch Citrix Receiver, your work-from-home day can be compromised.
- Your applications may cause the Citrix Receiver not to establish a problem.
- You must ensure that you have full permission for the user account.
XINSTALL BY CLICKING THE DOWNLOAD FILE
Fortect is a tool that does not simply cleans up your PC, but has a repository with several millions of Windows System files stored in their initial version. When your PC encounters a problem, Fortect will fix it for you, by replacing bad files with fresh versions. To fix your current PC issue, here are the steps you need to take:
- Download Fortect and install it on your PC.
- Start the tool’s scanning process to look for corrupt files that are the source of your problem
- Right-click on Start Repair so the tool could start the fixing algorythm
- Fortect has been downloaded by 0 readers this month.
Citrix Receiver for Windows 10 has incredible features that help you work smarter from anywhere. However, this doesn’t mean that you’ll never get to experience its fair share of flaws. For example, you could be out of luck when you can’t launch Citrix Receiver.
While you can do so without elevated permissions and logging in with the regular domain user account, you cannot launch any applications and desktops.
However, if you launch Citrix with elevated permissions and then log in with the regular domain user account, launching them works like a breeze. For those looking to fix this, that means one thing.
Why is Citrix Receiver not working?
First, you must confirm your complete authorization to use the app. And then, you should see if the app has the most recent update.
These are the two most typical factors contributing to the inability to launch Citrix Receiver in Windows 10 or 11.
In addition, many problems were reported by our users, which were quite similar to one another. The following are examples of some of them:
- Citrix desktop not launching – The programs you’re utilizing may be causing the problem with Citrix Receiver not starting up.
- The Citrix workspace does not launch – You may run into this problem using an older version of Citrix Workspace or Citrix Receiver. In that case, the application won’t be able to start a desktop or apps.
- Citrix workspace not opening – If you are utilizing Citrix Workspace, there are situations when an upgrade by itself will not function.
- The Citrix workspace won’t open – The Internet connection you are utilizing is perhaps the most typical reason Citrix Workspace (formerly known as Citrix Receiver) is not functioning correctly.
- Windows 10’s Citrix Receiver is not launching applications – In the event that one or more Citrix Receiver apps are unable to be started in Windows 10, the first thing that you should do is likely be to refresh them.
- Mac’s Citrix Receiver is not launching applications – It is possible that you will need to uninstall the application. And then delete all of its registry values in order to solve the problem of the app failing to open a desktop.
- Citrix application disappears after launching – The problem arises when the default time-out of one minute is surpassed. At this point, the session logs off automatically because the program takes a long time to start.
- Citrix application not launching no error – The problem can only occur when the published application is used outside a published session.
- Begin app failed please call system administrator – Any customization, such as a script that pushes changes to the TWI registry key, has the potential to lead to the deletion of needed data from the TWI registry. Which will result in an error when the program is launched.
- Citrix workspace not opening ICA file – Simply navigate to the directory where the ICA file was downloaded to correct this. When selecting the file, click the right mouse button to select Open with from the context menu. Next, choose Citrix Connection Manager as your software.
- Citrix Receiver not working in Chrome on Mac – Activate the Receiver Utility for cleaning up a Citrix Receiver installation that has been corrupted or that was performed in the past.
- Citrix Receiver not launching in Windows 10 – Refresh the applications you’re using in order to fix this error.
Is Citrix having issues today?
To see if Citrix is having issues at a particular moment, you can access their status page to see if they are up or not.
There you will see analytics and the states of gateways for every continent the service provides access to.
Today’s guide will show you how to quickly launch Citrix applications and desktops. So keep on reading the brief list of fixes you may apply in that regard.
What can I do if the Citrix workspace is not launching?
1. Refresh applications
If one or more Citrix Receiver applications cannot be launched in Windows 10, refreshing them is arguably the first thing you should do.
Immediately click the drop-down next to your name in the upper-right corner of the menu. Then, click Refresh Apps and see if the issue persists.
2. Ensure full permissions for the user account
If you’re looking to launch Citrix Receiver in Windows 10 with no effort again, note that Full Permissions are required for the user account. You will find this under HKEY_USERSUSER_SIDSOFTWARECitrix on the client machine.
We recommend ensuring you have full permissions for the user account used to log in to Citrix Receiver for the Registry Key.
If the domain user account does not have permissions, delete the Citrix Registry key after taking a backup. Then, exit Citrix Receiver and launch it back.
Some PC issues are hard to tackle, especially when it comes to missing or corrupted system files and repositories of your Windows.
Be sure to use a dedicated tool, such as Fortect, which will scan and replace your broken files with their fresh versions from its repository.
The Registry key will be created once more, with all relevant required permissions, and thus fix the Citrix workspace not opening ICA file error.
- How to open ICA files on Windows 10
- FIX: Citrix ceip.exe Application Error [Quick Guide]
- 3+ confirmed tips for fixing the Windows Remote Access Service error
3. Use another remote working solution
If Citrix Receiver is only giving you more headaches, maybe you should try another remote desktop solution. This way, you may increase your productivity.
To be more exact, the recommended solution below can deliver applications and desktops to any employee from a network.
But the best part is that it’s not complicated to implement within any environment. Moreover, it addresses the most significant concern in a company network: data security.
You will be able to secure all the online communication channels. From data leakage and theft by using the Secure Sockets Layer (SSL), data encryption using FIPS, and 2-way identification.
All the data transfers are monitored and reported in a central console for the IT manager in a visual manner.
This solution is perfectly integrated with a lot of other security solutions. Some examples are SafeNet, DualShield, Azure MFA, RADIUS server, and Google Authenticator.
Parallels RAS
Start using this all-in-one remote work solution for accessing your applications.
4. Download the latest version available
- In a browser, go to Citrix’s website to find the Citrix Windows 11 download file then click Download.
- The latest available version of the Citrix Workspace app should be there specified. Follow the on-screen steps to install it.
5. Reset Citrix Receiver
- Firstly, right-click the Receiver icon in the system tray.
- Click Advanced Preferences next and select the Reset Receiver option.
- A prompt will appear asking if you are sure you want to reset the receiver back to default settings. Confirm by clicking on Yes, reset Receiver.
- If Citrix Receiver requires you to add your account again. Enter your Domain username and password. You may be prompted to log in twice. This is also how you can fix Citrix apps not launching on Mac.
If things worsen and nothing seems to work, resetting the Citrix Receiver can help. Perform the above steps, and you should now be able to log onto Citrix as usual.
Note that resetting does not impact the Receiver or plug-in installation, per-machine ICA lockdown settings, or GPOs. However, accounts, apps delivered by the Self-Service plug-in, cached files, and saved passwords are removed.
Uninstalling with the receiver cleanup utility and reinstalling is also a potential solution. Just give it a go when all other fixes fail.
While each user has different expectations, this guide will provide a good overview of what you can do when you cannot launch Citrix Receiver in Windows 10/11.
For more potential solutions, check out how to fix the Citrix Receiver fatal error on Windows 10/11.
Do you have any ideas or tips to make Citrix Receiver work properly? Please drop a comment below and let us know your thoughts.
Still experiencing issues?
SPONSORED
If the above suggestions have not solved your problem, your computer may experience more severe Windows troubles. We suggest choosing an all-in-one solution like Fortect to fix problems efficiently. After installation, just click the View&Fix button and then press Start Repair.
![]()

Citrix Receiver для Windows 10 обладает большим набором функций, которые помогут вам работать эффективнее, где бы вы ни находились.
Это не означает, что вы никогда не столкнетесь с его недостатками. Например, вам может не повезти при попытке запустить Citrix Receiver.
Хотя вы можете сделать это без повышенных разрешений и входа в систему с обычной учетной записью пользователя домена, вы не можете запускать какие-либо приложения и рабочие столы, которые там появляются.
Однако, если вы запустите Citrix с повышенными правами, а затем войдете в систему с обычной учетной записью пользователя домена, их запуск будет очень простым. Для тех, кто хочет это исправить, это означает одно.
Цель сегодняшнего руководства — показать вам, как легко запускать приложения и рабочие столы Citrix. Просто продолжайте читать краткий список исправлений, которые вы можете применить в этом отношении.
Как исправить ошибку запуска Citrix Receiver в Windows 10?
1. Обновить приложения
Если одно или несколько приложений Citrix Receiver не могут быть запущены в Windows 10, возможно, первое, что вам следует сделать, это обновить их.
Немедленно щелкните раскрывающийся список рядом с вашим именем в правом верхнем углу меню. Затем нажмите «Обновить приложения» и посмотрите, сохраняется ли проблема.
2. Обеспечить полные права для учетной записи пользователя
Если вы хотите снова запустить Citrix Receiver в Windows 10 без каких-либо усилий, обратите внимание, что для учетной записи пользователя в разделе HKEY_USERSUSER_SIDSOFTWARECitrix на клиентском компьютере требуются полные разрешения.
Вот почему мы рекомендуем убедиться, что у вас есть полные разрешения для учетной записи пользователя, используемой для входа в Citrix Receiver для ключа реестра.
Если учетная запись пользователя домена не имеет разрешений, удалите ключ реестра Citrix после создания резервной копии. Затем выйдите из Citrix Receiver и снова запустите его.
Ключ реестра будет создан еще раз, на этот раз со всеми соответствующими необходимыми разрешениями.
3. Используйте другое решение для удаленной работы
Если Citrix Receiver только доставляет вам больше головной боли, возможно, вам следует подумать о том, чтобы попробовать другое решение для удаленного рабочего стола, которое может повысить вашу производительность.
Точнее, рекомендуемое ниже решение способно доставлять приложения и рабочие столы любому сотруднику по сети.
Но самое приятное то, что его совсем не сложно внедрить в любой среде, и он решает самую большую проблему в корпоративной сети: безопасность данных.
Вы сможете обезопасить все каналы онлайн-коммуникаций от утечки и кражи данных с помощью протокола защищенных сокетов (SSL), шифрования данных с использованием FIPS и двусторонней идентификации.
Все передачи данных отслеживаются и отображаются на центральной консоли для ИТ-менеджера в визуальной форме.
Кроме того, это решение отлично интегрируется со многими другими решениями для обеспечения безопасности, такими как SafeNet, DualShield, Azure MFA, RADIUS-сервер и даже Google Authenticator.
4. Загрузите последнюю доступную версию
- Найдите значок Citrix Receiver на панели задач.
- Щелкните его правой кнопкой мыши, чтобы выбрать «Дополнительные настройки».
- В разделе «О программе» обратите внимание на версию.
- В браузере перейдите по адресу Receiver.citrix.com.
- Затем нажмите «Загрузить для Windows».
- Там должна быть указана последняя доступная версия приложения Citrix Workspace. Сравните свою версию с этой.
- Если онлайн-версия отличается, загрузите новую версию следующей.
5. Сбросьте Citrix-приемник
- Во-первых, щелкните правой кнопкой мыши значок приемника на панели задач.
- Нажмите «Дополнительные настройки» далее.
- Выберите опцию «Сбросить приемник».
- Появится подсказка с вопросом, уверены ли вы, что хотите сбросить ресивер к настройкам по умолчанию. Подтвердите, нажав «Да, сбросить приемник».
- Введите remote.ptlgateway.net.
- Citrix Receiver требует, чтобы вы снова добавили свою учетную запись. Введите имя пользователя и пароль вашего домена. Вам может быть предложено дважды войти в систему.
- Вы также можете поставить галочку, чтобы запомнить учетные данные.
Если ситуация ухудшается и кажется, что ничего не работает, может помочь сброс Citrix Receiver. Выполните вышеуказанные шаги, и теперь вы сможете войти в Citrix как обычно.
Обратите внимание, что сброс не влияет на установку Receiver или подключаемого модуля, настройки блокировки ICA для каждой машины или объекты групповой политики. Однако учетные записи, приложения, предоставляемые подключаемым модулем самообслуживания, а также кэшированные файлы и сохраненные пароли, удаляются.
Удаление с помощью утилиты очистки приемника, а затем повторная установка также описываются как потенциальное решение. Просто попробуйте, когда все другие исправления не помогли.
Есть ли у вас какие-либо идеи или советы по правильной работе Citrix Receiver? Оставьте комментарий ниже и дайте нам знать ваши мысли.
sergun7d
Новичок
Зарегистрирован: 14.06.2015
Пользователь #: 157,197
Сообщения: 8
Источник
Что делать если невозможно запустить Citrix Receiver в Windows 10/11?
Citrix Receiver для Windows 10 обладает большим набором функций, которые помогут вам работать эффективнее, где бы вы ни находились.
Это не означает, что вы никогда не столкнетесь с его недостатками. Например, вам может не повезти при попытке запустить Citrix Receiver.
Хотя вы можете сделать это без повышенных разрешений и входа в систему с обычной учетной записью пользователя домена, вы не можете запускать какие-либо приложения и рабочие столы, которые там появляются.
Однако, если вы запустите Citrix с повышенными правами, а затем войдете в систему с обычной учетной записью пользователя домена, их запуск будет очень простым. Для тех, кто хочет это исправить, это означает одно.
Цель сегодняшнего руководства — показать вам, как легко запускать приложения и рабочие столы Citrix. Просто продолжайте читать краткий список исправлений, которые вы можете применить в этом отношении.
Как исправить ошибку запуска Citrix Receiver в Windows 10?
1. Обновить приложения
Если одно или несколько приложений Citrix Receiver не могут быть запущены в Windows 10, возможно, первое, что вам следует сделать, это обновить их.
Немедленно щелкните раскрывающийся список рядом с вашим именем в правом верхнем углу меню. Затем нажмите «Обновить приложения» и посмотрите, сохраняется ли проблема.
2. Обеспечить полные права для учетной записи пользователя
Если вы хотите снова запустить Citrix Receiver в Windows 10 без каких-либо усилий, обратите внимание, что для учетной записи пользователя в разделе HKEY_USERSUSER_SIDSOFTWARECitrix на клиентском компьютере требуются полные разрешения.
Вот почему мы рекомендуем убедиться, что у вас есть полные разрешения для учетной записи пользователя, используемой для входа в Citrix Receiver для ключа реестра.
Если учетная запись пользователя домена не имеет разрешений, удалите ключ реестра Citrix после создания резервной копии. Затем выйдите из Citrix Receiver и снова запустите его.
Ключ реестра будет создан еще раз, на этот раз со всеми соответствующими необходимыми разрешениями.
3. Используйте другое решение для удаленной работы
Если Citrix Receiver только доставляет вам больше головной боли, возможно, вам следует подумать о том, чтобы попробовать другое решение для удаленного рабочего стола, которое может повысить вашу производительность.
Точнее, рекомендуемое ниже решение способно доставлять приложения и рабочие столы любому сотруднику по сети.
Но самое приятное то, что его совсем не сложно внедрить в любой среде, и он решает самую большую проблему в корпоративной сети: безопасность данных.
Вы сможете обезопасить все каналы онлайн-коммуникаций от утечки и кражи данных с помощью протокола защищенных сокетов (SSL), шифрования данных с использованием FIPS и двусторонней идентификации.
Все передачи данных отслеживаются и отображаются на центральной консоли для ИТ-менеджера в визуальной форме.
Кроме того, это решение отлично интегрируется со многими другими решениями для обеспечения безопасности, такими как SafeNet, DualShield, Azure MFA, RADIUS-сервер и даже Google Authenticator.
4. Загрузите последнюю доступную версию
- Найдите значок Citrix Receiver на панели задач.
- Щелкните его правой кнопкой мыши, чтобы выбрать «Дополнительные настройки».
- В разделе «О программе» обратите внимание на версию.
- В браузере перейдите по адресу Receiver.citrix.com.
- Затем нажмите «Загрузить для Windows».
- Там должна быть указана последняя доступная версия приложения Citrix Workspace. Сравните свою версию с этой.
- Если онлайн-версия отличается, загрузите новую версию следующей.
5. Сбросьте Citrix-приемник
- Во-первых, щелкните правой кнопкой мыши значок приемника на панели задач.
- Нажмите «Дополнительные настройки» далее.
- Выберите опцию «Сбросить приемник».
- Появится подсказка с вопросом, уверены ли вы, что хотите сбросить ресивер к настройкам по умолчанию. Подтвердите, нажав «Да, сбросить приемник».
- Введите remote.ptlgateway.net.
- Citrix Receiver требует, чтобы вы снова добавили свою учетную запись. Введите имя пользователя и пароль вашего домена. Вам может быть предложено дважды войти в систему.
- Вы также можете поставить галочку, чтобы запомнить учетные данные.
Если ситуация ухудшается и кажется, что ничего не работает, может помочь сброс Citrix Receiver. Выполните вышеуказанные шаги, и теперь вы сможете войти в Citrix как обычно.
Обратите внимание, что сброс не влияет на установку Receiver или подключаемого модуля, настройки блокировки ICA для каждой машины или объекты групповой политики. Однако учетные записи, приложения, предоставляемые подключаемым модулем самообслуживания, а также кэшированные файлы и сохраненные пароли, удаляются.
Удаление с помощью утилиты очистки приемника, а затем повторная установка также описываются как потенциальное решение. Просто попробуйте, когда все другие исправления не помогли.
Есть ли у вас какие-либо идеи или советы по правильной работе Citrix Receiver? Оставьте комментарий ниже и дайте нам знать ваши мысли.
Источник
Полное удаление Citrix Receiver
Столкнулся я с такой проблемой, что запускаться клиент Citrix Receiver на машине с Dibian (на машине с ОС Windows тоже столкнулся с такой проблемой, но она решается легко, и решение описано в самом конце данной статьи). Что только не делал, переустановка не давала положительного результата. Пришлось методом «научного тыка» искать варианты полного удаления следов программы и повторной её установки.
1. Запуск консоли, и выполнение команды ниже
2. Вычистил «хвосты» от Citrix
3. Удалил libmotif3
ВАЖНО! Обязательно после этого перезагружаем ПК, если хотим повторно устанавливать Citrix Receiver
Алгоритм установки Citrix Receiver
1. скачал файл linuxx86-12.0.0.189834.tar.gz и распаковал
2. консоль, зашел в папку под root
3. Выбрал пункт установки 1
4. Выбрал папку не по умолчанию, и установил все
5. Установил libmotif3, и делаем ссылку на файл
Как результат — Все заработало!
В Операционной системе Windows сталкивался с подобной проблемой, но она решается намного проще 🙂 Достаточно скачать утилиту с оф. сайта, и запустить ее от имени Администратора. После удаления, можно повторно запустить установку клиента Citrix Receiver
Ниже указана ссылка, где можно скачать последнюю версию утилиты Receiver Clean-Up Utility, для полного удаления Citrix Receiver
Receiver Clean-Up Utility
Не удается удалить Citrix?
Как удалить Citrix?
Выберите Удалить приложение Citrix Workspace и следуйте инструкциям на экране. Файл. dmg — это файл, который загружается из Citrix при первой установке приложения Citrix Workspace для Mac. Если файла больше нет на вашем компьютере, загрузите файл еще раз из Citrix Downloads, чтобы удалить приложение.
Как удалить программу, которая не удаляется?
Все, что вам нужно сделать, это:
Как полностью удалить рабочую область Citrix?
Вы можете удалить приложение Citrix Workspace с помощью утилиты «Программы и компоненты» Windows («Установка и удаление программ»). Примечание. Во время установки приложения Citrix Workspace вы получите запрос на удаление пакета Citrix HDX RTME. Щелкните ОК, чтобы продолжить удаление.
Как удалить Citrix из реестра?
GUID можно найти в следующем разделе реестра: HKEY_LOCAL_MACHINE Software Microsoft Windows CurrentVersion Uninstall. Когда выбран ключ «Удалить», нажмите Ctrl + F и найдите термин Citrix. Подключ, содержащий запись клиента Citrix ICA, отображается как открытый (левая панель) и помечен идентификатором GUID.
Что делает Citrix Receiver?
Citrix Receiver — это клиентское программное обеспечение, необходимое для доступа к приложениям и полным рабочим столам, размещенным на серверах Citrix, с удаленного клиентского устройства. … Когда вы посещаете страницу загрузки Citrix Receiver, она автоматически определяет операционную систему и предлагает вам загрузить нужное клиентское программное обеспечение.
Как принудительно удалить программу?
Удалить папку в реестре Windows. Отображаемое имя реестра Windows. Удалите ключи, которые показывают имя вашей программы в DisplayName, щелкнув правой кнопкой мыши по элементам и выбрав Удалить. Теперь ваша программа не будет отображаться в списке «Установка и удаление программ».
Как удалить программу, которая не отображается в Панели управления?
Как удалить программы, не указанные в панели управления
Как принудительно удалить файл?
Для этого сначала откройте меню «Пуск» (клавиша Windows), введите «выполнить» и нажмите «Ввод». В появившемся диалоговом окне введите cmd и снова нажмите Enter. В открытой командной строке введите del / f имя_файла, где имя_файла — это имя файла или файлов (вы можете указать несколько файлов с помощью запятых), которые вы хотите удалить.
Следует ли мне удалить Citrix Receiver?
Однако оставление Citrix Receiver установленным на домашнем компьютере не вызывает никаких известных проблем с безопасностью. Если вы хотите оставить его в покое, это безопасно. Он не занимает много места и после отключения автоматического запуска не будет использовать память или процессор.
Как очистить кеш Citrix?
Как отключить рабочую область Citrix?
Все, что вам нужно сделать, это открыть диспетчер задач, щелкнув правой кнопкой мыши на панели задач или используя сочетание клавиш CTRL + SHIFT + ESC, нажав «Подробнее», переключившись на вкладку «Автозагрузка» и нажав кнопку «Отключить».
Как принудительно удалить Citrix Receiver?
Удалите Citrix Receiver из Windows
Войдите на устройство с правами администратора. Откройте Панель управления и выберите «Программы и компоненты». Приложение Citrix Receiver должно быть найдено в папке «Программы и компоненты», чтобы его можно было удалить. Щелкните приложение правой кнопкой мыши и выберите Удалить.
Могу ли я удалить программу запуска Citrix Online?
Windows: откройте «Программы и компоненты». Щелкните правой кнопкой мыши «Citrix Online Launcher». Выберите «Удалить», затем при появлении запроса нажмите «Да».
Как исправить мой Citrix Receiver?
Проблема с запуском Citrix Receiver может быть вызвана используемыми вами приложениями.
…
Как исправить ошибку запуска Citrix Receiver в Windows 10?
3 простых шага по исправлению ошибок CITRIXRECEIVER.EXE
В вашей системе запущено много процессов, которые потребляют ресурсы процессора и памяти. Некоторые из этих процессов, кажется, являются вредоносными файлами, атакующими ваш компьютер.
Чтобы исправить критические ошибки citrixreceiver.exe,скачайте программу Asmwsoft PC Optimizer и установите ее на своем компьютере
1- Очистите мусорные файлы, чтобы исправить citrixreceiver.exe, которое перестало работать из-за ошибки.
2- Очистите реестр, чтобы исправить citrixreceiver.exe, которое перестало работать из-за ошибки.
3- Настройка Windows для исправления критических ошибок citrixreceiver.exe:
Всего голосов ( 181 ), 115 говорят, что не будут удалять, а 66 говорят, что удалят его с компьютера.
Как вы поступите с файлом citrixreceiver.exe?
Некоторые сообщения об ошибках, которые вы можете получить в связи с citrixreceiver.exe файлом
(citrixreceiver.exe) столкнулся с проблемой и должен быть закрыт. Просим прощения за неудобство.
(citrixreceiver.exe) перестал работать.
citrixreceiver.exe. Эта программа не отвечает.
(citrixreceiver.exe) — Ошибка приложения: the instruction at 0xXXXXXX referenced memory error, the memory could not be read. Нажмитие OK, чтобы завершить программу.
(citrixreceiver.exe) не является ошибкой действительного windows-приложения.
(citrixreceiver.exe) отсутствует или не обнаружен.
CITRIXRECEIVER.EXE
Проверьте процессы, запущенные на вашем ПК, используя базу данных онлайн-безопасности. Можно использовать любой тип сканирования для проверки вашего ПК на вирусы, трояны, шпионские и другие вредоносные программы.
процессов:
Cookies help us deliver our services. By using our services, you agree to our use of cookies.
Ошибка запрошенной операции модуля citrix для опубликованных приложений при попытке удалить
All New Hotfixes for XenApp 5.0 for Windows Server 2003 x86/x64 and Windows Server 2008 x86/x64
Последняя версия: 5.0
Оф.сайт: Официальный сайт
По-русски: Форум
Citrix Receiver для Windows 10 обладает большим набором функций, которые помогут вам работать эффективнее, где бы вы ни находились.
Это не означает, что вы никогда не столкнетесь с его недостатками. Например, вам может не повезти при попытке запустить Citrix Receiver.
Хотя вы можете сделать это без повышенных разрешений и входа в систему с обычной учетной записью пользователя домена, вы не можете запускать какие-либо приложения и рабочие столы, которые там появляются.
Однако, если вы запустите Citrix с повышенными правами, а затем войдете в систему с обычной учетной записью пользователя домена, их запуск будет очень простым. Для тех, кто хочет это исправить, это означает одно.
Цель сегодняшнего руководства — показать вам, как легко запускать приложения и рабочие столы Citrix. Просто продолжайте читать краткий список исправлений, которые вы можете применить в этом отношении.
Как исправить ошибку запуска Citrix Receiver в Windows 10?
1. Обновить приложения
Если одно или несколько приложений Citrix Receiver не могут быть запущены в Windows 10, возможно, первое, что вам следует сделать, это обновить их.
Немедленно щелкните раскрывающийся список рядом с вашим именем в правом верхнем углу меню. Затем нажмите «Обновить приложения» и посмотрите, сохраняется ли проблема.
2. Обеспечить полные права для учетной записи пользователя
Если вы хотите снова запустить Citrix Receiver в Windows 10 без каких-либо усилий, обратите внимание, что для учетной записи пользователя в разделе HKEY_USERSUSER_SIDSOFTWARECitrix на клиентском компьютере требуются полные разрешения.
Вот почему мы рекомендуем убедиться, что у вас есть полные разрешения для учетной записи пользователя, используемой для входа в Citrix Receiver для ключа реестра.
Если учетная запись пользователя домена не имеет разрешений, удалите ключ реестра Citrix после создания резервной копии. Затем выйдите из Citrix Receiver и снова запустите его.
Ключ реестра будет создан еще раз, на этот раз со всеми соответствующими необходимыми разрешениями.
3. Используйте другое решение для удаленной работы
Если Citrix Receiver только доставляет вам больше головной боли, возможно, вам следует подумать о том, чтобы попробовать другое решение для удаленного рабочего стола, которое может повысить вашу производительность.
Точнее, рекомендуемое ниже решение способно доставлять приложения и рабочие столы любому сотруднику по сети.
Но самое приятное то, что его совсем не сложно внедрить в любой среде, и он решает самую большую проблему в корпоративной сети: безопасность данных.
Вы сможете обезопасить все каналы онлайн-коммуникаций от утечки и кражи данных с помощью протокола защищенных сокетов (SSL), шифрования данных с использованием FIPS и двусторонней идентификации.
Все передачи данных отслеживаются и отображаются на центральной консоли для ИТ-менеджера в визуальной форме.
Кроме того, это решение отлично интегрируется со многими другими решениями для обеспечения безопасности, такими как SafeNet, DualShield, Azure MFA, RADIUS-сервер и даже Google Authenticator.
4. Загрузите последнюю доступную версию
- Найдите значок Citrix Receiver на панели задач.
- Щелкните его правой кнопкой мыши, чтобы выбрать «Дополнительные настройки».
- В разделе «О программе» обратите внимание на версию.
- В браузере перейдите по адресу Receiver.citrix.com.
- Затем нажмите «Загрузить для Windows».
- Там должна быть указана последняя доступная версия приложения Citrix Workspace. Сравните свою версию с этой.
- Если онлайн-версия отличается, загрузите новую версию следующей.
5. Сбросьте Citrix-приемник
- Во-первых, щелкните правой кнопкой мыши значок приемника на панели задач.
- Нажмите «Дополнительные настройки» далее.
- Выберите опцию «Сбросить приемник».
- Появится подсказка с вопросом, уверены ли вы, что хотите сбросить ресивер к настройкам по умолчанию. Подтвердите, нажав «Да, сбросить приемник».
- Введите remote.ptlgateway.net.
- Citrix Receiver требует, чтобы вы снова добавили свою учетную запись. Введите имя пользователя и пароль вашего домена. Вам может быть предложено дважды войти в систему.
- Вы также можете поставить галочку, чтобы запомнить учетные данные.
Если ситуация ухудшается и кажется, что ничего не работает, может помочь сброс Citrix Receiver. Выполните вышеуказанные шаги, и теперь вы сможете войти в Citrix как обычно.
Обратите внимание, что сброс не влияет на установку Receiver или подключаемого модуля, настройки блокировки ICA для каждой машины или объекты групповой политики. Однако учетные записи, приложения, предоставляемые подключаемым модулем самообслуживания, а также кэшированные файлы и сохраненные пароли, удаляются.
Удаление с помощью утилиты очистки приемника, а затем повторная установка также описываются как потенциальное решение. Просто попробуйте, когда все другие исправления не помогли.
Есть ли у вас какие-либо идеи или советы по правильной работе Citrix Receiver? Оставьте комментарий ниже и дайте нам знать ваши мысли.
Troubleshooting
In this section you will find information on how to solve the most common problems.
Failed to get session from client
The error occurs when it is not possible to start a recording or session execution
Solution
Make sure the AllowSimulationAPI key is present in the above registry and not set to 0, as it enables Citrix ICO functionality.
Windows 32bits:
Location : HKEY_LOCAL_MACHINESOFTWARECitrixICA ClientCCM
Name : AllowSimulationAPI
Data : dword:00000001
Windows 64bits:
Location : HKEY_LOCAL_MACHINESOFTWAREWow6432NodeCitrixICA ClientCCM
Name : AllowSimulationAPI
Data : dword:00000001
Black screenshots
Citrix Receiver uses the Windows Manager to capture screenshots of running sessions.
Some video card drivers do not support the capture method used by Citrix.
When that case occurs, the screenshot appears black.
Solution
Option 1: Update the display graphics card drivers.
Option 2: Disabling the main graphics card driver not supported.
Disabling the graphics card driver will enable the Microsoft Windows compatible graphics driver, which is supported by Citrix Receiver.
The most common problematic drivers are those provided by Intel Graphics.
If you have an Intel driver listed, try disabling that driver first before others.
- Go to Device Manager in Windows
- select the category «Display adapters»
- Disable the driver by right-clicking and selecting «Disable device»
Citrix Application Launcher Errors
Some of the most common errors will be listed below, explaining the reason and what is its possible solution.
Solution
ICAFILE_TIMEOUT: Time out waiting for ICAFile
The error occurs at the time of the verification process of the ICA file against the Citrix server.
This can occur due to communication problems with the Citrix server or because it cannot respond in time.
You can adjust the timeout by increasing the value of the bzm.citrix.client_factory.client_property.icafile_timeout_ms property
ICAFILE_ERROR: Failed to load ICAFile
The error occurs at the time of the verification process of the ICA file against the Citrix server.
When this error occurs, the ICA file provided to the server is not a valid ICA file.
Verify the correct operation of the file download cycle, and if the file provider and Citrix server is working correctly.
CONNECT_TIMEOUT: Timed out waiting for OnConnect
The error occurs when trying to create a new session against the Citrix server.
You can try increasing the timeout time by changing the bzm.citrix.client_factory.client_property.connect_timeout_ms property
Check at the Citrix server level if there is a problem where a new session cannot be created.
LOGON_TIMEOUT: Timed out waiting for Logon
The error occurs when the connection and session were established but the windows login event does not occur.
The Logon process may not occur for multiple possible reasons.
It is possible that due to overload the server is not managing to start a Windows session.
You can increase the timeout value by setting the bzm.citrix.client_factory.client_property.logon_timeout_ms property.
ACTIVEAPP_TIMEOUT: Timed out waiting for Active App
The application under load may not be able to start in time or there is some other problem on the server that is preventing the application from starting.
START_SESSION_ERROR: Unable to start session
This error is an unexpected error.
Contact the plugin support team.
Citrix Error 13 «Unsupported Function»
The Citrix Error 13 is a general error code that usually refers to an error for which Citrix does not provide a specific code.
Solution
This error has multiple causes, check the following possible causes:
- The User Account Control (UAC) feature of Windows is not fully disabled and prevents the launching of the Citrix client.
- Another reason for the problem could be when there are Citrix processes (wfica32.exe, wfcrun32.exe, concentr.exe, receiver.exe) already running in other sessions than JMeter session
Fully disable the UAC with registry key:
     Location : HKEY_LOCAL_MACHINESoftwareMicrosoftWindowsCurrentVersionPoliciesSystem
     Name: EnableLUA
     Data: 0
Note that the change requires a restart of the computer!
Use Windows Task Manager to kill all these running processes:
- wfica32.exe,
- wfcrun32.exe,
- concentr.exe,
- receiver.exe before starting the load test.
Make sure to log out all the users before running the test in JMeter.
Error code 0x80070005
Getting error
The module C:Program Files (x86)CitrixICA Clientwfica.ocx was loaded but the call to DLLRegisterServer failed with error code 0x80070005
Solution
Ensure you run the regsvr32 and registry updates as Administrator as per:
- https://techjourney.net/the-call-to-dllregisterserver-failed-with-error-code-0x80004005-on-windows/
- https://social.technet.microsoft.com/Forums/windows/en-US/71037d62-d842-44a3-86df-6ed74df6fc39/0x80070005-error-trying-to-register-dll?forum=itprovistasecurity
Citrix user not logged before …
At execution of a «Citrix Application launcher» sampler, getting error
Citrix user not logged before ...
Solution
It means that the Citrix Client was unable to login in time.
First ensure the downloaded ICA file run a new Citrix session.
Then you can increase the Logon Timeout setting.
Foreground window area must be defined while obtaining the absolute position of a relative selection.
If you get this message at execution of a «Citrix Application launcher» sampler, getting error
Foreground window area must be defined while obtaining the absolute position of a relative selection.
Solution
This means the Timeout of End Clause is too short.
Then you can increase the Timeout setting of End Clause (not the Logon Timeout of Citrix Application Launcher).
Error 2312: The Citrix Receiver Received a Corrupt ICA File
If you get this message at execution
Error 2312: The Citrix Receiver Received a Corrupt ICA File
Solution
Check you’re using a version of Citrix Receiver compatible with plugin, see System requirements and compatibility
Citrix Receiver not start, «Error 70 cannot connect to server»
If you Citrix Receiver not start and in logs your get the error
Error 70 cannot connect to server
Solution
This issue can be solved by clearing the citrix client cache and registry.
Step:
- Close all the citrix processes using Task Manager
- Uninstall Citrix Receiver
- Run regedit and delete:
- Computer > HKEY_CURRENT_USER > Software>Citrix
- Computer > HKEY_CURRENT_LOCAL_MACHINE > Software > WOW6432Node > Citrix > ICA Client
- If any of the below folders have ICAClient and/or Citrix folders, delete ICAClient and/or Citrix located in those folders:
- C:UsersUSER RUNNING CITRIXApplication Data
- C:UsersUSER RUNNING CITRIXLocal
- C:UsersUSER RUNNING CITRIXRoaming
- Reboot the machine
- Reinstall Receiver
Popup when a Citrix Receiver update is available
By default, Citrix Receiver verify updates and notify you if a new version is available.
This behavior can affect the use of the test machine.
Solution
It is possible to disable the checking of new versions.
- Right-click the Citrix Receiver for Windows icon in the notification area.
- Select Advanced Preferences, and click Auto Update. The Citrix Receiver Updates dialog appears.
- Select «No, don’t notify me»
- Click Save.
The option may not be available due to server policies or at installation time.
In those cases, it is possible to change the behavior by adding the following Windows registry values.
Open regedit.exe and set the following keys:
Windows 32bits:
Location : HKEY_LOCAL_MACHINESOFTWARECitrixICA ClientAutoUpdateCommandline Policy
Name : Enable
Data : "false"

Location : HKEY_LOCAL_MACHINESOFTWARECitrixICA ClientAutoUpdateCommandline Policy
Name : Banned
Data : "true"
Windows 64bits:
Location : HKEY_LOCAL_MACHINESOFTWAREWOW6432NodeCitrixICA ClientAutoUpdateCommandline Policy
Name : Enable
Data : "false"

Location : HKEY_LOCAL_MACHINESOFTWAREWOW6432NodeCitrixICA ClientAutoUpdateCommandline Policy
Name : Banned
Data : "true"
High CPU usage on dwm.exe process
Citrix draws session windows using the system component called Desktop Window Manager (DWM)
Under high load, the component generates excessive CPU usage when rendering all the sessions at same time.
Solution
The Citrix plug-in does not require all the visual effects of Desktop Window Manager be enabled.
In order to allow a moderate use of resources without losing functionality, disable some visual effects features.
Under Windows run SystemPropertiesPerformance.exe program.
On the Visual Effects tab, select Custom option.
Just keep the option «Smooth edges of screen fonts» selected.
Image Hash or OCR fails on different machine resolution
Depending on the scaling configuration indicated in the server policy, or the default configuration of Citrix Receiver, the sessions will be scaled to adapt to the resolution of the client machine.
This adaptation of the session images causes the final image of the session to vary according to each machine with a difference in resolution to the machine on which the session was recorded.
This can prevent the Hash and OCR algorithms from working as expected.
Solution
To configure DPI scaling on Citrix Receiver:
- Right-click Citrix Receiver for Windows from the notification area.
- Select Advanced Preferences and click DPI settings.
The DPI settings dialog appears.
Change the settings to «No, use native resolution».
- Click Save.
- Restart the Citrix Receiver for Windows session for the changes to take effect.
In case you do not have access to that configuration screen, this is due to a policy indicated from the server.
It is possible to change the value of the configuration by changing a registry key.
Open regedit.exe and set the following key to disable dpi scaling:
Location : HKEY_CURRENT_USERSoftwareCitrixICA ClientDPI
Name : Enable_DPI
Data : dword:00000000
OutOfMemoryError: Java heap space error
JMeter has a set of default settings that allow the application to run without memory problems in most cases.
However, under some circumstances, an OutOfMemoryError can occur.
When the error occurs, this indicates that the configuration should be changed to consider the current memory usage.
Solution
In general, the OutOfMemoryError is due to the design of JMeter components and how they store information in the application memory for display.
One of the main memory consumers are the listeners.
1. First, let’s allocate as much memory as possible for 32-bit Java.
Locate the directory where jmeter.bat is located and edit it with a text editor.
Add after the line @echo the following line:
set HEAP=-Xms1024M -Xmx1024M -XX:MaxMetaspaceSize=256M
This allocates as much memory as possible to JMeter for the future runs.
Source: JMeter Wiki: JMeter keeps getting «Out of Memory» errors. What can I do?
2. Set a proper limit for the View Result Tree listener.
Locate user.properties file and open them with a text editor.
Add the following line to the configuration:
view.results.tree.max_results = 80
View Result Tree by default shows the last 500 items on the screen.
This consumes memory and can cause long tests to end up with an OutOfMemoryError.
Depending on the type of test you are running, the amount of information that JMeter stores may exceed the available memory.
The recommended setting limits only the last 80 results to remain visible to ensure that all memory is not consumed.
You can try increasing the value until you find the one best suited for the type of test you are running.
Source: JMeter View Results Tree documentation reference
Final notes
With the previous recommendations, in general, most of the problems with memory management in JMeter are solved.
In case they are not enough, there is also a good article available from BlazeMeter that tries to summarize other possible solutions to other possible causes of memory error.
BlazeMeter: 9 Easy Solutions for a JMeter Load Test “Out of Memory” Failure
In case you can’t find a solution, don’t forget to contact support.
Содержание
- 3 простых шага по исправлению ошибок CITRIXRECEIVER.EXE
- 1- Очистите мусорные файлы, чтобы исправить citrixreceiver.exe, которое перестало работать из-за ошибки.
- 2- Очистите реестр, чтобы исправить citrixreceiver.exe, которое перестало работать из-за ошибки.
- 3- Настройка Windows для исправления критических ошибок citrixreceiver.exe:
- Как вы поступите с файлом citrixreceiver.exe?
- Некоторые сообщения об ошибках, которые вы можете получить в связи с citrixreceiver.exe файлом
- CITRIXRECEIVER.EXE
- процессов:
- Citrix: после обновления Windows 10 Receiver не открывается
- FIX: Unable to launch Citrix Receiver in Windows 10
- How can I fix Citrix Receiver launch error in Windows 10?
- 1. Refresh applications
- 2. Ensure full permissions for the user account
- 3. Use another remote working solution
- Parallels RAS
- 4. Download the latest version available
- 5. Reset Citrix Receiver
- Citrix: после обновления Windows 10 Receiver не открывается
- 1 ответ 1
- Не устанавливается citrix receiver на windows 10
- АГЕНТ РЯДОМ – найдите своего страхового консультанта
- Лента новостей
3 простых шага по исправлению ошибок CITRIXRECEIVER.EXE
В вашей системе запущено много процессов, которые потребляют ресурсы процессора и памяти. Некоторые из этих процессов, кажется, являются вредоносными файлами, атакующими ваш компьютер.
Чтобы исправить критические ошибки citrixreceiver.exe,скачайте программу Asmwsoft PC Optimizer и установите ее на своем компьютере
1- Очистите мусорные файлы, чтобы исправить citrixreceiver.exe, которое перестало работать из-за ошибки.
2- Очистите реестр, чтобы исправить citrixreceiver.exe, которое перестало работать из-за ошибки.
3- Настройка Windows для исправления критических ошибок citrixreceiver.exe:
Всего голосов ( 181 ), 115 говорят, что не будут удалять, а 66 говорят, что удалят его с компьютера.
Как вы поступите с файлом citrixreceiver.exe?
Некоторые сообщения об ошибках, которые вы можете получить в связи с citrixreceiver.exe файлом
(citrixreceiver.exe) столкнулся с проблемой и должен быть закрыт. Просим прощения за неудобство.
(citrixreceiver.exe) перестал работать.
citrixreceiver.exe. Эта программа не отвечает.
(citrixreceiver.exe) — Ошибка приложения: the instruction at 0xXXXXXX referenced memory error, the memory could not be read. Нажмитие OK, чтобы завершить программу.
(citrixreceiver.exe) не является ошибкой действительного windows-приложения.
(citrixreceiver.exe) отсутствует или не обнаружен.
CITRIXRECEIVER.EXE
Проверьте процессы, запущенные на вашем ПК, используя базу данных онлайн-безопасности. Можно использовать любой тип сканирования для проверки вашего ПК на вирусы, трояны, шпионские и другие вредоносные программы.
процессов:
Cookies help us deliver our services. By using our services, you agree to our use of cookies.
Источник
Citrix: после обновления Windows 10 Receiver не открывается
Мы подключаемся к веб-сайту SaaS, который использует Citrix XenApp 6.5. Нам представлен список приложений, которые запускаются с помощью Citrix Receiver. Это работало нормально на моем ПК, пока я не обновил Windows 10 Anniversary Update. Теперь, когда я нажимаю на любое из доступных приложений на веб-сайте и открываю файл ICA, ничего не происходит. Он изолирован только от этого ПК.
Я попытался удалить Citrix с помощью утилиты очистки приемника и переустановить Citrix Receiver версии 14.4.1000.16. и получить тот же результат. Я не могу вернуться с помощью восстановления системы, потому что точка восстановления до обновления больше не доступна.
Извините за поздний ответ, но у меня есть решение для вас. Это касается именно вашей проблемы и любых других программ, которые ломаются после выполнения Windows 10 «крупного обновления / обновления ОС».
Пакеты обновлений Windows 10 / Обновления (Anniversary, Creator и т. Д.) Представляют собой более или менее обновления ОС и создают папку Windows.old, перемещают туда папку «Пользователи» и «Windows», обновляют ОС и при нормальных обстоятельствах должны двигаться назад. папку «Пользователи» и все, что ей нужно, из резервной копии папки Windows.
Что происходит, я считаю, что ваш профиль находится в подвешенном состоянии или осиротел или что-то в этом роде. Некоторые из ваших данных могут быть связаны с папкой C: windows.old users в качестве примера.
Мое исправление: создать новый профиль.
У меня был домашний пользователь, который принес свой ноутбук, который мог войти в Citrix до недавнего обновления в прошлом месяце. Я создал новый профиль, и Citrix снова работает правильно. ее документы и рабочий стол не были перемещены назад и были связаны с папкой C: windows.old users. Я предполагаю, что ее папка Appdata, а также информация о ее реестре хранились там также, и хотя я уверен, что есть способ это исправить, но в то время мне было проще создать новый профиль.
Конечно, вы также можете просто сделать резервную копию ваших данных и перезагрузить Windows 10. Если бы это случилось с моим компьютером, я бы сделал это, потому что я не доверял бы ОС в этот момент. Тем не менее, создать новый профиль проще, и если у вас есть время, вы, вероятно, могли бы выяснить, почему и как исправить проблему с привязкой профиля, если создание новой учетной записи / профиля не является вариантом.
Источник
FIX: Unable to launch Citrix Receiver in Windows 10
Citrix Receiver for Windows 10 has a great array of features that help you work smarter from anywhere.
This doesn’t mean that you’ll never get to experience its fair share of flaws. For example, you could be out of luck when you try launching Citrix Receiver.
While you can do so without elevated permissions and logging in with the regular domain user account, you cannot launch any of the applications and desktops that appear there.
However, if you launch Citrix with elevated permissions and then login with the regular domain user account, launching them works like a breeze. For those looking to fix this, that means one thing.
The goal of today’s guide is to show you how to launch Citrix applications and desktops with ease. Just keep on reading the brief list of fixes you may apply in that regard.
How can I fix Citrix Receiver launch error in Windows 10?
1. Refresh applications
If one or more Citrix Receiver applications cannot be launched in Windows 10, refreshing them is arguably the first thing that you should do.
Immediately click the drop-down next to your name in the upper-right corner of the menu. Then, click Refresh Apps and see if the issue persists.
2. Ensure full permissions for the user account
If you’re looking to launch Citrix Receiver in Windows 10 with no efforts again, note that Full Permissions are required for the user account under HKEY_USERSUSER_SIDSOFTWARECitrix on the client machine.
That’s why we’re recommending making sure you have full permissions for the user account used to log in to Citrix Receiver for the Registry Key.
If the domain user account does not have permissions, delete the Citrix Registry key after taking a backup. Then, exit Citrix Receiver and launch it back.
The Registry key will be once more created, this time with all relevant required permissions.
3. Use another remote working solution
Expert Tip: Some PC issues are hard to tackle, especially when it comes to corrupted repositories or missing Windows files. If you are having troubles fixing an error, your system may be partially broken. We recommend installing Restoro, a tool that will scan your machine and identify what the fault is.
Click here to download and start repairing.
If Citrix Receiver is only giving you more headaches, maybe you should think about trying another remote desktop solution that may increase your productivity.
To be more exact, the recommended solution below is capable of delivering applications and desktops to any employee from a network.
But the best part is that it’s not complicated at all to implement within any environment and addresses the biggest concern in a company network: data security.
You will be able to secure all the online communication channels from data leakage and theft by using the Secure Sockets Layer (SSL), data encryption using FIPS and 2-way identification.
All the data transfers are monitored and reported in a central console for the IT manager in a visual manner.
Moreover, this solution is perfectly integrated with lot of other security solutions like SafeNet, DualShield, Azure MFA, RADIUS server, and even Google Authenticator.
Parallels RAS
Parallels RAS and it’s remote working solutions can be life saving for your company and your employees.
4. Download the latest version available
5. Reset Citrix Receiver
If things turn for the worse and nothing seems to work, resetting the Citrix Receiver can help. Perform the above steps and you should now be able to log onto Citrix as normal.
Note that resetting does not impact the Receiver or plug-in installation, per-machine ICA lockdown settings, or GPOs. However, accounts, apps delivered by the Self-Service plug-in, along with cached files and saved passwords are all removed.
Uninstalling with the receiver cleanup utility and then reinstalling is also described as a potential solution. Just give it a go when all other fixes failed.
While each user has different expectations, this guide will provide you with a good overview of what you can do when you’re unable to launch Citrix Receiver in Windows 10.
Do you have any ideas or tips to make Citrix Receiver work properly? Drop a comment below and let us know your thoughts.
Restoro has been downloaded by 0 readers this month.
Источник
Citrix: после обновления Windows 10 Receiver не открывается
Мы подключаемся к веб-сайту SaaS, который использует Citrix XenApp 6.5. Нам представлен список приложений, которые запускаются с использованием Citrix Receiver. Это работало нормально на моем ПК, пока я не обновил Windows 10 Anniversary Update. Теперь, когда я нажимаю на любое из доступных приложений на веб-сайте и открываю файл ICA, ничего не происходит. Он изолирован только от этого ПК.
Я попытался удалить Citrix с помощью утилиты очистки приемника и переустановить Citrix Receiver версии 14.4.1000.16. и получить тот же результат. Я не могу вернуться с помощью восстановления системы, потому что точка восстановления до обновления больше не доступна.
1 ответ 1
Извините за поздний ответ, но у меня есть решение для вас. Это касается именно вашей проблемы и любых других программ, которые ломаются после выполнения Windows 10 «крупного обновления / обновления ОС».
Пакеты обновлений Windows 10 / Обновления (Anniversary, Creator и т.д.) Представляют собой более или менее обновления ОС и создают папку Windows.old, перемещают туда папку «Пользователи» и «Windows», обновляют ОС и при нормальных обстоятельствах должны двигаться назад. ваша папка Users и все, что нужно из резервной копии папки Windows.
Что происходит, я считаю, что ваш профиль находится в подвешенном состоянии или осиротел или что-то в этом роде. Некоторые из ваших данных могут быть связаны с папкой C:windows.oldusers в качестве примера.
Мое исправление: создать новый профиль.
У меня был домашний пользователь, который принес свой ноутбук, который мог войти в Citrix до недавнего обновления в прошлом месяце. Я создал новый профиль, и Citrix снова работает правильно. ее документы и рабочий стол не были перемещены назад и были связаны с папкой C:windows.oldusers. Я предполагаю, что ее папка Appdata, а также информация о ее реестре также хранились там, и хотя я уверен, что есть способ это исправить, но в то время мне было проще создать новый профиль.
Конечно, вы также можете просто сделать резервную копию ваших данных и перезагрузить Windows 10. Если бы это случилось с моим компьютером, я бы сделал это, потому что я не доверял бы ОС на тот момент. Тем не менее, создать новый профиль проще, и если у вас есть время, вы, вероятно, могли бы выяснить, почему и как исправить проблему с привязкой профиля, если создание новой учетной записи / профиля не вариант.
Источник
Не устанавливается citrix receiver на windows 10
Купите ОСАГО онлайн
Простое оформление за 5 минут
Купите ОСАГО онлайн
Простое оформление за 5 минут
Путешествуйте по России и миру
c туристическим полисом
Путешествуйте с комфортом
Год онлайн-консультаций
врачей и психологов за 1800 рублей
Врачи онлайн за 1800 рублей
Антикризисное предложение
опытным агентам
Антикризисное предложение
опытным агентам
Страхование от несчастных случаев
Защитите себя и своих близких
на случай непредвиденных ситуаций
Страхование от несчастных случаев
Добровольное медицинское
страхование
Сохраните здоровье вместе с РЕСО-Гарантия
Добровольное медицинское страхование
АГЕНТ РЯДОМ – найдите своего страхового консультанта
Мы ищем агентов рядом с вами на основе геоданных. Чтобы воспользоваться сервисом, разрешите нам отслеживать ваше местонахождение.
Лента новостей
Здоровье сотрудников университета путей сообщения в Санкт-Петербурге под защитой РЕСО-Гарантия
Изменения в графике работы Центра выплат в Москве на период с 28 октября по 8 ноября
РЕСО-Гарантия выплатила более 5 млн рублей за разобранный автомобиль
Отслеживайте статус страхового случая в приложении РЕСО Мобайл
Автострахование от РЕСО-Гарантия
РЕСО-Гарантия © – универсальная страховая компания. В числе наших приоритетов автострахование (как автоКАСКО, так и страхование ОСАГО), добровольное медицинское страхование, страхование имущества (в т.ч. страхование недвижимости), страхование ответственности (в т.ч. добровольная автогражданка) и грузов. Для определения стоимости страховых полисов на калькуляторах сайта вы можете произвести расчет КАСКО (страхование рисков «Хищение», «Ущерб»), рассчитать стоимость полиса ОСАГО и дополнительного страхования АГО, «Зеленая карта» и таких услуг, как ипотечное страхование, страхование квартиры, страхование дачи, ДМС, страхование путешественников, страхование жизни.
Источник
Если у вас возникли сложности с установкой программы Citrix Workspace, например, вы производите обновление с неподдерживаемой версии приложения Citrix Workspace или предыдущая установка или обновление завершились неудачно, в новых версиях установщика вы можете воспользоваться ключом командной строки /forceinstall.
Для этого откройте командную строку от имени администратора, перейдите в папку с инсталлятором программы и выполните установку, как показано ниже:
CitrixWorkspaceApp.exe /forceinstallКлюч /forceinstall определяет, требуется ли очистка, и в случае необходимости очищает все существующие записи конфигурации и реестра приложения Citrix Workspace в системе и повторяет попытку установки.
Если по каким-то причинам вам не удается корректно переустановить программу Citrix Workspace, вы также можете воспользоваться утилитой Receiver Clean-Up. Утилита представляет собой отдельный исполняемый файл и не требует установки.
Скачать утилиту вы можете здесь.
Хотя утилита очистки создаст резервную копию ключей реестра перед их удалением, рекомендуется самостоятельно сделать резервную копию реестра перед запуском этого инструмента.
Требования:
Утилита очистки Receiver Clean-Up не поддерживает пользователей без прав администратора с перемещаемым профилем.
Для корректной работы утилиты Receiver Clean-Up требуется полный доступ к следующим разделам реестра и папкам:
- Реестр локального компьютера (HKLM)
- Локальный реестр пользователей (HKCU)
- Профиль пользователя по умолчанию на компьютере
- Папка %programfiles%citrix в 32-разрядных системах или %programfiles(x86)%citrix в 64-разрядных системах
Порядок действий:
- Запустите утилиту очистки Receiver Clean-Up с правами администратора.
- Перезагрузите компьютер после завершения работы утилиты.
Примечание. При желании утилиту очистки можно запустить в автоматическом режиме с помощью параметра командной строки /silent.
ReceiverCleanupUtility.exe /silentПримечание: Если программа Citrix Workspace не установлена в папке по умолчанию, утилита очистки Receiver Clean-Up может работать неправильно.
Результат работы утилиты Receiver Clean-Up можно найти в папке ReceiverLogs, которая создается в том месте, где запущена утилита. Там же находится резервная копия ключей реестра программы Citrix Receiver.