by Milan Stanojevic
Milan has been enthusiastic about technology ever since his childhood days, and this led him to take interest in all PC-related technologies. He’s a PC enthusiast and he… read more
Updated on April 26, 2022
- The Extract error writing to file message appears when installing certain software, preventing you to finish the installation.
- You will see that the Extract error writing to file in Windows 10 can be triggered by a Windows Installer bug.
- One way of fixing the Error writing file is to tweak the Windows Installer service using a line-command tool.
- It’s also important to know that you can fix this issue using the chkdsk command.

XINSTALL BY CLICKING THE DOWNLOAD FILE
This software will repair common computer errors, protect you from file loss, malware, hardware failure and optimize your PC for maximum performance. Fix PC issues and remove viruses now in 3 easy steps:
- Download Restoro PC Repair Tool that comes with Patented Technologies (patent available here).
- Click Start Scan to find Windows issues that could be causing PC problems.
- Click Repair All to fix issues affecting your computer’s security and performance
- Restoro has been downloaded by 0 readers this month.
Computer errors can occur from time to time, and sooner or later you’ll experience an error on your Windows 10 PC.
Users reported Error writing to file error message while installing certain software, and since this error can prevent you from installing new applications, it’s crucial to know how to properly fix it.
In this comprehensive article, you will learn how to fix the Error writing to file for all the Windows 10 apps.
How can I fix error writing to file alerts?
1. Fix – Error writing to file
1. Register Windows Installer service
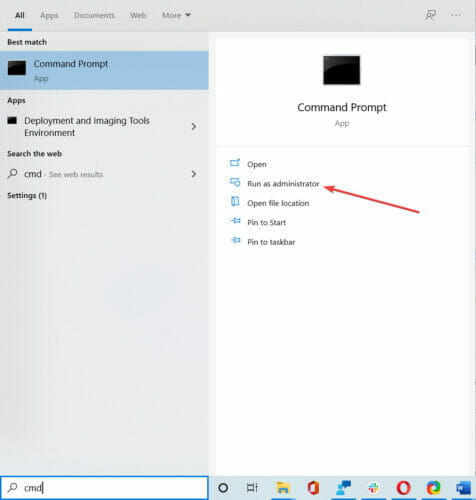
- Type cmd in the search tab and click on Run as administrator under Command Prompt to start it with full privileges.
- When Command Prompt opens, enter the following lines:
msiexec /unregistermsiexec /regserver
- After both commands are successfully executed, close Command Prompt.
If you’re trying to install new software on your PC, you’ll have to use Windows Installer service.
This service is crucial for the installation process, but sometimes this service can become unregistered and prevent new applications from installing.
To fix this problem, you need to register the Windows Installer service manually.
By running these commands you’ll manually unregister and reregister the Windows Installer service, and hopefully, that will fix this error for you.
If you can’t access the Windows Installer, we have an excellent guide that will help you fix the problem.
2. Run the chkdsk command
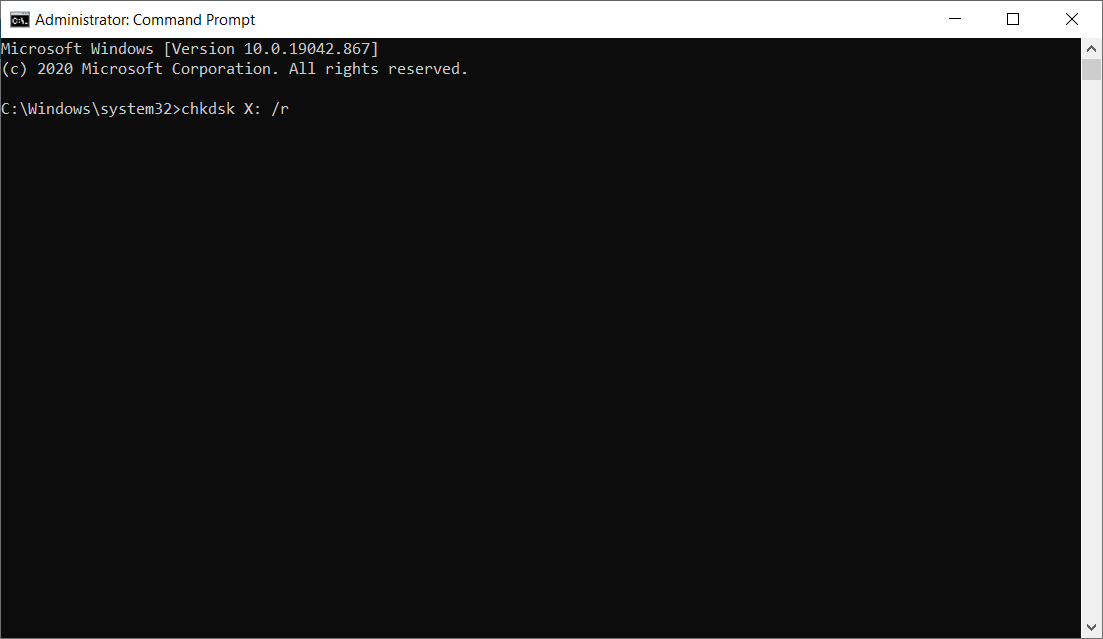
- Open Command Prompt as administrator as shown in the previous step.
- When Command Prompt opens, enter chkdsk X: /r and press Enter (Be sure to replace X with the letter that matches your hard drive partition that you’re to installing the application to).
- If you’re trying to scan your system partition you’ll have to schedule a restart and scan your partition before Windows 10 starts.
- If you’re trying to scan your system partition you’ll have to schedule a restart and scan your partition before Windows 10 starts.
- After the scan is completed, try to run the installation process again.
Sometimes Error writing to file message can appear if you have corrupt files that are interfering with the installation process.
One way to fix this problem is to perform a chkdsk scan and scan your hard drive partition for any corrupt files.
If chkdsk gets stuck follow this comprehensive guide to fix it quickly and continue with this fix.
3. Rename com.Apple.Outlook.client.resources folder
Users reported this error message while trying to install iTunes on their PC, and one way to fix this problem is to rename one of your folders.
According to users, com.Apple.Outlook.client.resources folder can cause this error to appear, therefore in order to fix this problem, you need to find this folder and rename it to com.Apple.Outlook.client.resources_OLD.
After renaming the folder, try to perform the installation again and check if your problem is resolved.
4. Perform a Clean boot
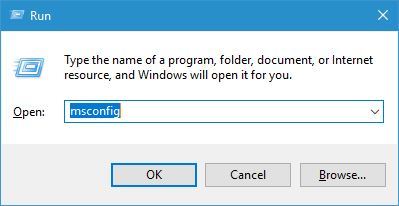
- Press Windows Key + R and enter msconfig. Press Enter or click OK.
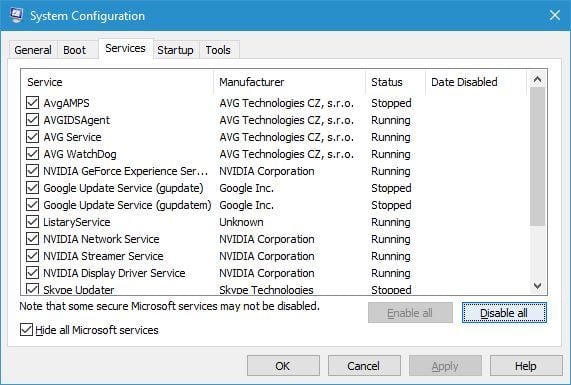
- When System Configuration window opens, go to Services tab.
- Check Hide all Microsoft services and then click on Disable all.
- Now go to Startup tab and click Open Task Manager.
- Task Manager will now open.
- In Startup tab, disable all startup applications. You can do that by right clicking the startup item and choosing Disable from the menu (Repeat this process for all startup applications).

- After all startup items are disabled, close Task Manager.
- Go back to System Configuration window and click Apply and OK to save the changes.
- Restart your PC.
Sometimes Error writing to file messages can appear due to installing third-party applications. Certain applications and services can interfere with the setup process and cause this error to appear on your PC.
One way to fix this problem is to disable all startup applications and processes.
After your PC restarts, try to install the application again. If the application manages to install without any errors, repeat the same steps and enable all startup applications and services.
5. Change the security permissions for the ProgramData folder
5.1 Change the owner of the folder
- Open File Explorer and navigate to C:.
- Locate the ProgramData folder.
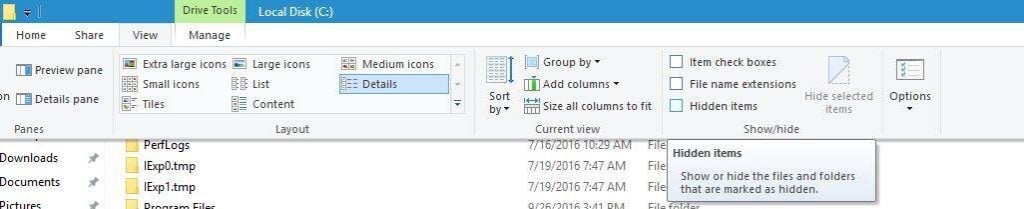
- If you can’t see this folder, go to View tab and check Hidden items checkbox.
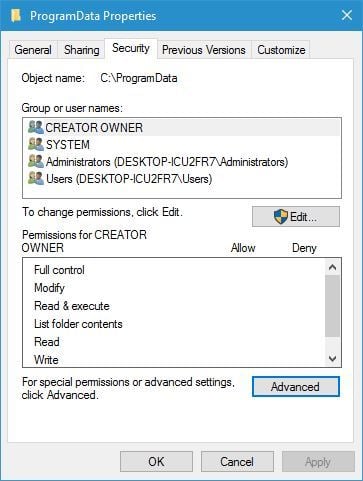
- Right-click the ProgramData folder and choose Properties.
- Go to the Security tab and click on Advanced button.
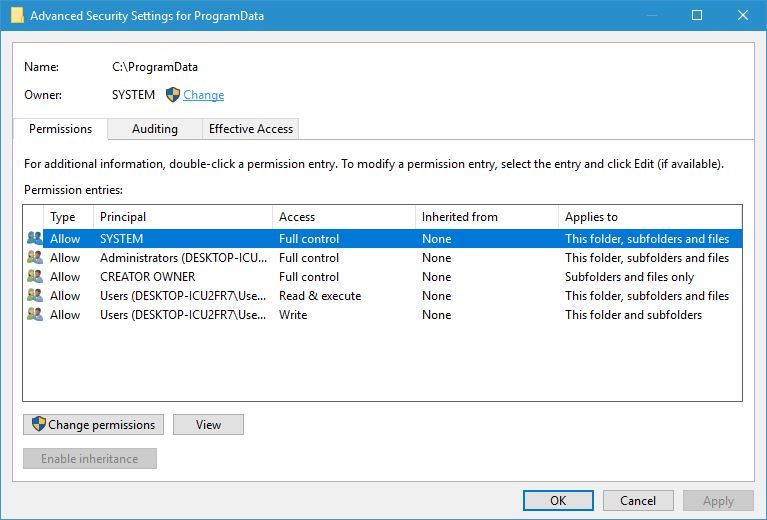
- Click the Change link next to the Owner name.
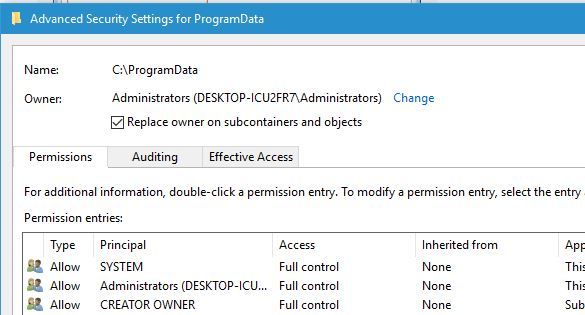
- In Enter the object name to select enter Administrators and click Check names. If everything is in order, click OK to save changes.

- Select the Replace the owner on subcontainers and objects.
- Click Apply and OK to save the changes.
Some applications rely on the ProgramData folder for their installation, and if you don’t have the necessary privileges to access this folder, you might get Error writing to file message.
To fix this problem, you need to change the security permissions, but since that is an advanced process, we strongly recommend that you create a System Restore point before making any security-related changes.
5.2 Change the permissions from the Advanced security settings
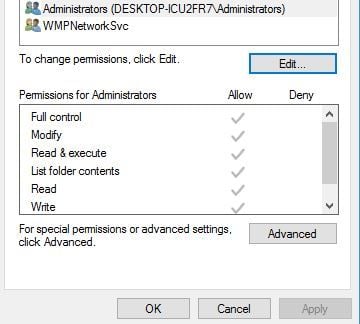
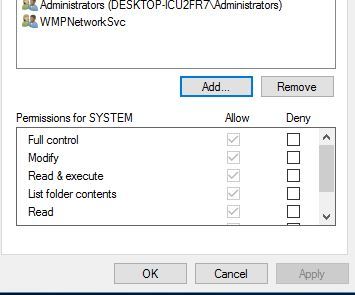
- When Advanced Security Settings window opens check if SYSTEM and Administrators group have Full control access.
- If one of the groups is missing, be sure to add it by clicking the Add button.
- In case any of the two groups doesn’t have Full control, you can simply change that by double-clicking the group and checking the Full control option.
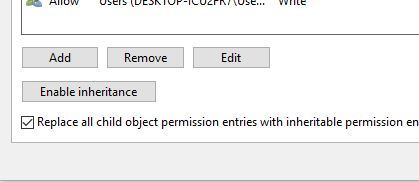
- Check Replace all child object permissions entries with inheritable permissions entries from this object and click Apply and OK.
- After that, try to reinstall the application again.
Another way to change the permissions of a specific folder is to use Command Prompt. This is a faster, although a bit more advanced method, therefore use it with extra caution.
To do that, open Command Prompt as administrator, enter the following command, and press Enter: icacls "C:Config.Msi" /T /C /grant administrators:F
This is just an example, therefore be sure to replace C:Config.Msi with the path of the folder that you’re trying to modify.
Although we showed you how to change the permissions of the ProgramData folder in our example, sometimes in order to fix this problem you need to change the permissions of the installation directory instead.
6. Rename the Config.msi folder
Sometimes, certain Adobe applications can’t be installed on your PC due to the Config.Msi folder. One of the simplest ways to fix this is to locate the Config.Msi folder and rename it.
By default, this folder should be located in the C: directory, and you can easily rename it. If you can’t rename the folder, you have to change the permission settings for the Config.Msi folder and try again.
7. Run the setup file as administrator
You can fix the Error writing to file error message simply by running the installation process as an administrator. To do that, right-click the setup file and choose Run as administrator from the menu.
This isn’t a permanent solution, but it should allow you to install the desired application without any errors.
- FIX: Error opening file for writing in Windows 10
- Time Synchronization Failed with time.windows.com: 4 Fixes
- Werfault.exe Error on Windows 10: How to Fix & Main Causes
- Fix: Windows Cannot Access the Specified Device, Path or File
8. Disable McAfee’s EPO agent
McAfee tools such as McAfee EPO agent can sometimes interfere with the installation process and cause this error to appear.
According to users, McAfee EPO agent has the policy to block autorun, and this policy can prevent applications from installing.
After turning the McAfee EPO agent off, you should be able to install any application without problems.
9. Check your firewall
Sometimes this error can occur due to your firewall settings, and you should be able to fix it simply by changing those settings.
User reported this error while installing iTunes, and according to them, the error was caused because the QTTask.exe was prevented from accessing the Internet by the firewall.
After allowing QTTask.exe to access the Internet the issue was completely resolved.
Some PC issues are hard to tackle, especially when it comes to corrupted repositories or missing Windows files. If you are having troubles fixing an error, your system may be partially broken.
We recommend installing Restoro, a tool that will scan your machine and identify what the fault is.
Click here to download and start repairing.
This solution applies to iTunes, but if you’re installing or updating a different application, be sure to check if your firewall isn’t blocking any installation files.
10. Give Full Control permissions to the Everyone group
- Locate the Config.msi folder, right-click it and choose Properties from the menu.
- By default this folder should be located in the C: directory.
- Keep in mind that this folder might be hidden, therefore you need to enable Show hidden items option from the View tab.
- Go to Security tab and click the Edit button.
- Click the Add button.
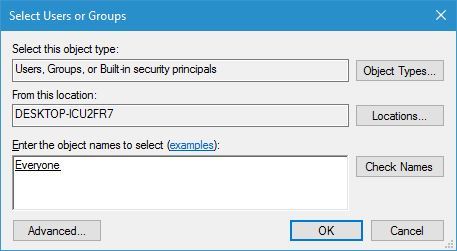
- In Enter the object names to select field enter Everyone and click Check Names. If your input is correct, click the OK button.
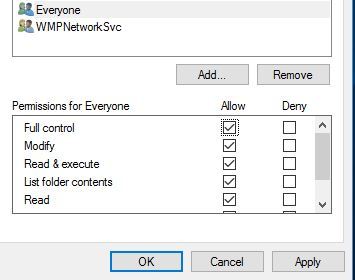
- Everyone group should now be added to the Group or user names section. Select Everyone and check Full control in the Allow column.
- Click Apply and OK to save the changes.
Users are also reporting that you can fix this problem simply by giving Full control over the Config.msi folder to Everyone on your PC. This is a simple procedure, and you can do it by following the steps above.
After changing the security permissions, try to install the application again.
11. Delete Config.msi directory
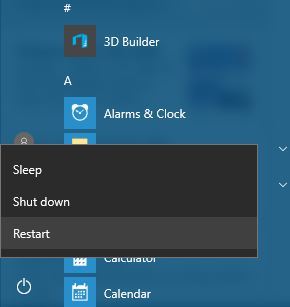
- Click the Start button, hold the Shift key on your keyboard and choose Power, then select Restart.
- When your PC restarts choose Troubleshoot, choose Advanced options and select Startup settings.
- Click the Restart button.
- When your PC restarts again you’ll see a list of options. Select any version of the Safe Mode by pressing the appropriate keyboard key.
- When Safe Mode starts, start the Command Prompt as administrator.
- When Command Prompt opens, type the following lines pressing Enter after each one:
cd c:config.msi
erase *.*
cd c:
rd config.msi
- Restart your PC and try to install iTunes again.
- If the problem still persists, create the Config.msi folder in the C: directory.
- Create the .rdf file that the installation requires in the Config.msi folder and try to install iTunes again.
- If you encounter any errors, be sure to ignore them and you should be able to install iTunes.
Few users reported that they were unable to install iTunes due to problems with Config.msi directory. One suggested a solution that worked for some users was to delete this folder from Safe Mode and recreate it.
12. Uninstall iDrive
According to users, sometimes Error writing to file message can appear if you have iDrive installed on your PC.
We don’t know how iDrive interferes with the installation process of other applications, but the only solution is to uninstall iDrive. After removing iDrive, the issue should be completely resolved.
You can, of course, do it manually from the Apps & features function in Windows 10.
But sometimes, programs don’t get uninstalled properly and you’re left with file remains that might interfere with the next installation of the same program.
The solution is to use a dedicated uninstaller tool that will do that automatically. To find the most suitable one for your needs, we advise you to pick from the best uninstaller software on Windows 10.
13. Disable Kaspersky antivirus and Memeo Instant Backup
Users reported this error while installing the MySQL workbench tool, and according to them, the issue was caused by Kaspersky antivirus and Memeo Instant Backup.
According to them, after disabling these tools the error was completely resolved. Keep in mind that any other antivirus or backup tool can cause this error to appear, therefore be sure to disable it temporarily.
Users also reported issues with Webroot antivirus, so if you have it installed be sure to temporarily disable it and check if that solves the problem.
14. Turn off User Account Control
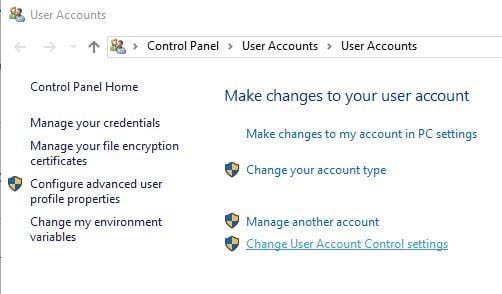
- Press Windows Key + S and enter user accounts. Select User Accounts from the menu.
- When User Accounts window opens, go to Change User Account Control settings.
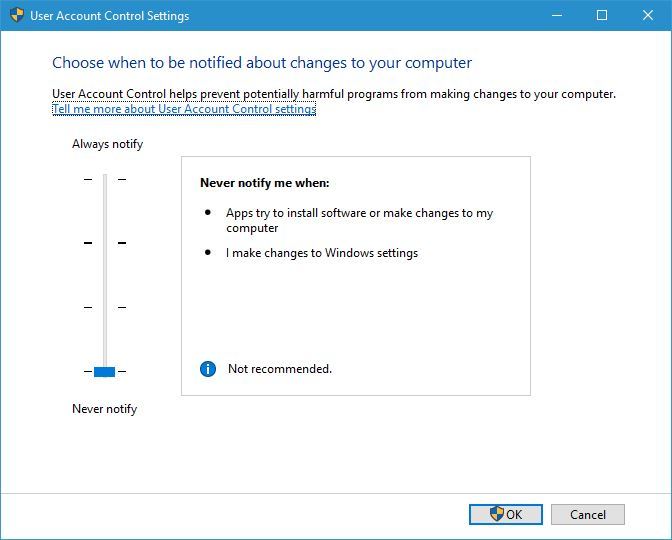
- Move the slider all the way down to Never notify and click OK to save changes.
- After disabling User Account Control restart your PC and check if the problem is resolved.
User Account Control is a security feature that will alert you whenever you try to make a change that requires administrator privileges.
This is a useful feature that can sometimes protect you from malicious software that tries to make changes to your PC without your knowledge.
Even though this feature can be useful, it can also interfere with the installation process and cause Error writing to file message to appear.
15. Change the Symantec Endpoint Protection settings
- Open Symantec Endpoint Protection.
- On the left side click the Change Settings tab.
- Click the Configure Settings button in the Client Management section.
- Locate and disable Enable Application and Device Control option.
According to users, sometimes Symantec Endpoint Protection can interfere with the installation process and cause this and other errors to appear. To fix this problem, you need to perform the quick steps above.
2. Fix – Error writing to file for android-sdk.7z
1. Install Java Development Kit
Users reported this error while trying to install Android SDK on their Windows 10 PC. Apparently, this error is caused because the Java Development Kit is missing.
And the fastest way to fix this problem is to download the Java Development Kit. After downloading it, simply install it and the problem should be completely resolved.
2. Run the setup as administrator and disable your firewall
According to users, you can fix this problem simply by running the setup file as the administrator. If that doesn’t help, you might have to temporarily disable your antivirus and firewall and check if that solves the issue.
If the problem still persists, you might have to completely remove your antivirus software. Users reported that the issue was resolved after removing McAfee antivirus, therefore be sure to try that.
Fix – Error writing to file for 3DS Max
1. Turn off the Compression on Save option
According to users, this error appears when you try to save your file in 3DS Max, and one suggests that the workaround is to disable the Compress on Save option in Preferences.
After disabling this option, the error will not appear anymore, but your files will get larger in size without compression, so keep that in mind.
Users also reported that this error appears if you have more than two instances of 3DS Max open, therefore as long as you have less than 3 instances of this application running, you shouldn’t have any problems.
3. Fix – Error writing to file for Adobe Acrobat
1. Rename the Active X folder
Users reported Error writing to file message while trying to install Adobe Acrobat, and according to them, they managed to resolve this issue simply by renaming the Active X folder.
After renaming the folder to Active X_OLD, create a new Active X folder and copy the files from Active X_OLD folder to the new Active X folder that you created. After doing that, try to install Adobe Acrobat again.
Some users are also suggesting renaming the Acrobat folder to something else and try to install Adobe Acrobat again, so you might want to do that as well.
2. Delete the Apricot folder
Few users reported that they managed to fix this problem simply by going to the Adobe folder: C:ProgramDataAdobe
You should see Apricot and two other folders available. Delete them and try to install Adobe Acrobat as administrator.
3. Use a dedicated software to fix the Registry
Users reported that they managed to fix Error writing to file error while installing Adobe Acrobat simply by running a third-party solution.
Using the dedicated solution recommended below they removed problematic registry entries and that solved the problem for them.
⇒ Get CCleaner
The Error writing to file message can prevent you from installing certain applications, but in most cases, you can fix this problem by disabling your antivirus or by changing your security permissions.
If those solutions don’t work, feel free to try any other solution from this article. Also, if you have any other suggestions, don’t hesitate to write them in the comments section below.
![]()
Newsletter
by Milan Stanojevic
Milan has been enthusiastic about technology ever since his childhood days, and this led him to take interest in all PC-related technologies. He’s a PC enthusiast and he… read more
Updated on April 26, 2022
- The Extract error writing to file message appears when installing certain software, preventing you to finish the installation.
- You will see that the Extract error writing to file in Windows 10 can be triggered by a Windows Installer bug.
- One way of fixing the Error writing file is to tweak the Windows Installer service using a line-command tool.
- It’s also important to know that you can fix this issue using the chkdsk command.
XINSTALL BY CLICKING THE DOWNLOAD FILE
This software will repair common computer errors, protect you from file loss, malware, hardware failure and optimize your PC for maximum performance. Fix PC issues and remove viruses now in 3 easy steps:
- Download Restoro PC Repair Tool that comes with Patented Technologies (patent available here).
- Click Start Scan to find Windows issues that could be causing PC problems.
- Click Repair All to fix issues affecting your computer’s security and performance
- Restoro has been downloaded by 0 readers this month.
Computer errors can occur from time to time, and sooner or later you’ll experience an error on your Windows 10 PC.
Users reported Error writing to file error message while installing certain software, and since this error can prevent you from installing new applications, it’s crucial to know how to properly fix it.
In this comprehensive article, you will learn how to fix the Error writing to file for all the Windows 10 apps.
How can I fix error writing to file alerts?
1. Fix – Error writing to file
1. Register Windows Installer service
- Type cmd in the search tab and click on Run as administrator under Command Prompt to start it with full privileges.
- When Command Prompt opens, enter the following lines:
msiexec /unregistermsiexec /regserver
- After both commands are successfully executed, close Command Prompt.
If you’re trying to install new software on your PC, you’ll have to use Windows Installer service.
This service is crucial for the installation process, but sometimes this service can become unregistered and prevent new applications from installing.
To fix this problem, you need to register the Windows Installer service manually.
By running these commands you’ll manually unregister and reregister the Windows Installer service, and hopefully, that will fix this error for you.
If you can’t access the Windows Installer, we have an excellent guide that will help you fix the problem.
2. Run the chkdsk command
- Open Command Prompt as administrator as shown in the previous step.
- When Command Prompt opens, enter chkdsk X: /r and press Enter (Be sure to replace X with the letter that matches your hard drive partition that you’re to installing the application to).
- If you’re trying to scan your system partition you’ll have to schedule a restart and scan your partition before Windows 10 starts.
- If you’re trying to scan your system partition you’ll have to schedule a restart and scan your partition before Windows 10 starts.
- After the scan is completed, try to run the installation process again.
Sometimes Error writing to file message can appear if you have corrupt files that are interfering with the installation process.
One way to fix this problem is to perform a chkdsk scan and scan your hard drive partition for any corrupt files.
If chkdsk gets stuck follow this comprehensive guide to fix it quickly and continue with this fix.
3. Rename com.Apple.Outlook.client.resources folder
Users reported this error message while trying to install iTunes on their PC, and one way to fix this problem is to rename one of your folders.
According to users, com.Apple.Outlook.client.resources folder can cause this error to appear, therefore in order to fix this problem, you need to find this folder and rename it to com.Apple.Outlook.client.resources_OLD.
After renaming the folder, try to perform the installation again and check if your problem is resolved.
4. Perform a Clean boot
- Press Windows Key + R and enter msconfig. Press Enter or click OK.
- When System Configuration window opens, go to Services tab.
- Check Hide all Microsoft services and then click on Disable all.
- Now go to Startup tab and click Open Task Manager.
- Task Manager will now open.
- In Startup tab, disable all startup applications. You can do that by right clicking the startup item and choosing Disable from the menu (Repeat this process for all startup applications).
- After all startup items are disabled, close Task Manager.
- Go back to System Configuration window and click Apply and OK to save the changes.
- Restart your PC.
Sometimes Error writing to file messages can appear due to installing third-party applications. Certain applications and services can interfere with the setup process and cause this error to appear on your PC.
One way to fix this problem is to disable all startup applications and processes.
After your PC restarts, try to install the application again. If the application manages to install without any errors, repeat the same steps and enable all startup applications and services.
5. Change the security permissions for the ProgramData folder
5.1 Change the owner of the folder
- Open File Explorer and navigate to C:.
- Locate the ProgramData folder.
- If you can’t see this folder, go to View tab and check Hidden items checkbox.
- Right-click the ProgramData folder and choose Properties.
- Go to the Security tab and click on Advanced button.
- Click the Change link next to the Owner name.
- In Enter the object name to select enter Administrators and click Check names. If everything is in order, click OK to save changes.
- Select the Replace the owner on subcontainers and objects.
- Click Apply and OK to save the changes.
Some applications rely on the ProgramData folder for their installation, and if you don’t have the necessary privileges to access this folder, you might get Error writing to file message.
To fix this problem, you need to change the security permissions, but since that is an advanced process, we strongly recommend that you create a System Restore point before making any security-related changes.
5.2 Change the permissions from the Advanced security settings
- When Advanced Security Settings window opens check if SYSTEM and Administrators group have Full control access.
- If one of the groups is missing, be sure to add it by clicking the Add button.
- In case any of the two groups doesn’t have Full control, you can simply change that by double-clicking the group and checking the Full control option.
- Check Replace all child object permissions entries with inheritable permissions entries from this object and click Apply and OK.
- After that, try to reinstall the application again.
Another way to change the permissions of a specific folder is to use Command Prompt. This is a faster, although a bit more advanced method, therefore use it with extra caution.
To do that, open Command Prompt as administrator, enter the following command, and press Enter: icacls "C:Config.Msi" /T /C /grant administrators:F
This is just an example, therefore be sure to replace C:Config.Msi with the path of the folder that you’re trying to modify.
Although we showed you how to change the permissions of the ProgramData folder in our example, sometimes in order to fix this problem you need to change the permissions of the installation directory instead.
6. Rename the Config.msi folder
Sometimes, certain Adobe applications can’t be installed on your PC due to the Config.Msi folder. One of the simplest ways to fix this is to locate the Config.Msi folder and rename it.
By default, this folder should be located in the C: directory, and you can easily rename it. If you can’t rename the folder, you have to change the permission settings for the Config.Msi folder and try again.
7. Run the setup file as administrator
You can fix the Error writing to file error message simply by running the installation process as an administrator. To do that, right-click the setup file and choose Run as administrator from the menu.
This isn’t a permanent solution, but it should allow you to install the desired application without any errors.
- FIX: Error opening file for writing in Windows 10
- Time Synchronization Failed with time.windows.com: 4 Fixes
- Werfault.exe Error on Windows 10: How to Fix & Main Causes
- Fix: Windows Cannot Access the Specified Device, Path or File
- Driver PNP Watchdog: 9 Easy Fixes For Windows
8. Disable McAfee’s EPO agent
McAfee tools such as McAfee EPO agent can sometimes interfere with the installation process and cause this error to appear.
According to users, McAfee EPO agent has the policy to block autorun, and this policy can prevent applications from installing.
After turning the McAfee EPO agent off, you should be able to install any application without problems.
9. Check your firewall
Sometimes this error can occur due to your firewall settings, and you should be able to fix it simply by changing those settings.
User reported this error while installing iTunes, and according to them, the error was caused because the QTTask.exe was prevented from accessing the Internet by the firewall.
After allowing QTTask.exe to access the Internet the issue was completely resolved.
Some PC issues are hard to tackle, especially when it comes to corrupted repositories or missing Windows files. If you are having troubles fixing an error, your system may be partially broken.
We recommend installing Restoro, a tool that will scan your machine and identify what the fault is.
Click here to download and start repairing.
This solution applies to iTunes, but if you’re installing or updating a different application, be sure to check if your firewall isn’t blocking any installation files.
10. Give Full Control permissions to the Everyone group
- Locate the Config.msi folder, right-click it and choose Properties from the menu.
- By default this folder should be located in the C: directory.
- Keep in mind that this folder might be hidden, therefore you need to enable Show hidden items option from the View tab.
- Go to Security tab and click the Edit button.
- Click the Add button.
- In Enter the object names to select field enter Everyone and click Check Names. If your input is correct, click the OK button.
- Everyone group should now be added to the Group or user names section. Select Everyone and check Full control in the Allow column.
- Click Apply and OK to save the changes.
Users are also reporting that you can fix this problem simply by giving Full control over the Config.msi folder to Everyone on your PC. This is a simple procedure, and you can do it by following the steps above.
After changing the security permissions, try to install the application again.
11. Delete Config.msi directory
- Click the Start button, hold the Shift key on your keyboard and choose Power, then select Restart.
- When your PC restarts choose Troubleshoot, choose Advanced options and select Startup settings.
- Click the Restart button.
- When your PC restarts again you’ll see a list of options. Select any version of the Safe Mode by pressing the appropriate keyboard key.
- When Safe Mode starts, start the Command Prompt as administrator.
- When Command Prompt opens, type the following lines pressing Enter after each one:
cd c:config.msi
erase *.*
cd c:
rd config.msi
- Restart your PC and try to install iTunes again.
- If the problem still persists, create the Config.msi folder in the C: directory.
- Create the .rdf file that the installation requires in the Config.msi folder and try to install iTunes again.
- If you encounter any errors, be sure to ignore them and you should be able to install iTunes.
Few users reported that they were unable to install iTunes due to problems with Config.msi directory. One suggested a solution that worked for some users was to delete this folder from Safe Mode and recreate it.
12. Uninstall iDrive
According to users, sometimes Error writing to file message can appear if you have iDrive installed on your PC.
We don’t know how iDrive interferes with the installation process of other applications, but the only solution is to uninstall iDrive. After removing iDrive, the issue should be completely resolved.
You can, of course, do it manually from the Apps & features function in Windows 10.
But sometimes, programs don’t get uninstalled properly and you’re left with file remains that might interfere with the next installation of the same program.
The solution is to use a dedicated uninstaller tool that will do that automatically. To find the most suitable one for your needs, we advise you to pick from the best uninstaller software on Windows 10.
13. Disable Kaspersky antivirus and Memeo Instant Backup
Users reported this error while installing the MySQL workbench tool, and according to them, the issue was caused by Kaspersky antivirus and Memeo Instant Backup.
According to them, after disabling these tools the error was completely resolved. Keep in mind that any other antivirus or backup tool can cause this error to appear, therefore be sure to disable it temporarily.
Users also reported issues with Webroot antivirus, so if you have it installed be sure to temporarily disable it and check if that solves the problem.
14. Turn off User Account Control
- Press Windows Key + S and enter user accounts. Select User Accounts from the menu.
- When User Accounts window opens, go to Change User Account Control settings.
- Move the slider all the way down to Never notify and click OK to save changes.
- After disabling User Account Control restart your PC and check if the problem is resolved.
User Account Control is a security feature that will alert you whenever you try to make a change that requires administrator privileges.
This is a useful feature that can sometimes protect you from malicious software that tries to make changes to your PC without your knowledge.
Even though this feature can be useful, it can also interfere with the installation process and cause Error writing to file message to appear.
15. Change the Symantec Endpoint Protection settings
- Open Symantec Endpoint Protection.
- On the left side click the Change Settings tab.
- Click the Configure Settings button in the Client Management section.
- Locate and disable Enable Application and Device Control option.
According to users, sometimes Symantec Endpoint Protection can interfere with the installation process and cause this and other errors to appear. To fix this problem, you need to perform the quick steps above.
2. Fix – Error writing to file for android-sdk.7z
1. Install Java Development Kit
Users reported this error while trying to install Android SDK on their Windows 10 PC. Apparently, this error is caused because the Java Development Kit is missing.
And the fastest way to fix this problem is to download the Java Development Kit. After downloading it, simply install it and the problem should be completely resolved.
2. Run the setup as administrator and disable your firewall
According to users, you can fix this problem simply by running the setup file as the administrator. If that doesn’t help, you might have to temporarily disable your antivirus and firewall and check if that solves the issue.
If the problem still persists, you might have to completely remove your antivirus software. Users reported that the issue was resolved after removing McAfee antivirus, therefore be sure to try that.
Fix – Error writing to file for 3DS Max
1. Turn off the Compression on Save option
According to users, this error appears when you try to save your file in 3DS Max, and one suggests that the workaround is to disable the Compress on Save option in Preferences.
After disabling this option, the error will not appear anymore, but your files will get larger in size without compression, so keep that in mind.
Users also reported that this error appears if you have more than two instances of 3DS Max open, therefore as long as you have less than 3 instances of this application running, you shouldn’t have any problems.
3. Fix – Error writing to file for Adobe Acrobat
1. Rename the Active X folder
Users reported Error writing to file message while trying to install Adobe Acrobat, and according to them, they managed to resolve this issue simply by renaming the Active X folder.
After renaming the folder to Active X_OLD, create a new Active X folder and copy the files from Active X_OLD folder to the new Active X folder that you created. After doing that, try to install Adobe Acrobat again.
Some users are also suggesting renaming the Acrobat folder to something else and try to install Adobe Acrobat again, so you might want to do that as well.
2. Delete the Apricot folder
Few users reported that they managed to fix this problem simply by going to the Adobe folder: C:ProgramDataAdobe
You should see Apricot and two other folders available. Delete them and try to install Adobe Acrobat as administrator.
3. Use a dedicated software to fix the Registry
Users reported that they managed to fix Error writing to file error while installing Adobe Acrobat simply by running a third-party solution.
Using the dedicated solution recommended below they removed problematic registry entries and that solved the problem for them.
⇒ Get CCleaner
The Error writing to file message can prevent you from installing certain applications, but in most cases, you can fix this problem by disabling your antivirus or by changing your security permissions.
If those solutions don’t work, feel free to try any other solution from this article. Also, if you have any other suggestions, don’t hesitate to write them in the comments section below.
![]()
Newsletter
-
Этот сайт использует файлы cookie. Продолжая пользоваться данным сайтом, Вы соглашаетесь на использование нами Ваших файлов cookie. Узнать больше.
Извлечение:Ошибка записи файла ( Что делать ? )
Тема в разделе «Архив», создана пользователем ROker21, 15 фев 2018.
- Статус темы:
-
Закрыта.
- Статус темы:
-
Закрыта.
Время от времени могут возникать компьютерные ошибки, и рано или поздно вы столкнетесь с ошибкой на вашем компьютере с Windows 10. Пользователи сообщали об ошибке записи в файл сообщения об ошибке при установке определенного программного обеспечения, и, поскольку эта ошибка может помешать установке новых приложений, важно знать, как правильно ее исправить.
Как исправить ошибку записи в файл предупреждений
Исправлено — Ошибка записи в файл
Решение 1. Зарегистрируйте службу установщика Windows.
Если вы пытаетесь установить новое программное обеспечение на свой компьютер, вам придется использовать службу установщика Windows. Эта служба имеет решающее значение для процесса установки, но иногда эта служба может стать незарегистрированной и препятствовать установке новых приложений.
Чтобы решить эту проблему, вам необходимо зарегистрировать службу установщика Windows вручную. Это довольно простая процедура, и для этого вам нужно выполнить следующие шаги:
- Нажмите Windows Key + X, чтобы открыть меню Win + X и выберите Командная строка (Admin).

- Когда откроется командная строка, введите следующие строки:
- msiexec / unregister
- msiexec / regserver
- После успешного выполнения обеих команд закройте командную строку.
Выполнив эти команды, вы вручную отмените регистрацию и перерегистрацию службы установщика Windows, и, надеюсь, это исправит эту ошибку.
Решение 2. Запустите команду chkdsk
Иногда сообщение об ошибке записи в файл может появиться, если у вас есть поврежденные файлы, которые мешают процессу установки. Одним из способов решения этой проблемы является сканирование chkdsk и сканирование раздела жесткого диска на наличие поврежденных файлов.
Для этого выполните следующие действия:
- Откройте командную строку от имени администратора.
- Когда откроется командная строка, введите chkdsk X: / r и нажмите Enter. Обязательно замените X буквой, которая соответствует разделу вашего жесткого диска, на который вы устанавливаете приложение. Если вы пытаетесь сканировать системный раздел, вам нужно запланировать перезагрузку и сканировать раздел до запуска Windows 10.
- После завершения сканирования попробуйте снова запустить процесс установки.
- Читайте также: Windows 10 ошибка 0x80073d0b блокирует перемещение игр на другой диск
Решение 3. Переименуйте папку com.Apple.Outlook.client.resources
Пользователи сообщали об этом сообщении об ошибке при попытке установить iTunes на свой компьютер, и один из способов решения этой проблемы — переименовать одну из ваших папок. По словам пользователей, папка com.Apple.Outlook.client.resources может вызвать появление этой ошибки, поэтому для решения этой проблемы вам необходимо найти эту папку и переименовать ее, например, в com.Apple.Outlook.client.resources_OLD.
После переименования папки попробуйте снова выполнить установку и проверьте, решена ли ваша проблема.
Решение 4 — Выполните Чистую загрузку
Иногда ошибка записи в файл сообщения может появиться из-за установленных сторонних приложений. Некоторые приложения и службы могут мешать процессу установки и приводить к появлению этой ошибки на вашем ПК.
Одним из способов решения этой проблемы является отключение всех запускаемых приложений и процессов. Для этого выполните следующие действия:
- Нажмите Windows Key + R и введите msconfig. Нажмите Enter или нажмите ОК.

- Когда откроется окно « Конфигурация системы», перейдите на вкладку « Службы ».
- Установите флажок Скрыть все службы Microsoft, а затем нажмите Отключить все.

- Теперь перейдите на вкладку « Автозагрузка » и нажмите « Открыть диспетчер задач».
- Диспетчер задач теперь откроется.
- На вкладке « Автозагрузка » отключите все запускаемые приложения. Вы можете сделать это, щелкнув правой кнопкой мыши по элементу автозагрузки и выбрав в меню пункт « Отключить». Повторите этот процесс для всех запускаемых приложений.

- После того, как все элементы автозагрузки отключены, закройте диспетчер задач.
- Вернитесь в окно System Configuration, нажмите Apply и OK, чтобы сохранить изменения.
- Перезагрузите компьютер.
После перезагрузки компьютера попробуйте установить приложение еще раз. Если приложение удается установить без каких-либо ошибок, повторите те же действия и включите все приложения и службы запуска.
Решение 5. Измените разрешения безопасности для папки ProgramData
Некоторые приложения используют для установки папку ProgramData, и если у вас нет необходимых прав доступа к этой папке, вы можете получить сообщение об ошибке записи в файл.
Чтобы решить эту проблему, вам необходимо изменить разрешения безопасности, но, поскольку это сложный процесс, мы настоятельно рекомендуем вам создать точку восстановления системы, прежде чем вносить какие-либо изменения, связанные с безопасностью.
Чтобы изменить разрешения безопасности для папки ProgramData, выполните следующие действия:
- Откройте проводник и перейдите к C:. Найдите папку ProgramData. Если вы не видите эту папку, перейдите на вкладку « Просмотр » и установите флажок « Скрытые элементы». Теперь найдите папку ProgramData, щелкните ее правой кнопкой мыши и выберите « Свойства».

- Перейдите на вкладку «Безопасность» и нажмите кнопку « Дополнительно».

- Нажмите на ссылку Изменить рядом с именем владельца.

- В поле Введите имя объекта выберите « Администраторы» и нажмите « Проверить имена». Если все в порядке, нажмите OK, чтобы сохранить изменения.

- Выберите Заменить владельца на субконтейнеры и объекты.

- Нажмите Apply и OK, чтобы сохранить изменения.
- Читайте также: Исправлено: ошибка «Не удается создать файл» в Windows 10
После изменения владельца снова откройте дополнительные параметры безопасности и выполните следующие действия.
- Когда откроется окно « Дополнительные параметры безопасности», проверьте, имеют ли SYSTEM и группа « Администраторы » полный доступ. Если одна из групп отсутствует, обязательно добавьте ее, нажав кнопку Добавить. В случае, если у любой из двух групп нет Полного контроля, вы можете просто изменить его, дважды щелкнув по группе и выбрав опцию Полное управление.
- Установите флажок Заменить все записи разрешений дочерних объектов на наследуемые записи разрешений этого объекта, нажмите Применить и OK.

- После этого попробуйте переустановить приложение еще раз.
Другой способ изменить разрешения для определенной папки — использовать командную строку. Это более быстрый, хотя и более продвинутый метод, поэтому используйте его с особой осторожностью. Для этого откройте командную строку от имени администратора. Когда откроется командная строка, введите icacls «C: Config.Msi» / T / C / grant администраторы: F и нажмите Enter.
Это всего лишь пример, поэтому обязательно замените C: Config.Msi на путь к папке, которую вы пытаетесь изменить.
Несмотря на то, что в нашем примере мы показали, как изменить разрешения для папки ProgramData, иногда для того, чтобы решить эту проблему, вместо этого необходимо изменить разрешения для каталога установки.
Решение 6 — Переименуйте папку Config.msi
Иногда некоторые приложения Adobe не могут быть установлены на вашем компьютере из-за папки Config.Msi. Один из самых простых способов исправить это — найти папку Config.Msi и переименовать ее. По умолчанию эта папка должна находиться в каталоге C:, и вы можете легко переименовать ее.
Если вы не можете переименовать папку, вам нужно изменить настройки разрешений для папки Config.Msi и повторить попытку.
- Читайте также: Исправлено: ошибка Xbox при входе
Решение 7. Запустите установочный файл от имени администратора.
Вы можете исправить сообщение об ошибке записи в файл, просто запустив процесс установки от имени администратора. Для этого щелкните правой кнопкой мыши файл установки и в меню выберите « Запуск от имени администратора». Это не постоянное решение, но оно должно позволить вам установить желаемое приложение без каких-либо ошибок.
Решение 8 — Отключить агент ЕРО McAfee
Такие инструменты McAfee, как агент McAfee EPO, могут иногда мешать процессу установки и приводить к появлению этой ошибки. По словам пользователей, агент McAfee EPO имеет политику блокирования автозапуска, и эта политика может препятствовать установке приложений.
После отключения агента McAfee EPO вы сможете без проблем установить любое приложение.
Решение 9 — Проверьте ваш брандмауэр
Иногда эта ошибка может возникать из-за настроек брандмауэра, и вы сможете исправить ее, просто изменив эти настройки. Пользователь сообщил об этой ошибке при установке iTunes, и, по их словам, ошибка была вызвана тем, что брандмауэр не позволил QTTask.exe получить доступ к Интернету.
После разрешения доступа QTTask.exe к Интернету проблема была полностью решена. Это решение применимо к iTunes, но если вы устанавливаете или обновляете другое приложение, обязательно проверьте, не блокирует ли ваш брандмауэр какие-либо установочные файлы.
Решение 10. Предоставьте полный доступ к группе «Все»
Пользователи также сообщают, что вы можете решить эту проблему, просто предоставив Полный контроль над папкой Config.msi всем на вашем ПК. Это простая процедура, и вы можете сделать это, выполнив следующие действия:
- Найдите папку Config.msi, щелкните ее правой кнопкой мыши и выберите « Свойства» в меню. По умолчанию эта папка должна находиться в каталоге C:. Помните, что эта папка может быть скрытой, поэтому вам нужно включить опцию Показать скрытые элементы на вкладке Вид.
- Перейдите на вкладку « Безопасность » и нажмите кнопку « Изменить».

- Нажмите кнопку Добавить.

- В поле Введите имена объектов для выбора введите « Все» и нажмите « Проверить имена». Если введенные данные верны, нажмите кнопку ОК.

- Каждая группа должна быть добавлена в раздел «Группа» или «Имена пользователей». Выберите Все и отметьте Полный контроль в столбце Разрешить.

- Нажмите Apply и OK, чтобы сохранить изменения.
После изменения разрешений безопасности попробуйте снова установить приложение.
- Читайте также: Исправлено: ошибка VPN в Windows 10
Решение 11 — Удалить каталог Config.msi
Немногие пользователи сообщили, что не смогли установить iTunes из-за проблем с каталогом Config.msi. Одним из предложенных решений, которое работало для некоторых пользователей, было удаление этой папки из безопасного режима и ее повторное создание. Для этого выполните следующие действия:
- Нажмите кнопку «Пуск», удерживайте клавишу Shift на клавиатуре и выберите « Питание»> «Перезагрузить».

- После перезагрузки компьютера выберите « Устранение неполадок»> «Дополнительные параметры»> «Параметры запуска».
- Нажмите кнопку « Перезагрузить».
- Когда ваш компьютер перезагрузится снова, вы увидите список параметров. Выберите любую версию безопасного режима, нажав соответствующую клавишу клавиатуры.
- При запуске безопасного режима запустите командную строку от имени администратора.
- Когда откроется командная строка, введите следующие строки:
- cd c: config.msi
- стереть *. *
- cd c:
- rd config.msi
- Перезагрузите компьютер и попробуйте установить iTunes снова.
- Если проблема не устранена, создайте папку Config.msi в каталоге C:.
- Создайте файл.rdf, который требуется для установки, в папке Config.msi и повторите попытку установки iTunes.
- Если вы столкнулись с какими-либо ошибками, обязательно игнорируйте их, и вы сможете установить iTunes.
Решение 12. Удалите iDrive.
По словам пользователей, иногда сообщение об ошибке записи в файл может появиться, если на вашем компьютере установлен iDrive. Мы не знаем, как iDrive мешает процессу установки других приложений, но единственное решение — удалить iDrive. После удаления iDrive проблема должна быть полностью решена.
Решение 13 — Отключить антивирус Касперского и Memeo Instant Backup
Пользователи сообщали об этой ошибке при установке инструмента MySQL Workbench, и, по их мнению, проблема была вызвана антивирусом Касперского и Memeo Instant Backup.
По их словам, после отключения этих инструментов ошибка была полностью устранена. Имейте в виду, что любой другой антивирус или средство резервного копирования может вызвать появление этой ошибки, поэтому обязательно отключите ее временно.
Пользователи также сообщали о проблемах с антивирусом Webroot, поэтому, если он установлен, обязательно временно отключите его и проверьте, решает ли это проблему.
- ЧИТАЙТЕ ТАКЖЕ: Исправлено: Ошибка 0x80070005-0x90002 в Windows 10
Решение 14 — отключить контроль учетных записей
Контроль учетных записей — это функция безопасности, которая будет предупреждать вас всякий раз, когда вы пытаетесь внести изменение, требующее прав администратора. Это полезная функция, которая иногда может защитить вас от вредоносного программного обеспечения, которое пытается внести изменения в ваш компьютер без вашего ведома.
Несмотря на то, что эта функция может быть полезна, она также может помешать процессу установки и вызвать сообщение об ошибке записи в файл. Чтобы решить эту проблему, необходимо отключить контроль учетных записей, выполнив следующие действия:
- Нажмите Windows Key + S и введите учетные записи пользователей. Выберите учетные записи пользователей в меню.

- Когда откроется окно « Учетные записи пользователей», перейдите к « Изменение настроек контроля учетных записей».

- Переместите ползунок полностью вниз, чтобы Никогда не уведомлять, и нажмите OK, чтобы сохранить изменения.

- После отключения контроля учетных записей перезагрузите компьютер и проверьте, устранена ли проблема.
Решение 15 — Измените настройки Symantec Endpoint Protection
По словам пользователей, иногда Symantec Endpoint Protection может помешать процессу установки и вызвать появление этой и других ошибок. Чтобы решить эту проблему, вам нужно сделать следующее:
- Откройте Symantec Endpoint Protection.
- С левой стороны перейдите на вкладку Изменить настройки.
- Нажмите кнопку « Настроить параметры» в разделе « Управление клиентами ».
- Найдите и отключите параметр « Включить приложение и управление устройством».
Исправлено — «Ошибка записи в файл» android-sdk.7z
Решение 1 — Установите Java Development Kit
Пользователи сообщали об этой ошибке при попытке установить Android SDK на свой ПК с Windows 10. По-видимому, эта ошибка вызвана тем, что отсутствует Java Development Kit, и самый быстрый способ решить эту проблему — загрузить Java Development Kit. После загрузки просто установите его, и проблема должна быть полностью решена.
Решение 2. Запустите установку от имени администратора и отключите брандмауэр
По словам пользователей, вы можете решить эту проблему, просто запустив установочный файл от имени администратора. Если это не поможет, возможно, вам придется временно отключить антивирус и брандмауэр и проверить, решает ли это проблему.
Если проблема не устранена, возможно, вам придется полностью удалить антивирусное программное обеспечение. Пользователи сообщили, что проблема была устранена после удаления антивируса McAfee, поэтому обязательно попробуйте это.
- Читайте также: Windows 10 Anniversary Update имеет проблемы, связанные с антивирусом
Исправлено — «Ошибка записи в файл» 3DS Max
Решение — отключить сжатие при сохранении
По словам пользователей, эта ошибка появляется, когда вы пытаетесь сохранить файл в 3DS Max, и один из возможных вариантов — отключить сжатие при сохранении в настройках. После отключения этой опции ошибка больше не будет появляться, но ваши файлы будут увеличиваться в размере без сжатия, так что имейте это в виду.
Пользователи также сообщили, что эта ошибка появляется, если у вас открыто более двух экземпляров 3DS Max, поэтому, если у вас запущено менее 3 экземпляров этого приложения, у вас не должно возникнуть никаких проблем.
Исправление — «Ошибка записи в файл» Adobe Acrobat
Решение 1. Переименуйте папку Active X
Пользователи сообщали об ошибке записи в файл сообщения при попытке установить Adobe Acrobat, и, по их мнению, им удалось решить эту проблему, просто переименовав папку Active X. После переименования папки в Active X_OLD создайте новую папку Active X и скопируйте файлы из папки Active X_OLD в новую папку Active X, которую вы создали. После этого попробуйте установить Adobe Acrobat снова.
Некоторые пользователи также предлагают переименовать папку Acrobat во что-то другое и попытаться установить Adobe Acrobat снова, так что вы можете сделать это.
Решение 2 — Удалить папку Абрикос
Немногие пользователи сообщили, что им удалось решить эту проблему, просто перейдя в папку C: ProgramDataAdobe. Вы должны увидеть абрикос и две другие папки доступны. Удалите их и попробуйте установить Adobe Acrobat от имени администратора.
Решение 3 — Используйте CCleaner
Пользователи сообщали, что им удалось исправить ошибку «Запись в файл» при установке Adobe Acrobat, просто запустив CCleaner. Используя CCleaner, они удалили проблемные записи реестра, и это решило проблему для них.
- Скачать сейчас CCleaner
Ошибка записи в файл сообщения может помешать вам установить определенные приложения, но в большинстве случаев вы можете решить эту проблему, отключив антивирус или изменив разрешения безопасности.
Если эти решения не работают, не стесняйтесь попробовать любое другое решение из этой статьи.
ЧИТАЙТЕ ТАКЖЕ:
- Исправлено: ошибка «Нет больше доступных конечных точек из сопоставителя конечных точек»
- Исправлено: ошибка «Файл слишком большой для блокнота» в Windows 10
- Исправлено: ошибка «Тип печатающей головки неправильный»
- Исправлено: ошибки Steam в Windows 10
- Исправлено: «Произошла ошибка при обработке вашего запроса»
Как правило, проблемы с arc.dll возникают в результате повреждения, а также случайного или намеренного удаления файла DLL из места расположения других файлов Ten For X Utilities Volume III. Как правило, решить проблему можно заменой файла DLL. В качестве дополнительного шага по устранению неполадок мы настоятельно рекомендуем очистить все пути к неверным файлам и ссылки на расширения файлов DLL, которые могут способствовать возникновению такого рода ошибок, связанных с arc.dll.
Формат Dynamic Link Library с расширением файла DLL классифицируют в качестве Системные файлы. Arc.dll для %%os%% и почти для всех версий операционной системы Windows можно скачать ниже. В настоящее время в нашей безе отсутствуют некоторые файлы arc.dll, однако вы можете получить их по запросу, нажав на кнопку Request (Запрос) рядом с соответствующей версией файла. В крайнем случае, если ниже отсутствует необходимая вам версия файла, вы всегда можете связаться с Allume Systems, Inc..
Размещение вновь загруженного файла arc.dll в правильном каталоге (в месте расположения исходного файла), скорее всего, решит проблему, однако, чтобы однозначно в этом убедиться, следует выполнить проверку. Попробуйте повторно запустить Ten For X Utilities Volume III, чтобы проверить, появляется ли сообщение об ошибке.
| Arc.dll Описание файла | |
|---|---|
| File: | DLL |
| Функция: | Utility |
| App: | Ten For X Utilities Volume III |
| Версия: | 2005 |
| Разработчик: | Allume Systems, Inc. |
| File: | arc.dll |
| KB: | 220672 |
| SHA-1: | cf249a3554c73522adb87766721f683cd138aac8 |
| MD5: | eb3f83b500cf76c378b966e7086d2c7a |
| CRC32: | b2689b59 |
Продукт Solvusoft
Загрузка
WinThruster 2022 — Сканировать ваш компьютер на наличие ошибок реестра в arc.dll
Windows
11/10/8/7/Vista/XP
Установить необязательные продукты — WinThruster (Solvusoft) | Лицензия | Политика защиты личных сведений | Условия | Удаление
DLL
arc.dll
Идентификатор статьи: 622803
Arc.dll
| Filename | MD5 | Байт | Загрузить | |||||||||||||||
|---|---|---|---|---|---|---|---|---|---|---|---|---|---|---|---|---|---|---|
| + arc.dll | eb3f83b500cf76c378b966e7086d2c7a | 215.50 KB | ||||||||||||||||
|
||||||||||||||||||
| + arc.dll | eb3f83b500cf76c378b966e7086d2c7a | 215.50 KB | ||||||||||||||||
|
||||||||||||||||||
| + arc.dll | eb3f83b500cf76c378b966e7086d2c7a | 215.50 KB | ||||||||||||||||
|
||||||||||||||||||
| + arc.dll | 734690f0c9a12ca923f5b02a3de298ba | 260.00 KB | ||||||||||||||||
|
||||||||||||||||||
| + arc.dll | eb3f83b500cf76c378b966e7086d2c7a | 215.50 KB | ||||||||||||||||
|
||||||||||||||||||
| + arc.dll | 734690f0c9a12ca923f5b02a3de298ba | 260.00 KB | ||||||||||||||||
|
||||||||||||||||||
| + arc.dll | eb3f83b500cf76c378b966e7086d2c7a | 215.50 KB | ||||||||||||||||
|
||||||||||||||||||
| + arc.dll | 734690f0c9a12ca923f5b02a3de298ba | 260.00 KB | ||||||||||||||||
|
||||||||||||||||||
| + arc.dll | eb3f83b500cf76c378b966e7086d2c7a | 215.50 KB | ||||||||||||||||
|
||||||||||||||||||
| + arc.dll | 734690f0c9a12ca923f5b02a3de298ba | 260.00 KB | ||||||||||||||||
|
||||||||||||||||||
| + arc.dll | c78b545d27679415b993042b1a6a255f | 190.00 KB | ||||||||||||||||
|
||||||||||||||||||
| + arc.dll | c78b545d27679415b993042b1a6a255f | 190.00 KB | ||||||||||||||||
|
||||||||||||||||||
| + arc.dll | c78b545d27679415b993042b1a6a255f | 190.00 KB | ||||||||||||||||
|
||||||||||||||||||
| + arc.dll | c78b545d27679415b993042b1a6a255f | 190.00 KB | ||||||||||||||||
|
||||||||||||||||||
| + arc.dll | c78b545d27679415b993042b1a6a255f | 190.00 KB | ||||||||||||||||
|
||||||||||||||||||
| + arc.dll | c78b545d27679415b993042b1a6a255f | 190.00 KB | ||||||||||||||||
|
||||||||||||||||||
| + arc.dll | 2af59847225274c90c195d05c435d36e | 80.00 KB | ||||||||||||||||
|
||||||||||||||||||
| + arc.dll | 2af59847225274c90c195d05c435d36e | 80.00 KB | ||||||||||||||||
|
||||||||||||||||||
| + arc.dll | 2af59847225274c90c195d05c435d36e | 80.00 KB | ||||||||||||||||
|
||||||||||||||||||
| + arc.dll | 2af59847225274c90c195d05c435d36e | 80.00 KB | ||||||||||||||||
|
||||||||||||||||||
| + arc.dll | 2af59847225274c90c195d05c435d36e | 80.00 KB | ||||||||||||||||
|
||||||||||||||||||
| + arc.dll | c78b545d27679415b993042b1a6a255f | 190.00 KB | ||||||||||||||||
|
||||||||||||||||||
| + arc.dll | c78b545d27679415b993042b1a6a255f | 190.00 KB | ||||||||||||||||
|
||||||||||||||||||
| + arc.dll | c78b545d27679415b993042b1a6a255f | 190.00 KB | ||||||||||||||||
|
||||||||||||||||||
| + arc.dll | c78b545d27679415b993042b1a6a255f | 190.00 KB | ||||||||||||||||
|
Распространенные сообщения об ошибках в Arc.dll
Обнаруженные проблемы arc.dll с Ten For X Utilities Volume III включают:
- «Arc.dll не найден.»
- «Отсутствует arc.dll. «
- «Arc.dll нарушение прав доступа.»
- «Не удается зарегистрировать arc.dll. «
- «Файл /Libraryarc.dll не найден.»
- «Не удалось запустить Ten For X Utilities Volume III. Отсутствует необходимый компонент: arc.dll. Пожалуйста, установите Ten For X Utilities Volume III заново.»
- «Не удалось выполнить приложение, так как arc.dll не найден. Повторная установка Ten For X Utilities Volume III может решить проблему. «
Ошибки DLL arc.dll возникают во время установки Ten For X Utilities Volume III, при запуске программ, связанных с arc.dll (Ten For X Utilities Volume III), во время запуска или завершения работы или во время установки ОС Windows. Выделение при возникновении ошибок arc.dll имеет первостепенное значение для поиска причины проблем Ten For X Utilities Volume III и сообщения о них Allume Systems, Inc. за помощью.
Корень проблем Arc.dll
Чаще всего поврежденный (или отсутствующий) arc.dll вызывает проблему. arc.dll является внешним ресурсом, создающим хорошие возможности для проблем Ten For X Utilities Volume III.
Проблемы с Ten For X Utilities Volume III из-за нерегулярного завершения работы ОС, заражения вирусами или других проблем, связанных с arc.dll, приводят к повреждению. Поврежденные файлы arc.dll предотвращают правильную загрузку, что приводит к сообщениям об ошибках Ten For X Utilities Volume III или arc.dll.
Другая возможность проблем Ten For X Utilities Volume III и arc.dll связана с нарушением реестра. Поврежденные ссылки на путь к файлу arc.dll на Ten For X Utilities Volume III предотвращают правильную загрузку файлов, создавая ошибки arc.dll. Сломанные ключи могут быть вызваны отсутствием arc.dll, перемещенным arc.dll или ошибочной ссылкой на путь к файлу в результате неудачной установки (или удаления) Ten For X Utilities Volume III.
Точнее, ошибка arc.dll, вызванная:
- Поврежденная или недопустимая запись реестра arc.dll.
- Вирус или вредоносное ПО поврежден arc.dll.
- Аппаратная неисправность Allume Systems, Inc. (например, принтер) вызвала повреждение arc.dll.
- Несвязанное программное приложение перезаписало необходимую версию arc.dll.
- arc.dll злонамеренно (или ошибочно) удален другой мошенникой или действительной программой.
- arc.dll ошибочно удален (или злонамеренно) несвязанным приложением Ten For X Utilities Volume III.
THIS IS WHAT IVE BEEN GETTING AND I CAN NOT FIGURE WHAT TO DO
Could not write XMP data in output file.
Could not write XMP data in output file.
— Source File: C:UsersYOUNGG~1AppDataLocalTempyams and potatoes part 2.prproj
— Output File: C:UsersYOUNG GWOPDesktopTRAILOR CUTS TO GWOLOS TURN.wmv
— Preset Used: HDTV 1080p 24 High Quality
— Video: 1920×1080, 24 [fps]
— Audio: 440 kbps, 44 kHz, 2 channel 24 bit VBR
— Bitrate: Compressed, VBR, 2 Pass, :0, Peak 10000.00, Avg 8000.00 [kbps]
— Encoding Time: 00:09:43
10/10/2011 7:03:52 AM : Encoding Failed
——————————————
Error compiling movie.
Unknown error.
——————————————
— Source File: C:UsersYOUNGG~1AppDataLocalTempyams and potatoes part 2_1.prproj
— Output File: C:UsersYOUNG GWOPDesktopTRAILOR CUTS TO GWOLOS TURN.wmv
— Preset Used: HDTV 1080p 24 High Quality
— Video:
— Audio:
— Bitrate:
— Encoding Time: 51:23:39
10/10/2011 7:09:02 AM : Encoding Failed
————————————-
The Operation was interrupted by user
————————————-
Could not write XMP data in output file.
— Source File: C:UsersYOUNGG~1AppDataLocalTempyams and potatoes part 2_5.prproj
— Output File: C:UsersYOUNG GWOPDesktopgwolos turn promo.wmv
— Preset Used: HDTV 1080p 24 High Quality 5.1
— Video: 1920×1080, 24 [fps]
— Audio: 440 kbps, 44 kHz, 2 channel 24 bit VBR
— Bitrate: Compressed, VBR, 2 Pass, :0, Peak 10000.00, Avg 8000.00 [kbps]
— Encoding Time: 00:09:43
10/12/2011 4:08:10 PM : Encoding Failed
——————————————
Error compiling movie.
Unknown error.
——————————————
— Source File: C:UsersYOUNGG~1AppDataLocalTempyams and potatoes part 2_6.prproj
— Output File: C:UsersYOUNG GWOPDesktopSequence 01 DONE WIT BIG CANNON.avi
— Preset Used: NTSC DV 24p
— Video:
— Audio:
— Bitrate:
— Encoding Time: 03:06:33
10/12/2011 4:49:05 PM : Encoding Failed
————————————-
The Operation was interrupted by user
————————————-
Could not write XMP data in output file.
— Source File: C:UsersYOUNGG~1AppDataLocalTempyams and potatoes part 2_7.prproj
— Output File: C:UsersYOUNG GWOPDesktopGWOLOS TURN PREVIEW.wmv
— Preset Used: NTSC Source to High Quality Download
— Video: 720×480, 29.97 [fps]
— Audio: 96 kbps, 48 kHz, stereo VBR
— Bitrate: Compressed, VBR, 2 Pass, :0, Avg 1500.00 [kbps]
— Encoding Time: 00:32:06
10/28/2011 12:37:54 PM : Encoding Failed
——————————————
Error compiling movie.
Unknown error.
——————————————
— Source File: C:UsersYOUNGG~1AppDataLocalTempyams and potatoes part 2_8.prproj
— Output File: C:UsersYOUNG GWOPDesktopSAMPLE OF GWOLOS TURN.wmv
— Preset Used: HDTV 1080p 24 High Quality
— Video:
— Audio:
— Bitrate:
— Encoding Time: 10:33:40
10/28/2011 1:53:37 PM : Encoding Failed
————————————-
The Operation was interrupted by user
————————————-
— Source File: C:UsersYOUNGG~1AppDataLocalTempyams and potatoes part 2_9.prproj
— Output File: C:UsersYOUNG GWOPDesktopSequence 01 DONE WIT BIG CANNON.mpg
— Preset Used: 1440 x 1080i 25 High Quality
— Video: PAL, 1440×1080, 25 [fps], Upper, Quality 4.0
— Audio: 384 [kbps], 48 kHz, 16 bit, Stereo, MPEG
— Bitrate: VBR, 1 Pass, Min 4.00, Target 15.00, Max 18.50 [Mbps]
— Encoding Time: 00:09:42
11/22/2011 12:38:07 AM : Encoding Failed
——————————————
Error compiling movie.
Unknown error.
——————————————
— Source File: C:UsersYOUNG GWOPDesktop2009 NEMS (NEW ENGLAND MUSIC SEMINAR ).wmv
— Output File: C:UsersYOUNG GWOPDesktopOutput2009 NEMS (NEW ENGLAND MUSIC SEMINAR ).mpg
— Preset Used: 1440 x 1080i 25 High Quality
— Video: PAL, 1440×1080, 25 [fps], Upper, Quality 4.0
— Audio: 384 [kbps], 48 kHz, 16 bit, Stereo, MPEG
— Bitrate: VBR, 1 Pass, Min 4.00, Target 15.00, Max 18.50 [Mbps]
— Encoding Time: 00:05:01
11/22/2011 12:43:16 AM : Encoding Failed
————————————-
The Operation was interrupted by user
————————————-
Could not write XMP data in output file.
— Source File: C:UsersYOUNGG~1AppDataLocalTempyams and potatoes part 2 SNIPPET_7.prproj
— Output File: C:UsersYOUNG GWOPDesktopGWOLOS TURN THE MOVIE SNIPPET COMING SOON.wmv
— Preset Used: HDTV 1080p 25 High Quality
— Video: 1920×1080, 25 [fps]
— Audio: 440 kbps, 44 kHz, 2 channel 24 bit VBR
— Bitrate: Compressed, VBR, 2 Pass, :0, Peak 10000.00, Avg 8000.00 [kbps]
— Encoding Time: 00:17:19
11/25/2011 5:14:24 PM : Encoding Failed
——————————————
Error compiling movie.
Unknown error.
——————————————
Could not write XMP data in output file.
— Source File: C:UsersYOUNGG~1AppDataLocalTempyams and potatoes part 2 SNIPPET_8.prproj
— Output File: C:UsersYOUNG GWOPDesktopGWOLOS TURN THE MOVIE SNIPPET COMING SOON_1.wmv
— Preset Used: HDTV 1080p 25 High Quality
— Video: 1920×1080, 25 [fps]
— Audio: 440 kbps, 44 kHz, 2 channel 24 bit VBR
— Bitrate: Compressed, VBR, 2 Pass, :0, Peak 10000.00, Avg 8000.00 [kbps]
— Encoding Time: 00:10:57
11/26/2011 6:12:13 PM : Encoding Failed
——————————————
Error compiling movie.
Unknown error.
——————————————
Could not write XMP data in output file.
— Source File: C:UsersYOUNGG~1AppDataLocalTempyams and potatoes part 2 SNIPPET_9.prproj
— Output File: C:UsersYOUNG GWOPDesktopSequence 01 DONE WIT BIG CANNON.wmv
— Preset Used: HDTV 1080p 25 High Quality
— Video: 1920×1080, 25 [fps]
— Audio: 440 kbps, 44 kHz, 2 channel 24 bit VBR
— Bitrate: Compressed, VBR, 2 Pass, :0, Peak 10000.00, Avg 8000.00 [kbps]
— Encoding Time: 00:17:54
12/7/2011 3:25:27 AM : Encoding Failed
——————————————
Error compiling movie.
Unknown error.
——————————————
Обновлено: 28.01.2023
Попробуй запустить прогу от им. администратора: ( правая кнопка мыши -》 запустить от имени администратора)
Попробуй перезапустить комп
Попробуй переустановить текст рп
Попробуй его заново скачать с сайта
Должно помочь
файл помести в корень диска и там распаковывай.
пример:
C:
D:
Миша Искусственный Интеллект (169193) Free Fire, у тебя эта ошибка при каких обстоятельствах возникает?

и эта фигня
В этой статье мы будем использовать следующие способы для устанения ошибки «Ошибка записи в файл»:
- Способ 1: Запуск инсталлятора с правами администратора
- Способ 2: Устранение проблем с совместимостью
- Способ 3: Установка разрешений на запись
- Способ 4: Отключение UAC
- Способ 5: Отключение антивируса
- Способ 6: Проверка состояния жесткого диска
1. Проверьте антивирус
Антивирус – ключевой элемент, защищающий ваш ПК. Скорее всего он задействовал необходимый документ, и это вызвало конфликт.
- Отключите некоторые его функции и проверьте, исправило ли это проблему.
- Отключите антивирусное ПО полностью, включая брандмауэр.
4. Переустановите приложение, вызывающее ошибку
Полностью деинсталлируйте программу и переустановите ее, используя свежую версию. Важно удалить все компоненты полностью, включая заметки в реестре. Выполните, на ваше усмотрение, одно из следующих действий:
- Воспользуйтесь специальной утилитой для деинсталляции.
- Удалите вручную, через “установку и удаление программ”.
- Воспользуйтесь деинсталлятором, он находится в папке установленного ПО.
Проверка целостности системных файлов
Следующий метод борьбы с ошибкой заключается в проверке ваших системных файлов компьютера. Для этого будет использована специальная утилита Windows. Чтобы ее запустить, откройте командную строку от имени администратора .

Сканирование системны утилитой sfc/ scannow
2. Запускаем средство устранения неполадок
Старое программное обеспечение, вероятно, не совместимо с Виндовс 10.
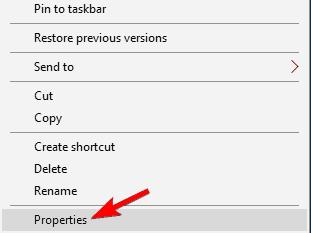
- Выберите “Свойства”.
- Вкладка “Совместимость”.
- Выбирите “Устранение неполадок совместимости”.
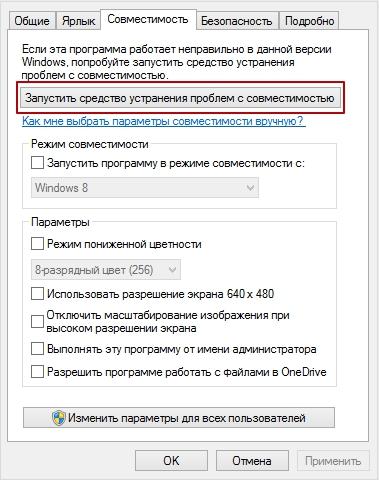
- Нажмите на “рекомендованные настройки”.
- Следуйте инструкциям.
3. Установка разрешений на запись
Если предыдущие методы не помогли устранить ошибку, возможно, дело в разрешениях на изменение содержимого целевого каталога. Рекомендуется проверить существующие параметры и изменить их в случае необходимости, в чём вам поможет этая инструкция.
5. Отключение антивируса
Нельзя исключать и вмешательство защитного ПО: нередко некоторые устаревшие компоненты инсталляторов помечены в их алгоритмах как небезопасные, антивирус блокирует их, вследствие чего и возникает ошибка записи в файл. Для проверки можно приостановить защиту и выполнить запуск проблемного инсталлятора. Но стоит иметь в виду, что такое решение небезопасно, и пользоваться им лучше лишь в случае крайней необходимости.
Причины, по которым происходит ошибка при распаковке файлов
Очень частая причина – поврежденный файл архива . В этом случае нужно попробовать скачать игру с другого источника и установить. Ошибка продолжает появляться – скачайте архив на съемный носитель и попробуйте установить на другом компьютере. Если игра установилась, то загвоздка скорее всего в вашем компьютере.
Еще один вариант, по которой возникает ошибка распаковки файлов – сам распаковщик . Вполне возможно, что он не распаковывает файл из-за сбоев, ведь архиватор такая же программа, как и все остальные и она также может выйти из строя. Путь извлечения может иметь русские буквы – это тоже может стать причиной. Ну и конечно же антивирусное программное обеспечение, ведь оно блокирует не только вирусы и шпионские программы, но может стать на пути и рабочих файлов, которые сочтет за угрозу.
Причины появления этой ошибки, и что делать.
Проверьте подключение накопителя
Во-первых, не соглашайтесь на форматирование диска (или исправление ошибок), которое может предлагать выполнить Windows.
Во-вторых, для начала попробуйте подключить диск к другому USB-порту, это актуально и для флешек. Также можно порекомендовать для диагностики подключить накопитель к другому ПК/ноутбуку.
Кстати, если вы подключаете внешний жесткий диск через различные разветвители (и переходники) — попробуйте на время отказаться от них (нередко, могут возникать ошибки из-за того, что к одному USB-порту подключено много устройств и тока просто не хватает для нормальной работы диска) .
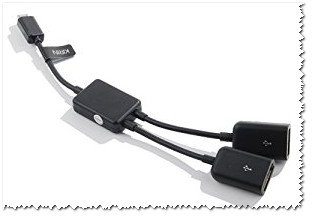
SMART диска
Если проблема возникла с SSD или HDD — то прежде всего рекомендую посмотреть SMART диска.
Примечание : SMART — система самодиагностики диска, контролирующая его состояние. В идеале она должна вовремя успеть вас проинформировать, если с диском начались проблемы и его пора менять.
Для просмотра SMART удобно использовать утилиту CrystalDiskInfo. Она покажет не только мало-понятные атрибуты SMART, но и сделает самостоятельно по ним заключение — которое нам и нужно! (обратите внимание на скриншот ниже — на нем показаны два диска: нормальный, и который уже начал «сыпаться»).
В идеале, если с диском все в порядке — должно появится техсостояние «Хорошо» (а среди атрибутов не должно быть красных строк).
Если техсостояние HDD плохое!
Исправление ошибок файловой системы
Если SMART диска показал, что с диском «все плохо» — то первым делом я бы порекомендовал попытаться сделать бэкап файлов (которые можно прочитать). К тому же спец. утилиты могут просканировать диск и восстановить даже невидимые файлы (об см. следующий пункт статьи).
Теперь о том, как проверить диск на наличие ошибок файловой системы.
Необходимо запустить командную строку от имени администратора . Для этого необходимо открыть диспетчер задач (сочетание Ctrl+Shift+Esc) и создать новую задачу: в строку «Открыть» написать cmd, поставить галочку, что задача должна быть с правами администратора и нажать OK. См. скриншот ниже.

Запуск командной строки от имени админа
Далее в командной строке нужно написать chkdsk v: /f и нажать Enter ( примечание : «v:» — буква диска, который необходимо проверить) .

chkdsk v: /f — проверка диска
Подобную операцию можно сделать и без командной строки (через проводник). Правда, в некоторых случаях проводник может зависать (тогда, см. способ 1).
И так, сначала необходимо открыть проводник (Win+E) и перейти во вкладку «Мой компьютер»). После открыть свойства того диска, на котором возникла ошибка.

Далее следует перейти во вкладку «Сервис» и нажать на кнопку проверки диска.

Проверить диск на наличие ошибок
После подтвердить начало проверки и дождаться ее завершения.

Вы не сможете использовать диск, пока Windows исправляет ошибки
Про восстановление файлов
Даже если сейчас на вашем диске невидны файлы, когда вы заходите в папку — есть возможность восстановления большей части из них с помощью спец. утилит.
Примечание : тут все дело в одном моменте. Наверное, вы замечали, что операция копирования происходит значительно дольше, чем удаления. А знаете почему? Просто при удалении информации с HDD-диска — физически она никак не стирается с блинов диска, просто Windows считает, что «такие-то» сектора стали свободны и в них можно записать новую информацию.
То есть, пока вы не произведете полное форматирование диска (или не запишите на него новые файлы) — большую часть информации можно восстановить!
Вообще, операция восстановления имеет свои нюансы, поэтому рекомендую вам ознакомиться с одной моей прошлой статьей (ссылка ниже, она многократно проверена — сотни человек уже восстановили по ней файлы) .

Несколько вариантов восстановления (кликабельно) / Утилита R.Saver
Возможно, ваш диск (флешка) заражен вирусом
Если логических ошибок на диске Windows не находит, SMART диска показывает, что с ним все не плохо, накопитель не падал, и с ним все вроде бы в порядке — обратите внимание на вирусы. Есть некоторые виды вирусов, которые способны не только скрыть (удалить) файлы с накопителя, но и сделать невидимыми диски, форматировать их и т.д.
Даже если у вас на ПК уже установлен антивирус, рекомендую загрузить какую-нибудь онлайн-версию антивируса (она не требует установки и может работать одновременно с установленным антивирусом). О том, чем и как проверить — можете узнать из моих прошлых статей, ссылки ниже.

О том, как можно восстановить внешний HDD диск
Если ваш внешний жесткий диск не подает признаков жизни и все вышеперечисленные советы никак не помогли — можно попробовать восстановить его в домашних условиях ( Важно! Этот вариант подойдет только тем, у кого нет очень нужных документов на диске и кто не собирается нести его в сервис) .
Суть здесь в чем: внешний диск, обычно, представляет из себя небольшую «коробочку», внутри которой находится сам диск и плата-контроллер. В половине случаев проблем с внешним HDD — дело как раз в этой плате. Можно аккуратно разобрать внешний корпус, вынуть сам диск и подключить его к ноутбуку/ПК напрямую (либо через переходник к USB порту, см. скрин ниже).
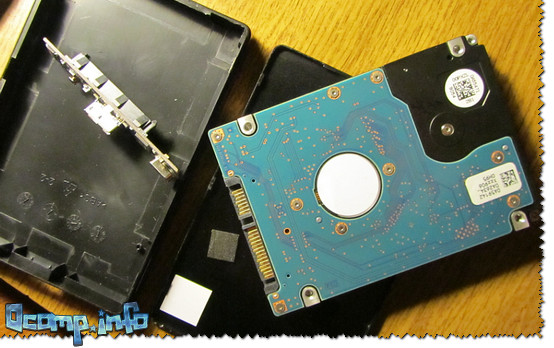
Диск извлечен из корпуса
Кстати, купить подобные переходники можно в китайских онлайн-магазинах. Рекомендую просмотреть одну мою прошлую статью (ссылка ниже) — в ней приведено 10 самых полезных штук для ПК, которые приобретаются за «копейки» (в том числе есть и этот переходник).
6. Проверка состояния жесткого диска
Самой редкой, но и самой неприятной причиной рассматриваемой проблемы являются сбои в работе жесткого диска: не исключено, что в нём присутствуют плохие и/или нестабильные секторы, запись в которые невозможна, о чём и сигнализирует система. Поэтому если ни один из вышеприведённых способов не принёс должного эффекта, следует проверить накопитель. Как проверить SSD и M2 жесткие диски на ошибки, а так же обычные диски читаем здесь и здесь.

- Ошибка открытия документа для записи в Виндовс 7 и 8. Даже если вы не являетесь пользователем Виндовс 10, большинство решений, собранных здесь, подойдет и вам.
- Ошибка открытия файла для записи qt5core.dll, vcredist_x86.exe, npf.sys, msvcr110.dll. Многие юзеры сообщили, что эта ошибка вызвана определенными файлами на вашем ПК. Чтобы устранить проблему, вам придется переустановить компоненты, отвечающие за них, затем проверить, решает ли это проблему.
- При открытии одного из файлов MSI Afterburner, Kodi, Steam, VLC, Wireshark, CCleaner, BSPlayer, Hotspot Shield. Для устранения переустановите приложение.
1. Проверьте антивирус
Антивирус – ключевой элемент, защищающий ваш ПК. Скорее всего он задействовал необходимый документ, и это вызвало конфликт.
- Отключите некоторые его функции и проверьте, исправило ли это проблему.
- Отключите антивирусное ПО полностью, включая брандмауэр.
2. Запускаем средство устранения неполадок
Старое программное обеспечение, вероятно, не совместимо с Виндовс 10.
- Кликните ПКМ по файлу установки.
- Выберите “Свойства”.
- Вкладка “Совместимость”.
- Выбирите “Устранение неполадок совместимости”.
- Нажмите на “рекомендованные настройки”.
- Следуйте инструкциям.
3. Запустите программу от имени администратора
- Правой кнопкой по файлу -> “Запустить от имени администратора”.
При удачном запуске выполните следующие действия:
- Правой кнопкой на документ -> Свойства.
- Перейдите во вкладку совместимость.
- Поставьте галочку на – “Запускать от имени администратора”.
4. Переустановите приложение, вызывающее ошибку
Полностью деинсталлируйте программу и переустановите ее, используя свежую версию. Важно удалить все компоненты полностью, включая заметки в реестре. Выполните, на ваше усмотрение, одно из следующих действий:
- Воспользуйтесь специальной утилитой для деинсталляции.
- Удалите вручную, через “установку и удаление программ”.
- Воспользуйтесь деинсталлятором, он находится в папке установленного ПО.
5. Отключите контроль учетных записей пользователей
Контроль учетных записей – это функция безопасности в Windows, запрещающая пользователям изменять параметры, имеющие административные привилегии. Несмотря на то, что эта функция бывает полезна, многие склонны ее отключать.
- Нажмите одновременно Win + S.
- Введите “учетная запись”.
- Выберите «Управление пользователями» в меню (либо откройте меню «Пуск» и выполните поиск пользовательского элемента управления).
- Появится окно настроек управления профилями.
- Передвиньте ползунок до упора до «Никогда» и нажмите «ОК», чтобы сохранить изменения.
Причины, по которым происходит ошибка при распаковке файлов
Очень частая причина – поврежденный файл архива . В этом случае нужно попробовать скачать игру с другого источника и установить. Ошибка продолжает появляться – скачайте архив на съемный носитель и попробуйте установить на другом компьютере. Если игра установилась, то загвоздка скорее всего в вашем компьютере.
Еще один вариант, по которой возникает ошибка распаковки файлов – сам распаковщик . Вполне возможно, что он не распаковывает файл из-за сбоев, ведь архиватор такая же программа, как и все остальные и она также может выйти из строя. Путь извлечения может иметь русские буквы – это тоже может стать причиной. Ну и конечно же антивирусное программное обеспечение, ведь оно блокирует не только вирусы и шпионские программы, но может стать на пути и рабочих файлов, которые сочтет за угрозу.
Правильно устанавливаем игру, если невозможно записать данные на диск
Для начала необходимо попытаться правильно установить игру и выполнить необходимые рекомендации в процессе установки, если происходит ошибка при распаковке файла.
Проверка целостности системных файлов
Следующий метод борьбы с ошибкой заключается в проверке ваших системных файлов компьютера. Для этого будет использована специальная утилита Windows. Чтобы ее запустить, откройте командную строку от имени администратора .
Сканирование системны утилитой sfc/ scannow
Проблема с оперативной памятью при распаковке файла
Эта ошибка может означать, что модуль вашей оперативной памяти компьютера или ноутбука пришел в негодность. Чтобы это проверить можно воспользоваться специальными утилитами, которые тестируют все модули компьютера на программном уровне. Но можно пойти и другим путем – протестировать RAM самостоятельно .
Если у вас установлено два и больше модуля оперативной памяти нужно поочередно вынимать каждый из них и пытаться устанавливать игру. Если игру удалось установить после снятия определенного модуля, то вы нашли неисправный. Его по возможности необходим заменить, ведь сегодняшние игры требуют по максимуму этого параметра.
Проверка работоспособности оперативной памяти
Вирусы – еще одна причина проблемы с записью данных на диск
Вирусы могут быть причиной не только ошибки при распаковке. Вирусы – одна из наиболее распространенных причин ошибок на персональном компьютере. Поэтому если вы столкнулись с проблемой такого типа, то перед следующей попыткой необходимо проверить вашу систему, используя глубокую проверку файлов . После чего необходимо проверить еще и устанавливаемый архив игры, ведь он может также содержать различные вредоносные программы.
Немного теории.
Папка LOST.DIR . Почему она заполняется?
Эта папка создается в случае, когда Android запускает File System ChecK (аналог Windows Chkdsk) и находит потерянные цепочки файлов. Эти файлы появляются, если вы вытаскиваете карту памяти в момент, когда на нее будет производится запись.
Ведь Windows пытается записать файлы, используя механизм кэширования. Когда вы выдёргиваете кабель, содержимое кэша не успевает записаться на диск и данные в файле оказываются неполноценные.
После того, как девайс отключён от компьютера, Android запускает сканирование карты и обнаруживает такие «битые» файлы, перемещая их остатки в директорию LOST.DIR.
Полезные ссылки:
1. FAQ по устройствам и Android OS — посмотрите в FAQ по Вашему аппарату, может там описаны рекомендуемые карты памяти для конкретной модели аппарата.
2. Посмотрите тему «Аксессуары» Вашего устройства. В ней тоже может быть собрана полезная информация по рабочим и не рабочим картам.
3. Затрудняетесь с выбором карты? Тогда смотрите здесь: Аксессуары для различных устройств, а так же много советов было здесь Хочу купить карту MicroSD 32гб. Посоветуйте., и здесь: Выбор флеш карты
Читать еще: Ошибка подключения wifi на телефоне
Приступим к практике.
1. Всегда, перед отключением девайса от компьютера, выбирайте «Безопасное извлечение» , а далее, в самом устройстве «Отключить USB накопитель» (P.S. Может называться по другому, в зависимости от модели и прошивки аппарата).
2. Проверьте карту памяти при помощи приложения ScanDisk.3. Проблема может крыться и в самой карте памяти. Попробуйте отформатировать ее и следуя совету выше, записывайте на нее файлы.
- Полное форматирование с помощью телефона: Меню-Настройки-Память-Отключить карту памяти (Извлечь карту)-Очистить карту-Подключить SD-карту (П.С. названия и пути могут меняться, в зависимости от модели телефона);
- Форматирование с помощью компьютера с выбором разного размера кластера.
- Форматирование с использованием специального приложения SD Formatter или Hard Disk Low Level Format Tool. Так называемое «низкоуровневое» форматирование.
4. Попробуйте поменять кэш на карте памяти с помощью этого приложения: ® SD Speed Increase5. Форматирование не помогает? Попробуйте заменить карту памяти на другую.
6. Записанные Вами файлы с компьютера видны а с устройства нет? Посмотрите, нет ли случайно в папке, в которую Вы их записали, файла .nomedia(файл скрытый). Если есть — удалите его.
Проверьте папки с музыкой на наличие файла .nomedia или просто отформатируйте флеш-карту и перезалейте музыку.
- Ошибка открытия документа для записи в Виндовс 7 и 8. Даже если вы не являетесь пользователем Виндовс 10, большинство решений, собранных здесь, подойдет и вам.
- Ошибка открытия файла для записи qt5core.dll, vcredist_x86.exe, npf.sys, msvcr110.dll. Многие юзеры сообщили, что эта ошибка вызвана определенными файлами на вашем ПК. Чтобы устранить проблему, вам придется переустановить компоненты, отвечающие за них, затем проверить, решает ли это проблему.
- При открытии одного из файлов MSI Afterburner, Kodi, Steam, VLC, Wireshark, CCleaner, BSPlayer, Hotspot Shield. Для устранения переустановите приложение.
4. Отключение UAC
Иногда причиной ошибки может быть система контроля учётных записей Windows (UAC): из-за бага или сбоев в настройках безопасности инсталлятору запрещено изменение файловой системы. Для решения этой проблемы можно временно отключить UAC, установить желаемый софт и активировать контроль аккаунтов обратно. На нашем сайте уже есть инструкции по проведению этой процедуры, ознакомьтесь с ними.

2. Устранение проблем с совместимостью
Нередко причина появления ошибки заключается в проблемах с совместимостью: например, установочный файл, предназначенный, скажем, для Windows XP, запускается на Windows 10 последних редакций. В такой ситуации стоит воспользоваться встроенным в ОС средством устранения неполадок совместимости.
- Кликните ПКМ по инсталлятору и выберите пункт «Свойства».
- Перейдите на вкладку «Совместимость» и воспользуйтесь ссылкой «Запустить средство устранения проблем с совместимостью».
- Подождите, пока инструмент подберёт настройки, после чего нажмите «Использовать рекомендованные параметры».
Попробуйте снова установить приложение, на этот раз рассматриваемая проблема больше не появится.
Правильно устанавливаем игру, если невозможно записать данные на диск
Для начала необходимо попытаться правильно установить игру и выполнить необходимые рекомендации в процессе установки, если происходит ошибка при распаковке файла.
| Совет | Особенности |
|---|---|
| Убедитесь, что по пути установки нет папок, которые названы русскими буквами | Если такие имеются их нужно переименовать, написав имя папки английскими буквами. |
| Игры и другие программы желательно не устанавливать на диск с системой (Windows или другой) | Обычно для диска с системой отводят небольшую часть места, особенно, если жесткий диск небольшого размера (80, 120 ГБ). Если вы будете все игры и программы устанавливать на диск с системой, то он очень скоро станет переполненным, что повлечет за собой проблемы и ошибки другого рода. Если у вас на компьютере всего один логический диск, то необходимо установить игру в отдельную папку, например – C:Games. |
| При установке игры выключите на время все антивирусы, брандмауэр и другие подобные программы. | Чтобы они не блокировали распаковку и установку игры. После установки их нужно снова включить. |
1. Запуск инсталлятора с правами администратора
Наиболее часто рассматриваемая ошибка возникает, когда установочный файл не может получить доступ к определённому месту для записи данных, например, при инсталляции софта на системный диск. В такой ситуации должно помочь открытие исполняемого файла с правами админа: кликните по нему правой кнопкой мыши, затем выберите параметр «Запуск от имени администратора».

3. Запустите программу от имени администратора
- Правой кнопкой по файлу -> “Запустить от имени администратора”.
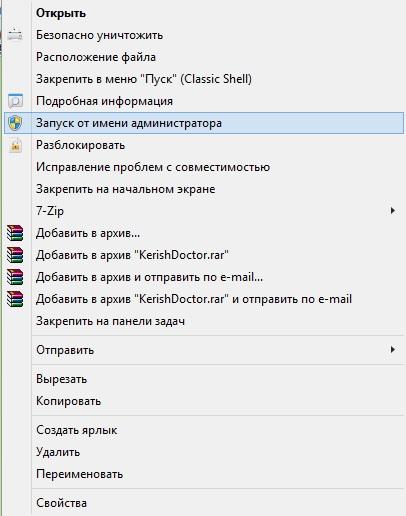
При удачном запуске выполните следующие действия:
- Правой кнопкой на документ -> Свойства.
- Перейдите во вкладку совместимость.
- Поставьте галочку на – “Запускать от имени администратора”.
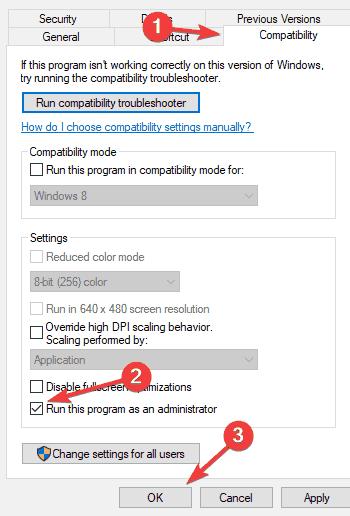
5. Отключите контроль учетных записей пользователей
Контроль учетных записей – это функция безопасности в Windows, запрещающая пользователям изменять параметры, имеющие административные привилегии. Несмотря на то, что эта функция бывает полезна, многие склонны ее отключать.
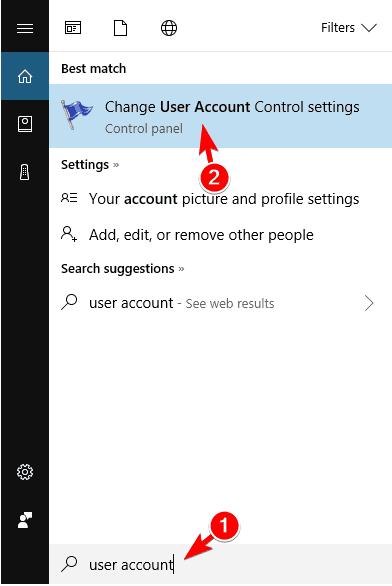
- Введите “учетная запись”.
- Выберите «Управление пользователями» в меню (либо откройте меню «Пуск» и выполните поиск пользовательского элемента управления).
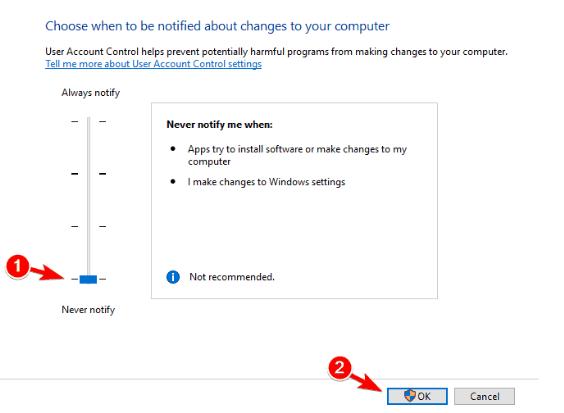
- Появится окно настроек управления профилями.
- Передвиньте ползунок до упора до «Никогда» и нажмите «ОК», чтобы сохранить изменения.
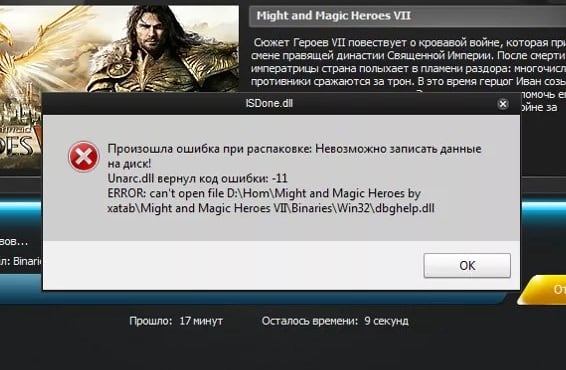
Вирусы – еще одна причина проблемы с записью данных на диск
Вирусы могут быть причиной не только ошибки при распаковке. Вирусы – одна из наиболее распространенных причин ошибок на персональном компьютере. Поэтому если вы столкнулись с проблемой такого типа, то перед следующей попыткой необходимо проверить вашу систему, используя глубокую проверку файлов . После чего необходимо проверить еще и устанавливаемый архив игры, ведь он может также содержать различные вредоносные программы.

У меня есть внешний жесткий диск на 1000 ГБ, использую его для хранения фото и видео. Не так давно подключал его к ПК и копировал несколько папок. Во время операции моргнуло электричество и все выключилось.
После включения зашел на диск и увидел ошибку, что «Нет доступа к F:. Файл или папка повреждены. Чтение невозможно. «. Можно ли как-то восстановить файлы?
Вообще, причин возникновения подобной ошибки достаточно много: от банальной программной ошибки, до выхода из строя механики HDD. В вашем случае (вероятнее всего) ошибка связана с небезопасным извлечением диска (возможны ошибки файловой системы). Обычно, это удается устранить довольно быстро с помощью командной строки (об этом ниже).
Кстати, подобная ошибка может возникать и на других накопителях: USB-флешках, SSD, SD-картах и пр.

Файл или папка повреждены. — пример ошибки
Проблема с оперативной памятью при распаковке файла
Эта ошибка может означать, что модуль вашей оперативной памяти компьютера или ноутбука пришел в негодность. Чтобы это проверить можно воспользоваться специальными утилитами, которые тестируют все модули компьютера на программном уровне. Но можно пойти и другим путем – протестировать RAM самостоятельно .
Если у вас установлено два и больше модуля оперативной памяти нужно поочередно вынимать каждый из них и пытаться устанавливать игру. Если игру удалось установить после снятия определенного модуля, то вы нашли неисправный. Его по возможности необходим заменить, ведь сегодняшние игры требуют по максимуму этого параметра.
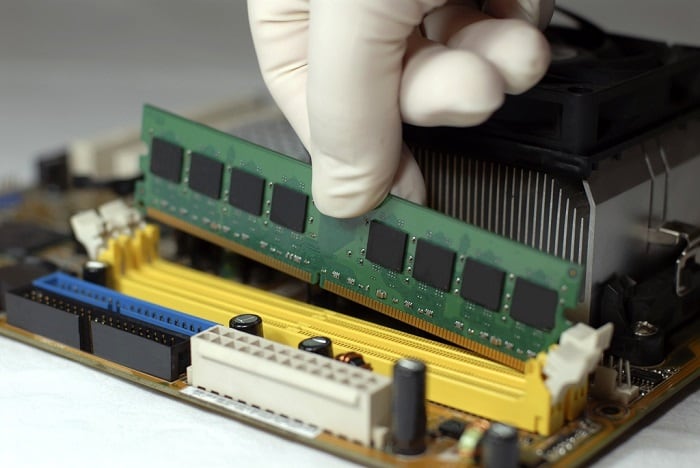
Проверка работоспособности оперативной памяти
Читайте также:
- At dead of night системные требования
- Как включить турбонагнетатель в world of tanks
- Как установить игру трансформеры битва за кибертрон
- Jedi outcast как поменять цвет меча
- Блицкриг 2 карты как установить
by Milan Stanojevic
Milan has been enthusiastic about technology ever since his childhood days, and this led him to take interest in all PC-related technologies. He’s a PC enthusiast and he… read more
Updated on April 26, 2022
- The Extract error writing to file message appears when installing certain software, preventing you to finish the installation.
- You will see that the Extract error writing to file in Windows 10 can be triggered by a Windows Installer bug.
- One way of fixing the Error writing file is to tweak the Windows Installer service using a line-command tool.
- It’s also important to know that you can fix this issue using the chkdsk command.
XINSTALL BY CLICKING THE DOWNLOAD FILE
This software will repair common computer errors, protect you from file loss, malware, hardware failure and optimize your PC for maximum performance. Fix PC issues and remove viruses now in 3 easy steps:
- Download Restoro PC Repair Tool that comes with Patented Technologies (patent available here).
- Click Start Scan to find Windows issues that could be causing PC problems.
- Click Repair All to fix issues affecting your computer’s security and performance
- Restoro has been downloaded by 0 readers this month.
Computer errors can occur from time to time, and sooner or later you’ll experience an error on your Windows 10 PC.
Users reported Error writing to file error message while installing certain software, and since this error can prevent you from installing new applications, it’s crucial to know how to properly fix it.
In this comprehensive article, you will learn how to fix the Error writing to file for all the Windows 10 apps.
How can I fix error writing to file alerts?
1. Fix – Error writing to file
1. Register Windows Installer service
- Type cmd in the search tab and click on Run as administrator under Command Prompt to start it with full privileges.
- When Command Prompt opens, enter the following lines:
msiexec /unregistermsiexec /regserver
- After both commands are successfully executed, close Command Prompt.
If you’re trying to install new software on your PC, you’ll have to use Windows Installer service.
This service is crucial for the installation process, but sometimes this service can become unregistered and prevent new applications from installing.
To fix this problem, you need to register the Windows Installer service manually.
By running these commands you’ll manually unregister and reregister the Windows Installer service, and hopefully, that will fix this error for you.
If you can’t access the Windows Installer, we have an excellent guide that will help you fix the problem.
2. Run the chkdsk command
- Open Command Prompt as administrator as shown in the previous step.
- When Command Prompt opens, enter chkdsk X: /r and press Enter (Be sure to replace X with the letter that matches your hard drive partition that you’re to installing the application to).
- If you’re trying to scan your system partition you’ll have to schedule a restart and scan your partition before Windows 10 starts.
- If you’re trying to scan your system partition you’ll have to schedule a restart and scan your partition before Windows 10 starts.
- After the scan is completed, try to run the installation process again.
Sometimes Error writing to file message can appear if you have corrupt files that are interfering with the installation process.
One way to fix this problem is to perform a chkdsk scan and scan your hard drive partition for any corrupt files.
If chkdsk gets stuck follow this comprehensive guide to fix it quickly and continue with this fix.
3. Rename com.Apple.Outlook.client.resources folder
Users reported this error message while trying to install iTunes on their PC, and one way to fix this problem is to rename one of your folders.
According to users, com.Apple.Outlook.client.resources folder can cause this error to appear, therefore in order to fix this problem, you need to find this folder and rename it to com.Apple.Outlook.client.resources_OLD.
After renaming the folder, try to perform the installation again and check if your problem is resolved.
4. Perform a Clean boot
- Press Windows Key + R and enter msconfig. Press Enter or click OK.
- When System Configuration window opens, go to Services tab.
- Check Hide all Microsoft services and then click on Disable all.
- Now go to Startup tab and click Open Task Manager.
- Task Manager will now open.
- In Startup tab, disable all startup applications. You can do that by right clicking the startup item and choosing Disable from the menu (Repeat this process for all startup applications).
- After all startup items are disabled, close Task Manager.
- Go back to System Configuration window and click Apply and OK to save the changes.
- Restart your PC.
Sometimes Error writing to file messages can appear due to installing third-party applications. Certain applications and services can interfere with the setup process and cause this error to appear on your PC.
One way to fix this problem is to disable all startup applications and processes.
After your PC restarts, try to install the application again. If the application manages to install without any errors, repeat the same steps and enable all startup applications and services.
5. Change the security permissions for the ProgramData folder
5.1 Change the owner of the folder
- Open File Explorer and navigate to C:.
- Locate the ProgramData folder.
- If you can’t see this folder, go to View tab and check Hidden items checkbox.
- Right-click the ProgramData folder and choose Properties.
- Go to the Security tab and click on Advanced button.
- Click the Change link next to the Owner name.
- In Enter the object name to select enter Administrators and click Check names. If everything is in order, click OK to save changes.
- Select the Replace the owner on subcontainers and objects.
- Click Apply and OK to save the changes.
Some applications rely on the ProgramData folder for their installation, and if you don’t have the necessary privileges to access this folder, you might get Error writing to file message.
To fix this problem, you need to change the security permissions, but since that is an advanced process, we strongly recommend that you create a System Restore point before making any security-related changes.
5.2 Change the permissions from the Advanced security settings
- When Advanced Security Settings window opens check if SYSTEM and Administrators group have Full control access.
- If one of the groups is missing, be sure to add it by clicking the Add button.
- In case any of the two groups doesn’t have Full control, you can simply change that by double-clicking the group and checking the Full control option.
- Check Replace all child object permissions entries with inheritable permissions entries from this object and click Apply and OK.
- After that, try to reinstall the application again.
Another way to change the permissions of a specific folder is to use Command Prompt. This is a faster, although a bit more advanced method, therefore use it with extra caution.
To do that, open Command Prompt as administrator, enter the following command, and press Enter: icacls "C:Config.Msi" /T /C /grant administrators:F
This is just an example, therefore be sure to replace C:Config.Msi with the path of the folder that you’re trying to modify.
Although we showed you how to change the permissions of the ProgramData folder in our example, sometimes in order to fix this problem you need to change the permissions of the installation directory instead.
6. Rename the Config.msi folder
Sometimes, certain Adobe applications can’t be installed on your PC due to the Config.Msi folder. One of the simplest ways to fix this is to locate the Config.Msi folder and rename it.
By default, this folder should be located in the C: directory, and you can easily rename it. If you can’t rename the folder, you have to change the permission settings for the Config.Msi folder and try again.
7. Run the setup file as administrator
You can fix the Error writing to file error message simply by running the installation process as an administrator. To do that, right-click the setup file and choose Run as administrator from the menu.
This isn’t a permanent solution, but it should allow you to install the desired application without any errors.
- FIX: Error opening file for writing in Windows 10
- Error #268D3: What Is It and How to Remove the Popup
8. Disable McAfee’s EPO agent
McAfee tools such as McAfee EPO agent can sometimes interfere with the installation process and cause this error to appear.
According to users, McAfee EPO agent has the policy to block autorun, and this policy can prevent applications from installing.
After turning the McAfee EPO agent off, you should be able to install any application without problems.
9. Check your firewall
Sometimes this error can occur due to your firewall settings, and you should be able to fix it simply by changing those settings.
User reported this error while installing iTunes, and according to them, the error was caused because the QTTask.exe was prevented from accessing the Internet by the firewall.
After allowing QTTask.exe to access the Internet the issue was completely resolved.
Some PC issues are hard to tackle, especially when it comes to corrupted repositories or missing Windows files. If you are having troubles fixing an error, your system may be partially broken.
We recommend installing Restoro, a tool that will scan your machine and identify what the fault is.
Click here to download and start repairing.
This solution applies to iTunes, but if you’re installing or updating a different application, be sure to check if your firewall isn’t blocking any installation files.
10. Give Full Control permissions to the Everyone group
- Locate the Config.msi folder, right-click it and choose Properties from the menu.
- By default this folder should be located in the C: directory.
- Keep in mind that this folder might be hidden, therefore you need to enable Show hidden items option from the View tab.
- Go to Security tab and click the Edit button.
- Click the Add button.
- In Enter the object names to select field enter Everyone and click Check Names. If your input is correct, click the OK button.
- Everyone group should now be added to the Group or user names section. Select Everyone and check Full control in the Allow column.
- Click Apply and OK to save the changes.
Users are also reporting that you can fix this problem simply by giving Full control over the Config.msi folder to Everyone on your PC. This is a simple procedure, and you can do it by following the steps above.
After changing the security permissions, try to install the application again.
11. Delete Config.msi directory
- Click the Start button, hold the Shift key on your keyboard and choose Power, then select Restart.
- When your PC restarts choose Troubleshoot, choose Advanced options and select Startup settings.
- Click the Restart button.
- When your PC restarts again you’ll see a list of options. Select any version of the Safe Mode by pressing the appropriate keyboard key.
- When Safe Mode starts, start the Command Prompt as administrator.
- When Command Prompt opens, type the following lines pressing Enter after each one:
cd c:config.msi
erase *.*
cd c:
rd config.msi
- Restart your PC and try to install iTunes again.
- If the problem still persists, create the Config.msi folder in the C: directory.
- Create the .rdf file that the installation requires in the Config.msi folder and try to install iTunes again.
- If you encounter any errors, be sure to ignore them and you should be able to install iTunes.
Few users reported that they were unable to install iTunes due to problems with Config.msi directory. One suggested a solution that worked for some users was to delete this folder from Safe Mode and recreate it.
12. Uninstall iDrive
According to users, sometimes Error writing to file message can appear if you have iDrive installed on your PC.
We don’t know how iDrive interferes with the installation process of other applications, but the only solution is to uninstall iDrive. After removing iDrive, the issue should be completely resolved.
You can, of course, do it manually from the Apps & features function in Windows 10.
But sometimes, programs don’t get uninstalled properly and you’re left with file remains that might interfere with the next installation of the same program.
The solution is to use a dedicated uninstaller tool that will do that automatically. To find the most suitable one for your needs, we advise you to pick from the best uninstaller software on Windows 10.
13. Disable Kaspersky antivirus and Memeo Instant Backup
Users reported this error while installing the MySQL workbench tool, and according to them, the issue was caused by Kaspersky antivirus and Memeo Instant Backup.
According to them, after disabling these tools the error was completely resolved. Keep in mind that any other antivirus or backup tool can cause this error to appear, therefore be sure to disable it temporarily.
Users also reported issues with Webroot antivirus, so if you have it installed be sure to temporarily disable it and check if that solves the problem.
14. Turn off User Account Control
- Press Windows Key + S and enter user accounts. Select User Accounts from the menu.
- When User Accounts window opens, go to Change User Account Control settings.
- Move the slider all the way down to Never notify and click OK to save changes.
- After disabling User Account Control restart your PC and check if the problem is resolved.
User Account Control is a security feature that will alert you whenever you try to make a change that requires administrator privileges.
This is a useful feature that can sometimes protect you from malicious software that tries to make changes to your PC without your knowledge.
Even though this feature can be useful, it can also interfere with the installation process and cause Error writing to file message to appear.
15. Change the Symantec Endpoint Protection settings
- Open Symantec Endpoint Protection.
- On the left side click the Change Settings tab.
- Click the Configure Settings button in the Client Management section.
- Locate and disable Enable Application and Device Control option.
According to users, sometimes Symantec Endpoint Protection can interfere with the installation process and cause this and other errors to appear. To fix this problem, you need to perform the quick steps above.
2. Fix – Error writing to file for android-sdk.7z
1. Install Java Development Kit
Users reported this error while trying to install Android SDK on their Windows 10 PC. Apparently, this error is caused because the Java Development Kit is missing.
And the fastest way to fix this problem is to download the Java Development Kit. After downloading it, simply install it and the problem should be completely resolved.
2. Run the setup as administrator and disable your firewall
According to users, you can fix this problem simply by running the setup file as the administrator. If that doesn’t help, you might have to temporarily disable your antivirus and firewall and check if that solves the issue.
If the problem still persists, you might have to completely remove your antivirus software. Users reported that the issue was resolved after removing McAfee antivirus, therefore be sure to try that.
Fix – Error writing to file for 3DS Max
1. Turn off the Compression on Save option
According to users, this error appears when you try to save your file in 3DS Max, and one suggests that the workaround is to disable the Compress on Save option in Preferences.
After disabling this option, the error will not appear anymore, but your files will get larger in size without compression, so keep that in mind.
Users also reported that this error appears if you have more than two instances of 3DS Max open, therefore as long as you have less than 3 instances of this application running, you shouldn’t have any problems.
3. Fix – Error writing to file for Adobe Acrobat
1. Rename the Active X folder
Users reported Error writing to file message while trying to install Adobe Acrobat, and according to them, they managed to resolve this issue simply by renaming the Active X folder.
After renaming the folder to Active X_OLD, create a new Active X folder and copy the files from Active X_OLD folder to the new Active X folder that you created. After doing that, try to install Adobe Acrobat again.
Some users are also suggesting renaming the Acrobat folder to something else and try to install Adobe Acrobat again, so you might want to do that as well.
2. Delete the Apricot folder
Few users reported that they managed to fix this problem simply by going to the Adobe folder: C:ProgramDataAdobe
You should see Apricot and two other folders available. Delete them and try to install Adobe Acrobat as administrator.
3. Use a dedicated software to fix the Registry
Users reported that they managed to fix Error writing to file error while installing Adobe Acrobat simply by running a third-party solution.
Using the dedicated solution recommended below they removed problematic registry entries and that solved the problem for them.
⇒ Get CCleaner
The Error writing to file message can prevent you from installing certain applications, but in most cases, you can fix this problem by disabling your antivirus or by changing your security permissions.
If those solutions don’t work, feel free to try any other solution from this article. Also, if you have any other suggestions, don’t hesitate to write them in the comments section below.
![]()
Newsletter
by Milan Stanojevic
Milan has been enthusiastic about technology ever since his childhood days, and this led him to take interest in all PC-related technologies. He’s a PC enthusiast and he… read more
Updated on April 26, 2022
- The Extract error writing to file message appears when installing certain software, preventing you to finish the installation.
- You will see that the Extract error writing to file in Windows 10 can be triggered by a Windows Installer bug.
- One way of fixing the Error writing file is to tweak the Windows Installer service using a line-command tool.
- It’s also important to know that you can fix this issue using the chkdsk command.
XINSTALL BY CLICKING THE DOWNLOAD FILE
This software will repair common computer errors, protect you from file loss, malware, hardware failure and optimize your PC for maximum performance. Fix PC issues and remove viruses now in 3 easy steps:
- Download Restoro PC Repair Tool that comes with Patented Technologies (patent available here).
- Click Start Scan to find Windows issues that could be causing PC problems.
- Click Repair All to fix issues affecting your computer’s security and performance
- Restoro has been downloaded by 0 readers this month.
Computer errors can occur from time to time, and sooner or later you’ll experience an error on your Windows 10 PC.
Users reported Error writing to file error message while installing certain software, and since this error can prevent you from installing new applications, it’s crucial to know how to properly fix it.
In this comprehensive article, you will learn how to fix the Error writing to file for all the Windows 10 apps.
How can I fix error writing to file alerts?
1. Fix – Error writing to file
1. Register Windows Installer service
- Type cmd in the search tab and click on Run as administrator under Command Prompt to start it with full privileges.
- When Command Prompt opens, enter the following lines:
msiexec /unregistermsiexec /regserver
- After both commands are successfully executed, close Command Prompt.
If you’re trying to install new software on your PC, you’ll have to use Windows Installer service.
This service is crucial for the installation process, but sometimes this service can become unregistered and prevent new applications from installing.
To fix this problem, you need to register the Windows Installer service manually.
By running these commands you’ll manually unregister and reregister the Windows Installer service, and hopefully, that will fix this error for you.
If you can’t access the Windows Installer, we have an excellent guide that will help you fix the problem.
2. Run the chkdsk command
- Open Command Prompt as administrator as shown in the previous step.
- When Command Prompt opens, enter chkdsk X: /r and press Enter (Be sure to replace X with the letter that matches your hard drive partition that you’re to installing the application to).
- If you’re trying to scan your system partition you’ll have to schedule a restart and scan your partition before Windows 10 starts.
- If you’re trying to scan your system partition you’ll have to schedule a restart and scan your partition before Windows 10 starts.
- After the scan is completed, try to run the installation process again.
Sometimes Error writing to file message can appear if you have corrupt files that are interfering with the installation process.
One way to fix this problem is to perform a chkdsk scan and scan your hard drive partition for any corrupt files.
If chkdsk gets stuck follow this comprehensive guide to fix it quickly and continue with this fix.
3. Rename com.Apple.Outlook.client.resources folder
Users reported this error message while trying to install iTunes on their PC, and one way to fix this problem is to rename one of your folders.
According to users, com.Apple.Outlook.client.resources folder can cause this error to appear, therefore in order to fix this problem, you need to find this folder and rename it to com.Apple.Outlook.client.resources_OLD.
After renaming the folder, try to perform the installation again and check if your problem is resolved.
4. Perform a Clean boot
- Press Windows Key + R and enter msconfig. Press Enter or click OK.
- When System Configuration window opens, go to Services tab.
- Check Hide all Microsoft services and then click on Disable all.
- Now go to Startup tab and click Open Task Manager.
- Task Manager will now open.
- In Startup tab, disable all startup applications. You can do that by right clicking the startup item and choosing Disable from the menu (Repeat this process for all startup applications).
- After all startup items are disabled, close Task Manager.
- Go back to System Configuration window and click Apply and OK to save the changes.
- Restart your PC.
Sometimes Error writing to file messages can appear due to installing third-party applications. Certain applications and services can interfere with the setup process and cause this error to appear on your PC.
One way to fix this problem is to disable all startup applications and processes.
After your PC restarts, try to install the application again. If the application manages to install without any errors, repeat the same steps and enable all startup applications and services.
5. Change the security permissions for the ProgramData folder
5.1 Change the owner of the folder
- Open File Explorer and navigate to C:.
- Locate the ProgramData folder.
- If you can’t see this folder, go to View tab and check Hidden items checkbox.
- Right-click the ProgramData folder and choose Properties.
- Go to the Security tab and click on Advanced button.
- Click the Change link next to the Owner name.
- In Enter the object name to select enter Administrators and click Check names. If everything is in order, click OK to save changes.
- Select the Replace the owner on subcontainers and objects.
- Click Apply and OK to save the changes.
Some applications rely on the ProgramData folder for their installation, and if you don’t have the necessary privileges to access this folder, you might get Error writing to file message.
To fix this problem, you need to change the security permissions, but since that is an advanced process, we strongly recommend that you create a System Restore point before making any security-related changes.
5.2 Change the permissions from the Advanced security settings
- When Advanced Security Settings window opens check if SYSTEM and Administrators group have Full control access.
- If one of the groups is missing, be sure to add it by clicking the Add button.
- In case any of the two groups doesn’t have Full control, you can simply change that by double-clicking the group and checking the Full control option.
- Check Replace all child object permissions entries with inheritable permissions entries from this object and click Apply and OK.
- After that, try to reinstall the application again.
Another way to change the permissions of a specific folder is to use Command Prompt. This is a faster, although a bit more advanced method, therefore use it with extra caution.
To do that, open Command Prompt as administrator, enter the following command, and press Enter: icacls "C:Config.Msi" /T /C /grant administrators:F
This is just an example, therefore be sure to replace C:Config.Msi with the path of the folder that you’re trying to modify.
Although we showed you how to change the permissions of the ProgramData folder in our example, sometimes in order to fix this problem you need to change the permissions of the installation directory instead.
6. Rename the Config.msi folder
Sometimes, certain Adobe applications can’t be installed on your PC due to the Config.Msi folder. One of the simplest ways to fix this is to locate the Config.Msi folder and rename it.
By default, this folder should be located in the C: directory, and you can easily rename it. If you can’t rename the folder, you have to change the permission settings for the Config.Msi folder and try again.
7. Run the setup file as administrator
You can fix the Error writing to file error message simply by running the installation process as an administrator. To do that, right-click the setup file and choose Run as administrator from the menu.
This isn’t a permanent solution, but it should allow you to install the desired application without any errors.
- FIX: Error opening file for writing in Windows 10
- Error #268D3: What Is It and How to Remove the Popup
- Windows 10 Undoing Changes Made to Your Computer [Fix]
- Circular Kernel Context Logger 0xc0000035: 6 Easy Fixes
- Error Opening File for Writing: 9 Methods to Fix This Issue
8. Disable McAfee’s EPO agent
McAfee tools such as McAfee EPO agent can sometimes interfere with the installation process and cause this error to appear.
According to users, McAfee EPO agent has the policy to block autorun, and this policy can prevent applications from installing.
After turning the McAfee EPO agent off, you should be able to install any application without problems.
9. Check your firewall
Sometimes this error can occur due to your firewall settings, and you should be able to fix it simply by changing those settings.
User reported this error while installing iTunes, and according to them, the error was caused because the QTTask.exe was prevented from accessing the Internet by the firewall.
After allowing QTTask.exe to access the Internet the issue was completely resolved.
Some PC issues are hard to tackle, especially when it comes to corrupted repositories or missing Windows files. If you are having troubles fixing an error, your system may be partially broken.
We recommend installing Restoro, a tool that will scan your machine and identify what the fault is.
Click here to download and start repairing.
This solution applies to iTunes, but if you’re installing or updating a different application, be sure to check if your firewall isn’t blocking any installation files.
10. Give Full Control permissions to the Everyone group
- Locate the Config.msi folder, right-click it and choose Properties from the menu.
- By default this folder should be located in the C: directory.
- Keep in mind that this folder might be hidden, therefore you need to enable Show hidden items option from the View tab.
- Go to Security tab and click the Edit button.
- Click the Add button.
- In Enter the object names to select field enter Everyone and click Check Names. If your input is correct, click the OK button.
- Everyone group should now be added to the Group or user names section. Select Everyone and check Full control in the Allow column.
- Click Apply and OK to save the changes.
Users are also reporting that you can fix this problem simply by giving Full control over the Config.msi folder to Everyone on your PC. This is a simple procedure, and you can do it by following the steps above.
After changing the security permissions, try to install the application again.
11. Delete Config.msi directory
- Click the Start button, hold the Shift key on your keyboard and choose Power, then select Restart.
- When your PC restarts choose Troubleshoot, choose Advanced options and select Startup settings.
- Click the Restart button.
- When your PC restarts again you’ll see a list of options. Select any version of the Safe Mode by pressing the appropriate keyboard key.
- When Safe Mode starts, start the Command Prompt as administrator.
- When Command Prompt opens, type the following lines pressing Enter after each one:
cd c:config.msi
erase *.*
cd c:
rd config.msi
- Restart your PC and try to install iTunes again.
- If the problem still persists, create the Config.msi folder in the C: directory.
- Create the .rdf file that the installation requires in the Config.msi folder and try to install iTunes again.
- If you encounter any errors, be sure to ignore them and you should be able to install iTunes.
Few users reported that they were unable to install iTunes due to problems with Config.msi directory. One suggested a solution that worked for some users was to delete this folder from Safe Mode and recreate it.
12. Uninstall iDrive
According to users, sometimes Error writing to file message can appear if you have iDrive installed on your PC.
We don’t know how iDrive interferes with the installation process of other applications, but the only solution is to uninstall iDrive. After removing iDrive, the issue should be completely resolved.
You can, of course, do it manually from the Apps & features function in Windows 10.
But sometimes, programs don’t get uninstalled properly and you’re left with file remains that might interfere with the next installation of the same program.
The solution is to use a dedicated uninstaller tool that will do that automatically. To find the most suitable one for your needs, we advise you to pick from the best uninstaller software on Windows 10.
13. Disable Kaspersky antivirus and Memeo Instant Backup
Users reported this error while installing the MySQL workbench tool, and according to them, the issue was caused by Kaspersky antivirus and Memeo Instant Backup.
According to them, after disabling these tools the error was completely resolved. Keep in mind that any other antivirus or backup tool can cause this error to appear, therefore be sure to disable it temporarily.
Users also reported issues with Webroot antivirus, so if you have it installed be sure to temporarily disable it and check if that solves the problem.
14. Turn off User Account Control
- Press Windows Key + S and enter user accounts. Select User Accounts from the menu.
- When User Accounts window opens, go to Change User Account Control settings.
- Move the slider all the way down to Never notify and click OK to save changes.
- After disabling User Account Control restart your PC and check if the problem is resolved.
User Account Control is a security feature that will alert you whenever you try to make a change that requires administrator privileges.
This is a useful feature that can sometimes protect you from malicious software that tries to make changes to your PC without your knowledge.
Even though this feature can be useful, it can also interfere with the installation process and cause Error writing to file message to appear.
15. Change the Symantec Endpoint Protection settings
- Open Symantec Endpoint Protection.
- On the left side click the Change Settings tab.
- Click the Configure Settings button in the Client Management section.
- Locate and disable Enable Application and Device Control option.
According to users, sometimes Symantec Endpoint Protection can interfere with the installation process and cause this and other errors to appear. To fix this problem, you need to perform the quick steps above.
2. Fix – Error writing to file for android-sdk.7z
1. Install Java Development Kit
Users reported this error while trying to install Android SDK on their Windows 10 PC. Apparently, this error is caused because the Java Development Kit is missing.
And the fastest way to fix this problem is to download the Java Development Kit. After downloading it, simply install it and the problem should be completely resolved.
2. Run the setup as administrator and disable your firewall
According to users, you can fix this problem simply by running the setup file as the administrator. If that doesn’t help, you might have to temporarily disable your antivirus and firewall and check if that solves the issue.
If the problem still persists, you might have to completely remove your antivirus software. Users reported that the issue was resolved after removing McAfee antivirus, therefore be sure to try that.
Fix – Error writing to file for 3DS Max
1. Turn off the Compression on Save option
According to users, this error appears when you try to save your file in 3DS Max, and one suggests that the workaround is to disable the Compress on Save option in Preferences.
After disabling this option, the error will not appear anymore, but your files will get larger in size without compression, so keep that in mind.
Users also reported that this error appears if you have more than two instances of 3DS Max open, therefore as long as you have less than 3 instances of this application running, you shouldn’t have any problems.
3. Fix – Error writing to file for Adobe Acrobat
1. Rename the Active X folder
Users reported Error writing to file message while trying to install Adobe Acrobat, and according to them, they managed to resolve this issue simply by renaming the Active X folder.
After renaming the folder to Active X_OLD, create a new Active X folder and copy the files from Active X_OLD folder to the new Active X folder that you created. After doing that, try to install Adobe Acrobat again.
Some users are also suggesting renaming the Acrobat folder to something else and try to install Adobe Acrobat again, so you might want to do that as well.
2. Delete the Apricot folder
Few users reported that they managed to fix this problem simply by going to the Adobe folder: C:ProgramDataAdobe
You should see Apricot and two other folders available. Delete them and try to install Adobe Acrobat as administrator.
3. Use a dedicated software to fix the Registry
Users reported that they managed to fix Error writing to file error while installing Adobe Acrobat simply by running a third-party solution.
Using the dedicated solution recommended below they removed problematic registry entries and that solved the problem for them.
⇒ Get CCleaner
The Error writing to file message can prevent you from installing certain applications, but in most cases, you can fix this problem by disabling your antivirus or by changing your security permissions.
If those solutions don’t work, feel free to try any other solution from this article. Also, if you have any other suggestions, don’t hesitate to write them in the comments section below.
![]()
Newsletter
Работа программы 7-Zip осуществляется благодаря взаимодействию команд и операторов. Для этого требуются подходящие условия, что обеспечивается не всегда. Поэтому возникает ошибка контрольной суммы и другие проблемы при распаковке архива приложением 7-Zip. В этой статье вы найдете решение частых неполадок в работе архиватора.
Ошибка контрольной суммы CRC
Скачивание заархивированного файла может завершиться тем, что пользователь при запуске получит сообщение: «Ошибка контрольной суммы». Другое название проблемы: «Ошибка CRC сжатых данных».
Такая ошибка возникает из-за того, что скачивание архива сопровождалось потерей пакетов. Во время загрузки происходили ошибки, что актуально для нестабильного интернета, когда теряется связь.
Чаще с такой проблемой сталкиваются пользователи с большими файлами, загрузка которых длится несколько часов. При этом объем документов совпадает, но только округленные значения, так как несколько битов все равно потеряно.
Как исправить:
- Проблему с распаковкой 7-Zip архива можно решить до возникновения ошибки, используя программное обеспечение Download Master. Потерянный пакет вынуждает начинать загрузку заново.
- Другой вариант – восстановить архив. Рекомендуется воспользоваться архиватором WinRAR. Если расширение файла не поддерживается, то подойдет программа Universal Extractor.
WinRAR удобен тем, что имеет встроенную функцию для восстановления архивов, где некоторое количество пакетов потеряно.
Как восстановить архив
- Запустите WinRAR, через интерфейс выберите Tools, а затем – Repair archive.

- Открыть поврежденный архив не получится, поэтому создайте новый и перейдите в папку к файлу с потерянными пакетами.
- Перед восстановлением щелкните один раз по названию.
- Иногда требуется указать путь для восстановленного архива и его формат. Расширение должно оставаться тем же, что было до потери информации. Если все указано верно, нажмите ОК и дождитесь окончания работы WinRAR.
Если приложение справится и ошибка архива 7-Zip исчезнет, то загружать файл заново не придется.
Проблема может возникать постоянно. Для решения систематического сбоя проверьте оперативную память и жесткий диск программным обеспечением Aida.
Отказ в доступе
Часто пользователи при добавлении новых файлов через меню 7-Zip сталкиваются с ошибкой «Отказано в доступе». Существует 3 варианта решения:
- Проверить корректность работы антивируса. Не блокирует ли он файл, запрещая активировать архив на компьютере. Достаточно отключить программу и открыть документ.
- Архиватор 7-Zip предполагает установку паролей. Возможно, требование ввести ключ от файла не отображается, а пользователь сразу получает отказ доступа. Единственный способ проверить это – обратиться к правообладателю сжатого материала.
- Если файл открывается не из администраторской директории, то нужно поменять учетную запись или открыть архив через главного пользователя.
Иные проблемы говорят о том, что файл битый. Попробуйте воспользоваться не 7-Zip, а другим распаковщиком или просто скачайте документ заново.
Unsupported command 7 Zip
Ошибка «Unsupported command» в 7-Zip возникает совместно с указанием места расположения файла. Но локальная ссылка не представляет ничего интересного, так как решение проблемы кроется не в ней.
Установка архиватора 7-Zip заканчивается тем, что пользователь устанавливает связь между программой и сжатыми данными. Для этого нужно указать ярлык программы.

Правильный выбор – 7zFM, а не 7zG. В последнем случае программе отправляется команда открыть файл через нерабочий ярлык.
Отменить привязку распаковщика к формату можно через интерфейс 7-Zip:
- Откройте файловый менеджер через меню «Пуск».
- «Сервис» – «Настройки».
- Во вкладке «Система» снимите галочку в окошке рядом с проблемным форматом. Щелкните ОК.
Теперь можно попробовать запустить документ заново.
Не удается открыть файл
Пользователь может получить сообщение, что 7-Zip не удалось открыть файл, который сохранен как архив. Ошибка носит функциональный характер, связанный с основным недостатком распаковщика.
Архивный файл открывается через контекстное меню.

Если это не дало результата, попробуйте следующие варианты:
- Воспользоваться аналогами, например WinRAR. Иногда достаточно переустановить 7-Zip, и ошибка исчезает.
- Установить на компьютер программу, восстанавливающую битые архивы, и извлечь файлы через нее.
Убедитесь, что расширение документа соответствует возможностям разархиватора.
Данные после конца блока полезных данных
Сообщение программы 7-Zip в конце распаковки: «Есть данные после конца блока полезных данных» возникает при использовании двух разных архиваторов. Запаковывались документы через WinRAR, где установлена опция «Добавить запись восстановления». Разработчики предлагают не бороться с ошибкой, а продолжать распаковывать.

Источник проблемы очевиден, если пользователь получает ошибку при распаковке через контекстное меню или интерфейс файлового менеджера. Для проверки выделите документы мышкой и перенесите в новую папку. Если сообщения нет, то и в остальных случаях его можно игнорировать.
Разработчики 7-Zip выявили связь с WinRAR после обнаружения в архиве данных, объем которых не превышает 50 Кб. Распаковщик предупреждает об этом документе, поэтому сообщение игнорируется.
Поврежденный архив
Если во время работы 7-Zip пользователь получает сообщение: «Ошибка данных», то, возможно, архив поврежден при загрузке на компьютер. Исправить проблему без использования сторонних средств нельзя. В таком случае установите программу Universal Extractor.
Приложение исправляет проблему поврежденных архивов. Поддерживаются все известные методы сжатия. Интерфейс не содержит лишних кнопок, поэтому понятен и прост.

Открыть архив удается почти всегда. Если ситуация повторилась, проверьте компьютер на вирусы, так как они могут перехватывать пакеты. Это разрушает структуру сжатого файла, делая его недоступным пользователю.
Неподдерживаемый метод
Если некоторые файлы извлечены из архива, а другие нет, то пользователь увидит ошибку, что определенный метод не поддерживается в программе 7-Zip.

Иногда быстрее воспользоваться другим распаковщиком. Если аналогов на компьютере нет, то обновите 7-Zip до последней версии.
С подобной ошибкой встречаются пользователи, скачивающие документы в формате «zipx». Новые методы, разработанные WinZip, позволяют сократить размер файла, но другим приложениям пришлось выпускать обновления, чтобы решить проблему.
Ошибки в архиваторе возникают часто, но пользователи совместно с разработчиками научились их решать и сокращать в последних версиях программы. О том, почему сайт www.7-zip.org не открывается и как получить доступ, подробно рассказывается в отдельной статье.
Обновить 7-Zip для исправления ошибок можно на официальном сайте разработчика. Но сейчас пользователи испытывают трудности с доступом к ресурсу, поэтому скачайте архиватор 7-Zip бесплатно на нашем сайте.
Загрузка…
Содержание
- 1 Ошибка контрольной суммы CRC
- 2 Как восстановить архив
- 3 Отказ в доступе
- 4 Unsupported command 7 Zip
- 5 Не удается открыть файл
- 6 Данные после конца блока полезных данных
- 7 Поврежденный архив
- 8 Неподдерживаемый метод
- 9 Сайт 7-Zip не открывается
Запись опубликовал aplayer · 12 сентября, 2018
6 102 просмотра
Все наши архивы создаются в программе 7z. Для распаковки сборок обязательно нужно использовать только эту программу. Скачать её можно на сайте https://www.7-zip.org/
При использовании WinRar и других программ работа сборок не гарантируется.
Если при распаковке многотомного архива нам выдало какую либо ошибку это значит надо какую-то часть перекачать заново. Но проблема в том, что архиватор не сообщает какой файл является битым. Перекачивать все куски архива не нужно.
Самая распространенная ошибка это «неожиданный конец архива». Лечится она следующим образом:
Открываем архиватор 7z. Находим в нем папку с нашим многотомных архивом. Кликаем по первому файлу правой кнопкой мыши и выбираем меню как на картинке ниже:

Когда откроется следующее окно, то идем на страницу скачивания сборки и там под каждой ссылкой видно какие-то непонятные цифры-буквы.
Сверяем значение sha1 полученное в программе 7z со значением под ссылкой.
Если буквы-цифры в программе и на сайте совпадают, то файл перекачивать не надо. Если не совпадают то этот кусок архива надо перекачать.
Такую операцию надо проделать с каждым файлом.
Эта операция называется проверка контрольных сумм. И служит специально для проверки целостности файлов.
Авторизация
Работа программы 7-Zip осуществляется благодаря взаимодействию команд и операторов. Для этого требуются подходящие условия, что обеспечивается не всегда. Поэтому возникает ошибка контрольной суммы и другие проблемы при распаковке архива приложением 7-Zip. В этой статье вы найдете решение частых неполадок в работе архиватора.
Ошибка контрольной суммы CRC
Скачивание заархивированного файла может завершиться тем, что пользователь при запуске получит сообщение: «Ошибка контрольной суммы». Другое название проблемы: «Ошибка CRC сжатых данных».
Такая ошибка возникает из-за того, что скачивание архива сопровождалось потерей пакетов. Во время загрузки происходили ошибки, что актуально для нестабильного интернета, когда теряется связь.
Чаще с такой проблемой сталкиваются пользователи с большими файлами, загрузка которых длится несколько часов. При этом объем документов совпадает, но только округленные значения, так как несколько битов все равно потеряно.
Как исправить:
- Проблему с распаковкой 7-Zip архива можно решить до возникновения ошибки, используя программное обеспечение Download Master. Потерянный пакет вынуждает начинать загрузку заново.
- Другой вариант – восстановить архив. Рекомендуется воспользоваться архиватором WinRAR. Если расширение файла не поддерживается, то подойдет программа Universal Extractor.
WinRAR удобен тем, что имеет встроенную функцию для восстановления архивов, где некоторое количество пакетов потеряно.
Как восстановить архив
- Запустите WinRAR, через интерфейс выберите Tools, а затем – Repair archive.
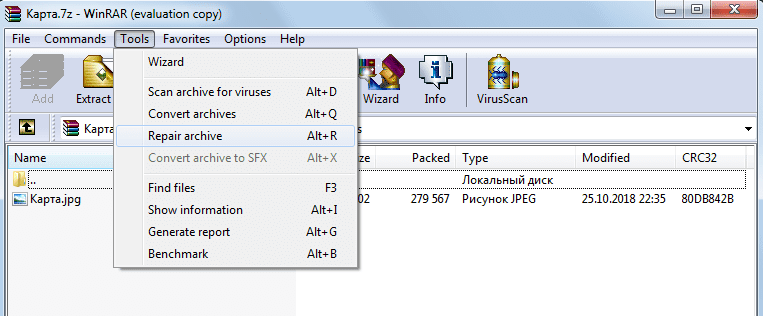
- Открыть поврежденный архив не получится, поэтому создайте новый и перейдите в папку к файлу с потерянными пакетами.
- Перед восстановлением щелкните один раз по названию.
- Иногда требуется указать путь для восстановленного архива и его формат. Расширение должно оставаться тем же, что было до потери информации. Если все указано верно, нажмите ОК и дождитесь окончания работы WinRAR.
Если приложение справится и ошибка архива 7-Zip исчезнет, то загружать файл заново не придется.
Проблема может возникать постоянно. Для решения систематического сбоя проверьте оперативную память и жесткий диск программным обеспечением Aida.
Отказ в доступе
Часто пользователи при добавлении новых файлов через меню 7-Zip сталкиваются с ошибкой «Отказано в доступе». Существует 3 варианта решения:
- Проверить корректность работы антивируса. Не блокирует ли он файл, запрещая активировать архив на компьютере. Достаточно отключить программу и открыть документ.
- Архиватор 7-Zip предполагает установку паролей. Возможно, требование ввести ключ от файла не отображается, а пользователь сразу получает отказ доступа. Единственный способ проверить это – обратиться к правообладателю сжатого материала.
- Если файл открывается не из администраторской директории, то нужно поменять учетную запись или открыть архив через главного пользователя.
Иные проблемы говорят о том, что файл битый. Попробуйте воспользоваться не 7-Zip, а другим распаковщиком или просто скачайте документ заново.
Unsupported command 7 Zip
Ошибка «Unsupported command» в 7-Zip возникает совместно с указанием места расположения файла. Но локальная ссылка не представляет ничего интересного, так как решение проблемы кроется не в ней.
Установка архиватора 7-Zip заканчивается тем, что пользователь устанавливает связь между программой и сжатыми данными. Для этого нужно указать ярлык программы.
Правильный выбор – 7zFM, а не 7zG. В последнем случае программе отправляется команда открыть файл через нерабочий ярлык.
Отменить привязку распаковщика к формату можно через интерфейс 7-Zip:
- Откройте файловый менеджер через меню «Пуск».
- «Сервис» – «Настройки».
- Во вкладке «Система» снимите галочку в окошке рядом с проблемным форматом. Щелкните ОК.
Теперь можно попробовать запустить документ заново.
Не удается открыть файл
Пользователь может получить сообщение, что 7-Zip не удалось открыть файл, который сохранен как архив. Ошибка носит функциональный характер, связанный с основным недостатком распаковщика.
Архивный файл открывается через контекстное меню.

Если это не дало результата, попробуйте следующие варианты:
- Воспользоваться аналогами, например WinRAR. Иногда достаточно переустановить 7-Zip, и ошибка исчезает.
- Установить на компьютер программу, восстанавливающую битые архивы, и извлечь файлы через нее.
Убедитесь, что расширение документа соответствует возможностям разархиватора.
Данные после конца блока полезных данных
Сообщение программы 7-Zip в конце распаковки: «Есть данные после конца блока полезных данных» возникает при использовании двух разных архиваторов. Запаковывались документы через WinRAR, где установлена опция «Добавить запись восстановления». Разработчики предлагают не бороться с ошибкой, а продолжать распаковывать.
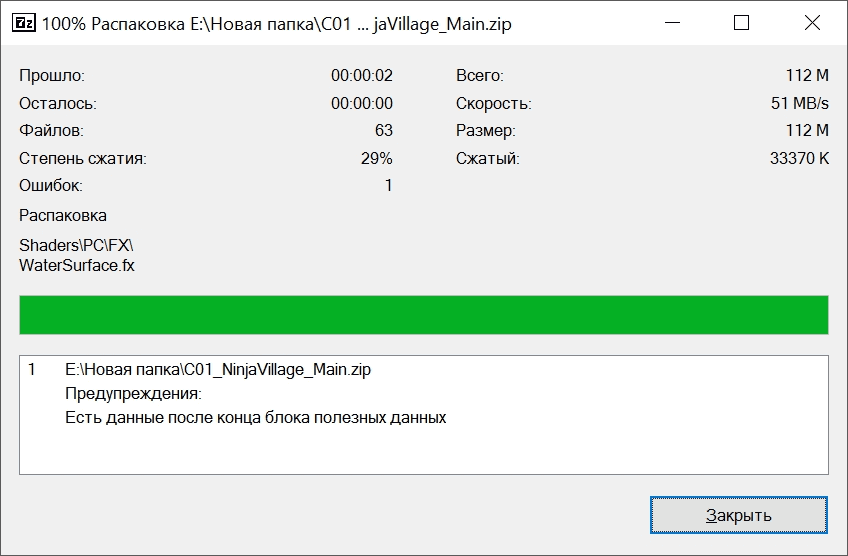
Источник проблемы очевиден, если пользователь получает ошибку при распаковке через контекстное меню или интерфейс файлового менеджера. Для проверки выделите документы мышкой и перенесите в новую папку. Если сообщения нет, то и в остальных случаях его можно игнорировать.
Разработчики 7-Zip выявили связь с WinRAR после обнаружения в архиве данных, объем которых не превышает 50 Кб. Распаковщик предупреждает об этом документе, поэтому сообщение игнорируется.
Поврежденный архив
Если во время работы 7-Zip пользователь получает сообщение: «Ошибка данных», то, возможно, архив поврежден при загрузке на компьютер. Исправить проблему без использования сторонних средств нельзя. В таком случае установите программу Universal Extractor.
Приложение исправляет проблему поврежденных архивов. Поддерживаются все известные методы сжатия. Интерфейс не содержит лишних кнопок, поэтому понятен и прост.
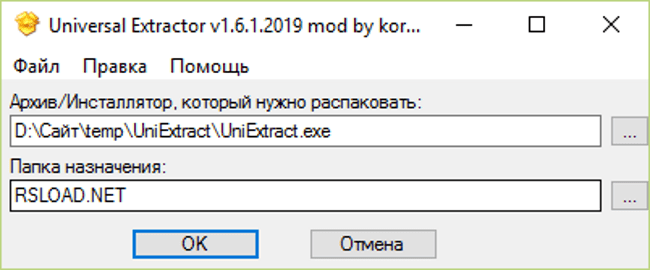
Открыть архив удается почти всегда. Если ситуация повторилась, проверьте компьютер на вирусы, так как они могут перехватывать пакеты. Это разрушает структуру сжатого файла, делая его недоступным пользователю.
Неподдерживаемый метод
Если некоторые файлы извлечены из архива, а другие нет, то пользователь увидит ошибку, что определенный метод не поддерживается в программе 7-Zip.
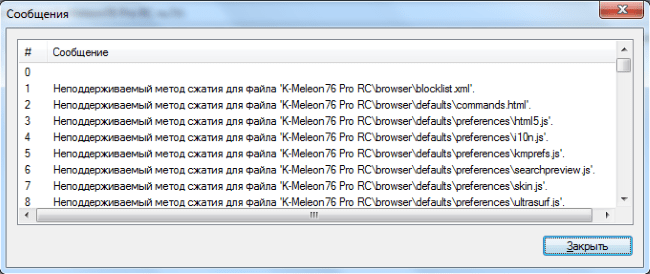
Иногда быстрее воспользоваться другим распаковщиком. Если аналогов на компьютере нет, то обновите 7-Zip до последней версии.
С подобной ошибкой встречаются пользователи, скачивающие документы в формате «zipx». Новые методы, разработанные WinZip, позволяют сократить размер файла, но другим приложениям пришлось выпускать обновления, чтобы решить проблему.
Сайт 7-Zip не открывается
Ошибки в архиваторе возникают часто, но пользователи совместно с разработчиками научились их решать и сокращать в последних версиях программы. О том, почему сайт www.7-zip.org не открывается и как получить доступ, подробно рассказывается в отдельной статье.
Скачать 7-Zip с нашего сайта
Обновить 7-Zip для исправления ошибок можно на официальном сайте разработчика. Но сейчас пользователи испытывают трудности с доступом к ресурсу, поэтому скачайте архиватор 7-Zip бесплатно на нашем сайте.
Используемые источники:
- https://amlgames.com/blogs/entry/2-oshibki-pri-raspakovke-mnogotomnyh-arhivov-chto-delat/
- https://7zip-arhive.ru/faq/oshibki
В этой статье мы будем использовать следующие способы для устанения ошибки «Ошибка записи в файл»:
- Способ 1: Запуск инсталлятора с правами администратора
- Способ 2: Устранение проблем с совместимостью
- Способ 3: Установка разрешений на запись
- Способ 4: Отключение UAC
- Способ 5: Отключение антивируса
- Способ 6: Проверка состояния жесткого диска
1. Запуск инсталлятора с правами администратора
Наиболее часто рассматриваемая ошибка возникает, когда установочный файл не может получить доступ к определённому месту для записи данных, например, при инсталляции софта на системный диск. В такой ситуации должно помочь открытие исполняемого файла с правами админа: кликните по нему правой кнопкой мыши, затем выберите параметр «Запуск от имени администратора».

2. Устранение проблем с совместимостью
Нередко причина появления ошибки заключается в проблемах с совместимостью: например, установочный файл, предназначенный, скажем, для Windows XP, запускается на Windows 10 последних редакций. В такой ситуации стоит воспользоваться встроенным в ОС средством устранения неполадок совместимости.
- Кликните ПКМ по инсталлятору и выберите пункт «Свойства».

- Перейдите на вкладку «Совместимость» и воспользуйтесь ссылкой «Запустить средство устранения проблем с совместимостью».

- Подождите, пока инструмент подберёт настройки, после чего нажмите «Использовать рекомендованные параметры».

Попробуйте снова установить приложение, на этот раз рассматриваемая проблема больше не появится.
3. Установка разрешений на запись
Если предыдущие методы не помогли устранить ошибку, возможно, дело в разрешениях на изменение содержимого целевого каталога. Рекомендуется проверить существующие параметры и изменить их в случае необходимости, в чём вам поможет этая инструкция.
4. Отключение UAC
Иногда причиной ошибки может быть система контроля учётных записей Windows (UAC): из-за бага или сбоев в настройках безопасности инсталлятору запрещено изменение файловой системы. Для решения этой проблемы можно временно отключить UAC, установить желаемый софт и активировать контроль аккаунтов обратно. На нашем сайте уже есть инструкции по проведению этой процедуры, ознакомьтесь с ними.

5. Отключение антивируса
Нельзя исключать и вмешательство защитного ПО: нередко некоторые устаревшие компоненты инсталляторов помечены в их алгоритмах как небезопасные, антивирус блокирует их, вследствие чего и возникает ошибка записи в файл. Для проверки можно приостановить защиту и выполнить запуск проблемного инсталлятора. Но стоит иметь в виду, что такое решение небезопасно, и пользоваться им лучше лишь в случае крайней необходимости.
6. Проверка состояния жесткого диска
Самой редкой, но и самой неприятной причиной рассматриваемой проблемы являются сбои в работе жесткого диска: не исключено, что в нём присутствуют плохие и/или нестабильные секторы, запись в которые невозможна, о чём и сигнализирует система. Поэтому если ни один из вышеприведённых способов не принёс должного эффекта, следует проверить накопитель. Как проверить SSD и M2 жесткие диски на ошибки, а так же обычные диски читаем здесь и здесь.

-
Этот сайт использует файлы cookie. Продолжая пользоваться данным сайтом, Вы соглашаетесь на использование нами Ваших файлов cookie. Узнать больше.
Извлечение:Ошибка записи файла ( Что делать ? )
Тема в разделе «Архив», создана пользователем ROker21, 15 фев 2018.
- Статус темы:
-
Закрыта.
- Статус темы:
-
Закрыта.
I have downloaded the InDesign_8_LS16.7z file twice using the alternate down load method, I will not use that virus of a Akami downloader. Both copies of the 7z file compare exactly the same.
05/16/2012 11:33 PM 921,324,758 InDesign_8_LS16.7z
However when I run the EXE to extract the file, once it reaches 100% complete I receive the following dialog:
«A Problem occurred while extracting some files. Check available space on your computer and the write privledges on the destination folder.»
I have done this on two separate x64 computers (Win7 & Vista) logged in as a user with administrative rights. I don’t have these types of errors installing or extracting any other software (for instance the trial version of Photoshop CS6).
Both computers have adequate space to extract the files. However in the created folders I see alot of zero byte files, for instance like this:
Directory of C:UsersAUserDownloadsCS6Adobe InDesign CS6Adobe InDesign CS6payloadsAdobeCameraRaw7.0All
05/16/2012 10:13 PM <DIR> .
05/16/2012 10:13 PM <DIR> ..
04/06/2012 12:41 AM 0 AdobeCameraRaw7.0All.boot.xml
04/06/2012 12:41 AM 0 AdobeCameraRaw7.0All.proxy.xml
04/06/2012 12:41 AM 0 Assets1_1.sig
04/06/2012 12:41 AM 17,208,900 Assets1_1.zip
04/06/2012 12:41 AM 0 Install.db
04/06/2012 12:41 AM 0 Install.sig
04/06/2012 12:41 AM 0 media.sql
04/06/2012 12:41 AM 0 Media_db.db
8 File(s) 17,208,900 bytes
2 Dir(s) 89,268,310,016 bytes free
Both computers compare the same for the extracted number of Adobe InDesign CS6 files, and bytes:
589 MB (618,496,815 bytes)
521 Files, 110 Folders
Clearly data is being dropped and not extracted without error until the end of the process, Any ideas on how to solve this problem ?
Ошибка с кодом выхода 6 или кодом выхода 7 при установке
При попытке установки приложения Creative Cloud возникает одна из ошибок, перечисленных ниже:
Код выхода: 6
Код выхода: 7
Установка Creative Suite, Photoshop Elements и Premiere Elements
Справка по устранению ошибок с кодом выхода 6 или 7, которые возникают при установке приложения Creative Suite, Photoshop Elements или Premiere Elements приводится в разделе «Ошибки установки. Код выхода 6 или код выхода 7 | CS».
Решение 1: переименуйте папки Adobe в папке Applications или в папке Program Files
Примечание. Перед выполнением этого решения, убедитесь, что Вы пробовали удалить программы, которые Вы пытаетесь установить.
Часто файлы, оставшиеся после предыдущих попыток установки, могут вызывать системные ошибки чтения или записи. Проверьте папки Applications (Mac OS) или Program Files (Windows) на предмет наличия папок, оставшихся после предыдущей попытки установки или обновления.
-
Перейдите к:
Mac OS: /Applications
Windows: C:Program FilesAdobe
-
Посмотрите, нет ли папок с именами, соответствующими названиям приложений, которые Вы пытаетесь установить, переименуйте их при наличии. Например, переименуйте Adobe Photoshop CC в Adobe Photoshop CС old.
-
Проверьте, нет ли папки с именем AdobePatchFiles и переименуйте ее при наличии.
-
(Только для Mac OS) Переименуйте папку Adobe в папке Applications в Adobe old.
-
Переустановите программное обеспечение.
-
Если установка завершена, убедитесь в том, что другие приложения Adobe работают должным образом, а затем удалите переименованные папки.
Решение 2: проверьте права доступа к файлам
Эти ошибки могут указывать на проблемы, связанные с правами доступа к файлам. Для их устранения проверьте, что у вас есть доступ с правом чтения и записи к требуемым файлам и папкам.
-
Проверьте в главном журнале установки Creative Cloud коды ошибок и запишите пути к файлам, с которыми связаны сообщения об ошибке.
-
Укажите родительскую папку (или каталог) в пути к файлу для каждого сообщения об ошибке. Родительская папка — это папка непосредственно перед итоговой папкой в сообщении об ошибке.
Укажите родительскую папку для каждого сообщения об ошибке. -
Закройте все приложения Adobe.
-
Следуйте приведенным ниже инструкциям для используемой операционной системы, чтобы изменить разрешения.
Для этого решения требуются права администратора на компьютере. Войдите в систему, используя учетную запись администратора.
-
Откройте «Пуск» > «Проводник» > «Мой компьютер».
-
Перейдите к родительской папке. Например, Windows (С:) > Program Files > Common Files > Adobe.
-
Щелкните правой кнопкой мыши по папке и выберите «Свойства».
-
В разделе «Атрибуты» снимите флажок «Только для чтения» и нажмите «Применить».
-
Откройте вкладку «Безопасность».
-
В разделе «Имена группы или пользователя» выберите «Система» и проверьте, что выбран параметр «Полный контроль» в разделе «Разрешения». Если он не выбран, выполните следующие действия:
- Нажмите кнопку «Изменить».
- В появившемся диалоговом окне «Разрешения» выберите «Система».
- В разделе «Разрешения для системы» установите галочку в столбце «Разрешить» рядом с параметром «Полный контроль».
- Нажмите кнопку «Применить», затем кнопку «ОК».
-
Повторите шаг 6, выберите «Администраторы» в разделе «Имена группы или пользователя».
-
Повторите процедуру для всех остальных путей из журналов сообщений об ошибках.
-
Переустановите приложение Adobe.
-
Откройте «Проводник»: щелкните мышкой в верхнем правом углу экрана, нажмите «Поиск», введите «Проводник» и затем щелкните «Проводник».
-
Перейдите к родительской папке. Например, Windows (С:) > Program Files > Common Files > Adobe.
-
Щелкните правой кнопкой мыши по папке и выберите «Свойства».
-
В разделе «Атрибуты» снимите флажок «Только для чтения» и нажмите «Применить».
-
В диалоговом окне «Подтверждение изменения атрибутов» нажмите OK, чтобы применить изменения для этой папки, подпапки и файлов.
-
Откройте вкладку «Безопасность».
-
В разделе «Имена группы или пользователя» выберите «Система» и проверьте, что выбран параметр «Полный контроль» в разделе «Разрешения». Если он не выбран, выполните следующие действия:
- Нажмите кнопку «Изменить».
- В появившемся диалоговом окне «Разрешения» выберите «Система».
- В разделе «Разрешения для системы» установите галочку в столбце «Разрешить» рядом с параметром «Полный контроль».
- Нажмите кнопку «Применить», а затем кнопку ОК.
-
Повторите шаг 7, выберите «Администраторы» в разделе «Имена группы или пользователя».
-
Повторите процедуру для всех остальных путей из журналов сообщений об ошибках.
-
Переустановите приложение Adobe.
-
Выберите «Пуск» > «Компьютер» > «Упорядочить» > «Параметры папок и поиска», затем откройте вкладку «Вид».
-
В разделе «Дополнительные параметры» снимите флажок «Использовать мастер общего доступа (рекомендуется)» и нажмите OK.
-
Перейдите к родительской папке.
-
Щелкните правой кнопкой мыши по папке и выберите «Свойства».
-
В разделе «Атрибуты» снимите флажок «Только для чтения» и нажмите «Применить».
-
В диалоговом окне «Подтверждение изменения атрибутов» нажмите OK, чтобы применить изменения для этой папки, подпапки и файлов.
-
На вкладке «Безопасность» проверьте, что установлены разрешения «Полный контроль» для пунктов «Администраторы» и «Системы». В противном случае выполните следующие действия:
- Нажмите кнопку «Изменить».
- При выводе запроса в отношении функций контроля учетных записей пользователей (UAC), примите его в соответствии с инструкциями.
- Измените настройки при необходимости, чтобы разрешить полный контроль для пунктов «Система» и «Администраторы».
- Для применения изменений нажмите кнопку «ОК».
-
Нажмите кнопку «Дополнительно», выберите вкладку «Владелец», а затем нажмите кнопку «Изменить». Примите запрос в отношении прав контроля учетных записей пользователей (UAC), если он появится.
-
В разделе «Изменить владельца» нажмите «Администраторы» и выберите «Заменить владельца подконтейнеров и объектов». Нажмите кнопку Применить, а затем кнопку ОК.
-
На вкладке «Разрешения» нажмите кнопку «Изменить разрешения». Примите запрос в отношении прав контроля учетных записей пользователей (UAC), если он появится.
-
Установите флажок Заменить все разрешения дочернего объекта на разрешения, наследуемые от этого объекта.
-
Нажимайте кнопки «ОК» и «Да» до тех пор, пока Вы не закроете диалоговое окно «Свойства».
-
Повторяйте эти действия для всех дополнительных путей к файлу.
-
Переустановите приложение Adobe.
-
Перейдите к родительской папке.
-
Нажмите клавишу Control и выберите папку. Выберите команду Get Info (Свойства).
-
В разделе «Общий доступ и права доступа» выберите пункт «Свойства», чтобы отобразить параметры владельца и группы, при необходимости.
-
Щелкните на значке замка в нижнем правом углу. Введите имя пользователя и пароль администратора при отображении соответствующего запроса.
-
Укажите разрешения для чтения и записи для Вашего имени пользователя, системы, администратора и для всех.
-
Нажмите на значок шестеренки, выберите «Применить к вложенным объектам» и нажмите ОК.
-
Закройте окно «Свойства».
-
Повторите эти действия для остальных путей.
-
Переустановите приложение Adobe.
Решение 3. Исправьте Microsoft Visual C++ Redistributable
-
Перейдите в «Панель управления» > «Программы» > «Программы и компоненты».
-
Проверьте наличие установленных пакетов Microsoft Visual C++ Redistributable.
Можно выполнить поиск файла журнала установки Adobe, чтобы определить точную версию пакета Microsoft Visual C++ Redistributable, вызвавшего ошибку. Затем или восстановите, или переустановите только эту версию.
-
По очереди щелкните правой кнопкой мыши на каждой версии, выберите Изменение и нажмите Восстановить в следующем диалоговом окне.
Если изменение не доступно для версии, можно удалить, а затем переустановить файлы. Посетите Центр загрузок Microsoft для загрузки новой копии файлов установки распространяемого пакета.
-
Переустановите приложение Adobe.
Решение 4: Перезагрузите компьютер в безопасном режиме
-
Перезагрузите компьютер, следуя инструкциям в одном из следующих документов:
-
Переустановите приложение Adobe.
Решение 5. (Только для Windows) Исправьте программу установки Microsoft Windows
-
(Windows 7) Выберите Пуск > Все программы > Стандартные.
-или-
(Windows 8.1/10) Щелкните правой кнопкой мыши на кнопке «Пуск».
-
(Windows 7) Щелкните правой кнопкой мыши по командной строке и выберите Запуск от имени администратора.
-или-
(Windows 8.1/10) Выберите командную строку (администратор).
-
В окне командной строки введите sfc /SCANNOW и нажмите клавишу Ввод.
-
По завершении сканирования системы введите msiexec /unreg в окне командной строки и нажмите Ввод.
-
Введите msiexec /regserver в окне командной строки и нажмите Ввод.
-
Переустановите приложение Adobe.
Решение 6: Просмотрите файл журнала установки
Код выхода 6 и код выхода 7 — это общие коды ошибок. Чтобы определить точную причину ошибки, см. журнал установки, раздел «Возникают проблемы при установке». Сообщение об ошибке, которое отображается под кодом выхода, описывает проблему.
Дополнительные сведения о том, где найти файлы журналов и как их просмотреть, можно найти в статье Устранение неполадок, возникших при установке, с помощью файлов журналов | Creative Cloud.
![]()
Adobe Support Community
![]()
-
Global community
- Language:
-
Deutsch
-
English
-
Español
-
Français
-
Português
- 日本語コミュニティ
- 한국 커뮤니티
Exit
-
-
Home
-
Illustrator
-
Discussions
-
- Re: Illustrator » error writing file»

1 Correct answer

![]()
Adobe Employee
,
Oct 01, 2020
Oct 01, 2020
Thank you for sharing the information. I’d request creating a new user account on your machine and try to work on the app there. Let us know how it goes. Thanks!

5
Replies
5
![]()
Learning Resources for Illustrator
Crash on launch and known issues
Fonts and Typography in Illustrator

- Сообщения
- 978
- Реакции
- 247
-
#1
Коллеги, добрый вечер.
Акробат не хочет сохранять файл
«Невозможно сохранить файл. Неверный числовой диапазон»
Куда копать, чтоб раскопать? )))

_MBK_
Пикирующий бомбардировщик
15 лет на форуме
- Сообщения
- 32 638
- Реакции
- 10 681
-
#2
Или вам на пальцах суть ошибки объяснить?