Если принтер Xerox 3140 больше не печатает, сообщая об ошибке свечением индикатора ⚠️, тогда неисправность следует устранить немедленно.
Работа устройства может быть прекращена по таким причинам:
- не проведена замена чипа после заправки картриджа или закончился тонер;
- износ комплектующих;
- открыта верхняя крышка;
- аппарат не может захватить бумагу, произошло застревание или лоток с расходным материалом пуст;
- программные ошибки;
- поломка функциональных механизмов.
Воспользуйтесь нашим руководством, чтобы восстановить печать. Если определенный пункт инструкции не актуален для вашей ситуации, смело переходите к следующему шагу.
Ошибки печати Xerox Phaser 3140
Отследить неисправность у Xerox 3140 поможет световая индикация диода Error LED, который указывает на ошибки характерным свечением красного цвета или мерцанием оранжевого (в случае замятия).

Шаг №1. Блокировка чипа после заправки
Недавно заправили тонером совместимый картридж Xerox 108R00908 (108R00909 — более емкая версия расходника), а принтер вдруг стал выдавать ошибку? Скорее всего, вы забыли заменить чип, именно он блокирует работу аппарата.
Чтобы отказаться от замены чипа, воспользуйтесь прошивкой Xerox 3140.
Шаг №2. Износ комплектующих
 Xerox 3140 не может печатать без периодической замены комплектующих, рассчитанных на 50 000 страниц (при заполняемости листа A4 до 5%):
- термоэлемент (фьюзер);
- ролик захвата бумаги;
- вал переноса (трансфер роллер).
О необходимости замены сменных элементов принтер проинформирует вас с помощью индикатора.
Шаг №3. Открыта крышка
Так называемый синдром «открытой крышки» появляется в случае поломки фиксатора. Проведите несколько манипуляций с крышкой то открывая, то закрывая ее. Если проблема не исчезнет, обратитесь за помощью в сервисный центр.
Шаг №4. Замена ролика захвата бумаги
Вряд ли вы бы не заметили отсутствие бумаги в лотке подачи. В большинстве случаев принтер не видит расходный материал из-за того, что резинка на ролике захвата стирается. По этой причине также происходят частые замятия и подбор слипшихся листов.
Выньте лоток для бумаги. Там же снимите ролик, отвинтив шуруп.

Подденьте резинку отверткой, чтобы закрепить неиспользуемой ранее стороной.

Напоследок почистите тормозную площадку спиртовым раствором.

Шаг №5. Программные ошибки
Для начала обновите драйверы и микропрограммное обеспечение, скачав его с официального сайта производителя.
Если ошибка возникает вновь, тогда проверьте документ, который отправляете в печать:
- смените формат (например, PDF распечатайте как изображение);
- разделите объемный документ на несколько более мелких файлов;
- очистите очередь на печать (возможно, заполнена память устройства или в процессе обработки операции произошел сбой).
Шаг №6. Поломка функциональных механизмов
Все вышеперечисленные рекомендации не помогли устранить ошибку печати? Тогда больше ничего не остается, кроме как вызвать мастера.
Провести аппаратный ремонт невозможно, если пользователь не обладает специальными навыками и необходимыми инструментами. Сломанный привод, вышедшую из строя плату управления, перегоревший модуль памяти и многие другие детали могут правильно заменить только профессионалы.
Нужна квалифицированная помощь? Сервисный центр ТонерДруг осуществляет круглосуточное обслуживание пользователей из Москвы и Московской области!
-
Page 1: Service Manual
Phaser 3140/3155/3160 ® Laser Printer Phaser 3140/3155/3160 ® Service Manual…
- Page 3
Phaser 3140/3155/3160 ® Service Manual Warning The following servicing instructions are for use by qualified service personnel only. To avoid personal injury, do not perform any servicing other than that contained in the operating instructions, unless you are qualified to do so. First Printing: September 2009… - Page 4
Xerox technical training materials and service manuals are intended for use by authorized Xerox service technicians and service partners only and are not for resale. These materials may not be distributed, copied, or otherwise reproduced without prior written consent from Xerox Corporation. -
Page 5: Table Of Contents
Engine F/W………………2-18 Phaser 3140/3155/3160 Printer Service Manual…
- Page 6
Common PostScript Problems …………..4-20 Phaser 3140/3155/3160 Printer Service Manual… - Page 7
Altitude Specifications …………….6-2 Phaser 3140/3155/3160 Printer Service Manual… - Page 8
Out Bin Full Sensor…………….8-63 Phaser 3140/3155/3160 Printer Service Manual… - Page 9
Acronyms and Abbreviations …………….A-2 Phaser 3140/3155/3160 Printer Service Manual… - Page 10
Contents viii Phaser 3140/3155/3160 Printer Service Manual… -
Page 11: Service Terms
Product Terms Caution: A personal injury hazard exists that may not be apparent. For example, a panel may cover the hazardous area. Danger: A personal injury hazard exists in the area where you see the sign. Phaser 3140/3155/3160 Printer Service Manual…
-
Page 12: Symbols Marked On The Product
Refer to the manual(s) for information. Do not touch the OPC Drum. Do not expose the item to sunlight. Do not tilt the Print Cartridge. Do not expose item to high temperature. 35°C 0°C 95°F 32°F Recycle the item. Phaser 3140/3155/3160 Printer Service Manual…
-
Page 13: Power Source
• if the printer is exposed to any excess moisture, • if the printer is dropped or damaged, • if you suspect that the product needs servicing or repair, • whenever you clean the product. Phaser 3140/3155/3160 Printer Service Manual…
- Page 14
• Handle IC’s and Erasable Programmable Read-Only Memories (EPROM’s) carefully to avoid bending pins. • Pay attention to the direction of parts when mounting or inserting them on Printed Circuit Boards (PCB’s). Phaser 3140/3155/3160 Printer Service Manual… -
Page 15: General Guidelines
Class 1 Laser Product The Phaser 3140/3155/3160 is certified to comply with Laser Product Performance Standards set by the U.S. Department of Health and Human Services as a Class 1 Laser Product.
-
Page 16: Part Replacement
Do not install a fuse of a different type or rating. Installing the wrong type or rating of fuse can cause overheating and a risk of fire. Part Replacement Only use genuine Xerox approved spare parts or components to maintain compliance with legislation and safety certification. Assembly Precautions Use extreme care during assembly.
-
Page 17: Servicing Electrical Components
This printer uses heat to fuse the toner image to paper. The Fuser is very hot. Turn the printer power Off and wait for the Fuser to cool before attempting to service the Fuser or adjacent components. Phaser 3140/3155/3160 Printer Service Manual…
-
Page 18: Moving The Printer
When shipping the printer, repack the printer using the original packing material and boxes or a Xerox packaging kit. Instructions for repacking the printer are included in the kit. If you do not have all the original packaging, or are unable to repackage the printer, contact your local Xerox service representative.
-
Page 19: Regulatory Information
• Consult the dealer or an experienced radio/television technician for help. Any changes or modifications not expressly approved by Xerox could void the user’s authority to operate the equipment. To ensure compliance with Part 15 of the FCC rules, use shielded interface cables.
-
Page 20: European Union
European Union The CE mark applied to this product symbolizes Xerox’s declaration of conformity with the following applicable Directives of the European Union as of the dates indicated: December 12, 2006: Council Directive 2006/95/EC as amended. Approximation of the laws of the member states related to low voltage equipment.
-
Page 21: Acronyms And Abbreviations
Manual Organization The Phaser 3140/3155/3160 Printer Service Manual is the primary document used for repairing, maintaining, and troubleshooting the printer. Use this manual as your primary resource for understanding the operational characteristics of the printer and all available options. This manual describes specifications, theory, and the diagnosis and repair of problems occurring in the print engine and attached options.
- Page 22
Phaser 3140/3155/3160 Printer Service Manual… -
Page 23: General Information
General Information In this chapter… • Introduction and Overview • Printer Configurations • Parts of the Printer • Maintenance Items • Consumables • Specifications Chapter…
-
Page 24: Introduction And Overview
General Information Introduction and Overview The Xerox Phaser 3140/3155/3160 Printers have a single-pass laser design architecture,. Print speeds range between 18 and 24 pages per minute (ppm), and resolution up to 1200 x 1200 dots-per-inch (dpi) image quality depending on the model.
-
Page 25: Printer Configurations
General Information Printer Configurations The Phaser 3140/3155/3160 printer is available in four configurations. Printer Configurations Feature Phaser 3140 Phaser 3155 Phaser 3160B Phaser 3160N Processor 150 MHz 150 MHz 360 MHz 360 MHz Speed Memory 8 MB 8 MB 64 MB…
- Page 26
Telnet, SMTP, LDAP, IPSec TCP/IPv6 (DHCP, DNS, RAW, LPR, SNMPv 1/2/3, HTTP (S), IPSec) Network CentreWare Management IS/CW Web Tray 1 Sheet Standard Standard Standard Standard Manual Feeder Paper Tray Standard Standard Standard Standard (250 Sheet) Phaser 3140/3155/3160 Printer Service Manual… -
Page 27: Parts Of The Printer
General Information Parts of the Printer Front View s3160-073 Item Description Item Output Tray Manual Feeder Control Panel Paper Tray Front Cover Handle Output Support Front Cover Print Cartridge Manual Feeder Guides Phaser 3140/3155/3160 Printer Service Manual…
-
Page 28: Rear View
General Information Rear View s3160-074 Item Description Rear Cover Network Port USB Port Power Receptacle a. 3160N only Phaser 3140/3155/3160 Printer Service Manual…
-
Page 29: Control Panel
When illuminated, indicates a printer error. Online Displays the online printer status. Cancel Stops an operation at any time. This button is also used to print Reports. Power Turns the printer power on and off. Phaser 3140/3155/3160 Printer Service Manual…
- Page 30
The printer is powered on and can be used. Blinking Green When the green LED slowly blinks, the printer is receiving data from the computer. When the green LED rapidly blinks, the printer is printing data. Phaser 3140/3155/3160 Printer Service Manual… -
Page 31: Maintenance Items
Maintenance parts should only be replaced by an authorized service provider, dealer, or the retailer where the printer was purchased. The warranty does not cover the replacement of any maintenance parts after their life span. Tray Fuser s3160-075 Phaser 3140/3155/3160 Printer Service Manual…
-
Page 32: Consumables
Print the Supplies Information Report (page 4-2) to check Print Cartridge life status. Print Cartridge Error Information Print Cartridge Status Functionality Xerox Toner Low/Red Continues to print. Blinking LED Xerox Toner Device will not print. Empty/Solid Red 1-10 Phaser 3140/3155/3160 Printer Service Manual…
-
Page 33: Specifications
(software enhanced up to 1200 x 1200 dpi) Operating System Mac OS X 10.3-10.6 Windows Windows 2000/XP(32/64bit)/Vista(32/64bit)/2003 Server (32/64bit)/2008 Server(32/64bit) Linux Red Hat 8~9, Fedora Core 1~4, Mandrake 9.2~10.1, SuSE 8.2~9.2, Mandriva 2005, 2006, 2007 (32bit/64bit), Ubuntu 6.06-7.04, Debian 4.0 Phaser 3140/3155/3160 Printer Service Manual 1-11…
-
Page 34: Print Speed
General Information Print Speed Media Phaser 3140 (ppm) Phaser 3155/3160 (ppm) Letter Duplex Manual Manual Warm-Up Time Warm-up Time is defined as the time when the printer changes from Power-On to Standby mode. • From Power On (UI Ready): Less than 30 seconds Power Save Mode The default setting is 1 minute.
-
Page 35: Environmental Specifications
Less than 6.5 W Average Operation Less than 400 W Less than 400 W a. See the Rating label on the machine for the correct voltage, frequency (hertz), and type of current for your machine. Phaser 3140/3155/3160 Printer Service Manual 1-13…
-
Page 36: Image Specifications
± 2.0 mm / 241.3 mm (Based on 0.0082 mm/mm) Horizontal ± 1.5 mm / 177.8 mm (Based on 0.0084mm/mm) Registration Left Print Position Accuracy ± 2.0 mm (scanning direction) Top Print Position Accuracy ± 2.0 mm (feeding direction) 1-14 Phaser 3140/3155/3160 Printer Service Manual…
-
Page 37: Physical Dimensions And Clearances
Depth 389 mm (15.3 in.) Weight Net.: 7.41kg (16.34 lb.) Gross: 9.52 kg (20.99 lb.) Minimum Clearances 10 cm (3.9 in.) 10 cm (3.9 in.) 10 cm (3.9 in.) 48.26 cm (18.8 in.) s3160-115 Phaser 3140/3155/3160 Printer Service Manual 1-15…
-
Page 38: Mounting Surface Specifications
Failure to adhere to the specified mounting specification will void all guarantees of print-quality and/or performance. Media and Tray Specifications This section list supported media for the Phaser 3140/3155/3160 printers. Supported Paper Type and Size Print Media Weight /Capacity…
- Page 39
If media weight is over 120 g/m (32 lb.), load a paper into the tray one by one. b. Maximum capacity may differ depending on media weight, thickness, and environmental conditions. c. Smoothness: 100 to 250 (sheffield) Phaser 3140/3155/3160 Printer Service Manual 1-17… - Page 40
General Information 1-18 Phaser 3140/3155/3160 Printer Service Manual… -
Page 41: Theory Of Operation
Theory of Operation In this chapter… • Operational Overview • Paper Path Chapter…
-
Page 42: Operational Overview
Theory of Operation Operational Overview The Phaser 3140/3155/3160 is a monochrome printer that has a single-pass laser design architecture, which offers mono print speed up to 24 pages per minute (ppm), and resolution up to 1200 x 1200 dots-per-inch (dpi) image quality. The printer provides a USB interface for all models, and the 3160N supports 10/100 Base-TX ethernet.
-
Page 43: Paper Path
The feeding mechanism consists of the manual feeder, Paper Tray, Pick Up Roller, Feed Rollers, and Holder Pad. The rollers and sensors in the paper feed path control paper registration and guide the paper through the image transfer, image development, image fusing, and exit assemblies. Phaser 3140/3155/3160 Printer Service Manual…
-
Page 44: Paper Tray
Manual Feeder The manual feeder is used to hold non-standard or custom paper sizes and special media (envelopes, transparencies, etc.). The manual feeder can hold 1 sheet of paper or 1 envelope. Phaser 3140/3155/3160 Printer Service Manual…
- Page 45
The Pick Up Roller is driven by the Pick Up Solenoid. Pick Up Roller s3160-090 Feed Roller (Registration) The Feed Roller controls paper registration and guides the paper into the printer. s3160-089 Phaser 3140/3155/3160 Printer Service Manual… -
Page 46: Drive Assembly
The Drive Assembly receives power from the Controller Board. The Drive Assembly consists of the main motor and gear set mounted to a support plate. • Motor: 24V DC • Driving Frequency: 2200 rpm 3155 & 3160 3140 s3160-084 Phaser 3140/3155/3160 Printer Service Manual…
-
Page 47: Laser Unit
Laser Unit s3160-087 The Laser Unit is the core part of the Phaser 3140/3155/3160 and is controlled by the video controller circuitry of the Controller Board. The Laser Unit converts video data received from the Controller Board into an electrostatic latent image on the surface of the OPC drum.
-
Page 48: Print Cartridge
Management of waste toner: Collects toner using the cleaning blade. • OPC drum protecting shutter: No • Toner CRUM reader: Identifies whether toner is Xerox branded toner or whether a non-Xerox Print Cartridge is installed. Max -1.4KV Cleaning Blade Zener Diode…
-
Page 49: Fuser
Heat Roller and Pressure Rollers, the toner is melted and permanently fixed to the paper. The surface of the Heat Roller is coated with Teflon, so that toner does not stick to the surface. Phaser 3140/3155/3160 Printer Service Manual…
-
Page 50: Electrical Components
Fuser cover temperature is maintained at less than 80° C. Electrical Components The printer’s major electrical components consist of these boards: • Control Panel • Controller • Power Supply Controller Control Panel Power Supply s3160-091 2-10 Phaser 3140/3155/3160 Printer Service Manual…
- Page 51
The signal from the Out Bin Empty Sensor is input directly to the Controller Board. Note Each printer model has a unique Controller Board. The following illustration shows the 3160N Controller Board. ENET CN15 CN12 CN10 s3160-093 Phaser 3140/3155/3160 Printer Service Manual 2-11… - Page 52
21.6V~26.4V) • Loading contrast: ± 3% or less • Output Voltage Rising Time: 50 ms Max • Output Voltage Falling Time: 100 ms Max • Fluctuating Transfer Voltage with Environmental Various: 0 V~5 KV 2-12 Phaser 3140/3155/3160 Printer Service Manual… - Page 53
Loading contrast: ± 3% or less • Output voltage rising time: 50 ms Max • Output voltage falling time: 50 ms Max • Output Control Signal (BIAS-PWM): The CPU output is HV output when PWM is low. Phaser 3140/3155/3160 Printer Service Manual 2-13… - Page 54
Rated Output +5.1 V ± 5% +24 V ± 15% (4.845 ~ 5.355 V) (20.4 ~ 27.6 V) Max. Output Current 1.2 A 2.0 A Peak Loading Current 1.5 A 2.5 A Under 100 ms 2-14 Phaser 3140/3155/3160 Printer Service Manual… - Page 55
Under 500 mVp-p Voltage Maximum Output 48 W Peak output 7.5 W 60 W Under 100 ms Protection for Shut down or Fuse Shut down (or Loading Shortage Protection Output Voltage Drop and Overflowing Current Phaser 3140/3155/3160 Printer Service Manual 2-15… -
Page 56: Sensor Input Circuit
Whether the Print Cartridge is inserted or not is detected by CRUM. After the cartridge is mounted, the sub- CRUM reads the print cartridge information from contact with CRUM involved in print cartridge. If the Print Cartridge is invalid, the red LED on the Control Panel illuminates. 2-16 Phaser 3140/3155/3160 Printer Service Manual…
-
Page 57: Driving Circuit
Controller Board. A diode protects the driving transistor from the noise pulse that is created when the solenoid is de-energizing. Motor Driving The Controller Board contains the motor interface circuits, and the Drive Assembly contains a motor control board with a driver IC. Phaser 3140/3155/3160 Printer Service Manual 2-17…
-
Page 58: Engine F/W
This change in resistance in turn changes the value of the voltage due to loading. This voltage is fed back into the printer through the A/D converter. Based on the value fed back, the PWM cycle is changed to maintain the required transfer voltage. 2-18 Phaser 3140/3155/3160 Printer Service Manual…
- Page 59
When an Over Heat error occurs, no heat is supplied to the fixing unit. After a specified time elapses, the engine detects the temperature again. If the temperature is a specified degree lower than the memorized temperature, the error is recovered. Phaser 3140/3155/3160 Printer Service Manual 2-19… - Page 60
The engine checks the Laser Unit error, and if the error doesn’t recur the printing job will proceed. 2-20 Phaser 3140/3155/3160 Printer Service Manual… -
Page 61: Error Messages And Codes
Error Messages and Codes In this chapter… • Introduction • Understanding the Control Panel LEDs • Jam Errors • Tray and Media Problems • Print Cartridge Errors • Fuser Errors • Front Cover Errors Chapter…
-
Page 62: Introduction
“General Troubleshooting.” Print-quality problems are covered in Chapter 5, “Print- Quality Troubleshooting.” Diagnostics The printer performs several self-tests. When turned On, a routine of power up tests (POST) checks key operational parameters. During operation, the printer monitors system performance. Phaser 3140/3155/3160 Printer Service Manual…
-
Page 63: Understanding The Control Panel Leds
Prepare a new cartridge for replacement. You may temporarily increase the printing quality by redistributing the toner. Orange The Print Cartridge is empty, or needs to be replaced. A paper jam has occurred. Phaser 3140/3155/3160 Printer Service Manual…
- Page 64
The machine is online and can receive data from the computer. Blinking When the backlight slowly blinks, the machine is receiving data from the computer. When the backlight blinks rapidly, the machine is printing data. Phaser 3140/3155/3160 Printer Service Manual… -
Page 65: Jam Errors
Paper Jam at the Paper Tray 1. Open and close the Front Cover. The jammed paper should automatically eject from the machine. If the paper does not eject, go to the next step. 2. Pull out the Paper Tray. s3160-097 Phaser 3140/3155/3160 Printer Service Manual…
- Page 66
4. Insert the Paper Tray back into the machine until it snaps into place. Printing automatically resumes. Paper Jam at the Manual Tray 1. If the paper is not feeding properly, pull the paper out of the machine. s3160-100 2. Open and close the Front Cover to resume printing. Phaser 3140/3155/3160 Printer Service Manual… -
Page 67: Paper Jam At Exit Tray
Paper Jam at the Exit Tray 1. Open and close the Front Cover. The jammed paper is automatically ejected from the machine. If you do not see the jammed paper, go to the next step. Phaser 3140/3155/3160 Printer Service Manual…
-
Page 68: Paper Jam 0
7. Open and close the Front Cover, printing automatically resumes. Paper Jam 0 The leading edge of the paper is jammed between the Pick Up Roller and the Paper Feed Sensor. Paper Feed Sensor s3160-069 Phaser 3140/3155/3160 Printer Service Manual…
-
Page 69: Initial Actions
Check the Paper Tray Holder Pad. Replace the Go to step 7. Is the Holder Pad loose due to bad Holder Pad sealing of the side-pad? (page 8-29). If the problem persists, go to step 7. Phaser 3140/3155/3160 Printer Service Manual…
-
Page 70: Paper Jam 1
Exit Roller in the Fuser just after passing through the Feed Actuator. Initial Actions • Check the paper path for obstructions or debris. • Cycle printer power. • If the problem persists, refer to the following procedure. s3160-072 3-10 Phaser 3140/3155/3160 Printer Service Manual…
-
Page 71: Paper Jam 2
The Heat Roller or Pressure Roller is seriously contaminated with toner. Initial Actions • Check the paper path for obstructions or debris. • Cycle printer power. • If the problem persists, refer to the following procedure. Phaser 3140/3155/3160 Printer Service Manual 3-11…
- Page 72
Clean the surface of the Pressure Replace the Complete. Roller with a clean dry cloth. Fuser. Check the Exit Actuator for damage and functionality, and then reinstall the Fuser. Does the problem persist? 3-12 Phaser 3140/3155/3160 Printer Service Manual… -
Page 73: Paper Rolled On The Opc Drum
Go to step 2. Replace the Does the media meet media. specifications? Check the Print Cartridge for Clean, or Complete. damage or debris. replace the Is the Print cartridge damaged or Print Cartridge. obstructed by debris? Phaser 3140/3155/3160 Printer Service Manual 3-13…
-
Page 74: Tray And Media Problems
Repair the Go to step 3. harness between Power Supply harness. Board CON2 and Controller Board If the problem CN5 (CN7 on 3160 model). persists, go to Is the wiring harness damaged? step 3. 3-14 Phaser 3140/3155/3160 Printer Service Manual…
-
Page 75: Paper Tray Empty With No Indication
(CN7 on the 3160). persists, go to Is the harness damaged? step 3. Replace the Power Supply Board Go to step 4. Complete. (page 8-54). Does the problem persist? Replace the Controller Board Complete. (page 8-51). Phaser 3140/3155/3160 Printer Service Manual 3-15…
-
Page 76: Multiple Sheet Feeding
Go to step 3. Is the Holder Pad dirty or damaged? Holder Pad, and replace if necessary (page 8-29). If the problem persists, go to step 3. Replace the Pick Up Solenoid Complete. (page 8-61). 3-16 Phaser 3140/3155/3160 Printer Service Manual…
-
Page 77: Out Bin Full
3. Check the continuity of the bin full Repair the Replace the harness connecting the Controller harness. Out Bin Full Board and Out Bin Full Sensor. Sensor Is the harness damaged? (page 8-63). Phaser 3140/3155/3160 Printer Service Manual 3-17…
-
Page 78: Print Cartridge Errors
5. Close the Front Cover. 6. Cycle printer power to clear the message. 7. If the problem persists, replace the Print Cartridge. If the problem persists, use the following procedures to troubleshoot the problem. 3-18 Phaser 3140/3155/3160 Printer Service Manual…
-
Page 79: Invalid Print Cartridge
Error Messages and Codes Invalid Print Cartridge If the Error LED is red (not blinking), the Print Cartridge may not be a genuine Xerox print cartridge. Non-Xerox or Third Party Print Cartridges can cause malfunctions, print-quality problems, and jam errors. Initial Actions •…
-
Page 80: Toner Empty Or Exhausted
Check for +3.3V at CN9-4 (CN10-4 Go to step 5. Replace the on the 3160). Controller Is +3.3V present? Board (page 8-51). Replace the Print Cartridge Replace the Complete. (page 8-6). Controller Does the error persist? Board (page 8-51). 3-20 Phaser 3140/3155/3160 Printer Service Manual…
-
Page 81: Fuser Errors
Check the guide claws for damage? If possible, Go to step 4. Are the guide claws damaged? repair the guide claws. Replace the Fuser. Replace the Complete. Does the problem persist? Drive Assembly (page 8-35). Phaser 3140/3155/3160 Printer Service Manual 3-21…
-
Page 82: Fuser Gear Damaged From Overheating
Does the problem persist? Replace the Power Supply Go to step 4. Complete. (page 8-54). Does the problem persist? Reseat connections on the Controller Replace the Complete. Board. Controller Does the problem persist? Board (page 8-51). 3-22 Phaser 3140/3155/3160 Printer Service Manual…
-
Page 83: Front Cover Errors
Inspect the Front Cover for damage. Replace the Go to step 3. Is the Front Cover damaged? Front Cover. If the problem persists, go to step 3. Replace the Power Supply Board Complete. (page 8-54). Phaser 3140/3155/3160 Printer Service Manual 3-23…
-
Page 84: No Error Led Indication For Front Cover
Controller Board CN5 (CN7 on model If the 3160). problem Is the wiring harness damaged? persists, go to step 3. Replace the Power Supply Board Go to step 4. Complete. (page 8-54). Does the error still occur? 3-24 Phaser 3140/3155/3160 Printer Service Manual…
- Page 85
Controller Board CN8 (CN9 on model If the 3160). problem Is the wiring harness damaged? persists, go to step 5. Replace the Control Panel (page 8-51). Replace the Complete. Does the problem persist? Controller Board (page 8-51). Phaser 3140/3155/3160 Printer Service Manual 3-25… - Page 86
Error Messages and Codes 3-26 Phaser 3140/3155/3160 Printer Service Manual… -
Page 87: General Troubleshooting
General Troubleshooting In this chapter… • Introduction • Reports • Servicing Instructions • Measurement Techniques • Media-Based Problems • Inoperable Printer Troubleshooting • Power Supply Troubleshooting • USB Port Testing • Network Configuration Errors • Operating System and Application Problems Chapter…
-
Page 88: Introduction
Troubleshooting. Reports This product provides several printable reports for maintenance purposes. These reports can be used to aid the diagnosis of print quality problems. The following reports are available in the Phaser 3140/3155/3160 printers. Report Description How To Print Printing Demo Page…
-
Page 89: Printing Demo Page
General Troubleshooting Printing Demo Page s3160-121 Phaser 3140/3155/3160 Printer Service Manual…
-
Page 90: Configuration Report
General Troubleshooting Configuration Report s3160-119 Phaser 3140/3155/3160 Printer Service Manual…
-
Page 91: Supplies Information Report/Error Information Report
General Troubleshooting Supplies Information Report/Error Information Report s3160-122 Phaser 3140/3155/3160 Printer Service Manual…
- Page 92
General Troubleshooting s3160-156 Phaser 3140/3155/3160 Printer Service Manual… -
Page 93: Cleaning Page
General Troubleshooting Cleaning Page s3160-118 Phaser 3140/3155/3160 Printer Service Manual…
-
Page 94: Servicing Instructions
If necessary move the printer. 4. Ensure the printer is not positioned in direct sunlight. If it is unavoidable, use a curtain to shade the printer. Phaser 3140/3155/3160 Printer Service Manual…
-
Page 95: Measurement Techniques
8. When a troubleshooting procedure instructs you to replace a non-spared component and that component is part of a parent assembly, you should replace the entire parent assembly. Phaser 3140/3155/3160 Printer Service Manual…
-
Page 96: Media-Based Problems
3. Try loading paper from a fresh ream, fan the paper, and then insert into the tray or flip existing paper over. 4. Clean the Feed Rollers with a clean, dry, lint-free wipe. If necessary, replace the Feed Rollers (page 8-38). 4-10 Phaser 3140/3155/3160 Printer Service Manual…
-
Page 97: Inoperable Printer Troubleshooting
If the problem is within a single application, adjust the printing properties within that program. If changing the properties in the application print dialog box does not solve the problem, uninstall and reinstall new printer driver. Phaser 3140/3155/3160 Printer Service Manual 4-11…
-
Page 98: Power Supply Troubleshooting
AC wall outlet? output from the outlet. Check the power cord for defects or loose Replace or Replace the connection. reconnect Power Is the Power Cord loose or defective? the Power Supply Cord. (page 8-54). 4-12 Phaser 3140/3155/3160 Printer Service Manual…
-
Page 99: No Power
Check for +24 V at each of the following Supply pins: CON2-5, 6, 9, 10, and 12. (page 8-54). Check for +5 V at CON2-8, 15, and 16. Is the correct voltage present at each pin? Phaser 3140/3155/3160 Printer Service Manual 4-13…
- Page 100
Controller Board CN8 (CN9 on model If the Board 3160). problem (page 8-51). Is the wiring harness damaged? persists, go If the to step 7. problem persists, go to step 7. Replace the Control Panel (page 8-51). Complete. 4-14 Phaser 3140/3155/3160 Printer Service Manual… -
Page 101: Usb Port Testing
6. Locate the correct entry for the printer being tested and display its properties from the File menu pull-down. 7. Open the General tab and click the Print Test Page button to generate the test print. If the test page prints, the USB port is functioning normally. Phaser 3140/3155/3160 Printer Service Manual 4-15…
-
Page 102: Network Configuration Errors
Check server configuration. Go to step 5. Correct server Is the server configured to accept settings. incoming data? Cycle printer power. Replace the Complete. Does the error persist? Controller Board (page 8-51). 4-16 Phaser 3140/3155/3160 Printer Service Manual…
-
Page 103: Operating System And Application Problems
If changing the properties in the application print dialog box does not solve the problem, uninstall and reinstall the printer driver. Note Check the Xerox web site for a newer version of the print driver before reinstalling. Phaser 3140/3155/3160 Printer Service Manual…
-
Page 104: Spool Error
Mac OS 10.3.2. Some letters do not display Mac OS cannot find Only alphanumeric normally during cover sheet the font during cover characters are allowed on printing. page printing. the cover page. 4-18 Phaser 3140/3155/3160 Printer Service Manual…
-
Page 105: Common Linux Problems
SuSE Linux 9.2 (cups-1.1.21) has a network in SuSE 9.2, the problem with IPP (Internet Printing Protocol) printing. printer does not print. Use the socket printing instead of IPP or install the later version of CUPS (cups-1.1.22 or higher). Phaser 3140/3155/3160 Printer Service Manual 4-19…
-
Page 106: Common Postscript Problems
Macintosh with Acrobat may not be matched printer driver matches Reader 6.0 or higher, with that in Acrobat information in Acrobat colors print incorrectly. Reader. Reader. 4-20 Phaser 3140/3155/3160 Printer Service Manual…
-
Page 107: Print-Quality Troubleshooting
Print-Quality Troubleshooting In this chapter… • Print-Quality Troubleshooting Overview • Troubleshooting Print-Quality Checklist • Print-Quality Troubleshooting Procedures • Print-Quality Specifications Chapter…
-
Page 108: Print-Quality Troubleshooting Overview
Refer to “Media and Tray Specifications” on page 1-16 for supported and specialty media that have been tested and approved for use in the Phaser 3140/3155/3160. Use paper from a fresh ream that is acclimated to room temperature and humidity.
- Page 109
• Ghosting (3) (page 5-17) • Incomplete Fusing (page 5-30) Controller Board • Black Print (page 5-11) • Ghosting (1) (page 5-15) • Vertical Lines are Curved (page 5-20) • Blank Page (2) (page 5-29) Phaser 3140/3155/3160 Printer Service Manual… -
Page 110: Troubleshooting Print-Quality Checklist
One area where accumulations of dust and debris often occur is the Laser Unit lens. Remove the Print Cartridge, and clean the laser lens using a dry cotton swab or lint-free cloth. s3160-137 Phaser 3140/3155/3160 Printer Service Manual…
-
Page 111: Check The Transfer Roller
If you are printing on thick or uneven media, change the media type settings to a heavier type. Check that the media meets specifications (refer to “Media and Tray Specifications” on page 1-16). Smudges or Smears Phaser 3140/3155/3160 Printer Service Manual…
- Page 112
5. Streaks appear on the page. Toner may be low. Change the Print Cartridge. Horizontal Band, Void, or Streaks 7. Part of the page prints. Check the Print Cartridge to make sure it is installed correctly. Partial Band Phaser 3140/3155/3160 Printer Service Manual… - Page 113
9. Printing on both ends of the transparencies is faded. This occurs when the printer is operating at a location where relative humidity reaches 85° or more. Adjust the humidity or relocate the printer to an appropriate environment. Light Print on Transparency Phaser 3140/3155/3160 Printer Service Manual… -
Page 114: Print-Quality Troubleshooting Procedures
The back of the page is stained. page 5-27 of the Page Blank Page (1) The entire image area is blank. page 5-28 Blank Page (2) The entire print is blank. One or several blank page 5-29 pages are printed. Phaser 3140/3155/3160 Printer Service Manual…
-
Page 115: Repeating Defects
35 mm White spots, Print PL1.0.12 Roller (1.38 in) Black bands Cartridge Transfer Roller Ghosting or Transfer PL1.0.8 poor fusing Roller Pressure Roller Background Fuser PL9.0.34 Heat Roller Black spot and Fuser PL9.0.36 image ghost Phaser 3140/3155/3160 Printer Service Manual…
-
Page 116: Printing Begins At Wrong Position
• Agitate the Print Cartridge to redistribute the toner. • Set Toner Save mode to Off. Troubleshooting Reference Table Applicable Parts Example Print Power Supply Board, PL1.0.1 Print Cartridge, PL1.0.12 Light or Undertone Print 5-10 Phaser 3140/3155/3160 Printer Service Manual…
-
Page 117: Black Print
Check the connection between the Controller Board and Power Supply Board. • Check the connection between the Power Supply Board and Print Cartridge. Troubleshooting Reference Table Applicable Parts Example Print Controller Board, PL1.0.2 Power Supply Board, PL1.0.1 Laser Unit, PL6.0.79 Black Print Phaser 3140/3155/3160 Printer Service Manual 5-11…
- Page 118
(page 8-54). Does the error still occur? Does the error still occur? Replace the Complete. Laser Unit (page 8-30). Go to step 5. Does the error still occur? Replace the Complete. Controller Board (page 8-51). 5-12 Phaser 3140/3155/3160 Printer Service Manual… -
Page 119: Uneven Density
Go to step 2. installation. Reseat the Transfer Roller if necessary (page 8-8). Does the image quality improve? Check the Print Cartridge. Replace the Complete. Is the Print Cartridge empty or Print Cartridge damaged? (page 8-6). Phaser 3140/3155/3160 Printer Service Manual 5-13…
-
Page 120: Background Contamination
Go to step 4. Print Cartridge at or near end of life? Print Cartridge (page 8-51). Check the Transfer Roller movement. Go to step 5. Clean the Does the Transfer Roller rotate Transfer Roller smoothly? bushings. 5-14 Phaser 3140/3155/3160 Printer Service Manual…
-
Page 121: Ghosting (1)
Go to step 3. counter. Transfer Roller Is the Transfer Roller at or near end (page 8-8). of life? Check the ambient temperature. Relocate the Go to step 4. Is the ambient temperature below printer. 10° C? Phaser 3140/3155/3160 Printer Service Manual 5-15…
-
Page 122: Ghosting (2)
Check that Paper Type is set to Thick Clean the Set Paper Type in the prnter driver. Power Supply to Thick. Is the driver set to Paper Type Thick? Board contacts. If problem persists, go to Ghosting (1). 5-16 Phaser 3140/3155/3160 Printer Service Manual…
-
Page 123: Ghosting (3)
Print Cartridge Print Cartridge is at end of life. (page 8-6). If Is the Print Cartridge at end of life? the problem persists, go to step 2. Replace the Power Supply Board Complete. (page 8-54). Phaser 3140/3155/3160 Printer Service Manual 5-17…
-
Page 124: Ghosting (4)
Fuser toner particles on the roller, and (page 8-11). clean any foreign matter between the Thermistor and Heat Roller. NOTE If the Heat Roller is deformed, replace it (page 8-17). Does the problem persist? 5-18 Phaser 3140/3155/3160 Printer Service Manual…
-
Page 125: Vertical White Lines
Is there any debris on the OPC drum. drum? Check the OPC Drum on the Print Replace the Go to step 5. Cartridge for damage. Print Cartridge Is the OPC Drum damaged? (page 8-6). Phaser 3140/3155/3160 Printer Service Manual 5-19…
-
Page 126: Vertical Lines Are Curved
Controller Board, PL1.0.2 Vertical Lines Are Curved Troubleshooting Procedure Table Step Actions and Questions Replace the Laser Unit Go to step 2. Complete. Does the problem persists? Replace the Controller Board Complete. (page 8-51). 5-20 Phaser 3140/3155/3160 Printer Service Manual…
-
Page 127: Vertical Black Line Or Band
Go to step 2. damage. Print Cartridge Is the Print Cartridge damaged? (page 8-6). Check the Transfer Roller surface for Replace the Complete. damage. Transfer Roller Is the Transfer Roller surface (page 8-8). damaged? Phaser 3140/3155/3160 Printer Service Manual 5-21…
-
Page 128: Horizontal Black Line Or Band
Develop roller = 35mm Transfer roller = 46.2mm Heat Roller = 63.9mm Pressure Roller = 75.3mm Check the right side OPC Drum gear Replace the Complete. for damage. Print Cartridge Is the Gear damaged? (page 8-6). 5-22 Phaser 3140/3155/3160 Printer Service Manual…
-
Page 129: Black/White Spot
(page 8-6). OPC drum: 75.3 mm interval Is there repeating spots on the page? Check the Print Cartridge for Replace the Go to step 5. damage. Print Cartridge Is the Print Cartridge damaged? (page 8-6). Phaser 3140/3155/3160 Printer Service Manual 5-23…
-
Page 130: Skew
Open and close the Rear Cover. Go to step 3. Complete. Does the error still occur? Check the Transfer Roller. Go to step 4. Clean or Is the surface clean and smooth? replace the Transfer Roller (page 8-8). 5-24 Phaser 3140/3155/3160 Printer Service Manual…
- Page 131
Go to step 7. Is there any debris in the media debris. path? Replace the Paper Tray Pick Up Replace the Complete. Roller (page 8-9). Paper Tray Does the error still occur? Holder Pad (page 8-29). Phaser 3140/3155/3160 Printer Service Manual 5-25… -
Page 132: Stains On The Front Of The Page
Go to step 2. contamination. Cleaning Page Is the Transfer Roller surface dirty? (page 4-2) several times. Check the Print Cartridge for Replace the Complete. damage or leakage. Print Cartridge Is the Print Cartridge damaged? (page 8-6). 5-26 Phaser 3140/3155/3160 Printer Service Manual…
-
Page 133: Stains On The Back Of The Page
Does the error persist? Disassemble the Fuser and clean the Replace the Complete. Heat Roller, Pressure Roller, and the Fuser area between the Heat Roller and (page 8-11). Thermistor. Does the error persist? Phaser 3140/3155/3160 Printer Service Manual 5-27…
-
Page 134: Blank Page (1)
Troubleshooting Procedure Table Step Actions and Questions Clean the contacts on the Print Go to step 2. Complete. Cartridge and inside of the printer. Does the error still occur? Replace Print Cartridge (page 8-6). Complete. 5-28 Phaser 3140/3155/3160 Printer Service Manual…
-
Page 135: Blank Page (2)
Go to Step 3. Replace the operation. Pick Up Does the solenoid operate correctly? Solenoid (page 8-61). Reseat the Controller Board Replace the Complete. connections. Controller Does the error still occur? Board (page 8-51). Phaser 3140/3155/3160 Printer Service Manual 5-29…
-
Page 136: Incomplete Fusing
Is the Print Cartridge damaged? Cartridge (page 8-6). Reseat the Fuser. Go to step 6. Complete. Does the problem persist? Replace the Fuser (page 8-11). Replace the Complete. Does the problem persist? Power Supply (page 8-54). 5-30 Phaser 3140/3155/3160 Printer Service Manual…
-
Page 137: Print-Quality Specifications
Left print position (scanning direction): ± 2.0 mm Top print position (feeding direction): ± 2.0 mm Noise • Ready Mode: <25 dB(A) • Printing Mode: • Phaser 3140: <50 dB(A) • Phaser 3155, Phaser 3160: <51 dB(A) Phaser 3140/3155/3160 Printer Service Manual 5-31…
-
Page 138: Image Area
The print-quality is best when quality paper is fed from the tray. The print quality is evaluated on the maximum size of each standard paper. • Black and White Quality: Xerox-brand 4200 paper Paper Condition Paper should be fresh and stored in the operating environment for 12 hours before use for printing.
-
Page 139: Printer Condition
Print-Quality Troubleshooting Printer Condition The specified print quality is guaranteed with the printer in specified normal environmental condition. Phaser 3140/3155/3160 Printer Service Manual 5-33…
- Page 140
Print-Quality Troubleshooting 5-34 Phaser 3140/3155/3160 Printer Service Manual… -
Page 141: Adjustments And Calibrations
Adjustments and Calibrations In this chapter… • Adjustments Chapter…
-
Page 142: Adjustments
Normal s3160-067 Making Altitude Adjustments For Phaser 3160 1. From the Start menu, select Programs > Xerox Phaser 3160 > Printer Settings Utility. 2. On the left column, select Setting. 3. On the right column, select Altitude Adjustment. 4. On the Altitude Adjustment pull-down menu, select the appropriate altitude setting for the printer.
- Page 143
Adjustments and Calibrations For Phaser 3140 and 3155 1. Click the Windows Start menu. • For Windows 2000, select Settings > Printers. • For Windows XP/2003, select Control Panel > Printers and Faxes. For Windows 2008/Vista, select Control Panel > Hardware and Sound >… - Page 144
Adjustments and Calibrations Phaser 3140/3155/3160 Printer Service Manual… -
Page 145: Cleaning And Maintenance
Cleaning and Maintenance In this chapter… • Service Maintenance Procedure • Cleaning • Maintenance • Firmware Updates Chapter…
-
Page 146: Service Maintenance Procedure
5. Clean the Fan. 6. Ensure that all cover vents are clean and free of obstructions. 7. Remove and clean the paper trays. 8. Clean all rubber rollers with a lint-free cloth slightly dampened with cold water. Phaser 3140/3155/3160 Printer Service Manual…
-
Page 147: Cleaning The Print Cartridge
3. Use a dry lint-free cloth to wipe to clean the Print Cartridge. s3160-134 4. Use a dry lint-free cloth to wipe any dust and/or spilled toner from the Print Cartridge area. Remove any paper debris from the area. s3160-135 Phaser 3140/3155/3160 Printer Service Manual…
-
Page 148: Cleaning The Laser Unit
In Ready mode, press and hold the Cancel button for approximately 10 seconds until the status LED blinks fast, and then release. For more information on other internal printer pages, see “Reports” on page 4-2. Phaser 3140/3155/3160 Printer Service Manual…
-
Page 149: Maintenance
Firmware Update Procedures There are two methods for upgrading firmware, USB and Network. 1. Down load the applicable files from the Xerox support web site. Unzip (decompress) the files. 2. Be sure your appropriate firmware updating option (Network or USB) is available and connected.
-
Page 150: Using A Network Connection
10. Click the Blue button to start the firmware update process. 11. A processing window is displayed. 12. Click OK to close the status window when the firmware upgrade is complete. 13. Print a Configuration page and verify the firmware information. Phaser 3140/3155/3160 Printer Service Manual…
-
Page 151: Service Parts Disassembly
Service Parts Disassembly In this chapter… • Overview • Maintenance Items and Consumables • Covers • Disassembly Procedures • Feeder • Electrical • Solenoids and Sensors Chapter…
-
Page 152: Overview
When needed, the orientation of the printer is called out in the procedure as an aid for locating the printer parts. The following illustration identifies the Front, Rear, Left, and Right sides of the printer. Rear Left Right Front s3160-101 Phaser 3140/3155/3160 Printer Service Manual…
-
Page 153: Preparation
Many parts are secured by plastic tabs. Do not over flex or force these parts. Do not over torque screws threaded into plastic parts. Warning Unplug the AC power cord from the wall outlet before removing any printer part. Phaser 3140/3155/3160 Printer Service Manual…
-
Page 154: Notations In The Disassembly Text
Bold arrows in an illustration show direction of movement when removing or replacing a component. • The notation “(tap, plastic, 10 mm)” or “(metal, 6 mm)” refer to the type of screw being removed. Note Provides information specific to the replacement of parts or assemblies. Phaser 3140/3155/3160 Printer Service Manual…
-
Page 155: Fastener Types
Always use the correct type and size screw and properly align the screw to prevent damaging the tapped holes. Do not use excessive force to remove or install either a screw or a printer part. Phaser 3140/3155/3160 Printer Service Manual…
-
Page 156: Maintenance Items And Consumables
Print Cartridge is the only consumable item. Print Cartridge PL1.0.12 Caution Do not touch the OPC drum or expose the Print Cartridge to light for more than 5 minutes. 1. Open the front cover. 2. Pull the Print Cartridge out. s3160-094 Phaser 3140/3155/3160 Printer Service Manual…
-
Page 157: Paper Tray
Service Parts Disassembly Paper Tray PL10.0 1. Pull the Tray out of the printer. s3160-014 Phaser 3140/3155/3160 Printer Service Manual…
-
Page 158: Transfer Roller
Use a screwdriver to gently push on the hook while using care to not break the hook. s3160-104 Replacement Note When replacing the Transfer Roller, wrap a sheet of paper around it to avoid touching the roller. Phaser 3140/3155/3160 Printer Service Manual…
-
Page 159: Pick Up Roller
1. Remove the Paper Tray. 2. Turn the printer over. 3. Remove 1 screw (silver, 6 mm, plastic, tap). s3160-043 4. Use a flat screwdriver to carefully lift the tab off of the Pick Up Roller. s3160-044 Phaser 3140/3155/3160 Printer Service Manual…
- Page 160
5. Rotate the Pick Up Roller and lift it off the shaft. s3160-045 Replacement Note The following illustration shows how the Pick Up Roller is attached to the Feed Roller Shaft. Feed Roller Clip Feed Roller Shaft Feed Roller s3160-046 8-10 Phaser 3140/3155/3160 Printer Service Manual… -
Page 161: Fuser
Allow the Fuser to cool 30 minutes before performing this procedure. 1. Remove the Rear Cover (page 8-26). 2. On the Power Supply, remove CON1. P/JCON1 s3160-038 Note Press the connector lock to remove CON1. s3160-068 Phaser 3140/3155/3160 Printer Service Manual 8-11…
- Page 162
See the following illustration. 3160: CN8 3155: CN12 3140: CN12 s3160-048 4. Remove 4 screws (10 mm, silver, tap) securing the Fuser. s3160-049 5. Pull the Fuser out of the printer. 8-12 Phaser 3140/3155/3160 Printer Service Manual… -
Page 163: Thermistor
1. Remove the Fuser (page 8-11). 2. Remove 1 screw (10 mm, silver, tap) securing the Thermistor. s3160-056 3. Remove the wiring harness from the harness guide and remove the Thermistor. Phaser 3140/3155/3160 Printer Service Manual 8-13…
-
Page 164: Thermostat
2. Remove 3 screws (8 mm, black) that secure the Thermostat. CN49 CN50 s3160-064 3. Lift the Thermostat away from the Fuser Cover. 4. Disconnect the wiring harness connectors CN49 & CN50 from the Thermostat. 5. Remove the Thermostat. 8-14 Phaser 3140/3155/3160 Printer Service Manual…
-
Page 165: Fuser Lamp
1. Remove the Fuser (page 8-11). 2. Release the 2 tabs on the right Fuser lamp cap and remove the cap. Caution Take care to not over flex the tabs as they can easily break. s3160-105 Phaser 3140/3155/3160 Printer Service Manual 8-15…
- Page 166
Service Parts Disassembly 3. Release the 3 tabs on the left Fuser lamp cap and remove the cap. s3160-106 4. Disconnect the lamp wires on both sides of the Fuser. s3160-055 8-16 Phaser 3140/3155/3160 Printer Service Manual… -
Page 167: Heat Roller
Heat Roller PL9.0.36 Warning Turn the printer power Off and allow the Fuser to cool 30 minutes before performing this procedure. 1. Remove the Fuser (page 8-11). 2. Remove the Fuser Lamp (page 8-15). Phaser 3140/3155/3160 Printer Service Manual 8-17…
- Page 168
Service Parts Disassembly 3. Remove 2 screws (6 mm, silver). s3160-053 4. Remove 2 screws (6 mm, silver). s3160-054 5. Lift the Fuser Cover off the Fuser. 8-18 Phaser 3140/3155/3160 Printer Service Manual… - Page 169
Move to the left and repeat the process with the next claw. Repeat until each claw is pulled forward and secure the cover. s3160-133 Phaser 3140/3155/3160 Printer Service Manual 8-19… -
Page 170: Pressure Roller
Turn the printer power Off and allow the Fuser to cool 30 minutes before performing this procedure. 1. Remove the Fuser (page 8-11). 2. Remove the Heat Roller (page 8-17). 3. Rotate the Right Bushing counter-clockwise and then remove it. s3160-059 8-20 Phaser 3140/3155/3160 Printer Service Manual…
- Page 171
5. Release the e-ring and washer that secures the Jam Link Lever, and then remove the Jam Link Lever. Note You can remove the e-ring/washer from either the left or right lever. s3160-116 Phaser 3140/3155/3160 Printer Service Manual 8-21… - Page 172
Service Parts Disassembly 6. Slide the Pressure Roller High Bushing up and away from the Fuser Frame, and then remove the Pressure Roller. s3160-060 8-22 Phaser 3140/3155/3160 Printer Service Manual… -
Page 173: Covers
Service Parts Disassembly Covers Front Cover PL1.0.11 1. Remove the Tray (page 8-7). 2. Take off the front cover by removing both hooks. s3160-015 Top Cover PL1.0.10 1. Open the Front Cover. Phaser 3140/3155/3160 Printer Service Manual 8-23…
- Page 174
2. Remove 2 screws (10 mm, silver, tap) on the front of the printer. s3160-157 3. Open the Rear Cover. 4. Remove 2 screws (10 mm, silver, tap) on the rear of the printer. s3160-017 8-24 Phaser 3140/3155/3160 Printer Service Manual… - Page 175
Service Parts Disassembly 5. Lift the Top Cover off of the bosses at the front and rear of the printer. Bosses s3160-143 6. Lift the Top Cover off of the printer and disconnect CN1. s3160-018 Phaser 3140/3155/3160 Printer Service Manual 8-25… -
Page 176: Rear Cover
Service Parts Disassembly Rear Cover PL3.0.1 1. Remove 4 screws (10 mm, silver, tap) and 1 black screw (8 mm, black, tap) from the rear cover. s3160-019 2. Remove the Rear Cover. 8-26 Phaser 3140/3155/3160 Printer Service Manual…
-
Page 177: Left Side Cover
5. Lift the top 2 hooks on the Left Side Cover off of the printer. 6. Lift the Left Side Cover off of the 2 bosses on the rear of the printer and remove the cover. Hooks Bosses s3160-021 Phaser 3140/3155/3160 Printer Service Manual 8-27…
-
Page 178: Right Side Cover
5. Lift the top 2 hooks on the Right Side Cover off of the printer. 6. Lift the Right Side Cover off of the 2 bosses on the rear of the printer and remove the cover. Hooks Bosses s3160-020 8-28 Phaser 3140/3155/3160 Printer Service Manual…
-
Page 179: Disassembly Procedures
Tray Holder Pad Assembly PL10.0.11 1. Remove the Tray (page 8-7). 2. Remove paper from the Tray. 3. Unhook the latches on the left and right sides of the Holder Pad and remove s3160-138 Phaser 3140/3155/3160 Printer Service Manual 8-29…
-
Page 180: Laser Unit
PL6.0.79 1. Remove the Top Cover (page 8-23). 2. Remove 3 screws (10 mm, silver, tap). s3160-023 3. Move the harness that lays over the top of the Laser Unit out of the way. 8-30 Phaser 3140/3155/3160 Printer Service Manual…
- Page 181
Service Parts Disassembly 4. Lift the Laser Unit slightly, and disconnect CN1 and CN5. s3160-144 5. Remove the Laser Unit. Phaser 3140/3155/3160 Printer Service Manual 8-31… -
Page 182: Feeder
3. Turn the printer over, and remove 11 screws (10 mm, silver, tap) on the Engine Shield assembly. s3160-037 4. Lift the Engine Shield Assembly slightly and disconnect all cables on the boards to remove the assembly. 5. Remove the Drive Assembly (page 8-35). 8-32 Phaser 3140/3155/3160 Printer Service Manual…
- Page 183
Service Parts Disassembly 6. Remove 3 screws (10 mm, silver, tap) and remove the Feed Bracket. s3160-028 Phaser 3140/3155/3160 Printer Service Manual 8-33… - Page 184
Service Parts Disassembly 7. Remove the Pick Up Gear. s3160-030 8. Turn the printer upside down with the rear of the printer facing you. 8-34 Phaser 3140/3155/3160 Printer Service Manual… -
Page 185: Drive Assembly
When installed on the printer, the numbers on the bracket are upside down. Drive Assembly PL7.0 and 7.1 1. Remove the Left Cover (page 8-27). Phaser 3140/3155/3160 Printer Service Manual 8-35…
- Page 186
Start all 6 screws in the order listed, and then tighten them in the same order. When installed on the printer, the numbers on the bracket are upside down. 8-36 Phaser 3140/3155/3160 Printer Service Manual… -
Page 187: Clutch Assembly
Service Parts Disassembly Clutch Assembly PL6.0.68 1. Remove the Drive Assembly (page 8-35). 2. Remove 3 screws (10 mm, silver, tap) and remove the Feed Bracket. s3160-028 Phaser 3140/3155/3160 Printer Service Manual 8-37…
-
Page 188: Feed Roller
Service Parts Disassembly 3. Remove the Idler Gear (black), and then pull the Clutch Assembly out. s3160-029 Feed Roller PL6.0.42 1. Remove the front cover (page 8-23). 2. Remove the Drive Assembly (page 8-35). 8-38 Phaser 3140/3155/3160 Printer Service Manual…
- Page 189
Service Parts Disassembly 3. Remove the Feed Shaft. s3160-139 4. Unclip the Feed Roller from the 2 clips. s3160-140 Phaser 3140/3155/3160 Printer Service Manual 8-39… -
Page 190: Feed Actuator
3. Turn the printer over, and remove 11 screws (10 mm, silver, tap) on the Engine Shield assembly. s3160-037 4. Lift the Engine Shield Assembly and disconnect all cables on the boards to remove the assembly. 5. Remove the Drive Assembly (page 8-35). 8-40 Phaser 3140/3155/3160 Printer Service Manual…
- Page 191
Service Parts Disassembly 6. Remove 3 screws (10 mm, silver, tap) and remove the Feed Bracket. s3160-028 Phaser 3140/3155/3160 Printer Service Manual 8-41… - Page 192
Service Parts Disassembly 7. Remove the Pick Up Gear. s3160-030 8. Turn the printer upside down with the rear of the printer facing you. 8-42 Phaser 3140/3155/3160 Printer Service Manual… - Page 193
10. Gently press the tab and remove the Feed Actuator. Note For reinstallation purposes, observe the position of the spring on the Feed Actuator. s3160-033 Phaser 3140/3155/3160 Printer Service Manual 8-43… -
Page 194: Manual Feed Actuator
4. Remove 11 screws (10 mm, silver, tap) on the Engine Shield assembly. s3160-037 5. Lift the Engine Shield Assembly and disconnect all cables on the boards and remove the assembly. 6. Remove the Drive Assembly (page 8-35). 8-44 Phaser 3140/3155/3160 Printer Service Manual…
- Page 195
7. Remove 3 screws (10 mm, silver, tap) and remove the Feed Bracket. s3160-028 8. Remove the Feed Roller (page 8-38). 9. Turn the printer upside down with the rear of the printer facing you. Phaser 3140/3155/3160 Printer Service Manual 8-45… - Page 196
10. Lift the clip on the Pick Up Shaft and slide the Pick Up Assembly slightly to the left, and then lift the assembly and slide it to the right to remove it. s3160-031 8-46 Phaser 3140/3155/3160 Printer Service Manual… -
Page 197: Paper Tray Empty Actuator
If necessary, wind the spring around the shaft 1 time to increase tension during reinstallation. Paper Tray Empty Actuator PL6.0.56 1. Remove the Print Cartridge (page 8-6). 2. Remove the Tray (page 8-7). 3. Remove the Rear Cover (page 8-26). Phaser 3140/3155/3160 Printer Service Manual 8-47…
- Page 198
Service Parts Disassembly 4. On the Power Supply Board, disconnect CON1. P/JCON1 s3160-038 s3160-068 8-48 Phaser 3140/3155/3160 Printer Service Manual… - Page 199
Service Parts Disassembly 5. Disconnect CON3. P/JCON3 s3160-127 6. Turn the printer over. 7. Remove 11 screws (10 mm, silver, tap) on the Engine Shield assembly. s3160-037 Phaser 3140/3155/3160 Printer Service Manual 8-49… - Page 200
8. Gently turn the Engine Shield Assembly over and disconnect all cables on the Controller Board and remove the assembly. 9. Gently press on the tab and lift the Tray Empty Actuator out of the printer. s3160-047 8-50 Phaser 3140/3155/3160 Printer Service Manual… -
Page 201: Electrical
2. Remove 2 screws (10 mm, silver, tap), and then remove the Control Panel. s3160-025 Controller Board PL1.0.2 1. Remove the Print Cartridge (page 8-6). 2. Remove the Tray (page 8-7). 3. Remove the Rear Cover (page 8-26). Phaser 3140/3155/3160 Printer Service Manual 8-51…
- Page 202
Service Parts Disassembly 4. On the Power Supply Board, disconnect CON1. P/JCON1 s3160-038 s3160-068 8-52 Phaser 3140/3155/3160 Printer Service Manual… - Page 203
Service Parts Disassembly 5. Disconnect CON3. P/JCON3 s3160-127 6. Turn the printer over. 7. Remove 11 screws (10 mm, silver, tap) on the Engine Shield assembly. s3160-037 Phaser 3140/3155/3160 Printer Service Manual 8-53… -
Page 204: Power Supply Board
9. Remove 4 screws (silver, 6mm) from the Controller Board. s3160-042 10. Remove the Controller Board. Power Supply Board PL1.0.1 1. Remove the Print Cartridge (page 8-6). 2. Remove the Tray (page 8-7). 3. Remove the Rear Cover (page 8-26). 8-54 Phaser 3140/3155/3160 Printer Service Manual…
- Page 205
Service Parts Disassembly 4. Disconnect CON1 on the Power Supply Board. P/JCON1 s3160-038 s3160-068 Phaser 3140/3155/3160 Printer Service Manual 8-55… - Page 206
Service Parts Disassembly 5. Disconnect CON3. P/JCON3 s3160-127 6. Turn the printer over. 7. Remove 11 screws (10 mm, silver, tap) on the Engine Shield assembly. s3160-037 8-56 Phaser 3140/3155/3160 Printer Service Manual… - Page 207
11. Remove 5 screws (silver, 6mm). Remove the ground wire screw (silver, 6mm). Note that the ground wire screw is slightly larger in diameter than the other screws. P/JCON2 s3160-040 12. Remove the Power Supply Board. Phaser 3140/3155/3160 Printer Service Manual 8-57… -
Page 208: Fan
1. Remove the Top Cover (page 8-23). 2. Remove the Left Cover (page 8-26). 3. Remove 1 screw (10 mm, silver, tap), and then unplug fan connector CON3. P/JCON3 s3160-036 4. Remove the Fan. 8-58 Phaser 3140/3155/3160 Printer Service Manual…
-
Page 209: Solenoids And Sensors
Service Parts Disassembly Solenoids and Sensors Manual Feed Solenoid PL6.0.19 1. Remove the Drive Assembly (page 8-35). 2. Disconnect the black and gray wiring harness connector CN22. CN22 s3160-130 Phaser 3140/3155/3160 Printer Service Manual 8-59…
- Page 210
3. Remove 3 screws (10 mm, silver, tap) and remove the Feed Bracket. s3160-028 4. Remove the Pick Up Gear Assembly. Remove 1 screw (10 mm, silver, tap) that secures the Manual Feed Solenoid. s3160-062 5. Remove the Manual Feed Solenoid. 8-60 Phaser 3140/3155/3160 Printer Service Manual… -
Page 211: Pick Up Solenoid
1. Remove the Print Cartridge (page 8-6). 2. Remove the Paper Tray (page 8-7). 3. Remove the Rear Cover (page 8-26). 4. Turn the printer over. 5. Remove 11 screws (10 mm, silver, tap) on the Engine Shield assembly. s3160-037 Phaser 3140/3155/3160 Printer Service Manual 8-61…
- Page 212
6. Lift the Engine Shield Assembly and disconnect CN7 (CN6 on the 3160) on the Controller Board. s3160-131 7. Remove the Drive Assembly (page 8-35). 8. Remove 1 screw (10 mm, silver, tap) that secures the Pick Up Solenoid. s3160-061 8-62 Phaser 3140/3155/3160 Printer Service Manual… -
Page 213: Out Bin Full Sensor
9. Carefully thread the solenoid cable through the side of the printer and remove the solenoid. Out Bin Full Sensor PL6.0.73 1. Remove the Top Cover (page 8-23). 2. Disconnect the wiring harness CN21, and then press the tabs and remove the sensor. CN21 s3160-063 Phaser 3140/3155/3160 Printer Service Manual 8-63…
- Page 214
Service Parts Disassembly 8-64 Phaser 3140/3155/3160 Printer Service Manual… -
Page 215: Parts List
Parts List In this chapter… • Serial Number Format • Using the Parts List • Parts Lists • Xerox Supplies and Accessories Chapter…
-
Page 216: Serial Number Format
Parts List Serial Number Format Changes to Xerox products are made to accommodate improved components as they become available. It is important when ordering parts to include the following information: • Component’s part number • Product type or model number •…
-
Page 217: Using The Parts List
P2. Note Only parts showing part numbers are available for ordering by support. Parts not showing part numbers are available on the parent assembly. Abbreviations Abbreviation Meaning C-ring E-ring K-clip Screw Phaser 3140/3155/3160 Printer Service Manual…
-
Page 218: Parts Lists
Parts List Parts Lists Parts List 1.0 Main s3160-001 Phaser 3140/3155/3160 Printer Service Manual…
- Page 219
022N02354 Main Frame — Top Cover 002N02909 Front Cover 3140 002N02910 3155 002N02911 3160B 002N02912 3160N 002N02906 Print Cartridge — 1.5K 108R00908 Print Cartridge — 2.5K 108R00909 Power Cord, 110V 105N02072 Power Cord, 220V 117N01769 Phaser 3140/3155/3160 Printer Service Manual… -
Page 220: Parts List 2.0 Top Cover
Parts List Parts List 2.0 Top Cover s3160-002 Phaser 3140/3155/3160 Printer Service Manual…
- Page 221
— Exit Cover — PMO-Sub_M_Stacker — PMO-Bushing_F/Down — Out Bin Full Actuator — LED Lens — Key-Start — Key-Power — Key-Power Holder — Control Panel 140N63412 Screw-Taptype — Sponge-Cover_Top (3155 and 3160 models only) — Phaser 3140/3155/3160 Printer Service Manual… -
Page 222: Parts List 3.0 Covers
Parts List Parts List 3.0 Covers s3160-003 Phaser 3140/3155/3160 Printer Service Manual…
- Page 223
Parts List 3.0 Cover Assemblies ID No. Name/Description Part Number Rear Cover Assembly 3140/3155/3160B 002N02913 3160N 002N02905 Front Cover Assembly 3140 002N02910 3155 002N02911 3160B 002N02912 3160N 002N02906 Left Cover Assembly 002N02907 4. — Right Cover Assembly 002N02908 Phaser 3140/3155/3160 Printer Service Manual… -
Page 224: Parts List 4.0 Front Cover
Parts List Parts List 4.0 Front Cover s3160-007 9-10 Phaser 3140/3155/3160 Printer Service Manual…
- Page 225
Parts List 4.0 Cover Assemblies ID No. Name/Description Part Number Front Cover Assembly 3140 002N02910 3155 002N02911 3160B 002N02912 3160N 002N02906 Adjust-Manual_Right — 3. — Adjust-Manual_Left — Adjust Rack-M-Manual — Screw-Taptype — Gear-Rack_Pinion — Phaser 3140/3155/3160 Printer Service Manual 9-11… -
Page 226: Parts List 5.0 Rear Cover
Parts List Parts List 5.0 Rear Cover s3160-008 9-12 Phaser 3140/3155/3160 Printer Service Manual…
- Page 227
Parts List Parts List 5.0 Cover Assemblies ID No. Name/Description Part Number Rear Cover Assembly 3140/3155/3160B 002N02913 3160N 002N02905 Upper Rear Cover — Lower Rear Cover — Phaser 3140/3155/3160 Printer Service Manual 9-13… -
Page 228: Parts List 6.0 Main Frame
Parts List Parts List 6.0 Main Frame 80-3 80-2 80-1 80-4 59-3 68-2 68-4 68-1 68-5 68-3 59-1 59-2 38 37 39 36-2 36-1 57-2 57-1 58-2 58-1 s3160-009 9-14 Phaser 3140/3155/3160 Printer Service Manual…
- Page 229
Parts List 77-1 77-2 Transfer Roller s3160-010 Phaser 3140/3155/3160 Printer Service Manual 9-15… - Page 230
Bush-TR_L — Spring ETC-Guide Deve — Spring ETC-TR — Frame-Left Stopper Pick Up — 36-1. Spring-TS — 36.2. Cam-M-Pick Up — Gear-Feed 2 — Gear-Idle 23 — Shaft-Feed — Roller-Registration — Shaft-Idle Feed — 9-16 Phaser 3140/3155/3160 Printer Service Manual… - Page 231
— MEC-Terminal — Terminal-CRUM — Clutch Assembly 005N01031 68-1. Spring-TS — 68-2. Gear-Feed 1 — 68-3. Shaft-Feed — 68-4. PMO-Collar Spring — 68-5. PMO-Hub Clutch — Photo-Interrupter 130N01574 IPR-P-Terminal CON — Bracket-Bush_TR L — Phaser 3140/3155/3160 Printer Service Manual 9-17… - Page 232
Laser Unit 130N01579 Frame-Roller Decurl — 80-1. Holder-M-Exit F/Down — 80-2. Roller-M-Exit FR — 80-3. Roller-M-Exit Main — 80-4 Spring-CS — Harness-Bin full — Harness-Laser — Harness-Step Motor Clutch — Harness-CRUM — Harness-OPE — 9-18 Phaser 3140/3155/3160 Printer Service Manual… - Page 233
Parts List Phaser 3140/3155/3160 Printer Service Manual 9-19… -
Page 234: Parts List 7.0 Drive Assembly (Model 3140)
Parts List Parts List 7.0 Drive Assembly (Model 3140) s3160-011 9-20 Phaser 3140/3155/3160 Printer Service Manual…
- Page 235
Gear RDCN 57/18 — Gear RDCN 90/31 — Gear RDCN 103/41 — Gear DRV Fuser Out — Gear Hub Clutch — Gear DRV Fuser In — Screw-Taptype — Plain Washer — Motor BLDC — Phaser 3140/3155/3160 Printer Service Manual 9-21… -
Page 236: Parts List 7.1 Drive Assembly (Models 3155/3160)
Parts List Parts List 7.1 Drive Assembly (Models 3155/3160) s3160-012 9-22 Phaser 3140/3155/3160 Printer Service Manual…
- Page 237
Gear DRV Fuser Out — Gear Hub Clutch — Gear DRV Fuser In — Gear Fuser DR OUT 37 — Gear Hub Clutch — Gear DRV Fuser In — Screw-Taptype — Plain Washer — Phaser 3140/3155/3160 Printer Service Manual 9-23… -
Page 238: Parts List 8.0 Pick Up Roller Assembly
Parts List Parts List 8.0 Pick Up Roller Assembly s3160-004 9-24 Phaser 3140/3155/3160 Printer Service Manual…
- Page 239
PMO-Idle Pick Up — Frame Base- Pick Up Rubber — 3-1. Pick Up Rubber Pick Up Rubber Housing 3-3. Pick Up Housing Pick up Holder — Screw-Taptype — Shaft-P-Pick Up — Bush-M-Pick Up L — Phaser 3140/3155/3160 Printer Service Manual 9-25… -
Page 240: Parts List 9.0 Fuser
Parts List Parts List 9.0 Fuser 10 7 45 44 43 s3160-005 9-26 Phaser 3140/3155/3160 Printer Service Manual…
- Page 241
— Bush-M-HR R R2 — Bush-M-HR L R2 — Fuser Frame — Input Guide — Fuser Cover — Fuser Dummy Cover — Roller-M-Exit F/Up — Pressure Roller 022N01611 Gear Fuser — Heat Roller 022N02310 Phaser 3140/3155/3160 Printer Service Manual 9-27… - Page 242
ID No. Name/Description Part Number Exit Actuator — Lever Link Jam-L — Lever Link Jam-R — CAP Lamp-L — CAP Lamp-R — Caution Label — PMO-Gear Exit Drv16 — Gear-RDCN Exit — Gear-Idle 23 — 9-28 Phaser 3140/3155/3160 Printer Service Manual… - Page 243
Parts List Phaser 3140/3155/3160 Printer Service Manual 9-29… -
Page 244: Parts List 10.0 Paper Tray
Parts List Parts List 10.0 Paper Tray 11-1 11-2 11-3 s3160-006 9-30 Phaser 3140/3155/3160 Printer Service Manual…
- Page 245
Holder Pad Housing — Spring ETC-Exit Roll FD — Roller-M-Idle Feed — Spring-ES — Tray Cover — Screw-Taptype — Gear-Pinion — Screw-Taptype — PMO-Plate Locker — Spring ETC-Locker, Plate — PMO-Roller Upper DP — Phaser 3140/3155/3160 Printer Service Manual 9-31… -
Page 246: Xerox Supplies And Accessories
Fuser — 110V (50K) 126N00332 Fuser — 220V (50K) 126N00333 PL1.0.12 Print Cartridge — 2.5K 108R00909 Print Cartridge — 1.5K 108R00908 Power Cords Description Part Number Power Cord, 110V 105N02072 Power Cord, 220V 117N01769 9-32 Phaser 3140/3155/3160 Printer Service Manual…
-
Page 247: Wiring
Wiring • Plug/Jack Locators • Component Locator Diagrams • Wiring Diagrams • Phaser 3140 Wiring • Phaser 3155 Wiring • Phaser 3160 Wiring Chapter…
-
Page 248: Plug/Jack Locators
I-140 Print Cartridge CRUM CN11 A-138 USB Port CN12 D-140 Fuser Thermistor 3160B and 3160N Controller Board C-137 B-137 A-138 USB Port A-139 Ethernet Port (3610N only) J-139 Laser Unit J-140 Pick Up Solenoid 10-2 Phaser 3140/3155/3160 Printer Service Manual…
- Page 249
G-140 Control Panel CN10 I-140 Print Cartridge CRUM CN12 F-140 Manual Feed Solenoid and Motor CN15 E-140 Out Bin Full Sensor Power Supply Board CON1 C-135 Fuser CON2 H-139 Controller Board Interface CON3 F-134 Phaser 3140/3155/3160 Printer Service Manual 10-3… -
Page 250: Map 1 — Controller Board (3140)
Wiring Map 1 — Controller Board (3140) CN9 CN7 (USB) CN12 CN11 s3160-155 10-4 Phaser 3140/3155/3160 Printer Service Manual…
-
Page 251: Map 2 — Controller Board (3155)
Wiring Map 2 — Controller Board (3155) (USB) CN15 CN12 CN10 s3160-154 Phaser 3140/3155/3160 Printer Service Manual 10-5…
-
Page 252: Map 3 — Controller Board (3160B/3160N)
Wiring Map 3 — Controller Board (3160B/3160N) (USB) CN15 CN12 CN10 CN4 (ENET) s3160-111 10-6 Phaser 3140/3155/3160 Printer Service Manual…
-
Page 253: Map 4 — 110V And 220V Power Supply Boards
Wiring Map 4 — 110V and 220V Power Supply Boards 110V P/JCON3 P/JCON1 P/JCON2 220V P/JCON3 P/JCON1 P/JCON2 s3160-112 Phaser 3140/3155/3160 Printer Service Manual 10-7…
-
Page 254: Component Locator Diagrams
Out Bin Full Sensor C-135 Paper Empty Sensor D-138 Manual Feed Sensor E-139 Feed Sensor D-139 Exit Sensor E-137 Front Cover Interlock Switch E-139 Pick Up Solenoid B-138 Manual Feed Solenoid C-138 Motor D-136 I-137 10-8 Phaser 3140/3155/3160 Printer Service Manual…
-
Page 255: Map 5 — Sensors
Wiring Map 5 — Sensors Exit Sensor Outbin Full Sensor Front Door Interlock Switch Paper Empty Sensor Manual Feed Sensor Feed Sensor s3160-113 Phaser 3140/3155/3160 Printer Service Manual 10-9…
-
Page 256: Map 6 — Motor, Solenoids, And Fan
Wiring Map 6 — Motor, Solenoids, and Fan Motor Pick Up Solenoid Manual Feed Solenoid s3160-114 10-10 Phaser 3140/3155/3160 Printer Service Manual…
-
Page 257: Wiring Diagrams
Jumper Denotes the parts. PL X.Y.Z implies the item “Z” of plate (PL) “X.Y” Fuser in Parts List. PL X.Y.Z Subassembly 1 Denotes functional parts attached with functional parts name. Heater Subassembly 2 Phaser 3140/3155/3160 Printer Service Manual 10-11…
- Page 258
The given voltage is for signal in high status. The arrow indicates the direction of signal. Function Logic 2 Denotes a connection between wires. Connection of Wires Denotes a Clutch or Solenoid. Solenoid/Clutch Denotes a Motor. Motor 10-12 Phaser 3140/3155/3160 Printer Service Manual… - Page 259
Denotes an NPN Photo-transistor. NPN Phototransistor I/L +24 VDC Denotes DC voltage when the Interlock Switch in MCU Board turns On. +5 VDC Denotes DC voltage. +3.3 VDC Denotes signal ground. Denotes analog ground. Denotes return. Phaser 3140/3155/3160 Printer Service Manual 10-13… -
Page 260: Phaser 3140 Wiring
Print Cartridge CRUM Control Panel Power Supply Board CON1 CON2 Outbin Full Sensor Empty Sensor Pickup Solenoid Manual Feed Sensor CN22 Manual Feed Solenoid CN11 Feed Motor Sensor Exit Sensor Front Cover Interlock INLET1 s3160-145 10-14 Phaser 3140/3155/3160 Printer Service Manual…
-
Page 261: 3140 Controller Board Wiring
Controller Board +3.3VDC +3.3VDC Outbin Full Sensor nSENS_OUTBIN_FULL Interlock +24VDC 24VDC Pickup Solenoid PICKUP_CLUTCH CN11 Motor Interlock +24VDC CN22 24VS Manual Feed REGI_CLUTCH Solenoid Control Panel nKEY_PRINT nKEY_POWER_SAVE LED_POWER nLED_READY nLED_ERROR nLED_TONER nKEY_CANCEL s3160-147 Phaser 3140/3155/3160 Printer Service Manual 10-15…
-
Page 262: 3140 Laser Unit Wiring
3140 Laser Unit Wiring 3140 Controller Board Interlock +24VDC Laser nPMOTOR nLREADY LSU_CLK nLD_ENABLE DAC_OUT nHSYNC nLSU_SH DO1- DO1+ +5VDC 5V_LSU CN12 CON1 Power Supply FUSER_THERM1 LIVE Board Fuser THERMISTOR1 NEUTRAL INLET1 LIVE NEUTRAL s3160-148 10-16 Phaser 3140/3155/3160 Printer Service Manual…
-
Page 263: 3140 Power Supply Wiring
+24V Sensor Feed +24VS Sensor +24VS +24VS Exit Sensor Front Cover 5V_SMPS Interlock 5V_SMPS nP_EXIT THV_READ nTHV_EN THV_PWM MHV_PWM PWM_DEV_DC nRELAY_AC_OFF FAN_MAIN Supply FUSER_ON STANDBY Print Cartridge +3.3VDC CRUM SCL1_CHORUS3 Drum SDA1_CHORUS3 3.3V s3160-149 Phaser 3140/3155/3160 Printer Service Manual 10-17…
-
Page 264: Phaser 3155 Wiring
CRUM Control Panel Power Supply CN11 Board CON1 CON2 Outbin Full Sensor Empty Sensor Pickup Solenoid Manual Feed CN22 Manual Feed Solenoid Sensor Feed Motor Sensor Exit Sensor Front Cover Interlock CON3 INLET1 s3160-146 10-18 Phaser 3140/3155/3160 Printer Service Manual…
-
Page 265: 3155 Controller Board Wiring
24VS Pickup Solenoid PICKUP_CLUTCH 33 PULL-DOWN (DIR) Motor Interlock BLDC_CLK +24VDC BLDC_MOTOR_READY nBLDC_MOTOR_EN 33 PULL-DOWN (BRAKE) +24VS +24VS CN22 24VS Manual Feed REGI_CLUTCH Solenoid Control Panel nKEY_PRINT nKEY_POWER_SAVE LED_POWER nLED_READY nLED_ERROR nLED_TONER nKEY_CANCEL s3160-150 Phaser 3140/3155/3160 Printer Service Manual 10-19…
-
Page 266: 3155 Laser Unit Wiring
3155 Controller Board Interlock +24VDC Laser nPMOTOR nLREADY LSU_CLK nLD_ENABLE DAC_OUT nHSYNC nLSU_SH DO1- DO1+ +5VDC 5V_LSU CN12 CON1 Power Supply FUSER_THERM1 LIVE Board Fuser THERMISTOR1 NEUTRAL INLET1 LIVE NEUTRAL CON3 FAN_POWER N.C. s3160-151 10-20 Phaser 3140/3155/3160 Printer Service Manual…
-
Page 267: 3155 Power Supply Wiring
+24V Sensor Feed +24VS Sensor +24VS +24VS Exit Sensor Front Cover 5V_SMPS Interlock 5V_SMPS nP_EXIT THV_READ nTHV_EN THV_PWM MHV_PWM PWM_DEV_DC nRELAY_AC_OFF FAN_MAIN Supply FUSER_ON STANDBY Print Cartridge +3.3VDC CRUM SCL1_CHORUS3 Drum SDA1_CHORUS3 3.3V s3160-152 Phaser 3140/3155/3160 Printer Service Manual 10-21…
-
Page 268: Phaser 3160 Wiring
Control Panel Power Supply Board CON1 CON2 ENET Empty Sensor CN15 Outbin Full Sensor Manual Feed Pickup Solenoid Sensor Feed CN22 Manual Feed Solenoid Sensor CN12 Motor Exit Sensor Front Cover Interlock CON3 INLET1 s3160-107 10-22 Phaser 3140/3155/3160 Printer Service Manual…
-
Page 269: 3160 Controller Board Wiring
Pickup Solenoid PICKUP_CLUTCH CN12 33 PULL-DOWN (DIR) Motor Interlock BLDC_CLK +24VDC BLDC_MOTOR_READY nBLDC_MOTOR_EN 33 PULL-DOWN (BRAKE) +24VS +24VS CN22 +24VS Manual Feed REGI_CLUTCH Solenoid Control Panel N.C. nKEY_POWER_SAVE LED_POWER nLED_READY nLED_ERROR nLED_TONER nKEY_CANCEL s3160-108 Phaser 3140/3155/3160 Printer Service Manual 10-23…
-
Page 270: 3160 Laser Unit Wiring
3160 Controller Board Interlock +24VDC Laser +24VS nLSU_MOT_EN nREADY_LSU CLK_LSU_MOT nLDON_LSU LD_POWER1 HSYNC_1 nSH_LSU_1 VDO_1_N VDO_2_P +5VDC 5V_LSU CON1 Power Supply FUSER_THERM1 LIVE Board Fuser THERMISTOR1 NEUTRAL INLET1 LIVE NEUTRAL CON3 FAN_POWER N.C. s3160-109 10-24 Phaser 3140/3155/3160 Printer Service Manual…
-
Page 271: 3160 Power Supply Wiring
Sensor Feed +24VS Sensor +24VS +24VS Exit Sensor Front Cover 5V_SMPS Interlock 5V_SMPS nSENS_P_EXIT THV_READ nTHV_EN PWM_THV PWM_MHV PWM_DEV_DC nRELAY_AC_OFF FAN_MAIN Supply FUSER_ON STANDBY Print Cartridge +3.3VDC CN10 CRUM SCL1_CHORUS3 Drum SDA1_CHORUS3 3.3V s3160-110 Phaser 3140/3155/3160 Printer Service Manual 10-25…
- Page 272
Wiring 10-26 Phaser 3140/3155/3160 Printer Service Manual… - Page 273
Reference Contents… • Acronyms and Abbreviations Appendix… -
Page 274: Acronyms And Abbreviations
Direct Current is type of power for printer components. Machine converts AC power from power source to DC power. Diagnostic Control Unit DDR2 Double Data Rate Dual In-Line Memory Module DIMM DEVE Developer DHCP Dynamic Host Configuration Protocol Phaser 3140/3155/3160 Printer Service Manual…
- Page 275
Integrated Circuit International Electrotechnical Commission Interface Input and Output Intelligent Drive electronics or Imbedded Drive Electronics IEEE Institute of Electrical and Electronics Engineers. Inc. Image Processor Isopropyl Alcohol Kilo Byte Local Area Network Liquid Crystal Display Phaser 3140/3155/3160 Printer Service Manual… - Page 276
Random Access Memory Relative Humidity Read-Only Memory Raster Output Scanner — Laser Unit SMPS Switching Mode Power Supply Sensor Solenoid Start of Scan SPOOL Simultaneous Peripheral Operations Online Switch SYNC Synchronous or Synchronization Transfer High Voltage Toner Phaser 3140/3155/3160 Printer Service Manual… - Page 277
Reference Acronym Description User Interface Universal Serial Bus Phaser 3140/3155/3160 Printer Service Manual… - Page 278
Reference Phaser 3140/3155/3160 Printer Service Manual… - Page 279
8-51 fasteners Controller Board 2-11 precautions 3140 wiring 10-15 Feed Actuator 3155 wiring 10-19 part number 9-17 3160 wiring 10-23 removal 8-40 connector definitions 2-11 Spring designators 10-2 part number 9-17 Phaser 3140/3155/3160 Printer Service Manual I – 1… - Page 280
OPC drum ghosting image 5-15 image defects Out Bin Full Sensor 2-17 Laser Unit part number 9-17 3140 wiring removal 10-16 8-63 3155 wiring Output Tray 10-20 3160 wiring capacity 10-24 I – 2 Phaser 3140/3155/3160 Printer Service Manual… - Page 281
Exit 2-17 cleaning Feed 2-16 component life Front Cover interlock 2-17 defect definitions Out Bin Full 2-17 dimensions 1-15 Paper Empty 2-16 electrical requirements 1-13 Toner Cartridge 2-16 image area 5-32 Phaser 3140/3155/3160 Printer Service Manual I – 3… - Page 282
8-14 Toner Cartridge removal sensor 2-16 Top Cover part number warm-up time 1-12 removal 8-23 wiring Transfer Roller Phaser 3140 10-14 image defects Phaser 3155 10-18 life count Phaser 3160 10-22 location I – 4 Phaser 3140/3155/3160 Printer Service Manual… - Page 284
Copyright © 2009, Xerox Corporation. All rights reserved. Unpublished rights reserved under the copyright laws of the United States. Part#: 701P49961…
Современные копировальные аппараты Xerox отличаются качество, надежностью и «быстрым» стартом. Также у них существует множество особенностей, которые отличают их от принтеров других производителей. Например, используется тефлоновый вал, а не термопленка.
Однако избегать различных поломок и ошибок пока не удается ни одному устройству. К самым частым неисправностям у принтеров Xerox относятся: залипание или повреждение датчика бумаги, повреждение роликов подачи, часто требуется перепрошивка программного обеспечения.
Если у вас возникнут вопросы насчет того, как исправить код ошибки копировального аппарата Xerox, то вы можете обратиться к специалистам нашего сервисного центра.

Основные коды ошибок копировальных аппаратов Xerox и способы их устранения:
- Коды ошибок Xerox 1012, 1012(RE)
- Коды ошибок Xerox 1020
- Коды ошибок Xerox 1025
- Коды ошибок Xerox 1035
- Коды ошибок Xerox 1038
- Коды ошибок Xerox 2830
- Коды ошибок Xerox 5011, 5012, 5014
- Коды ошибок Xerox 5016, 5017, 5316, 5317
- Коды ошибок Xerox 5018, 5028
- Коды ошибок Xerox 5312, 5313, 5314
- Коды ошибок Xerox 5318, 5320, 5322
- Коды ошибок Xerox 5328
- Коды ошибок Xerox 5330
- Коды ошибок Xerox 5340, 5343
- Коды ошибок Xerox 5345
- Коды ошибок Xerox 5350, 5352
- Коды ошибок Xerox 5355
- Коды ошибок Xerox 5622
- Коды ошибок Xerox XC520, 540, 560, 580
Xerox 1012, 1012(RE)
| Код ошибки | Описание |
|---|---|
| E1 | Jam between paper feed and fuser |
| E3 | Jam in fuser |
| E5 | Clam shell open |
| E6 | Paper feed section cover is open |
| J1 | Toner cartridge near empty |
| J3 | Drum cartridge not seated properly |
| J7 | Waste toner full (replace drum cartridge) |
| L6 | Key counter out |
| L8 | Exposure area overheat |
| U1 | No clock pulse (drive problem) |
| U2 | Scan problem |
| U3 | Lens/mirror problem (RE model only) |
| U4 | Heat problem |
| U8 | Exposure lamp control circuit problem |
Xerox 1020
| Код ошибки | Описание |
|---|---|
| LL | Probable bad heater lamp |
Xerox 1025
| Код ошибки | Описание |
|---|---|
| A1 | DF jam |
| C1 | PF jam cass. 1 |
| C2 | PF jam cass. 2 |
| C3 | PF jam cass. 3 |
| C9 | Bypass jam |
| E1-1 | Paper jam before exit switch |
| E1-2 | Paper jam |
| E1-5 | Paper jam |
| E1-6 | Paper jam |
| E3-3 | Paper jam at exit switch |
| E3-4 | Paper jam at exit switch |
| E5 | Front door open |
| F1 | Collator jam |
| F5 | Collator interlock |
| F8 | No power to collator |
| F9 | Collator bin home switch |
| J7 | 250 copies since toner waste was full |
| L5 | Original cass. not present after clearing interrupt |
| L6 | Key counter |
| L8 | Platen glass too hot |
| U1 | Main motor clock pulse |
| U2 | Scan problem |
| U3-1 | Lens problem |
| U4-1 | Open thermistor |
| U4-2 | Low temperature |
| U4-4 | Temperature |
| U4-5 | Main PWB |
| U6-1 | Main PWB |
| U6-2 | Main PWB |
| U6-3 | Main board battery |
| U6-4 | Initialization |
| U8 | Exposure lamp |
Xerox 1035
| Код ошибки | Описание |
|---|---|
| A9 | Scanner location |
| C1 | Paper feed — upper cassette |
| C2 | Paper feed — lower cassette |
| C9 | Bypass jam |
| E5 | Clam shell is open |
| L6 | Key counter |
| U1 | Off/On |
| U2 | Optics |
| U4 | Low fuser temperature |
Xerox 1038
| Код ошибки | Описание |
|---|---|
| A1 | DF jam |
| C1 | PF jam cass. 1 |
| C2 | PF jam cass. 2 |
| C3 | PF jam cass. 3 |
| C9 | Bypass jam |
| E1-1 | Paper jam before exit switch |
| E1-2 | Paper jam |
| E1-5 | Paper jam |
| E1-6 | Paper jam |
| E3-3 | Paper jam at exit switch |
| E3-4 | Paper jam at exit switch |
| E5 | Front door open |
| F1 | Collator jam |
| F5 | Collator interlock |
| F8 | No power to collator |
| F9 | Collator bin home switch |
| J7 | 250 copies since toner waste was full |
| L5 | Original cass. not present after clearing interrupt |
| L6 | Key counter |
| L8 | Platen glass too hot |
| U1 | Main motor clock pulse |
| U2 | Scan problem |
| U3-1 | Lens problem |
| U4-1 | Open thermistor |
| U4-2 | Low temperature |
| U4-4 | Temperature |
| U4-5 | Main PWB |
| U6-1 | Main PWB |
| U6-2 | Main PWB |
| U6-3 | Main board battery |
| U6-4 | Initialization |
| U8 | Exposure lamp |
Xerox 2830
| Код ошибки | Описание |
|---|---|
| A9 | Scanner location |
| C1 | Paper feed — upper cassette |
| C2 | Paper feed — lower cassette |
| C9 | Bypass jam |
| E5 | Clam shell is open |
| E5 | Clam shell open |
| L6 | Key counter |
| U1 | Off/On |
| U2 | Optics |
| U4 | Low fuser temperature |
Xerox 5011, 5012, 5014
| Код ошибки | Описание |
|---|---|
| C8 | Bypass jam/no paper |
| C9 | Bypass jam |
| E1 | Jam |
| E3 | Fuser jam |
| E5 | Clamshell open |
| E6 | PF section cover open |
| J1 | Toner cartridge amost empty |
| J3 | Copy cart (drum unit) missing/not seated right |
| J7 | Copy cartridge has run 18,000 copies |
| J8 | Copy cartridge. Improperly seated or possible only one of two fuses in the cartridge blew |
| L6 | Key counter |
| L8 | Exposure glass too hot |
| U1 | Drive problem |
| U2 | Scan problem |
| U3 | Lens or mirror drive problem |
| U4 | Fuser problem. Heat lamp, thermoswitch, SSR, thermistor |
| U6 | Battery on main board |
| U8 | Exposure lamp or exposure lamp circuit |
Xerox 5016, 5017, 5316, 5317
| Code | Description |
|---|---|
| A1-1 | Document feeder feed jam |
| A1-2 | Document feeder belt jam |
| A2-1 | Document feeder exit jam |
| A2-2 | Duplex jam |
| A3 | DAD interlock |
| A5 | Duplex and DAD right side interlock |
| A6 | Copier jams after |
| A9 | Document feed belt drive motor |
| C1-3 | Top cassette misfeed |
| C2-3 | Middle cassette misfeed |
| C3-3 | Bottom cassette misfeed |
| C9-3 | Bypass misfeed |
| E1-11 to E1-14 | Paper jam in machine. Did not reach exit switch soon enough |
| E1-6 | Paper path jam |
| E3-31 to E3-34 | Exit switch jam |
| E3-6 | Fuser jam |
| E5 | Front door interlock |
| E6 | Right side interlock or TTM interlock |
| F1 | Sorter jam |
| F5 | Sorter interlock |
| F8 | Sorter board to copier main board communication problem |
| F9 | Sorter bins |
Xerox 5018, 5028
| Code | Description |
|---|---|
| A1 | Document is ADF |
| A1-8 | Main board received reset signal |
| A2 | ADF jams |
| A6, A7 | ADF jams |
| A9 | ADF jams |
| C1 — C4 | Feed jam |
| C5-1 to C5-4 | Jams in various areas |
| C5-2 | Jams in various areas |
| C5-3 | Jams in various areas |
| C5-4 | Duplex jam |
| E0 | Machine has reset |
| E1 | Jam |
| E1-E0 | Registration jam |
| E1-E5 | Clamshell interlock |
| E1-E6 | Right side interlock |
| E1-E7 | Two tray interlock |
| E1-E8 | Sorter interlock |
| E1-E9 | Copy cartridge interlock |
| E2 | Reset signal happened |
| E3 | Jam |
| E4 | Exit jam |
| E4-10 | Exit jam |
| E4-5 | Clamshell interlock |
| E4-6 | Right side interlock |
| E4-7 | Two tray interlock. Duplex interlock |
| E4-8 | Sorter interlock |
| E4-9 | Copy cartridge interlock |
| E5 | Clamshell interlock |
| E6 | Right side interlock |
| E7 | Duplex interlock |
| E9 | Copy cartridge interlock |
| F3-1 | Sorter bin home switch |
| F3-2 | Sorter cam switch |
| F3-3 | Sorter cam switch |
| J1-1 | Add toner |
| J1-2 | Temporary low toner signal |
| J2-0 | Replace copy cartridge |
| L2 | 2000 copies left on copy cartridge |
| L3 | ADF to machine communication problem |
| L4 (flashing) | 1000 copies left on fuser web |
| rr | Bad EPROM on main board |
| U0 | Main board |
| U2 | Scan problem |
| U2-1 | Scan home |
| U3-00 | Cam drive problem |
| U3-01 | Cam movement slow |
| U3-04 | Main board to duplex communication |
| U3-09 | Cam problem |
| U3-12 | Jogger problem |
| U3-19 | Cam problem |
| U3-21 | Cam problem |
| U3-23 | Cam problem |
| U3-29 | Cam problem |
| U3-32 | Cam problem |
| U3-34 | Cam problem |
| U3-39 | Cam problem |
| U3-43 | Cam problem |
| U3-45 | Cam problem |
| U3-49 | Cam problem |
| U3-54 | Cam problem |
| U3-56 | Cam problem |
| U3-59 | Cam problem |
| U4-1 | Fuser problem. Long warm up |
| U4-2 | Low fuser temperature after warm up |
| U4-3 | High fuser temperature |
| U4-4 | Open fuser thermistor |
| U4-6 | Replace fuser web |
| U4-7 | Thermistor signal problem |
| U7-1 | Copy cartridge belt drive problem |
| U9-3 | Exposure lamp problem |
| U9-4 | Toner motor |
| U9-5 | Problem in warm up |
Xerox 5312, 5313, 5314
| Код ошибки | Описание |
|---|---|
| C1 | Upper paper feed problem. Did not reach feed sensor |
| C2 | Lower paper feed problem. Did not reach feed sensor |
| E1 | Exit jam. Paper did not reach exit sensor |
| E3 | Exit jam. Paper still on exit sensor |
| J1 | Add toner |
| J3 | Copy cartridge (drum unit) not installed |
| J7 | Copy cartridge (drum unit) must be replaced |
| J8 | Copy cartridge (drum unit) problem |
| L6 | Problem with an accessory. Installed but not initialized |
| U1 | Drive problem. Main motor, gear etc. |
| U2 | Scan problem |
| U3 | Main board dip switches wrong. Lens drive problem |
| U4 | Fuser problem. Heat lamp, thermal switch, overheat, thermistor. |
| U6 | EPROM error |
| U8 | Auto exposure sensor. No exposure lamp or weak lamp |
Xerox 5318, 5320, 5322
| Code | Description |
|---|---|
| A1-11 | Original ready switch |
| A1-12 | Feed sensor |
| A1-1 to A1-32 | All indicate a paper path problem, etc. in the ADF |
| A1-21 | Original ready switch and document registration sensor or both the document feed sensor and document registration sensor |
| A1-22 | ADF registration sensor |
| A1-23 | Original did not reach ADF registration sensor quickly enough |
| A1-24 | ADF sensor stuck down too long |
| A1-25 | ADF sensor actuated at the wrong time during single sheet feed |
| A1-26 | ADF sensor not actuated quickly enough in sheet feed mode |
| A1-31 | In reverse, ADF sensor is not actuated soon enough |
| A1-32 | In reverse, ADF sensor is actuated too long |
| A2 | ADF exit problems |
| A2-1 | Original ready sensor and ADF exit switch are actuated or ADF feed in sensor and ADF exit switch are both actuated |
| A2-2 | ADF exit switch |
| A2-3 | ADF exit switch is not actuated on time |
| A3 | Irregular size documents |
| A3-1 | Wrong size original sensed in 1:1 mode |
| A3-2 | Wrong size original sensed in the 2:1 mode |
| A5 | ADF interlock |
| A5 | ADF interlock |
| A6 | ADF single sheet document reset. |
| A6-1 | Reset original |
| A6-2 | Reset sheet feeder |
| A7 | Document cover interlock |
| A8 | ADF exit interlock |
| C1 | Tray 1 jam |
| C1-2 | Paper feed problem in tray 1 |
| C1-3 | Paper does not reach registration |
| C2 | Tray 2 jam |
| C3 | Tray 3 jam |
| C3-1 | Paper feed problem from tray 3 |
| C3-2 | Paper feed problem from tray 3 |
| C3-3 | Paper feed problem from tray 1 |
| C6-1 | Duplex paper feed problem |
| C6-2 | Duplex and/or tray 1 paper feed problem |
| C6-3 | Paper feed problem from tray 1 |
| C7-1 | Paper feed problem from HCF |
| C7-2 | Paper feed problem from HCF on tray 1 |
| C7-3 | Paper feed problem from tray 1 |
| C8 | Paper stays in tray or duplex or HCF |
| C8-1 | Paper on tray 1 feed sensor |
| C8-2 | Paper on tray 2 feed sensor |
| C8-3 | Paper on tray 3 feed sensor |
| C8-4 | Paper on HCF feed sensor |
| C8-5 | Paper in duplex section |
| C9 | Bypass feed problem |
| C9-3 | Paper from bypass did not reach registration sensor quickly enough |
| E1-10 to E1-25 | Internal jam |
| E1-6 | Paper on registration sensor |
| E2 | Reset signal happened. Might read E-2 something else. |
| E3-30 to E4-14 | Exit jam |
| E3-30 to E3-35 | Exit switch actuated too long |
| E3-6 | Exit jam |
| E3-6 | Paper on exit switch |
| E4-10 to E4-14 | Inverter sensor not actuated. |
| E4-10 to E4-45 | Paper did not reach inverter switch soon enough |
| E4-15 | Inverter sensor |
| E4-40 to E4-45 | Duplex entry sensor |
| E4-6 | Paper on inverter switch |
| E4-6 | Inverter sensor |
| E5 | Front door interlock |
| E6-1 | Tray 1 interlock |
| E6-2 | 2 tray or duplex interlock |
| E6-3 | HCF interlock |
| E7-2 | Duplex inverter interlock |
| E7-3 | Duplex interlock |
| E8-10 to E8-15 | Paper on duplex feed sensor is not actuated soon enough |
| E8-6 | Paper in duplex |
| E8-6 to E8-15 | Duplex entry sensor |
| F1-1 | Paper did not reach sorter |
| F1-2 | Paper stayed on sorter feed sensor |
| F1-6 | Sorter exit sensor |
| F3 | Paper size not available for sort/stack |
| F5 | Sorter interlock |
| H2-1 | Communication problem between main board and duplex board |
| H2-2 | Side guard sensor problem |
| H3-1 | Communication problem between main board and HCF |
| H3-2 | Upper limit sensor problem on HCF |
| H6-1 | ADF size sensor |
| H6-2 | ADF nudgeer sensor |
| H6-3 | Belt drive motor does not have 24 volts. Black toner is empty, but 100 copies have been run without changing toner |
| J1 | Black toner is empty, but 100 copies have been run without changing toner |
| J3 | Replace copy cartridge |
| J3 | No copy cartridge (drum unit) |
| J7 | Copy cartrige must be replaced |
| J8-1 | Wrong copy cartridge installed |
| J8-2 | Copy cartridge EEPROM must be changed |
| L6 | Auditron or other counter problem |
| L6 | Key counter not installed |
| L8 | Platen glass temperature is too high |
| L9 | Communication problem between interimage erase/edge lamps and main board |
| U1-1 | Main motor drive problem |
| U2-1 | Scan home problem |
| U2-1 to U2-4 | Scan home sensor |
| U2-2 | Scan home problem or optics problem |
| U2-3, U2-4 | Scan home problem |
| U3-1 | Lens sensor problem |
| U4-1 | Fuser thermistor open |
| U4-2 | Fuser did not warm up properly |
| U4-3 | Fuser temperature too high |
| U4-4 | Fuser problem. Staying on too long |
| U4-6 | High fuser temperature |
| U5-1 | Sorter bin home switch not activated |
| U5-2 | Sorter bin home switch stayed actuated |
| U5-3 | Sorter bin home switch |
| U5-4 | Sorter bin home switch |
| U6-1 | ROM problem |
| U6-2 | RAM problem |
| U6-3 | Low battery |
| U6-4 | Incorrect value in NVM. Reinitialize main board with code 20-96 |
| U8-1 | Exposure lamp problem |
| U8-2 | Communication problem main board and exposure board |
| U8-3 | Exposure lamp or exposure lamp board problem |
| U8-4 to U8-6 | Problem with exposure lamp, lamp sensor, lamp board |
Xerox 5328
| Code | Description |
|---|---|
| A1 | Document in ADF |
| A1-8 | Main board received reset signal |
| A2 | ADF jams |
| A6 | ADF registration jam |
| A7 | ADF interlock |
| A9 | Tray 1 jam |
| C1 | Tray 2 jam |
| C2 | Tray 3 jam |
| C3 | Bypass feed jams |
| C4 | Machine has reset |
| E1 | Jam |
| E1-5 | Clamshell interlock |
| E1-6 | Right side interlock |
| E1-7 | Two tray interlock, or duplex interlock |
| E1-8 | Sorter interlock |
| E1-9 | Copy cartridge interlock |
| E1 or E1-0 | Registration jam |
| E2 | Reset signal happened |
| E3 | Jam in transfer area |
| E4 | Exit jam |
| E4-0 | Exit jam |
| E4-5 | Clamshell interlock |
| E4-6 | Right side interlock |
| E4-7 | Two tray interlock |
| E4-8 | Sorter interlock |
| E4-9 | Copy cartridge interlock |
| E5 | Clamshell interlock |
| E6 | Right side interlock |
| E9 | Copy cartridge interlock |
| F3-1 | Sorter bin home switch |
| F3-2 | Sorter cam switch |
| F3-3 | Sorter cam switch |
| F5 | Sorter interlock |
| J1-1 | Add toner |
| J1-2 | Temporary low toner signal |
| J2-1, J2-2 | Replace copy cartridge |
| J5, J6 | ADF to machine communications problem |
| L2 | 2000 copies left on cartridge |
| L3 | ADF to machine communications problem |
| L4 | (flashing) 1000 copier left on fuser web |
| L6 | Auditron or other counter problem |
| LL | Main board. Try simulation 1.1 to initialize |
| rc | Wrong operation panel installed |
| rr | Bad EPROM on main board. Try 1.1 |
| U0 | Main board |
| U2 | Scan problem |
| U2-1 | Scan home |
| U2-2 | Scan home or scan encoder |
| U2-4 | Scan home or scan dual page sensor |
| U2-7 | Scan home |
| U4-1 | Fuser problem. Long warm up |
| U4-2 | Low fuser temperature after warm up |
| U4-3 | High fuser temperature |
| U4-4 | Open fuser thermistor |
| U4-6 | Replace fuser web. |
| U4-7 | Thermistor signal problem |
| U7-1 | Copy cartridge belt drive problem |
| U9-3 | Exposure lamp problem |
| U9-4 | Toner motor |
| U9-5 | Problem in warm-up |
Xerox 5330
| Code | Description |
|---|---|
| A1-1 to A1-32 | All indicate a paper path problem, etc. in the ADF. |
| A2 | ADF exit problems |
| A3 | Irregular size documents |
| A5 | ADF interlock |
| A6 | ADF single sheet document reset. |
| A7 | Platen interlock |
| A8 | ADF exit interlock |
| C1 | Tray 1 jam |
| C2 | Tray 2 jam |
| C3 | Tray 3 jam |
| C6-1, C6-2 | Jams related to duplex |
| C6-3 | Registration sensor, re tray 1 |
| C7-1, C7-2 | HCF feed problems |
| C7-3 | Tray 1 feed problem |
| C8 | Paper stays in tray or duplex or HCF |
| C9 | Bypass feed problem |
| E1-10 to E1-25 | Internal jam |
| E1-6 | Paper on registration sensor |
| E2 | Reset signal happened. Might read E-2 something else. |
| E3-30 to E4-14 | Exit jam |
| E3-6 | Exit jam |
| E4-10 to E4-14 | Inverter sensor not actuated. |
| E4-15 | Inverter sensor |
| E4-40 to E4-45 | Duplex entry sensor |
| E4-6 | Inverter sensor |
| E5 | Front door interlock |
| E6-1 | Tray 1 interlock |
| E6-2 | 2 tray or duplex interlock |
| E6-3 | HCF interlock |
| E7-2, E7-3 | Duplex interlock |
| E8-6 to E8-15 | Duplex entry sensor |
| F1-1 | Sorter entry sensor |
| F1-6 | Sorter exit sensor |
| F3 | Paper size not available for sort/stack |
| F5 | Sorter interlock |
| J1 | Add toner |
| J3 | Replace copy cartridge |
| J7 | Replace copy cartridge |
| J8-1 | Wrong copy cartridge installed |
| J8-2 | Copy cartridge EEPROM |
| L6 | Auditron or other counter problem |
| L8 | Platen glass temperature is too high |
| L9 | Communication problem between interimage erase/edge lamps and main board |
| U1-1 | Main motor drive problem |
| U2-1 to U2-4 | Scan home sensor |
| U3-1 | Lens sensor |
| U4-1 | Open fuser thermistor |
| U4-2 | Fuser did not warm up properly |
| U4-3 | Fuser temperature too high |
| U4-4 | Fuser problem. Staying on too long |
| U4-6 | High fuser temperature |
| U5-1 | Sorter bin home switch not activated |
| U5-2 | Sorter bin home switch stayed actuated |
| U5-3 | Sorter bin home switch |
| U5-4 | Sorter bin home switch |
| U6-1 | ROM problem |
| U6-2 | RAM problem |
| U6-3 | Low battery |
| U6-4 | Incorrect value in NVM. Reinitialize main board with code 20-96 |
| U8-1 to U8-6 | Problem with exposure lamp, lamp sensor, lamp board |
Xerox 5340, 5343
| Code | Description |
|---|---|
| 00-009; 030 to 033 | A door was opened while paper was being fed |
| 00-047 | Paper in duplex |
| 00-1 | Auditron |
| 00-2 | Diagnostic error |
| 00-3 | Faults error |
| 00-4 | Ric error |
| 00-5 | Job manager system error |
| 00-6 | LLM interface |
| 00-7 | Standby error |
| 00-8 | Communications error |
| 00-9 | Xerographic error |
| 01-300 | Front interlock |
| 01-310 | Right upper interlock |
| 01-315 | Left upper interlock |
| 01-320 | Left lower interlock |
| 01-325 | Fuser interlock |
| 02-910 | Key counter missing |
| 02-920 | Wrong combination of accessories |
| 03-321, 322, 326, 327 | LLM to ISIL communications problems |
| 03-328 | IOT communications problem with duplex or tray 4 |
| 03-330 | IOT communications problems with HCF |
| 03-335, 03-336 | LLM communications problems with edit |
| 03-340 | NVM memory |
| 03-341, 03-347 | Communications problems between IOT and sorter |
| 03-350, 03-354 | Communications problem with LLM and user interface |
| 03-363, 03-364 | Communications problem between LLM & optics |
| 03-370, 03-373 | Communications problem between LLM & DADF |
| 03-380, 384 | |
| 03-416, 03-422 | RAM memory problem |
| 03-424, 426 | NVM memory problem |
| 03-430, 432 | Billing problem |
| 03-439 | GRAIB communications problem |
| 03-440 | RIC communications problem |
| 03-441 | RIC NVM problem |
| 03-442 | Modem |
| 03-443, 03-458 | RIC problems |
| 03-460 | Serial communications processor problem |
| 04-300 | Main motor or drive problem |
| 05-100, 05-108 | DADF registration sensor |
| 05-110 | DADF exit sensor |
| 05-115, 120 | DADF jams |
| 05-305 | DADF document drive |
| 05-310, 312 | DADF document sensor |
| 05-316 | DADF registration sensor jam |
| 05-325 | DADF exit sensor |
| 05-335, 341, 345 | DADF interlock switches |
| 06-300, 06-310 | Scan problems |
| 06-315 | Scan drive |
| 06-320A, 320B, 320C, 325 | Scan problem |
| 06-330 | Lens drive |
| 06-340 | Exposure control problem |
| 06-342 | LLM CPU problem |
| 06-344, 06-350 | Exposure cvontrol problem |
| 06-352 | IOT CPU problem |
| 07-300, 315, 330, 345 | Tray faults |
| 07-360, 07-370 | HCF problems |
| 07-375, 380A, 380B | Duplex problems |
| 08-100, 08-110 | Feed problems. Lead edge of copy paper is late getting to feed sensor of tray 1 |
| 08-115, 08-162 | Feed problem. Lead edge of copy paper is late getting to registration sensor |
| 08-165 | Paper jam at registration sensor |
| 08-310, 08-370 | Paper at a sensor when power is turned on |
| 08-330 | DADF nudger sensor |
| 08-380 | Registration side to side problem with home position |
| 08-390 | Nip |
| 09-300 | Copy cartridge finished (drum unit) |
| 09-310 | Add black toner Add color toner |
| 09-320 | Add color toner |
| 09-330 | Wrong copy cartridge (wrong drum unit) |
| 09-340 | Drum cartridge not installed properly |
| 09-350 | Waste toner full |
| 100 | A fault has occurred |
| 10-100 | Exit jam |
| 10-105 | Exit jam |
| 10-110 | Vertical sensor jam |
| 10-120, 122, 125 | Duplex jam |
| 10-150, 155 | Too much or not enough paper in duplex tray |
| 10-300 | Fuser thermistor |
| 10-302 | Low fuser temperature |
| 10-304 | Bad fuser temp |
| 10-308 | High fuser temperature or open thermistor |
| 10-310 | High fuser temperature |
| 10-312 | Fuser not up to temperature after energy save |
| 10-314 | Fuser problem |
| 10-320 | Fuser web finished |
| 10-330, 335, 340 | Exit switch, vertical sensor switch actuated when power is turned on |
| 11-100, 11-116 | Sorter jam |
| 11-150, 11-176 | Sorter auto stapler jam |
| 11-310, 314, 316 | Sorter interlock |
| 11-325A, B, C, D, E, F, G | Sorter index |
| 11-352, 354, 356 | Sorter auto stapler interlocks |
| 11-365A, B, C, D, E | Sorter auto stapler bin |
| 11-370, 371, 372A, 373A, 373B, 374 | Sorter auto stapler staple failure, staple home problem or tamper home problem |
| 11-385A, 385B, 390A,B,C,D,E, 396A | Sorter auto stapler staple failure, staple home problem or tamper home problem |
| 301 | Fuser web must be replaced |
| 302 | Copy cartridge (drum unit) must be replaced |
| 501 | Tray 1 must be rebuilt |
| 502 | Tray 2 must be rebuilt |
| 503 | Tray 3 must be rebuilt |
| 504 | Tray 4 must be rebuilt |
| 505 | HCF must be rebuilt |
| 506 | Bypass must be rebuilt |
| 507 | Duplex unit must be rebuilt |
| 508 | Replace black developer |
| 509 | Replace red developer |
| 510 | Replace green developer |
| 512 | Replace brown developer |
| 513 | Copy cartridge (drum unit) will need replacing soon |
| 514 | Fuser web will need replacing soon |
| 515 | DADF belt should be replaced |
| 516 | DADF feed rollers should be replaced |
| 517 | Replace exposure lamp |
| 518 | Replace suction filter |
| 519 | Replace ozone filter |
| 520 | Replace optics filter |
| 521 | Replace particle filter |
| 522 | Replace upper fuser roller |
| 523 | Replace fuser pawls |
| 524 | Replace pressure roller |
| 525 | Replace pressure roller pawls |
| 900-905 | Key operator calls |
Xerox 5345
| Код ошибки | Описание |
|---|---|
| 01-01 | Frequency monitoring and zero cross problem |
| 01-02 | Interlock |
| 01-03 | AC power problem |
| 01-04 | Finisher interlock |
| 01-05 | 24v problem |
| 03-01 | Optics to main board communication problem |
| 03-02 | Software reset problem |
| 03-03 | Could be punched holes in the lead edge of the original |
| 03-04 | Software problem |
| 03-06 | Low battery |
| 03-07 | NVM not initialized or is missing or defective |
| 03-17 | Communication problem between main board and finisher board |
| 03-18 | Initializes one NVM counter to agree to others |
| 03-19 | All three NVM counter to agree with others |
| 03-20 | Main board/interface board problems |
| 03-21 | Problem with RIC NVM |
| 03-22 | RIC modem problem |
| 03-23 | RIC real time clock failure. |
| 03-25 | RIC NVM problem or not initialized |
| 03-27 | NVM problem |
| 03-28 | Watchdog software problem |
| 03-29 | Microprocessor crystal not at correct frequency |
| 03-30 | No software response from finisher after 20 seconds have elapsed |
| 06-01 | Lens did not reach 1.1 position |
| 06-02 | 1/2 rate scanner problem |
| 06-03 | Scan home problem |
| 06-04 | Scan home problem |
| 06-05 | Scan home problem |
| 06-06 | Scan encoder |
| 06-07 | Scan encoder |
| 06-08 | Scan drive boost |
| 06-09 | Scan encoder |
| 06-11 | Scan encoder pulse phases |
| 06-12 | Insufficient scan damping |
| 07-01 | Duplex tray not home during duplexing |
| 07-02 | Tray 2 not home when selected |
| 07-13 | Tray 2 height sensor problem |
| 07-15 | Tray 2 empty |
| 07-16 | Tray 1 door open |
| 07-18 | Tray 1 stack sensor |
| 07-22 | Tray 1 empty |
| 07-26 | Tray 1 bypass switch actuated too long |
| 07-27 | Tray 1 bypass switch deactuated too early |
| 07-30 | Paper in duplex |
| 07-31 | Paper in duplex |
| 07-32 | Duplex tray empty, when paper should be there |
| 08-10 | Paper did not reach tray 2 input tray sensor |
| 08-11 | Paper did not reach duplex input sensor |
| 08-12 | Paper did not reach tray 1 |
| 08-14 | Paper did not leave tray 2 input sensor quickly enough |
| 08-18 | Trail edge did not reach tray 2 input sensor quickly enough |
| 08-19 | Trail edge did not reach tray 1 input sensor quickly enough |
| 08-20 | Paper in duplex |
| 08-21 | Paper in tray 2 input |
| 08-22 | Paper in tray 2 or duplex at wrong time |
| 08-23 | Paper at tray 1 input at wrong time |
| 08-24 | Paper in tray 1 at wrong time |
| 08-28 | Upper and lower nips problem |
| 09-08 | Low toner condition |
| 09-12 | Drum signals are out of range |
| 09-13 | Unstable drum patch readings |
| 09-15 | Patch is too dark |
| 09-16 | Patch is too light |
| 09-17 | Open toner container access cover |
| 09-18 | Low toner level |
| 09-21 | Low toner sensor disconnected |
| 09-22 | Low toner condition, even after machine has been theoretically, adding toner |
| 10-02 | Low fuser temperature |
| 10-03 | High fuser temperature |
| 10-06 | Paper did not reach out put switch |
| 10-07 | Paper stayed on output switch |
| 10-10 | Paper did not reach decurler sensor |
| 10-11 | Paper did not reach decurler sensor |
| 10-12 | Paper on decurler sensor |
| 10-13 | Paper did not reach duplex entry sensor in time |
| 10-14 | Paper did not reach duplex entry sensor in time |
| 10-15 | Paper on entry sensor at wrong time |
| 10-17 | Fuser temperature is too high and fuser relay has deactuated |
| 12-01 | Paper at finisher input sensor |
| 12-02 | Paper did not reach finisher |
| 12-03 | Paper reached finisher too soon |
| 12-05 | Paper at stapler |
| 12-06 | Paper at stapler |
| 12-07 | Paper did not reach stapler |
| 12-08 | Paper did not reach stapler |
| 12-10 | Complied motor not working properly |
| 12-15 | Eject motor problem and/or eject encoder |
| 12-20 | Stacker motor problem |
| 12-21 | Stacker interlock |
| 12-22 | Stacker bottom sensor |
| 12-23 | Stacker bottom sensor |
| 12-24 | Stacker bottom sensor senses full |
| 12-25 | Stack height sensor |
| 12-26 | Stack height sensor |
| 12-27 | Stack height sensor |
| 12-30 | Offset home sensor |
| 12-31 | Offset home sensor |
| 12-32 | OCT switch |
| 12-35 | Eject nip carriage |
| 12-36 | Eject cam interlock |
| 12-37 | Eject nip carriage open timing |
| 12-38 | Eject cam interlock |
| 12-40 | Tamper motor |
| 12-41 | Tamper home problem |
| 12-42 | Tamper home sensor |
| 12-43 | Staple load sensor |
| 12-44 | Tamper home sensor |
| 12-45 | Tamper home sensor |
| 12-50 | Low on staples |
| 12-51 | Stapler home sensor |
| 12-52 | Stapler home sensor |
| 12-53 | Eject cam interlock |
| 33-37 | Too few documents |
| 55-01 | RDH interlock switch open during use |
| 55-04 | Paper on bypass sensor |
| 55-05 | Paper at vacuum timing sensor |
| 55-06 | Paper on output sensor |
| 55-10 | No paper reached S31 |
| 55-20 | Paper did not leave S31 at correct time |
| 55-24 | Set counter arm problem |
| 55-25 | Documents in input tray not detected |
| 55-27 | Lead edge did not reach S35 at correct time |
| 55-2955-30 | Trail edge did not reach S35 at correct time |
| 55-31 | S32, ADF registration sensor did not see paper at correct time |
| 55-32 | S32 did not see trail edge at correct time |
| 55-33 | S36 One too many documents |
| 55-36 | One too many documents |
| 55-39 | Hole count problem on document feeder belt |
| 55-40 | Document belt travel problem |
| 55-41 | Document belt mistracking or skewing |
| 55-45 | Paper at inverter sensor |
| 55-47 | Inverter sensor did not see paper lead edge at correct time |
| 55-49 | More than 50 sheets in input tray |
| 55-50 | Right side interlock |
| 55-51 | Left side interlock |
| 55-55 | Document on glass |
| 93-93 | NVM has to be initialized after new software installed |
Xerox 5350, 5352
| Code | Description |
|---|---|
| 00-009, 030, 031, 032, 033 | A door was opened while paper was being fed |
| 00-047 | Paper in duplex |
| 00-1 | Auditron |
| 00-2 | Diagnostic error |
| 00-3 | Faults error |
| 00-4 | Ric error |
| 00-5 | Job manager system error |
| 00-6 | LLM interface |
| 00-7 | Standby error |
| 00-8 | Communications error |
| 00-9 | Xerographic error |
| 01-300 | Front interlock |
| 01-310 | Right upper interlock |
| 01-315 | Left upper interlock |
| 01-320 | Left lower interlock |
| 01-325 | Fuser interlock |
| 02-910 | Key counter missing |
| 02-920 | Wrong combination of accessories |
| 03-321, 322, 326, 327 | LLM to ISIL communications problems |
| 03-328 | IOT communications problem with duplex or tray 4 |
| 03-330 | IOT communications problems with HCF |
| 03-335, 336 | LLM communications problems with edit |
| 03-340 | NVM memory |
| 03-341-347 | Communications problems between IOT and sorter |
| 03-350-354 | Communications problem with LLM and user interface |
| 03-363, 364 | Communications problem between LLM & optics |
| 03-370-03-373 | Communications problem between LLM & DADF |
| 03-380, 384 | |
| 03-416-422 | RAM memory problem |
| 03-424, 426 | NVM memory problem |
| 03-430, 432 | Billing problem |
| 03-439 | GRAIB communications problem |
| 03-440 | RIC communications problem |
| 03-441 | RIC NVM problem |
| 03-442 | Modem |
| 03-443-458 | RIC problems |
| 03-460 | Serial communications processor problem |
| 04-300 | Main motor or drive problem |
| 05-100-108 | DADF registration sensor |
| 05-110 | DADF exit sensor |
| 05-115, 120 | DADF jams |
| 05-305 | DADF document drive |
| 05-310, 312 | DADF document sensor |
| 05-316 | DADF registration sensor jam |
| 05-325 | DADF exit sensor |
| 05-335, 341, 345 | DADF interlock switches |
| 06-300-310 | Scan problems |
| 06-315 | Scan drive |
| 06-320A, 320B, 320C, 325 | Scan problem |
| 06-330 | Lens drive |
| 06-340 | Exposure control problem |
| 06-342 | LLM CPU problem |
| 06-344-350 | Exposure cvontrol problem |
| 06-352 | IOT CPU problem |
| 07-300, 315, 330, 345 | Tray faults |
| 07-360-370 | HCF problems |
| 07-375, 380A, 380B | Duplex problems |
| 08-100-110 | Feed problems. Lead edge of copy paper is late getting to feed sensor of tray 1 |
| 08-115-162 | Feed problem. Lead edge of copy paper is late getting to registration sensor |
| 08-165 | Paper jam at registration sensor |
| 08-310-370 | Paper at a sensor when power is turned on |
| 08-330 | DADF nudger sensor |
| 08-380 | Registration side to side problem with home position |
| 08-390 | Nip |
| 09-300 | Copy cartridge finished (drum unit) |
| 09-310 | Add black toner Add color toner |
| 09-320 | Add color toner |
| 09-330 | Wrong copy cartridge (wrong drum unit) |
| 09-340 | Drum cartridge not installed properly |
| 09-350 | Waste toner full |
| 100 | A fault has occurred |
| 10-100 | Exit jam |
| 10-105 | Exit jam |
| 10-110 | Vertical sensor jam |
| 10-120, 122, 125 | Duplex jam |
| 10-150, 155 | Too much or not enough paper in duplex tray |
| 10-300 | Fuser thermistor |
| 10-302 | Low fuser temperature |
| 10-304 | Bad fuser temp |
| 10-308 | High fuser temperature or open thermistor |
| 10-310 | High fuser temperature |
| 10-312 | Fuser not up to temperature after energy save |
| 10-314 | Fuser problem |
| 10-320 | Fuser web finished |
| 10-330, 335, 340 | Exit switch, vertical sensor switch actuated when power is turned on |
| 11-100-116 | Sorter jam |
| 11-150-176 | Sorter auto stapler jam |
| 11-310, 314, 316 | Sorter interlock |
| 11-325A,B,C,D,E,F,G | Sorter index |
| 11-352, 354, 356 | Sorter auto stapler interlocks |
| 11-365A,B,C,D,E | Sorter auto stapler bin |
| 11-370,371,372A,373A,373B,374 | Sorter auto stapler staple failure, staple home problem or tamper home problem |
| 11-385A,385B,390A,B,C,D,E,396A | Sorter auto stapler staple failure, staple home problem or tamper home problem |
| 301 | Fuser web must be replaced |
| 302 | Copy cartridge (drum unit) must be replaced |
| 501 | Tray 1 must be rebuilt |
| 502 | Tray 2 must be rebuilt |
| 503 | Tray 3 must be rebuilt |
| 504 | Tray 4 must be rebuilt |
| 505 | HCF must be rebuilt |
| 506 | Bypass must be rebuilt |
| 507 | Duplex unit must be rebuilt |
| 508 | Replace black developer |
| 509 | Replace red developer |
| 510 | Replace green developer |
| 512 | Replace brown developer |
| 513 | Copy cartridge (drum unit) will need replacing soon |
| 514 | Fuser web will need replacing soon |
| 515 | DADF belt should be replaced |
| 516 | DADF feed rollers should be replaced |
| 517 | Replace exposure lamp |
| 518 | Replace suction filter |
| 519 | Replace ozone filter |
| 520 | Replace optics filter |
| 521 | Replace particle filter |
| 522 | Replace upper fuser roller |
| 523 | Replace fuser pawls |
| 524 | Replace pressure roller |
| 525 | Replace pressure roller pawls |
| 900-905 | Key operator calls |
Xerox 5355
| Код ошибки | Описание |
|---|---|
| 01-01 | Frequency monitoring and zero cross problem |
| 01-02 | Interlock |
| 01-03 | AC power problem |
| 01-04 | Finisher interlock |
| 01-05 | 24v problem |
| 03-01 | Optics to main board communication problem |
| 03-02 | Software reset problem |
| 03-03 | Could be punched holes in the lead edge of the original |
| 03-04 | Software problem |
| 03-06 | Low battery |
| 03-07 | NVM not initialized or is missing or defective |
| 03-17 | Communication problem between main board and finisher board |
| 03-18 | Initializes one NVM counter to agree to others |
| 03-19 | All three NVM counter to agree with others |
| 03-20 | Main board/interface board problems |
| 03-21 | Problem with RIC NVM |
| 03-22 | RIC modem problem |
| 03-23 | RIC real time clock failure. |
| 03-25 | RIC NVM problem or not initialized |
| 03-27 | NVM problem |
| 03-28 | Watchdog software problem |
| 03-29 | Microprocessor crystal not at correct frequency |
| 03-30 | No software response from finisher after 20 seconds have elapsed |
| 06-01 | Lens did not reach 1.1 position |
| 06-02 | 1/2 rate scanner problem |
| 06-03 | Scan home problem |
| 06-04 | Scan home problem |
| 06-05 | Scan home problem |
| 06-06 | Scan encoder |
| 06-07 | Scan encoder |
| 06-08 | Scan drive boost |
| 06-09 | Scan encoder |
| 06-11 | Scan encoder pulse phases |
| 06-12 | Insufficient scan damping |
| 07-01 | Duplex tray not home during duplexing |
| 07-02 | Tray 2 not home when selected |
| 07-13 | Tray 2 height sensor problem |
| 07-15 | Tray 2 empty |
| 07-16 | Tray 1 door open |
| 07-18 | Tray 1 stack sensor |
| 07-22 | Tray 1 empty |
| 07-26 | Tray 1 bypass switch actuated too long |
| 07-27 | Tray 1 bypass switch deactuated too early |
| 07-30 | Paper in duplex |
| 07-31 | Paper in duplex |
| 07-32 | Duplex tray empty, when paper should be there |
| 08-10 | Paper did not reach tray 2 input tray sensor |
| 08-11 | Paper did not reach duplex input sensor |
| 08-12 | Paper did not reach tray 1 |
| 08-14 | Paper did not leave tray 2 input sensor quickly enough |
| 08-18 | Trail edge did not reach tray 2 input sensor quickly enough |
| 08-19 | Trail edge did not reach tray 1 input sensor quickly enough |
| 08-20 | Paper in duplex |
| 08-21 | Paper in tray 2 input |
| 08-22 | Paper in tray 2 or duplex at wrong time |
| 08-23 | Paper at tray 1 input at wrong time |
| 08-24 | Paper in tray 1 at wrong time |
| 08-28 | Upper and lower nips problem |
| 09-08 | Low toner condition |
| 09-12 | Drum signals are out of range |
| 09-13 | Unstable drum patch readings |
| 09-15 | Patch is too dark |
| 09-16 | Patch is too light |
| 09-17 | Open toner container access cover |
| 09-18 | Low toner level |
| 09-21 | Low toner sensor disconnected |
| 09-22 | Low toner condition, even after machine has been theoretically, adding toner |
| 10-02 | Low fuser temperature |
| 10-03 | High fuser temperature |
| 10-06 | Paper did not reach out put switch |
| 10-07 | Paper stayed on output switch |
| 10-10 | Paper did not reach decurler sensor |
| 10-11 | Paper did not reach decurler sensor |
| 10-12 | Paper on decurler sensor |
| 10-13 | Paper did not reach duplex entry sensor in time |
| 10-14 | Paper did not reach duplex entry sensor in time |
| 10-15 | Paper on entry sensor at wrong time |
| 10-17 | Fuser temperature is too high and fuser relay has deactuated |
| 12-01 | Paper at finisher input sensor |
| 12-02 | Paper did not reach finisher |
| 12-03 | Paper reached finisher too soon |
| 12-05 | Paper at stapler |
| 12-06 | Paper at stapler |
| 12-07 | Paper did not reach stapler |
| 12-08 | Paper did not reach stapler |
| 12-10 | Complied motor not working properly |
| 12-15 | Eject motor problem and/or eject encoder |
| 12-20 | Stacker motor problem |
| 12-21 | Stacker interlock |
| 12-22 | Stacker bottom sensor |
| 12-23 | Stacker bottom sensor |
| 12-24 | Stacker bottom sensor senses full |
| 12-25 | Stack height sensor |
| 12-26 | Stack height sensor |
| 12-27 | Stack height sensor |
| 12-30 | Offset home sensor |
| 12-31 | Offset home sensor |
| 12-32 | OCT switch |
| 12-35 | Eject nip carriage |
| 12-36 | Eject cam interlock |
| 12-37 | Eject nip carriage open timing |
| 12-38 | Eject cam interlock |
| 12-40 | Tamper motor |
| 12-41 | Tamper home problem |
| 12-42 | Tamper home sensor |
| 12-43 | Staple load sensor |
| 12-44 | Tamper home sensor |
| 12-45 | Tamper home sensor |
| 12-50 | Low on staples |
| 12-51 | Stapler home sensor |
| 12-52 | Stapler home sensor |
| 12-53 | Eject cam interlock |
| 33-37 | Too few documents |
| 55-01 | rdh interlock switch open during use |
| 55-04 | Paper on bypass sensor |
| 55-05 | Paper at vacuum timing sensor |
| 55-06 | Paper on output sensor |
| 55-10 | No paper reached S31 |
| 55-20 | Paper did not leave S31 at correct time |
| 55-24 | Set counter arm problem |
| 55-25 | Documents in input tray not detected |
| 55-27 | Lead edge did not reach S35 at correct time |
| 55-2955-30 | Trail edge did not reach S35 at correct time |
| 55-31 | S32, ADF registration sensor did not see paper at correct time |
| 55-32 | S32 did not see trail edge at correct time |
| 55-33 | S36 One too many documents |
| 55-36 | One too many documents |
| 55-39 | Hole count problem on document feeder belt |
| 55-40 | Document belt travel problem |
| 55-41 | Document belt mistracking or skewing |
| 55-45 | Paper at inverter sensor |
| 55-47 | Inverter sensor did not see paper lead edge at correct time |
| 55-49 | More than 50 sheets in input tray |
| 55-50 | Right side interlock |
| 55-51 | Left side interlock |
| 55-55 | Document on glass |
| 93-93 | NVM has to be initialized after new software installed |
Xerox XC520, 540, 560, 580
| Код ошибки | Описание |
|---|---|
| H2 | Fuser thermistor |
| H3 | Fuser temperature too high. Must be reset in diagnostics |
| H4 | Fuser temperature too low. Must be reset in diagnostics |
| L3 | Scan problem |
| L4 | Min motor drive problem |
| L8 | Exposure lamp not lightning or not enough light reaching auto exposure sensor |
| P | Paper did not feed |
Xerox 5622
| Code | Description |
|---|---|
| A1-1 to A1-32 | All indicate a paper path problem, etc. in the ADF |
| A2 | ADF exit problems |
| A3 | Irregular size documents |
| A5 | ADF interlock |
| A6 | ADF single sheet document reset |
| A7 | Platen interlock |
| A8 | ADF exit interlock |
| C1 | Tray 1 jam |
| C2 | Tray 2 jam |
| C3 | Tray 3 jam |
| C6-1, C6-2 | Jams related to duplex |
| C6-3 | Registration sensor, re tray 1 |
| C7-1, C7-2 | HCF feed problems |
| C7-3 | Tray 1 feed problem |
| C8 | Paper stays in tray or duplex or HCF |
| C9 | Bypass feed problem |
| E1-10 to E1-25 | Internal jam |
| E1-6 | Paper on registration sensor |
| E2 | Reset signal happened. Might read E-2 something else |
| E3-30 to E4-14 | Exit jam |
| E3-6 | Exit jam |
| E4-10 to E4-14 | Inverter sensor not actuated |
| E4-15 | Inverter sensor |
| E4-40 to E4-45 | Duplex entry sensor |
| E4-6 | Inverter sensor |
| E5 | Front door interlock |
| E6-1 | Tray 1 interlock |
| E6-2 | 2 tray or duplex interlock |
| E6-3 | HCF interlock |
| E7-2, E7-3 | Duplex interlock |
| E8-6 to E8-15 | Duplex entry sensor |
| F1-1 | Sorter entry sensor |
| F1-6 | Sorter exit sensor |
| F3 | Paper size not available for sort/stack |
| F5 | Sorter interlock |
| J1 | Add toner |
| J3 | Replace copy cartridge |
| J7 | Replace copy cartridge |
| J8-1 | Wrong copy cartridge installed |
| J8-2 | Copy cartridge EEPROM |
| L6 | Auditron or other counter problem |
| L8 | Platen glass temperature is too high |
| L9 | Communication problem between interimage erase/edge lamps and main board |
| U1-1 | Main motor drive problem |
| U2-1 to U2-4 | Scan home sensor |
| U3-1 | Lens sensor |
| U4-1 | Open fuser thermistor |
| U4-2 | Fuser did not warm up properly |
| U4-3 | Fuser temperature too high |
| U4-4 | Fuser problem. Staying on too long |
| U4-6 | High fuser temperature |
| U5-1 | Sorter bin home switch not activated |
| U5-2 | Sorter bin home switch stayed actuated |
| U5-3, U5-4 | Sorter bin home switch |
| U6-1 | ROM problem |
| U6-2 | RAM problem |
| U6-3 | Low battery |
| U6-4 | Incorrect value in NVM. Reinitialize main board with code 20-96 |
| U8-1 to U8-6 | Problem with exposure lamp, lamp sensor, lamp board |
Содержание
- Ошибка очереди печати принтера — решение
- Принтер не печатает с компьютера ставит в очередь пишет ошибка
- Правильная последовательность действий, если принтер не печатает
- Видео на тему: Что делать, если принтер не печатает. 6 Способов
- Что делать, если принтер не печатает, а ставит в очередь и выдает ошибку?
- Правильная последовательность действий
- Принтер вместо печати предлагает сохранить документ. Что делать?
- Принтер Epson L210 печатает с полосами: что делать, как исправить
- МФУ устанавливается только как сканер. Что делать?
- 17 комментариев
- Причины, почему документ стоит в очереди, но принтер не печатает, и их устранение
- Проверка подключения
- В лотке нет бумаги
- Неправильные настройки
- Зависание очереди печати
- Закончились расходные материалы
- Переустановка драйвера
- Не печатает принтер [решение]
- Почему может не печатать принтер
- Причина №1: нет связи между компьютером и принтером
- Причина №2: очередь печати зависла
- Причина №3: выбран не тот принтер для печати
- Причина №4: замялась или отсутствует бумага
- Причина №5: закончилась краска в устройстве (либо используется не родной картридж)
- Причина №6: не установлен драйвер, либо произошел конфликт драйверов
Ошибка очереди печати принтера — решение

Во время печати различных документов в Windows могут возникнуть разного рода проблемы, после которых принтер отказывается печатать. Что делать?
В основном, причиной такой неприятности является сбой в работе или ошибка очереди печати принтера — специальной системный сервис, являющийся ключевым в системе управления печатью Виндовс и следящий за порядком документов в очереди. В результате документы отправляются в отложенную печать и просто сохраняются в памяти.
Чтобы исправить ситуацию, можно попробовать сделать следующее.
Открываем Панель управления Windows и заходим в раздел «Оборудование и звук»>>>»Устройства и Принтеры»:
Находим свой принтер и кликаем по нему правой кнопкой мыши. В появившемся меню снимаем галочку «Использовать по умолчанию», если она установлена.
Далее надо снова кликнуть по нему правой кнопкой и выбрать пункт «Просмотр очереди печати». Здесь надо убедиться, что она пустая и в ней не осталось документов:
Если что-то осталось, то необходимо кликнуть по документу правой кнопкой мыши и выбрать пункт меню «Отменить».
Теперь надо в этом же окне открыть раздел меню Печать и снова поставить галочку «Использовать по умолчанию».
Теперь надо перезагрузить компьютер и проверить результат. Обычно после этого ошибка очереди печати пропадает и принтер работает как положено.
Если предыдущий шаг не помог, тогда надо зайти в системную консоль «Управление» и зайти в раздел «Службы». В списке сервисов надо найти «Диспетчер печати» и кликнуть по нему дважды чтобы открылось такое окно:
Проверьте, чтобы тип запуска службы стоял «Автоматически», а в поле состояние было написано «Работает».
Ещё один способ восстановить нормальную работу принтера — это запустить командную строку Windows с правами Администратора и ввести команду:
Заметьте, что перед «RPCSS» надо оставить пробел:
Нажимаем клавишу «Enter» и ждём, пока команда отработает. После этого перезагружаем свой ПК или ноутбук и и проверяем — ошибка очереди печати Виндовс должна устраниться.
Источник
Принтер не печатает с компьютера ставит в очередь пишет ошибка
Принтер не печатает! Данная ситуация очень хорошо знакома пользователям компьютеров, которые часто и много работают с принтерами. В один прекрасный момент принтер попросту отказывается печатать отправленный на него документ, устанавливая его в очередь печати и при этом выдавая ошибку о невозможности распечатать документ.
В этой статье вы узнаете как можно выйти из сложившейся ситуации и восстановить работоспособность принтера.

Правильная последовательность действий, если принтер не печатает
Итак, первым делом, что вам нужно проверить в случае, когда принтер отказывается печатать это включен ли он в розетку и горит ли на нем кнопка, свидетельствующая о его включении. Также стоит проверить надежность соединения кабеля, идущего от компьютера к принтеру.

Если с проводами все хорошо, они вставлены корректно и индикаторы на принтере светятся, тогда попробуйте выключить и включить принтер. Тоже самое стоит сделать и с компьютером, к которому подключен принтер.
Также не забывайте очищать очередь печати при каждой новой попытке распечатать документ. Для этого отключите принтер и в очереди печати удалите все документы.
Также стоит проверить не включен ли на принтере автономный режим.
Для этого зайти в «Устройства и принтеры» через «Пуск» или «Панель управления«, найдите в списке свой принтер и кликните по нему правой кнопкой мыши.

Обратите внимание на то, чтобы галочки «Приостановить печать» и «Работать автономно» были сняты. В противном случае снимите их, кликнув по ним левой кнопкой мыши.

В случае если все выше перечисленное не помогло и ваш принтер по прежнему не печатает, а ставит документы в очередь печати и выдает ошибку, то последнее, что уж точно должно помочь решить эту проблему — переустановка драйвера.
Чтобы переустановить драйвер нужно вначале удалить сам принтер. Для этого все в том же «Устройства и принтеры» нужно нажать на свой принтер и выбрать «Удалить устройство».

После этого отключите питание принтера и через 10 секунд включить снова. Драйвер принтера должен будет установиться автоматически.
Видео на тему: Что делать, если принтер не печатает. 6 Способов
Дорогой читатель! Добавьте этот сайт в закладки своего браузера и поделитесь с друзьями ссылкой на этот сайт! Мы стараемся показывать здесь всякие хитрости и секреты. Пригодится точно.
Источник
Что делать, если принтер не печатает, а ставит в очередь и выдает ошибку?
Данная ситуация очень хорошо знакома пользователям компьютеров, которые часто и много работают с принтерами. В один прекрасный момент принтер попросту отказывается печатать отправленный на него документ, устанавливая его в очередь печати и при этом выдавая ошибку о невозможности распечатать документ. В данной статье вы узнаете как можно выйти из сложившейся ситуации и восстановить работоспособность принтера.
Правильная последовательность действий
Итак, первым делом, что вам нужно проверить в случае, когда принтер отказывается печатать это включен ли он в розетку и горит ли на нем кнопка, свидетельствующая о его включении. Также стоит проверить надежность соединения кабеля, идущего от компьютера к принтеру.

Проверка подключения кабелей принтера

Проверка подключения кабелей принтера
Если с проводами все хорошо, они вставлены корректно и индикаторы на принтере светятся, тогда попробуйте выключить и включить принтер. Тоже самое стоит сделать и с компьютером, к которому подключен принтер.
Также не забывайте очищать очередь печати при каждой новой попытке распечатать документ. Для этого отключите принтер и в очереди печати удалите все документы.
Также стоит проверить не включен ли на принтере автономный режим.
Для этого зайти в “Устройства и принтеры” через “Пуск” или “Панель управления“, найдите в списке свой принтер и кликните по нему правой кнопкой мыши.

Заходим в устройства и принтеры
Обратите внимание на то, чтобы галочки “Приостановить печать” и “Работать автономно” были сняты. В противном случае снимите их, кликнув по ним левой кнопкой мыши.

Проверка опций принтера
Почему принтер переходит в автономное состояние и методы решения проблемы подробно описаны тут: https://poprinteram.ru/avtonomnaya-rabota.html
В случае если все выше перечисленное не помогло и ваш принтер по прежнему не печатает, а ставит документы в очередь печати и выдает ошибку, то последнее, что уж точно должно помочь решить эту проблему – переустановка драйвера.
Чтобы переустановить драйвер нужно вначале удалить сам принтер. Для этого все в том же “Устройства и принтеры” нужно нажать на свой принтер и выбрать “Удалить устройство“.

После этого отключите питание принтера и через 10 секунд включить снова. Драйвер принтера должен будет установиться автоматически.
Если этого не произошло, то воспользуйтесь этой инструкцией по поиску и установке драйвера к принтеру.

Принтеры и сканеры
Принтер вместо печати предлагает сохранить документ. Что делать?

Принтеры и сканеры
Принтер Epson L210 печатает с полосами: что делать, как исправить

Принтеры и сканеры
МФУ устанавливается только как сканер. Что делать?
17 комментариев
добрый день!
возникла такая проблема: принтер перестал печатать, не подключается к ноутбуку… отправляю файлы на печать – ставит в очередь, на принтере горит красный цвет на “в сети / ошибка” (когда печатал – горел зеленый)
при том, что на при подключении к другому компьютеру все нормально печатает
Источник
Причины, почему документ стоит в очереди, но принтер не печатает, и их устранение

В этой статье детально рассмотрены причины и способы устранения проблемы, когда принтер не печатает с компьютера, а ставит в очередь все документы. Варианты исправлений применимы к устройствам независимо от варианта, как тот подключен. Действия аналогичны для локального и сетевого аппарата печати. Инструкцию можно смело применять для самых разных моделей и серий техники таких известных брендов как HP, Canon, Epson, Samsung, Brother, Kyocera и многих других. А также в ситуациях, когда документ не отправляется и не стает в задания.
Стоит отметить, что эта проблема может сопровождаться ошибками или уведомлениями «В очереди находится задание, которое не позволяет выполнить печать», «Подготовка задания» и другими аналогичными. Никаких дополнительных мероприятий делать не нужно. Просто следуйте инструкции ниже.
Проверка подключения
Первым делом сразу стоит проверить подключение устройства печати с персональным компьютером или ноутбуком, в зависимости от того, что используете. Внимание следует уделить шнуру подачи питания и кабелям USB или Ethernet. Когда используется беспроводная связь по Wi-Hi, то проверка качества сигнала обязательна. Выключите технику, отсоедините все, а потом снова подключите. Еще лучше всего найти и попробовать использовать другие провода, хотя бы некоторое время в виде теста.
Вот еще несколько практических советов, которые могут оживить работу печатающего устройства:
В лотке нет бумаги
Проблемы с бумагой также могут влиять на работу принтера не самым лучших образом. Возможны несколько основных моментов, которые чаще всего встречаются в работе со струйными и лазерными устройствами.
Неправильные настройки
Кроме физических проблем нельзя откидать проблемы системного характера, которые возникают, когда прежние настройки были случайно или по ошибке изменены пользователем. Все они аналогично отрицательно влияют на работу принтера, что влечет за собой ситуации, когда он ставит документ в очередь, но не печатает его в дальнейшем. Рассмотрим их детально и способы их устранения.
Зависание очереди печати
Очередь печати — это список документов, с которыми работает принтер, с указанием статуса, которые показывают состояние и ход выполнения печати определенного задания. Одной из основных «болячек» очереди является частое зависание из-за большого количества документов. Система программно и принтер физически попросту не может все «переварить». В таких случаях целесообразно выполнить очистку.
Самый простой и быстрой способ это сделать через меню окна просмотра.  Но не всегда удается так удачно все совершить. Есть другие более сложные варианты очистки и удаления.
Закончились расходные материалы
Многие новые современные модели стали комплектоваться специальными чипами или датчиками расхода красок или тонера. Если, по их данным, остаток красящего вещества очень мал, то печать блокируется автоматически и не происходит. Принтер переводит документ в очередь и ожидает пополнения расходных материалов.
Проверьте визуально, если это возможно в Вашем случае, наличие чернил в картриджах. Сделайте заправку до надлежащего уровня и снова попробуйте распечатать нужный текст или фото.
Следует отметить, что не всегда датчик срабатывает правильно. Он не размещен непосредственно в банке с чернилами, а производит подсчет по своему алгоритму. Это может быть количество распечатанных листов, но при этом на каждый засчитывается одно и то же количество краски. Но так делать не совсем правильно.
В такой ситуации стоит обратить свое внимание на возможность обнуления счетчика краски для своей модели. Универсальной инструкции не существует и порядок действий для техники HP, Epson или Canon может кардинально отличаться. Поищите в интернете варианты для своего принтера.
Переустановка драйвера
Программное обеспечение самого устройства (драйвера) время от времени нуждаются в периодическом обновлении. Возможно сейчас наступил тот момент, когда это нужно сделать. Конфликты ПО техники и системы вполне могут привести у ситуации, когда принтер ставит в очередь, но не печатает.
Источник
Не печатает принтер [решение]
Я думаю, никого не удивлю, если скажу, что одно из самых главных офисных устройств — это принтер…
И довольно часто (особенно, когда нужно распечатать что-то срочно) — принтер выдает «пируэты»: вроде отправил документ на печать, а он совсем никак не реагирует. А возможно просто «прожужжал» 10-15 сек. и дальше замолчал, как будто ничего и не было… 👀
Во многих случаях данную проблему можно достаточно быстро устранить своими силами (не вызывая, лишний раз, системного администратора, особенно в новогодние каникулы ✌).
В общем, в этой статье приведу самые распространенные причины такого поведения принтера, с которыми мне приходится часто сталкиваться.
Почему может не печатать принтер
Причина №1: нет связи между компьютером и принтером
Довольно распространенное явление: компьютер включен, а принтер нет — в результате сколько не отправляй на печать документ, все равно ничего не будет напечатано.
Я, конечно, понимаю, что эта причина банальна, но все же, не представляете сколько раз пришлось с ней столкнуться (и сколько раз еще предстоит, я думаю…).
Так же следует обратить внимание на провода: довольно часто штекер может отойти или не плотно прилегать (просто попробуйте переподключить его). Иногда кабель может быть перебит при неаккуратном передвижении мебели (пример на фото ниже).

Еще один момент: если вы печатаете на сетевой принтер, который USB-кабелем подключен к другому ПК, проверьте, чтобы помимо принтера, тот компьютер также был включен, и у него работала локальная сеть.
Часто помогает решить проблему простая перезагрузка принтера и компьютера. Рекомендую попробовать!
В общем-то, подытоживая, могу сказать, что вот эти банальные причины составляют почти треть случаев проблем с принтером…
Причина №2: очередь печати зависла
Когда вы печатаете много документов и один за одним их отправляете на принтер, случается так, что очередь печати зависает (т.е. происходит какой-то сбой и принтер не может выйти из этого состояния).
В идеале, нужно отменить ВСЮ очередь печати (удалить все из нее) и попробовать отправить на печать заново какой-нибудь документ.
Кстати, заметил, что очередь печати чаще подвисает при печати больших документов: многостраничных текстов, листов (где много графики), документы, размер которых превышает десятки мегабайт.
Как просмотреть и очистить очередь печати
Заходите в панель управления Windows по следующему адресу: «Панель управленияОборудование и звук». Далее необходимо открыть вкладку «Устройства и принтеры» (см. скрин ниже 👇).

После, нужно найти подключенный принтер, и нажать по нему правой кнопкой мышки — в контекстном меню выбрать «Просмотр очереди печати».

В очереди печати следует удалить все документы, которые в нем находятся. Чтобы отменить печать — просто щелкните правой кнопкой мышки по файлу, и нажмите «отменить» (как на скриншоте ниже 👇).

Должен заметить, что иногда очередь печати зависает так, что таким обычным образом ее не отметить…
Если очередь печати не очищается
Сначала нужно открыть службы, для этого нажмите кнопки WIN+R, введите команду services.msc и нажмите Enter.

Далее в службах найдите «Диспетчер печати», щелкните по нему правой кнопкой мышки и остановите его работу.
👉 Примечание! Эта служба нужна для того, чтобы Windows могла поставить в очередь печать документов, если она отключена — вы не сможете печатать на принтере…

Далее нужно зайти в папку — C:WINDOWSsystem32spoolPRINTERS (потребуются права администратора). В этой папке посмотрите — нет ли там каких-нибудь файлов. Если они есть — удалите их все из нее.

После удаление файлов, не забудьте включить диспетчер печати в службах!
Пробная печать/проверка принтера
После очистки очереди печати, попробуйте открыть свойства принтера и произвести пробную печать (см. скриншот ниже 👇).
Это нужно, чтобы убедиться в том, что с самим принтером и его подключением к компьютеру — все в порядке. Просто иногда очередь печати зависает из-за определенных «битых» файлов, и логично, что необходимо бы проверить сей момент…

Причина №3: выбран не тот принтер для печати
Обычно в Windows установлено несколько принтеров, например, Microsoft Print to PDF, Fax и пр. Ничего общего к реальному принтеру они не имеют. Теперь представьте, к этим принтерам добавляется реальный (а то и несколько), и пользователь в результате часто отправляет документ на печать совсем не на то устройство!
👉 Примечание! К тому же часто при настройке принтера, мастера выбирают один из них в качестве основного, чтобы печать на него шла умолчанию. Но иногда эта настройка сбивается, либо какая-нибудь программа (в которой вы хотите напечатать) выбирает другой принтер.

Как изменить принтер по умолчанию
Сначала открыть панель управления Windows по адресу: Панель управленияОборудование и звукУстройства и принтеры
Далее выбрать принтер, который вы хотите, чтобы по умолчанию всегда привлекался первым при распечатке документов, щелкнуть по нему правой кнопкой мышки и выбрать в меню «использовать по умолчанию».
Кстати, обратите внимание, что на нем начнет гореть зеленый кружок с галочкой (скрин ниже 👇).

Причина №4: замялась или отсутствует бумага
Очень распространенная причина отказа принтера в печати документа — это отсутствие бумаги в лотке. Казалось бы, очевидный факт, но часто многие не торопятся открыть лоток и проверить: есть ли там бумага.
У некоторых принтеров есть несколько лотков под бумагу (например, под А3 и А4). Если бумага закончилась хоть в одном из них — то принтер откажется печатать…
Более неприятный момент — бумага в принтере может замяться. В этом случае можно увидеть предупреждение в Windows, либо на самом принтере: если у него есть цифровое окно, где можно задавать параметры и получать уведомления.
Что делать с замятием (см. скрин ниже):
Чтобы избегать замятия, рекомендую:
Причина №5: закончилась краска в устройстве (либо используется не родной картридж)
В некоторых случаях отказ принтера печатать может произойти из-за того, что закончилась краска. Причем, например, многие струйные принтеры могут не печатать черно-белый текст, даже если закончилась цветная краска! Как это связано друг с другом — я, честно говоря, не очень понимаю…
Во многих моделях принтеров есть монитор для просмотра, оставшегося количество краски, в режиме реального времени (часто этот монитор может сказать, сколько примерно листов вы еще сможете напечатать).
Чтобы его открыть, обычно, достаточно посмотреть значок рядом с часами (где он в подавляющем большинстве появляется, после установки драйверов). Пример ниже показан для принтера EPSON — как видно, краски еще с избытком…
👉 Примечание! О том, что заканчивается краска, можно заметить по белым пустым листам, выходящим после печати. Либо по неоднородному цвету при печати: одна половина листа может быть яркой, другая — тусклой.

Другой момент: после заправки картриджа, или его замены, часто принтер сообщает, что картридж не «родной», и что он может являться причиной ухудшения качества печати (примечание: все дело в том, что родной картридж от производителя принтера стоит столько же, сколько новый принтер, поэтому многие заправляют, либо покупают аналогичные более дешевые картриджи).
Принтер в этом случае просит подтвердить разрешение использование не родного картриджа. Просто соглашаемся и продолжаем печать.

Чтобы продлить на некоторое время возможность печати на лазерном принтере — достаньте картридж из него и слегка потрясите его, чтобы тонер (порошок) равномерно расположился внутри него.
Затем снова установите в принтер. Такая процедура дает еще напечатать, в среднем, 20-100 страниц текста.
Причина №6: не установлен драйвер, либо произошел конфликт драйверов
Обычно проблема с драйверов возникает в следствии:
Как правило, во всех этих случаях, пользователь (как минимум!) догадывается, что произошло…
Вообще, для начала следует зайти в диспетчер устройств. Для этого нужно зажать кнопки WIN+R, затем ввести команду devmgmt.msc, нажать OK.

Источник
Принтеры компании Xerox, как и других брендов, делают нашу жизнь и работу проще. Эта техника может располагаться дома, может быть на работе, в офисе, но все-таки она есть в наличии, и проблемы с ней тоже могут случиться.
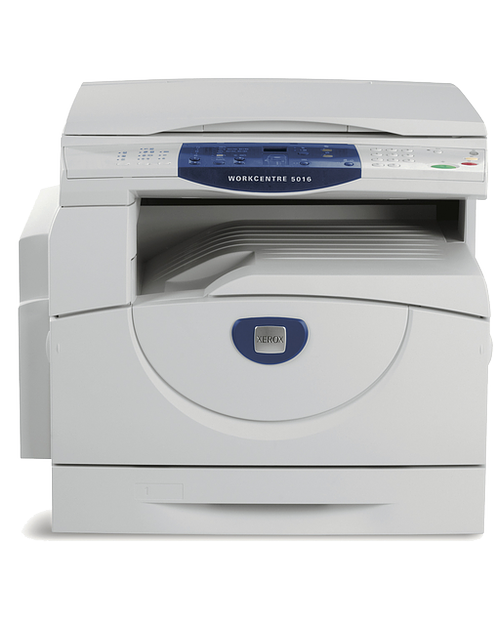
Xerox WorkCentre 5016
Ошибка температуры печки принтера
Стоит подробнее разобрать ошибки принтера Xerox 3100 или Xerox WorkCentre 5016, чтобы всегда можно было решить их без проблем. Самая распространенная ошибка принтера Xerox – температура печки не может быть определена устройством, и оно выходит из строя.
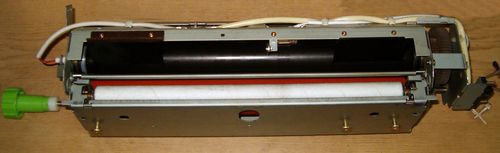
Термоэлемент принтера
Печка может перегреться, и ее температура не будет отображаться по нескольким причинам:
•термодатчик принтера вышел из строя;
•не работают мотор или отдельные части мотора;
•лампы нагрева сломались или отказали;
•инородное тело в термопредохранителе принтера.
Любые ошибки и поломки в принтере имеют свое решение.
Если дело в лампе нагрева, из-за чего возникла ошибка принтера Xerox 3100, температуру печки, естественно, не надо вычислять. При этом лампу нужно просканировать, прозвонить мультиметром. Если прибор укажет, что лампа сломана, то ее требуется заменить.
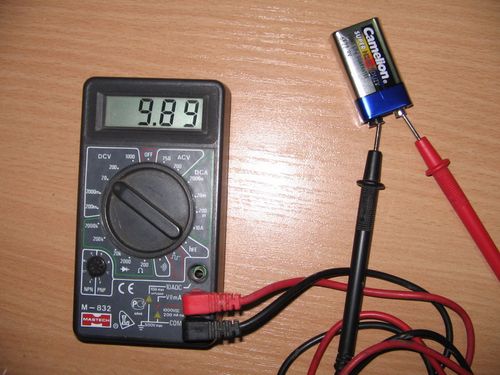
Мультиметр
Термодатчик принтера, соответственно, тоже проверяется мультиметром. Если датчик печки грязный, его нужно почистить. Делается это с помощью тампона и ацетона.
Мультиметром проверяется и термопредохранитель печки. Чтобы он вновь заработал, можно попробовать его потрясти или постучать по нему. Если все вышеуказанные части печки исправны, то необходимо сбросить ошибку принтера, набрав определенную комбинацию кнопок и символов на клавиатуре. Эту комбинацию можно найти в инструкции.
Ошибка «Мотор»
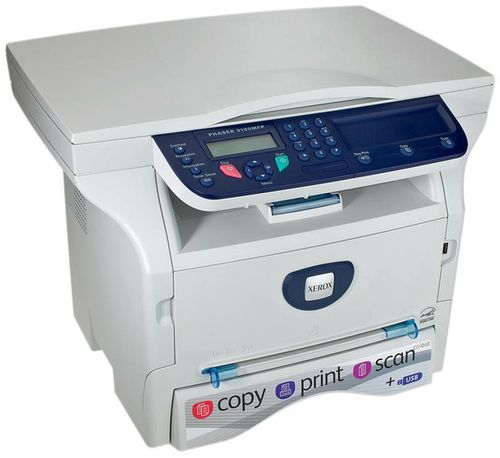
Xerox Phaser 3100
Ошибка принтера Xerox Phaser 3100 или Xerox WorkCentre 5016 «Мотор» тоже довольно распространена. Появляется эта неисправность в тот момент, когда пользователь хочет распечатать что-то на принтере. Решается ошибка «Мотор» очень просто. Нужно несколько раз выключить и включить принтер заново, тогда ошибка «Мотор» исчезнет.
Ошибка Hsync – еще одна распространенная неисправность принтеров Xerox. Она подразумевает ошибку лазера. При попытке просканировать документ принтер начинает шуметь, треск длится около 30 секунд, а потом выходит чистый лист. При этом нужно проверить, замкнуты ли нормально оба контакта крышки сканера. Если замкнут только один контакт, может появиться эта ошибка. Тогда нужно замкнуть и второй контакт, и неисправность пропадет. Если все в порядке, то необходимо обратиться в сервисную службу для того, чтобы узнать, не сгорел ли сам лазер.
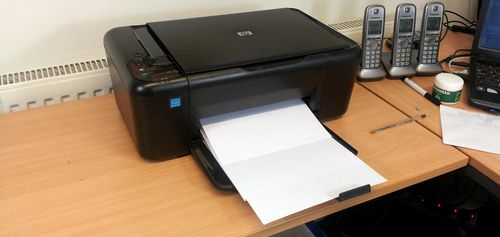
Ошибка лазера
Проблемы с принтером Xerox Phaser 3117
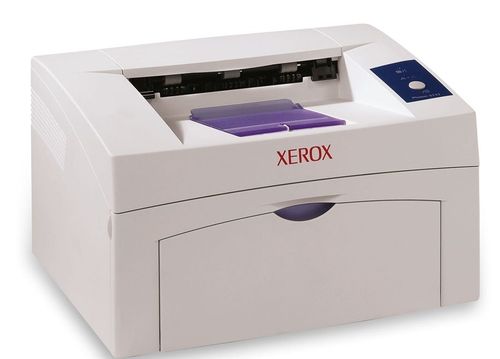
Если у вас принтер Xerox Phaser 3117, то на нем могут встречаться аналогичные ошибки, которые были описаны выше. Чтобы ошибок не возникало в Xerox Phaser 3117 и другой подобной технике, необходимо регулярно чистить принтер, проводить обслуживание, проверять все контакты и подключения к сети и компьютеру, а также устанавливать новые драйвера и проверять их наличие. Это поможет избежать возникновения неисправностей в самый неудачный момент.
Коды ошибок принтеров Xerox
Коды ошибок принтеров Xerox для разных моделей могут быть разные, но основные значат одно и то же. Расшифровать коды можно с помощью инструкции по эксплуатации, где есть переводы подробное описание комбинаций для сброса ошибок и их кодов всех видов.
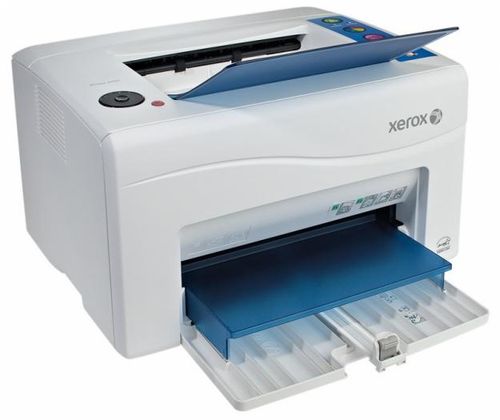
Будьте внимательны к вашей технике дома и в офисе, чтобы не допускать появления неисправностей. Приобретайте технику у проверенных производителей и вовремя проводите обслуживание.

Ошибка печати на принтерах Canon, HP, Epson, Samsung и многих других может иметь множество источников, которые необходимо проверить. Она часто сопровождается сообщениями типа «Принтер не смог распечатать», «Ошибка обработки команды», «Не удалось распечатать локальный документ низкого уровня», «Статус печати принтера — ошибка».
Эта статья поможет пользователю выяснить, почему это происходит и машина печатает такие сообщения, что делать в первую очередь в таких ситуациях. Мы предлагаем несколько быстрых решений для ошибок принтера, которые вызывают и показывают ошибку печати в операционных системах Windows 7, 8 и 10.

Также убедитесь, что вы не установили печать в файл. Нажмите на ссылку, чтобы узнать, как это проверить и исправить.
Содержание
- Очистка очереди печати и отключение автономного режима работы
- Перезапуск служб
- Отключение антивируса и брандмауэра
- Настройка разрешений
- Обновление драйверов
- Откат операционной системы
- Неисправность программ
- Проблемы после заправки картриджей
Очистка очереди печати и отключение автономного режима работы
Если в очереди заданий принтера накопилось несколько заданий печати, возможно заклинивание очереди. В этом случае даже перезагрузка компьютера может не помочь. Пользователь должен выполнить ручную очистку. Самый простой и быстрый способ — использовать панель управления принтером и контекстное меню.


Перезапуск служб
Не забывайте о специальной службе в операционной системе Windows, которая отвечает за управление и работу всех печатающих устройств в ней. Нелишним будет проверить его текущее состояние. Для этого следуйте приведенным ниже инструкциям.
- Откройте окно быстрого запуска с помощью клавиш Windows+R.
- Введите «services.msc», чтобы открыть весь список служб.

- В списке найдите «Диспетчер печати» и щелкните правой кнопкой мыши на его свойствах.
- Проверьте, работает ли сервис. Если необходимо, установите автоматический запуск и нажмите «Запустить», как показано на рисунке.

Отключение антивируса и брандмауэра
Антивирусное и другое программное обеспечение, выступающее в качестве «защитника» от вредоносных файлов и программ, при неправильной настройке может привести к тому, что принтер откажется печатать какие-либо документы. Если вы недавно установили новую антивирусную программу, подключили сетевое устройство, подключили и настроили новый принтер, сначала проверьте это.
Доступ к режиму управления брандмауэром можно получить следующим образом:
- Откройте панель управления, затем в панели управления найдите подраздел «Система и безопасность».
- Перейдите в раздел «Брандмауэр Windows».
- В столбце слева выберите «Включить и отключить» или аналогичный вариант, если вы не используете Windows 7.
- Отключите «Брандмауэр» на некоторое время, чтобы проверить печать.

- Если проблема подтвердится, вы можете окончательно заблокировать «Брандмауэр» или установить исключение для принтера.
Настройка разрешений
Если вы используете сетевой принтер на главном компьютере, через который он подключен к сети, вам нужно будет сделать настройки доступа и разрешения для других пользователей. Это можно сделать через свойства принтера, доступ к которым можно получить через панель управления.


Обновление драйверов
Драйверы — это аббревиатура для специального программного обеспечения, которое позволяет компьютеру или ноутбуку «общаться» с печатающим устройством на его «языке». Иногда сами «драйверы» могут вызывать проблемы, когда принтер не печатает. В таких ситуациях рекомендуется полностью переустановить их. Чтобы правильно выполнить этот процесс, следуйте приведенным ниже инструкциям:
- Откройте окно Quick Launch с помощью сочетания клавиш Windows+R.
- Там введите команду «devmgmt.msc».
- В списке найдите ветку устройств обработки изображений или печати. Расширьте и выделите свою модель.
- В верхней части нажмите на «обновить драйверы».

- В следующем окне вы можете выбрать один из двух вариантов обновления. Мы рекомендуем автоматический, который легче и проще для обычного пользователя.
Откат операционной системы
Если принтер работал без проблем до одного дня и не выдавал никаких ошибок, то в качестве одного из вариантов можно попробовать откатиться на предыдущую версию операционной системы «Windows». Однако это возможно, если вы ранее выполняли точки восстановления вручную или запланировали их автоматическое создание.
Чтобы проверить это и попытаться выполнить откат, выполните следующие действия:
- Зайдите в свойства компьютера.

- Затем выберите и нажмите на «Защита системы» в левой части списка.

- Нажмите «Восстановить», а затем следуйте инструкциям мастера.
Неисправность программ
Все типы браузеров и редакторов могут иметь проблемы или просто не могут печатать из них. Чтобы исключить эту ошибку, попробуйте распечатать документ или графику из любого другого редактора. Например, если принтер не печатает в Excel, попробуйте отправить задание на печать из текстового файла.

Решение проблем с печатью в Word
Способы возобновления работы принтера с помощью приложений Office.

Причины непечатания документов в формате pdf
Все быстрые решения — от устранения сбоев компьютера до исправления поврежденных файлов pdf.
Проблемы после заправки картриджей
Картриджи, которые непосредственно участвуют в процессе нанесения изображения на бумагу, часто становятся причиной выхода из строя самого принтера. Чтобы убедиться, что причиной ошибки являются расходные материалы, возможно, что проблема возникла сразу после заправки. В случае лазерного устройства первое, что необходимо проверить, это качество сборки и наличие контактов между различными частями. Просто аккуратно разберите и снова соберите.
Особое внимание следует обратить на чип, который недавно был поставлен для картриджей лазерных и струйных моделей. Возможно, его необходимо переустановить или полностью заменить.
Также часто бывает, что струйные картриджи засоряются воздухом в системе непрерывной подачи чернил, если она используется. Сопла печатающей головки могут высохнуть, независимо от того, где они установлены (на картридже или как отдельная часть системы). Это вызвано длительным холостым ходом или интенсивным использованием устройства без профилактического обслуживания.

Промывка струйных картриджей в домашних условиях
Все быстрые способы очистки картриджей от грязи.

Все варианты очистки печатающей головки
Быстрые способы очистки и промывки сопел принтера и форсунок.
-
Page 1
Phaser 3140/3155/3160 ® Laser Printer Phaser 3140/3155/3160 ® Service Manual Downloaded From ManualsPrinter.com Manuals… -
Page 2
Downloaded From ManualsPrinter.com Manuals… -
Page 3
Phaser 3140/3155/3160 ® Service Manual Warning The following servicing instructions are for use by qualified service personnel only. To avoid personal injury, do not perform any servicing other than that contained in the operating instructions, unless you are qualified to do so. First Printing: September 2009 Downloaded From ManualsPrinter.com Manuals… -
Page 4
Xerox technical training materials and service manuals are intended for use by authorized Xerox service technicians and service partners only and are not for resale. These materials may not be distributed, copied, or otherwise reproduced without prior written consent from Xerox Corporation. -
Page 5: Table Of Contents
Engine F/W………………2-18 Phaser 3140/3155/3160 Printer Service Manual…
-
Page 6
Common PostScript Problems …………..4-20 Phaser 3140/3155/3160 Printer Service Manual… -
Page 7
Altitude Specifications …………….6-2 Phaser 3140/3155/3160 Printer Service Manual… -
Page 8
Out Bin Full Sensor…………….8-63 Phaser 3140/3155/3160 Printer Service Manual… -
Page 9
Acronyms and Abbreviations …………….A-2 Phaser 3140/3155/3160 Printer Service Manual… -
Page 10
Contents viii Phaser 3140/3155/3160 Printer Service Manual Downloaded From ManualsPrinter.com Manuals… -
Page 11: Service Terms
Caution: A personal injury hazard exists that may not be apparent. For example, a panel may cover the hazardous area. Danger: A personal injury hazard exists in the area where you see the sign. Phaser 3140/3155/3160 Printer Service Manual Downloaded From ManualsPrinter.com Manuals…
-
Page 12: Symbols Marked On The Product
Do not touch the OPC Drum. Do not expose the item to sunlight. Do not tilt the Print Cartridge. 35°C Do not expose item to high temperature. 0°C 95°F 32°F Recycle the item. Phaser 3140/3155/3160 Printer Service Manual Downloaded From ManualsPrinter.com Manuals…
-
Page 13: Power Source
• if the printer is dropped or damaged, • if you suspect that the product needs servicing or repair, • whenever you clean the product. Phaser 3140/3155/3160 Printer Service Manual Downloaded From ManualsPrinter.com Manuals…
-
Page 14
Handle IC’s and Erasable Programmable Read-Only Memories (EPROM’s) carefully to avoid bending pins. • Pay attention to the direction of parts when mounting or inserting them on Printed Circuit Boards (PCB’s). Phaser 3140/3155/3160 Printer Service Manual Downloaded From ManualsPrinter.com Manuals… -
Page 15: General Guidelines
Class 1 Laser Product The Phaser 3140/3155/3160 is certified to comply with Laser Product Performance Standards set by the U.S. Department of Health and Human Services as a Class 1 Laser Product.
-
Page 16
Do not install a fuse of a different type or rating. Installing the wrong type or rating of fuse can cause overheating and a risk of fire. Part Replacement Only use genuine Xerox approved spare parts or components to maintain compliance with legislation and safety certification. Assembly Precautions Use extreme care during assembly. -
Page 17: Servicing Electrical Components
This printer uses heat to fuse the toner image to paper. The Fuser is very hot. Turn the printer power Off and wait for the Fuser to cool before attempting to service the Fuser or adjacent components. Phaser 3140/3155/3160 Printer Service Manual Downloaded From ManualsPrinter.com Manuals…
-
Page 18: Moving The Printer
When shipping the printer, repack the printer using the original packing material and boxes or a Xerox packaging kit. Instructions for repacking the printer are included in the kit. If you do not have all the original packaging, or are unable to repackage the printer, contact your local Xerox service representative.
-
Page 19: Regulatory Information
• Consult the dealer or an experienced radio/television technician for help. Any changes or modifications not expressly approved by Xerox could void the user’s authority to operate the equipment. To ensure compliance with Part 15 of the FCC rules, use shielded interface cables.
-
Page 20: European Union
European Union The CE mark applied to this product symbolizes Xerox’s declaration of conformity with the following applicable Directives of the European Union as of the dates indicated: December 12, 2006: Council Directive 2006/95/EC as amended. Approximation of the laws of the member states related to low voltage equipment.
-
Page 21
Manual Organization The Phaser 3140/3155/3160 Printer Service Manual is the primary document used for repairing, maintaining, and troubleshooting the printer. Use this manual as your primary resource for understanding the operational characteristics of the printer and all available options. This manual describes specifications, theory, and the diagnosis and repair of problems occurring in the print engine and attached options. -
Page 22
Phaser 3140/3155/3160 Printer Service Manual Downloaded From ManualsPrinter.com Manuals… -
Page 23: General Information
General Information In this chapter… • Introduction and Overview • Printer Configurations • Parts of the Printer • Maintenance Items • Consumables • Specifications Chapter Downloaded From ManualsPrinter.com Manuals…
-
Page 24: Introduction And Overview
General Information Introduction and Overview The Xerox Phaser 3140/3155/3160 Printers have a single-pass laser design architecture,. Print speeds range between 18 and 24 pages per minute (ppm), and resolution up to 1200 x 1200 dots-per-inch (dpi) image quality depending on the model.
-
Page 25: Printer Configurations
General Information Printer Configurations The Phaser 3140/3155/3160 printer is available in four configurations. Printer Configurations Feature Phaser 3140 Phaser 3155 Phaser 3160B Phaser 3160N Processor 150 MHz 150 MHz 360 MHz 360 MHz Speed Memory 8 MB 8 MB 64 MB…
-
Page 26
(DHCP, DNS, RAW, LPR, SNMPv 1/2/3, HTTP (S), IPSec) Network CentreWare Management IS/CW Web Tray 1 Sheet Standard Standard Standard Standard Manual Feeder Paper Tray Standard Standard Standard Standard (250 Sheet) Phaser 3140/3155/3160 Printer Service Manual Downloaded From ManualsPrinter.com Manuals… -
Page 27: Parts Of The Printer
General Information Parts of the Printer Front View s3160-073 Item Description Item Output Tray Manual Feeder Control Panel Paper Tray Front Cover Handle Output Support Front Cover Print Cartridge Manual Feeder Guides Phaser 3140/3155/3160 Printer Service Manual Downloaded From ManualsPrinter.com Manuals…
-
Page 28: Rear View
General Information Rear View s3160-074 Item Description Rear Cover Network Port USB Port Power Receptacle a. 3160N only Phaser 3140/3155/3160 Printer Service Manual Downloaded From ManualsPrinter.com Manuals…
-
Page 29: Control Panel
When illuminated, indicates a printer error. Online Displays the online printer status. Cancel Stops an operation at any time. This button is also used to print Reports. Power Turns the printer power on and off. Phaser 3140/3155/3160 Printer Service Manual Downloaded From ManualsPrinter.com Manuals…
-
Page 30
The printer is powered on and can be used. Blinking Green When the green LED slowly blinks, the printer is receiving data from the computer. When the green LED rapidly blinks, the printer is printing data. Phaser 3140/3155/3160 Printer Service Manual Downloaded From ManualsPrinter.com Manuals… -
Page 31: Maintenance Items
Maintenance parts should only be replaced by an authorized service provider, dealer, or the retailer where the printer was purchased. The warranty does not cover the replacement of any maintenance parts after their life span. Tray Fuser s3160-075 Phaser 3140/3155/3160 Printer Service Manual Downloaded From ManualsPrinter.com Manuals…
-
Page 32: Consumables
Print the Supplies Information Report (page 4-2) to check Print Cartridge life status. Print Cartridge Error Information Print Cartridge Status Functionality Xerox Toner Low/Red Continues to print. Blinking LED Xerox Toner Device will not print. Empty/Solid Red 1-10 Phaser 3140/3155/3160 Printer Service Manual Downloaded From ManualsPrinter.com Manuals…
-
Page 33: Specifications
Mac OS X 10.3-10.6 Windows Windows 2000/XP(32/64bit)/Vista(32/64bit)/2003 Server (32/64bit)/2008 Server(32/64bit) Linux Red Hat 8~9, Fedora Core 1~4, Mandrake 9.2~10.1, SuSE 8.2~9.2, Mandriva 2005, 2006, 2007 (32bit/64bit), Ubuntu 6.06-7.04, Debian 4.0 Phaser 3140/3155/3160 Printer Service Manual 1-11 Downloaded From ManualsPrinter.com Manuals…
-
Page 34: Print Speed
General Information Print Speed Media Phaser 3140 (ppm) Phaser 3155/3160 (ppm) Letter Duplex Manual Manual Warm-Up Time Warm-up Time is defined as the time when the printer changes from Power-On to Standby mode. • From Power On (UI Ready): Less than 30 seconds Power Save Mode The default setting is 1 minute.
-
Page 35: Environmental Specifications
Average Operation Less than 400 W Less than 400 W a. See the Rating label on the machine for the correct voltage, frequency (hertz), and type of current for your machine. Phaser 3140/3155/3160 Printer Service Manual 1-13 Downloaded From ManualsPrinter.com Manuals…
-
Page 36: Image Specifications
(Based on 0.0082 mm/mm) Horizontal ± 1.5 mm / 177.8 mm (Based on 0.0084mm/mm) Registration Left Print Position Accuracy ± 2.0 mm (scanning direction) Top Print Position Accuracy ± 2.0 mm (feeding direction) 1-14 Phaser 3140/3155/3160 Printer Service Manual Downloaded From ManualsPrinter.com Manuals…
-
Page 37: Physical Dimensions And Clearances
389 mm (15.3 in.) Weight Net.: 7.41kg (16.34 lb.) Gross: 9.52 kg (20.99 lb.) Minimum Clearances 10 cm (3.9 in.) 10 cm (3.9 in.) 10 cm (3.9 in.) 48.26 cm (18.8 in.) s3160-115 Phaser 3140/3155/3160 Printer Service Manual 1-15 Downloaded From ManualsPrinter.com Manuals…
-
Page 38: Mounting Surface Specifications
Failure to adhere to the specified mounting specification will void all guarantees of print-quality and/or performance. Media and Tray Specifications This section list supported media for the Phaser 3140/3155/3160 printers. Supported Paper Type and Size Print Media Weight /Capacity…
-
Page 39
(32 lb.), load a paper into the tray one by one. b. Maximum capacity may differ depending on media weight, thickness, and environmental conditions. c. Smoothness: 100 to 250 (sheffield) Phaser 3140/3155/3160 Printer Service Manual 1-17 Downloaded From ManualsPrinter.com Manuals… -
Page 40
General Information 1-18 Phaser 3140/3155/3160 Printer Service Manual Downloaded From ManualsPrinter.com Manuals… -
Page 41: Theory Of Operation
Theory of Operation In this chapter… • Operational Overview • Paper Path Chapter Downloaded From ManualsPrinter.com Manuals…
-
Page 42: Operational Overview
Theory of Operation Operational Overview The Phaser 3140/3155/3160 is a monochrome printer that has a single-pass laser design architecture, which offers mono print speed up to 24 pages per minute (ppm), and resolution up to 1200 x 1200 dots-per-inch (dpi) image quality. The printer provides a USB interface for all models, and the 3160N supports 10/100 Base-TX ethernet.
-
Page 43: Paper Path
Feed Rollers, and Holder Pad. The rollers and sensors in the paper feed path control paper registration and guide the paper through the image transfer, image development, image fusing, and exit assemblies. Phaser 3140/3155/3160 Printer Service Manual Downloaded From ManualsPrinter.com Manuals…
-
Page 44: Manual Feeder
Manual Feeder The manual feeder is used to hold non-standard or custom paper sizes and special media (envelopes, transparencies, etc.). The manual feeder can hold 1 sheet of paper or 1 envelope. Phaser 3140/3155/3160 Printer Service Manual Downloaded From ManualsPrinter.com Manuals…
-
Page 45
The Pick Up Roller is driven by the Pick Up Solenoid. Pick Up Roller s3160-090 Feed Roller (Registration) The Feed Roller controls paper registration and guides the paper into the printer. s3160-089 Phaser 3140/3155/3160 Printer Service Manual Downloaded From ManualsPrinter.com Manuals… -
Page 46: Drive Assembly
The Drive Assembly receives power from the Controller Board. The Drive Assembly consists of the main motor and gear set mounted to a support plate. • Motor: 24V DC • Driving Frequency: 2200 rpm 3155 & 3160 3140 s3160-084 Phaser 3140/3155/3160 Printer Service Manual Downloaded From ManualsPrinter.com Manuals…
-
Page 47: Laser Unit
Laser Unit s3160-087 The Laser Unit is the core part of the Phaser 3140/3155/3160 and is controlled by the video controller circuitry of the Controller Board. The Laser Unit converts video data received from the Controller Board into an electrostatic latent image on the surface of the OPC drum.
-
Page 48: Print Cartridge
Management of waste toner: Collects toner using the cleaning blade. • OPC drum protecting shutter: No • Toner CRUM reader: Identifies whether toner is Xerox branded toner or whether a non-Xerox Print Cartridge is installed. Max -1.4KV Cleaning Blade Zener Diode…
-
Page 49: Fuser
Heat Roller and Pressure Rollers, the toner is melted and permanently fixed to the paper. The surface of the Heat Roller is coated with Teflon, so that toner does not stick to the surface. Phaser 3140/3155/3160 Printer Service Manual Downloaded From ManualsPrinter.com Manuals…
-
Page 50: Electrical Components
Fuser cover temperature is maintained at less than 80° C. Electrical Components The printer’s major electrical components consist of these boards: • Control Panel • Controller • Power Supply Controller Control Panel Power Supply s3160-091 2-10 Phaser 3140/3155/3160 Printer Service Manual Downloaded From ManualsPrinter.com Manuals…
-
Page 51
The signal from the Out Bin Empty Sensor is input directly to the Controller Board. Note Each printer model has a unique Controller Board. The following illustration shows the 3160N Controller Board. ENET CN15 CN12 CN10 s3160-093 Phaser 3140/3155/3160 Printer Service Manual 2-11 Downloaded From ManualsPrinter.com Manuals… -
Page 52
Loading contrast: ± 3% or less • Output Voltage Rising Time: 50 ms Max • Output Voltage Falling Time: 100 ms Max • Fluctuating Transfer Voltage with Environmental Various: 0 V~5 KV 2-12 Phaser 3140/3155/3160 Printer Service Manual Downloaded From ManualsPrinter.com Manuals… -
Page 53
Output voltage rising time: 50 ms Max • Output voltage falling time: 50 ms Max • Output Control Signal (BIAS-PWM): The CPU output is HV output when PWM is low. Phaser 3140/3155/3160 Printer Service Manual 2-13 Downloaded From ManualsPrinter.com Manuals… -
Page 54: Power Supply
+5.1 V ± 5% +24 V ± 15% (4.845 ~ 5.355 V) (20.4 ~ 27.6 V) Max. Output Current 1.2 A 2.0 A Peak Loading Current 1.5 A 2.5 A Under 100 ms 2-14 Phaser 3140/3155/3160 Printer Service Manual Downloaded From ManualsPrinter.com Manuals…
-
Page 55
Maximum Output 48 W Peak output 7.5 W 60 W Under 100 ms Protection for Shut down or Fuse Shut down (or Loading Shortage Protection Output Voltage Drop and Overflowing Current Phaser 3140/3155/3160 Printer Service Manual 2-15 Downloaded From ManualsPrinter.com Manuals… -
Page 56: Sensor Input Circuit
CRUM reads the print cartridge information from contact with CRUM involved in print cartridge. If the Print Cartridge is invalid, the red LED on the Control Panel illuminates. 2-16 Phaser 3140/3155/3160 Printer Service Manual Downloaded From ManualsPrinter.com Manuals…
-
Page 57: Driving Circuit
Motor Driving The Controller Board contains the motor interface circuits, and the Drive Assembly contains a motor control board with a driver IC. Phaser 3140/3155/3160 Printer Service Manual 2-17 Downloaded From ManualsPrinter.com Manuals…
-
Page 58: Engine F/W
This voltage is fed back into the printer through the A/D converter. Based on the value fed back, the PWM cycle is changed to maintain the required transfer voltage. 2-18 Phaser 3140/3155/3160 Printer Service Manual Downloaded From ManualsPrinter.com Manuals…
-
Page 59
When an Over Heat error occurs, no heat is supplied to the fixing unit. After a specified time elapses, the engine detects the temperature again. If the temperature is a specified degree lower than the memorized temperature, the error is recovered. Phaser 3140/3155/3160 Printer Service Manual 2-19 Downloaded From ManualsPrinter.com Manuals… -
Page 60
The engine checks the Laser Unit error, and if the error doesn’t recur the printing job will proceed. 2-20 Phaser 3140/3155/3160 Printer Service Manual Downloaded From ManualsPrinter.com Manuals… -
Page 61: Error Messages And Codes
Error Messages and Codes In this chapter… • Introduction • Understanding the Control Panel LEDs • Jam Errors • Tray and Media Problems • Print Cartridge Errors • Fuser Errors • Front Cover Errors Chapter Downloaded From ManualsPrinter.com Manuals…
-
Page 62: Introduction
“General Troubleshooting.” Print-quality problems are covered in Chapter 5, “Print- Quality Troubleshooting.” Diagnostics The printer performs several self-tests. When turned On, a routine of power up tests (POST) checks key operational parameters. During operation, the printer monitors system performance. Phaser 3140/3155/3160 Printer Service Manual Downloaded From ManualsPrinter.com Manuals…
-
Page 63: Understanding The Control Panel Leds
Prepare a new cartridge for replacement. You may temporarily increase the printing quality by redistributing the toner. Orange The Print Cartridge is empty, or needs to be replaced. A paper jam has occurred. Phaser 3140/3155/3160 Printer Service Manual Downloaded From ManualsPrinter.com Manuals…
-
Page 64
The machine is online and can receive data from the computer. Blinking When the backlight slowly blinks, the machine is receiving data from the computer. When the backlight blinks rapidly, the machine is printing data. Phaser 3140/3155/3160 Printer Service Manual Downloaded From ManualsPrinter.com Manuals… -
Page 65: Jam Errors
1. Open and close the Front Cover. The jammed paper should automatically eject from the machine. If the paper does not eject, go to the next step. 2. Pull out the Paper Tray. s3160-097 Phaser 3140/3155/3160 Printer Service Manual Downloaded From ManualsPrinter.com Manuals…
-
Page 66
Paper Jam at the Manual Tray 1. If the paper is not feeding properly, pull the paper out of the machine. s3160-100 2. Open and close the Front Cover to resume printing. Phaser 3140/3155/3160 Printer Service Manual Downloaded From ManualsPrinter.com Manuals… -
Page 67: Paper Jam At Exit Tray
Paper Jam at the Exit Tray 1. Open and close the Front Cover. The jammed paper is automatically ejected from the machine. If you do not see the jammed paper, go to the next step. Phaser 3140/3155/3160 Printer Service Manual Downloaded From ManualsPrinter.com Manuals…
-
Page 68: Paper Jam 0
7. Open and close the Front Cover, printing automatically resumes. Paper Jam 0 The leading edge of the paper is jammed between the Pick Up Roller and the Paper Feed Sensor. Paper Feed Sensor s3160-069 Phaser 3140/3155/3160 Printer Service Manual Downloaded From ManualsPrinter.com Manuals…
-
Page 69: Initial Actions
Check the Paper Tray Holder Pad. Replace the Go to step 7. Is the Holder Pad loose due to bad Holder Pad sealing of the side-pad? (page 8-29). If the problem persists, go to step 7. Phaser 3140/3155/3160 Printer Service Manual Downloaded From ManualsPrinter.com Manuals…
-
Page 70: Paper Jam 1
Exit Roller in the Fuser just after passing through the Feed Actuator. Initial Actions • Check the paper path for obstructions or debris. • Cycle printer power. • If the problem persists, refer to the following procedure. s3160-072 3-10 Phaser 3140/3155/3160 Printer Service Manual Downloaded From ManualsPrinter.com Manuals…
-
Page 71: Paper Jam 2
The Heat Roller or Pressure Roller is seriously contaminated with toner. Initial Actions • Check the paper path for obstructions or debris. • Cycle printer power. • If the problem persists, refer to the following procedure. Phaser 3140/3155/3160 Printer Service Manual 3-11 Downloaded From ManualsPrinter.com Manuals…
-
Page 72
Clean the surface of the Pressure Replace the Complete. Roller with a clean dry cloth. Fuser. Check the Exit Actuator for damage and functionality, and then reinstall the Fuser. Does the problem persist? 3-12 Phaser 3140/3155/3160 Printer Service Manual Downloaded From ManualsPrinter.com Manuals… -
Page 73: Paper Rolled On The Opc Drum
Does the media meet media. specifications? Check the Print Cartridge for Clean, or Complete. damage or debris. replace the Is the Print cartridge damaged or Print Cartridge. obstructed by debris? Phaser 3140/3155/3160 Printer Service Manual 3-13 Downloaded From ManualsPrinter.com Manuals…
-
Page 74: Tray And Media Problems
Go to step 3. harness between Power Supply harness. Board CON2 and Controller Board If the problem CN5 (CN7 on 3160 model). persists, go to Is the wiring harness damaged? step 3. 3-14 Phaser 3140/3155/3160 Printer Service Manual Downloaded From ManualsPrinter.com Manuals…
-
Page 75: Paper Tray Empty With No Indication
Is the harness damaged? step 3. Replace the Power Supply Board Go to step 4. Complete. (page 8-54). Does the problem persist? Replace the Controller Board Complete. (page 8-51). Phaser 3140/3155/3160 Printer Service Manual 3-15 Downloaded From ManualsPrinter.com Manuals…
-
Page 76: Multiple Sheet Feeding
Is the Holder Pad dirty or damaged? Holder Pad, and replace if necessary (page 8-29). If the problem persists, go to step 3. Replace the Pick Up Solenoid Complete. (page 8-61). 3-16 Phaser 3140/3155/3160 Printer Service Manual Downloaded From ManualsPrinter.com Manuals…
-
Page 77: Out Bin Full
Check the continuity of the bin full Repair the Replace the harness connecting the Controller harness. Out Bin Full Board and Out Bin Full Sensor. Sensor Is the harness damaged? (page 8-63). Phaser 3140/3155/3160 Printer Service Manual 3-17 Downloaded From ManualsPrinter.com Manuals…
-
Page 78: Print Cartridge Errors
5. Close the Front Cover. 6. Cycle printer power to clear the message. 7. If the problem persists, replace the Print Cartridge. If the problem persists, use the following procedures to troubleshoot the problem. 3-18 Phaser 3140/3155/3160 Printer Service Manual Downloaded From ManualsPrinter.com Manuals…
-
Page 79: Invalid Print Cartridge
Error Messages and Codes Invalid Print Cartridge If the Error LED is red (not blinking), the Print Cartridge may not be a genuine Xerox print cartridge. Non-Xerox or Third Party Print Cartridges can cause malfunctions, print-quality problems, and jam errors. Initial Actions •…
-
Page 80: Toner Empty Or Exhausted
Go to step 5. Replace the on the 3160). Controller Is +3.3V present? Board (page 8-51). Replace the Print Cartridge Replace the Complete. (page 8-6). Controller Does the error persist? Board (page 8-51). 3-20 Phaser 3140/3155/3160 Printer Service Manual Downloaded From ManualsPrinter.com Manuals…
-
Page 81: Fuser Errors
Check the guide claws for damage? If possible, Go to step 4. Are the guide claws damaged? repair the guide claws. Replace the Fuser. Replace the Complete. Does the problem persist? Drive Assembly (page 8-35). Phaser 3140/3155/3160 Printer Service Manual 3-21 Downloaded From ManualsPrinter.com Manuals…
-
Page 82: Fuser Gear Damaged From Overheating
Replace the Power Supply Go to step 4. Complete. (page 8-54). Does the problem persist? Reseat connections on the Controller Replace the Complete. Board. Controller Does the problem persist? Board (page 8-51). 3-22 Phaser 3140/3155/3160 Printer Service Manual Downloaded From ManualsPrinter.com Manuals…
-
Page 83: Front Cover Errors
Inspect the Front Cover for damage. Replace the Go to step 3. Is the Front Cover damaged? Front Cover. If the problem persists, go to step 3. Replace the Power Supply Board Complete. (page 8-54). Phaser 3140/3155/3160 Printer Service Manual 3-23 Downloaded From ManualsPrinter.com Manuals…
-
Page 84: No Error Led Indication For Front Cover
If the 3160). problem Is the wiring harness damaged? persists, go to step 3. Replace the Power Supply Board Go to step 4. Complete. (page 8-54). Does the error still occur? 3-24 Phaser 3140/3155/3160 Printer Service Manual Downloaded From ManualsPrinter.com Manuals…
-
Page 85
If the 3160). problem Is the wiring harness damaged? persists, go to step 5. Replace the Control Panel (page 8-51). Replace the Complete. Does the problem persist? Controller Board (page 8-51). Phaser 3140/3155/3160 Printer Service Manual 3-25 Downloaded From ManualsPrinter.com Manuals… -
Page 86
Error Messages and Codes 3-26 Phaser 3140/3155/3160 Printer Service Manual Downloaded From ManualsPrinter.com Manuals… -
Page 87: General Troubleshooting
General Troubleshooting In this chapter… • Introduction • Reports • Servicing Instructions • Measurement Techniques • Media-Based Problems • Inoperable Printer Troubleshooting • Power Supply Troubleshooting • USB Port Testing • Network Configuration Errors • Operating System and Application Problems Chapter Downloaded From ManualsPrinter.com Manuals…
-
Page 88: Introduction
Troubleshooting. Reports This product provides several printable reports for maintenance purposes. These reports can be used to aid the diagnosis of print quality problems. The following reports are available in the Phaser 3140/3155/3160 printers. Report Description How To Print Printing Demo Page…
-
Page 89: Printing Demo Page
General Troubleshooting Printing Demo Page s3160-121 Phaser 3140/3155/3160 Printer Service Manual Downloaded From ManualsPrinter.com Manuals…
-
Page 90: Configuration Report
General Troubleshooting Configuration Report s3160-119 Phaser 3140/3155/3160 Printer Service Manual Downloaded From ManualsPrinter.com Manuals…
-
Page 91: Supplies Information Report/Error Information Report
General Troubleshooting Supplies Information Report/Error Information Report s3160-122 Phaser 3140/3155/3160 Printer Service Manual Downloaded From ManualsPrinter.com Manuals…
-
Page 92
General Troubleshooting s3160-156 Phaser 3140/3155/3160 Printer Service Manual Downloaded From ManualsPrinter.com Manuals… -
Page 93: Cleaning Page
General Troubleshooting Cleaning Page s3160-118 Phaser 3140/3155/3160 Printer Service Manual Downloaded From ManualsPrinter.com Manuals…
-
Page 94: Servicing Instructions
If necessary move the printer. 4. Ensure the printer is not positioned in direct sunlight. If it is unavoidable, use a curtain to shade the printer. Phaser 3140/3155/3160 Printer Service Manual Downloaded From ManualsPrinter.com Manuals…
-
Page 95: Measurement Techniques
8. When a troubleshooting procedure instructs you to replace a non-spared component and that component is part of a parent assembly, you should replace the entire parent assembly. Phaser 3140/3155/3160 Printer Service Manual Downloaded From ManualsPrinter.com Manuals…
-
Page 96: Media-Based Problems
3. Try loading paper from a fresh ream, fan the paper, and then insert into the tray or flip existing paper over. 4. Clean the Feed Rollers with a clean, dry, lint-free wipe. If necessary, replace the Feed Rollers (page 8-38). 4-10 Phaser 3140/3155/3160 Printer Service Manual Downloaded From ManualsPrinter.com Manuals…
-
Page 97: Inoperable Printer Troubleshooting
If the problem is within a single application, adjust the printing properties within that program. If changing the properties in the application print dialog box does not solve the problem, uninstall and reinstall new printer driver. Phaser 3140/3155/3160 Printer Service Manual 4-11 Downloaded From ManualsPrinter.com Manuals…
-
Page 98: Power Supply Troubleshooting
Check the power cord for defects or loose Replace or Replace the connection. reconnect Power Is the Power Cord loose or defective? the Power Supply Cord. (page 8-54). 4-12 Phaser 3140/3155/3160 Printer Service Manual Downloaded From ManualsPrinter.com Manuals…
-
Page 99: No Power
Check for +24 V at each of the following Supply pins: CON2-5, 6, 9, 10, and 12. (page 8-54). Check for +5 V at CON2-8, 15, and 16. Is the correct voltage present at each pin? Phaser 3140/3155/3160 Printer Service Manual 4-13 Downloaded From ManualsPrinter.com Manuals…
-
Page 100
Board 3160). problem (page 8-51). Is the wiring harness damaged? persists, go If the to step 7. problem persists, go to step 7. Replace the Control Panel (page 8-51). Complete. 4-14 Phaser 3140/3155/3160 Printer Service Manual Downloaded From ManualsPrinter.com Manuals… -
Page 101: Usb Port Testing
File menu pull-down. 7. Open the General tab and click the Print Test Page button to generate the test print. If the test page prints, the USB port is functioning normally. Phaser 3140/3155/3160 Printer Service Manual 4-15 Downloaded From ManualsPrinter.com Manuals…
-
Page 102: Network Configuration Errors
Check server configuration. Go to step 5. Correct server Is the server configured to accept settings. incoming data? Cycle printer power. Replace the Complete. Does the error persist? Controller Board (page 8-51). 4-16 Phaser 3140/3155/3160 Printer Service Manual Downloaded From ManualsPrinter.com Manuals…
-
Page 103: Operating System And Application Problems
If changing the properties in the application print dialog box does not solve the problem, uninstall and reinstall the printer driver. Note Check the Xerox web site for a newer version of the print driver before reinstalling. Phaser 3140/3155/3160 Printer Service Manual 4-17 Downloaded From ManualsPrinter.com Manuals…
-
Page 104: Spool Error
Mac OS 10.3.2. Some letters do not display Mac OS cannot find Only alphanumeric normally during cover sheet the font during cover characters are allowed on printing. page printing. the cover page. 4-18 Phaser 3140/3155/3160 Printer Service Manual Downloaded From ManualsPrinter.com Manuals…
-
Page 105: Common Linux Problems
SuSE 9.2, the problem with IPP (Internet Printing Protocol) printing. printer does not print. Use the socket printing instead of IPP or install the later version of CUPS (cups-1.1.22 or higher). Phaser 3140/3155/3160 Printer Service Manual 4-19 Downloaded From ManualsPrinter.com Manuals…
-
Page 106: Common Postscript Problems
Macintosh with Acrobat may not be matched printer driver matches Reader 6.0 or higher, with that in Acrobat information in Acrobat colors print incorrectly. Reader. Reader. 4-20 Phaser 3140/3155/3160 Printer Service Manual Downloaded From ManualsPrinter.com Manuals…
-
Page 107: Print-Quality Troubleshooting
Print-Quality Troubleshooting In this chapter… • Print-Quality Troubleshooting Overview • Troubleshooting Print-Quality Checklist • Print-Quality Troubleshooting Procedures • Print-Quality Specifications Chapter Downloaded From ManualsPrinter.com Manuals…
-
Page 108: Print-Quality Troubleshooting Overview
Refer to “Media and Tray Specifications” on page 1-16 for supported and specialty media that have been tested and approved for use in the Phaser 3140/3155/3160. Use paper from a fresh ream that is acclimated to room temperature and humidity.
-
Page 109
Ghosting (3) (page 5-17) • Incomplete Fusing (page 5-30) Controller Board • Black Print (page 5-11) • Ghosting (1) (page 5-15) • Vertical Lines are Curved (page 5-20) • Blank Page (2) (page 5-29) Phaser 3140/3155/3160 Printer Service Manual Downloaded From ManualsPrinter.com Manuals… -
Page 110: Troubleshooting Print-Quality Checklist
One area where accumulations of dust and debris often occur is the Laser Unit lens. Remove the Print Cartridge, and clean the laser lens using a dry cotton swab or lint-free cloth. s3160-137 Phaser 3140/3155/3160 Printer Service Manual Downloaded From ManualsPrinter.com Manuals…
-
Page 111: Check The Transfer Roller
If you are printing on thick or uneven media, change the media type settings to a heavier type. Check that the media meets specifications (refer to “Media and Tray Specifications” on page 1-16). Smudges or Smears Phaser 3140/3155/3160 Printer Service Manual Downloaded From ManualsPrinter.com Manuals…
-
Page 112
Toner may be low. Change the Print Cartridge. Horizontal Band, Void, or Streaks 7. Part of the page prints. Check the Print Cartridge to make sure it is installed correctly. Partial Band Phaser 3140/3155/3160 Printer Service Manual Downloaded From ManualsPrinter.com Manuals… -
Page 113
This occurs when the printer is operating at a location where relative humidity reaches 85° or more. Adjust the humidity or relocate the printer to an appropriate environment. Light Print on Transparency Phaser 3140/3155/3160 Printer Service Manual Downloaded From ManualsPrinter.com Manuals… -
Page 114: Print-Quality Troubleshooting Procedures
Page Blank Page (1) The entire image area is blank. page 5-28 Blank Page (2) The entire print is blank. One or several blank page 5-29 pages are printed. Phaser 3140/3155/3160 Printer Service Manual Downloaded From ManualsPrinter.com Manuals…
-
Page 115: Repeating Defects
Print PL1.0.12 Roller (1.38 in) Black bands Cartridge Transfer Roller Ghosting or Transfer PL1.0.8 poor fusing Roller Pressure Roller Background Fuser PL9.0.34 Heat Roller Black spot and Fuser PL9.0.36 image ghost Phaser 3140/3155/3160 Printer Service Manual Downloaded From ManualsPrinter.com Manuals…
-
Page 116: Printing Begins At Wrong Position
Agitate the Print Cartridge to redistribute the toner. • Set Toner Save mode to Off. Troubleshooting Reference Table Applicable Parts Example Print Power Supply Board, PL1.0.1 Print Cartridge, PL1.0.12 Light or Undertone Print 5-10 Phaser 3140/3155/3160 Printer Service Manual Downloaded From ManualsPrinter.com Manuals…
-
Page 117: Black Print
Check the connection between the Power Supply Board and Print Cartridge. Troubleshooting Reference Table Applicable Parts Example Print Controller Board, PL1.0.2 Power Supply Board, PL1.0.1 Laser Unit, PL6.0.79 Black Print Phaser 3140/3155/3160 Printer Service Manual 5-11 Downloaded From ManualsPrinter.com Manuals…
-
Page 118
Does the error still occur? Does the error still occur? Replace the Complete. Laser Unit (page 8-30). Go to step 5. Does the error still occur? Replace the Complete. Controller Board (page 8-51). 5-12 Phaser 3140/3155/3160 Printer Service Manual Downloaded From ManualsPrinter.com Manuals… -
Page 119: Uneven Density
Reseat the Transfer Roller if necessary (page 8-8). Does the image quality improve? Check the Print Cartridge. Replace the Complete. Is the Print Cartridge empty or Print Cartridge damaged? (page 8-6). Phaser 3140/3155/3160 Printer Service Manual 5-13 Downloaded From ManualsPrinter.com Manuals…
-
Page 120: Background Contamination
Print Cartridge at or near end of life? Print Cartridge (page 8-51). Check the Transfer Roller movement. Go to step 5. Clean the Does the Transfer Roller rotate Transfer Roller smoothly? bushings. 5-14 Phaser 3140/3155/3160 Printer Service Manual Downloaded From ManualsPrinter.com Manuals…
-
Page 121: Ghosting (1)
Is the Transfer Roller at or near end (page 8-8). of life? Check the ambient temperature. Relocate the Go to step 4. Is the ambient temperature below printer. 10° C? Phaser 3140/3155/3160 Printer Service Manual 5-15 Downloaded From ManualsPrinter.com Manuals…
-
Page 122: Ghosting (2)
Clean the Set Paper Type in the prnter driver. Power Supply to Thick. Is the driver set to Paper Type Thick? Board contacts. If problem persists, go to Ghosting (1). 5-16 Phaser 3140/3155/3160 Printer Service Manual Downloaded From ManualsPrinter.com Manuals…
-
Page 123: Ghosting (3)
Print Cartridge is at end of life. (page 8-6). If Is the Print Cartridge at end of life? the problem persists, go to step 2. Replace the Power Supply Board Complete. (page 8-54). Phaser 3140/3155/3160 Printer Service Manual 5-17 Downloaded From ManualsPrinter.com Manuals…
-
Page 124: Ghosting (4)
(page 8-11). clean any foreign matter between the Thermistor and Heat Roller. NOTE If the Heat Roller is deformed, replace it (page 8-17). Does the problem persist? 5-18 Phaser 3140/3155/3160 Printer Service Manual Downloaded From ManualsPrinter.com Manuals…
-
Page 125: Vertical White Lines
Is there any debris on the OPC drum. drum? Check the OPC Drum on the Print Replace the Go to step 5. Cartridge for damage. Print Cartridge Is the OPC Drum damaged? (page 8-6). Phaser 3140/3155/3160 Printer Service Manual 5-19 Downloaded From ManualsPrinter.com Manuals…
-
Page 126: Vertical Lines Are Curved
Vertical Lines Are Curved Troubleshooting Procedure Table Step Actions and Questions Replace the Laser Unit Go to step 2. Complete. Does the problem persists? Replace the Controller Board Complete. (page 8-51). 5-20 Phaser 3140/3155/3160 Printer Service Manual Downloaded From ManualsPrinter.com Manuals…
-
Page 127: Vertical Black Line Or Band
Print Cartridge Is the Print Cartridge damaged? (page 8-6). Check the Transfer Roller surface for Replace the Complete. damage. Transfer Roller Is the Transfer Roller surface (page 8-8). damaged? Phaser 3140/3155/3160 Printer Service Manual 5-21 Downloaded From ManualsPrinter.com Manuals…
-
Page 128: Horizontal Black Line Or Band
Transfer roller = 46.2mm Heat Roller = 63.9mm Pressure Roller = 75.3mm Check the right side OPC Drum gear Replace the Complete. for damage. Print Cartridge Is the Gear damaged? (page 8-6). 5-22 Phaser 3140/3155/3160 Printer Service Manual Downloaded From ManualsPrinter.com Manuals…
-
Page 129: Black/White Spot
OPC drum: 75.3 mm interval Is there repeating spots on the page? Check the Print Cartridge for Replace the Go to step 5. damage. Print Cartridge Is the Print Cartridge damaged? (page 8-6). Phaser 3140/3155/3160 Printer Service Manual 5-23 Downloaded From ManualsPrinter.com Manuals…
-
Page 130: Skew
Go to step 3. Complete. Does the error still occur? Check the Transfer Roller. Go to step 4. Clean or Is the surface clean and smooth? replace the Transfer Roller (page 8-8). 5-24 Phaser 3140/3155/3160 Printer Service Manual Downloaded From ManualsPrinter.com Manuals…
-
Page 131
Is there any debris in the media debris. path? Replace the Paper Tray Pick Up Replace the Complete. Roller (page 8-9). Paper Tray Does the error still occur? Holder Pad (page 8-29). Phaser 3140/3155/3160 Printer Service Manual 5-25 Downloaded From ManualsPrinter.com Manuals… -
Page 132: Stains On The Front Of The Page
Is the Transfer Roller surface dirty? (page 4-2) several times. Check the Print Cartridge for Replace the Complete. damage or leakage. Print Cartridge Is the Print Cartridge damaged? (page 8-6). 5-26 Phaser 3140/3155/3160 Printer Service Manual Downloaded From ManualsPrinter.com Manuals…
-
Page 133: Stains On The Back Of The Page
Does the error persist? Disassemble the Fuser and clean the Replace the Complete. Heat Roller, Pressure Roller, and the Fuser area between the Heat Roller and (page 8-11). Thermistor. Does the error persist? Phaser 3140/3155/3160 Printer Service Manual 5-27 Downloaded From ManualsPrinter.com Manuals…
-
Page 134: Blank Page (1)
Actions and Questions Clean the contacts on the Print Go to step 2. Complete. Cartridge and inside of the printer. Does the error still occur? Replace Print Cartridge (page 8-6). Complete. 5-28 Phaser 3140/3155/3160 Printer Service Manual Downloaded From ManualsPrinter.com Manuals…
-
Page 135: Blank Page (2)
Replace the operation. Pick Up Does the solenoid operate correctly? Solenoid (page 8-61). Reseat the Controller Board Replace the Complete. connections. Controller Does the error still occur? Board (page 8-51). Phaser 3140/3155/3160 Printer Service Manual 5-29 Downloaded From ManualsPrinter.com Manuals…
-
Page 136: Incomplete Fusing
(page 8-6). Reseat the Fuser. Go to step 6. Complete. Does the problem persist? Replace the Fuser (page 8-11). Replace the Complete. Does the problem persist? Power Supply (page 8-54). 5-30 Phaser 3140/3155/3160 Printer Service Manual Downloaded From ManualsPrinter.com Manuals…
-
Page 137: Print-Quality Specifications
Left print position (scanning direction): ± 2.0 mm Top print position (feeding direction): ± 2.0 mm Noise • Ready Mode: <25 dB(A) • Printing Mode: • Phaser 3140: <50 dB(A) • Phaser 3155, Phaser 3160: <51 dB(A) Phaser 3140/3155/3160 Printer Service Manual 5-31 Downloaded From ManualsPrinter.com Manuals…
-
Page 138: Image Area
The print-quality is best when quality paper is fed from the tray. The print quality is evaluated on the maximum size of each standard paper. • Black and White Quality: Xerox-brand 4200 paper Paper Condition Paper should be fresh and stored in the operating environment for 12 hours before use for printing.
-
Page 139: Printer Condition
Print-Quality Troubleshooting Printer Condition The specified print quality is guaranteed with the printer in specified normal environmental condition. Phaser 3140/3155/3160 Printer Service Manual 5-33 Downloaded From ManualsPrinter.com Manuals…
-
Page 140
Print-Quality Troubleshooting 5-34 Phaser 3140/3155/3160 Printer Service Manual Downloaded From ManualsPrinter.com Manuals… -
Page 141: Adjustments And Calibrations
Adjustments and Calibrations In this chapter… • Adjustments Chapter Downloaded From ManualsPrinter.com Manuals…
-
Page 142: Adjustments
Normal s3160-067 Making Altitude Adjustments For Phaser 3160 1. From the Start menu, select Programs > Xerox Phaser 3160 > Printer Settings Utility. 2. On the left column, select Setting. 3. On the right column, select Altitude Adjustment. 4. On the Altitude Adjustment pull-down menu, select the appropriate altitude setting for the printer.
-
Page 143
Adjustments and Calibrations For Phaser 3140 and 3155 1. Click the Windows Start menu. • For Windows 2000, select Settings > Printers. • For Windows XP/2003, select Control Panel > Printers and Faxes. • For Windows 2008/Vista, select Control Panel > Hardware and Sound >… -
Page 144
Adjustments and Calibrations Phaser 3140/3155/3160 Printer Service Manual Downloaded From ManualsPrinter.com Manuals… -
Page 145
Cleaning and Maintenance In this chapter… • Service Maintenance Procedure • Cleaning • Maintenance • Firmware Updates Chapter Downloaded From ManualsPrinter.com Manuals… -
Page 146: Cleaning And Maintenance
6. Ensure that all cover vents are clean and free of obstructions. 7. Remove and clean the paper trays. 8. Clean all rubber rollers with a lint-free cloth slightly dampened with cold water. Phaser 3140/3155/3160 Printer Service Manual Downloaded From ManualsPrinter.com Manuals…
-
Page 147: Cleaning The Print Cartridge
3. Use a dry lint-free cloth to wipe to clean the Print Cartridge. s3160-134 4. Use a dry lint-free cloth to wipe any dust and/or spilled toner from the Print Cartridge area. Remove any paper debris from the area. s3160-135 Phaser 3140/3155/3160 Printer Service Manual Downloaded From ManualsPrinter.com Manuals…
-
Page 148: Cleaning The Laser Unit
In Ready mode, press and hold the Cancel button for approximately 10 seconds until the status LED blinks fast, and then release. For more information on other internal printer pages, see “Reports” on page 4-2. Phaser 3140/3155/3160 Printer Service Manual Downloaded From ManualsPrinter.com Manuals…
-
Page 149: Maintenance
Firmware Update Procedures There are two methods for upgrading firmware, USB and Network. 1. Down load the applicable files from the Xerox support web site. Unzip (decompress) the files. 2. Be sure your appropriate firmware updating option (Network or USB) is available and connected.
-
Page 150: Using A Network Connection
10. Click the Blue button to start the firmware update process. 11. A processing window is displayed. 12. Click OK to close the status window when the firmware upgrade is complete. 13. Print a Configuration page and verify the firmware information. Phaser 3140/3155/3160 Printer Service Manual Downloaded From ManualsPrinter.com Manuals…
-
Page 151: Service Parts Disassembly
Service Parts Disassembly In this chapter… • Overview • Maintenance Items and Consumables • Covers • Disassembly Procedures • Feeder • Electrical • Solenoids and Sensors Chapter Downloaded From ManualsPrinter.com Manuals…
-
Page 152: Overview
When needed, the orientation of the printer is called out in the procedure as an aid for locating the printer parts. The following illustration identifies the Front, Rear, Left, and Right sides of the printer. Rear Left Right Front s3160-101 Phaser 3140/3155/3160 Printer Service Manual Downloaded From ManualsPrinter.com Manuals…
-
Page 153: Preparation
Many parts are secured by plastic tabs. Do not over flex or force these parts. Do not over torque screws threaded into plastic parts. Warning Unplug the AC power cord from the wall outlet before removing any printer part. Phaser 3140/3155/3160 Printer Service Manual Downloaded From ManualsPrinter.com Manuals…
-
Page 154: Notations In The Disassembly Text
• The notation “(tap, plastic, 10 mm)” or “(metal, 6 mm)” refer to the type of screw being removed. Note Provides information specific to the replacement of parts or assemblies. Phaser 3140/3155/3160 Printer Service Manual Downloaded From ManualsPrinter.com Manuals…
-
Page 155: Fastener Types
Always use the correct type and size screw and properly align the screw to prevent damaging the tapped holes. Do not use excessive force to remove or install either a screw or a printer part. Phaser 3140/3155/3160 Printer Service Manual Downloaded From ManualsPrinter.com Manuals…
-
Page 156: Maintenance Items And Consumables
Caution Do not touch the OPC drum or expose the Print Cartridge to light for more than 5 minutes. 1. Open the front cover. 2. Pull the Print Cartridge out. s3160-094 Phaser 3140/3155/3160 Printer Service Manual Downloaded From ManualsPrinter.com Manuals…
-
Page 157: Paper Tray
Service Parts Disassembly Paper Tray PL10.0 1. Pull the Tray out of the printer. s3160-014 Phaser 3140/3155/3160 Printer Service Manual Downloaded From ManualsPrinter.com Manuals…
-
Page 158: Transfer Roller
Use a screwdriver to gently push on the hook while using care to not break the hook. s3160-104 Replacement Note When replacing the Transfer Roller, wrap a sheet of paper around it to avoid touching the roller. Phaser 3140/3155/3160 Printer Service Manual Downloaded From ManualsPrinter.com Manuals…
-
Page 159: Pick Up Roller
2. Turn the printer over. 3. Remove 1 screw (silver, 6 mm, plastic, tap). s3160-043 4. Use a flat screwdriver to carefully lift the tab off of the Pick Up Roller. s3160-044 Phaser 3140/3155/3160 Printer Service Manual Downloaded From ManualsPrinter.com Manuals…
-
Page 160
5. Rotate the Pick Up Roller and lift it off the shaft. s3160-045 Replacement Note The following illustration shows how the Pick Up Roller is attached to the Feed Roller Shaft. Feed Roller Clip Feed Roller Shaft Feed Roller s3160-046 8-10 Phaser 3140/3155/3160 Printer Service Manual Downloaded From ManualsPrinter.com Manuals… -
Page 161: Fuser
Allow the Fuser to cool 30 minutes before performing this procedure. 1. Remove the Rear Cover (page 8-26). 2. On the Power Supply, remove CON1. P/JCON1 s3160-038 Note Press the connector lock to remove CON1. s3160-068 Phaser 3140/3155/3160 Printer Service Manual 8-11 Downloaded From ManualsPrinter.com Manuals…
-
Page 162
See the following illustration. 3160: CN8 3155: CN12 3140: CN12 s3160-048 4. Remove 4 screws (10 mm, silver, tap) securing the Fuser. s3160-049 5. Pull the Fuser out of the printer. 8-12 Phaser 3140/3155/3160 Printer Service Manual Downloaded From ManualsPrinter.com Manuals… -
Page 163: Thermistor
1. Remove the Fuser (page 8-11). 2. Remove 1 screw (10 mm, silver, tap) securing the Thermistor. s3160-056 3. Remove the wiring harness from the harness guide and remove the Thermistor. Phaser 3140/3155/3160 Printer Service Manual 8-13 Downloaded From ManualsPrinter.com Manuals…
-
Page 164: Thermostat
2. Remove 3 screws (8 mm, black) that secure the Thermostat. CN49 CN50 s3160-064 3. Lift the Thermostat away from the Fuser Cover. 4. Disconnect the wiring harness connectors CN49 & CN50 from the Thermostat. 5. Remove the Thermostat. 8-14 Phaser 3140/3155/3160 Printer Service Manual Downloaded From ManualsPrinter.com Manuals…
-
Page 165: Fuser Lamp
2. Release the 2 tabs on the right Fuser lamp cap and remove the cap. Caution Take care to not over flex the tabs as they can easily break. s3160-105 Phaser 3140/3155/3160 Printer Service Manual 8-15 Downloaded From ManualsPrinter.com Manuals…
-
Page 166
Service Parts Disassembly 3. Release the 3 tabs on the left Fuser lamp cap and remove the cap. s3160-106 4. Disconnect the lamp wires on both sides of the Fuser. s3160-055 8-16 Phaser 3140/3155/3160 Printer Service Manual Downloaded From ManualsPrinter.com Manuals… -
Page 167: Heat Roller
Turn the printer power Off and allow the Fuser to cool 30 minutes before performing this procedure. 1. Remove the Fuser (page 8-11). 2. Remove the Fuser Lamp (page 8-15). Phaser 3140/3155/3160 Printer Service Manual 8-17 Downloaded From ManualsPrinter.com Manuals…
-
Page 168
Service Parts Disassembly 3. Remove 2 screws (6 mm, silver). s3160-053 4. Remove 2 screws (6 mm, silver). s3160-054 5. Lift the Fuser Cover off the Fuser. 8-18 Phaser 3140/3155/3160 Printer Service Manual Downloaded From ManualsPrinter.com Manuals… -
Page 169
Move to the left and repeat the process with the next claw. Repeat until each claw is pulled forward and secure the cover. s3160-133 Phaser 3140/3155/3160 Printer Service Manual 8-19 Downloaded From ManualsPrinter.com Manuals… -
Page 170: Pressure Roller
Turn the printer power Off and allow the Fuser to cool 30 minutes before performing this procedure. 1. Remove the Fuser (page 8-11). 2. Remove the Heat Roller (page 8-17). 3. Rotate the Right Bushing counter-clockwise and then remove it. s3160-059 8-20 Phaser 3140/3155/3160 Printer Service Manual Downloaded From ManualsPrinter.com Manuals…
-
Page 171
5. Release the e-ring and washer that secures the Jam Link Lever, and then remove the Jam Link Lever. Note You can remove the e-ring/washer from either the left or right lever. s3160-116 Phaser 3140/3155/3160 Printer Service Manual 8-21 Downloaded From ManualsPrinter.com Manuals… -
Page 172
Service Parts Disassembly 6. Slide the Pressure Roller High Bushing up and away from the Fuser Frame, and then remove the Pressure Roller. s3160-060 8-22 Phaser 3140/3155/3160 Printer Service Manual Downloaded From ManualsPrinter.com Manuals… -
Page 173: Covers
Service Parts Disassembly Covers Front Cover PL1.0.11 1. Remove the Tray (page 8-7). 2. Take off the front cover by removing both hooks. s3160-015 Top Cover PL1.0.10 1. Open the Front Cover. Phaser 3140/3155/3160 Printer Service Manual 8-23 Downloaded From ManualsPrinter.com Manuals…
-
Page 174
2. Remove 2 screws (10 mm, silver, tap) on the front of the printer. s3160-157 3. Open the Rear Cover. 4. Remove 2 screws (10 mm, silver, tap) on the rear of the printer. s3160-017 8-24 Phaser 3140/3155/3160 Printer Service Manual Downloaded From ManualsPrinter.com Manuals… -
Page 175
5. Lift the Top Cover off of the bosses at the front and rear of the printer. Bosses s3160-143 6. Lift the Top Cover off of the printer and disconnect CN1. s3160-018 Phaser 3140/3155/3160 Printer Service Manual 8-25 Downloaded From ManualsPrinter.com Manuals… -
Page 176: Rear Cover
Service Parts Disassembly Rear Cover PL3.0.1 1. Remove 4 screws (10 mm, silver, tap) and 1 black screw (8 mm, black, tap) from the rear cover. s3160-019 2. Remove the Rear Cover. 8-26 Phaser 3140/3155/3160 Printer Service Manual Downloaded From ManualsPrinter.com Manuals…
-
Page 177: Left Side Cover
5. Lift the top 2 hooks on the Left Side Cover off of the printer. 6. Lift the Left Side Cover off of the 2 bosses on the rear of the printer and remove the cover. Hooks Bosses s3160-021 Phaser 3140/3155/3160 Printer Service Manual 8-27 Downloaded From ManualsPrinter.com Manuals…
-
Page 178: Right Side Cover
5. Lift the top 2 hooks on the Right Side Cover off of the printer. 6. Lift the Right Side Cover off of the 2 bosses on the rear of the printer and remove the cover. Hooks Bosses s3160-020 8-28 Phaser 3140/3155/3160 Printer Service Manual Downloaded From ManualsPrinter.com Manuals…
-
Page 179: Disassembly Procedures
PL10.0.11 1. Remove the Tray (page 8-7). 2. Remove paper from the Tray. 3. Unhook the latches on the left and right sides of the Holder Pad and remove s3160-138 Phaser 3140/3155/3160 Printer Service Manual 8-29 Downloaded From ManualsPrinter.com Manuals…
-
Page 180: Laser Unit
1. Remove the Top Cover (page 8-23). 2. Remove 3 screws (10 mm, silver, tap). s3160-023 3. Move the harness that lays over the top of the Laser Unit out of the way. 8-30 Phaser 3140/3155/3160 Printer Service Manual Downloaded From ManualsPrinter.com Manuals…
-
Page 181
Service Parts Disassembly 4. Lift the Laser Unit slightly, and disconnect CN1 and CN5. s3160-144 5. Remove the Laser Unit. Phaser 3140/3155/3160 Printer Service Manual 8-31 Downloaded From ManualsPrinter.com Manuals… -
Page 182: Feeder
3. Turn the printer over, and remove 11 screws (10 mm, silver, tap) on the Engine Shield assembly. s3160-037 4. Lift the Engine Shield Assembly slightly and disconnect all cables on the boards to remove the assembly. 5. Remove the Drive Assembly (page 8-35). 8-32 Phaser 3140/3155/3160 Printer Service Manual Downloaded From ManualsPrinter.com Manuals…
-
Page 183
Service Parts Disassembly 6. Remove 3 screws (10 mm, silver, tap) and remove the Feed Bracket. s3160-028 Phaser 3140/3155/3160 Printer Service Manual 8-33 Downloaded From ManualsPrinter.com Manuals… -
Page 184
Service Parts Disassembly 7. Remove the Pick Up Gear. s3160-030 8. Turn the printer upside down with the rear of the printer facing you. 8-34 Phaser 3140/3155/3160 Printer Service Manual Downloaded From ManualsPrinter.com Manuals… -
Page 185: Drive Assembly
When installed on the printer, the numbers on the bracket are upside down. Drive Assembly PL7.0 and 7.1 1. Remove the Left Cover (page 8-27). Phaser 3140/3155/3160 Printer Service Manual 8-35 Downloaded From ManualsPrinter.com Manuals…
-
Page 186
Start all 6 screws in the order listed, and then tighten them in the same order. When installed on the printer, the numbers on the bracket are upside down. 8-36 Phaser 3140/3155/3160 Printer Service Manual Downloaded From ManualsPrinter.com Manuals… -
Page 187: Clutch Assembly
Service Parts Disassembly Clutch Assembly PL6.0.68 1. Remove the Drive Assembly (page 8-35). 2. Remove 3 screws (10 mm, silver, tap) and remove the Feed Bracket. s3160-028 Phaser 3140/3155/3160 Printer Service Manual 8-37 Downloaded From ManualsPrinter.com Manuals…
-
Page 188: Feed Roller
3. Remove the Idler Gear (black), and then pull the Clutch Assembly out. s3160-029 Feed Roller PL6.0.42 1. Remove the front cover (page 8-23). 2. Remove the Drive Assembly (page 8-35). 8-38 Phaser 3140/3155/3160 Printer Service Manual Downloaded From ManualsPrinter.com Manuals…
-
Page 189
Service Parts Disassembly 3. Remove the Feed Shaft. s3160-139 4. Unclip the Feed Roller from the 2 clips. s3160-140 Phaser 3140/3155/3160 Printer Service Manual 8-39 Downloaded From ManualsPrinter.com Manuals… -
Page 190: Feed Actuator
3. Turn the printer over, and remove 11 screws (10 mm, silver, tap) on the Engine Shield assembly. s3160-037 4. Lift the Engine Shield Assembly and disconnect all cables on the boards to remove the assembly. 5. Remove the Drive Assembly (page 8-35). 8-40 Phaser 3140/3155/3160 Printer Service Manual Downloaded From ManualsPrinter.com Manuals…
-
Page 191
Service Parts Disassembly 6. Remove 3 screws (10 mm, silver, tap) and remove the Feed Bracket. s3160-028 Phaser 3140/3155/3160 Printer Service Manual 8-41 Downloaded From ManualsPrinter.com Manuals… -
Page 192
Service Parts Disassembly 7. Remove the Pick Up Gear. s3160-030 8. Turn the printer upside down with the rear of the printer facing you. 8-42 Phaser 3140/3155/3160 Printer Service Manual Downloaded From ManualsPrinter.com Manuals… -
Page 193
10. Gently press the tab and remove the Feed Actuator. Note For reinstallation purposes, observe the position of the spring on the Feed Actuator. s3160-033 Phaser 3140/3155/3160 Printer Service Manual 8-43 Downloaded From ManualsPrinter.com Manuals… -
Page 194: Manual Feed Actuator
4. Remove 11 screws (10 mm, silver, tap) on the Engine Shield assembly. s3160-037 5. Lift the Engine Shield Assembly and disconnect all cables on the boards and remove the assembly. 6. Remove the Drive Assembly (page 8-35). 8-44 Phaser 3140/3155/3160 Printer Service Manual Downloaded From ManualsPrinter.com Manuals…
-
Page 195
7. Remove 3 screws (10 mm, silver, tap) and remove the Feed Bracket. s3160-028 8. Remove the Feed Roller (page 8-38). 9. Turn the printer upside down with the rear of the printer facing you. Phaser 3140/3155/3160 Printer Service Manual 8-45 Downloaded From ManualsPrinter.com Manuals… -
Page 196
10. Lift the clip on the Pick Up Shaft and slide the Pick Up Assembly slightly to the left, and then lift the assembly and slide it to the right to remove it. s3160-031 8-46 Phaser 3140/3155/3160 Printer Service Manual Downloaded From ManualsPrinter.com Manuals… -
Page 197: Paper Tray Empty Actuator
If necessary, wind the spring around the shaft 1 time to increase tension during reinstallation. Paper Tray Empty Actuator PL6.0.56 1. Remove the Print Cartridge (page 8-6). 2. Remove the Tray (page 8-7). 3. Remove the Rear Cover (page 8-26). Phaser 3140/3155/3160 Printer Service Manual 8-47 Downloaded From ManualsPrinter.com Manuals…
-
Page 198
Service Parts Disassembly 4. On the Power Supply Board, disconnect CON1. P/JCON1 s3160-038 s3160-068 8-48 Phaser 3140/3155/3160 Printer Service Manual Downloaded From ManualsPrinter.com Manuals… -
Page 199
Service Parts Disassembly 5. Disconnect CON3. P/JCON3 s3160-127 6. Turn the printer over. 7. Remove 11 screws (10 mm, silver, tap) on the Engine Shield assembly. s3160-037 Phaser 3140/3155/3160 Printer Service Manual 8-49 Downloaded From ManualsPrinter.com Manuals… -
Page 200
8. Gently turn the Engine Shield Assembly over and disconnect all cables on the Controller Board and remove the assembly. 9. Gently press on the tab and lift the Tray Empty Actuator out of the printer. s3160-047 8-50 Phaser 3140/3155/3160 Printer Service Manual Downloaded From ManualsPrinter.com Manuals… -
Page 201: Electrical
2. Remove 2 screws (10 mm, silver, tap), and then remove the Control Panel. s3160-025 Controller Board PL1.0.2 1. Remove the Print Cartridge (page 8-6). 2. Remove the Tray (page 8-7). 3. Remove the Rear Cover (page 8-26). Phaser 3140/3155/3160 Printer Service Manual 8-51 Downloaded From ManualsPrinter.com Manuals…
-
Page 202
Service Parts Disassembly 4. On the Power Supply Board, disconnect CON1. P/JCON1 s3160-038 s3160-068 8-52 Phaser 3140/3155/3160 Printer Service Manual Downloaded From ManualsPrinter.com Manuals… -
Page 203
Service Parts Disassembly 5. Disconnect CON3. P/JCON3 s3160-127 6. Turn the printer over. 7. Remove 11 screws (10 mm, silver, tap) on the Engine Shield assembly. s3160-037 Phaser 3140/3155/3160 Printer Service Manual 8-53 Downloaded From ManualsPrinter.com Manuals… -
Page 204: Power Supply Board
10. Remove the Controller Board. Power Supply Board PL1.0.1 1. Remove the Print Cartridge (page 8-6). 2. Remove the Tray (page 8-7). 3. Remove the Rear Cover (page 8-26). 8-54 Phaser 3140/3155/3160 Printer Service Manual Downloaded From ManualsPrinter.com Manuals…
-
Page 205
Service Parts Disassembly 4. Disconnect CON1 on the Power Supply Board. P/JCON1 s3160-038 s3160-068 Phaser 3140/3155/3160 Printer Service Manual 8-55 Downloaded From ManualsPrinter.com Manuals… -
Page 206
Service Parts Disassembly 5. Disconnect CON3. P/JCON3 s3160-127 6. Turn the printer over. 7. Remove 11 screws (10 mm, silver, tap) on the Engine Shield assembly. s3160-037 8-56 Phaser 3140/3155/3160 Printer Service Manual Downloaded From ManualsPrinter.com Manuals… -
Page 207
Remove the ground wire screw (silver, 6mm). Note that the ground wire screw is slightly larger in diameter than the other screws. P/JCON2 s3160-040 12. Remove the Power Supply Board. Phaser 3140/3155/3160 Printer Service Manual 8-57 Downloaded From ManualsPrinter.com Manuals… -
Page 208: Fan
1. Remove the Top Cover (page 8-23). 2. Remove the Left Cover (page 8-26). 3. Remove 1 screw (10 mm, silver, tap), and then unplug fan connector CON3. P/JCON3 s3160-036 4. Remove the Fan. 8-58 Phaser 3140/3155/3160 Printer Service Manual Downloaded From ManualsPrinter.com Manuals…
-
Page 209: Solenoids And Sensors
Service Parts Disassembly Solenoids and Sensors Manual Feed Solenoid PL6.0.19 1. Remove the Drive Assembly (page 8-35). 2. Disconnect the black and gray wiring harness connector CN22. CN22 s3160-130 Phaser 3140/3155/3160 Printer Service Manual 8-59 Downloaded From ManualsPrinter.com Manuals…
-
Page 210
3. Remove 3 screws (10 mm, silver, tap) and remove the Feed Bracket. s3160-028 4. Remove the Pick Up Gear Assembly. Remove 1 screw (10 mm, silver, tap) that secures the Manual Feed Solenoid. s3160-062 5. Remove the Manual Feed Solenoid. 8-60 Phaser 3140/3155/3160 Printer Service Manual Downloaded From ManualsPrinter.com Manuals… -
Page 211: Pick Up Solenoid
2. Remove the Paper Tray (page 8-7). 3. Remove the Rear Cover (page 8-26). 4. Turn the printer over. 5. Remove 11 screws (10 mm, silver, tap) on the Engine Shield assembly. s3160-037 Phaser 3140/3155/3160 Printer Service Manual 8-61 Downloaded From ManualsPrinter.com Manuals…
-
Page 212
6. Lift the Engine Shield Assembly and disconnect CN7 (CN6 on the 3160) on the Controller Board. s3160-131 7. Remove the Drive Assembly (page 8-35). 8. Remove 1 screw (10 mm, silver, tap) that secures the Pick Up Solenoid. s3160-061 8-62 Phaser 3140/3155/3160 Printer Service Manual Downloaded From ManualsPrinter.com Manuals… -
Page 213: Out Bin Full Sensor
Out Bin Full Sensor PL6.0.73 1. Remove the Top Cover (page 8-23). 2. Disconnect the wiring harness CN21, and then press the tabs and remove the sensor. CN21 s3160-063 Phaser 3140/3155/3160 Printer Service Manual 8-63 Downloaded From ManualsPrinter.com Manuals…
-
Page 214
Service Parts Disassembly 8-64 Phaser 3140/3155/3160 Printer Service Manual Downloaded From ManualsPrinter.com Manuals… -
Page 215: Parts List
Parts List In this chapter… • Serial Number Format • Using the Parts List • Parts Lists • Xerox Supplies and Accessories Chapter Downloaded From ManualsPrinter.com Manuals…
-
Page 216: Serial Number Format
Parts List Serial Number Format Changes to Xerox products are made to accommodate improved components as they become available. It is important when ordering parts to include the following information: • Component’s part number • Product type or model number •…
-
Page 217: Using The Parts List
P2. Note Only parts showing part numbers are available for ordering by support. Parts not showing part numbers are available on the parent assembly. Abbreviations Abbreviation Meaning C-ring E-ring K-clip Screw Phaser 3140/3155/3160 Printer Service Manual Downloaded From ManualsPrinter.com Manuals…
-
Page 218: Parts Lists
Parts List Parts Lists Parts List 1.0 Main s3160-001 Phaser 3140/3155/3160 Printer Service Manual Downloaded From ManualsPrinter.com Manuals…
-
Page 219
Top Cover 002N02909 Front Cover 3140 002N02910 3155 002N02911 3160B 002N02912 3160N 002N02906 Print Cartridge — 1.5K 108R00908 Print Cartridge — 2.5K 108R00909 Power Cord, 110V 105N02072 Power Cord, 220V 117N01769 Phaser 3140/3155/3160 Printer Service Manual Downloaded From ManualsPrinter.com Manuals… -
Page 220: Parts List 2.0 Top Cover
Parts List Parts List 2.0 Top Cover s3160-002 Phaser 3140/3155/3160 Printer Service Manual Downloaded From ManualsPrinter.com Manuals…
-
Page 221
PMO-Sub_M_Stacker — PMO-Bushing_F/Down — Out Bin Full Actuator — LED Lens — Key-Start — Key-Power — Key-Power Holder — Control Panel 140N63412 Screw-Taptype — Sponge-Cover_Top (3155 and 3160 models only) — Phaser 3140/3155/3160 Printer Service Manual Downloaded From ManualsPrinter.com Manuals… -
Page 222: Parts List 3.0 Covers
Parts List Parts List 3.0 Covers s3160-003 Phaser 3140/3155/3160 Printer Service Manual Downloaded From ManualsPrinter.com Manuals…
-
Page 223
Name/Description Part Number Rear Cover Assembly 3140/3155/3160B 002N02913 3160N 002N02905 Front Cover Assembly 3140 002N02910 3155 002N02911 3160B 002N02912 3160N 002N02906 Left Cover Assembly 002N02907 4. — Right Cover Assembly 002N02908 Phaser 3140/3155/3160 Printer Service Manual Downloaded From ManualsPrinter.com Manuals… -
Page 224: Parts List 4.0 Front Cover
Parts List Parts List 4.0 Front Cover s3160-007 9-10 Phaser 3140/3155/3160 Printer Service Manual Downloaded From ManualsPrinter.com Manuals…
-
Page 225
Parts List 4.0 Cover Assemblies ID No. Name/Description Part Number Front Cover Assembly 3140 002N02910 3155 002N02911 3160B 002N02912 3160N 002N02906 Adjust-Manual_Right — 3. — Adjust-Manual_Left — Adjust Rack-M-Manual — Screw-Taptype — Gear-Rack_Pinion — Phaser 3140/3155/3160 Printer Service Manual 9-11 Downloaded From ManualsPrinter.com Manuals… -
Page 226: Parts List 5.0 Rear Cover
Parts List Parts List 5.0 Rear Cover s3160-008 9-12 Phaser 3140/3155/3160 Printer Service Manual Downloaded From ManualsPrinter.com Manuals…
-
Page 227
Parts List Parts List 5.0 Cover Assemblies ID No. Name/Description Part Number Rear Cover Assembly 3140/3155/3160B 002N02913 3160N 002N02905 Upper Rear Cover — Lower Rear Cover — Phaser 3140/3155/3160 Printer Service Manual 9-13 Downloaded From ManualsPrinter.com Manuals… -
Page 228: Parts List 6.0 Main Frame
Parts List Parts List 6.0 Main Frame 80-3 80-2 80-1 80-4 59-3 68-2 68-4 68-1 68-5 68-3 59-1 59-2 38 37 39 36-2 36-1 57-2 57-1 58-2 58-1 s3160-009 9-14 Phaser 3140/3155/3160 Printer Service Manual Downloaded From ManualsPrinter.com Manuals…
-
Page 229
Parts List 77-1 77-2 Transfer Roller s3160-010 Phaser 3140/3155/3160 Printer Service Manual 9-15 Downloaded From ManualsPrinter.com Manuals… -
Page 230
Spring ETC-Guide Deve — Spring ETC-TR — Frame-Left Stopper Pick Up — 36-1. Spring-TS — 36.2. Cam-M-Pick Up — Gear-Feed 2 — Gear-Idle 23 — Shaft-Feed — Roller-Registration — Shaft-Idle Feed — 9-16 Phaser 3140/3155/3160 Printer Service Manual Downloaded From ManualsPrinter.com Manuals… -
Page 231
— Clutch Assembly 005N01031 68-1. Spring-TS — 68-2. Gear-Feed 1 — 68-3. Shaft-Feed — 68-4. PMO-Collar Spring — 68-5. PMO-Hub Clutch — Photo-Interrupter 130N01574 IPR-P-Terminal CON — Bracket-Bush_TR L — Phaser 3140/3155/3160 Printer Service Manual 9-17 Downloaded From ManualsPrinter.com Manuals… -
Page 232
Frame-Roller Decurl — 80-1. Holder-M-Exit F/Down — 80-2. Roller-M-Exit FR — 80-3. Roller-M-Exit Main — 80-4 Spring-CS — Harness-Bin full — Harness-Laser — Harness-Step Motor Clutch — Harness-CRUM — Harness-OPE — 9-18 Phaser 3140/3155/3160 Printer Service Manual Downloaded From ManualsPrinter.com Manuals… -
Page 233
Parts List Phaser 3140/3155/3160 Printer Service Manual 9-19 Downloaded From ManualsPrinter.com Manuals… -
Page 234: Parts List 7.0 Drive Assembly (Model 3140)
Parts List Parts List 7.0 Drive Assembly (Model 3140) s3160-011 9-20 Phaser 3140/3155/3160 Printer Service Manual Downloaded From ManualsPrinter.com Manuals…
-
Page 235
Gear RDCN 90/31 — Gear RDCN 103/41 — Gear DRV Fuser Out — Gear Hub Clutch — Gear DRV Fuser In — Screw-Taptype — Plain Washer — Motor BLDC — Phaser 3140/3155/3160 Printer Service Manual 9-21 Downloaded From ManualsPrinter.com Manuals… -
Page 236: Parts List 7.1 Drive Assembly (Models 3155/3160)
Parts List Parts List 7.1 Drive Assembly (Models 3155/3160) s3160-012 9-22 Phaser 3140/3155/3160 Printer Service Manual Downloaded From ManualsPrinter.com Manuals…
-
Page 237
— Gear Hub Clutch — Gear DRV Fuser In — Gear Fuser DR OUT 37 — Gear Hub Clutch — Gear DRV Fuser In — Screw-Taptype — Plain Washer — Phaser 3140/3155/3160 Printer Service Manual 9-23 Downloaded From ManualsPrinter.com Manuals… -
Page 238: Parts List 8.0 Pick Up Roller Assembly
Parts List Parts List 8.0 Pick Up Roller Assembly s3160-004 9-24 Phaser 3140/3155/3160 Printer Service Manual Downloaded From ManualsPrinter.com Manuals…
-
Page 239
Frame Base- Pick Up Rubber — 3-1. Pick Up Rubber Pick Up Rubber Housing 3-3. Pick Up Housing Pick up Holder — Screw-Taptype — Shaft-P-Pick Up — Bush-M-Pick Up L — Phaser 3140/3155/3160 Printer Service Manual 9-25 Downloaded From ManualsPrinter.com Manuals… -
Page 240: Parts List 9.0 Fuser
Parts List Parts List 9.0 Fuser 10 7 45 44 43 s3160-005 9-26 Phaser 3140/3155/3160 Printer Service Manual Downloaded From ManualsPrinter.com Manuals…
-
Page 241
— Bush-M-HR L R2 — Fuser Frame — Input Guide — Fuser Cover — Fuser Dummy Cover — Roller-M-Exit F/Up — Pressure Roller 022N01611 Gear Fuser — Heat Roller 022N02310 Phaser 3140/3155/3160 Printer Service Manual 9-27 Downloaded From ManualsPrinter.com Manuals… -
Page 242
Exit Actuator — Lever Link Jam-L — Lever Link Jam-R — CAP Lamp-L — CAP Lamp-R — Caution Label — PMO-Gear Exit Drv16 — Gear-RDCN Exit — Gear-Idle 23 — 9-28 Phaser 3140/3155/3160 Printer Service Manual Downloaded From ManualsPrinter.com Manuals… -
Page 243
Parts List Phaser 3140/3155/3160 Printer Service Manual 9-29 Downloaded From ManualsPrinter.com Manuals… -
Page 244: Parts List 10.0 Paper Tray
Parts List Parts List 10.0 Paper Tray 11-1 11-2 11-3 s3160-006 9-30 Phaser 3140/3155/3160 Printer Service Manual Downloaded From ManualsPrinter.com Manuals…
-
Page 245
Spring ETC-Exit Roll FD — Roller-M-Idle Feed — Spring-ES — Tray Cover — Screw-Taptype — Gear-Pinion — Screw-Taptype — PMO-Plate Locker — Spring ETC-Locker, Plate — PMO-Roller Upper DP — Phaser 3140/3155/3160 Printer Service Manual 9-31 Downloaded From ManualsPrinter.com Manuals… -
Page 246: Xerox Supplies And Accessories
126N00332 Fuser — 220V (50K) 126N00333 PL1.0.12 Print Cartridge — 2.5K 108R00909 Print Cartridge — 1.5K 108R00908 Power Cords Description Part Number Power Cord, 110V 105N02072 Power Cord, 220V 117N01769 9-32 Phaser 3140/3155/3160 Printer Service Manual Downloaded From ManualsPrinter.com Manuals…
-
Page 247: Wiring
Wiring • Plug/Jack Locators • Component Locator Diagrams • Wiring Diagrams • Phaser 3140 Wiring • Phaser 3155 Wiring • Phaser 3160 Wiring Chapter Downloaded From ManualsPrinter.com Manuals…
-
Page 248: Plug/Jack Locators
CN11 A-138 USB Port CN12 D-140 Fuser Thermistor 3160B and 3160N Controller Board C-137 B-137 A-138 USB Port A-139 Ethernet Port (3610N only) J-139 Laser Unit J-140 Pick Up Solenoid 10-2 Phaser 3140/3155/3160 Printer Service Manual Downloaded From ManualsPrinter.com Manuals…
-
Page 249
I-140 Print Cartridge CRUM CN12 F-140 Manual Feed Solenoid and Motor CN15 E-140 Out Bin Full Sensor Power Supply Board CON1 C-135 Fuser CON2 H-139 Controller Board Interface CON3 F-134 Phaser 3140/3155/3160 Printer Service Manual 10-3 Downloaded From ManualsPrinter.com Manuals… -
Page 250: Map 1 — Controller Board (3140)
Wiring Map 1 — Controller Board (3140) CN9 CN7 (USB) CN12 CN11 s3160-155 10-4 Phaser 3140/3155/3160 Printer Service Manual Downloaded From ManualsPrinter.com Manuals…
-
Page 251: Map 2 — Controller Board (3155)
Wiring Map 2 — Controller Board (3155) (USB) CN15 CN12 CN10 s3160-154 Phaser 3140/3155/3160 Printer Service Manual 10-5 Downloaded From ManualsPrinter.com Manuals…
-
Page 252: Map 3 — Controller Board (3160B/3160N)
Wiring Map 3 — Controller Board (3160B/3160N) (USB) CN15 CN12 CN10 CN4 (ENET) s3160-111 10-6 Phaser 3140/3155/3160 Printer Service Manual Downloaded From ManualsPrinter.com Manuals…
-
Page 253: Map 4 — 110V And 220V Power Supply Boards
Wiring Map 4 — 110V and 220V Power Supply Boards 110V P/JCON3 P/JCON1 P/JCON2 220V P/JCON3 P/JCON1 P/JCON2 s3160-112 Phaser 3140/3155/3160 Printer Service Manual 10-7 Downloaded From ManualsPrinter.com Manuals…
-
Page 254: Component Locator Diagrams
Paper Empty Sensor D-138 Manual Feed Sensor E-139 Feed Sensor D-139 Exit Sensor E-137 Front Cover Interlock Switch E-139 Pick Up Solenoid B-138 Manual Feed Solenoid C-138 Motor D-136 I-137 10-8 Phaser 3140/3155/3160 Printer Service Manual Downloaded From ManualsPrinter.com Manuals…
-
Page 255: Map 5 — Sensors
Wiring Map 5 — Sensors Exit Sensor Outbin Full Sensor Front Door Interlock Switch Paper Empty Sensor Manual Feed Sensor Feed Sensor s3160-113 Phaser 3140/3155/3160 Printer Service Manual 10-9 Downloaded From ManualsPrinter.com Manuals…
-
Page 256: Map 6 — Motor, Solenoids, And Fan
Wiring Map 6 — Motor, Solenoids, and Fan Motor Pick Up Solenoid Manual Feed Solenoid s3160-114 10-10 Phaser 3140/3155/3160 Printer Service Manual Downloaded From ManualsPrinter.com Manuals…
-
Page 257: Wiring Diagrams
Denotes the parts. PL X.Y.Z implies the item “Z” of plate (PL) “X.Y” Fuser in Parts List. PL X.Y.Z Subassembly 1 Denotes functional parts attached with functional parts name. Heater Subassembly 2 Phaser 3140/3155/3160 Printer Service Manual 10-11 Downloaded From ManualsPrinter.com Manuals…
-
Page 258
The given voltage is for signal in high status. The arrow indicates the direction of signal. Function Logic 2 Denotes a connection between wires. Connection of Wires Denotes a Clutch or Solenoid. Solenoid/Clutch Denotes a Motor. Motor 10-12 Phaser 3140/3155/3160 Printer Service Manual Downloaded From ManualsPrinter.com Manuals… -
Page 259
I/L +24 VDC Denotes DC voltage when the Interlock Switch in MCU Board turns On. +5 VDC Denotes DC voltage. +3.3 VDC Denotes signal ground. Denotes analog ground. Denotes return. Phaser 3140/3155/3160 Printer Service Manual 10-13 Downloaded From ManualsPrinter.com Manuals… -
Page 260: Phaser 3140 Wiring
Power Supply Board CON1 CON2 Outbin Full Sensor Empty Sensor Pickup Solenoid Manual Feed Sensor CN22 Manual Feed Solenoid CN11 Feed Motor Sensor Exit Sensor Front Cover Interlock INLET1 s3160-145 10-14 Phaser 3140/3155/3160 Printer Service Manual Downloaded From ManualsPrinter.com Manuals…
-
Page 261: 3140 Controller Board Wiring
Outbin Full Sensor nSENS_OUTBIN_FULL Interlock +24VDC 24VDC Pickup Solenoid PICKUP_CLUTCH CN11 Motor Interlock +24VDC CN22 24VS Manual Feed REGI_CLUTCH Solenoid Control Panel nKEY_PRINT nKEY_POWER_SAVE LED_POWER nLED_READY nLED_ERROR nLED_TONER nKEY_CANCEL s3160-147 Phaser 3140/3155/3160 Printer Service Manual 10-15 Downloaded From ManualsPrinter.com Manuals…
-
Page 262: 3140 Laser Unit Wiring
Controller Board Interlock +24VDC Laser nPMOTOR nLREADY LSU_CLK nLD_ENABLE DAC_OUT nHSYNC nLSU_SH DO1- DO1+ +5VDC 5V_LSU CN12 CON1 Power Supply FUSER_THERM1 LIVE Board Fuser THERMISTOR1 NEUTRAL INLET1 LIVE NEUTRAL s3160-148 10-16 Phaser 3140/3155/3160 Printer Service Manual Downloaded From ManualsPrinter.com Manuals…
-
Page 263: 3140 Power Supply Wiring
Sensor +24VS +24VS Exit Sensor Front Cover 5V_SMPS Interlock 5V_SMPS nP_EXIT THV_READ nTHV_EN THV_PWM MHV_PWM PWM_DEV_DC nRELAY_AC_OFF FAN_MAIN Supply FUSER_ON STANDBY Print Cartridge +3.3VDC CRUM SCL1_CHORUS3 Drum SDA1_CHORUS3 3.3V s3160-149 Phaser 3140/3155/3160 Printer Service Manual 10-17 Downloaded From ManualsPrinter.com Manuals…
-
Page 264: Phaser 3155 Wiring
Power Supply CN11 Board CON1 CON2 Outbin Full Sensor Empty Sensor Pickup Solenoid Manual Feed CN22 Manual Feed Solenoid Sensor Feed Motor Sensor Exit Sensor Front Cover Interlock CON3 INLET1 s3160-146 10-18 Phaser 3140/3155/3160 Printer Service Manual Downloaded From ManualsPrinter.com Manuals…
-
Page 265: 3155 Controller Board Wiring
33 PULL-DOWN (DIR) Motor Interlock BLDC_CLK +24VDC BLDC_MOTOR_READY nBLDC_MOTOR_EN 33 PULL-DOWN (BRAKE) +24VS +24VS CN22 24VS Manual Feed REGI_CLUTCH Solenoid Control Panel nKEY_PRINT nKEY_POWER_SAVE LED_POWER nLED_READY nLED_ERROR nLED_TONER nKEY_CANCEL s3160-150 Phaser 3140/3155/3160 Printer Service Manual 10-19 Downloaded From ManualsPrinter.com Manuals…
-
Page 266: 3155 Laser Unit Wiring
+24VDC Laser nPMOTOR nLREADY LSU_CLK nLD_ENABLE DAC_OUT nHSYNC nLSU_SH DO1- DO1+ +5VDC 5V_LSU CN12 CON1 Power Supply FUSER_THERM1 LIVE Board Fuser THERMISTOR1 NEUTRAL INLET1 LIVE NEUTRAL CON3 FAN_POWER N.C. s3160-151 10-20 Phaser 3140/3155/3160 Printer Service Manual Downloaded From ManualsPrinter.com Manuals…
-
Page 267: 3155 Power Supply Wiring
Sensor +24VS +24VS Exit Sensor Front Cover 5V_SMPS Interlock 5V_SMPS nP_EXIT THV_READ nTHV_EN THV_PWM MHV_PWM PWM_DEV_DC nRELAY_AC_OFF FAN_MAIN Supply FUSER_ON STANDBY Print Cartridge +3.3VDC CRUM SCL1_CHORUS3 Drum SDA1_CHORUS3 3.3V s3160-152 Phaser 3140/3155/3160 Printer Service Manual 10-21 Downloaded From ManualsPrinter.com Manuals…
-
Page 268: Phaser 3160 Wiring
CON1 CON2 ENET Empty Sensor CN15 Outbin Full Sensor Manual Feed Pickup Solenoid Sensor Feed CN22 Manual Feed Solenoid Sensor CN12 Motor Exit Sensor Front Cover Interlock CON3 INLET1 s3160-107 10-22 Phaser 3140/3155/3160 Printer Service Manual Downloaded From ManualsPrinter.com Manuals…
-
Page 269: 3160 Controller Board Wiring
33 PULL-DOWN (DIR) Motor Interlock BLDC_CLK +24VDC BLDC_MOTOR_READY nBLDC_MOTOR_EN 33 PULL-DOWN (BRAKE) +24VS +24VS CN22 +24VS Manual Feed REGI_CLUTCH Solenoid Control Panel N.C. nKEY_POWER_SAVE LED_POWER nLED_READY nLED_ERROR nLED_TONER nKEY_CANCEL s3160-108 Phaser 3140/3155/3160 Printer Service Manual 10-23 Downloaded From ManualsPrinter.com Manuals…
-
Page 270: 3160 Laser Unit Wiring
+24VDC Laser +24VS nLSU_MOT_EN nREADY_LSU CLK_LSU_MOT nLDON_LSU LD_POWER1 HSYNC_1 nSH_LSU_1 VDO_1_N VDO_2_P +5VDC 5V_LSU CON1 Power Supply FUSER_THERM1 LIVE Board Fuser THERMISTOR1 NEUTRAL INLET1 LIVE NEUTRAL CON3 FAN_POWER N.C. s3160-109 10-24 Phaser 3140/3155/3160 Printer Service Manual Downloaded From ManualsPrinter.com Manuals…
-
Page 271: 3160 Power Supply Wiring
+24VS +24VS Exit Sensor Front Cover 5V_SMPS Interlock 5V_SMPS nSENS_P_EXIT THV_READ nTHV_EN PWM_THV PWM_MHV PWM_DEV_DC nRELAY_AC_OFF FAN_MAIN Supply FUSER_ON STANDBY Print Cartridge +3.3VDC CN10 CRUM SCL1_CHORUS3 Drum SDA1_CHORUS3 3.3V s3160-110 Phaser 3140/3155/3160 Printer Service Manual 10-25 Downloaded From ManualsPrinter.com Manuals…
-
Page 272
Wiring 10-26 Phaser 3140/3155/3160 Printer Service Manual Downloaded From ManualsPrinter.com Manuals… -
Page 273
Reference Contents… • Acronyms and Abbreviations Appendix Downloaded From ManualsPrinter.com Manuals… -
Page 274: Acronyms And Abbreviations
Direct Current is type of power for printer components. Machine converts AC power from power source to DC power. Diagnostic Control Unit DDR2 Double Data Rate Dual In-Line Memory Module DIMM DEVE Developer DHCP Dynamic Host Configuration Protocol Phaser 3140/3155/3160 Printer Service Manual Downloaded From ManualsPrinter.com Manuals…
-
Page 275
Interface Input and Output Intelligent Drive electronics or Imbedded Drive Electronics IEEE Institute of Electrical and Electronics Engineers. Inc. Image Processor Isopropyl Alcohol Kilo Byte Local Area Network Liquid Crystal Display Phaser 3140/3155/3160 Printer Service Manual Downloaded From ManualsPrinter.com Manuals… -
Page 276
Read-Only Memory Raster Output Scanner — Laser Unit SMPS Switching Mode Power Supply Sensor Solenoid Start of Scan SPOOL Simultaneous Peripheral Operations Online Switch SYNC Synchronous or Synchronization Transfer High Voltage Toner Phaser 3140/3155/3160 Printer Service Manual Downloaded From ManualsPrinter.com Manuals… -
Page 277
Reference Acronym Description User Interface Universal Serial Bus Phaser 3140/3155/3160 Printer Service Manual Downloaded From ManualsPrinter.com Manuals… -
Page 278
Reference Phaser 3140/3155/3160 Printer Service Manual Downloaded From ManualsPrinter.com Manuals… -
Page 279
Controller Board 2-11 precautions 3140 wiring 10-15 Feed Actuator 3155 wiring 10-19 part number 9-17 3160 wiring 10-23 removal 8-40 connector definitions 2-11 Spring designators 10-2 part number 9-17 Phaser 3140/3155/3160 Printer Service Manual I – 1 Downloaded From ManualsPrinter.com Manuals… -
Page 280
5-15 image defects Out Bin Full Sensor 2-17 Laser Unit part number 9-17 3140 wiring removal 10-16 8-63 3155 wiring Output Tray 10-20 3160 wiring capacity 10-24 I – 2 Phaser 3140/3155/3160 Printer Service Manual Downloaded From ManualsPrinter.com Manuals… -
Page 281
Feed 2-16 component life Front Cover interlock 2-17 defect definitions Out Bin Full 2-17 dimensions 1-15 Paper Empty 2-16 electrical requirements 1-13 Toner Cartridge 2-16 image area 5-32 Phaser 3140/3155/3160 Printer Service Manual I – 3 Downloaded From ManualsPrinter.com Manuals… -
Page 282
2-16 Top Cover part number warm-up time 1-12 removal 8-23 wiring Transfer Roller Phaser 3140 10-14 image defects Phaser 3155 10-18 life count Phaser 3160 10-22 location I – 4 Phaser 3140/3155/3160 Printer Service Manual Downloaded From ManualsPrinter.com Manuals… -
Page 283
Downloaded From ManualsPrinter.com Manuals… -
Page 284
Copyright © 2009, Xerox Corporation. All rights reserved. Unpublished rights reserved under the copyright laws of the United States. Part#: 701P49961 Downloaded From ManualsPrinter.com Manuals…
Принтер Xerox Phaser 3140 – периферийное компьютерное оборудование, доказавшее на практике многим пользователям собственную полезность. Однако немного портят красочный быт этого печатного аппарата отдельные дефекты, с которыми иногда приходится сталкиваться. Один из таких дефектов – остановка печати документа на половине трека и повышенный «щёлкающий» шум тракта протяжки бумаги. Рассмотрим способ устранения такого дефекта, а также способы устранения некоторых других рабочих ошибок принтера Xerox Phaser 3140.
СОДЕРЖИМОЕ ПУБЛИКАЦИИ :
- 1 Диагностика неисправности остановки печати Xerox Phaser 3140
- 1.1 Вариант ремонта принтера своими руками
- 1.2 Прокладки электромагнитных соленоидов тракта протяжки бумаги
- 1.3 Ремонт электромагнитных соленоидов Xerox Phaser 3140 своими руками
- 2 Другие часто проявляющиеся дефекты Xerox Phaser 3140
- 2.1 Как сбросить счётчик напечатанных копий?
- 3 Неисправности принтеров Xerox Phaser 6000
- 3.1 Список часто проявляющихся дефектов Xerox Phaser 6000
- 3.2 Решение проблемы восклицательного знака
- 4 Как ремонтируются модели принтеров Phaser 3140 и 3160
Диагностика неисправности остановки печати Xerox Phaser 3140
Встроенная автоматика упоминаемого принтера реагирует на неисправность, связанную с остановкой печати документа, довольно интересно. Индикатор состояния на верхней панели загорается оранжевым цветом (сигнализирует замятие бумаги) и продолжает гореть до момента, пока пользователь не выключит и вновь не включит печатающее устройство Xerox Phaser 3140.
После повторного включения аппарата, сигнал тревоги сбрасывается, печать документа продолжается, но вслед за первым листом бумаги в тоннеле выхода появляется второй (чистый) лист. При этом тракт протяжки бумаги находится в нормальном рабочем состоянии (то есть замятия бумаги, как сигнализирует аппарат, по факту нет). Как же быть пользователю в такой ситуации?
Доступны несколько вариантов решения проблемы:
- запускать печать документа, каждый раз помещая в лоток только по одному листу бумаги;
- отправить принтер на ремонт в мастерскую;
- попытаться отремонтировать аппарат своими руками;
- купить новый принтер.
Очевидно — первый вариант эксплуатации неисправного принтера крайне неудобен для пользователя. Второй вариант – неоправданно затратный с финансовой точки зрения. Третий вариант исключает и первый и второй, но требует некоторых знаний в области электромеханики.
Для варианта ремонта своими руками нужно знать, как разбирать и собирать принтер Xerox Phaser 3140 (в этом деле всегда поможет сервисный мануал). Наконец, вариант купить новый принтер – это опять же лишняя финансовая нагрузка на владельца неисправной машины.
Вариант ремонта принтера своими руками
Цель разборки аппарата, в данном случае проявления дефекта, – это получение доступа к рабочим деталям принтера, именуемым «электромагнитные соленоиды». Конструкция принтера Xerox Phaser 3140, в общей сложности, содержит два электромагнитных соленоида.
Одним соленоидом контролируется операция подачи бумаги, тогда как другим соленоидом контролируется операция подхвата бумаги.
ПРИНТЕРЫ

Так вот, именно по причине неправильной работы электромагнитных соленоидов конструкции принтера проявляется неисправность, связанная с дефектом протяжки бумаги. В свою очередь, нарушению правильной работы электромагнитных соленоидов способствуют смягчающие прокладки, приклеенные производителем на поверхностях рычажных пластин (своего рода амортизаторы).
Прокладки электромагнитных соленоидов тракта протяжки бумаги
При эксплуатации аппарата, со временем материал амортизирующих прокладок теряет свойства эластичности, но приобретает свойства липучести. Когда же в моменты работы принтера электромагнитные соленоиды срабатывают, рычажные пластины притягиваются магнитным сердечником катушек, обеспечивая контакт с той самой амортизирующей прокладкой.
СОЛЕНОИДЫ

Момент съёма напряжения с катушек соленоидов сопровождается возвратом пластин на место пружинами, но липучие прокладки не сразу «отпускает» эти детали. В результате нарушается алгоритм работы соленоидов, и как следствие, работа принтера Xerox Phaser 3140 в целом. Проявляется тот самый дефект «недопечати», рассмотрению которого посвящена тема.
Ремонт электромагнитных соленоидов Xerox Phaser 3140 своими руками
Ремонт своими руками электромагнитных соленоидов управления протяжкой бумаги сопровождается относительно простейшими действиями:
- снять (демонтировать) электромагнитные соленоиды,
- убрать (счистить) с поверхности пластин соленоидов амортизирующие прокладки,
- тщательно протереть очищенные места этиловым спиртом.
После выполненных операций, электромагнитные соленоиды устанавливаются на свои рабочие места тракта протяжки бумаги. Принтер собирается в обратной последовательности.
Останется только протестировать нормальную работу принтера Xerox Phaser 3140 и продолжить использовать по назначению. После ремонта электромагнитных соленоидов аппарат прослужит пользователю ещё не один год.
Другие часто проявляющиеся дефекты Xerox Phaser 3140
Достаточно часто пользователям рассматриваемого печатного аппарата приходится также сталкиваться с проблемами работы картриджа и системы контроля печати копий. В частности, проблемы с картриджем могут проявляться после попытки вторичной заправки тонером.
Плюс к этому, если число напечатанных принтером копий превышает установленную производителем границу (15 – 18 тыс. листов), принтер также отказывается работать. Что можно сделать в этих случаях?
Как сбросить счётчик напечатанных копий?
Согласно практическим экспериментам «народных умельцев», сброс счётчика напечатанных копий руками пользователя выполнить вполне допустимо. Обычно такая проблема принтера отмечается невозможностью работы аппарата на печать, а также постоянным свечением красного индикатора на панели управления.
ДЕТАЛИ

Так вот, специалисты-народники предлагают выполнить следующую последовательность операций для решения проблемы счётчика (сброс):
- Отключить аппарат от сети стандартной кнопкой управления «вкл/выкл».
- Открыть крышку дока картриджа и вынуть картридж.
- Развернуть изъятый картридж электрическими контактами вперёд.
- Отрезать кусок прозрачного скотча, заклеить первый контакт справа.
- Установить картридж обратно в док.
- Одновременно нажать кнопки «печать» и «сеть» на панели.
- Удерживать кнопки до момента начала мигания индикаторов красного и зелёного свечения.
КАРТРИДЖИ

После исполнения последнего пункта списка выше, принтер невозможно отключить от сети стандартной кнопкой питания. Поэтому следует попросту вынуть сетевой шнур из розетки.
Обесточив принтер, нужно вновь извлечь картридж, снять ранее наклеенную ленту, очистить контактную площадку спиртовым раствором. Затем картридж устанавливается на рабочее место – в док, после чего аппарат можно включить. В большинстве случаев проблемы, связанные с картриджем, после таких манипуляций устраняются.
Неисправности принтеров Xerox Phaser 6000
Дополнительно к теме ремонта принтеров модели Xerox Phaser 3140 не лишней для пользователей будет практика ремонта родственной модели — Phaser 6000.
PHASER

Этот аппарат печати видится более совершенной конструкцией по сравнению с предыдущей моделью. Однако, несмотря на всё имеющееся совершенство, полностью избежать ошибок печати пользователям таких аппаратов также не удаётся.
Список часто проявляющихся дефектов Xerox Phaser 6000
Рассмотрим традиционный список тех неисправностей, с которыми пользователям приходится сталкиваться наиболее часто.
- Принтер не печатает и при этом выдаёт на индикаторной панели знак «!». Не исключена выдача предупреждения в паре с какими-нибудь другими контрольными значками. Например, в паре с красной точкой. Здесь всё относительно просто.Такая ошибка, скорее всего, показывает отсутствие тонера красного цвета. Особенность принтеров Xerox Phaser 6000 заключается в том, что при отсутствии любого тонера, а таких в наборе 4 штуки, печать попросту невозможна.
- Тот же самый знак восклицания в паре с ярлычком печатной страницы, как правило, свидетельствует о замятии бумаги трактом протяжки. Между тем практически всегда пользователю не удаётся обнаружить визуально застрявшую бумагу в секции подачи или на выходе.Здесь никак не избежать разборки аппарата. Придётся снимать панель задней стенки и узкую панель верхней крышки. Так открывается доступ к механическим валикам проката и термоплёнке. Именно в этом месте чаще всего застревает небольшой кусочек бумаги, оторванный механизмом в процессе протяжки через тракт печати.
- На индикаторной панели высвечивается восклицательный знак без каких-либо дополнительных контрольных ярлычков. Это самая простая неисправность принтера Xerox Phaser 6000, но вместе с тем, самая «хитрая».Неискушённый пользователь рискует неделями «танцевать с бубном» вокруг аппарата, но сделать ничего не сможет. Неудивительно, что многие отправляют технику в ремонт и тут же лишаются нескольких тысяч рублей за профессиональный сервис.
Решение проблемы восклицательного знака
Однако проблема восклицательного знака решается, в данном случае, легче, чем представляется неискушённым мастерам-любителям. Делается это при помощи двух обычных дамских пластиковых палочек с тампонами ваты на концах. Пользователю нужно открыть заднюю крышку принтера Xerox Phaser 6000, внимательно осмотреть стенку механизма протяжки:
ЧИСТКА

Цель поиска – два небольших прямоугольных отверстия (окна барабана). Обнаружив искомое, аккуратно заглубить ватную палочку внутрь каждого окна и лёгкими круговыми движениями вычистить область от тонера. На этом процедура завершается. Можно смело включать аппарат в работу.
Как ремонтируются модели принтеров Phaser 3140 и 3160
Представленный ниже видеоролик по тематике ремонта и обслуживания принтеров серии Phaser позволяет наглядно оценить собственные возможности относительно производства ремонтно-восстановительных работ: