Windows 7 Professional Windows 7 Enterprise Windows 7 Ultimate Windows Server 2008 R2 Standard Windows Server 2008 R2 Enterprise Windows Server 2008 R2 Datacenter Windows Server 2008 R2 Foundation Windows Server 2008 R2 for Itanium-Based Systems More…Less
Symptoms
Consider the following scenario:
-
You have a computer that is running Windows 7 or Windows Server 2008 R2.
-
You try to export to some circular files that are used by the Event Tracing for Windows (ETW) feature.
In this scenario, you cannot export to these files, and you receive the following error message:
out of memory
For example, consider the following scenario:
-
You run the following command to set the cluster log size to 512 megabytes (MB):
cluster log /size:512
-
You run the following command to export the trace to a text file:
cluster log /g
In this scenario, you receive the error message. Because of this issue, the memory usage of the Cprepsrv.exe process is high. Additionally, the computer stops responding because memory is insufficient.
Cause
This issue occurs because the ETW engine handles finalized files incorrectly.
When the ETW engine handles some circular files that have finalized and non-finalized files, the buffer count value becomes very large. However, this incorrect buffer count value is used to allocate memory. Therefore, you receive the error message that is mentioned in the «Symptoms» section.
Resolution
Hotfix information
A supported hotfix is available from Microsoft. However, this hotfix is intended to correct only the problem that is described in this article. Apply this hotfix only to systems that are experiencing this specific problem.
If the hotfix is available for download, there is a «Hotfix download available» section at the top of this Knowledge Base article. If this section does not appear, submit a request to Microsoft Customer Service and Support to obtain the hotfix.
Note If additional issues occur or if any troubleshooting is required, you might have to create a separate service request. The usual support costs will apply to additional support questions and issues that do not qualify for this specific hotfix. For a complete list of Microsoft Customer Service and Support telephone numbers or to create a separate service request, visit the following Microsoft Web site:
http://support.microsoft.com/contactus/?ws=supportNote The «Hotfix download available» form displays the languages for which the hotfix is available. If you do not see your language, it is because a hotfix is not available for that language.
Prerequisites
To apply this hotfix, you must be running one of the following operating systems:
-
Windows 7
-
Windows 7 Service Pack 1 (SP1)
-
Windows Server 2008 R2
-
Windows Server 2008 R2 Service Pack 1 (SP1)
For more information about how to obtain a Windows 7 or a Windows Server 2008 R2 service pack, click the following article number to view the article in the Microsoft Knowledge Base:
976932 Information about Service Pack 1 for Windows 7 and for Windows Server 2008 R2
Registry information
To use the hotfix in this package, you do not have to make any changes to the registry.
Restart requirement
You must restart the computer after you apply this hotfix.
Hotfix replacement information
This hotfix does not replace a previously released hotfix.
File information
The global version of this hotfix installs files that have the attributes that are listed in the following tables. The dates and the times for these files are listed in Coordinated Universal Time (UTC). The dates and the times for these files on your local computer are displayed in your local time together with your current daylight saving time (DST) bias. Additionally, the dates and the times may change when you perform certain operations on the files.
Windows 7 and Windows Server 2008 R2 file information notes
Important Windows 7 hotfixes and Windows Server 2008 R2 hotfixes are included in the same packages. However, hotfixes on the Hotfix Request page are listed under both operating systems. To request the hotfix package that applies to one or both operating systems, select the hotfix that is listed under «Windows 7/Windows Server 2008 R2» on the page. Always refer to the «Applies To» section in articles to determine the actual operating system that each hotfix applies to.
-
The files that apply to a specific product, SR_Level (RTM, SPn), and service branch (LDR, GDR) can be identified by examining the file version numbers as shown in the following table.
Version
Product
SR_Level
Service branch
6.1.760
0.
20xxxWindows 7 and Windows Server 2008 R2
RTM
LDR
6.1.760
1.
21xxxWindows 7 and Windows Server 2008 R2
SP1
LDR
-
The MANIFEST files (.manifest) and the MUM files (.mum) that are installed for each environment are listed separately in the «Additional file information for Windows Server 2008 R2 and for Windows 7» section. MUM and MANIFEST files, and the associated security catalog (.cat) files, are extremely important to maintain the state of the updated components. The security catalog files, for which the attributes are not listed, are signed with a Microsoft digital signature.
For all supported x86-based versions of Windows 7
|
File name |
File version |
File size |
Date |
Time |
Platform |
|---|---|---|---|---|---|
|
Advapi32.dll |
6.1.7600.20928 |
640,000 |
19-Mar-2011 |
06:52 |
x86 |
|
Advapi32.dll |
6.1.7601.21687 |
640,512 |
19-Mar-2011 |
06:53 |
x86 |
For all supported x64-based versions of Windows 7 and of Windows Server 2008 R2
|
File name |
File version |
File size |
Date |
Time |
Platform |
|---|---|---|---|---|---|
|
Advapi32.dll |
6.1.7600.20928 |
877,568 |
19-Mar-2011 |
07:32 |
x64 |
|
Advapi32.dll |
6.1.7601.21687 |
878,080 |
19-Mar-2011 |
07:38 |
x64 |
|
Advapi32.dll |
6.1.7600.20928 |
640,000 |
19-Mar-2011 |
06:52 |
x86 |
|
Advapi32.dll |
6.1.7601.21687 |
640,512 |
19-Mar-2011 |
06:53 |
x86 |
For all supported IA-64-based versions of Windows Server 2008 R2
|
File name |
File version |
File size |
Date |
Time |
Platform |
|---|---|---|---|---|---|
|
Advapi32.dll |
6.1.7600.20928 |
1,564,160 |
19-Mar-2011 |
06:43 |
IA-64 |
|
Advapi32.dll |
6.1.7601.21687 |
1,564,160 |
19-Mar-2011 |
06:48 |
IA-64 |
|
Advapi32.dll |
6.1.7600.20928 |
640,000 |
19-Mar-2011 |
06:52 |
x86 |
|
Advapi32.dll |
6.1.7601.21687 |
640,512 |
19-Mar-2011 |
06:53 |
x86 |
Status
Microsoft has confirmed that this is a problem in the Microsoft products that are listed in the «Applies to» section.
More Information
For more information about software update terminology, click the following article number to view the article in the Microsoft Knowledge Base:
824684 Description of the standard terminology that is used to describe Microsoft software updates
For more information about a similar issue in Windows Server 2008 or in Windows Vista, click the following article number to view the article in the Microsoft Knowledge Base:
2257986 You receive the «out of memory» error message when you try to export to circular files in Windows Server 2008 or in Windows Vista
Additional file information
Additional file information for Windows 7 and for Windows Server 2008 R2
Additional files for all supported x86-based versions of Windows 7
|
File name |
Update.mum |
|
File version |
Not applicable |
|
File size |
2,773 |
|
Date (UTC) |
21-Mar-2011 |
|
Time (UTC) |
21:49 |
|
Platform |
Not applicable |
|
File name |
X86_56f2164f922b2f8537785abcba4fac65_31bf3856ad364e35_6.1.7601.21687_none_ee94589842885ebe.manifest |
|
File version |
Not applicable |
|
File size |
696 |
|
Date (UTC) |
21-Mar-2011 |
|
Time (UTC) |
21:49 |
|
Platform |
Not applicable |
|
File name |
X86_f75d57ff99dca7655288df83c5252bb6_31bf3856ad364e35_6.1.7600.20928_none_485b6566fa29ab9f.manifest |
|
File version |
Not applicable |
|
File size |
696 |
|
Date (UTC) |
21-Mar-2011 |
|
Time (UTC) |
21:49 |
|
Platform |
Not applicable |
|
File name |
X86_microsoft-windows-advapi32_31bf3856ad364e35_6.1.7600.20928_none_e3ec2e7d00bf840d.manifest |
|
File version |
Not applicable |
|
File size |
2,719 |
|
Date (UTC) |
19-Mar-2011 |
|
Time (UTC) |
07:22 |
|
Platform |
Not applicable |
|
File name |
X86_microsoft-windows-advapi32_31bf3856ad364e35_6.1.7601.21687_none_e590a9cafe178121.manifest |
|
File version |
Not applicable |
|
File size |
2,719 |
|
Date (UTC) |
19-Mar-2011 |
|
Time (UTC) |
07:20 |
|
Platform |
Not applicable |
Additional files for all supported x64-based versions of Windows 7 and of Windows Server 2008 R2
|
File name |
Amd64_3144ba4d9040a7e1feab72a1e3b0ebc4_31bf3856ad364e35_6.1.7600.20928_none_8350571323769fab.manifest |
|
File version |
Not applicable |
|
File size |
1,040 |
|
Date (UTC) |
21-Mar-2011 |
|
Time (UTC) |
21:49 |
|
Platform |
Not applicable |
|
File name |
Amd64_56f2164f922b2f8537785abcba4fac65_31bf3856ad364e35_6.1.7601.21687_none_4ab2f41bfae5cff4.manifest |
|
File version |
Not applicable |
|
File size |
698 |
|
Date (UTC) |
21-Mar-2011 |
|
Time (UTC) |
21:49 |
|
Platform |
Not applicable |
|
File name |
Amd64_8014512d693bc0ef97c6e78d60ef6e04_31bf3856ad364e35_6.1.7600.20928_none_4cc5c8743cf574aa.manifest |
|
File version |
Not applicable |
|
File size |
700 |
|
Date (UTC) |
21-Mar-2011 |
|
Time (UTC) |
21:49 |
|
Platform |
Not applicable |
|
File name |
Amd64_84924b498e7ec05493e1d22793b6dd48_31bf3856ad364e35_6.1.7601.21687_none_204a572a8aa3532c.manifest |
|
File version |
Not applicable |
|
File size |
1,040 |
|
Date (UTC) |
21-Mar-2011 |
|
Time (UTC) |
21:49 |
|
Platform |
Not applicable |
|
File name |
Amd64_c7bacbeccb6d5e63576fd2c03142b861_31bf3856ad364e35_6.1.7601.21687_none_e1118973af1d173a.manifest |
|
File version |
Not applicable |
|
File size |
700 |
|
Date (UTC) |
21-Mar-2011 |
|
Time (UTC) |
21:49 |
|
Platform |
Not applicable |
|
File name |
Amd64_f75d57ff99dca7655288df83c5252bb6_31bf3856ad364e35_6.1.7600.20928_none_a47a00eab2871cd5.manifest |
|
File version |
Not applicable |
|
File size |
698 |
|
Date (UTC) |
21-Mar-2011 |
|
Time (UTC) |
21:49 |
|
Platform |
Not applicable |
|
File name |
Amd64_microsoft-windows-advapi32_31bf3856ad364e35_6.1.7600.20928_none_400aca00b91cf543.manifest |
|
File version |
Not applicable |
|
File size |
2,723 |
|
Date (UTC) |
19-Mar-2011 |
|
Time (UTC) |
08:18 |
|
Platform |
Not applicable |
|
File name |
Amd64_microsoft-windows-advapi32_31bf3856ad364e35_6.1.7601.21687_none_41af454eb674f257.manifest |
|
File version |
Not applicable |
|
File size |
2,723 |
|
Date (UTC) |
19-Mar-2011 |
|
Time (UTC) |
08:13 |
|
Platform |
Not applicable |
|
File name |
Update.mum |
|
File version |
Not applicable |
|
File size |
4,059 |
|
Date (UTC) |
21-Mar-2011 |
|
Time (UTC) |
21:49 |
|
Platform |
Not applicable |
|
File name |
X86_microsoft-windows-advapi32_31bf3856ad364e35_6.1.7600.20928_none_e3ec2e7d00bf840d.manifest |
|
File version |
Not applicable |
|
File size |
2,719 |
|
Date (UTC) |
19-Mar-2011 |
|
Time (UTC) |
07:22 |
|
Platform |
Not applicable |
|
File name |
X86_microsoft-windows-advapi32_31bf3856ad364e35_6.1.7601.21687_none_e590a9cafe178121.manifest |
|
File version |
Not applicable |
|
File size |
2,719 |
|
Date (UTC) |
19-Mar-2011 |
|
Time (UTC) |
07:20 |
|
Platform |
Not applicable |
Additional files for all supported IA-64-based versions of Windows Server 2008 R2
|
File name |
Ia64_2f59fc48dd07386c526633d65501fb87_31bf3856ad364e35_6.1.7600.20928_none_65e5f6455878c21f.manifest |
|
File version |
Not applicable |
|
File size |
698 |
|
Date (UTC) |
21-Mar-2011 |
|
Time (UTC) |
21:49 |
|
Platform |
Not applicable |
|
File name |
Ia64_56f2164f922b2f8537785abcba4fac65_31bf3856ad364e35_6.1.7601.21687_none_ee95fc8e428667ba.manifest |
|
File version |
Not applicable |
|
File size |
697 |
|
Date (UTC) |
21-Mar-2011 |
|
Time (UTC) |
21:49 |
|
Platform |
Not applicable |
|
File name |
Ia64_c79b6fad3ef91b5958151a25bde7f91e_31bf3856ad364e35_6.1.7601.21687_none_2c4d549af0405275.manifest |
|
File version |
Not applicable |
|
File size |
698 |
|
Date (UTC) |
21-Mar-2011 |
|
Time (UTC) |
21:49 |
|
Platform |
Not applicable |
|
File name |
Ia64_f75d57ff99dca7655288df83c5252bb6_31bf3856ad364e35_6.1.7600.20928_none_485d095cfa27b49b.manifest |
|
File version |
Not applicable |
|
File size |
697 |
|
Date (UTC) |
21-Mar-2011 |
|
Time (UTC) |
21:49 |
|
Platform |
Not applicable |
|
File name |
Ia64_microsoft-windows-advapi32_31bf3856ad364e35_6.1.7600.20928_none_e3edd27300bd8d09.manifest |
|
File version |
Not applicable |
|
File size |
2,721 |
|
Date (UTC) |
19-Mar-2011 |
|
Time (UTC) |
08:20 |
|
Platform |
Not applicable |
|
File name |
Ia64_microsoft-windows-advapi32_31bf3856ad364e35_6.1.7601.21687_none_e5924dc0fe158a1d.manifest |
|
File version |
Not applicable |
|
File size |
2,721 |
|
Date (UTC) |
19-Mar-2011 |
|
Time (UTC) |
08:15 |
|
Platform |
Not applicable |
|
File name |
Update.mum |
|
File version |
Not applicable |
|
File size |
2,169 |
|
Date (UTC) |
21-Mar-2011 |
|
Time (UTC) |
21:49 |
|
Platform |
Not applicable |
|
File name |
X86_microsoft-windows-advapi32_31bf3856ad364e35_6.1.7600.20928_none_e3ec2e7d00bf840d.manifest |
|
File version |
Not applicable |
|
File size |
2,719 |
|
Date (UTC) |
19-Mar-2011 |
|
Time (UTC) |
07:22 |
|
Platform |
Not applicable |
|
File name |
X86_microsoft-windows-advapi32_31bf3856ad364e35_6.1.7601.21687_none_e590a9cafe178121.manifest |
|
File version |
Not applicable |
|
File size |
2,719 |
|
Date (UTC) |
19-Mar-2011 |
|
Time (UTC) |
07:20 |
|
Platform |
Not applicable |
Need more help?
Want more options?
Explore subscription benefits, browse training courses, learn how to secure your device, and more.
Communities help you ask and answer questions, give feedback, and hear from experts with rich knowledge.
Здравствуйте, Сергей
Данная ошибка связана с нехваткой памяти для хранения списка исходных файлов.
У вас в исходной папке задания очень много файлов.
Не имеет значения, сколько RAM у вашего ПК (8 ГБ, 16 ГБ или 32 ГБ), т.к. Windows каждому процессу выделяет определенное кол-во памяти, а именно 2,147 ГБ.
Данную проблему мы уже решили в новой версии 6.0. Для этого нам пришлось почти полностью переписать программу, изменить структуру хранения данных в памяти и заодно оптимизировать существующие алгоритмы. Помимо этого в версии 6.0 были устранены целый ряд недочетов и проблем, которые могли проявляться в версии 5.0 и добавлены новые возможности. Выпуск версии 6.0 запланирован на февраль 2021. Можем дать Вам версию 6.0 на тестирование (напишите нам через форму обратной связи в разделе «Поддержка» на сайте).
Смысла увеличивать память на Виртуальной машине или добавить виртуальной памяти нет, т.к. это не увеличит RAM, выделяемой ОС Windows каждому процессу.
Борьба с вылетом, ошибкой в модах игры сталкер aka out of memory.
«Произошла ошибка при попытке копирования файла Out of memory»
Способ работает только на API DirectX версий 10 (R3) и выше. Также на оригинальных движках трилогий.
Текстуры теперь будут храниться в видеопамяти, не загружая оперативную.
Если видеопамять кончилась, то текстуры начинают грузиться в ОЗУ.
Так что правку рекомендую включать всем, однако хороший результат будет у владельцев 4 гб видеопамяти, а самый лучший от 6 гб.
— Эх, наконец-то свершилось, 32 битные моды больше не вылетает по памяти, ура! Максимальные настройки.
Форумчанин под ником Krt0ki он же @mortan рассказал о «переключений» текстур с ОЗУ на видеопамять, об этом способе ему поведал сам «Shoker». Это вещь была сделана GSC для оптимизаций под слабые карты, в те «бородатые года в основном были 256-512мб GDDR затычки, однако ОЗУ было более 1.5 гб.
— Самое странное, что за такое продолжительное время, а именно начиная с 2009 года никто об этом не рассказывает, выглядит очень странно, такое ощущение что разработчики нас отгораживают от рептилоидов просто забывают и не рассказывают про этот про способ.
Cпособ немного улучшит положение у владельцев ПК с видеокартами у которых памяти менее 1 ГБ, станет поменьше вылетов по памяти, некоторые непроходимые моменты теперь можно пройти.
Чтобы включить режим хранения текстур видеопамяти нужно прописать в ярлык: -no_staging
Не забудьте, ярлык должен быть создан от файла «xrEngine.exe».
Отследить можно через мониторинг в Task manager или использовать сторонние программы, например MSI afterburner или FPS Monitor.
От автора: Имея видеокарту GTX 1070 8gb я забыл о вылетах по памяти…
What is Out of Memory error while copying files? As you know, both the hard drive and RAM play a major role in performing any operation on a computer since every process or task that takes place in the system requires some RAM storage as well as hard drive storage to be executed. However, there are times when you may receive the following error messages when you try to copy files from one location to another:
“Out of memory or system resources, Close some windows or programs and try again.”
“There is not enough memory to complete this operation – copying files.”
These errors are caused by the Desktop Heap limitation when there is no longer enough memory to complete the operation while copying the files. If you encounter any of these errors, you will be guided in this post with the help of some potential fixes that can increase its limit and will hopefully fix this error on your Windows 10 computer.
You may try to close all the open windows and programs and then try copying the file again and see if that helps. If not, then proceed to the instructions given below. But before you do that, make sure that you create a System Restore point first. This way, you can undo the changes you’ve made any time in case there are some unwanted changes you want to reverse. After you create a System Restore point, refer to the steps provided below.
Step 1: Tap the Win + R keys to open the Run utility and type “Regedit” in the field and tap Enter to open the Registry Editor.
Step 2: Next, navigate to this registry key: ComputerHKEY_LOCAL_MACHINESYSTEMCurrentControlSetControlSession ManagerSubSystems
Step 3: Now double click on the DWORD named Windows to modify it.
Step 4: Change the values for SharedSection in the Value Data field. It should be in the format of “SharedSection=aaaa,bbbb,cccc”. Note that you have to change the value of “bbbb” and “cccc”. So in case you are using an x86 operating system, set the value of bbbb to 12288 and then set the value for cccc to 1024. On the other hand, if you are using an x64 operating system, set the bbbb value to 20480 and the cccc value to 1024.
Step 5: Exit the Registry Editor and restart your computer to successfully apply the changes made.
Note: The bbbb value in the SharedSection registry is the size of the desktop heap for each interactive window station while the cccc section of the SharedSection value is the size of the desktop heap for each non-interactive window station. In addition, you must keep in mind that setting the value of bbbb to more than 20480 KB is not really recommended.
On the other hand, there is another tool that could help in resolving the Out of Memory error. This tool is called the Memory Diagnostic tool in windows can help resolve the Out of Memory error by checking and automatically fixing any memory-based issues. To run it, refer to these steps:
- Tap the Win + R keys to open Run and type mdsched.exe and hit Enter to open the Windows Memory Diagnostic Tool.
- After that, it will give two options such as:
- Restart now and check for problems (Recommended)
- Check for problems the next time I start my computer
- Once your computer has restarted, perform a basic scan or you could also go for the “Advanced” options such as “Test mix” or “Pass count”. Simply tap the F10 key to start the test.
Note: After you select your preferred option, your computer will restart and check for memory-based issues. If it finds any issues, it will automatically fix them.
Do You Need Help with Your Device?
Our Team of Experts May Help

Troubleshoot.Tech Experts are There for You!
GET HELP
Troubleshoot.Tech experts work with all versions of Microsoft Windows including Windows 11, with Android, Mac, and more.
Share this article:
You might also like
If you find that your headphones are suddenly not working, read on as this post will help you sort out the problem. There could be several reasons why your headphone is malfunctioning, it could be due to an update you just installed, or it could also be due to incompatible operating system, drivers, and so on.
Although updates are created to fix bugs on a computer, there are times when it also causes some issues in the computer. One of the issues it causes is the broken headphone. When this happens, the computer will stop playing any audio using the headphones. The problem, as pointed out, could be due to Windows Updates or incompatible or corrupted drivers in the system.
To resolve this problem with the headphones, there are several fixes you can check out. Make sure that you follow each one of the given potential fixes below.
Option 1 – Try to set the headphone as the default device manually
There are times when you plug a headphone, it does not toggle the default audio device. Thus, to fix this issue, you have to set the default audio device to the headphones manually. To do that, follow these steps:
- First, right-click on the volume icon located on the system tray.
- Next, select the Open sound settings option to open the Sound section in the Windows 10 Settings app.
- After that, go to the Output section and select Headphones for the “Choose your output device” option. This should fix the problem for you.
Option 2 – Try to update, rollback or reinstall the Audio driver
If the glitch in your audio has something to do with software, chances are it might be related to the audio driver – it could be that the newest version of your Windows 10 does not work well with the old version of the driver. This is why you have to update your audio driver to the newest available version.
- Tap the Win + R keys to open the Run dialog box and then type in MSC and tap Enter or click OK to open the Device Manager.
- Expand the section for the outdated device drivers.
- And then select the outdated driver(s) and right-click on it/them.
- From the drop-down menu, select the Update Driver option and follow the on-screen instructions to install the latest version of the driver.
- Then also click on the option, “Search automatically for updated driver software.
- Restart your PC after the installation.
Note: If updating the Audio driver didn’t work, you can go to the website of your PC manufacturer and look for the support section where you can download the drivers for your computer. You just need to take note of your PC’s correct model and model number so you can find the appropriate driver.
Option 3 – Try checking the status of the audio-related Windows Services
The Windows Services manages audio for all Windows-based programs and if this service is stopped, audio devices, as well as effects, will also be affected and if this service is disabled, any services that depend on it explicitly will fail to start. So you need to check the status of this service. How? Follow the steps below.
- Tap the Win + R to open the Run dialog box.
- Then type in “MSC” in the field and tap enter to open the Windows Service Manager.
- Next, navigate down to the Windows Audio Service and double-click on it to open Properties.
- After that, set the Startup Type to Automatic and then click on the Start button and if it has already started, stop it and then start it again.
Note: You should also make sure that the following Dependency Services are started and have Automatic Startup type:
- Remote Procedure Call
- Windows Audio Endpoint Builder
You should also start the Multimedia Class Scheduler and set it on Automatic if you have it in your system. The Multimedia Class Scheduler Service or MMCSS is a service in Windows that allows multimedia applications to get prioritized access to CPU for time-sensitive processing like the multimedia applications as well as prioritized disc access to make sure that the process does not lack data to process.
Option 4 – Try running the Playing Audio Troubleshooter
Since the Windows 10 operating system has the Playing Audio Troubleshooter, you can use this troubleshooter to try and fix the problem with the headphones. You can access this tool in the Control Panel or in the Taskbar Search and even on the Troubleshooters page of Windows 10.
Run this troubleshooter and see if it can fix the issue or not.
Option 5– Try to rollback or install a newer Windows Update
As mentioned earlier, the issue with the headphones could be due to a Windows Update. Thus, to fix the problem, you can try to either roll back or install a newer Windows Update.
Read More
As you know, Windows allows you to share files between systems that are on the same network even though they are not connected physically. All you have to do is to make sure that the folder administrator allows access to the intended use and that your computer should be connected to the internet. Once you meet these conditions, you can share files between systems. However, recently a number of users reported that despite fulfilling these conditions, they end up getting errors instead when they try to access the shared drive. The error states:
“Error code: 0x80070035. The network path was not found.”
One of the common causes of this error is the antivirus program or the Firewall installed on your computer. It could also be that the drive is not shared in the first place or there are some issues with your network drivers. Whichever the case is, here are some potential fixes you need to check out to fix the Error code: 0x80070035.
Option 1 – Try to temporarily disable anti-virus and Windows Defender Firewall
As mentioned, the error could be due to the antivirus program or the Windows Defender Firewall installed on your computer. Thus, disabling them or any security software installed in your computer is always a good idea you can try when you’re not able to access the shared drive on your computer. There are times when you encounter problems like Error code: 0x80070035 due to interference of antivirus or security programs. Thus, you have to disable both your antivirus program and Windows Defender Firewall for the meantime and check if it fixes the error or not.
Option 2 – Check if the drive is shared
Before you further troubleshoot the problem, make sure that the drive you are trying to access is shared first. To do so, follow these steps:
- Right-click on the folder and select Properties.
- Go to the Sharing tab and check the status of the Network File and Folder Sharing.
- And if the status is “Not Shared”, you need to select Share.
- Next, select the intended Network User for sharing the file and choose the permission level for the user.
- After that, click on the Apply and OK buttons to save the changes made. You or the intended user should now be able to access the shared folder or file.
Option 3 – Try to ping the IP address of the targeted computer
Even though the shared folder or file is shared correctly, it is possible that the network channel is not connected properly which is why you have to test it by pinging the IP address of the targeted computer from the primary computer.
- Tap the Win + R keys to launch the Run dialog box.
- Type “cmd” in the field and tap Enter to open Command Prompt.
- Next, type the “ipconfig/all” command and tap Enter to execute it. This will populate various details.
- From the given details, take note of the IPv4 address.
- Afterward, open Command Prompt on the primary computer and then type the “ping <IPv4 address of the target computer>” command and hit Enter.
- Now check if you get 4 confirmation replies or not. If not, you can try to access the Network Adapter Troubleshooter.
To run the Network Troubleshooter, refer to these steps:
- Open the Search bar on your computer and type in “troubleshoot” to open the Troubleshoot settings.
- Next, scroll down and select the “Network Adapter” option from the right pane.
- Then click on the Run Troubleshooter” button.
- After that, your computer will check for any possible errors and will pinpoint the root cause of the problem if possible.
- Restart your computer.
Option 4 – Verify if Network Discovery is enabled
All you have to do is go to Start > Settings > Network & Internet and from there, click on the “Change connection properties” option and shift the radio button for Network profile to Private. After that, check if folder sharing is now working.
Option 5 – Try to modify the Network Security settings
There are times when the Network Security settings interfere with the folder or file sharing process. And if that’s the case, you can modify it to resolve the problem. How? Refer to these steps:
- Tap the Win + R keys to open the Run dialog box.
- Then type “secpol.msc” in the field and tap Enter to open the Local Security Policy manager window.
- After that, go to Local Policies > Security Options located on the left pane.
- Next, double click on Network security: LAN Manager authentication level in the right pane to open its Properties.
- And then select the “Send LM & NTLM-use NTLMv2 session security if negotiated” option from the drop-down menu.
- Now click on Apply and OK buttons to save the changes made.
- Reboot your computer.
Option 6 – Try to enable NetBIOS over TCP/IP
- Tap the Win + R keys to open the Run dialog box.
- Then type “ncpa.cpl” in the field and tap Enter to open the Network Connections window.
- After that, right-click on your network and select Properties.
- Next, double click on Internet Protocol Version 4 and click on the Advanced button.
- From there, go to the WINS tab and shift the radio button to Enable NetBIOS over TCP/IP.
- Now click OK to save the changes made and then restart your computer.
Option 7 – Update the Network Adapter drivers
You might also want to update the Network Adapter drivers by following these steps:
- Tap the Win + R keys to launch the Run window and then type in the “MSC” command and hit Enter to open the Device Manager window.
- Under the Device Manager, you will see a list of drivers. From there, look for the Network Adapters and expand it.
- Then right-click on each one of the Network drivers and update them all.
- Restart your PC and see if it helped in fixing the BSOD error.
Note: If updating the network drivers didn’t help in fixing Error code: 0x80070035, you can also try to uninstall the very same drivers and restart your Windows 10 PC. After that, the system itself will reinstall the drivers you just uninstalled. Alternatively, you can also download and install the drivers from the manufacturer’s website directly.
To reinstall the network adapter driver, refer to these steps:
- Open the Devices Manager from the Win X Menu.
- Then locate the device drivers and right-click on them to open the Properties.
- After that, switch to the Driver tab and click on the Uninstall Device button.
- Follow the screen option to completely uninstall it.
- Finally, restart your computer. It will just reinstall the device drivers automatically.
Read More
The Blue Screen of Death error or BSOD is definitely not an issue to face on your computer. Many users, if not all, have already experienced this headache at least once. One of these BSOD errors is the ATTEMPTED EXECUTE OF NOEXECUTE MEMORY error. The bug check error code for this is 0x000000FC and is usually caused by outdated or faulty drivers. In some cases, it could also be caused by an error in the Random Access Memory or RAM. This kind of error in the RAM might be physical, based on drivers, or even some kind of unwanted malware. So basically there are lots of possibilities why this particular BSOD error pops up.
If you are currently facing this BSOD error, read on and carefully follow the suggestions given below but before you do that, make sure to create a System Restore point just in case something goes wrong. This way, you can always undo those changes using the System Restore point. Once you have that covered, proceed to the options given below to fix the ATTEMPTED EXECUTE OF NOEXECUTE MEMORY error.
Option 1 – Try updating Windows 10 with all the security patches and updates
You might be able to fix the ATTEMPTED EXECUTE OF NOEXECUTE MEMORY error by simply updating your Windows 10 computer with all the security patches and updates. To do so, go to Settings then proceed to the Windows Update section > Update & Security > Windows Update, and then click on the Check for Updates option. After you do that, it will automatically find and install all the latest security patches and feature updates from Microsoft.
Option 2 – Try updating all your drivers
From time to time, drivers get corrupted or outdated so it’s no surprise that they conflict with the operating system and cause errors like the ATTEMPTED EXECUTE OF NOEXECUTE MEMORY BSOD error. To fix the problem, you need to update all your drivers. Follow the steps below to update your drivers.
- Tap the Win + R keys to launch Run.
- Type in devmgmt.msc into the box and tap Enter or click OK to open the Device Manager.
- After that, a list of device drivers will be displayed. If you see a red or yellow sign that shows up against the driver, right-click on the driver’s name and select “Update Driver Software” or “Uninstall”. And if you find any “Unknown device”, you need to update it as well.
- Select the “Search automatically for updated driver software” option and then follow the instructions to complete the process.
- Restart your PC.
Note: You also have the option to go directly to the website of your graphics card manufacturer and check if there’s a new update – if there is, download it.
Option 3 – Try running a Memory Check using Windows Memory Diagnostic
As mentioned, this error might be caused by some issues in the memory. To resolve it, you need to run the Memory Check on your Windows 10 PC. Refer to these steps to do so.
- Tap the Win + R keys to open the Run dialog box.
- Then type “mdsched.exe” in the field and hit Enter to open the Windows Memory Diagnostic.
- After that, the Windows Memory Diagnostic will give out two options such as:
- Restart now and check for problems (recommended)
- Check for problems the next time I start my computer
- Select any of the given options. After that, your computer will restart and check for memory-based issues upon the restart. If there are any issues, it will automatically them.
Option 4 – Try using the System File Checker via Command Prompt
System File Checker or SFC is a built-in command utility that helps in restoring corrupted files as well as missing files. It replaces bad and corrupted system files with good system files that might be causing the ATTEMPTED EXECUTE OF NOEXECUTE MEMORY BSOD error. To run the SFC command, follow the steps given below.
- Tap Win + R to launch Run.
- Type in cmd in the field and tap Enter.
- After opening Command Prompt, type in sfc /scannow
The command will start a system scan which will take a few whiles before it finishes. Once it’s done, you could get the following results:
- Windows Resource Protection did not find any integrity violations.
- Windows Resource Protection found corrupt files and successfully repaired them.
- Windows Resource Protection found corrupt files but was unable to fix some of them.
Read More
Windows 11 is released and its adoption goes slower than Microsoft would like but nevertheless, it is slowly getting adopted, especially among new computers. Windows 11 has brought us a new modern look of OS but if you would like to personalize it a little more you can. Follow the guide on various things that you can change inside Windows 11.
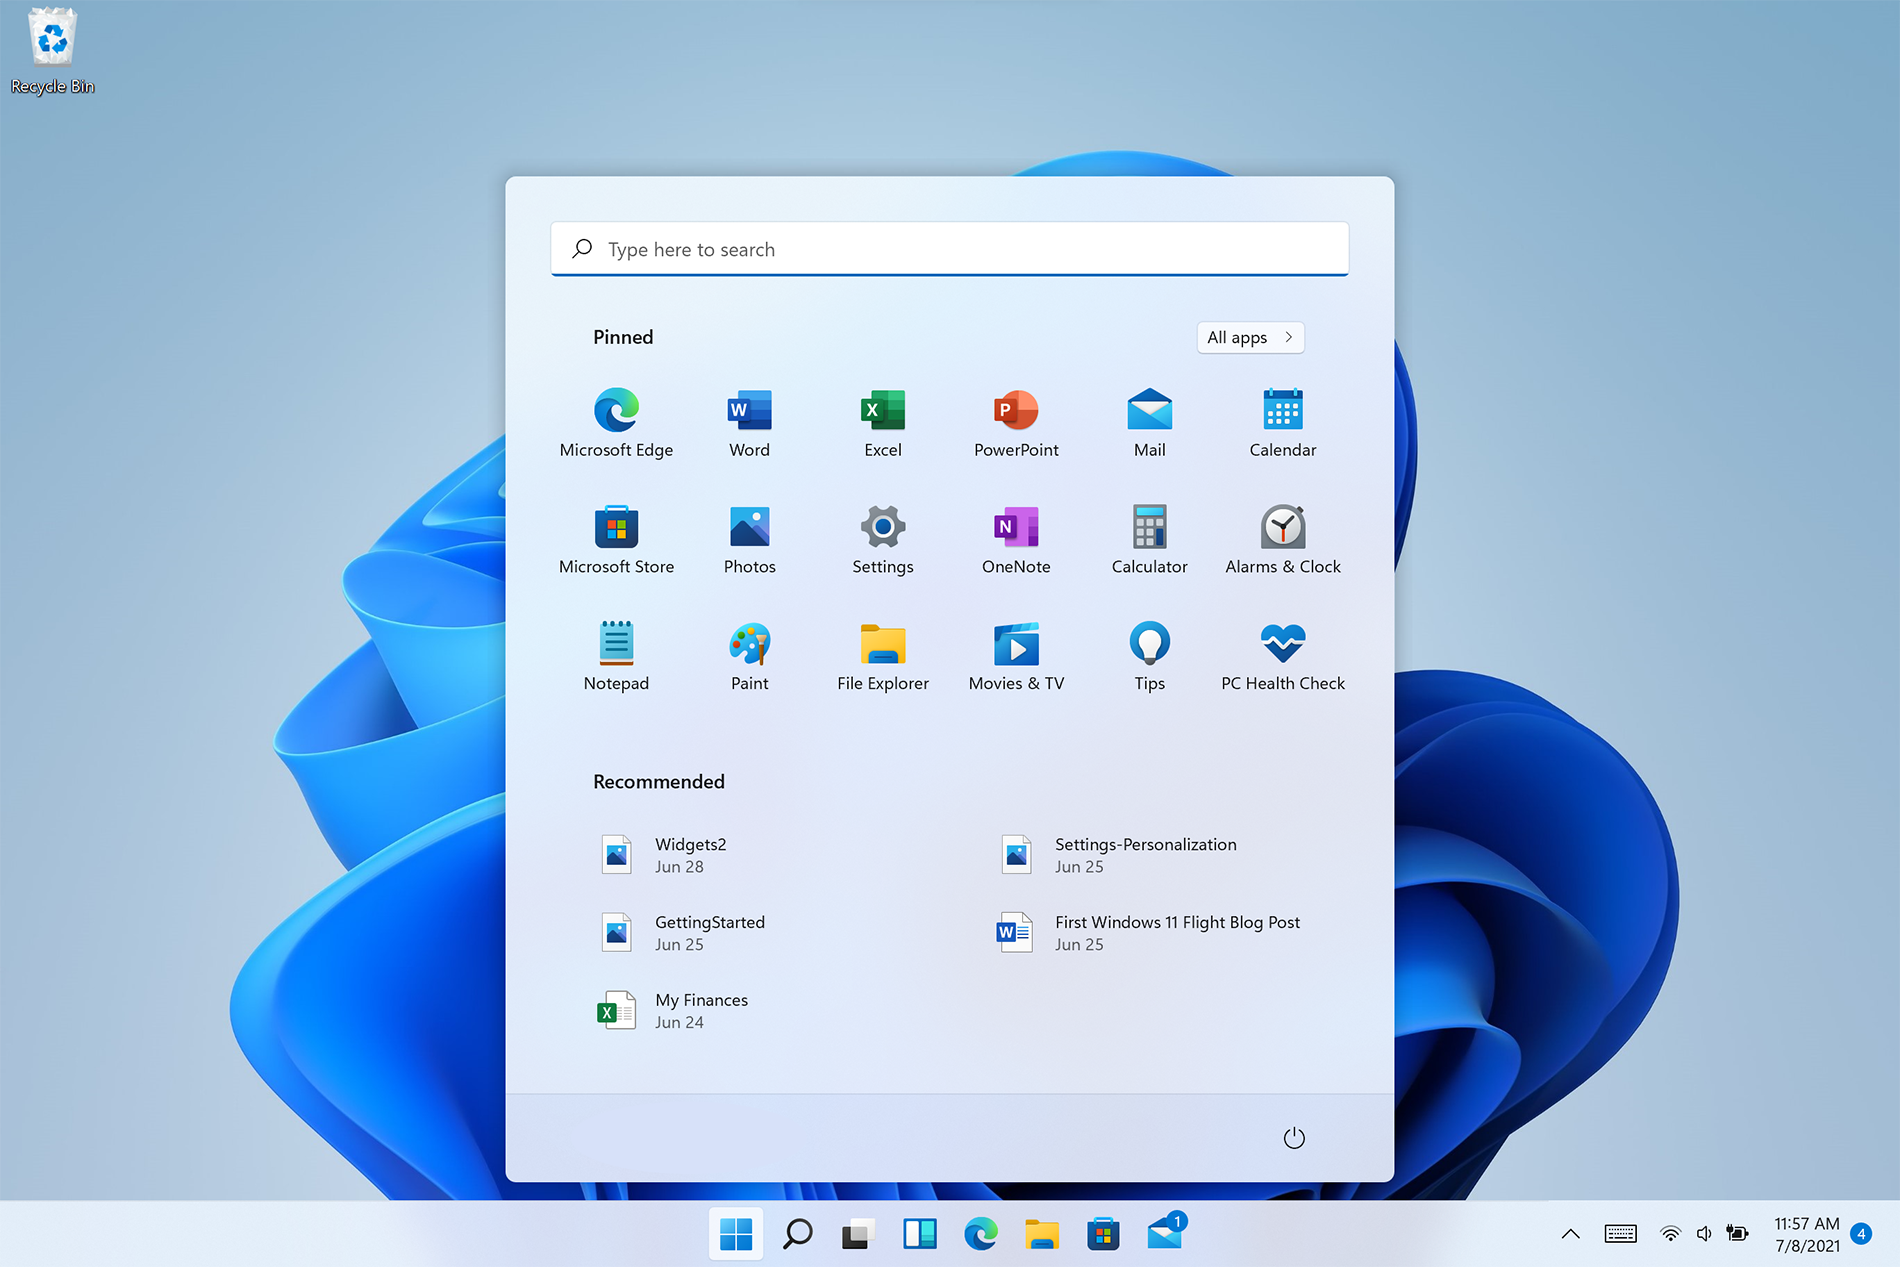 Personalize list of recently added apps, opened items, folders
The recommended section that shows recently added apps and recently open items can be turned off and hidden now to be shown. In order to do this follow these steps:
- Open Windows Settings by pressing WINDOWS + I
- Click on personalization in the sidebar
- Click on START and go through the options
- Turn OFF switch beside recently accessed files
- Additionally, you can also change which folders appear on the Start menu.
Remove apps or change app order on the Start Menu
To remove application not to be shown in the Start menu at all follow this simple guide:
- Right-click on app
- Choose unpin
- To place the application on Start click on All Apps, right-click on the app and choose Pin to Start
- To drag and rearrange apps, simply click on them and drag them to the new place.
Change the Start Menu location
When Windows 11 was first released Start Menu could only be located in the middle of the screen but thanks to plenty of backlash from users now it is possible to move it on a more traditional left side.
- Press WINDOWS + I to open the settings app
- Click on Personalization
- Look for taskbar behaviors
- Inside taskbar behaviors look for Taskbar alignment
- Change alignment to left
Change the Start Menu color
In order to change the color of the Start Menu follow the next steps:
- Open Settings app
- Go to personalization settings
- Go to Colors
- Switch to custom
- Under accent color pick a color you like or make your custom one.
Read More
If you are trying to connect to the internet using a Wi-Fi, Ethernet, or a Wi-Fi connection and you suddenly encounter Error 633, then read on as this post will guide you on how you can fix this problem in your Windows 10 computer.
According to users who encountered the same problem, when they try to connect to the internet, an error pops up that states, “The modem or other connecting device is either already in use or not appropriately configured”. This error is the VPN Error 633 which indicates that the modem is malfunctioning due to some broken configuration. It is possible that this broken configuration is caused by the WAN Miniport device which is associated with your preferred VPN protocol. It could also be due to the TCP port that’s required for the VPN connection to work might be used by another application.
There are instances when Error 622 could occur when there are multiple internet connections set up on one device or when the communication port is exploited by another program. It could also occur when the affected modem is not bound to one specific device. Thus, any model and computer can be affected by this problem.
The first and basic thing you can do to fix the VPN Error 633 is to turn off or unplug the modem your computer is using and then plug it back in to see if the problem is fixed. If not, then there are several other potential fixes you need to check out to resolve the problem. You can try the suggestions provided below and see if any of them help.
Option 1 – Run the Network Adapter Troubleshooter
- Open the Search bar on your computer and type in “troubleshoot” to open the Troubleshoot settings.
- Next, scroll down and select the “Network Adapter” option from the right pane.
- Then click on the Run Troubleshooter” button.
- After that, your computer will check for any possible errors and will pinpoint the root cause of the problem if possible.
Option 2 – Try to explicitly reserve the TCP port
The next thing you can do to fix the error is to reserve the TCP port explicitly and to do that, follow the steps below.
- Tap the Win + R keys to pull up the Run dialog box and type “Regedit” in the field and hit Enter to open the Registry Editor.
- Next, navigate to this registry path: HKEY_LOCAL_MACHINESYSTEMCurrentControlSetServicesTcpipParameters
- After that, follow the path New > Multi-String Value on the edit menu and rename the multi-string value as “ReservedPorts” and then double click on it.
- Now in the value data of ReservedPorts, input “1723-1723” and click OK to save the changes made.
- Close the Registry Editor and restart your PC. Once your computer has restarted, check if the VPN Error 633 is fixed or not.
Option 3 – Try to use the netstat command
- In the Windows Start Search, type “cmd” and from the search results that appear, right-click on Command Prompt and then select the “Run as administrator” option.
- After opening Command Prompt as admin, type this command and hit Enter: netstat –aon
- After that, the output will be displayed and from there, look for the process ID or PID of any program that uses the TCP port 1723 on your computer.
- Next, type this next command and hit Enter: taskkill /PID PID /F
- Once the command has been executed, the concerned program will be forced to close and the TCP port 1723 will be freed up. Keep in mind that the taskkill command ends the process corresponds to the process ID number and the given command above, “/F” option is used to end the program’s process forcefully.
- Now restart your computer and after that, the concerned program should start using a TCP port other than 1723 which leaves the TCP port 1723 free for your internet device to use.
Option 4 – Remove any irrelevant internet device programs
You could also try removing any irrelevant device programs since it is possible that any of these programs could be the one that’s causing the modem to malfunction. These irrelevant programs could be an internet booster or third-party tools that comes with the modem and so on. These programs are not necessarily needed for your modem to function. Thus, if you want to fix the VPN Error 633, you can try uninstalling them and see if it fixed the error.
Option 5 – Update the Network Adapter drivers
You might also want to update the Network Adapter drivers by following these steps:
- Tap the Win + R keys to launch the Run window and then type in the “devmgmt.msc” command and hit Enter to open the Device Manager window.
- Under the Device Manager, you will see a list of drivers. From there, look for the Network Adapters and expand them.
- Then right-click on each one of the Network drivers and update them all.
- Restart your PC and see if it helped in fixing the BSOD error.
Note: If updating the network drivers didn’t help in fixing the VPN Error 633, you can also try to uninstall the very same drivers and restart your Windows 10 PC. After that, the system itself will reinstall the drivers you just uninstalled. Alternatively, you can also download and install the drivers from the manufacturer’s website directly.
To reinstall the network adapter driver, refer to these steps:
- Open the Devices Manager from the Win X Menu.
- Then locate the device drivers and right-click on them to open the Properties.
- After that, switch to the Driver tab and click on the Uninstall Device button.
- Follow the screen option to completely uninstall it.
- Finally, restart your computer. It will just reinstall the device drivers automatically.
Read More
Microsoft store is ready and prepared for Windows 11 official release on October 5th and it is coming with some surprises.
 It has officially confirmed that many open source and free applications will be in it like Opera, VLC, discord, Libre office, etc. It seems that Microsoft wants to place its store as one place to go for all of your software needs.
Another great surprise is the coming of Epic games store implementation. It was officially confirmed but not explained in detail, will we have Epic store opened in Windows store or we will only get installer as a package we will see but this is some great news.
As for how it states now, it seems that the Windows store aims to eliminate searching the web for applications and bring them all into one environment with reviews and ratings so you know which one to install and use. It also features a great search engine to find proper applications for your needs.
The new store will come to Windows 10 as well but after all Windows 11 has been mostly released and adopted. So expect it via update in two or three months’ time.
It would be great if some larger companies decide to join MS stores like Autodesk, Adobe, the Foundry, etc so you can install everything you need from it but one can only hope.
Read More
What is 0x0000007B Error?
0x0000007B is the most common Windows stop error.
The error is displayed on the blue-colored screen which is also called the blue screen of death. You may receive a 0x0000007B error message during Windows XP setup or while running the setup program.
The message is often displayed as ‘a problem has been detected and Windows has been shut down to prevent damages’ or ‘inaccessible boot device error’.
Solution
 Error Causes
The 0x0000007B error code is usually triggered by:
- Poor Window XP installation
- Registry corruption
- Device Drivers Issues
- Boot sector viruses
Further Information and Manual Repair
The 0x0000007B error makes your system vulnerable and reduces its speed significantly. And besides, you can’t run the programs smoothly on your PC either. Therefore, it’s advisable to fix the error right away.
To fix and repair the 0x0000007B error successfully, you must first understand the cause of the error. Let’s take a look at all the solutions available to fix the 0x0000007B error.
Cause: Boot Sector Viruses
Solution: If your computer is infected with boot sector viruses, then you will first have to download a powerful antivirus. After downloading the antivirus program, run it on your PC to check your computer for viruses. Delete the viruses found and click the repair option.
Sometimes even an antivirus program may fail to remove the virus and repair the system. In such cases, you must repartition and format your hard disk and also reinstall Windows XP.
Cause: Device Driver Issues
Solution: Device driver issues may occur if the boot controller is not properly configured or the driver is not up to date. If device driver configuration is the cause of the 0x0000007B error on your PC, then all you need to do is restart your PC, and while restarting press F8 to go to the advanced boot options.
Now choose the ‘Last Known Good Configuration’ option. After selecting it, boot into windows and then perform a system restore. Now go to Device Manager and perform a driver rollback to reinstall the drivers. This will resolve the configuration issues.
However, if you need an updated driver, all you need to do go on the web and download software to update the driver. It is advisable to download software from the manufacturer’s website in order to successfully update the device driver.
Cause: Poor Windows Installation
Solution: In this case, you will have to perform a Windows start-up repair. To do this: boot Windows XP from CD. Press ‘enter’ at setup Windows Screen when prompted. Then press R to repair Windows Installation.
This procedure will not delete any user data and files. In fact, it will copy only the original Windows files over the bad or existing ones.
Some of the best ways to avoid Ox0000007B blue screen errors are
- To scan for viruses every time you use your PC
- Never open web pages, emails, or download content that you think looks suspicious because that’s probably a virus.
- Always keep your computer updated.
Read More
Error Code 0x8007007B (Code 0x8007007B) – What is it?
Error code 0x8007007B (Code 0x8007007B) is an error that occurs when you attempt to activate Windows 10, as well as Windows Server 2008, Windows Vista, Windows 7, Windows 8, or Windows Server 2012.
Common symptoms include:
- You will see an error message like this: “Error 0x8007007B ‘The filename, directory name, or volume label syntax is incorrect”.
- If you are using volume-licensed media to install: Windows 7, Windows 8, Windows Vista Business, Windows Vista Enterprise, Windows Server 2008 R2, Windows Server 2008, Windows Server 2012, Windows 10.
- Your computer is not connecting the activation wizard to a Key Management Service (KMS) host computer.
Solution
Further Information and Manual Repair
Error Code 0x8007007B usually occurs when a product key has been activated too many times. Blocking activation aids in avoiding abuse of the key. If abuse of the key is not the case, it is possible to get the key reset, or you may receive a new key altogether. When you are not sure that you can complete these methods yourself, as they do contain advanced steps, it would be wise to consult a computer repair technician to avoid making the problem any worse.
Generally, the solution can be simple; it is just dependent on how comfortable you are with getting technical in your computer. Volume licensed media means that the media has a preset number of times that it is allowed to be activated. This helps to avoid misuse of the product. Some people install the Windows 10 program multiple times on their computer if they are software developers or do certain types of software testing. It is important to know the cause in order to effectively find the solution.
Method One:
- From the desktop screen, press the Windows key and S, type “Command Prompt”. Then, right-click on Command Prompt in the results. Select Run as Administrator. Click Yes when asked about requesting permission.
- In the Command Prompt box, enter the command: slmgr.vbs -ipk xxxxx-xxxxx-xxxxx-xxxxx-xxxxx
- The x’s represent the product key. Replace these with your unique product key.
- Type in the following command into the “Command Prompt” window: slmgr.vbs -ato
- Click Enter
- Restart your computer and try to activate windows again. It should not show the error code anymore.
Method Two:
- While on the desktop, press the Windows key and R.
- A window saying Run should open.
- Type in the following command: Slui 3
- Press ENTER and a window should appear.
- This window asks for you to enter the operating system activation product key.
- Enter this key in the space provided.
- After entering this, click Activate.
- Restart your computer now.
- Check for activation. The Error code should be gone now.
Method Three:
- Open the Command Prompt with access as administrator just as in Method One, and enter the following command: sfc /scannow
- The command will complete the tasks. This will take some time so just let the computer do its thing and work. Let the sfc finish the scan.
- When the scan is complete, restart the computer.
- Check for the activation. The error code should be gone at this point.
- If it is gone, revisit Method One or move on the Method Four.
Method Four:
Call the Microsoft Support Team and explain the problem in as much detail as you can give. Give the team the error code 0x8007007B and ask to have a different product key. When they give you the new product key, repeat Method 2. The Microsoft Support Team will either change your product key, or they will reset your current product key so that it can be used for activation again.
Read More
If you have a BlueTooth device on your computer, you know that each time you need to receive or transfer the file you need to find the icon in the system tray, right-click on it and choose the desired option. But there is a simpler solution, create a Bluetooth icon on the desktop so it is always easy to access.
Open File Explorer by pressing ⊞ WINDOWS + E
Go to C:WindowsSystem32
Find fsquirt.exe
Right-click on it and choose copy
Go to the desktop and right-click, choose paste
Rename the file to Bluetooth
And, you are done!
Read More
Error Code 0xC1900200, 0x20008 (Code 0xC1900202 – 0x20008) – What is it?
Error Code 0xC1900200, 0x20008 (Code 0xC1900202 – 0x20008) is an error that occurs when you attempt to upgrade to Microsoft Windows 10, but the minimum requirements have not been met by your computer. You will therefore be unable to upgrade to Microsoft Windows 10 until your computer is updated or upgraded to meet those requirements.
Common symptoms include:
- When attempting to upgrade a dialog box with Code 0xC1900200 – 0x20008 (Code 0xC1900202 – 0x20008) is displayed.
- Your computer is unable to begin the Microsoft Windows 10 upgrade process.
Solution
Error Causes
Error Code 0xC1900200 – 0x20008 (Code 0xC1900202 – 0x20008) occurs when you are unable to begin the Microsoft Windows 10 upgrade because your computer does not meet the minimum requirements to run Microsoft Windows 10.
- You are unable to begin the upgrade because your computer does not meet the required system or hardware specifications.
- You are not running the correct version of Microsoft Windows to be able to begin the upgrade.
- You are not running the latest updated version of Microsoft Windows 7 SP1 or Microsoft Windows 8.1.
Error Code 0xC1900200 – 0x20008 (Code 0xC1900202 – 0x20008) as stated, simply means your computer does not meet the requirements to update and does not indicate a permanent problem or inability to continue to use your computer. This error only means that you will not be able to upgrade to Microsoft Windows 10 until your computer is made to meet these requirements.
Further Information and Manual Repair
There are several solutions that the user can complete at home that should fix the problem resulting in a manifestation of Error Code 0xC1900200 – 0x20008 (Code 0xC1900202 – 0x20008). Below are several options that should resolve this error.
Method 1:
Verify what version of Microsoft Windows you are currently running, older, outdated, or no longer supported versions of Microsoft Windows are not able to upgrade to Microsoft Windows 10. If you are not running one of the following versions you will have to update before being able to upgrade.
- The most current version of Microsoft Windows 7 SP1
- The most current version of Microsoft Windows 8.1
Method 2:
Your computer’s system specifications do not meet the requirements to be able to upgrade to and run Microsoft Windows 10. To check your system specifications do the following.
- Click on the start button in the bottom left corner, then locate the control panel on the menu, click on it to open.
- Once it opens, locate system and security on the menu and click to open, click on system and this will show you your amount of RAM and processor speed.
- Find device manager on the left-hand side click this then select display adapter, and it will show you your current video card.
- Click on the start button again, then click on the computer in the menu, this will show you your hard drive size, and available space.
If you have the option available you can simply run the get Microsoft Windows 10 app to check compatibility. Once you have your system specs make sure they meet or exceed the following.
- 1 GHz or higher processor or SoC
- 1 gig of RAM for 32 bit and 2 gigs of RAM for 64 bit
- 16 GB available hard drive space for 32 bit, 20 GB for 64 bit
- Minimum of DirectX9 that has 1.0 WDDM
- At least an 800x600display
If your computer does not meet these minimum requirements, upgrade the components necessary to meet them. If you do not possess the technical expertise required to accomplish this yourself or do not feel comfortable doing so, download and install a powerful automated tool to get the job done.
Method 3:
Your computer might not meet the aforementioned requirements to make an upgrade because of insufficient hard drive space or resources. Learn how to create or make space on your computer here.
Method 4:
Many people hold on to and use the same computer for a very long time. It is possible that your computer cannot be upgraded to meet the requirements, or that the cost to do so would be so high that a new computer would be cheaper. If that is the case, your only option may be to replace your computer.
Read More
![]()
Copyright © 2023, ErrorTools. All Rights Reserved
Trademark: Microsoft Windows logos are registered trademarks of Microsoft. Disclaimer: ErrorTools.com is not affiliated with Microsoft, nor claims direct affiliation.
The information on this page is provided for information purposes only.
![]()
Вы здесь: Главная / Исправлена ошибка нехватки памяти при копировании файлов на Windows 10
Жесткий диск и оперативная память играют важную роль в выполнении любых операций на компьютере. Каждая задача или процесс, происходящий в компьютере, требует некоторого объема оперативной памяти, а также жесткого диска для выполнения. Но иногда, когда вы копируете файлы из одного места в другое, вы можете получить одно из следующих сообщений:
- Недостаточно памяти или системных ресурсов, закройте некоторые windows или программы и попробуйте еще раз.
- Недостаточно памяти для выполнения этой операции — копирования файлов.
Эта ошибка вызвана из-за Ограничение кучи рабочего стола когда памяти недостаточно для выполнения этой операции при копировании файлов. Сегодня мы рассмотрим возможные исправления, чтобы увеличить этот лимит, и в конечном итоге исправим эту ошибку на Windows 10.

Ну закрой все открытыми windows и программы и попробуйте скопировать снова и посмотреть, поможет ли это. Если это не так, следуйте нашему предложению.
Ошибка нехватки памяти при копировании файлов
Прежде чем начать, вы можете захотеть создать точку восстановления системы Во-первых, это может помочь вам отменить нежелательные или нежелательные изменения.
Мы будем использовать редактор реестра, чтобы исправить эту проблему. Бежать regedit и нажмите Enter. Когда откроется редактор реестра, перейдите к следующему разделу:
КомпьютерHKEY_LOCAL_MACHINESYSTEMCurrentControlSetControlSession ManagerSubSystems
Двойной клик на DWORD с именем Windows изменить это.
В разделе Значение поле, вам нужно изменить значения для SharedSection.
Это будет в формате,
SharedSection = AAAA, BBBB, сссс
Вам нужно изменить значение bbbb и cccc.

- Если вы используете операционную систему x86, установите значение для BBBB в 12288 и значение для сссс в 1024
- Если вы используете операционную систему x64, установите значение для BBBB в 20480 и значение для сссс в 1024
Выйдите из редактора реестра и перезагрузите компьютер, чтобы изменения вступили в силу.
Значение bbbb в реестре SharedSection — это размер кучи рабочего стола для каждой станции интерактивного окна, тогда как раздел cccc значения SharedSection — это размер кучи рабочего стола для каждой неинтерактивной станции окна. Вы также должны знать, что установка значения bbbb более 20480 KB совсем не рекомендуется.
Ваша проблема исправлена сейчас?
Оригинал статьи